

Page 1

8288 663 000
Addendum for D-160 V ersion 2.0
The software of this product has been upgraded to version 2.0 and the following functions
have been added. This addendum describes only the added functions. For information
regarding basic operation of the D-160, refer to the main Owner’s Manual.
<Additional Functions>
1. Using a SCSI drive as the current drive, in addition to E-IDE disks. (See page
4.)
In addition to an E-IDE hard disk, you may use an external SCSI device as the current
drive. Up to two SCSI drives (current and backup) can be connected to the SCSI
terminal on the D-160.
2. Formatting has been changed. (See page 5.)
The format function for the current drive disk (E-IDE or SCSI) and the backup drive
disk (SCSI) has been changed.
3. A Preview function has been added, and the RECALL key function has been
expanded. (See page 1 1.)
Pressing a Memory key while holding down the RECALL key enables you to preview
fade-in or fade-out at a point stored in the corresponding Memory key.
4. The Envelope function has been added, and the STOP button function has
been expanded. (See page 13.)
Pressing a RECORD RACK select key while holding down the STOP button enables you
to perform digital scrubbing. you can simultaneously check the signal envelope of
the corresponding track displayed on the screen.
5. Storing function for the Locate points (edit points) has been updated. (See
page 14.)
Now up to 99 (01-99) Locate points can be stored.
6. The Save/Load function for song data has been enhanced. (See page 18.)
You can use a SCSI device as the current drive. This means that you can save and load
using a SCSI device, as well as an E-IDE hard disk. You can also use a DOS-formatted
backup disk to save and load .wav files (RIFF WAVE file format).
<Note>
Due to version update, the procedure described in the “Saving and Loading Song Data” section of the original
manual does not apply any more. Please refer to the procedure on page 18 of this addendum for information on
saving and loading song data.
Page 2

Addendum for D-160 Version 2.0
Table of Contents
List of SCSI drive and media checked for function.......................................................................3
Connecting a SCSI device
Connections.....................................................................................................................4
1. Using one SCSI device as the current drive............................................................................4
2. Adding a SCSI device when an E-IDE hard disk is already installed...................................4
3. Connecting a backup SCSI device to the current SCSI device.............................................5
Changed Format function
Formatting the Current drive (E-IDE hard disk)......................................................................6
Newly formatting an unformatted E-IDE hard disk..................................................................6
Reformatting a preformatted E-IDE hard disk...........................................................................6
Formatting the Current drive (SCSI disk)................................................................................7
Newly formatting the unformatted SCSI disk............................................................................7
Reformatting a previously formatted SCSI disk........................................................................8
Formatting of both E-IDE and SCSI equipment.....................................................................9
Formatting the Backup disk (SCSI disk)...............................................................................10
Addition of the Preview function
Executing the preview function.............................................................................................12
Trimming the sound while previewing...................................................................................12
Addition of the Envelope function
Digital scrubbing using the envelope function......................................................................13
Enhanced Locate Point storage
Storing data to the LOCA TE key ...........................................................................................14
Storing in real-time.................................................................................................................15
Editing and storing locate data..............................................................................................15
Edit and re-store data that is already stored.........................................................................16
Enhanced Locate function
Locating a point by specifying the Locate number................................................................17
New Save/Load function
Saving the data using DA T A OUT .........................................................................................19
Loading the data using DA T A IN...........................................................................................21
Saving the data using SCSI..................................................................................................23
Loading the data using SCSI.................................................................................................27
Saving or Loading using a SCSI hard disk as the current drive...........................................30
Save/Load using a DOS-formatted disk (WA V file)..............................................................31
2
Page 3
Addendum for D-160 Version 2.0
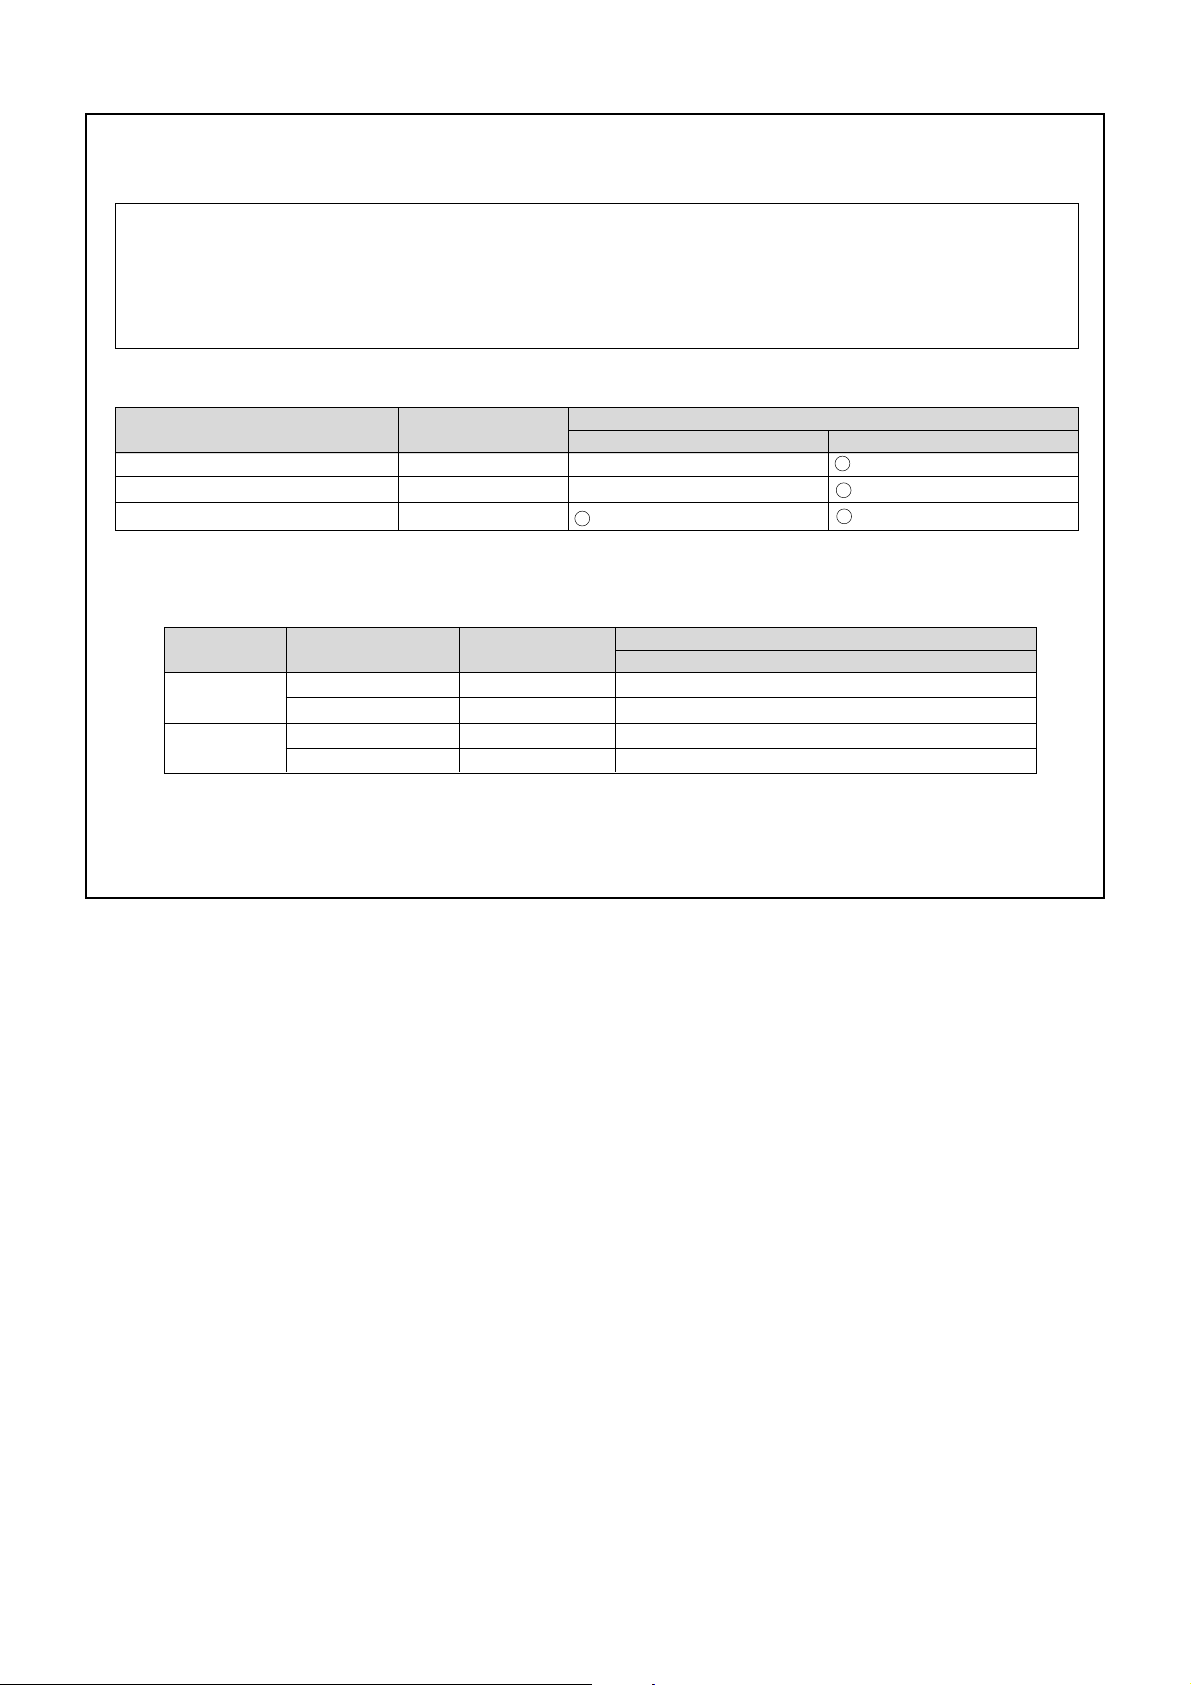
<List of SCSI drive and media checked for function (as of Aug. 1998)>
<SCSI drive and media checked for function>
“The SCSI drive and media checked for function” are products that have been selected from the Fostex recommended list. They have
been connected to an D-160 and their correct operation confirmed. However, in some cases, there is a subtle difference in performance
from unit to unit, even in the same model from the same manufacturer, and therefore, this is not a guarantee of the performance of all
recommended products on the list. This is also not a evaluation of the SCSI drive and their performance. The D-160 has two types of
“Recording Mode” and there is a limit to the equipment which can be used (Refer to page 5).
<Drive and media possible in record/playback when connecting to the D-160>
Maker/Drive name
Iomega zip
MO drive related
External fixed SCSI hard disk *3
Disk Capacity
100 MB
640/540/230 MB
-
8 track format
X
X
(*1):Record/playback time will differ depending on the capacity of the disk used (640/540/230 MB).
The drive and media which can be used are as follows (The time in the following is the approximate mono track recording time).
Recording mode of the D-160
4 track format
(Approx. 17 minutes)
*1
Maker name Drive
FUJITSU
OLYMPUS
M2513A/M2513E
M2513D/M2512A
MOS350/MOS341 series
MOS332 series
Media type
640/540/230 MB
230 MB
640/540/230 MB
230 MB
Recording time
4 track mode
(Approx. 119/101/42 minutes)
(Approx. 42 minutes)
(Approx. 119/101/42 minutes)
(Approx. 42 minutes)
(*2):Recording time could be shorter than the time written in above chart, depending on the drive used.
Therefore, the recording time should be checked after formatting, and then checking the REMAIN display.
(*3):Record/playback time depends on the drive memory capacity.
3
Page 4
Addendum for D-160 Version 2.0
Connecting a SCSI device
You may now use a SCSI device (removable or fixed) as the current drive. This section explains how to connect
a SCSI device as the current drive, and provides some guidelines. Follow the guidelines below to learn how to use
SCSI devices correctly. For more information on the type of SCSI devices that can be used as the current drive,
refer to page 3 “List of SCSI drive and media checked for function” in this Manual.
Connections
You can connect a SCSI device to the D-160 Version 2.0 in one of three configurations:
1.Using one SCSI device as the current drive
2.Adding a SCSI device when an E-IDE hard disk is already installed
3.Connecting a backup SCSI device to the current SCSI device
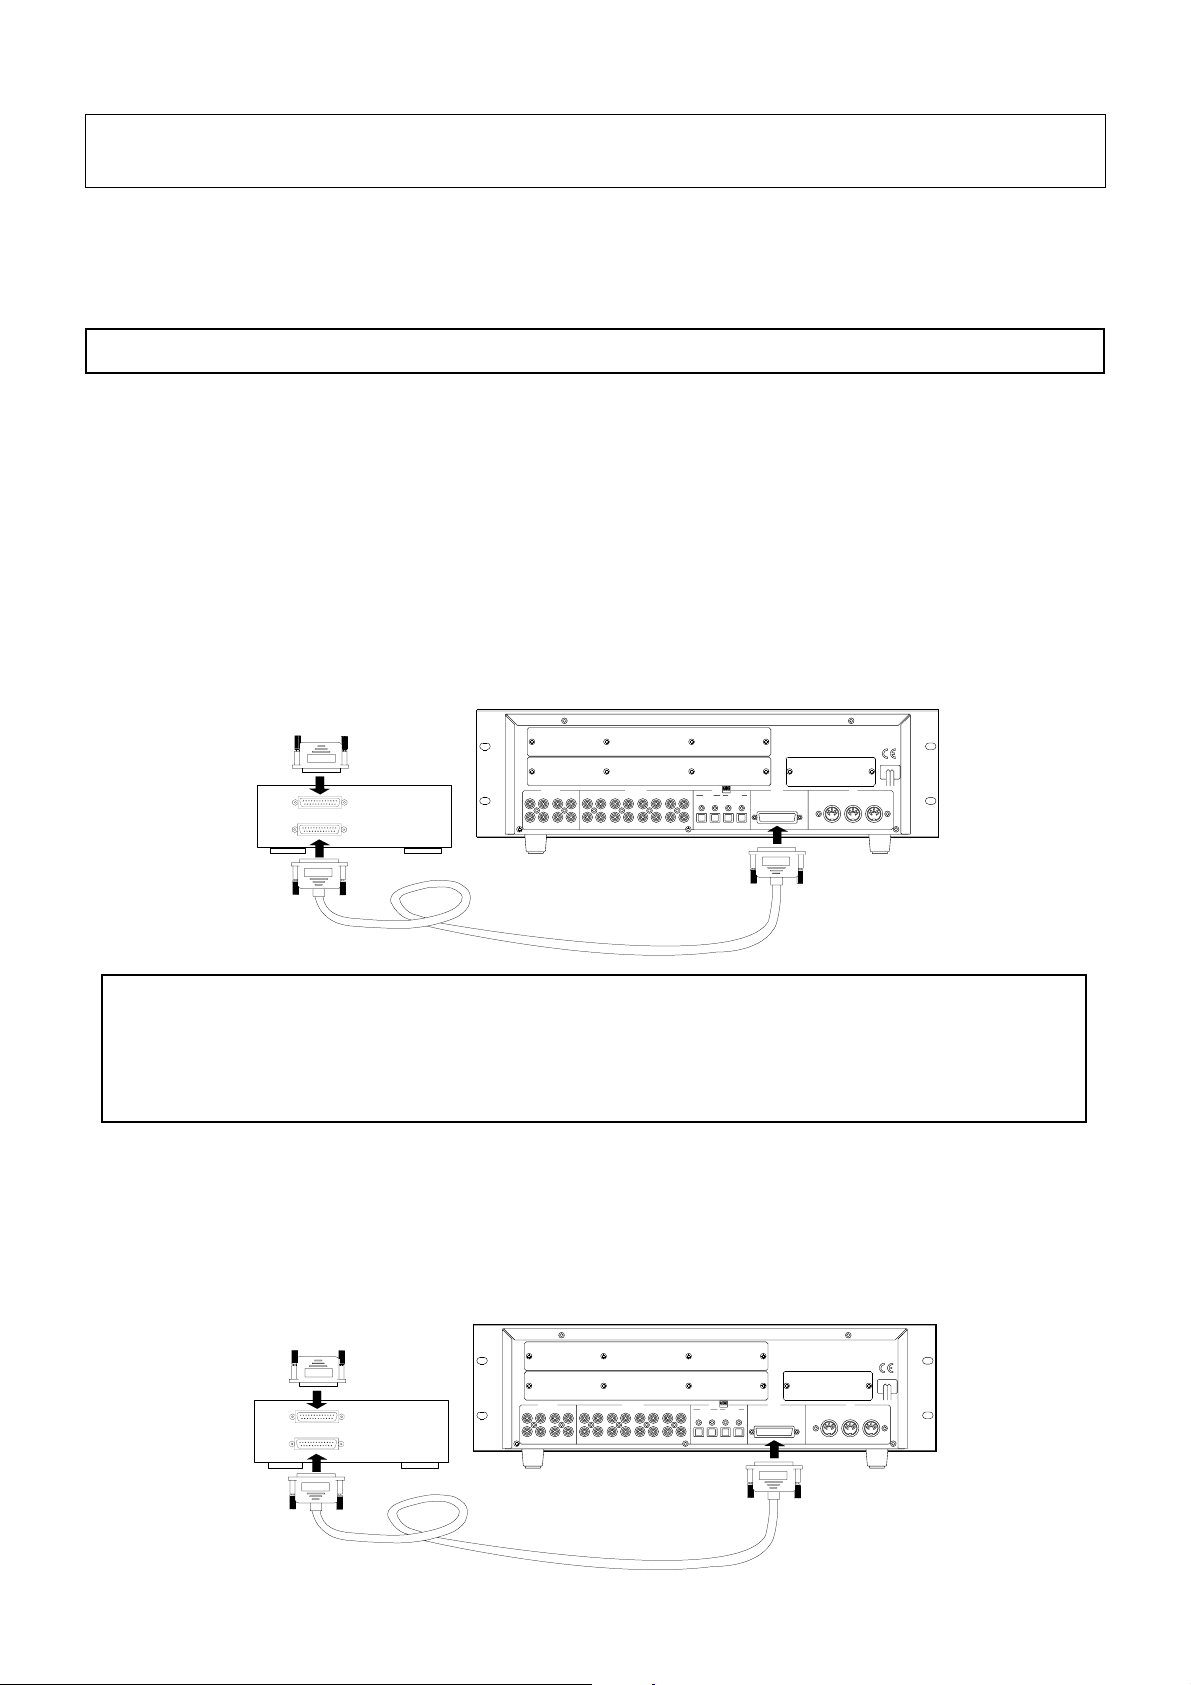
1. Using one SCSI device as the current drive
As shown in the diagram, connect a SCSI device to the SCSI terminal on the D-160 Version 2.0. Be sure to install
a SCSI terminator on another SCSI terminal on the SCSI device. (If the SCSI device uses a termination switch, be
sure to turn it on.) You can connect only one SCSI device as the current drive. (You may connect an additional
SCSI device as a backup drive.) When you turn on the power to the D-160 and the SCSI device, the D-160 will
recognize the connected SCSI device as the current drive.
SCSI drive
SCSI terminator
ANALOG IN
ANALOG OUT SCSI MIDI
1234
16
5678
12345678
9101112131415
DATA
9 - 16 1 - 8 9 - 16
OPTICAL
OUTPUTINPUT
1 - 8
INPUT OUTPUT THRU
D-160
SCSI cable
<Notes on setting the SCSI ID number of the SCSI device (IMPORTANT!!)>
Select any number from 1 to 5 EXCEPT “6” for the ID number of the SCSI device. (ID number “6” should be used for a backup
SCSI device.) Earlier versions of the D-160 automatically recognized the ID number set for the backup SCSI device. Therefore,
no such restriction was necessary . However , due to a version update, a SCSI device can now be used as a current drive, and
this restriction must apply .
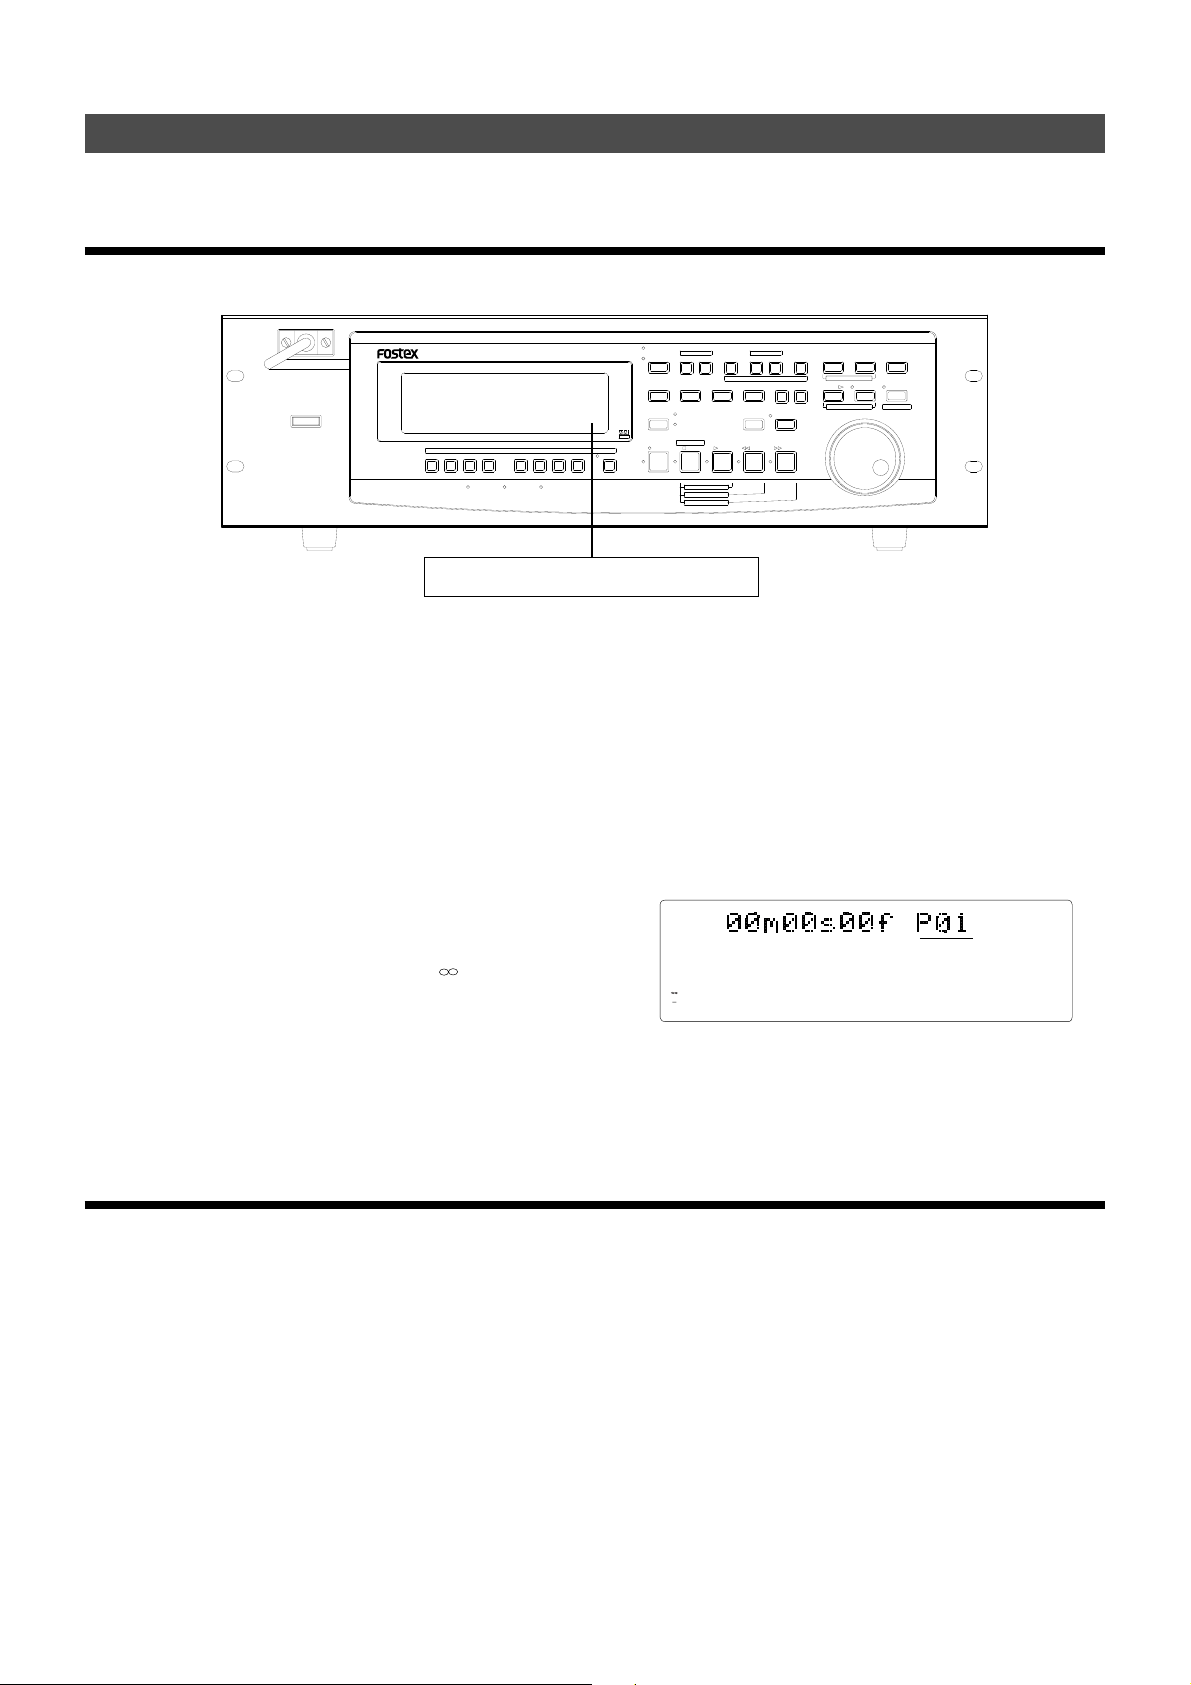
2. Adding a SCSI device when an E-IDE hard disk is already installed
Connect a SCSI device to the SCSI terminal on the D-160 Version 2.0. Follow the steps described above to install
a SCSI terminator and set the ID number. When you turn on the power to two current drives and the D-160, the
D-160 will recognize the connected E-IDE hard disk as the current drive. If you wish to use the SCSI device as
the current drive, use the [Drive Sel.?] menu in Setup mode to switch the current drive.
SCSI drive
SCSI terminator
ANALOG IN
1234
16
5678
SCSI cable
4
ANALOG OUT SCSI MIDI
12345678
9101112131415
DATA
9 - 16 1 - 8 9 - 16
OPTICAL
OUTPUTINPUT
1 - 8
INPUT OUTPUT THRU
D-160
Page 5

Addendum for D-160 Version 2.0
3. Connecting a backup SCSI device to the current SCSI device
To use another SCSI device as a backup drive, connect two SCSI devices in chain as shown below. There is no
restriction regarding which device comes first. However, be sure to install the terminator on the second SCSI
device (the device at the end of the chain). Refer to the “Notes on setting the SCSI ID number of the SCSI device
(IMPORTANT!!)” section on the previous page for more information on setting the ID number of each SCSI
device.
D-160
SCSI device #2
SCSI cable
SCSI device #1
DATA
9 - 16 1 - 8 9 - 16
OPTICAL
OUTPUTINPUT
1 - 8
SCSI MIDI
INPUT OUTPUT THRU
SCSI cable
Changed Format function
The format of the current drive disk and backup disk has changed. The format of the current drive disk is as
follows, depending on the type of devices:
E-IDE hard disk 16-track format
SCSI device Select from 8-track format, 4-track format
[Backup format] is used for a backup disk (which is used to save and load song data). Refer to the table below
for more details. See the next page for information on how to format a disk.
Application
Supported media E-IDE hard disk
Recording format
Quantization
Sampling frequency
Maximum recording time
Recording/playback track
16 track format
16-bit, linear
44.1/48kHz
~17min/100MB (converted one track)
16 tracks
Current drive Backup drive
SCSI drive (removable or fixed)
SCSI fixed disk
8 track format 4 track format
< -
< < - < -
8 tracks
SCSI fixed disk
SCSI removable disk
(MO or zip)
< -
< -
4 tracks
SCSI drive
(removable or fixed)
Backup format
Record/playback function
Save/Load function
Available Additional tracks
* 16-track simultaneous
recording of adat digital
signals
* 16-track simultaneous
recording of adat digital
signals via eight digital-ins and
eight analog-ins
* 8-track simultaneous
recording of S/P DIF digital
signals via two digital-ins and
six analog-ins
* 8-track simultaneous
recording of analog input
signals
Available via a DAT, adat, or
SCSI device
8 tracks (Tr 17-24) 16 tracks (Tr 9-24)
* 8-track simultaneous
recording of adat
digital signals
* 8-track simultaneous
recording of S/P DIF
digital signals via two
digital-ins and six
analog-ins
* 8-track simultaneous
recording of analog
input signals
Available via a DAT,
adat, or SCSI device
5
* 4-track simultaneous
recording of adat
digital signals (ch1-4)
* 4-track simultaneous
recording of S/P DIF
digital signals via two
digital-ins and two
analog-ins
* 4-track simultaneous
recording of analog
input signals
Note:
Simultaneous
recording by MO disk is
a maximum two tracks.
Available via a DAT,
adat, or SCSI device
20 tracks (Tr 5-24)
* Real-time recording/
playback is not
available, since this
disk is dedicated to
saving and loading
song data.
Page 6
Addendum for D-160 Version 2.0
Formatting the Current drive (E-IDE hard disk)
This section explains formatting when only an E-IDE hard disk is installed for the current drive.
Newly formatting an unformatted E-IDE hard disk
The following explanations will be on the assumption that D-160 is already has an unformatted E-IDE hard disk
installed.
AUTO RTN
POWER
1/9
3/11
2/10
IN / OUT
PUNCH
4/12 5/13 6/14
E-IDE hard disk only is installed.
Switch ON power to the D-160.
..
1
.
..
After display of [Current IDE Drv] -> [Model name], the
[Unformat!] message is displayed and the D-160 will
automatically enter the [Disk Format?] menu of the SETUP
mode.
..
Press the EXECUTE/YES key .
2
.
..
The display will change to the record mode and [?] and
[SURE?] of the [16 track format] will start to blink.
Press the EXECUTE/YES key while pressing the
..
3
.
..
RECORD button.
The unformatted area on the hard disk to be formatted will
be displayed and a count down will start as formatting
progresses. At the start of formatting, the [ ] section FL in
the display level meter will light and then successively
extinguish from the right end as formatting progresses.
This requires time especially when formatting a large
capacity hard disk. When formatting is completed,
[COMPLETED!] will be lit in the display and access to the
disk will stop.
16 TRACK DIGITAL RECORDER
RECORD TRACK
7/15 8/16
TC INLOCKED HD ACCESS
D-160
OPTICAL
SHIFT
4
CLIPBOARD
COPY MOVE PASTE
AUTO
REHEARSAL
PUNCH LOCATE
TAKE
ENVELOPE
RECORD STOP PLAY REWIND F FWD
CLIPBOARD PLAY
LOCATE ABS 0
LOCATE REC END
..
.
..
T o exit from the SETUP mode, press the EXIT/NO key
(or STOP button).
Upon completion of formatting, the display will change to
the Program 1 time base (head of the ABS 0 program).
Switch to the REMAIN display by pressing the DISP
..
5
.
..
SEL key and check the recordable time after
formatting.
After this check, press the DISP SEL key to return to the
original time base display.
OL
0
3
6
9
12
18
24
30
42
1
OUTINAUTO PLAY
START OUTIN END
32
AUTO PUNCH
AUTO RTN
4
VARI PITCH
5
EXIT
EXECUTE
/NO
/YES
DISP SEL
TIME BASE SEL
REDOUNDOERASE
6
7
RECALLSTOREHOLD/
PGM SEL
PREVIEW
ABS
44.1kHz
9
8
13
16
14
12
1110
15
Reformatting a preformatted E-IDE hard disk
A previously formatted E-IDE hard disk will be reformatted here. If the disk is reformatted again, not only will all
program data which had been recorded be erased but the program numbers and various settings of D-160 will be
returned to the initial state.
Rotate the JOG dial to select the SETUP menu [Disk
..
3
.
Switch ON power to D-160.
..
1
.
..
The D-160 will start up in the initial display (Time base:
ABS 0) of the program which had been active previous to
switching OFF the D-160.
After switching to the SETUP display by pressing the
..
2
.
..
DISP SEL key, press the EXECUTE/YES key .
The D-160 wiil with enter the SETUP mode, the SETUP menu
which had been active previous to switching OFF power
will be displayed (under the initial setting, and the [Drive
Sel.?] menu will be displayed.)
..
Format?] and then press the EXECUTE/YES key .
[IDE] will change to blinking. This is an indication that the
D-160 is in the standby mode for formatting the internal EIDE hard disk.
While [IDE] is blinking, press the EXECUTE/YES key .
..
4
.
..
The E-IDE hard disk will be formatted in the same manner
as detailed in above “Newly Formatting An Unformatted EIDE Hard Disk.” After completing formatting, [COMPLETED!]
will light in the display and disk access will stop.
6
Page 7
Addendum for D-160 Version 2.0
..
5
.
..
Exit from the SETUP mode by pressing the EXIT/NO
key (or STOP button).
The display will change to the program 1 time base
indication to which it will be set after formattting.
..
6
.
..
Switch to the REMAIN display by pressing the DISP
SEL key to check the recordable time after this
formatting.
After this check, press the DISP SEL key to return it to the
original time base display.
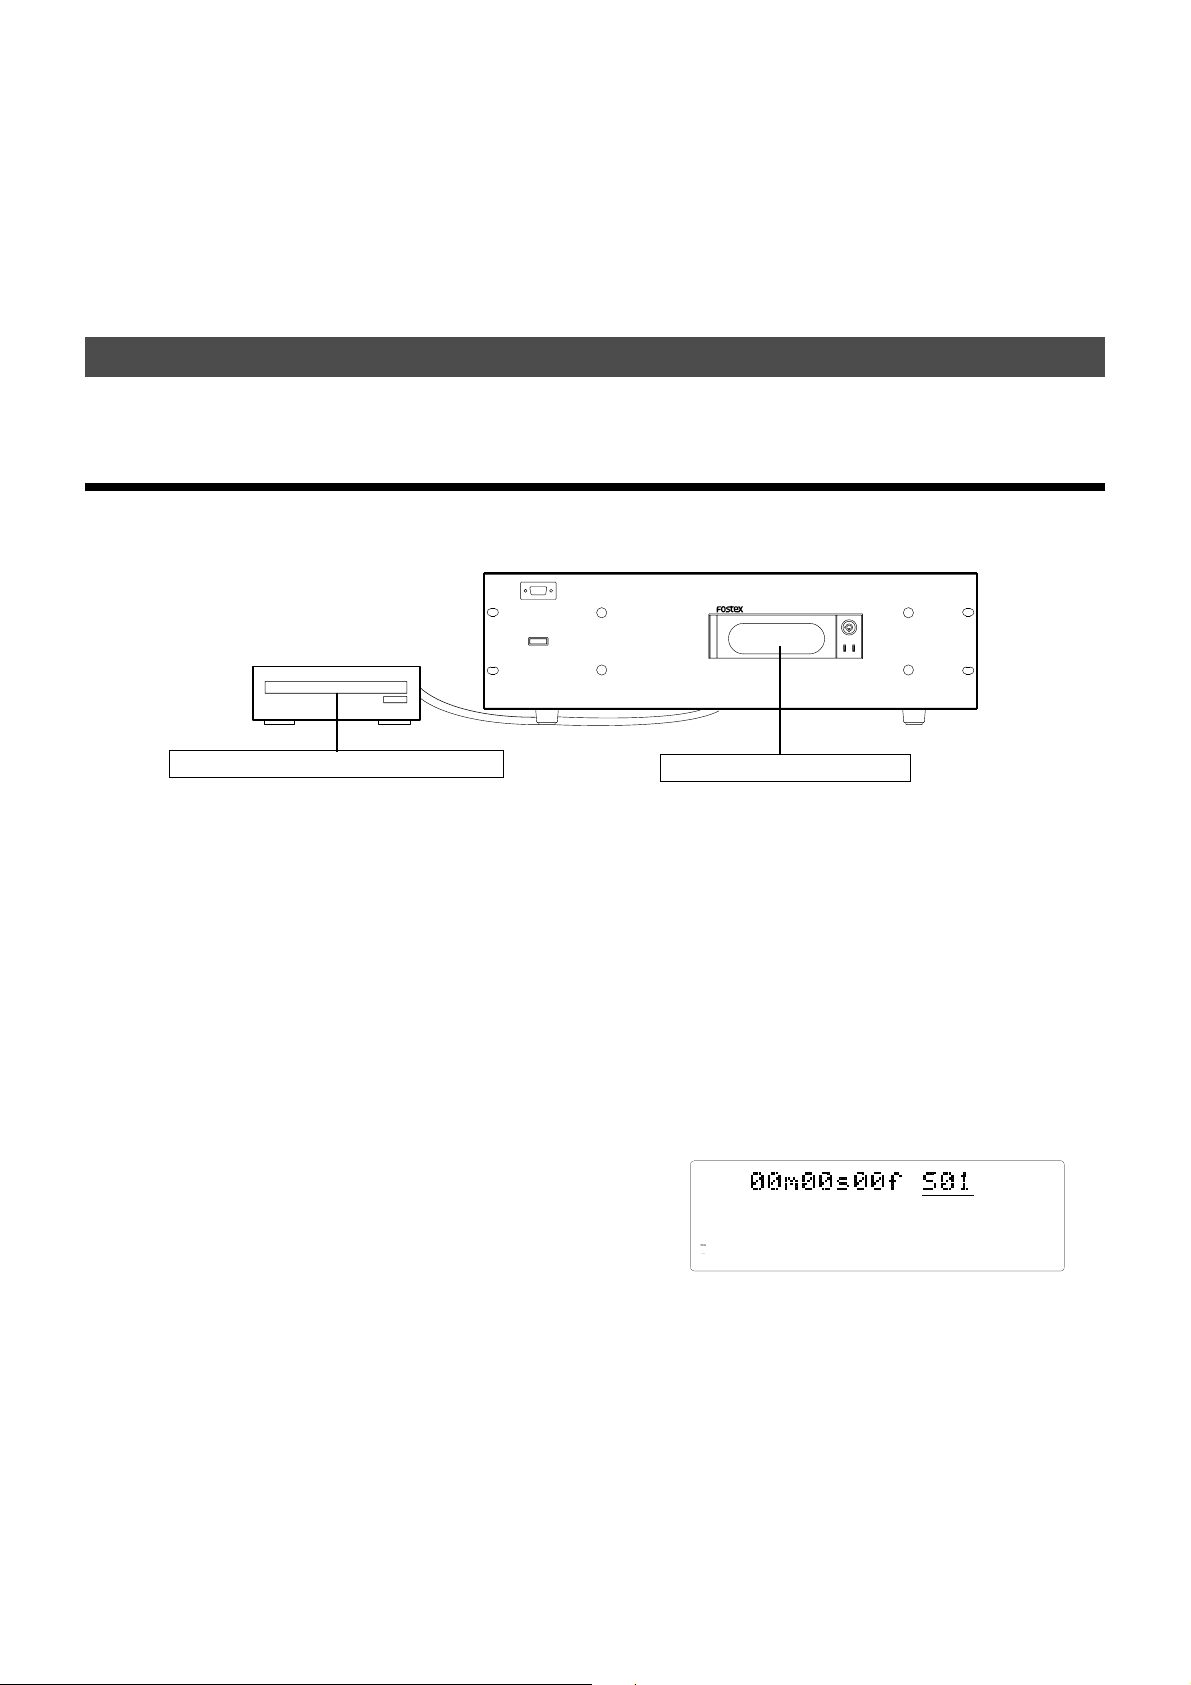
Formatting the Current drive (SCSI disk)
How to format a removable disk (or hard disk) which is connected as the current drive.
Newly formatting the unformatted SCSI disk
In the formatting explanation below, the D-160 is assumed to a SCSI type removable disk (or hard disk) for the current
drive and that an unformatted disk is not in the disk drive.
16 TRACK DIGITAL RECORDER
D-160
POWER
SCSI drive only is connected
..
1
.
..
Switch ON power to both pieces of equipment.
The D-160 will display the [Initial...] message. This will
change to [No Disk]. In the case of a hard disk, following
the display of the [Initial...] message at switch ON of power,
the [Unformat!] message and enter the SETUP mode follows.
Continue from Step 3, below.
..
2
.
..
Set the unformatted removable disk in the current
drive.
After displaying [Current Dr] -> [SCSI drive name] ->
[Unformat!] messages, the D-160 will automatically enter
the SETUP mode [Disk Format?] menu and the [SCSI #] (# =
SCSI ID number) message will blink in the display.
After checking that [SCSI#] is blinking, press the
..
3
.
..
EXECUTE/YES key.
The ID number and the drive name will be displayed and
[SURE?] will blink in the display.
..
4
.
..
Then, press the EXECUTE/YES key again.
The display will change to record mode select and [8 track
format] will blink.
..
5
.
..
Select the desired record mode with the JOG dial.
When the JOG dial is rotated, [8 track format] and [4 track
format] can be alternately selected. Either the [8 track
format] or [4 track format] can be selected only when the
SCSI drive is used as the current drive. Normally, when
making a recording with the D-160, the [8 track format] is
selected for formatting. The [4 track format] is selected
depending on the purpose of the recording.
E-IDE hard disk is not installed
After selecting the recording mode, press the
..
6
.
..
EXECUTE/YES key while pressing the RECORD
button.
Formatting will start in the selected recording mode. During
formatting, [REMAIN] will be lit in the display, the disk
unformatted area (capacity) will be displayed and counted
down with progress of formatting. [COMPLETED!] will light
upon completion of formatting and the disk will stop.
..
Exit from the SETUP mode by pressing the EXIT/NO
7
.
..
key (or STOP button).
The display will change to the program 1 time base display
(00m 00s 00f S01) to which it will be set after formatting.
ABS
OL
0
3
6
9
12
18
24
30
42
1
32
Switch to the REMAIN display by pressing the DISP
..
8
.
..
9
87654
13
14
12
1110
44.1kHz
16
15
SEL key to check the recordable time after formatting.
Press the DISP SEL key after this check to return it to the
original time base display. In order to eject the removable
disk from the current drive, press the EXIT/NO key while
pressing the STOP button. To format other removable disks,
after ejecting the formatted disk, load another one in the
current drive and repeat the above procedure.
7
Page 8
Addendum for D-160 Version 2.0
Reformatting a previously formatted SCSI disk
Here is how to reformat previously formatted SCSI disk for use in the current drive or for backup. When a disk is
reformatted, any previously recorded program data will all be erased and, at the same time, the number of programs
and various settings will revert to its original state. The explanations below are based on the assumption that a SCSI
drive is connected as the current drive, that a formatted disk is not loaded in the SCSI drive and, [No Disk] is shown in
the display.
* Steps in reformatting a disk which have been formatted
for use in the current drive
..
1
.
..
Load disk in the drive.
After display of the [8 track mode] or [4 track mode] in
which it had been formatted, the display will change to
time base (00m 00s 00f S01) of the current drive.
After switching to the SETUP display by pressing the
..
2
.
..
DISP SEL key, press the EXECUTE/YES key .
At the same time as entering the SETUP mode, the SETUP
menu which was active previous to switching off power will
be displayed. Under this initial setting, the [Drive Sel.?]
menu will be displayed.
..
3
.
..
Select [Disk Format?] in the SETUP menu by rotating
the JOG dial, and then press the EXECUTE/YES key .
The display will change to blinking of [SCSI #] (# = ID number
of the SCSI equipment).
..
4
.
..
Press the EXECUTE/YES key while [SCSI #] is
blinking.
ID number and drive name will be displayed and both [?]
and [SURE?] will blink.
* Steps in reformatting a disk which have been formatted
for backup use (including DOS formats)
..
1
.
..
Load disk in the drive.
After display of [Illegal format], the display will change to
the backup disk time base (00m 00s 00f B01).
< Note >:
here is displayed simply for entering the SETUP
mode and will be ignored by displaying [Void
command] even if an attempt is made to record from
this state.
..
2
.
After switching to the SETUP display by pressing the
..
DISP SEL key, press the EXECUTE/YES key .
Simultaneous with entering the SETUP mode, the SETUP
menu which was active prior to switch off of power will be
displayed under the initial setting, the [Drive Sel. ?] menu
will be displayed.
..
3
.
..
Select the SETUP menu [Disk Format?] by rotating
the JOG dial and press the EXECUTE/YES key .
The display will change to blinking of [SCSI #] (# = ID number
of SCSI equipment).
The backup disk time base that appears
..
5
.
..
Press the EXECUTE/YES key again.
The display will change to select the record mode and
[SURE?] will blink.
..
6
.
After selecting the record mode by rotating the JOG
..
dial, press the EXECUTE/YES key while pressing the
RECORD button.
Formatting will start in the selected record mode. After
formatting is completed, [COMPLETED!] will blink and disk
access will stop.
..
7
.
..
Exit from the SETUP mode by pressing the EXIT/NO
key (or the STOP button.)
The display will change to the program 1 time base (ABS
00m 00s 00f S01) to which it will be set after formatting.
In order to eject the removable disk from the current drive,
press the EXIT/NO key while pressing the STOP button.
..
Press the EXECUTE/YES key while [SCSI #] is
4
.
..
blinking.
The ID number and drive name will be displayed and [?]
and [SURE?] will blink.
Press the EXECUTE/YES key again.
..
5
.
..
The display will change to selecting the record mode and
[SURE?] will blink.
After selecting the record mode with the JOG dial,
..
6
.
..
press the EXECUTE/YES key while pressing the
RECORD button.
Formatting will start in the selected recording mode.
Please wait patiently during formatting. [COMPLETED!] will
be lit upon completion of formatting and disk access will
stop.
Exit from the SETUP mode by pressing the EXIT/NO
..
7
.
..
key (or the STOP button).
The display will change to the program 1 time base display
(ABS 00m 00s 00f S01) to which it will be set after formatting.
In order to eject the removable disk from the current drive,
press the EXIT/NO key while pressing the STOP button.
8
Page 9
Addendum for D-160 Version 2.0
Formatting of both E-IDE and SCSI equipment
In a situation where both the E-IDE hard disk and a SCSI drive are used for the current drive, each current drive disk will
be formatted here. Normally, when power is switched ON to equipment using both types as the current drive, the E-IDE
hard disk will automatically become active as the current drive.
In the D-160, regardless to which is the current drive, the presently active current drive can format the other current
drive. In the procedure below, it is assumed that the E-IDE hard disk had been formatted in according to the above
“FORMATTING THE CURRENT DRIVE (E-IDE HARD disk” and this, then will format the SCSI drive. It is also assumed
that the E-IDE time base is shown in the display.
16 TRACK DIGITAL RECORDER
D-160
POWER
SCSI drive for the current drive is connected.
..
1
.
..
After switching to the SETUP display by pressing the
DISP SEL key, press the EXECUTE/YES key .
The D-160 will enter the SETUP mode and the display will
change to the SETUP menu which was in effect prior to
switch OFF of power.
..
2
.
..
Select the [Disk Format?] menu by rotating theJOG
dial and press the EXECUTE/YES key .
[IDE] will change to blinking and as the JOG dial is rotated.
This will alternately switch and allow a choice between the
blinking [IDE] and blinking [SCSI #] (# = ID of the SCSI
equipment).
..
After selecting [SCSI #] with the JOG dial, press the
3
.
..
EXECUTE/YES key once again.
No matter whether an unformatted or formatted disk is
loaded in the SCSI drive, the ID number and drive name
will be displayed and [SURE?] will blink.
..
4
.
..
Press the EXECUTE/YES key once again.
The display will change to selecting the recording mode
and [8 track format] will blink.
E-IDE hard disk for the current drive is installed.
After selecting the recording mode, press the
..
6
.
..
EXECUTE/YES key while pressing the RECORD
button.
Formatting will start in the selected recording mode.
[REMAIN] will be lit during formatting, the disk unformatted
area (capacity) displayed and will count down with progress
of the formatting. After formatting is completed,
[COMPLETED!] will light and the disk will stop.
..
7
.
Exit from the SETUP mode by pressing the EXIT/NO
..
key (or STOP button).
The display will change to the time base shown prior to
entering the SETUP mode.
In order to confirm REMAIN upon completing the formatting,
enter the SETUP mode [Drive Sel.?] menu while the EIDE hard disk is in the current drive state, and then after
changing the current drive, switch to the REMAIN display.
In order to eject the removable disk from the current drive
after formatting, press the SCSI drive EJECT button.
..
5
.
..
Select the desired recording mode with the JOG dial.
Either [8 track format] or [4 track format] can be selected
alternately by rotating the JOG dial. Only when the SCSI
drive is used for the current drive, either the [8 track format]
or [4 track format] can be selected. Normally, the [8 track
format] is selected for formatting when recording with the
D-160. Depending on the purpose of the recording, it can
also be formatted in the [4 track format].
9
Page 10
Addendum for D-160 Version 2.0
Formatting the BACKUP disk (SCSI disk)
In the D-160, song data recorded in the current drive can be saved /loaded by using the backup SCSI drive disk, not to
mention DAT and adat. In addition to the current drive, when a backup SCSI drive is connected to D-160, the ID
number for the backup SCSI drive must be set to “6” and the disk must be formatted in the backup exclusive recording
mode. Even if the backup disk is loaded in the SCSI drive, the disk information cannot be displayed such as by the
current drive. For this reason, in order to format the backup disk, same as with the aforementioned current SCSI disk
formatting, it must be forcibly executed by the SETUP mode [Disk Format?] menu. In this example, assume that the
current drive and backup drive are connected as shown below and that it is in the time base for the E-IDE hard disk.
< Note>:
(DOS format) disk must be formatted beforehand in another computer (PC/AT type).
Backup SCSI equipment
A disk intended for save/load by WA V file cannot be formatted by the D-160 [Disk Format?] menu. The WA V file
16 TRACK DIGITAL RECORDER
Current drive SCSI equipment
E-IDE hard disk + SCSI equipment + Backup SCSI equipment (or SCSI equipment + backup SCSI equipment)
POWER
Backup SCSI equipment
Backup SCSI equipmentE-IDE hard disk + Backup SCSI equipment
POWER
16 TRACK DIGITAL RECORDER
D-160
D-160
..
1
.
After switching to the SETUP display by pressing the
..
DISP SEL key, press the EXECUTE/YES key .
The D-160 will enter the SETUP mode and the display will
change to the SETUP menu which was active prior to switch
OFF of power.
..
2
.
..
Select the [Disk Format?] menu by rotating the JOG
dial, then press the EXECUTE/YES key .
[IDE] will change to blinking and when the JOG dial is
rotated, the alternately blinking [IDE] and [SCSI 6] can be
easily selected (If a current drive SCSI is also connected,
[SCSI #] (# = ID number of the SCSI drive) will also be
displayed).
After selecting [SCSI 6] with the JOG dial, press the
..
3
.
..
EXECUTE/YES key again.
Even though an unformatted or formatted disk is loaded in
the SCSI drive, the ID number and drive name will be
displayed and both [?] and [SURE?] will blink.
..
4
.
..
Then, press the EXECUTE/YES key again.
[Backup format?] will be displayed and both [?] and [SURE?]
will blink. This is an indication that it is in standby for
formatting the backup disk by the [Backup format].
..
5
.
..
Press the EXECUTE/YES key while pressing the
RECORD button.
Formatting will start in the backup format mode. During
formatting, [REMAIN] will be lit in the display, the disk area
(capacity) not yet formatted will be displayed and count
down will continue with progress of formatting. After
formatting is [COMPLETED!] will be lit and disk will stop.
Exit from the SETUP mode by pressing the EXIT/NO
..
6
.
..
key (or the STOP button).
The display will change to the current drive time base prior
to entering the SETUP mode.
T o retrieve the disk from the backup drive, press the drive
EJECT button.
10
Page 11
Addendum for D-160 Version 2.0
Addition of the Preview function
The preview function enables you to repeatedly audition the rise (fade in) or the fall (fade out) of the sound data
at a locate point (edit point) that is stored in the AUTO PUNCH IN/OUT, AUTO RTN START/END, or CLIPBOARD
IN/OUT key. This is also called “point rehearsal.”
With this function, you can check the locate points in real-time. You can also use this function to fine-tune the
position of the locate points while previewing the sound. This function is effective only when the D-160 is
stopped.
• Previewing the rise of the sound (fade in)
While holding down the RECALL key, press the AUTO RTN
START key, the AUTO PUNCH OUT key, or CLIPBOARD IN
key.
AUTO RTN ST AR T key
CLIPBOARD IN key
AUTO RTN
CLIPBOARD
OUTINAUTO PLAY START OUTIN END
AUTO PUNCH OUT key
AUTO PUNCH
AUTO RTN
REDOUNDOERASECOPY MOVE PASTE
DISP SEL
TIME BASE SEL
PGM SEL
EXECUTE
/YES
EXIT
/NO
RECALLSTOREHOLD/
PREVIEW
RECALL key
<Display indication during the Preview operation>
Memory data
SETUP
OL
0
3
6
9
12
18
24
30
42
1
5
2
4
3
8
6
7
9
13
10
14
12
11
15
LOCATE
44.1kHz
16
• Previewing the fall of the sound (fade out)
While holding down the RECALL key, press the AUTO END
START key, the AUTO PUNCH IN key, or the CLIPBOARD
OUT key.
CLIPBOARD OUT key AUTO RTN END key
AUTO PUNCH IN key
AUTO RTN
CLIPBOARD
OUTINAUTO PLAY START OUTIN END
AUTO PUNCH
AUTO RTN
EXIT
EXECUTE
/NO
/YES
DISP SEL
REDOUNDOERASECOPY MOVE PASTE
TIME BASE SEL
PGM SEL
RECALLSTOREHOLD/
PREVIEW
RECALL key
<Display indication during the Preview operation>
Memory data
SETUP
OL
0
3
6
9
12
18
24
30
42
2
1
5
8
6
4
3
9
7
13
10
14
12
11
15
LOCATE
44.1kHz
16
10
2
1
5
6
4
3
9
8
7
12
11
13
16
14
15
Approx. 2sec.
1sec. (mute playback)
1sec. (normal playback)
The sound rises at the memory point
The D-160 repeats playback the “rise sound” at the locate
point (edit point). As shown in the diagram, one-second
of data prior to the locate point is muted during
playback. The mute is off (fade in) at the locate point
and the sound is played back for one second.
The D-160 will repeat this operation until you quit the
Preview function.
11
2
1
5
4
3
8
6
7
10
9
13
12
11
16
14
15
Approx. 2sec.
1sec. (normal playback)
1sec. (mute playback)
The sound falles at the memory point
The D-160 repeats playback of the “fall sound” at the
locate point (edit point). As shown in the diagram, onesecond of data prior to the locate point is played back,
then muted (fade out) at the locate point. The muted
playback continues for one second. The D-160 will repeat
this operation until you quit the Preview function.
Page 12

Addendum for D-160 Version 2.0
SF
H
MS
F
SF
H
MS
F
SF
H
MS
F
Executing the Preview function
1. Press the desired memory key while holding down
the RECALL key when the D-160 is stopped.
2. Adjust the monitor sound of the selected track so
that it can be monitored on the mixer.
Pressing the desired memory key will enable you to
preview the sound at the locate point (edit point) stored
in the corresponding memory key.
Memory key
AUTO PUNCH IN key
AUTO RTN END key
CLIPBOARD OUT key
AUTO PUNCH OUT key
AUTO RTN START key
CLIPBOARD IN key
The D-160 plays the fall (fade out) of
the sound at the locate point stored in
the keys.
The D-160 plays the fall (fade in) of
the sound at the locate point stored in
the keys.
Operation
Note:
If data stored in each memory key is in the initial state,
all memory keys will be in ABS time 00h 00m 00s.
In other words, the program head value is in the memory. Should
fade out preview be executed in this condition, the [Void Data !]
message and memory data [00h 00m 00s] will alternately flash
in the display as a warning.
However, for fade in preview, this will function as the memory
data [00h 00m 00s] point.
3. Press the STOP button or the EXIT/NO key.
Trimming the sound while previewing
You can trim the position of the locate point (edit point) using the JOG dial while you preview the sound.
At this time, you can also adjust the size of the trimming steps (the amount of offset controlled by the JOG dial).
Trimming allows you to fine-tune the position of the locate point stored in the memory keys while previewing the
sound. Use this function to change the Auto Punch In/Out points, the start point of Copy & Paste and Move & Paste,
and the start and end points of the Erase function.
<Notes>
• Y ou can audition the result of trimming during the next preview. That is, if you trim the position while previewing the
sound for the first time, you can check the result when you preview the sound next time.
• If the locate point is shifted outside the range of the preview playback as a result of trimming, [Void Data!] and the
locate point indication appear alternately . In this case, you cannot use the Preview function. Trim the position again so
that it will be within the playback range.
• When Auto Punch mode is turned on and you trim the Auto Punch In or Auto Punch Out point while previewing the
sound with [Void Data!] indicated on the display, Auto Punch mode will be cancelled.
1. Start previewing the sound by following the steps
described on the previous page.
2. Use the JOG dial to trim the position.
When previewing starts, the unit of JOG trimming flashes
on the screen. For example, value of SF (sub-frame) flashes
if ABS Time Base or MTC Time Base is selected. CLK (clock)
flashes if BAR/BEAT/CLK is selected. The flashing value
also indicates the position you can trim.
Example: Time Base is ABS (value of SF flashes.)
SETUP
OL
0
3
6
9
12
18
24
30
42
1
5
2
4
3
8
6
9
7
13
10
14
12
11
44.1kHz
16
15
Example: Time Base is BAR/BEAT/CLK (CLK flashes.)
SETUP
OL
0
3
6
9
12
18
24
30
42
1
5
2
4
3
8
6
9
7
13
10
12
11
16
14
15
44.1kHz
LOCATE
LOCATE
Flashes
Flashes
3. T o change the unit of trimming, press the HOLD/>
key , or turn the SHUTTLE dial.
These key or dial will change the trimming unit as follows:
Time Base
ABS or MTC BAR/BEAT/CLK
BAR
HOLD/> key
SHUTTLE dial
CLK
CLK
BAR
(clockwise)
SHUTTLE dial
CLK
BAR
(counter clock-
wise)
4. Trim the position at the selected unit (digit).
5. Press the STOP button or the EXIT/NO key.
The trimmed locate point (edit point) data will be stored
in the corresponding memory key.
12
Page 13

Addendum for D-160 Version 2.0
42
44.1kHz
OL
0
4
30
24
18
12
9
6
3
42
44.1kHz
OL
0
8
30
24
18
12
9
6
3
Addition of the Envelope function
The envelope function is the ability to reproduce in the display the signal level recorded in the real track, and
digital scrub untilizing this function becomes possible. As digital scrub can be executed by selecting any single
real track while D-160 is stopped, the desired point can be accurately confirmed with your eye and ear, and
therefore, quickly located.
The prerequisite of the following operation is that the time base is ABS, however , the operation can be executed in any time base. To execute
this function with a non-ABS time base there is a need to priory switch over to the desired time base.
Digital scrubbing using the envelope function
You may perform digital scrubbing using the “Envelope Function” of the D-160 while the recorder section is
stopped. The envelope function allows digital scrubbing for each track recorded. The display will show the
envelope indication of the track selected.
POWER
IN / OUT
PUNCH
1/9
2/10
3/11
4/12 5/13 6/14
16 TRACK DIGITAL RECORDER
RECORD TRACK
7/15 8/16
TC INLOCKED HD ACCESS
D-160
OPTICAL
SHIFT
5
AUTO RTN
CLIPBOARD
COPY MOVE PASTE
AUTO
REHEARSAL
PUNCH LOCATE
TAKE
ENVELOPE
RECORD STOP PLAY REWIND F FWD
CLIPBOARD PLAY
LOCATE ABS 0
LOCATE REC END
OUTINAUTO PLAY
START OUTIN END
AUTO PUNCH
AUTO RTN
VARI PITCH
EXIT
EXECUTE
/NO
/YES
DISP SEL
TIME BASE SEL
PGM SEL
RECALLSTOREHOLD/
PREVIEW
REDOUNDOERASE
2
4
1. While the D-160 is stopped, depress the STOP
button and then press the RECORD TRACK select
key of the desired record track.
This turns ON the envelope function. The envelope
indication of the selected track will appear on the
display. The following example shows the indication of
track 4 envelope, after RECORD TRACK select key 4 is
pressed. At this time the recorder section is in the STILL
status (scrub mode is in still status) and the REWIND LED
and F FWD lights up.
playback point
OL
0
3
6
9
12
18
24
30
42
Track indication
4
playback point
44.1kHz
1
3. Adjust the monitor sound of the selected track so
that it can be monitored on the mixer.
4. Press the RECORD TRACK select key of the desired
record track to select another track.
[Please Wait!] will briefly appear and then go to the
envelope indication of the selected track. The following
example shows the case when the indication is switched
from track 4 to track 8.
2. Y ou can use the JOG dial to digitally scrub the
performance of the track selected.
The envelope of the performance recorded on the track
variates in real-time. During forward direction scrub the
F FWD LED lights up, and during rewind direction scrub
the REWIND LED lights up.
5. Press the STOP button to stop the envelope
function.
Doing so will turn OFF the envelope function. The D-160
will return to the time base indication prior to turning
the envelope function ON.
13
Page 14

Addendum for D-160 Version 2.0
Enhanced Locate point storage
Now you can store up to 99 Locate points for a simple Locate function using the LOCATE key. The function of
other Memory keys (*) has not changed.
With the previous version, the last Locate data (except for ABS 0 LOCATE and REC END LOCATE) was always
stored in the LOCATE key. This function has been enhanced, and now you can assign any Locate number (01-99)
to the LOCATE key to simply locate the point. The last Locate point is stored in Locate number 00.
Although the procedure for storing the points in the Memory keys has not been changed, part of the indication
on the display has been changed. When you store a Locate point (edit point) in a Memory key, refer to the notes
below.
This addendum explains only how to store Locate data into the LOCATE key. For more information on other
Memory keys, refer to the main User’s Guide.
(*) Memory keys
Memory keys are capable of storing time data for locating or editing points. There are six Memory keys (AUTO PUNCH
IN/OUT , CLIPBOARD IN/OUT, AUTO RTN START/END).
<Notes on storing data to the Memory keys>
Due to the version update, part of the indication on the display has changed. Follow the guideline below when you store
Locate points (edit points) into the Memory keys:
When you press the STORE key to store real-time or edited time data into a Memory key, the following indication
appears. This parameter is used to assign a Locate number to the LOCA TE key, and is not related to storing data into
Memory keys. Ignore this indication and press the desired Memory key .
OL
0
3
6
9
12
18
24
30
42
1
5
4
32
8
6
9
7
13
14
12
1110
44.1kHz
16
15
Use of this parameter is explained in the following section.
Storing data to the LOCATE key
Up to 99 Locate points (time data) can be stored in the LOCATE key to perform simple Locate functions.
You can assign any Locate number from 01-99 to mange the time data. You may then specify the desired Locate
number to locate the corresponding position in the data. You can also edit this time data to locate a different
point, or store the data into any other Memory key.
<Notes>
• The last Locate data (located via a Memory key or the LOCATE key) is stored as Locate number 00. This means that the
data will be overwritten by new data each time a point is located. Therefore, do not use Locate number 00 as an independent
Locate data.
• You cannot preview the data stored in the LOCA TE key.
• If you wish to use any Time Base other than ABS time, first use the DISP SEL key and EXECUTE/YES key to select the
desired Time Base.
• Stored or edited Locate point data is effective only within the current Program.
14
Page 15

Addendum for D-160 Version 2.0
Storing in real-time
You can store the locate point (in the ABS, MTC, or BAR/BEAT/CLK Time Base) in real-time while the D-160 is
playing.
POWER
IN / OUT
16
5
AUTO RTN
16 TRACK DIGITAL RECORDER
2/10
3/11
4/12 5/13 6/14
RECORD TRACK
PUNCH
1/9
TC INLOCKED HD ACCESS
7/15 8/16
D-160
OPTICAL
SHIFT
CLIPBOARD
COPY MOVE PASTE
AUTO
REHEARSAL
PUNCH LOCATE
TAKE
ENVELOPE
RECORD STOP PLAY REWIND F FWD
CLIPBOARD PLAY
LOCATE ABS 0
LOCATE REC END
OUTINAUTO PLAY
START OUTIN END
AUTO PUNCH
AUTO RTN
VARI PITCH
2
EXIT
EXECUTE
/NO
/YES
DISP SEL
TIME BASE SEL
PGM SEL
RECALLSTOREHOLD/
PREVIEW
3
REDOUNDOERASE
4
1. Press the PLAY button to start playback.
2. Press the HOLD/> key in the store location.
When you press the HOLD/> key the time base (or bar/
beat/clock) will return to the edit mode of the data put
on hold.
OL
0
3
6
9
12
18
24
30
42
1
Blink
SETUP
LOCATE
44.1kHz
5
8
6
4
32
9
7
13
10
12
11
16
14
15
3. Press the ST ORE key (the ST ORE LED lights up).
The memory number selection menu will appear, as
follows.
OL
0
3
6
9
12
18
24
30
42
5
8
6
4
1
32
9
7
Blink
44.1kHz
13
16
14
12
1110
15
4. Select the LOCATE number desired using the JOG
dial.
LOCATE number from 00-99 are selectable. However,
select a number other then 00.
5. Next press the LOCATE key.
The time base (or bar/beat/clock) put on hold is stored
as data in the LOCATE number selected. The system will
return to the original time base when the storage process
is completed, and playback is resumed.
• You can omit Step 2 to speed operation.
6. After completing the store process, press the STOP
button to stop the recorder section.
• If you set “BAR/BEAT Resolution mode” in SETUP mode
to ON, the D-160 will round off the CLK value of the captured
bar/beat/clock value. That is, the locate point will be at the
beginning of the beat (00).
Editing and storing locate data
If you know the position of the desired locate point, follow the steps below.
AUTO RTN
POWER
PUNCH
IN / OUT
16 TRACK DIGITAL RECORDER
2/10
3/11
4/12 5/13 6/14
RECORD TRACK
1/9
TC INLOCKED HD ACCESS
7/15 8/16
D-160
OPTICAL
SHIFT
CLIPBOARD
COPY MOVE PASTE
AUTO
REHEARSAL
PUNCH LOCATE
TAKE
ENVELOPE
RECORD STOP PLAY REWIND F FWD
CLIPBOARD PLAY
LOCATE ABS 0
LOCATE REC END
OUTINAUTO PLAY
START OUTIN END
AUTO PUNCH
AUTO RTN
VARI PITCH
5
15
1, 2
DISP SEL
REDOUNDOERASE
EXECUTE
/YES
TIME BASE SEL
PGM SEL
2, 4
EXIT
/NO
RECALLSTOREHOLD/
PREVIEW
3
2
Page 16

Addendum for D-160 Version 2.0
1. Press the HOLD/> key while the D-160 is stopped.
The currently-displayed time value (or bar/beat/clock value)
is captured and the D-160 enters data edit mode.
2. Press the HOLD/> key , or turn the SHUTTLE dial to
move the flashing cursor on the time value digit, and
use the JOG dial to increase or decrease the value.
3. Press the STORE key .
4. Select the LOCATE number desired using the JOG
dial.
5. Press the LOCATE key.
The edit time data is stored as the time data for the
selected LOCATE number.
• Press the STORE key instead of the HOLD/> key in
Step 1 and omit Step 3 to speed operation.
Edit and re-store data that is already stored
RECALL the desired time data already stored in the LOCATE key, edit that data and re-store it.
4
POWER
IN / OUT
2, 6
AUTO RTN
16 TRACK DIGITAL RECORDER
2/10
3/11
4/12 5/13 6/14
RECORD TRACK
PUNCH
1/9
TC INLOCKED HD ACCESS
7/15 8/16
D-160
OPTICAL
SHIFT
CLIPBOARD
COPY MOVE PASTE
AUTO
REHEARSAL
PUNCH LOCATE
TAKE
ENVELOPE
RECORD STOP PLAY REWIND F FWD
CLIPBOARD PLAY
LOCATE ABS 0
LOCATE REC END
OUTINAUTO PLAY
START OUTIN END
AUTO PUNCH
AUTO RTN
VARI PITCH
3
EXIT
EXECUTE
/NO
/YES
DISP SEL
TIME BASE SEL
PGM SEL
RECALLSTOREHOLD/
PREVIEW
REDOUNDOERASE
1
2, 5
1. Press the RECALL key while the D-160 is stopped.
The menu to select the LOCATE number will appear.
Blink
OL
0
3
6
9
12
18
24
30
42
1
5
8
6
4
32
9
7
13
14
12
1110
44.1kHz
16
15
2. Turn the JOG dial to select the desired LOCATE
number, then press the LOCATE key.
The data edit mode will appear when the data stored in
the selected LOCATE number appears.
Blink
SETUP
OL
0
3
6
9
12
18
24
30
42
1
5
8
6
4
32
9
7
13
10
14
12
11
15
LOCATE
44.1kHz
16
3. Press the HOLD/> key , or turn the SHUTTLE dial to
move the (cursor) column of the time indication to edit
(cursor flashing point), increase or decrease the
number setting with the JOG dial or input the desired
time base.
3
4. Press the ST ORE key (the ST ORE LED lights up).
The LOCATE number selection menu to store data will
appear.
OL
0
3
6
9
12
18
24
30
42
1
5
8
6
4
32
9
7
•If the STORE key is press instead of the LOCA TE key at
this stage, it becomes possible to directly LOCATE the
time data of the selected LOCATE number. For more
details refer to the next section on “Location Functions.”
5. You can use the JOG dial to input the desired
LOCA TE number.
6. Press the LOCATE key.
The edit time data is stored as the time data for the
selected LOCATE number.
Blink
44.1kHz
13
16
14
12
1110
15
16
Page 17

Addendum for D-160 Version 2.0
Enhanced Locate function
The function of storing Locate points has been enhanced. You can store up to 99 Locate points into the LOCATE
key to perform a simple Locate function. Specifying the desired Locate number will locate the corresponding
point immediately.
This section explains how to locate a point by specifying the Locate number. For more information regarding
how to locate ABS 0 (top of a Program), REC END (end of recording), and points stored in the Memory keys, refer
to the main Owner’s Manual.
Locating a point by specifying the Locate number
3, 4
AUTO RTN
POWER
IN / OUT
16 TRACK DIGITAL RECORDER
3/11
4/12 5/13 6/14
RECORD TRACK
1/9
PUNCH
2/10
TC INLOCKED HD ACCESS
7/15 8/16
D-160
OPTICAL
SHIFT
CLIPBOARD
COPY MOVE PASTE
AUTO
REHEARSAL
PUNCH LOCATE
TAKE
ENVELOPE
RECORD STOP PLAY REWIND F FWD
CLIPBOARD PLAY
LOCATE ABS 0
LOCATE REC END
OUTINAUTO PLAY
START OUTIN END
AUTO PUNCH
AUTO RTN
VARI PITCH
EXIT
EXECUTE
/NO
/YES
DISP SEL
TIME BASE SEL
PGM SEL
RECALLSTOREHOLD/
PREVIEW
1
REDOUNDOERASE
2
1.Press the RECALL key while the D-160 is stopped.
The D-160 displays the Locate number selection.
Blink
OL
0
3
6
9
12
18
24
30
42
1
5
8
6
4
32
9
7
13
14
12
1110
44.1kHz
16
15
2.Use the JOG dial to select the desired Locate
number.
You can enter any number from 00 to 99.
Locate number 00 always contains the time data of the
last Locate point.
3.Press the LOCATE key.
The corresponding time data appears. You can edit this
time data. The value flashes in seconds.
Blink
SETUP
OL
0
3
6
9
12
18
24
30
42
1
5
8
6
4
32
9
7
13
10
14
12
11
15
LOCATE
44.1kHz
16
If you wish to locate the point with this time data, go to
step 4. If you wish to edit this time data, use the HOLD/>
key or the SHUTTLE dial to move a flashing cursor to the
numbers you wish to edit, then use the JOG dial to modify
the value.
4.Press the LOCATE key.
The D-160 immediately locates the point that corresponds
to the displayed memory data (time data).
If you have edited the time data, the D-160 locates the
new corresponding point. The time data of the Locate
point is automatically stored in Locate number 00.
If you wish to store the edited data, instead of locating
the point, press the STORE key, not the LOCATE key.
The D-160 displays the Locate number selection.
Enter the desired Locate number and press the STORE key.
The edited time data will be stored in the selected Locate
number.
Memory Data
17
Page 18

Addendum for D-160 Version 2.0
New Save/Load function
The upgraded version enables you to save and load data using an E-IDE hard disk or a SCSI device as the
current drive. In this case, may use an external DAT machine, adat, or a backup SCSI device. When you
use a backup SCSI device to save and load data, you can use a DOS-formatted disk to save and load wav
files (RIFF WAVE file format). In this way, you can utilize the D-160 Ver.2.0 data with computer music
software.
Due to the version update, the format was changed and the procedure described in the “Saving and
Loading Song Data” section of the original manual no longer applies. Please refer to the procedure
described in this addendum to save and load song data. Note the followings when you save and load
data using an external DAT machine or adat:
<Notes on saving song data using a DAT or adat>
Refer to the following notes when you save all track data (Real tracks and Additional tracks) using a
DA T or adat.
The duration of the data that can be saved on the disk is calculated based on the duration of the song
data (ABS 0 - REC END) on the Real tracks. Therefore, if you try to save data on an Additional track that
is longer in duration than the data on the Real track, only that part of the Additional track (up to the same
time indication of the Real T rack) will be saved.
For example, assume that you moved 10-minutes of data on a Real track to an Additional track (using
the T rack Exchange function), then you recorded three minutes of data on the same Real track. In this
case, only three minutes of the Additional track data will be saved. The rest (seven-minutes of data) will
not be saved.
If this happens, set the save time longer (up to 59 minutes and 59 seconds) using the save time editing
procedure (see Step 7 on page 20). Alternatively, move the longest data on the Additional track to a
Real track, then perform the save operation. At this time, be careful not to accidentally erase important
data on the Additional tracks. Refer to the main Owner's Manual for more information on the Track
Exchange function.
Additional Tracks 17~24
Real Tracks 1~16
Only this range of data will
be saved.
D-160 Ver 2.0
Save
DAT or adat
REC END of the Additional tracks.
REC END of the Real tracks.
18
Page 19

Addendum for D-160 Version 2.0
Saving the data using DATA OUT
S/P DIF digital signal (or adat digital signal) from the DATA OUT jack of the D-160 is saved. The prerequisite
is that an E-IDE hard disk is used as a current drive.
* Restore the initial settings on the D-160.
* Set the same sampling rate on the external digital device and the D-160.
Connecting an external device
Connect DATA OUTPUT 1-8 connector of the D-160 to the digital input connector on the external digital device.
<Notes>
* The D-160 has DATA OUT connectors for an S/P DIF digital signal (OPTICAL) and for an adat
digital signal. These connectors have the same shape but carry different information.
* Use the DATA OUTPUT 1-8 connector to save data. Do not use the DATA OUTPUT 9-16
connector.
D-160
ANALOG IN
1234
5678
ANALOG OUT SCSI MIDI
16
DATA
OPTICAL
12345678
9 - 16 1 - 8 9 - 16
9101112131415
DATA OUTPUT 1-8
OUTPUTINPUT
1 - 8
DIGITAL IN
INPUT OUTPUT THRU
External Digital Device (DAT or Adat)
* If the external device has only COAXIAL type (RCA) digital I/O connectors, connect an optional COP-1
(optical/coaxial converter) to use an S/P DIF digital signal.
* Connecting both output and input connectors on the D-160 to the input and output connectors on the
external digital device respectively may generate a digital loop.
Setting up an external device
1.Set the same sampling rate to that of the D-160.
2.Select digital input on the external device so that the external device will accept a digital signal.
On some external devices, you may have to set up so that the external device will synchronize with the incoming
digital signal.
<Note>
If the external device does not accept the digital signal or if you notice digital noise, check the connection, cabling,
and the settings of the D-160 and the external device.
* Refer to the instruction manuals that came with any external digital device for details.
Executing the save operation
Use the “Save PGM?” menu in Setup mode.
* Output format available: adat, DAT, SCSI (6)
* Programs available: P01 - P99
* Track available: When using an adat or DAT: Tracks 1-8, Tracks 1-16, Tracks 1-24, Tracks 9-16,
Tracks 9-24, Tracks 17-24;
When using a SCSI disk: All tracks will be automatically selected.
19
Page 20

Addendum for D-160 Version 2.0
1.Press the DISP SEL key to select “SETUP”
(“SETUP” will flash), then press the EXECUTE/YES
key. (“SETUP” will light up.)
The D-160 enters Setup mode.
2.Use the JOG dial to select “Save PGM?” (“?” will
flash.).
3.Press the EXECUTE/YES key.
The message “Save Device?” and an indication of the
digital signal to be saved (“DAT,” “adat,” or “SCSI”) will
flash on the display.
OL
0
3
6
9
12
18
24
30
42
1
32
OL
0
3
6
9
12
18
24
30
42
1
32
87654
9
1110
87654
9
1110
SETUP
44.1kHz
1615141312
SETUP
44.1kHz
SAVE
1615141312
4.Rotate the JOG dial to select a type of digital signal
format to be used for the save operation.
Selecting “adat” will save data in the adat digital signal
format. Selecting “DAT” will save data in the S/P DIF
digital signal format. Select “SCSI” if you are saving or
loading data via SCSI. The following operation will be
that when "adat" or "DAT" is selected for "Save Device?."
5.Press the EXECUTE/YES key.
Selection of the digital signal format for the save operation
will be confirmed, and the existing Program numbers will
flash on the display.
OL
0
3
6
9
12
18
24
30
42
1
32
87654
9
1110
SETUP
44.1kHz
SAVE
1615141312
6.Rotate the JOG dial to select a Program to save.
You can select any existing Program (up to 99) to save.
7.Press the EXECUTE/YES key.
The length of the time (ABS 0 - REC END) of the program
recording selected appears and the time shown can be
edited. The time is usually saved according to the time
displayed, however, it is possible to shorten the time to
save at this stage when saving the time. In other words,
though the actual recording may be 9 minutes 00 seconds,
as shown in the example below, that time can be edited
to 5 minutes when saved.
As mentioned in the <Note> above, if the data on the
additional track is longer the time can be set to a longer
time and saved (however, the maximum time that can be
edited is 59 minutes 59 seconds).
OL
0
3
6
9
12
18
24
30
42
1
32
9
1110
87654
SETUP
44.1kHz
1615141312
SAVE
8.Press the EXECUTE/YES key again.
“Save Trk ? 1-8” (“1” is flashing) appears on the display
and you can select tracks to save.
While “1” is flashing, rotate the JOG dial to select “1”->
”9”->”17.” To select “8”->”16”->”24,” use the SHUTTLE
or press the HOLD/> key to flash “16” and rotate the JOG
wheel.
OL
0
3
6
9
12
18
24
30
42
1
32
9
1110
87654
SETUP
44.1kHz
SAVE
1615141312
9.Select the desired track range using the JOG dial.
You can select 1, 9 and 17 of the points that are flashing
(left). Use the SHUTTLE or HOLD/> key to move the
flashing cursor to the left, then turn the JOG dial to select
8, 16 and 24. You can select track saving combinations
from Tr1-16, Tr1-24, Tr9-16, Tr9-24 and Tr17-24, in
addition to Tr1-8.
<Note>
Refer to the <Note> on page 18 prior to saving data
including the additional track.
10. Press the EXECUTE/YES key.
“Rec Start DAT!” (Start recording on the DAT) or “Rec
Start adat!” (Start recording on the adat) appears on the
display, and “SURE?” flashes.
OL
0
3
6
9
12
18
24
30
42
1
32
87654
9
1110
SETUP
44.1kHz
SURE?
SAVE
1615141312
11. Confirm that the external device is syncing with
the digital input signal, and start recording on the
external device (DAT or adat).
Setting a START-ID (DAT) or a locate point at the recording
start point will facilitate future loading operations.
12. Confirm that the recording on the external device
has started, and press the EXECUTE/YES key.
(“REMAIN” will light.)
The save operation starts, and the time required for the
save operation appears on the display and a few seconds
later, it will start counting down. This few seconds delay
is due to the pilot signal which is recorded to mark the
beginning of the Program to facilitate future load
operation. Therefore, the actual save operation starts
when counting down starts. Two tracks are saved each
time in the order of Track 1 and 2, 3 and 4, etc. to a DAT
machine. Eight tracks are saved each time in the order of
Track 1-8, 9-16, etc. to an adat machine. The level meter
indication during save of DAT will always be for only
tracks 1 and 2 and always for tracks 1~8 in save of adat.
SETUP
OL
0
3
6
9
12
18
24
30
42
1
32
9
1110
87654
REMAIN
44.1kHz
1615141312
SAVE
13. When data is successfully saved a
"COMPLETED!" message will appear on the
display, and stop the external DAT or adat.
14. Press the STOP button or the EXIT/NO key to quit
the Setup mode.
The display will return to the previous time base
indication.
* To cancel the operation or restore the indication shown before you
pressed the EXECUTE/YES key, press the STOP button or the
EXIT/NO key. Pressing one of these keys repeatedly takes you to
the previous layer, finally quitting the Setup mode, and the display
will return to the previous time base indication. If you press the STOP
button or the EXIT/NO key any time after you execute the save
operation but before it is complete, the saved song data will be invalid.
20
Page 21

Addendum for D-160 Version 2.0
Loading the data using DATA IN
Load the data by S/P DIF digital signals (or adat digital signals) from the DATA IN jack of the D-160.
The prerequisite is that an E-IDE hard disk is the current drive, as in the save conditions mentioned earlier.
* Restore the initial settings on the D-160.
* Set the same sampling rate on the external digital device and the D-160.
Connecting the external device
Connect DATA INPUT 1-8 connectors of the D-160 to the digital output connectors on the external digital device.
<Notes>
* The D-160 has DATA INPUT 1-8 connectors for an S/P DIF digital signal (OPTICAL) and for an
adat digital signal. These connectors have the same shape but carry different information.
* Use the DATA INPUT 1-8 connector to load data. Do not use the DATA INPUT 9-16 connector.
* Do not remove the optical cable or perform any other operation that would disconnect the S/P
DIF signal until the session is complete. Otherwise, the D-160 will generate noise, and affect the
connected device.
ANALOG IN
1234
5678
ANALOG OUT SCSI MIDI
16
12345678
9101112131415
DATA
9 - 16 1 - 8 9 - 16
DATA INPUT 1-8
OPTICAL
OUTPUTINPUT
1 - 8
DIGITAL OUT
External Digital Device (DAT or Adat)
* If the external device has only COAXIAL type (RCA) digital I/O connectors, connect an optional COP-1
(optical/coaxial converter) to use an S/P DIF digital signal.
* Connecting both output and input connectors on the D-160 to the input and output connectors on the
external digital device respectively may generate a digital loop.
Setting up an external device
1.Setup the external device so that it can output a digital signal.
D-160
INPUT OUTPUT THRU
2.Locate the beginning of the pilot signal recorded in the saved data.
* Refer to the instruction manual that came with your external digital device for details.
Executing the load operation
You will use the “Load PGM ?” menu in Setup mode.
* Input format available: adat, DAT, SCSI (6)
* Programs available: P01 - P99
* Track available: When using an adat or DAT: Tracks 1-8, Tracks 1-16, Tracks 1-24, Tracks 9-16,
Tracks 9-24, Tracks 17-24;
When using a SCSI disk: All tracks will be automatically selected.
21
Page 22

Addendum for D-160 Version 2.0
1.Press the DISP SEL key to select “SETUP”
(“SETUP” will flash) and press the EXECUTE/YES
key. (“SETUP” will light up.)
The D-160 will enter the Setup mode.
2.Use the JOG dial to select “Load PGM ?” (“?” will
flash.).
3.Press the EXECUTE/YES key.
The message “Load Device?” and the type of digital signal
to be loaded (“DAT,” “adat,” or “SCSI”) will flash on the
display.
OL
0
3
6
9
12
18
24
30
42
1
32
OL
0
3
6
9
12
18
24
30
42
1
32
9
1110
87654
9
1110
87654
SETUP
44.1kHz
1615141312
SETUP
44.1kHz
LOAD
1615141312
4.Rotate the JOG dial to select the type of digital signal
format to be used for the load operation.
Selecting “adat” will load data in the adat digital signal
format. Selecting “DAT” will load data in the S/P DIF
digital signal format. Select “SCSI” if you are loading
data via SCSI. The following operation will be that when
"adat" or "DAT" is selected for "Load Device?."
5.Press the EXECUTE/YES key. (“SURE?” flashes.)
The digital signal selected is set and the program number
currently set on the load destination current drive flashes.
The size of the program recording is also displayed.
OL
0
3
6
9
12
18
24
30
42
1
32
87654
9
1110
SETUP
44.1kHz
SURE?
LOAD
1615141312
6.Rotate the JOG dial to select a Program into which
to load data.
You can select any existing Program (from up to 99).
If you select a Program that already contains data and
execute the load operation, the existing data will be
overwritten by the new data. If you do not wish to
overwrite any data in any current Program, use the JOG
dial toselect “New PGM” to execute the load operation.
You can do this only when the number of existing
Programs is 99 or less and the hard disk has enough free
space to accommodate the new data.
If a program that is already recorded with some sort of data is
selected and loaded, only the song data loaded will be valid.
All the data of the programs recorded on that same track up to
then will be erased.
7.Press the EXECUTE/YES key.
Now you can select tracks into which to load.
OL
0
3
6
9
12
18
24
30
42
1
32
9
1110
87654
SETUP
44.1kHz
LOAD
1615141312
You can select track loading combinations from Tr1-16,
Tr1-24, Tr9-16, Tr9-24 and Tr17-24, in addition to Tr1-
8.
9.Press the EXECUTE/YES key. (“SURE?” flashes.)
OL
0
3
6
9
12
18
24
30
42
1
32
9
1110
87654
<Notes>
* If digital signal is being input correctly, a red “DIGITAL” and
“EXT SYNC” indicator will light up on the display. If the red
“DIGITAL” and “EXT SYNC” indicator flashes, check the
connection, cabling, and the settings of the D-160 and the
external device.
* The FS indication will flash and warn you if the sampling
frequency of the D-160 and DAT vary when loading with S/P
DIF digital signals. Be careful when setting the sampling
frequency for adat digital signals because there will be no FS
warning though there may be a discrepancy.
SETUP
44.1kHz
SURE?
LOAD
1615141312
EXT SYNC
DIGITAL
10. Press the EXECUTE/YES key again.
“Play DAT!” (Start playing the DAT) or “Play adat!” (Start
playing the adat) appears on the display.
OL
0
3
6
9
12
18
24
30
42
1
32
9
1110
87654
SETUP
44.1kHz
LOAD
1615141312
EXT SYNC
DIGITAL
11. Play the corresponding external device (DAT or
adat).
The load operation starts when the D-160 accepts the
incoming digital signal. The time required for the load
operation appears on the display and starts counting
down. Two tracks are loaded at a time from a DAT
machine in the following order: Track 1 and 2, 3 and 4,
etc. from a DAT machine. Eight tracks are loaded each
time in the order of Track 1-8, 9-16, etc..
SETUP
OL
0
3
6
9
12
18
24
30
42
1
32
87654
9
1110
REMAIN
44.1kHz
LOAD
EXT SYNC
1615141312
DIGITAL
12. When the load operation is complete,
“COMPLETED!” flashes on the display.
13. Press the STOP button or the EXIT/NO key to quit
Setup mode.
The display will indicate the time base set for the
loaded Program.
Press the STOP button or EXIT/NO key to return to one previous
menu prior to the EXECUTE/YES key or if you want to cancel a
procedure. Everytime you press these keys you will move back
one previous hierarchy, and eventually escape from the SETUP
mode and return to the time base display. Note that all the song
data saved will be invalid if you press the STOP button or EXIT/
NO key while saving at <Step 11>.
8.Select the desired track range using the JOG dial.
You can select 1, 9 and 17 of the points that are flashing
(left). Use the SHUTTLE or HOLD/> key to move the
flashing cursor to the left, then turn the JOG dial to select
8, 16 and 24.
22
Page 23

Addendum for D-160 Version 2.0
Saving the data using SCSI
This procedure will SAVE/LOAD using a SCSI hard disk that is a backup disk.
A backup purpose SCSI hard disk is generally used after formatted in the backup format, however, a DOS
formatted (computer format) SCSI hard disk can also be used to SAVE/LOAD in WAV. Data saved in WAV can
be re-loaded and even directly be read by the computer. Therefore, this kind of data can be used as music
software, as well. The prerequisite is that an E-IDE hard disk is the current drive as mentioned in the save
section using a DAT or adat device.
About SCSI device
Be sure to use a drive and a disk with operation guaranteed by Fostex. For more information on disks
supported by the D-160, refer to page 5 "Changed Format function" in this manual.
<Note>
These SCSI devices have already been tested for performance at Fostex.
However, any product lot includes variance in quality.
The test at Fostex does not include inspection for such variance. When you use external SCSI devices, check
the operation carefully. Fostex is not liable for any damage (data loss or damage) caused by using the D-160
with external SCSI devices.
Connecting a SCSI device
Refer to the diagram to connect a SCSI device to a D-160.
<Notes on connection>
* Before making connections, make sure that both the D-160 and the SCSI drive are turned off.
* Up two SCSI drives may be connected on a SCSI chain with the D-160.
Connect one SCSI drive as a "current drive" for real-time recording/playback. (Refer to "SCSI ID number
setting" below.)
* The SCSI connector on the D-160 is a 25-pin connector compatible with Macintosh computers.
Use a cable with connectors that conform to the standards for connecting a SCSI drive.
* The last SCSI drive on the SCSI chain should be terminated. Install a SCSI terminator, or turn the termination
switch to "on" if the drive has a termination switch (like a zip drive).
<SCSI ID number setting>
* Be sure to set the SCSI ID number for the SCSI drive correctly, according to the purpose of the drive (as a
current drive or a back-up drive). The ID setting is very important.
Using the SCSI drive as a current drive Select any number from 0 to 5, but not "6."
Using the SCSI drive as a back-up drive Select "6."
* You must format the SCSI disk after you connect it to the D-160. Refer to the “Formatting” section on the next page
for the formatting procedure.
Be sure the install the SCSI terminator.
ANALOG IN
1234
5678
ANALOG OUT SCSI MIDI
16
12345678
9101112131415
DATA
9 - 16 1 - 8 9 - 16
OPTICAL
OUTPUTINPUT
1 - 8
INPUT OUTPUT THRU
Connect the SCSI cable securely.
23
Page 24

Addendum for D-160 Version 2.0
Formatting a SCSI disk
An unformatted disk or a disk used with the computer can also be used. Check to see that the data on the disk is no
longer necessary prior to formatting a disk that was previously used with the computer. Once formatting is started it
cannot be stopped. The formatting process will erase all data. Be especially careful not to erase the data that you still
need. The prerequisite here is that a removable disk is used. The same procedures apply for a fixed SCSI hard disk, as
well.
1.Connect the SCSI device to the D-160 and turn the
power on to the both machines.
2.If you are using a removable disk, insert the disk
into the drive.
3.Press the DISP SEL key to select the Setup mode,
and press the EXECUTE/YES key.
The Setup mode menu appear on the display.
4.Turn the JOG dial to select “Disk Format?” (“?”
flashes), and press the EXECUTE/YES key again.
“Disk Format IDE” (“IDE” flashes) appears.
OL
0
3
6
9
12
18
24
30
42
1
OL
0
3
6
9
12
18
24
30
42
1
CAUTION:
32
32
87654
13
12
9
1110
87654
13
12
9
1110
If format is executed while "IDE" is blinking, the
SETUP
FORMAT
44.1kHz
16
14
15
SETUP
FORMAT
44.1kHz
16
14
15
internal IDE hard disk will be formatted and data in the IDE hard
disk will be lost.
5.Rotate the JOG dial to display the flashing “SCSI6”
and press the EXECUTE/YES key.
The ID number and name of the connected SCSI device
appear on the display, and “?” and “SURE?” flash.
SETUP
OL
0
3
6
9
12
18
24
30
42
1
32
OL
0
3
6
9
12
18
24
30
42
1
32
9
87654
9
87654
13
12
1110
13
12
1110
FORMAT
44.1kHz
161514
SETUP
FORMAT
44.1kHz
SURE?
161514
6.Press the EXECUTE/YES key.
The "Backup format?" ("?" flashing) message appears and
"SURE?" flashes. This indicates that you are in the standby mode to format the backup purpose SCSI hard disk in
the "Backup Format".
OL
0
3
6
9
12
18
24
30
42
1
32
9
87654
13
12
1110
SETUP
FORMAT
44.1kHz
SURE?
16
14
15
7.Press and hold down the RECORD button and press
the EXECUTE/YES key.
“REMAIN” lights up and formatting starts.
As the formatting operation progresses, the size of the
area to be formatted on the disk will count down on the
display. Also, when the formatting operation starts, all
the FL indicators (for Tracks 1-16) at level of the level
meters light up. As the formatting operation progresses,
these indicators will be turned off from Track 16. This
condition indicates that the disk is being formatted
correctly.
When formatting is complete, “COMPLETED!” will appears
and all the FL indicators will turn off.
SETUP
OL
0
3
6
9
12
18
24
30
42
1
32
OL
0
3
6
9
12
18
24
30
42
1
32
87654
9
87654
9
13
12
1110
13
12
1110
REMAIN
FORMAT
44.1kHz
16
14
15
SETUP
FORMAT
44.1kHz
COMPLETED!
16
14
15
8.Press the EXIT/NO key or the STOP button to quit
the Setup mode.
The D-160 returns to the ABS display of the Program that
was selected before it entered Setup mode.
OL
0
3
6
9
12
18
24
30
42
1
32
9
87654
12
1110
Your backup purpose SCSI hard disk has been formatted
after completing the steps up to this point. The SCSI
hard disk is now ready to SAVE/LOAD.
To continuously format another disk, remove the disk
from the SCSI drive and then repeat the same procedures.
Press the eject switch on the SCSI drive to remove the
disk from the SCSI drive.
In addition to the formatting procedure mentioned
above, you can also use the following steps to format
an unformatted disk.
Install an unformatted fixed disk or removable disk,
and go to the “Drive Sel.?” menu in Setup mode. Change
the current drive from “IDE” to “SCSI”.
The D-160 will recognize that the SCSI disk is not
formatted and automatically enter the “Disk Format ?”
menu in Setup mode, where you can follow the
procedure mentioned above to format the disk.
ABS
44.1kHz
13
16
14
15
24
Page 25

Addendum for D-160 Version 2.0
Saving data of an individual Program
When saving with a SCSI hard disk it is possible to save each program or all programs. This section will
explain the procedures to save each program. Go to the next Chapter for more details on how to save all
programs.
* Output format available: adat, DAT, SCSI 6
* Programs available: P01 - P99, or All Program
* Track available: When using an adat or DAT: Tracks 1-8, Tracks 1-16, Tracks 1-24, Tracks 9-16,
Tracks 9-24, Tracks 17-24;
When using a SCSI disk: All tracks will be automatically selected.
<Note>
Label each disk with a serial number (1, 2, 3...) prior to saving one program on several removable disks.
This makes it easier to load the program, as explained later.
1.Press the DISP SEL key to select “SETUP”
(“SETUP” will flash), and then press the EXECUTE/
YES key.
“SETUP” will light up. The D-160 will enter the Setup
mode.
2.Use the JOG dial to select “Save PGM?” (“?” will
flash.).
3.Press the EXECUTE/YES key. (“SAVE” lights up.)
The indication of the type of digital signal to be saved
will flash on the display.
SETUP
OL
0
3
6
9
12
18
24
30
42
1
32
OL
0
3
6
9
12
18
24
30
42
1
32
87654
9
9
87654
13
14
12
1110
13
14
12
1110
44.1kHz
16
15
SETUP
44.1kHz
SAVE
16
15
4.Rotate the JOG dial to select a flashing “SCSI 6.”
5.Press the EXECUTE/YES key. (“SURE?” flashes.)
The digital signal to save is set on "SCSI 6", the program
number currently set on the current drive flashes and
the size of that program appears.
SETUP
OL
0
3
6
9
12
18
24
30
42
1
5
4
32
9
876
13
14
12
1110
44.1kHz
SAVE
16
15
* If you have selected a Program that has no recorded:
SETUP
OL
0
3
6
9
12
18
24
30
42
1
32
9
87654
13
14
12
1110
44.1kHz
SAVE
16
15
* If you have selected a Program that requires only
one disk to save:
SETUP
OL
0
3
6
9
12
18
24
30
42
1
32
87654
9
13
14
12
1110
44.1kHz
SAVE
16
15
* If you have selected a Program that requires multiple
disks:
The following indication, for example, appears. (****
is the tentative title, the program number flashes,
the information on the size of the program and
number of disks necessary, alternate)
This display indicates that one SCSI hard disk is not
enough to save the program chosen, and that several
disks are necessary to proceed with the save
procedure. In the following example you see a "2D"
indication as the number of disks necessary.
This indicates that 2 disks are necessary to execute
the save procedure.
This program can be selected and executed even
when using a fixed disk. However, in this case saving
with several disks is not possible, and therefore, the
save procedure will be interrupted.
SETUP
OL
0
3
6
9
12
18
24
30
42
1
5
4
32
876
9
13
14
12
1110
44.1kHz
SAVE
16
15
6.Rotate the JOG dial to select a Program to save.
You can select any existing Program individually or all
Programs (Save All). (Refer to the next section for
information on saving all Programs.)
As mentioned previously, the display indication differs
as follows depending on whether the selected Program
to save requires only one removable disk or multiple disks.
SETUP
OL
0
3
6
9
12
18
24
30
42
1
5
4
32
9
876
13
14
12
1110
44.1kHz
16
15
7.Press the EXECUTE/YES key. (“SURE?” flashes.)
The D-160 performs the save operation differently
depending on the selected Program.
25
SAVE
Page 26

Addendum for D-160 Version 2.0
* When selecting a program that can be saved on one
backup disk:
The backup disk will indicate that a new program is
going to be created (backup disk shows B01).
OL
0
3
6
9
12
18
24
30
42
1
32
9
87654
13
12
1110
SETUP
44.1kHz
SURE?
SAVE
16
14
15
Pressing the EXECUTE/YES key will start save
operations and then the following indication will
appear. This indicates that the song data of the
current drive selected is being saved on the B01
backup disk. The disk space necessary to save the
data is counted down while the data is being saved.
SETUP
OL
0
3
6
9
12
18
24
30
42
1
32
9
87654
13
12
1110
REMAIN
44.1kHz
SAVE
16
14
15
When the data is saved, the system goes to the
program time base indication prior to going to the
SETUP mode, then "COMPLETED!" lights up.
* When selecting a program to save that requires
several disks:
Save will immediately start if the EXECUTE/YES key
is pressed at <Step 7>. The save process appears as
in the above case. When the first disk is full, that
disk is ejected and the display will indicate "Insert
second disk!".
OL
0
3
6
9
12
18
24
30
42
1
32
9
87654
13
12
1110
SETUP
44.1kHz
SAVE
16
14
15
Save is automatically resumed when the second disk
is inserted in the SCSI drive. The same process is
repeated when a third, or more disks are required.
When the program is successfully saved on the last
disk, the program time base indication (ABS 0) that
was started up prior to entering the SETUP mode
appears and "COMPLETED!" lights up.
8.Press the EXECUTE/YES key. (“SURE?” flashes.)
The D-160 performs the save operation differently
depending on the selected Program.
<Note>
You cannot interrupt the save operations on the SCSI hard
disk, as with DAT or adat.
You will have to start the save process from the very first disk
again, if you erroneously press the EXIT/NO key during the
insertion of several disks required to save the program on.
Press the eject switch on the SCSI drive to remove the
disk from the SCSI drive after the program has been
successfully saved.
The instructions on the left was based on use of disks
that were already formatted for backup use, when
saving programs using several disks.
It is recommended that all the disks to save data on
are already formatted prior to the save process.
However, there may be times that you will unexpectedly
not have enough formatted disks during the save
process thus, forcing you to use an "unformatted disk"
or a "used disk" that already has other data saved on
it. Observe the respective procedures described when
inserting the disk according to the [Insert Disk 2] or
[Insert Disk 3] message that prompts you to "Insert
another disk!!" as shown in the instructions on the left.
* When inserting an unformatted disk
The D-160 automatically recognizes an "Unformatted"
disk, and will indicate [Unformat!], then automatically
go to the [Disk Format?] menu in the SETUP mode, to
format the backup disk. Follow the formatting
procedures to actually format the backup disk.
The save process automatically resumes when the disk
is successfully formatted.
* When inserting a disk that is saved or loaded with
other data
The following display may appear as an example, when
inserting such type of disk. This prompt is asking you
whether you want to erase the existing data saved on
the disk that was inserted, and indicates that you have
entered the [Delete PGM?] menu in the SETUP mode.
OL
0
3
6
9
12
18
24
30
42
1
32
87654
9
13
12
1110
SETUP
44.1kHz
SURE?
SAVE
16
14
15
If it is okay to erase that disk, press the EXECUTE/YES
key. The [Delete ALL PGM?] message will appear. Press
the EXECUTE/YES key to delete all programs.
Save is automatically resumed after the programs are
deleted. If it is not okay to erase the disk, turn the JOG
dial to select [Eject] when the above indication appears
to eject the disk. Press the EXECUTE/YES key after [Eject]
is selected.
When the disk is ejected, then a prompt to [Insert Disk]
will appear on the display. Insert another disk.
* When inserting a disk that was used as the current
drive
[Wrong Disk] will briefly appear, the [Disk Format?]
menu of the SETUP mode will appear for backup
formatting, then the following indication will appear.
SETUP
OL
0
3
6
9
12
18
24
30
42
1
32
9
87654
13
14
12
1110
15
If it is okay to proceed formatting, then execute the
formatting process as done in the above case. If it is
not okay to proceed formatting, then turn the JOG dial
to select [Eject] to eject the disk.
The save operations can automatically be resumed in
such manner when the disk is formatted as a backup
disk or when a program is deleted.
FORMAT
44.1kHz
SURE?
16
26
Page 27

Saving all Programs (Save ALL)
Addendum for D-160 Version 2.0
1.Follow Steps 1 through 5 of the “Saving an
individual Program” procedure.
2.Use the JOG dial to select “Save ALL?” (“?”
flashes.).
Selecting “Save All?” will cause the following display to
appear.
SETUP
OL
0
3
6
9
12
18
24
30
42
1
32
9
87654
13
14
12
1110
This indicates the number of ALL the programs being
saved and the actual number of programs that can be
saved. The number on the right side of (**/**) indicates
the total number of programs existing, and the number
on the left side indicates the number of programs that
can be saved.
Therefore, when the numbers on the left and right are
equal then all the programs can be saved, as shown in
the case above. However, you must note the following
indications that are individually described.
OL
0
3
6
9
12
18
24
30
42
1
32
9
87654
13
14
12
1110
“03/05” means that three Program out of five Programs
can be saved.
44.1kHz
SAVE
16
15
SETUP
44.1kHz
SAVE
16
15
SETUP
OL
0
3
6
9
12
18
24
30
42
1
32
9
87654
13
14
12
1110
44.1kHz
SAVE
16
15
“00/05” means that no Programs can be saved. If you
press the EXECUTE/YES key at this point, “Void
Command!” appears and you cannot proceed with the
save operation.
<Note>
If you have selected “Save All”, you cannot use multiple
disks to save.
In this case, chose the save operation for an individual
Program.
3.Press the EXECUTE/YES key (“SAVE” light up.)
The save process is started and save is taking place serially
from Program 1. "COMPLETED!" lights up when the
program is successfully saved.
4.Press the STOP button or the EXIT/NO key to return
to the previous Time Base display.
<Note>
You cannot abort a load operation on a SCSI device
while it is in progress.
Loading the data using SCSI
Here you are loading on the current drive, the data of each program or the data of all programs saved on the
backup purpose SCSI hard disk. The prerequisite is that the current drive is an E-IDE hard disk, as in the case
of save procedures mentioned earlier, and that a backup SCSI hard disk is connected to the D-160.
Load the data saved on one removable disk (or fixed disk).
Load the program with the "Load PGM?" menu in the SETUP mode. This assumes that a saved disk is
inserted in the backup purpose SCSI hard disk.
* Input format available: adat, DAT, SCSI 6
* Programs available: P01 - P99, or All Program
* Track available: When using an adat or DAT: Tracks 1-8, Tracks 1-16, Tracks 1-24, Tracks 9-16,
Tracks 9-24, Tracks 17-24;
When using a SCSI disk: All tracks will be automatically selected.
1.Press the DISP SEL key to select “SETUP”
(“SETUP” will flash) and press the EXECUTE/YES
key. (“SETUP” will light up.)
The D-160 will enter the Setup mode.
2.Use the JOG dial to select “Load PGM?” (“?” will
flash.).
3.Press the EXECUTE/YES key. (“LOAD” will light.)
An indication of the type of the digital signal to be loaded
will flash on the display.
OL
0
3
6
9
12
18
24
30
42
1
OL
0
3
6
9
12
18
24
30
42
1
5
4
32
5
4
32
9
876
9
876
13
12
1110
13
12
1110
SETUP
44.1kHz
16
14
15
SETUP
44.1kHz
LOAD
16
14
15
27
Page 28

Addendum for D-160 Version 2.0
4.Rotate the JOG dial to select a flashing “SCSI 6.”
5.Press the EXECUTE/YES key.
The external digital device is set to “SCSI 6,” and the
existing Song numbers will flash on the display.
6.Rotate the JOG dial to select the data to load.
You can choose to load any existing Song individually or
all Songs collectively.
The display indication differs as follows depending on
whether you selected an individual Song number or all
Song numbers.
* When selecting a specific backup number
The example shows that backup number 2 (B02) has 45MB
of disk space (02 flashes).
SETUP
OL
0
3
6
9
12
18
24
30
42
1
32
9
87654
13
14
12
1110
44.1kHz
LOAD
16
15
*When selecting all backup numbers
This is an example of all backup data selected when there
are two backup data present. (? flashes)
SETUP
OL
0
3
6
9
12
18
24
30
42
1
32
9
8
654
7
13
14
12
1110
44.1kHz
LOAD
16
15
7.Press the EXECUTE/YES key. (“SURE?” flashes.)
The load destination (current drive) program can now
be selected. The following indications will appear when
selecting individual or ALL programs in the previous step.
* When selecting a specific backup number
A prompt inquiring whether to setup a new program on
the current drive appears (New PGM indication appears
and [SURE?] flashes).
SETUP
OL
0
3
6
9
12
18
24
30
42
1
32
9
87654
13
14
12
1110
Turning the JOG dial in this state makes it possible to
select another program, other than the above, on the
current drive. The size of the program appears when the
program is selected. If you select a program that is already
recorded with data and load is executed for the load
destination, the existing data is deleted while loading takes
place.
If you do not want to overwrite the existing data, select
"New PGM" mentioned above, prior to loading.
44.1kHz
SURE?
LOAD
16
15
SETUP
OL
0
3
6
9
12
18
24
30
42
1
32
9
8
654
7
13
14
12
1110
44.1kHz
LOAD
16
15
This is because the “Load All” operation will first erase
any Program data on the disk before loading Song data.
Pressing the EXECUTE/YES key at this point will cause
“Delete All PGM?” (deleting all Programs) to appear, and
then “SURE?” will flash.
<Note>
Be careful when choosing "Load All?" since all programs
on the load destination will be erased. Check to see that
the data on the current drive is not important prior to going
ahead with the "Load All?" procedure.
If there is any important data on the disk, cancel the load
process at this stage.
Turning the JOG dial in this state makes it possible to
select another program for the load destination, as well
as the "Eject" choice. To remove the disk at this point,
select the "Eject" feature then press the EXECUTE/YES
key.
8.Press the EXECUTE/YES key.
Song data will be loaded to the selected Program.
If, for example, backup 1 is started for Program 1, then
"B01>>P1 ***MB" will appear, "REMAIN" lights up, load
proceeds, and "***MB (program size)" is counted down,
when individual programs are loaded.
If the EXECUTE/YES key is pressed to load all programs,
then the display will show "Delete ALL PGM?". Loading is
started when the EXECUTE/YES key is pressed again.
When the load operation is complete, “COMPLETED!” will
light and the D-160 will display the Time Base that was
shown before the unit entered the Setup mode.
9.Press the STOP button or the EXECUTE/YES key,
and “COMPLETED!” will turn off.
<Note>
You cannot abort a load operation on a SCSI device
while it is in progress.
* If you have selected “Load All?(**/**):
The D-160 will indicate the destination Program number
on the internal hard disk. Use the JOG dial to select a
desired destination Program number into which to load
data.
If the destination hard disk already contains data and
you select a Program, “DEL” (Delete) appears following
the Program number.
28
Page 29

Addendum for D-160 Version 2.0
Loading data saved on several removable disks
As an example here, we will load the data of a Program saved onto two removable disks.
1.Insert the first disk (Disk-1) into the SCSI device.
<Note>
Make sure that you insert the disks in the correct order.
If you insert the wrong disk, the D-160 displays [Wrong
disk] -> [Illegal No!] and ejects the disk.
Follow the disk markings you made during the save
operation.
2.Follow Steps 1-4 of the “Loading Song data”
procedure.
3.Select “SCSI” and press the EXECUTE/YES key.
(“LOAD” lights up).
The external digital device is set to “SCSI”. The display
flashes the number of the existing Backup data in the
SCSI disk, and then indicates that the first disk has been
inserted.
SETUP
OL
0
3
6
9
12
18
24
30
42
1
5
4
32
9
8
6
7
13
14
12
1110
Rotating the JOG dial will toggle between “B01” and
“Eject.” If you wish to cancel the load operation and
remove the disk, select “Eject” and press the EXECUTE/
YES key.
44.1kHz
LOAD
16
15
When Disk 1 loading is completed, an "Insert Disk 2"
message appears, and Disk 1 is automatically ejected.
6.Insert Disk 2 (second disk) into the SCSI hard disk
drive according to what the display requests.
Loading automatically resumes when Disk 2 is inserted.
The display will show the same count down as shown for
Disk 1. The size of the program is counted down along
with the load process.
When all data is loaded, "COMPLETED!" lights up, and
the program time base (ABS 0) started up prior to going
into the SETUP mode will appear.
The "COMPLETED!" prompt can be canceled by pressing
the EXIT/NO key or STOP button.
<Note>
You cannot abort a load operation on a SCSI device
while it is in progress.
4.Press the EXECUTE/YES key after "B01[#0001]D1"
appears.
A prompt inquiring whether to set a new program on the
current drive which is the load destination will appear.
([New PGM] appears and [SURE?] flashes.)
SETUP
OL
0
3
6
9
12
18
24
30
42
1
5
4
32
9
8
6
7
13
14
12
1110
44.1kHz
SURE?
LOAD
16
15
Turning the JOG dial in this state makes it possible to
select a program on the current drive. The size of the
program appears when the program is selected.
If you select a program that is already recorded with data
and load is executed for the load destination, the existing
data is deleted while loading takes place. If you do not
want to overwrite the existing data, select "New PGM"
mentioned above, prior to loading.
5.Press the EXECUTE/YES key after selecting the
program.
Loading is started and the display will show
"B01>>P**.***MB". This indicates that the backup data
(B01) on the SCSI harddisk is being loaded on the current
drive program (P**).
The "***MB" (load size) is counted down as loading
proceeds.
29
Page 30

Addendum for D-160 Version 2.0
Saving or loading using a SCSI hard disk as the current drive
The [SAVE/LOAD] process described up to the previous page is based on the prerequisite that an E-IDE hard
disk is used as the current drive. This section will describe the procedures necessary for the SAVE/LOAD
process when using a SCSI drive as the current drive.
SAVE/LOAD procedures using a SCSI drive, DAT, adat or backup purpose SCSI drive as the current drive are
basically the same as when using an E-IDE hard disk. However, you must be careful of the following points
when using a SCSI drive as the current drive.
Backup drive connections
Connect the backup purpose SCSI disk to the other open SCSI terminal of the SCSI device that is
already connected as the current drive, as shown in the figure below. (there is no specific
chronological order concerned when connecting the equipment)
SCSI device #2
SCSI device #1
DATA
9 - 16 1 - 8 9 - 16
OPTICAL
OUTPUTINPUT
1 - 8
SCSI MIDI
INPUT OUTPUT THRU
<Note>
Always terminate the empty SCSI terminal of the second SCSI device using a SCSI terminator when
connecting a second SCSI device. Leave the termination switch ON if the Zip or other SCSI devices
are switched type systems. When using a switched SCSI device for both the current drive and
backup drive, turn the switch OFF for the first device and the switch ON for the second device.
<Setting the ID number (IMPORTANT!)>
Set the SCSI devices that is the current drive with ID numbers 1, 2, 3, 4 or 5. Do not use ID number
6 for the current drive. Always assign the backup equipment to ID number "6".
Switching the current drive
The current drive can be mounted with the SCSI device by turning on the power if only a SCSI
device is used as the current drive (no E-IDE hard disk mounted). However, if both E-IDE hard disk
and SCSI devices are used, the E-IDE hard disk always mounts as the current drive when the power
is turned ON. Based on this fact, to SAVE/LOAD data recorded on the current drive that is a SCSI
device, there is a need to switch the current drive to the SCSI device through the "Drive Sel.?"
(current drive setup) menu in the SETUP mode. Check to see that the display resembles the
following figure prior to proceeding with the SAVE/LOAD process.
ABS
OL
0
3
6
9
12
18
24
30
42
1
5
4
32
9
8
6
7
13
14
12
1110
44.1kHz
16
15
<Note>
If the current drive is an E-IDE harddisk then the program displayed during the SAVE/LOAD process will come
with a [P] (standing for Program) prefix, in the manner of P01, P02, etc.
If the current drive is a SCSI device then the program displayed during the SAVE/LOAD process is differentiated
with a [S] (standing for SCSI) prefix, in the manner of S01, S02, etc.
Further, in the case of a backup purpose SCSI device the prefix will be a [B] (standing for backup) prefix, in the
manner of B01, B02, etc.
Keep this in mind when executing "SAVE/LOAD" operations as mentioned earlier.
30
Page 31

Addendum for D-160 Version 2.0
SAVE/LOAD using a DOS-formatted disk (WAV file)
As mentioned earlier in the SAVE/LOAD procedures using a SCSI disk, you can setup the D-160 with a DOSformatted disk, in addition to the usual backup disk, to SAVE/LOAD in WAVE file (RIFF WAVE file format,
hereafter WAV). Data saved or loaded in WAV file allows the user to save and re-read data as in the earlier
case of "SAVE/LOAD". The data saved is read into the computer (PC AT) and can be used as materials to play
or edit using music software that run WAV.
<Formatting>
The D-160 does not have the function to format disks in DOS from the "Disk Format?" menu in the SETUP
mode. Therefore, all disks used to save or load WAV must be pre-formatted on the computer prior to use.
When formatting in DOS format a removable disk or a fixed disk with more than 2GB space you
may have to select a file format of either [FAT16] or [FAT32]. The D-160 is only compatible with the
[FAT16] file format. Make a point to select only the [FAT16] file format when formatting a disk.
Note that disks that are formatted in [FAT16] can only have up to a maximum of 2GB of space in one area.
This means, that regardless of how much disk space there is, the D-160 can only recognize data up to 2GB
in size. Also note that saving and loading in WAV is not compatible with partitioning. Therefore, the
system will only recognize the first partition of hard disks that have been partitioned. The other partitions
will not be recognized at all.
To save or load in WAV, always use a disk that has been newly formatted. Using a disk that has been
previously saved or loaded may result in slower access speed.
<Note 1>
Saving and loading in WAV only accesses the file on the route and therefore, the folder is not recognized.
Note that there is a limit to the number of characters and symbols that can be input for the title since DOS
file names only allow for 8 characters and an extension (.WAV) and cannot accommodate long file
names. Therefore the title input on the current drive may be replaced with other characters/symbols
when saved. It is important to input a recognizable title when saving the file. (For more details refer to
"How To Save" operations described below)
WAV file names are identified with a 6 character file name, with the remaining 2 characters indicating
the track number (equaling 8 characters). The track number is automatically assigned when the file is
saved.
When saving one program (song) in WAV, 24 WAV files as shown in the figure below are created (1 file
for 1 track). Files like that shown in the figure below are created for tracks that are not recorded, as well.
###### (6 characters) indicates the title name and 01, 02 indicates the track number. (Example: icon
indication)
###### 01.WAV
###### 02.WAV
###### 24.WAV
<Note 2>
It is recommended that you always backup the data on the current drive prior to saving or loading on a
DOS formatted disk to prevent damaging or losing the data due to error taking place on the D-160.
<Note 3>
Saving in WAV also saves the silent range as "Zero Data", therefore, it may take more disk space. If, for
example, 2 minutes of space are recorded, with a breakdown of 1 minute between the points ABS 0" to
ABS 1", and 1 minute between ABS 10" to ABS 11" (ABS 1 minutes to 10 minutes are not recorded), only
2 minutes worth of space are consumed on the current drive, however in WAV, a total of 11 minutes of
space is consumed.
31
Page 32

Addendum for D-160 Version 2.0
<Keep In Mind!>
As it was already mentioned earlier, saving files in WAV will save all the program data on the current drive.
If the saved titles of the files on tracks 1-24 are the same, all data of the track can be loaded, as in the case with the
save function. It is also possible to load only the voluntary track data saved with WAV.
This, for example, means that a voluntary track from the track data saved can be edited with computer software and
allow for you to load only that track data. Simply put, data can be freely loaded in such manner.
To make this possible the title name of the file and the extension (.WAV) mentioned earlier play an important role.
Remember, WAV recognizes a file by the 6 character title plus the 2 digit track number, along with the extension
following the (8 character) file name. Therefore, those identifiers can be changed so that the file is not recognized.
(Refer to following example)
Let's, for example change the title name of the files for track 1-8, of the
files saved (all title names are the same) as shown in the left figure.
Group 1
###### 01.WAV
<Note>:
###### 09.WAV
###### 17.WAV
###### 02.WAV
###### 10.WAV
###### 18.WAV
###### 08.WAV
###### 16.WAV
Group 2
###### 24.WAV
Do not use a disk created with folders in such manner, for save purposes. If you do, there will be an error generated in the
remaining disk space when saving data, which will prevent the data from being saved properly. When using such disk for save purposes
always take the file out of the folder.
This means it is now possible to individually select Group 1 and Group
2 when loading the file. If, for example, you want to load only the data
of tracks 1-8, select Group 1. If you want to load only tracks 9-24, then
select Group 2 to execute the process. If you want to save each track
individually, all you have to do is give respective titles to each track,
in a similar manner.
There is also the option to store a file that you do not want to load in
a folder that was separately created in addition to this, on the disk.
WAV only recognizes the files on the disk and does not recognize a
folder, therefore WAV can only load the files that are outside the
folders.
<Note when loading voluntary track data>
When loading with WAV, data is overwritten while being loaded. If data already exists as a program on the current drive, then the existing data
will be overwritten for the amount of the data loaded.
You can also effectively use this feature when loading a similar program on the program saved, since it is possible to edit only the voluntary
track on the computer and then load that data back to the original program. If for example, you want to load the data of only tracks 1-8 on a
program that is already recorded with data of tracks 1-24, then only tracks 1-8 that are loaded are overwritten, and the previous data of tracks
9-24 remain intact. However, there is a need to be very careful when applying this procedure to load different programs since the loaded
program result in a mixture of different data.
Saving with WAV file...
The following procedure is based on the prerequisite that the backup purpose SCSI drive is set with a DOS
formatted disk and the current drive is an E-IDE disk.
1. Press the DISP SEL key to go to the "SETUP" menu,
then press the EXECUTE/YES key.
This will put you in the SETUP mode.
2. Select "Save PGM?" ("?" is flashing) with the JOG
dial, then press the EXECUTE/YES key.
The digital signal that is currently set to be saved flashes.
3. Use the JOG dial to select "SCSI 6" that is flashing
then press the EXECUTE/YES key.
The [Drive Name] and [DOS format] appears, then the
program number of the current drive flashes as when
saving to a SCSI disk, as mentioned earlier.
4. Use the JOG dial to select the program to save.
When selecting a program that can be saved on one disk,
only the program number flashes.
When selecting a program that requires multiple disks to
be saved on, the program number flashes, along with the
size indication and the number of disks required to save
the data that will alternately flash.
There is no "Save All" option when saving with WAV.
If only one program that can be selected exists, the
indication will remain the same even if the JOG dial is
turned.
5. After selecting the program to save, press the
EXECUTE/YES key.
The indication to create a new program appears on the
DOS disk that is the save site, then [SURE?] flashes.
You can select [Eject] (eject disk) by turning the JOG dial
at this time.
SETUP
OL
0
3
6
9
12
18
24
30
42
1
5
4
32
9
876
13
14
12
1110
44.1kHz
SURE?
SAVE
16
15
32
Page 33

Addendum for D-160 Version 2.0
6. Press the EXECUTE/YES key again.
The menu to input the title of the data being saved will
appear. The beginning of the title flashes. By turning
the JOG dial of the flashing point you can input the
number or symbol desired. You can move the flashing
point (cursor) with the HOLD/> key or SHUTTLE dial.
Refer to the <Note> mentioned earlier, to input the title.
<Note>
WAV can only recognize 6 characters in a title. Always create
a title with 6 characters. If you attempt to save a long title that
was input on the current drive, the alphabet and symbols may
be replaced with alphabets and symbols that WAV can
recognize (within WAV's limit), with only up to 6 characters
being valid. If, for example, a title was made in lower case on
the current drive, it may be replaced with upper case characters
on WAV.
You can input the following alphanumerics and symbols at this
stage.
Number: 0-9
Symbol: ! # $ % & ' ( ) @ ˆ _ Alphabet: A-Z
7. Input the title then press the EXECUTE/YES key.
The title is saved and the following indication appears.
The following example may appear depending on the
current drive. The save progress and the size indication
is counted down.
<When saving from E-IDE hard disk (example)>
SETUP
OL
0
3
6
9
12
18
24
30
42
1
5
4
32
9
8
6
7
13
12
1110
REMAIN
44.1kHz
SAVE
16
14
15
<When saving from SCSI device (example)>
SETUP
OL
0
3
6
9
12
18
24
30
42
1
5
4
32
876
9
13
12
1110
REMAIN
44.1kHz
SAVE
16
14
15
When the save process is completed, the time base
indication of the program that was started prior to
entering the SETUP mode appears, and [COMPLETED!]
lights up.
8. Press the EXIT/NO key or STOP button.
[COMPLETED!] turn OFF.
<Note when using a disk that is already saved with other programs>
The instructions indicated above apply to a disk without any data saved on it (immediately after formatting).
However, when using a disk with data already on it, the program saved can be selected in the following
manner.
By turning the JOG dial the program, New
PGM and Eject operations of the save side
can alternately be selected.
This refers to creation of a new program on the disk. However, it
indicates that there is not enough disk space "indicated" to create a
new program. If save is attempted by selecting this indication a [Disk
Full!] message appears, followed by a [Delete All WAV?] message.
If you proceed with the save process all programs on the disk are
erased, and only the new data is saved. ALL Programs data on the disk
are erased and the newly saved data only is saved on the disk.
This indicates that there is not enough space "indicated" to save the
program selected. If save is attempted by selecting this indication a
[Disk Full!] message appears, followed by a [Delete All WAV?] message.
If you proceed with the save process all programs on the disk are
erased, and only the new data is saved. ALL Programs data on the disk
are erased and the newly saved data only is saved on the disk.
This indicates that there is enough space on the disk to save the program
selected. If save is attempted by selecting this indication, a [DEL]
indication appears after the Program indication. Saving in such manner
will erase only the selected programs, while saving. In other words,
only the selected data is overwritten with new data and the other
programs remain intact.
Program
to save
New PGM and
size alternately
indicated.
Program minus
indicating size
only.
Program
indicating size
only.
You can eject the disk by selecting this indication and pressing the
Eject
EXECUTE/YES key. Select this indication to cancel the save process or
to switch disks.
<Note>
Note that the access speed of the disk is compromised when using a disk that has been repeatedly saved or loaded and overwritten
with data many times, such as in the above mentioned manner. It is recommended that you use a newly formatted disk to prevent
any compensation in speed.
33
Page 34

Addendum for D-160 Version 2.0
Loading with WAV file
The following procedures are based on the prerequisite that the backup purpose SCSI drive is set with a
disk saved in WAV, with a current drive that is an E-IDE harddisk.
<Note when loading>
When data that is already saved is edited on the computer and then saved on the computer, be careful of any
changes in the title. It is possible to completely load the files of all tracks if the title name remain the same
as when they were saved. However, if due to some reason a voluntary file is attempted to be saved under a
different title name, the D-160 will recognize this as multiple files, as described earlier. Before changing the title,
always check to see that the title only consists 6 characters, that the track number is correctly input, and the title
comes with an "extension" (.WAV), prior to loading. The file cannot be recognized when loading the file if the title
is longer than 6 characters, the track number is incorrect, or if the title contains no extension. Therefore, it is
important that these prerequisites are properly observed.
###### 01.WAV
###### 02.WAV
###### 24.WAV
<Note when inputting a title on the computer>
You must use the following symbols and alphanumerics to use the computer to input the title name of the data
saved. If you use any alphanumerics or symbols other than those indicated below, the file on the disk may not be
recognized. It is important that you do not use any spaces between characters, as well.
Number: 0-9
Symbol: ! # $ % & ' ( ) @ ˆ _ Alphabet: A-Z
<Hint!>
You can switch tracks upon loading if the track number (only) is changed prior to loading while the title remains
the same, as when conducting Track Exchange. For example, if you change [******02.WAV] to [******05.WAV],
and change [******05.WAV] to [******02.WAV] and attempt loading, tracks 2 and 5 will be replaced with each
other.
1. Press the DISP SEL key to go to the "SETUP" menu,
OL
then press the EXECUTE/YES key.
This will put you in the SETUP mode.
2. Select "Load PGM?" ("?" is flashing) with the JOG
dial, then press the EXECUTE/YES key.
The digital signal that is currently set to be loaded flashes.
3. Use the JOG dial to select "SCSI 6" that is flashing
then press the EXECUTE/YES key.
The [Drive Name] and [DOS format] appears, then the
program size saved appears and [SURE?] flashes.
4. Use the JOG dial to select the program to load.
If there are several programs saved on the disk, use the
JOG dial to select the Program/Size of the program saved
or select [Eject] to eject the disk.
If there is only 1 program saved on the disk, you can
only select the Program or [Eject] option even if the JOG
dial is turned for other choices.
5. After selecting the program to load, press the
EXECUTE/YES key.
The indication to create a new program appears on the
load destination E-IDE harddisk and [SURE?] flashes.
You can select the Program/Size of the files existing on
the E-IDE harddisk by turning the JOG dial at this time.
0
3
6
9
12
18
24
30
42
1
5
4
32
876
9
13
16
14
12
1110
15
6. Press the EXECUTE/YES key again.
Select the menu to create a new program and execute
loading to immediately start loading that program.
If an existing program is selected to be loaded, [Overwrite!]
will appear on the display, followed by a flashing [SURE?]
message. If you proceed with this procedure the existing
program data is overwritten while loading takes place.
Continue the procedure by pressing the EXECUTE/YES
key to start loading while overwriting data.
OL
0
3
6
9
12
18
24
30
42
1
5
4
32
9
876
13
16
14
12
1110
15
When loading is completed the [COMPLETED!] indication
lights up, and the time base indication of the program
that was started prior to entering the SETUP mode,
appears.
7. Press the EXIT/NO key or STOP button.
Only the [COMPLETED!] message turn OFF.
SETUP
SETUP
44.1kHz
REMAIN
44.1kHz
SURE?
LOAD
LOAD
34
Page 35

Memo
Addendum for D-160 Version 2.0
35
Page 36

FOSTEX CORPORATION
3-2-35 Musashino, Akishima-shi, Tokyo, Japan 196-0021
FOSTEX CORPORATION OF AMERICA
15431, Blackburn Ave., Norwalk, CA 90650, U. S. A.
C
PRINTED IN JAPAN DEC.1998 8288 663 000 FX
 Loading...