

Page 1
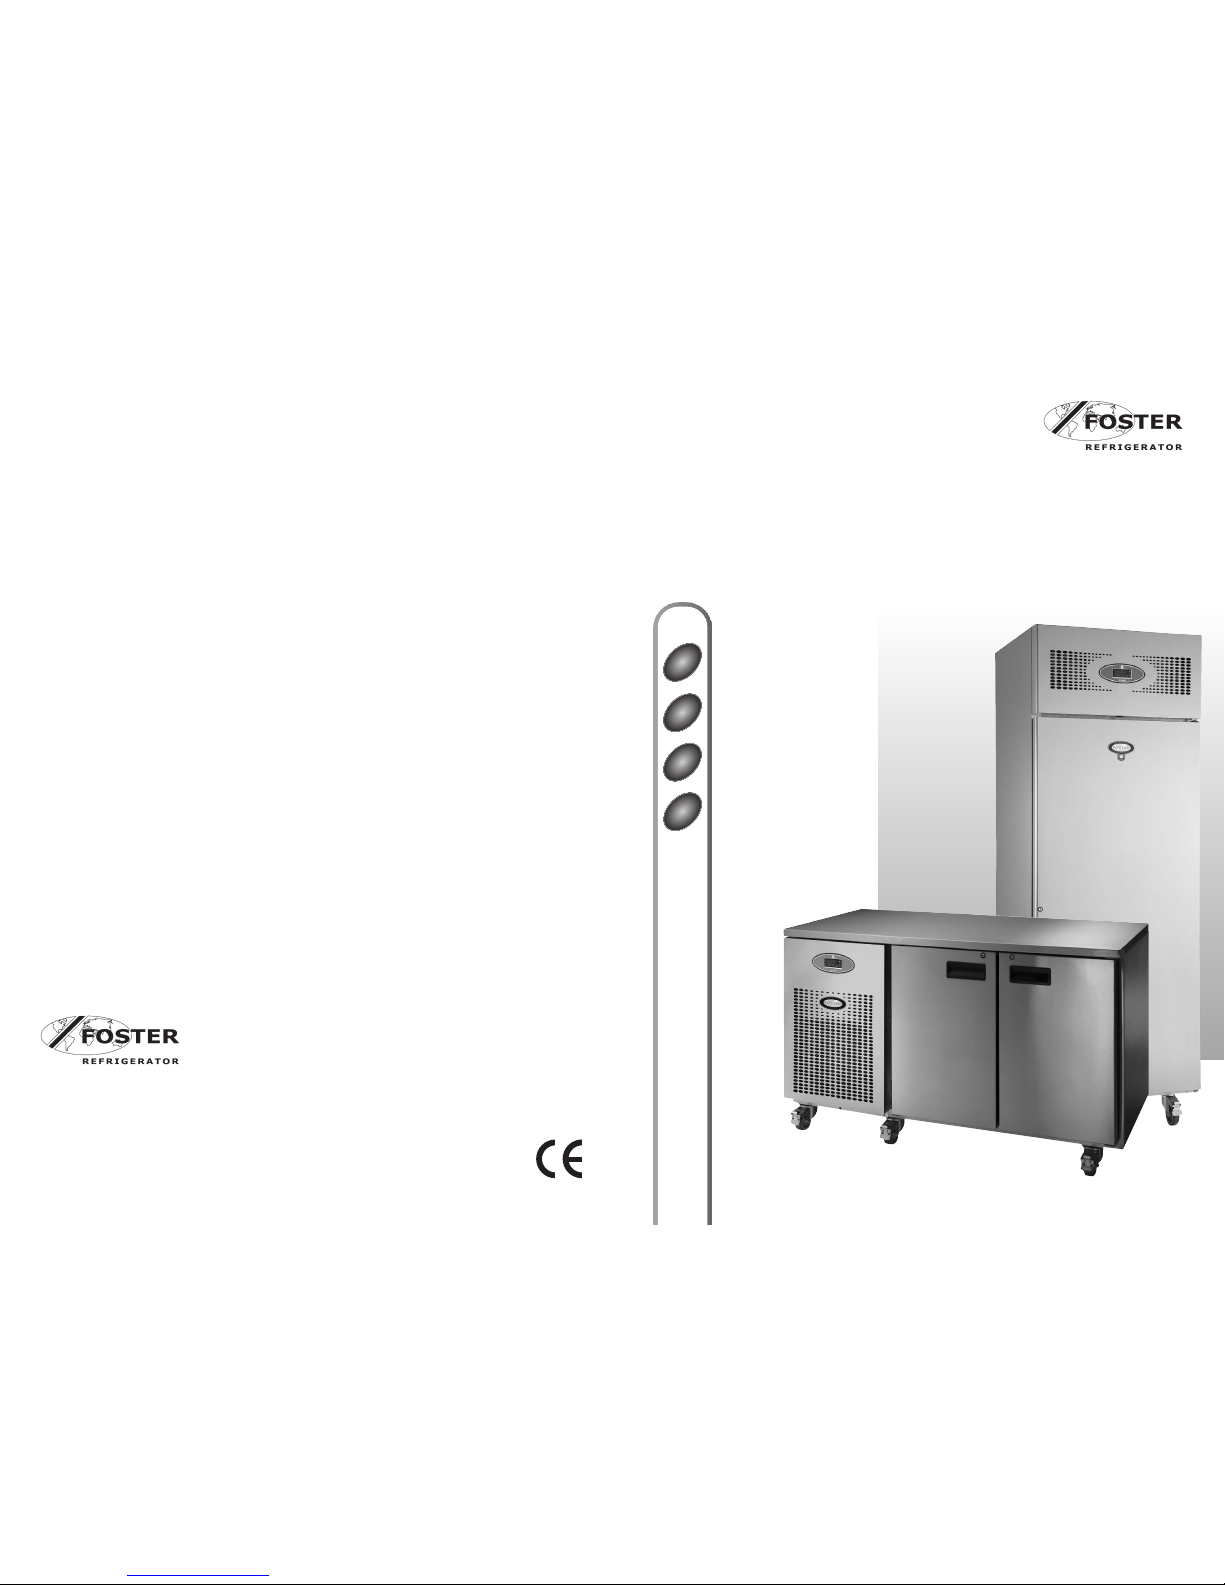
GB
Operating instructions
F
Notice d'installation
et d'utilisation
D
Bedienungsanleitung
operating instructions
Foster European Operations
Foster Refrigerator
Oldmedow Road, King’s Lynn,
Norfolk, PE30 4JU
England
Tel: 01553 691122
Fax: 01553 691447
Website: www.fosterrefrigerator.co.uk
Email: sales@foster-uk.com
a Division of ITW (UK) Ltd.
France
Foster Refrigerator France SA
Tel: (33) 01 34 30 22 22 Fax: (33) 01 30 37 68 74 Email: info@fosterfrance.com
Germany
Foster Refrigerator Germany
Tel. (49) 0781 9907840, Fax (49) 0781 9907844, E-Mail info@foster-de.com
www.fosterrefrigerator.de
Spain
Foster Refrigerator Spain
Tlf.: +34 943463222 Fax.: +34 943463246
PROCAB/A0211 00-556322
NL
Installatie en
Gebruiksaanwijzing
Installation and Operation
EPro Cabinets & Counters
with FD2-10 Controller
Page 2
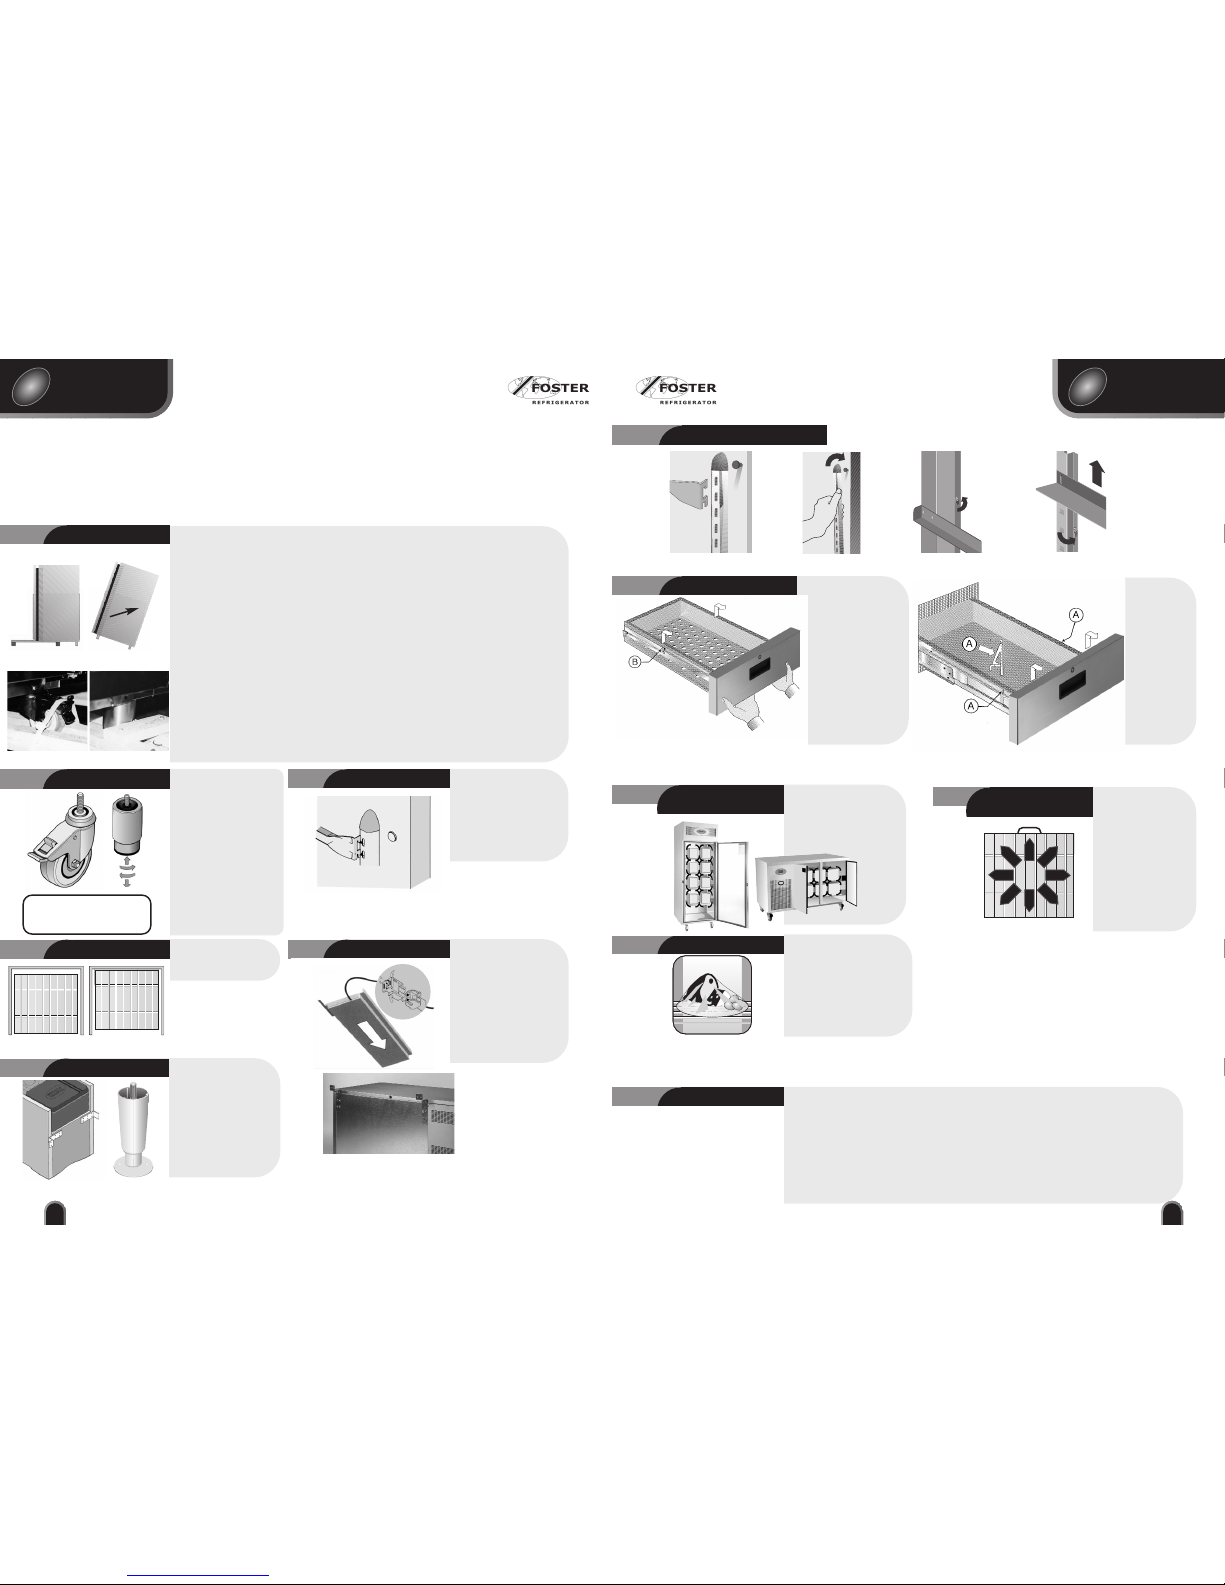
To adjust the position of the
trayslides insert the ends into
the vertical support with the
‘hooks’ pointing downwards
and ‘slot downwards’ into
position. Ensure the
trayslides are parallel and
level after fitting.
Shelf/Tray Supports
3
Shelves must be inserted
into the unit so that they
sit at the back of the unit.
4
installation
Positioning/unpacking
1
All models are normally fitted
with swivel castors. Ensure
during installation the unit is level
if not the door(s) may not close
correctly. Adjust castors by
inserting spacers under the
appropriate castor and the base
of the unit until level.
As an alternative adjustable legs
can be fitted to all models.
8mm threaded adjustable levelling
feet are available for ‘U’ mount
cabinet models, for all other
models 12mm threaded
adjustable levelling feet are
available. (Fitting method as
castors or legs).
Castors/legs/feet
2
This is only fitted to the Pro
300/300 cabinet models.
Slide the vaporiser tray onto
its runners on the underside
of the cabinet and insert the
electrical plug into the socket
provided. If the runners are
tight loosen slightly and
re-tighten after inserting the
tray. Ensure tray covers drain
outlet.
Vaporiser Tray
5
IMPORTANT:
To the installer: Installation of these units should be carried out by a competent person and
the appropriate codes of practice adhered to, thus ensuring safe installation.
Pass to the user: Do not discard this document as it contains important guidelines on
Operation, Loading, Cleaning and Maintenance and should be kept for reference.
english
GB
2
Important (Cabinets only): Ensure a minimum clearance of 150mm above the unit for ventilation and
efficient operation. Where possible, ensure the unit is not adjacent to a heat source.
Unpacking: The unit is delivered on a pallet and shrink-wrapped. Documentation is inserted into a clear
pocket located inside the unit. Carefully remove the protective plastic film and cardboard from the
unit exterior and from the door opening surround making sure that any sharp instrument used does not cause
damage, plus remove any quality labels.
Cabinet removal from the pallet: Remove the shelf holding the package containing the castors or legs.
Remove the retaining bolts which secures the unit to the pallet. Move the unit over the front of the pallet and
fit the lockable castors or legs in the mounting holes. To fit the rear castors or legs, lock the front castors, tilt
the unit forwards, remove the pallet and fit the castors or legs in the mounting holes. Ensure that all are
tightened firmly into position.
On double door top mount cabinets, ensure 3 castors are fitted at the front.
N.B Gastro Pro 300/300 and all Fish Cabinets only. Take care not to damage the drain outlet under the base.
All cabinets are heavy and care should be taken when handling.
Counter removal from the pallet:
Counters fitted with castors - Remove fittings from inside the unit and ensure all drawers and doors are
locked before removal from the pallet. Cut the heavy duty cable ties that hold the front castors to the pallet.
Unlock the castors and then carefully roll the unit forward off the pallet.
Counters fitted with legs - Remove fittings from inside the unit and ensure all drawers and doors are
locked before removal from the pallet. Remove the fixing blocks located in front of the legs at the front of the
unit and cut the straps securing the unit to the pallet. Carefully manoeuvre the unit forward, off the pallet.
Fitting Shelves
Units for marine
applications are provided
with special marine legs
and bulkhead fixings.
These units must be
installed by specialist
marine installation
companies.
Marine Units
6
Marine Leg
Cabinet Bulkhead
Fixings
Counter Bulkhead Fixings
Cabinet Counter
Cabinet
Counter
Castors Legs
Please refer to label on back
and base of unit for correct
fitting of castors
DISPOSAL REQUIREMENTS
If not disposed of properly all refrigerators have components that can be harmful
to the environment. All end of life refrigerators must be disposed of by
appropriately registered and licensed waste contractors, and in accordance with
National Laws & Regulations.
23
nederlands
N
Geleiders & roosters (vervolg)
16
Probleemoplossing
Controles moeten worden uitgevoerd door een vakkundig persoon.
Controleer de volgende punten, voordat u contact opneemt met de klantenservice:
a) stroomuitval (netstroom kan zijn weggevallen)
b) storingen zoals omschreven in de bedieningshandleiding voor de gebruiker: Alarmeringen en
Waarschuwingen
c) defecte zekering
Wanneer u om assistentie vraagt van de klantenservice dient u altijd de volgende gegevens bij de hand te
hebben:
a) serienummer van de machine (E..........)
b) het modelnummer aan de hand van het serienummer dat aan de binnenkant van de machine vermeld is
c) de ‘foutcodereferentie’, wanneer er een foutcode wordt weergegeven.
Probleemoplossing
21
Dek al het voedsel af en houd
rauw en gekookt voedsel
gescheiden. Voor verwarmde
kasten: dek het voedsel af om
uitdroging te voorkomen en
vul het reservoir voor de hoge
luchtvochtigheidsgraad op de
bodem van de kast met
water.
Belading: voedsel
20
Zorg er bij de belading
van producten voor
dat de lucht kan
circuleren langs en
door de producten.
Belading: goede
luchtstroom
Zorg voor een
gelijkmatige verdeling
van het gewicht over het
rooster. De maximale
belasting is 40 kg per
rooster en 120 kg per
kast met enkele deur.
Plaats geen producten
op de binnenvloer van
de kast.
Belading:
gewichtsverdeling
18
19
40Kg
Variant Visrek
Variant Verwarmd Rooster
Verwijderen Geleiders
Standaard Geleiders
Gekoelde lades
Om deze lades te
verwijderen, trekt u de
lade geheel uit en tilt u
deze zó op dat de rollers
(B) door de gaatjes in de
ladegeleiders vallen.
Onthoud hierbij de
volgorde van de lades,
want als ze in een andere
volgorde worden
teruggeplaatst, kan het
gebeuren dat ze niet
goed aansluiten.
Verwijderen van lades
Messenlade
(indien van
toepassing)
Deze lades zijn
vastgemaakt aan
de ladegeleiders
door middel van
afsluitclips (A).
Deze clips
moeten naar
beneden worden
geduwd om de
lade los te
maken.
Belading
17
Page 3
english
GB
3
If the unit has been laid on its back at any time DO NOT switch on immediately but leave in the upright
position for at least 60 minutes. To switch on the unit see ‘User Operation Guidelines’. Allow the unit to reach its
normal operating temperature before loading with product.
Switching On
7
start up
nederlands
N
Deze moeten regelmatig worden gecontroleerd en worden vervangen, wanneer zij beschadigd zijn. Om ze
schoon te maken, veegt u ze eerst af met een warme vochtige doek met een beetje zeep en vervolgens met
een schone vochtige doek. Tenslotte wrijft u ze grondig droog, voordat u de deur sluit.
Deurrubbers
Reinigingsinstructies
Belangrijke reinigingsinstructies
Indien het op de juiste manier wordt verzorgd, is het apparaat in staat om jarenlang weerstand te
bieden aan corrosie en pitting. Wij bevelen het onderstaande wekelijkse reinigingsschema aan:
a. interieur en exterieur: uitwassen met zeepwater, naspoelen en grondig drogen (GEBRUIK ZEER
WEINIG WATER!!)
b. deur en unit cover: gebruik een speciaal reinigingsmiddel voor roestvrij staal volgens de instructies
van de fabrikant.
WAARSCHUWING:
Sterk alkalische reinigingsmiddelen of middelen met bleekmiddel, zuren of chloor zijn zeer schadelijk
voor roestvrij staal. Wanneer zij per ongeluk of opzettelijk worden gebruikt, kunnen zij corrosie en
pitting veroorzaken. Wanneer een van deze middelen tijdens de algemene reiniging van de keuken
in aanraking met het apparaat komt, dient u het betreffende gedeelte meteen schoon te maken met
schoon water en droog te wrijven. Gebruik nooit staalwol of schuurmiddelen op oppervlakken uit
roestvrij staal of aluminium. Laat het apparaat na het reinigen de normale bedrijfstemperatuur
bereiken, voordat u het met producten belaadt. Tijdens het gebruik dient men alle gemorste stoffen
onmiddellijk te verwijderen, maar men dient aanraking van het interieur van het apparaat te
vermijden omdat warme huid aan metaal kan 'vastvriezen'. Vermijd bovendien ook de hete
behuizingen.
Reinigingsinstructies
13
N.B. Schakel vóór de reiniging het apparaat uit.
Maak de condensor, geplaatst in het motorcompartiment, schoon als deze vuil is geworden (zie ook 10:
Alarm signalen en waarschuwingen). Schakel de machine uit. (Verwijder de kap van het motorcompartiment
zoals hieronder omschreven.)
Reinig de condensor met behulp van een zachte borstel of stofzuiger. LET OP: neem bij hardnekkige vetresten
op/in de condensor contact op met de onderhoudsdienst van Hobart Foster Holland b.v. voor een volledige
onderhoudsbeurt.
Nadat de condensor is gereinigd, zet u deze weer aan door op de knop 1 te drukken. Deze actie zal ook het
alarm “maak de condensor schoon/alarm hoge druk” (code HP) resetten. Indien deze stap niet wordt
uitgevoerd, kan dit de garantie van de verdamper unit schaden.
Condensor
Kasten:
Werkbanken
21
Verwijder de roosters en geleiders (zie instructies voor installatie). Verwijder de ladders door ze omhoog te
tillen en weg te trekken. De klembouten blijven aan de binnenwand bevestigd. Zorg bij het terugplaatsen
dat de sleutelgatsleuven aan de achterkant van de kunststof vorm in de klembouten grijpen. De roosters en
geleiders zijn vaatwasmachinebestendig. Reinig deze verticale ladders met warm zeepsop, spoel ze af en
maak ze goed droog voordat u ze terugplaatst.
Geleiders
Verwijder de geleiders door de fixeerschroef los te draaien en de steunen uit de sleutelgatklem te tillen.
Wijnrekken
Verwijder het wijnrek door de duimschroef waarmee het rek aan de achterkant van de kast is bevestigd, los
te draaien en til het rek er voorzichtig uit.
Geleiders & roosters
16
Draai de twee schroeven
onder aan het condensorcompartiment los en trek de
kap naar voren. Reinig de
condensor met behulp van
een zachte borstel.
3
Onderbouw
Bovenbouw
22
user operation guidelines
8
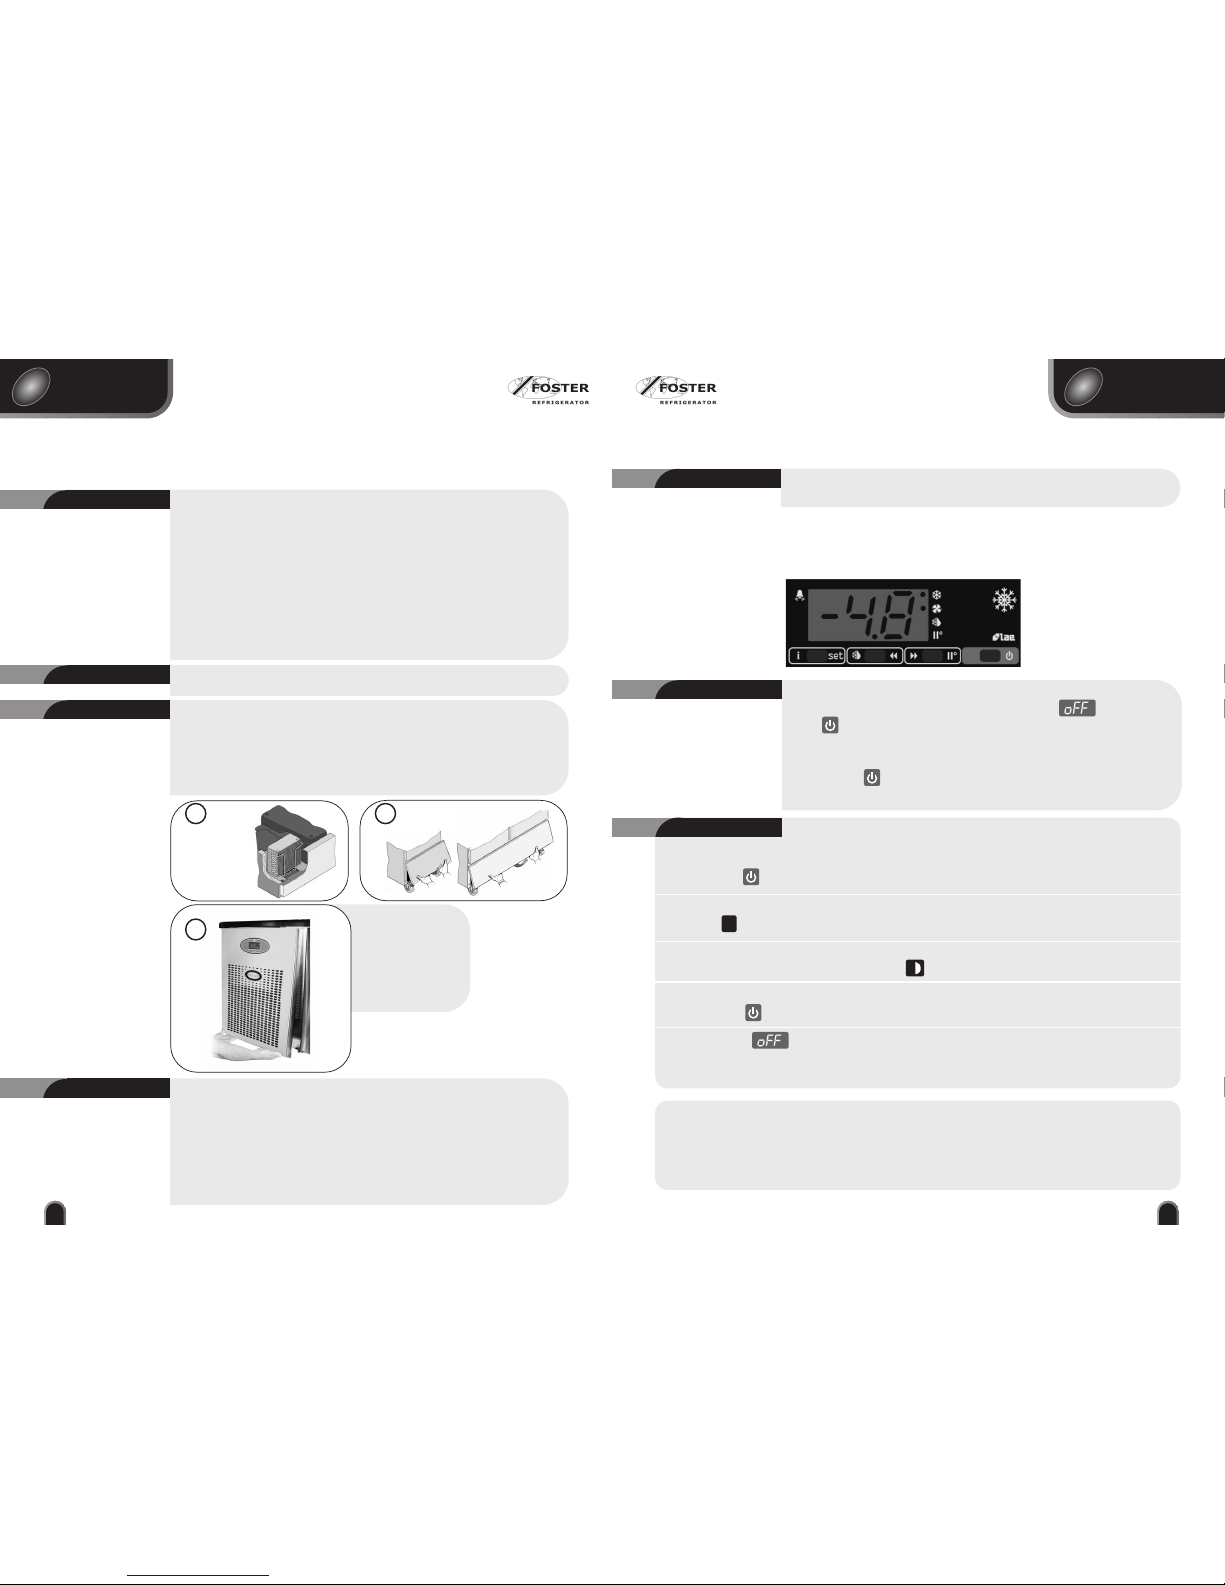
FD2-10 Controller
Initial Start Up
9
Operating Instructions
i
IMPORTANT NOTE:
Fuzzy Logic
Foster products are designed to be as energy efficient as possible. An energy saving feature called ’Fuzzy Logic’ enables the
controller to automatically adjust the refrigeration performance to match the usage levels whilst maintaining the optimum stored
product temperature. When ‘Fuzzy Logic’ is operating this causes the internal fan(s) and temperature to cycle differently. This
feature may be disabled through accessing the Service Parameters.
Your new Foster Cabinet will be delivered ready to run. Plug into the mains supply and the
unit will operate in the following way.
The display will briefly show a dash in the centre of the screen and then display . Press and
hold the button for 3 seconds then release.
(If pressed and held for 5 seconds then released this will start the ‘Test Sequence’.)
To cancel the Test Sequence
Press and release the button during the test sequence.
If not pressed the test will continue and when complete the controller will wait for 1 min, then resume
normal operation.
1. To Start the Unit
Press and hold the for three seconds then release.
2. To Check Storage Temperature Set Point
Press button for at least half a second to display the set point.
3. Manual Defrost
To initiate a manual defrost press and hold the defrost button for 2 seconds.
4. Set Unit to Standby.
When pressing the button for 3 seconds, will allow the controller to be put on a standby.
Standby Indication
This indication is displayed while the unit is not operating but with mains power applied to the unit.
This mode may be used for internal cleaning regimes and short periods when the unit is not required.
For extended periods of inactivity the mains supply should be isolated.
❄
14
15
Page 4
english
GB
4
To lock the door, insert the key and turn through 90˚.
Door Lock
11
Cabinets
The ‘rocker switch’
on/off internal light
switch is located under
the bottom edge of the
stainless steel top
control panel housing.
12
Light with Glass Door
Counters
The ‘push button’ on/off
internal light switch is
located on the fan housing
(see left).
Cabinets Counters
10
Alarms and Warnings
21
nederlands
N
Om de deur af te sluiten: steek de sleutel in het slot en draai door tot 90˚.
Afsluiten deur
11
Kasten
De tuimelschakelaar om
de verlichting aan de
binnenzijde van de kast
aan/uit te zetten
bevindt zich onder de
onderrand van de
roestvrijstalen behuizing
van de besturingseenheid.
12
Binnenverlichting
(indien aanwezig)
Werkbanken
De drukknop om de verlichting aan de
binnenzijde van de werkbank aan/uit
te zetten bevindt zich op de
ventilatorbehuizing aan de linkerkant
bij werkbanken met de configuratie
aan de linkerkant en aan de
rechterkant bij werkbanken met de
configuratie aan de rechterkant.
Kasten
Werkbanken
10
Alarm signalen en waarschuwingen
Alarm deur open (uitsluitend van toepassing op apparaten met deurschakelaar)
Op het scherm verschijnt
Het alarm gaat af en kan worden uitgezet door op de knop
te drukken. Het display zal de alarm melding blijven tonen totdat de deur gesloten wordt.
Stopt hierna de alarmmelding niet, neem dan contact op met de storingsdienst van Hobart Foster Holland b.v.
Alarm hoge druk (uitsluitend van toepassing op apparaten met condensorvoeler)
Op het scherm verschijnt
Dit alarm houdt verband met de condensor. Controleer en reinig de condensator regelmatig. (Frequentie hangt af van
de omstandigheden op de locatie. Zie ook 'Reinigingsinstructies'.)
Het alarm gaat af en kan worden uitgezet door op één van de knoppen te drukken. Na de vooraf ingestelde periode
gaat het opnieuw af. Het alarm stopt automatisch zodra de normale druk is bereikt. Is dit na vier uur nog niet het geval,
controleer dan of de condensator schoon is en niet is geblokkeerd, of neem contact op met de storingsdienst van
Hobart Foster Holland b.v.
Alarm hoge temperatuur
Op het scherm verschijnt
Het alarm gaat af en kan worden uitgezet door op één van de knoppen te drukken. Na de vooraf ingestelde periode
gaat het opnieuw af. Het alarm stopt automatisch zodra de normale bedrijfstemperatuur is bereikt. Is dit na vier uur nog
niet het geval, neem dan contact op met de storingsdienst van Hobart Foster Holland b.v.
Alarm lage temperatuur
Op het scherm verschijnt
Het alarm gaat af en kan worden uitgezet door op één van de knoppen te drukken. Het apparaat blijft in werking, maar
na de vooraf ingestelde periode gaat het alarm opnieuw af. Het alarm stopt automatisch zodra de normale
bedrijfstemperatuur is bereikt. Is dit na vier uur nog niet het geval, neem dan contact op met de storingsdienst van
Hobart Foster Holland b.v.
Storing luchttemperatuurvoeler
Op het scherm verschijnt
Het alarm gaat af en kan worden uitgezet door op één van de knoppen te drukken.
De gebruiker kan verder niets doen. Aangezien het apparaat nu niet optimaal werkt, is het van belang dat u zo snel
mogelijk contact opneemt met de storingsdienst van Hobart Foster Holland b.v.
Storing temperatuurvoeler verdamper (uitsluitend van toepassing op apparaten met optie automatisch ontdooien)
Op het scherm verschijnt
Het alarm gaat af en kan worden uitgezet door op één van de knoppen te drukken.
De gebruiker kan verder niets doen. Neem daarom zo snel mogelijk contact op met de storingsdienst van Hobart Foster
Holland b.v. Het apparaat blijft in werking. Indien de storing voortduurt, heeft dit echter gevolgen voor het ont
dooiproces en daarmee ook voor de efficiency.
Door Open Alarm (Only applies to cabinets fitted with door switches.)
Will be displayed.
The alarm will sound but can be silenced by pressing.
The display will continue to display the alarm message until
cancelled by shutting the door.
If the alarm cannot be cancelled by doing this call your Foster Authorised Service Provider.
Condensor High Pressure Alarm. (Only applies to machines fitted with a condenser probe).
Will be displayed.
This alarm relates to the condenser which must be checked and cleaned at regular intervals the frequency being
determined by site conditions. (See ‘Condenser Clean’ instruction).
The alarm will sound but can be silenced by pressing any of the buttons and the unit will continue to operate, however
it will return after the pre-set designated period. The unit returning to normal operating temperature will automatically
cancel the alarm.
If this does not occur after 4 hours check that the condenser is clean and clear of any obstruction or call your Foster
Authorised Service Provider.
Internal High temperature alarm
Will be displayed.
The alarm will sound but can be silenced by pressing any of the buttons, however it will return after the pre-set
designated period. If the unit returns to normal operating temperature the alarm etc. will be cancelled automatically.
If this does not occur after 4 hours call your Foster Authorised Service Provider.
Internal Low temperature alarm.
Will be displayed.
The alarm will sound but can be silenced by pressing any of the buttons and the unit will continue to operate,
however it will return after the pre-set designated period. If the unit returns to normal operating temperature the
alarm etc. will be cancelled automatically. If this does not occur after 4 hours call your Foster Authorised Service
Provider.
Air Temperature Probe T1 Failure.
Will be displayed.
The alarm will sound but can be silenced by pressing any button.
There is no further action that can be taken by the user in this instance; therefore call your Foster Authorised Service
Provider as soon as possible. During this period the unit will continue to operate but have a reduced performance.
Evaporator Temperature Probe T2 Failure. (Freezer Cabinets Only)
Will be displayed.
The alarm will sound but can be silenced by pressing any button.
There is no further action that can be taken by the user in this instance; therefore call your Foster Authorised Service
Provider as soon as possible. During this period the unit will continue to operate satisfactorily, but this failure will
have an effect on the defrost and therefore efficiency if allowed to continue.
Page 5

Gebruiksaanwijzing
8
FD2-10 Bedieningspaneel
Aanzetten en zelftest
9
Gebruiksaanwijzing
i
Belangrijke opmerking:
Fuzzy logic
Foster producten zijn ontwikkeld om zo zuinig mogelijk te functioneren. Een kenmerk hiervan is Fuzzy Logic. Fuzzy Logic maakt het
mogelijk dat de software automatisch de koelprestatie aanpast aan het gebruikersniveau, terwijl wel de meest optimale
koeltemperatuur wordt aangehouden. Als Fuzzy Logic is ingeschakeld, zullen de inwendige koelventilator(en) en de temperatuur
een steeds verschillende cyclus hebben. Fuzzy logic zou kunnen worden uitgeschakeld als de service parameters worden aangepast.
1. Aanzetten
Druk op en houd gedurende drie seconden ingedrukt. Laat vervolgens los.
2. Controleren ingestelde temperatuur
Controleer de instelling door minimaal een halve seconde op te drukken. De temperatuur verschijnt op het beeldscherm.
3. Handmatig ontdooien
Voor handmatig ontdooien: druk op en houd gedurende twee seconden ingedrukt.
4. Apparaat standby zetten
Druk op en houd gedurende drie seconden ingedrukt
Aanduiding standby
Deze aanduiding verschijnt op het scherm wanneer het apparaat niet in werking is, maar wel op de netspanning is aangesloten.
Gebruik deze stand wanneer u de binnenkant reinigt en wanneer u het apparaat korte tijd niet gebruikt. Neem, wanneer u het
apparaat langere tijd niet gebruikt, de stekker uit het stopcontact.
❄
Eerste keer aanzetten
Uw nieuwe Foster apparaat is bij aflevering klaar voor gebruik. Nadat u de stekker in het stopcontact heeft
gestoken, werkt het apparaat als volgt:
Aanzetten & zelftest:
Op het scherm verschijnt kort een liggend streepje en vervolgens verschijnt er . Druk op en
houd gedurende drie seconden ingedrukt. Laat vervolgens los. (als u gedurende 5 seconden ingedrukt
houdt, zal dit de zelftest activeren).
De zelftest annuleren:
Druk gedurende de zelftest op Als u niet op deze knop drukt, zal de zelftest worden uitgevoerd en
afgerond. Vervolgens wacht het display een minuut alvorens in de normale modus terug te gaan.
english
GB
5
These should be inspected on a regular basis and replaced if damaged. To clean, wipe with a warm damp
soapy cloth followed by a clean damp cloth and finally thoroughly dry before closing the door.
Door Gaskets
cleaning/maintenance
Important Cleaning Instructions
Cared for correctly, stainless steel has the ability to resist corrosion and pitting for many years.
The following weekly cleaning regime is recommended:
a. Exterior: Use a proprietary stainless steel cleaner following the manufacturers instructions.
b. Interior: Wash with soapy water, rinse and dry thoroughly.
WARNING:
High alkaline cleaning agent or those containing bleaches, acids and chlorines are very harmful to
stainless steel. Corrosion and pitting may result from their accidental or deliberate application.
If any of these liquids should come into contact with the unit during general kitchen cleaning,
wipe down the affected area immediately with clean water and rub dry.
Never use wire wool or scouring powders on stainless steel or aluminium surfaces.
After cleaning allow the unit to reach its normal operating temperature before reloading with
product. During usage all spills should be wiped clean immediately but care should be taken not
to touch the interior of freezer units as warm skin can ‘freeze’ to metal or heated cabinets.
Foster can supply cleaning products which have been tested on our cabinets. Please contact your
dealer for further information and prices.
Cleaning Instructions
13
N.B. Before internal cleaning, switch off unit.
Clean the condenser, located in the unit compartment, when it becomes dirty (see Alarms and Warnings in
the User Operation Guidelines).
Important: Disconnect the mains electrical supply to the machine prior to cleaning the condenser. (Remove
the unit cover on bottom mounts and counters as below.)
Clean the condenser using a soft brush or vacuum cleaner. NOTE: if there are any stubborn grease deposits
etc left on or through the condenser call your Foster Authorised Service Provider to carry out a full service.
Once the condenser has been cleaned switch the unit on.
Failure to carry out this action may invalidate the warranty of the condensing unit
Condenser Clean
Cabinets
Counters
21
Remove the shelves and trayslides (see Installation Instructions). To remove the support uprights lift vertically
and pull away. The retaining studs remain attached to the internal wall. To replace, ensure the “keyhole”
slots in the rear of the plastic moulding engages the retaining stud. The shelves and trayslides are dishwasher
safe. Wash the vertical supports with warm soapy water, rinse and thoroughly dry before replacing.
Shelf Supports
To remove, loosen the locating screw and lift from the ‘keyhole’ fixing.
Wine Racks
To remove, unscrew the thumb screw holding the rack to the rear of the unit and carefully lift out.
Shelf Supports,
Trayslides & Shelves
16
On counter units, remove
the two screws located at
the base of the condenser
compartment unit cover for
access to condenser. Brush
with a stiff (not wire) brush.
3
Bottom Mount
Top Mount
20
nederlands
N
LET OP: Als de machine op zijn kant heeft gelegen, zet hem dan niet meteen aan. Zet de machine rechtop en
wacht minstens 60 minuten, voordat u hem aanzet. Laat het apparaat eerst de normale bedrijfstemperatuur
bereiken, voordat u het met producten belaadt.
Aanzetten
7
Eerste in gebruikname
14
15
Page 6

Shelf Supports (continued)
16
operation failure
Checks must be carried out by a competent person.
Before calling a Foster Authorised Service Provider check the following:
a) Power failure (may be off at source)
b) Fault conditions as described in User Operational Guidelines - Alarms and Warnings.
c) Damaged mains lead plug.
When requesting service assistance always quote the following:
a) unit serial number (E..........)
b) the model number from the serial number plate located inside the unit.
c) If a “Fault Code ” appears quote the “Fault Code Reference” to the Foster Authorised Service Provider.
Problem Diagnosis
21
english
GB
6
Cover all foods and
separate raw and cooked
foods.
In heated cabinets cover
food to prevent
dehydration and fill the
high humidity container in
the base with water.
Food
20
When loaded, ensure
that air can circulate
around / through
stored products.
Airflow
Evenly distribute the
load.
For Cabinets 40kg max
per shelf or 160kg per
full door section.
For Counters 40kg max
per shelf or 80kg per
door section.
Do not stack product on
the base of the unit.
Load Distribution
18
19
40Kg
Fish Racking Variation Heated Shelf Variation
Ladderack Removal
Standard Trayslide
Refrigerated Drawers
To Remove these
drawers pull out to full
extent and lift the
drawer so that the
rollers (B) pass through
the slots in the drawer
runners.
Please note on removal
where each draw is
allocated or to which
runner. If put back in a
different order the
drawers may not line up
or fit correctly.
Drawer Removal
Chef’s knife
Drawer
(if fitted)
These drawers are
secured to their
runners by
locking clips A.
These must be
depressed to
release the
drawer.
loading
19
nederlands
N
Om de positie van de
geleiders aan te passen
plaatst u de uiteinden in de
verticale steun met de
‘haken’ naar beneden en
duwt u ze neerwaarts op de
juiste positie. Zorg ervoor
dat de roosters na montage
parallel op elkaar en
waterpas staan.
Rooster-/rekgeleiders
3
Leg de roosters op
zodanige wijze in de kast
of werkbank dat ze de
achterzijde van de kast
raken.
4
Installatie / uitpakken
Plaatsen/Uitpakken
1
Alle modellen zijn normaal
gesproken voorzien van
zwenkwielen. Controleer tijdens de
installatie of de machine waterpas
staat, omdat anders de deur
misschien niet goed sluit. Stel de
zwenkwielen af door
afstandhouders onder het
betreffende zwenkwiel en de
onderkant van de machine te
plaatsen, totdat die waterpas staat.
Als alternatief kunnen alle
modellen worden uitgerust met 12
mm verstelbare poten. Voor de ‘U’modellen zijn 8 mm verstelbare
poten verkrijgbaar waarmee de
kast kan worden gesteld
(monteren zoals wielen/ poten).
Zwenkwielen/poten/voetjes
2
Uitsluitend aanwezig in
modellen Pro 300/300. Schuif
de verdampingsbak op de
runners onder in de kast en
steek de stekker in de
bijgeleverde contactdoos.
Indien de runners vastzitten,
draai deze iets losser en draai
ze opnieuw vast nadat de bak
is aangebracht. Zorg ervoor dat
de bak over de afvoeropening
wordt geplaatst.
Verdampingsbak
5
Belangrijk:
Voor de installateur: de installatie van deze machine mag uitsluitend worden uitgevoerd
door een vakkundig persoon en men dient zich te houden aan de algemeen aanvaarde
werkmethodieken om een veilige installatie te waarborgen.
Belangrijk: (alleen bij kasten): Zorg ervoor dat boven de kast een vrije ruimte van ten minste 150mm
aanwezig is voor de benodigde ventilatie. Om een efficiënte werking te garanderen, dient u ervoor te zorgen
dat de machine - waar mogelijk - niet in de buurt van een hittebron staat.
De machine wordt geleverd in krimpfolie op een pallet. Verwijder voorzichtig de beschermende plasticlaag en
het karton van de buitenkant en van de deuropening. Let erop dat eventueel gebruikte scherpe voorwerpen
geen schade veroorzaken en verwijder alle kwaliteitslabels. De documentatie bevindt zich in de machine in
een doorzichtig mapje.
Kasten van de pallet afnemen Verwijder de plastic spanbanden die de machine op de pallet op zijn plaats
houden met behulp van een schaar of mesje. Verwijder het rooster met daarop de doos met de wieltjes of
poten. Verwijder de opsluitbouten waarmee de kast aan de pallet is bevestigd. Schuif de kast over de
voorkant van de pallet en bevestig de vergrendelbare wieltjes of poten in de montagegaten. Voor het
aanbrengen van de achterste wieltjes of poten: zet de voorwieltjes op slot, kantel de kast naar voren,
verwijder de pallet en bevestig de wieltjes of poten in de montagegaten. Zorg ervoor dat alle wieltjes/poten
goed worden bevestigd. In het geval van een dubbeldeurs kast: zorg ervoor dat er drie wieltjes zijn
gemonteerd aan de voorzijde.
N.B.: uitsluitend geldend voor Gastro Pro 300/300 alle viskasten en werkbanken: Pas op dat u de
afvoeropening onder de bodem niet beschadigt. Alle kasten zijn zwaar en er dient met zorg mee te worden omgegaan.
Werkbanken van de pallet afnemen
Werkbanken met wieltjes: Verwijder alle losse onderdelen uit de werkbanken en verzeker u ervan dat alle
deuren en lades gesloten zijn, voordat u de werkbank van de pallet afneemt. Verwijder de plastic spanbanden
die de voorste wieltjes op de pallet op zijn plaats houden met behulp van een schaar of mesje en rol
vervolgens de werkbank voorzichtig van de pallet af.
Werkbanken met poten: Verwijder alle losse onderdelen uit de werkbanken en verzeker u ervan dat alle
deuren en lades gesloten zijn, voordat u de werkbank van de pallet afneemt. Verwijder de blokken voor de
poten aan de voorzijde van de werkbank en verwijder de plastic spanbanden die de machine op de pallet op
zijn plaats houden. Manoeuvreer vervolgens de werkbank voorzichtig van de pallet af.
Roosters
Kasten voor toepassingen
in de scheepvaart zijn
uitgerust met speciale
scheepvaartpoten en
scheepshaken. Installatie
van deze kasten dient te
geschieden door in
scheepvaartinstallaties
gespecialiseerde bedrijven.
Scheepvaartunits
6
Scheepsvaartpoot
Scheepshaken
Voor Kasten
Scheepshaken Voor Werkbanken
Kast Werkbank
Kast
Werkbank
Wielen Poten
Kijk ook op de het label aan de
achter- en onderzijde van de
machine voor het correct monteren
van de wielen.
Verwerkingsvoorschriften
Koel- en vrieskasten bevatten onderdelen die, wanneer ze niet op de juiste
manier worden verwerkt, schadelijk kunnen zijn voor het milieu. Alle oude
koel- en/of vrieskasten moeten door erkende en geregistreerde afvalverwerkingsbedrijven worden verwerkt - dit in overeenstemming met wettenen
bepalingen geldig in Nederland.
17
Page 7

english
GB
7
français
F
Défauts
Les vérifications doivent être effectuées par du personnel autorisé.
Avant d'appeler votre revendeur agréé, prière de contrôler les points suivants:
Défaut d'alimentation électrique (disjoncteur)
Défaut affiché sur le régulateur (voir chapitre alarmes et avertissements)
Prise de courant endommagée
En cas de besoin d'assistance technique préciser:
Le numéro de série de l'appareil
Le type de l'appareil. Ces informations se trouvent sur une plaque à l'intérieur de l'armoire.
Lorsqu'un code de défaut s'affiche sur le régulateur, mentionner ces indications lors de votre appel téléphonique.
Diagnostic
21
Couvrir les aliments en
séparant les produits crus des
produits cuits.
Dans les armoires de
maintien en température,
couvrir les bacs pour éviter
tout dessèchement et
remplir le bac humidificateur
en partie basse avec de l'eau.
Aliments
20
Chargement
Une fois l'armoire chargée,
contrôler que l'air peut circuler
librement autour des produits
stockés.
Circulation de l'air
La charge de 40 kg
maximum par clayettes
dolt être uniformément
répartie avec un
maximum de 160kg par
section de 600 litres pour
les armoires et de 80 kg
par porte pour les
meubles bas.
Ne pas stocker de
produits directement sur
le fond des appareils.
Répartition de la charge
18
19
40Kg
Démontage Crémaillère Variante Armoire á PoissonsSupports Standard Variante Armoire de
Maintien en Température
Tiroirs réfrigérés
Pour enlever les tiroirs,
tirer le bloc à fond et le
lever pour que les
roulements (B) des
glissières télescopiques
passent dans les
encoches prévues à cet
effet. Il est conseillé de
bien repérer
l’emplacement exact de
chaque tiroir afin d’évier
tout risque de faux
alignement lors de la
remise en place.
Démontage des tiroirs
Tiroirs
réfrigérés
(option)
Pour enlever ces
tiroirs, les ouvrir
à fond et lever
pour que les
roulements (B)
des glissières
passent dans les
encoches
prévues à cet
effet.
18
17
Page 8

deutsch
D
8
Befestigen Sie die
Auflageschienen wie
abgebildet. Achten Sie
darauf, dass die Schienen
waagerecht und parallel
montiert werden.
Auflageschienen
3
4
Aufstellung
Positionierung/Auspacken
1
Schränke und Tische
werden mit verstellbaren
Füßen oder auf Wunsch mit
Rollen geliefert. Überprüfen
Sie, ob der Schrank im Waage
steht, ansonsten ist es
möglich, dass die Türen nicht
richtig schlieflen. Die Füße
sind höhenverstellbar.
Gegebenenfalls legen Sie
Unterlegscheiben zwischen
Rollen und Schrankboden ein.
Füße/Rollen
2
Achtung: nur bei PRO G 300/300
und PRO S 250/250. Die
Verdunsterschale wird unter dem
Schrank in Führungsschienen
montiert. Stecken Sie den
Stecker der Verdunsterheizung in
die dafür vorgesehene Steckdose
in der Schrankunterseite. Wenn
nötig, lockern Sie die
Führungsschienen und befestigen Sie sie nach Montage der
Verdunsterschale wieder neu.
Tauwasserverdunsterschale
5
WICHTIG
Dieses Gerät muss gemäß der nachstehenden Anleitung unter Berücksichtigung aller
Sicherheits-Richtlinien aufgestellt werden.
Bitte diese Bedienungsanleitung sicher aufbewahren: sie enthält wichtige Informationen
über die Bedienung des Gerätes sowie Hinweise über Pflege, Reinigung und Wartung.
Entsorgungshinweise
Alle Kühlschränke beinhalten auch Teile die schädlich für die Umwelt sein können, wenn
diese nicht korrekt entsorgt werden. Die Entsorgung jedes Kühlschrankes durch einen
registrierten Fachbetrieb muss gewährleistet werden. Dieser Fachbetrieb muss lizenziert
sein und entsprechend den Gesetzen und Regelungen arbeiten.
Wichtig (nur Schränke): stellen Sie einen Deckenabstand von 150mm sowie eine ausreichende Belüftung
über dem Schrank sicher, um die einwandfreie Funktion des Gerätes zu gewährleisten. Stellen Sie das Gerät
nicht neben einer Wärmequelle auf.
Auspacken: der Schrank ist auf einer Palette montiert und in einer Schrumpffolie verpackt. Technische
Unterlagen finden Sie in einer Folientasche an der Tür oder im Schrank. Entfernen Sie die Schrumpffolie
vorsichtig, um eine Beschädigung des Gerätes zu vermeiden. Entfernen Sie die Schutzfolie vom
Schrankgehäuse und die Prüfaufkleber.
Entfernen der Palette (Schränke): Nehmen Sie den Karton mit den Schrankfüßen bzw. -rollen aus dem
Gerät. Lösen Sie die Befestigungsbolzen aus der Unterseite der Palette. Ziehen Sie den Schrank vorsichtig nach
vorne auf der Palette und schrauben Sie die vorderen Füße bzw. die feststellbaren Rollen in die dafür vorgesehenen Löcher in der Schrankunterseite ein. Kippen Sie den Schrank nach vorne (vordere Rollen vorher feststellen) und schrauben Sie die hinteren Füße bzw. Rollen fest.
Bei Schränken mit zwei Türen nebeneinander müssen stets 3 Füße bzw. 3 Rollen vorne montiert werden.
Achtung (nur bei PRO 300/300 und bei Fischkühlschränken): Sorgen Sie dafür, dass der Tauwasserabfluss
unter dem Gerät nicht beschädigt wird.
Entfernen der Palette (Tische): Tische mit Rollen: Nehmen Sie das Zubehör aus dem Tisch und schließen
Sie die Türen und Schubladen ab. Schneiden Sie die Kabelhalterung von den vorderen Rollen ab. Lösen Sie die
Bremsen bei den vorderen Rollen und fahren Sie das Gërat vorsichtig von der Palette herunter.
Tische mit Füßen: Nehmen Sie das Zubehör aus dem Tisch und schließen Sie die Türen und Schubladen ab.
Entfernen Sie die Klötze vor den Füßen und die Befestigungsbänder. Ziehen Sie das Gerät vorsichtig von der
Palette herunter.
Roste
Schränke und Tische in
Schiffsausführung werden
mit Befestigungswinkeln
und Marine-Füßen geliefert.
Diese Geräte müssen von
einem Fachmann installiert
werden.
Schiffskühlschränke
6
Marine-Fuß
Befestigungswinkel
Schiffskühltisch mit
Befestigungswinkeln
Schrank
Tisch
Rollen Füße
Vor dem Anbringen von Rollen lesen
Sie bitte das Hinweisschild auf der
Rückseite des Gerätes.
français
F
17
Ceux ci doivent être régulièrement inspectés et remplacés en cas de détérioration. Nettoyer avec un chiffon
humecté à l'eau chaude et savonneuse, rincer avec un chiffon humide et sécher avant de refermer les portes.
Joints de porte
Nettoyage et entretien
Instructions de nettoyage
13
Nota: Eteindre l'appareil avant le nettoyage intérieur
Pour enlever les clayettes et les glissières, se reporter aux instructions d'installation. Pour démonter les
crémaillères, soulever et tirer. Les vis de fixation restent en place sur les parois. Au remontage, s'assurer que
les trous oblongs à l'arrière des embouts plastiques s'engagent correctement sur les vis de fixation. Les
clayettes et les glissières peuvent être nettoyer en machine. Laver les supports verticaux (crémaillères) à l'eau
chaude et savonneuse, rincer avec et sécher avant de les remettre en place.
Crémaillères pour armoire à poisson et armoire de maintien en température.
Pour le démontage, desserrer les écrous de fixation et lever la crémaillère au travers des trous oblongs.
Casier à vins.
Pour le démontage, dévisser l'écrou moleté retenant le casier sur l'arrière.
Clayettes et supports
16
Nettoyer le condenseur, situé dans le compartiment du groupe, lorsqu'il est encrassé (voir le chapître Alarmes de la
Notice d'Utilisation).
Important: Déconnecter le cordon d'alimentation de l'appareil avant de procéder au nettoyage du condenseur.
(Pour les modèles groupe en bas et les meubles bas, retirer au préalable le cache-groupe).
Nettoyer le condenseur à l'aide d'une brosse souple (non métallique) ou d'un aspirateur. NOTA: en cas de dépôt de
graisse ou encrassement sévère, faire appel à votre distributeur Foster agréé.
Une fois le condenseur nettoyé, remettre l'appareil sous tension.
Tout manquement peut entraîner l'annulation des conditions de garantie.
Nettoyage du Condenseur
Important
En en prenant soin, le revêtement inox à la propriété de résister à la corrosion pendant de longues
années.
Pour conserver ces propriétés, nous recommandons le nettoyage hebdomadaire suivant:
a - Extérieur: utiliser un produit spécifique au nettoyage de l'inox (selon instruction du fabricant)
b - Intérieur: laver à l'eau savonneuse, rincer et sécher avec un chiffon doux.
AVERTISSEMENT
Les agents détergents à base de solution alcaline, d'eau de javel, de chlore ou d'acide sont
formellement interdites pour le nettoyage des inox. Des traces de corrosion ou de piquage
peuvent résulter de leur application délibérée ou involontaire.
Au cas où l'un de ces produits entrerait en contact avec une meuble réfrigérée pendant un
nettoyage général de la cuisine, rincer immédiatement les parties attaquées avec de l'eau propre
et sécher en frottant.
Ne jamais utiliser de tampon ou de poudre abrasive sur les surface en inox ou en aluminium.
Après le nettoyage, attendre que l'appareil et atteint sa température de fonctionnement avant de
le recharger avec les aliments.
En cas de salissures pendant l'utilisation, essuyer immédiatement en prenant soin de ne pas
mettre la peau en contact avec les parois internes des meubles à température négative ou de
maintien en température (risque de brûlures dans les 2 cas).
Armoire
Meubles
Bas
21
Sur les meubles bas, enlever
les 2 vis situées en dessous de
la tùle cache groupe.
Nettoyer avec une brosse
douce et non métallique.
3
Groupe Logé en BasGroupe
Logé en
Haut
Schrank Tisch
Die Roste müssen
vollständig in das Gerät
eingeschoben werden,
damit sie an der Rückseite
anstehen.
14
15
Page 9

deutsch
D
9
Wenn der Schrank während der Montage der Füße/Rollen gelegen hat, muss nach dem Aufrichten mindestens eine
Stunde gewartet werden, bis das Gerät in Betrieb genommen wird. Schalten Sie das Gerät ein (s. unten: „Bedienung
der Steuerung”). Lassen Sie den Schrank auf Betriebstemperatur kommen, bevor Sie ihn mit Lebensmitteln beschicken.
Bedienung der Steuerung
7
Inbetriebnahme
Pour fermer la porte à clé, insérer la clé dans la serrure et tourner de 90˚.
Serrure
11
Armoires
Le interrupteur à bascule
Marche/arrêt
commandant l'éclairage
est situé sous le bandeau
supérieur inox de
l'armoire.
12
10
Alarmes et avertissements
français
F
Meubles bas
Le bouton poussoir
marche/arrêt commandant
l'éclairage est situé à
l’intérieur du meuble sur le
caisson ventilation à
gauche ou à droite selon
l’emplacement du groupe
froid.
Armoires
Meubles Bas
Eclairage
( Optionnel)
16
Alarme porte ouverte. (Ne concerne que les armoires équipées d'interrupteurs de porte)
Sera affiché.
L'alarme sonore se déclenchera, mais pourra être annulée en appuyant sur.
Le message d'alarme continuera de s'afficher sur le régulateur jusqu'à la fermeture de la porte.
Si la fermeture de la porte n'annule pas l'alarme, veuillez appeler votre Revendeur Agréé.
Alarme haute pression (Uniquement sur les appareils munis d'une sonde condenseur.)
S'affiche.
Cette alarme indique que le condenseur doit être vérifié et nettoyé régulièrement. La fréquence de cet entretien dépend
des conditions d'exploitation du lieu d'installation. (Voir les instructions 'Nettoyage condenseur')
Une alarme sonore retentit et peut être mise sous silence en appuyant sur une touche quelconque (l'appareil continue à
fonctionner). Elle retentira de nouveau après une période définie dans les paramètres de réglages. Le retour de la
température dans les plages définies annule automatiquement l'alarme.
Au cas où l'alarme perdurerait plus de 4 heures, appeler votre revendeur Foster.
Alarme haute température
S'affiche.
Une alarme sonore retentit et peut être mise sous silence en appuyant sur une touche quelconque. Elle retentira de
nouveau après une période définie dans les paramètres de réglages. Le retour de la température dans les plages définies
annule automatiquement l'alarme.
Au cas où l'alarme perdurerait plus de 4 heures, appeler votre revendeur Foster.
Alarme basse température
S'affiche.
Une alarme sonore retentit et peut être mise sous silence en appuyant sur une touche quelconque (l'appareil continue à
fonctionner). Elle retentira de nouveau après une période définie dans les paramètres de réglages. Le retour de la
température dans les plages définies annule automatiquement l'alarme.
Au cas où l'alarme perdurerait plus de 4 heures, appeler votre revendeur Foster.
Défaut sonde d'air.
S'affiche.
Une alarme sonore retentit et peut être mise sous silence en appuyant sur une touche quelconque.
L'utilisateur ne peut pas résoudre le défaut et doit faire intervenir une société de maintenance agréée Foster.
Pendant cette période l'appareil continuera de fonctionner avec des performances réduites.
Défaut sonde évaporateur. (Appareils avec dégivrage automatique uniquement)
S'affiche.
Une alarme sonore retentit et peut être mise sous silence en appuyant sur une touche quelconque.
L'utilisateur ne peut pas résoudre le défaut et doit faire intervenir une société de maintenance agréée Foster. Pendant
cette période l'appareil continuera de fonctionner avec des performances normales, mais ce défaut aura un effet de
réduction de l'efficacité du dégivrage et donc à terme sur les performances de l'appareil.
Instructions de nettoyage Condenseur
Important: Débrancher l'alimentation électrique avant toute intervention .
Retirer les 2 vis maintenant la tôle cache groupe (partie basse de cette tôle) et tirer en arrière en prenant soin de ne pas
endommager les câbles de connexions du régulateur.
Nettoyer la batterie condenseur avec une brosse douce ou un aspirateur.
NOTE: En cas de subsistance de résidus graisseux ou autres il est nécessaire de faire intervenir une société de
maintenance agréé pour un entretien complet.
Bedienung der Steuerung
8
Regler
Inbetriebnahme
9
Bedienungsanleitung
i
Wichtige Notiz:
Fuzzy Logic
Foster Produkte werden entwickelt, um ein größtmögliches Energiesparpotential auszuschöpfen. Der energiesparende ‘Fuzzy
Logic‘ Regler ermöglicht automatisch die optimale Kühlleistung bei gleichzeitigem Energiesparen. Wenn ‘Fuzzy Logic‘ eingeschaltet
ist, dreht der Verdampferlüfter mit weniger Umdrehungen und die Innenraumtemperatur wird um 1°C angehoben auf 2°C. Fuzzy
Logic kann bei Reinigungs- und Wartungsarbeiten ausgeschaltet werden.
Ihr neues Foster Produkt wird betriebsfertig ausgeliefert und ist sofort einsatzbereit. Schließen Sie das Gerät an
die Stromversorgung an und es wird nachfolgend funktionieren.
Das Display wird kurz einen Strich in der Mitte anzeigen und dann zeigen.
Drücken Sie und halten Sie den Knopf 3 Sekunden lang gedrückt, dass Gerät schaltet sich ein.
(Wenn Sie drücken und 5 Sekunden gedrückt halten starten Sie die ‘Test Sequenz’.)
Um die Test Sequenz zu beenden
Drücken Sie einmal während der Prüfungssequenz. Wenn Sie Test Sequenz nicht unterbrechen wird das
Gerät nach beenden des Tests ca. nach 1 Minute den Normalbetrieb aufnehmen.
1. Schrank starten
Drücken Sie und halten Sie den Knopf 3 Sekunden gedrückt und lassen los.
2. Temperatur Feststellen Einstellwert
Drücken Sie Knopf mindestens eine halbe Sekunde um den Einstellwert festzustellen.
3. Manuelle Abtauung
Drücken und halten Sie den Knopf Abtauung für 2 Sekunden gedrückt.
4. Bereitschaftsmodus
Beim Drücken des Knopfs für 3 Sekunden, wird der Regler den Bereitschaftsmodus starten.
Bereitschaftsmodusanzeige
Dieser Wert wird angezeigt während das Gerät ausgeschaltet ist, aber mit Strom versorgt wrid. Dieser Modus darf für innere
Reinigung benutzt werden, und kurze Perioden, an denen das Gerät nicht benötigt wrid.
Sollte das Gerät längere Zeit nicht benötigt werden so trennen Sie es bitte vom Stromnetz.
❄
Page 10

Instructions d'utilisation
Afficheur
8
Mise en route
9
Mode d'emploi
i
Avis important:
Fuzzy Logic
Les produits Foster sont conçus pour consommer le moins d’énergie possible. L’une des caractéristiques d'économie d'énergie
appelée «Fuzzy Logic» permet au régulateur d’ajuster automatiquement les performances de l’appareil pour qu’elles soient en
adéquation avec le niveau d'utilisation tout en maintenant une température optimale du produit conservé. Lorsque «Fuzzy Logic»
est activée, ceci influe sur le comportement des ventilateurs intérieurs et sur la régulation de la température. Cette fonctionnalité
peut être désactivée grâce à l'accès aux paramètres de service.
Votre nouvel appareil Foster est livré prêt à fonctionner. Raccordé au secteur, le régulateur fonctionnera de la
manière suivante:
L'afficheur indiquera brièvement un tiret au centre de l'écran et ensuite affichera . Appuyez sur la
touche pendant 3 secondes puis relâchez.
(Le fait de maintenir cette touche enfoncée pendant 5 secondes aura pour résultat de déclencher une séquence
d’auto-test).
Pour annuler la séquence d’auto-test:
appuyez et relâchez le bouton pendant la séquence d’auto-test.
Si aucune pression n’est exercée sur ce bouton, l’auto-test se poursuivra et une fois terminé l’afficheur attendra
1 minute, puis reprendra son fonctionnement normal.
1. Pour mettre l’appareil en marche
Appuyez sur la touche pendant 3 secondes puis relâchez
2. Pour vérifier la température de consigne
Appuyez sur le bouton pendant au moins une demi-seconde pour afficher le point de consigne
3. Dégivrage manuel
Pour lancer un dégivrage manuel, et maintenez la touche de dégivrage appuyée pendant 2 secondes
4. Mise en veille de l’appareil
Maintenez la touche enfoncée pendant 3 secondes pour mettre l’appareil en mode veille.
Mention veille
Cette mention indique que l’appareil est toujours sous tension mais n’est pas en fonctionnement. Ce mode peut être utilisé pour
le nettoyage interne par exemple ou pour des arrêts de courte durée lorsque l'appareil ne sert pas. Pour des arrêts prolongés,
l’appareil doit être déconnecté du secteur.
❄
deutsch
D
Drehen Sie den Schlüssel um 90˚, um die Tür abzuschließen.
Türschloss
12
Schränke
Der Ein-/Aus-Schalter
für die Beleuchtung
befindet sich an der
Unterseite der
Maschinenraumblende.
12
Innenbeleuchtung bei
Glastüren
Tische
Der Ein-/Aus-Schalter für
die Beleuchtung befindet
sich in Gerät in einem
wasserdichten Gehäuse.
Schränke Tische
10
Warnmeldungen und Alarmzustand
10
français
F
15
Au cas où l'appareil aurait été couché, NE PAS METTRE EN MARCHE avant une période de 60 minutes (sauf pour
les armoires chaudes). Pour mettre en marche, se reporter aux instructions d'utilisation. Laisser l'appareil atteindre
sa température de fonctionnement avant d'introduire des aliments.
Branchement
7
mise en marche
Alarm „Tür auf” (nur bei Geräten mit Türkontaktschalter)
erscheint im Display
Die Hupe ertönt und kann durch Drücken der Taste ausgeschaltet werden.
Die Alarmmeldung im Display erlischt, wenn die Tür wieder geschlossen wird. Den Kundendienst anrufen, wenn der
Alarmzustand nach dem Schließen der Tür noch besteht.
Hochdruck-Alarm (nur bei Geräten mit Kondensatorfühler)
erscheint im Display, die Hupe ertönt.
Prüfen Sie sofort, ob der Verfüssiger verstaubt oder verfettet ist und diesen gegebenenfalls gründlich reinigen (s. auch
„Reinigungshinweise - Verflüssiger”). Die Hupe kann durch Drücken einer beliebigen Taste ausgeschaltet werden, ertönt
jedoch wieder, wenn nach Ablauf der festgelegten Zeit der Alarmzustand noch besteht. Der Alarm wird durch
Wiedererreichen der festgelegten Temperatur gelöscht. Den Kundendienst anrufen, wenn der Alarmzustand nach 4
Stunden noch besteht.
Zu warm
erscheint im Display, die Hupe ertönt.
Die Hupe kann durch Drücken einer beliebigen Taste ausgeschaltet werden, ertönt jedoch wieder, wenn nach Ablauf der
festgelegten Zeit der Alarmzustand noch besteht. Der Alarm wird durch Wiedererreichen der festgelegten Temperatur
gelöscht. Den Kundendienst anrufen, wenn der Alarmzustand nach 4 Stunden noch besteht.
Zu kalt
erscheint im Display, die Hupe ertönt.
Die Hupe kann durch Drücken einer beliebigen Taste ausgeschaltet werden, ertönt jedoch wieder, wenn nach Ablauf der
festgelegten Zeit der Alarmzustand noch besteht. Der Alarm wird durch Wiedererreichen der festgelegten Temperatur
gelöscht. Den Kundendienst anrufen, wenn der Alarmzustand nach 4 Stunden noch besteht.
Alarm Lufttemperaturfühler
erscheint im Display. Lufttemperaturfühler defekt.
In diesem Falle ist es erforderlich, den Kundendienst zu benachrichtigen. Das Gerät läuft weiter, gegebenenfalls bei
reduzierter Leistung. Die Hupe kann durch Drücken einer beliebigen Taste ausgeschaltet werden.
Alarm Verdampferfühler (nicht bei Geräten mit Temperaturbereich +1/+4˚C)
erscheint im Display. Abtaufühler defekt.
In diesem Falle ist es erforderlich, den Kundendienst zu benachrichtigen. Das Gerät läuft weiter, die fehlende
Abtaufunktion wird jedoch zu anderen Problemen führen (z.B. Eisbildung am Verdampfer). Die Hupe kann durch
Drücken einer beliebigen Taste ausgeschaltet werden.
11
Page 11

D
11
Reinigen Sie die Türdichtung(en) wöchentlich mit einer Seifenlauge. Gründlich trocknen. Wenn eine Dichtung
beschädigt ist, muss sie ausgetauscht werden.
Türdichtungen
Reinigung/Wartung
WICHTIG: damit das Gerät sein ansprechendes Äußeres behält, empfehlen wir eine wöchentliche
Reinigung mit einem Sprühreiniger, speziell für Edelstahloberflächen oder heißer Seifenlauge und
einem nicht kratzenden Lappen. Reinigen Sie immer in Schliffrichtung des Bleches.
WARNUNG
Hochalkalische Reínigungsmittel oder solche, die Bleichmittel oder Säuren enthalten, sind ebenso
wie chlorhaltige nicht zur Reinigung von Edelstahloberflächen geeignet. Diese Reinigungsmittel
greifen die Edelstahloberflächen an. Sollte ein Schrank aus Versehen mit solchen
Reinigungsmitteln in Kontakt gekommen sein, reinigen Sie die Stelle SOFORT mit einer milden
Seifenlauge und reiben Sie die Stelle trocken. Benutzen Sie niemals Scheuerpulver oder
Stahlwolle.
Für die Zeit der Reinigung müssen alle Lebensmittel in einem anderen Kühl- oder Tiefkühlschrank
gelagert werden. Lassen Sie das Gerät vor dem Beschicken wieder auf Betriebstemperatur
kommen. Verschüttetes sofort entfernen.
Berühren Sie die Innenwände nicht mit nassen Händen - die Haut könnte festfrieren.
Vorsicht bei Warmhalteschränken!
Reinigungshinweise
13
Achtung: Gerät vor der Reinigung ausschalten.
Die Inneneinrichtung kann ohne Werkzeug entfernt werden. Die Stellleisten werden nach oben gezogen.
Die Roste und Auflageschienen sind spülmaschinenfest. Reinigen Sie die Stellleisten mit warmer Seifenlauge,
gründlich trocknen.
Feste Auflagen (nur bei Fischkühlschränken und Warmhalteschränken): lösen Sie die
Befestigungsschrauben und heben Sie die senkrechten Leisten.
Weingestell: dieses wird mit Schrauben an der Rückwand befestigt.
Stellleisten,
Auflageschienen und Roste
16
Ein verstaubter oder verfetteter Verflüssiger erhöht den Stromverbrauch und kann zu Ausfällen führen.
Wichtig: Ziehen Sie den Stecker aus der Steckdose, bevor Sie die Maschinenraumblende entfernen.
Lösen Sie die beiden Schrauben in der Maschinenraumblende unten. Ziehen Sie die Blende vorsichtig nach vorne,
ohne die Verbindungskabel zur Steuerung zu beschädigen oder zu reißen. Reinigen Sie den Verfüssiger gründlich
mit einem Staubsauger oder einer weichen Bürste. Fettflecken am Verflüssiger müssen mit einem Fett lösenden
Reinigungsmittel entfernt werden.
Nach der Reinigung die Maschinenraumblende wieder anschrauben und das Gerät einschalten.
Bei Nichtachtung dieser Hinweise erlischt die Garantie.
Verflüssiger
deutsch
Schrank
Tisch
21
Bei Tischen müssen 2
Schrauben an der Unterseite
der Maschinenraumblende
gelöst werden. Reinigen Sie
den Verflüssiger mit einem
Staubsauger oder einer
weichen Bürste (keine
Drahtbürste).
3
Maschine UntenMaschine
Oben
français
F
14
Pour ajuster les niveaux de
clayettes, insérer les
extrémités des supports dans
les montants verticaux en
pointant les encoches vers le
bas, puis relever pour mettre
en position. S'assurer que les
supports sont parallèles et
de niveau.
Clayettes et supports
3
Les clayettes doivent être
insérées afin que le
décroché permette la
circulation de l'air sur
l'arrière des appareils.
4
installation
Mise en place/déballage
1
Tout modèle: La fourniture standard
est de 4 roulettes pivotantes de
100mm. Lors de l'installation s'assurer
que l'armoire est de niveau pour
garantir la fermeture correcte de(s)
porte(s). En cas de sol non plan,
insérer des rondelles entre le socle de
l'armoire et la/les roulette(s) jusqu'à la
mise à niveau. Des pieds réglables de
150mm sont également disponibles
sur demande pour tous les modèles.
Des vérins réglables sont également
disponibles sur demande. (la méthode
de fixation reste identique)
Roulettes et piétements
2
Modèles PRO 300/300 H et
PRO 250/250 H uniquement:
Insérer le bac dans les
glissières sous l'armoire et
raccorder la prise électrique à
l'embase située sous
l'appareil. En cas de glissières
trop serrées, desserrer
légèrement pour glisser le
bac et resserrer une fois mis
en place.
Bac de réévaporation
5
IMPORTANT:
Pour l'installation
L'installation de ces produits doit être assurée par un personnel qualifié selon les usages de la
profession et les normes en vigueur.
Pour l'utilisation
Conserver ce document. Il contient des informations essentielles quant au fonctionnement,
l'entretien et le nettoyage de votre matériel.
IMPORTANT: Pour assurer une ventilation correcte de l'appareil, il est nécessaire de prévoir un espace de
150mm entre le dessus du groupe frigorifique et le plafond du bâtiment. Dans la mesure du possible, ne pas
positionner l'appareil près d'une source de chaleur.
Déballage
Le meuble est livré sur palette avec un emballage recouvert d'un film thermorétractable. Les documents se
trouvent dans une pochette à l'intérieur du meuble. Retirer le film de protection recouvrant le meuble en prenant
soin de ne pas endommager l'appareil avec un outil pointu ou tranchant. Oter les étiquettes de contrôle.
Dépalettisation
Retirer la clayette supportant le carton avec les pieds ou les roulettes.
Dévisser les boulons qui maintiennent le meuble sur sa palette et faire glisser de moitié l'appareil vers l'avant.
Fixer les roulettes avec frein ou les pieds dans les mêmes filetages que les fixations sur la palette.
Pour mettre en place les piétements arrière, mettre les freins aux roulettes avant et basculer l'appareil pour enlever
la palette et accéder aux fixations. S'assurer que tous les piétements sont fermement serrés.
Dépalettisation des meubles bas
Comptoirs livrés sur roulettes-
Enlever les accessoires fournis à l'intérieur des appareils et s'assurer que les portes et tiroirs soient refermés à clé.
Couper les fixations plastiques qui retiennent les roulettes avant sur la palette. Libérer les roulettes de leur frein et
avec précaution, faire rouler le meuble pour le sortir de la palette. Remettre le meuble dans sa position dès cette
opération terminée.
Comptoirs livrés sur pieds-
Enlever les accessoires fournis à l'intérieur des appareils et s'assurer que les portes et tiroirs soient refermés à clé.
Enlever les cales de bois qui bloquent les pieds sur l'avant et couper les fixations plastiques pour libérer le meuble.
Avec précaution, manoeuvrer le meuble pour le sortir de la palette.
NB: Modèles PRO 300/300 H et armoires à poisson uniquement: Prendre soin de ne pas
endommager la sortie d'écoulement située sous l'armoire. Toutes les armoires et meubles bas sont lourds et
volumineux. Ils doivent être manipulés avec précaution. Sur les armoires doubles portes, veillez à mettre 3
roulettes à l'avant de l'appareil.
Clayette
Ces appareils sont fournis
avec des piétements
spéciaux et des accroches
particulières. Ils doivent être
installés par du personnel
spécialisé dans ce domaine.
Kit 'marine'
6
Pieds Marine
Fixation
Fixations Particulières
Meubles Bas Kit Marine
Armoires
Meubles Bas
Castors Legs
Armoires Meubles Bas
Pour un montage correct des
roulettes, se référer aux instructions
collées à l'arrière de l'appareil
MISE AU REBUT
Les appareils frigorifiques recèlent des composants qui peuvent présenter un danger pour
l’environnement. La mise au rebut de ces appareils doit être effectuée par un organisme agréé
en conformité avec la législation et la réglementation en vigueur dans le pays concerné.
14
15
Page 12

deutsch
D
Störung
Reparaturen dürfen nur von einem Fachmann durchgeführt werden.
Kontrollieren Sie folgendes, bevor Sie den Kundendienst anrufen:
Stromausfall
Störmeldung wie vorher beschrieben
Stecker nicht richtig eingesteckt
Wenn ein Serviceeinsatz notwendig ist, bitte Modell- und Serien-Nummer (Typenschild befindet sich im
Gerät), gegebenenfalls auch Fehlermeldung, angeben.
Fehlerdiagnose
21
Rohe und gekochte Speisen
getrennt lagern. Keine offenen Behälter verwenden.
Bei Warmhalteschränken
Befeuchtungswanne mit
Wasser füllen.
Lagerung
20
Den Schrank nicht überladen. Den Luftstrom
nicht blockieren.
Umluft
Die Ladung gleichmäßig
verteilen.
Höchstbelastung der
Roste 40 kg.
Der Boden des Gerätes
sollte nicht als Ablage
benutzt werden.
Roste und Schubladen
18
19
40Kg
Herausnehmen der Stellleisten
Auflageschienen Auflageschienen bei
Fischkühlschränken
Auflageschienen bei
Warmhalteschränken
Gekühlte Schubladen
Um diese Schubladen zu
Entfernen, ziehen Sie die
Schublade maximal aus
damit die Walzen (B) durch
die Gleitschienen der
Schubladen geführt werden
können.
Bitte achten Sie auf die
Reihenfolge. Wenn Sie die
Schubladen in verschiedene
Reihenfolgen zurücksetzen,
könnte es Komplikationen
verursachen.
Herausnehmen der
Schubladen
Herausnehmen
der gekühlten
Schubladen.
Ziehen sie die
Schublade so
weit wie möglich
heraus, bis die
Rollen (B) durch
die Schlitze in
den
Teleskopschienen
gelangen.
Betrieb
12
deutsch
D
13
17
 Loading...