

Foscam P2P Quick Installation Manual
One Minute Quick Installation Guide
P2P HD IP Camera
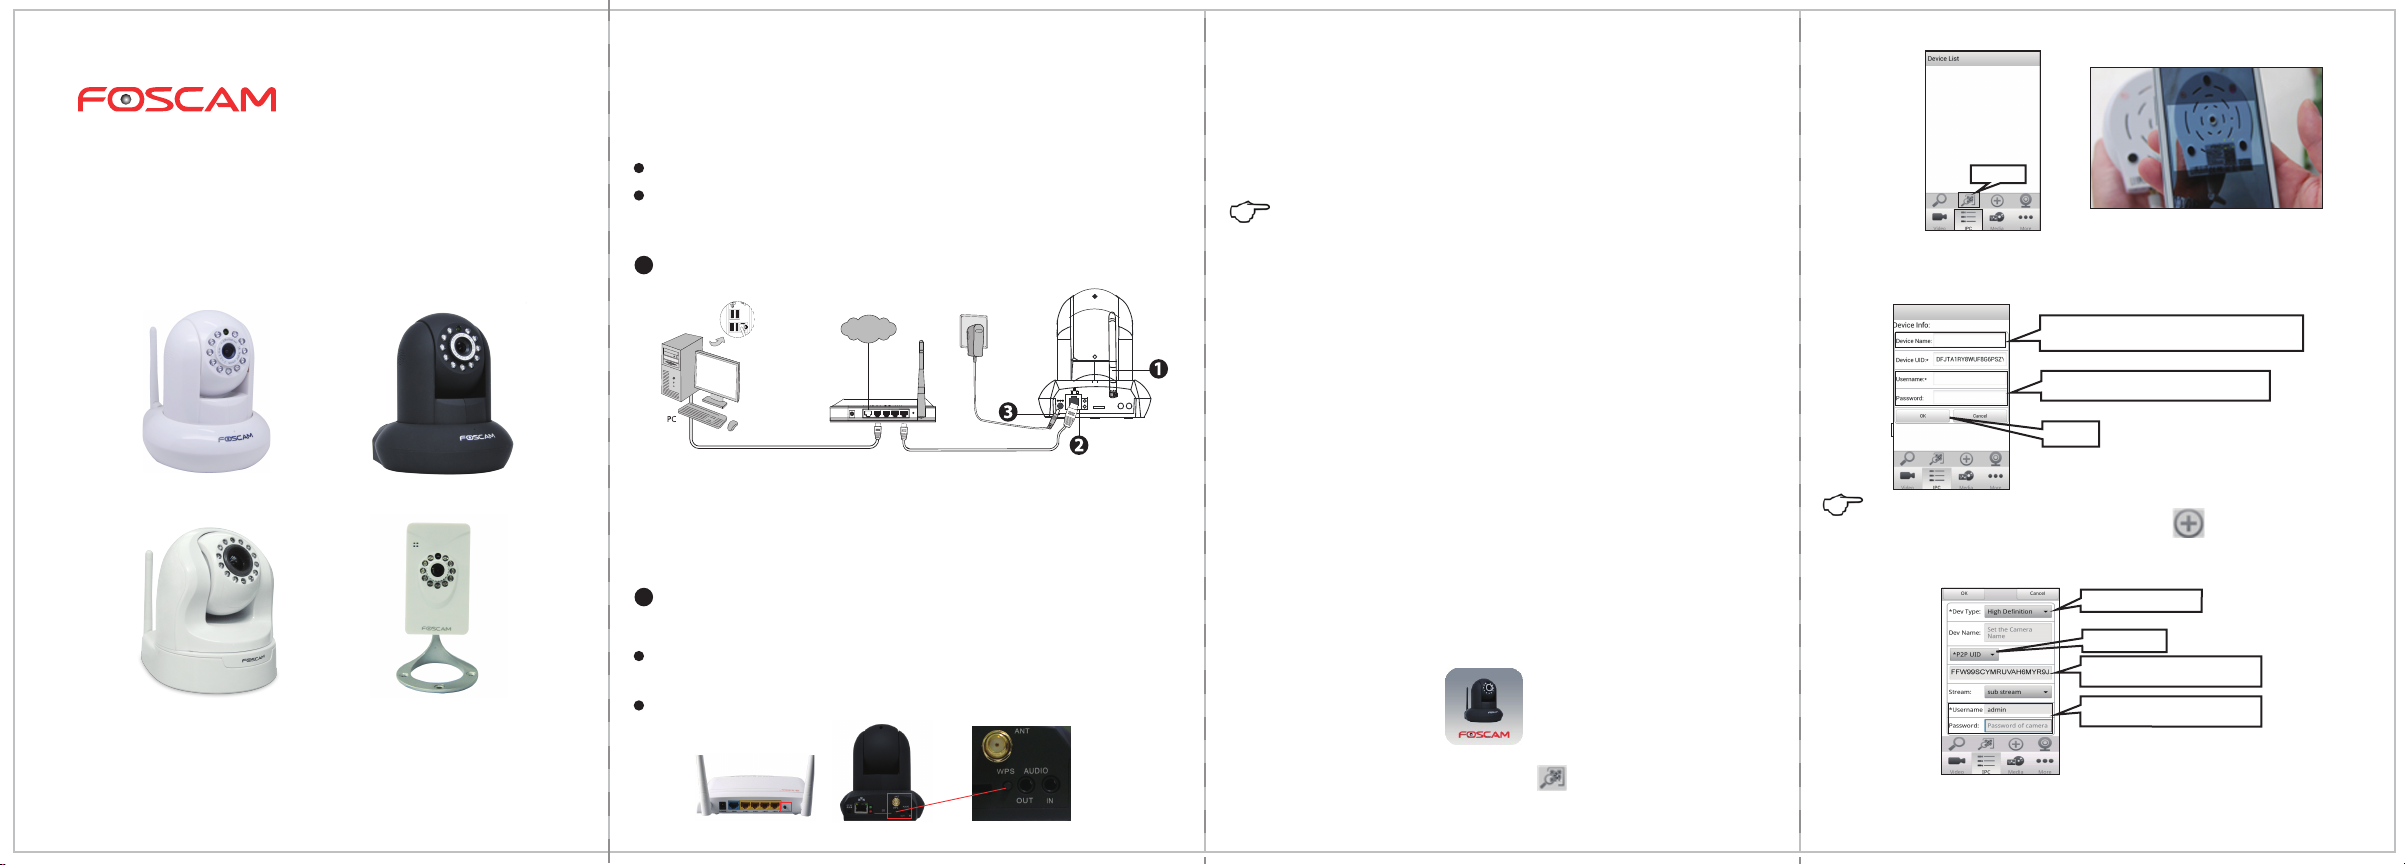
1 Connect the IP Camera to the Internet
You just need to choose either of the following two ways, quick connect
cameras and the internet.
Wired Connection
WPS(Wi-Fi Protected Set-up)Connection
Wired Connection
Internet
Router
WPS
① Mount the antenna and make it stand vertically(only for the device
with external antenna).
② Connect the camera to the LAN network (router or switch) via network
cable.
③ Connect the power adapter to the camera.
WPS Connection
Before using the WPS connection,the matters need attention.
Please make sure that your router supports WPS function, and has
been connected to the network.
If the camera have connected the network cable, please disconnect it.
(FI9821E does not support WPS.)
ANT
AUDIO
SD
OUT
IN
① Mount the antenna and make it stand vertically.
② Connect the power adapter to the camera.
③ Press and hold the WPS button for two seconds.
④ Press the WPS button on your wireless router within 60 seconds.
⑤ The camera will automatically create a secure wireless connection to
your router in about 60 seconds.
Note:
If your router does not support WPS or WPS connection failed, please refer
to the IP Camera User Manual for manual wireless connection setup.
2 Access the IP Camera by Smart Phone
(Android or iOS operating system)
If you use android or iOS mobile device, you can access the IP camera by
Foscam APP. Mobile phone connecting the camera after the success,
recommend that you modify the user name and password.
This document takes Android system as an example, the iOS and android
interface only subtle differences, you can still complete the operation in
accordance with this example.
① Download and Install the Foscam APP
Search and install Foscam Viewer on APP Store or Google Play for
iOS or Android devices.
② Click the Foscam Viewer on your phone to run the APP.
Click here
④ When you finish the QR code scanning, the UID will be input
automatically, then input Device Name, Username(default is admin),
Password(blank by default),click OK.
If you scan a QR code on the bottom of the camera
successfully, the UID will be displayed automatically.
Default username is admin with no password.
Click OK.
Note:
If the QR code scanning is not successful, click , please input the UID
on the bottom of the camera manually. The procedure for inputting data
is as follows.Click OK.
Select High Definition.
Select P2P UID.
Please input the UID on the bottom
of the camera manually.
Default username is admin with no
password.
ShenZhen Foscam Intelligent Technology Co.,Ltd
V4.3
③ In the IPC management interface,click . Your phone will go into the
QR code scanning mode.
⑤ So far, the camera has been added successfully. You can click it from
the list to check the live video.
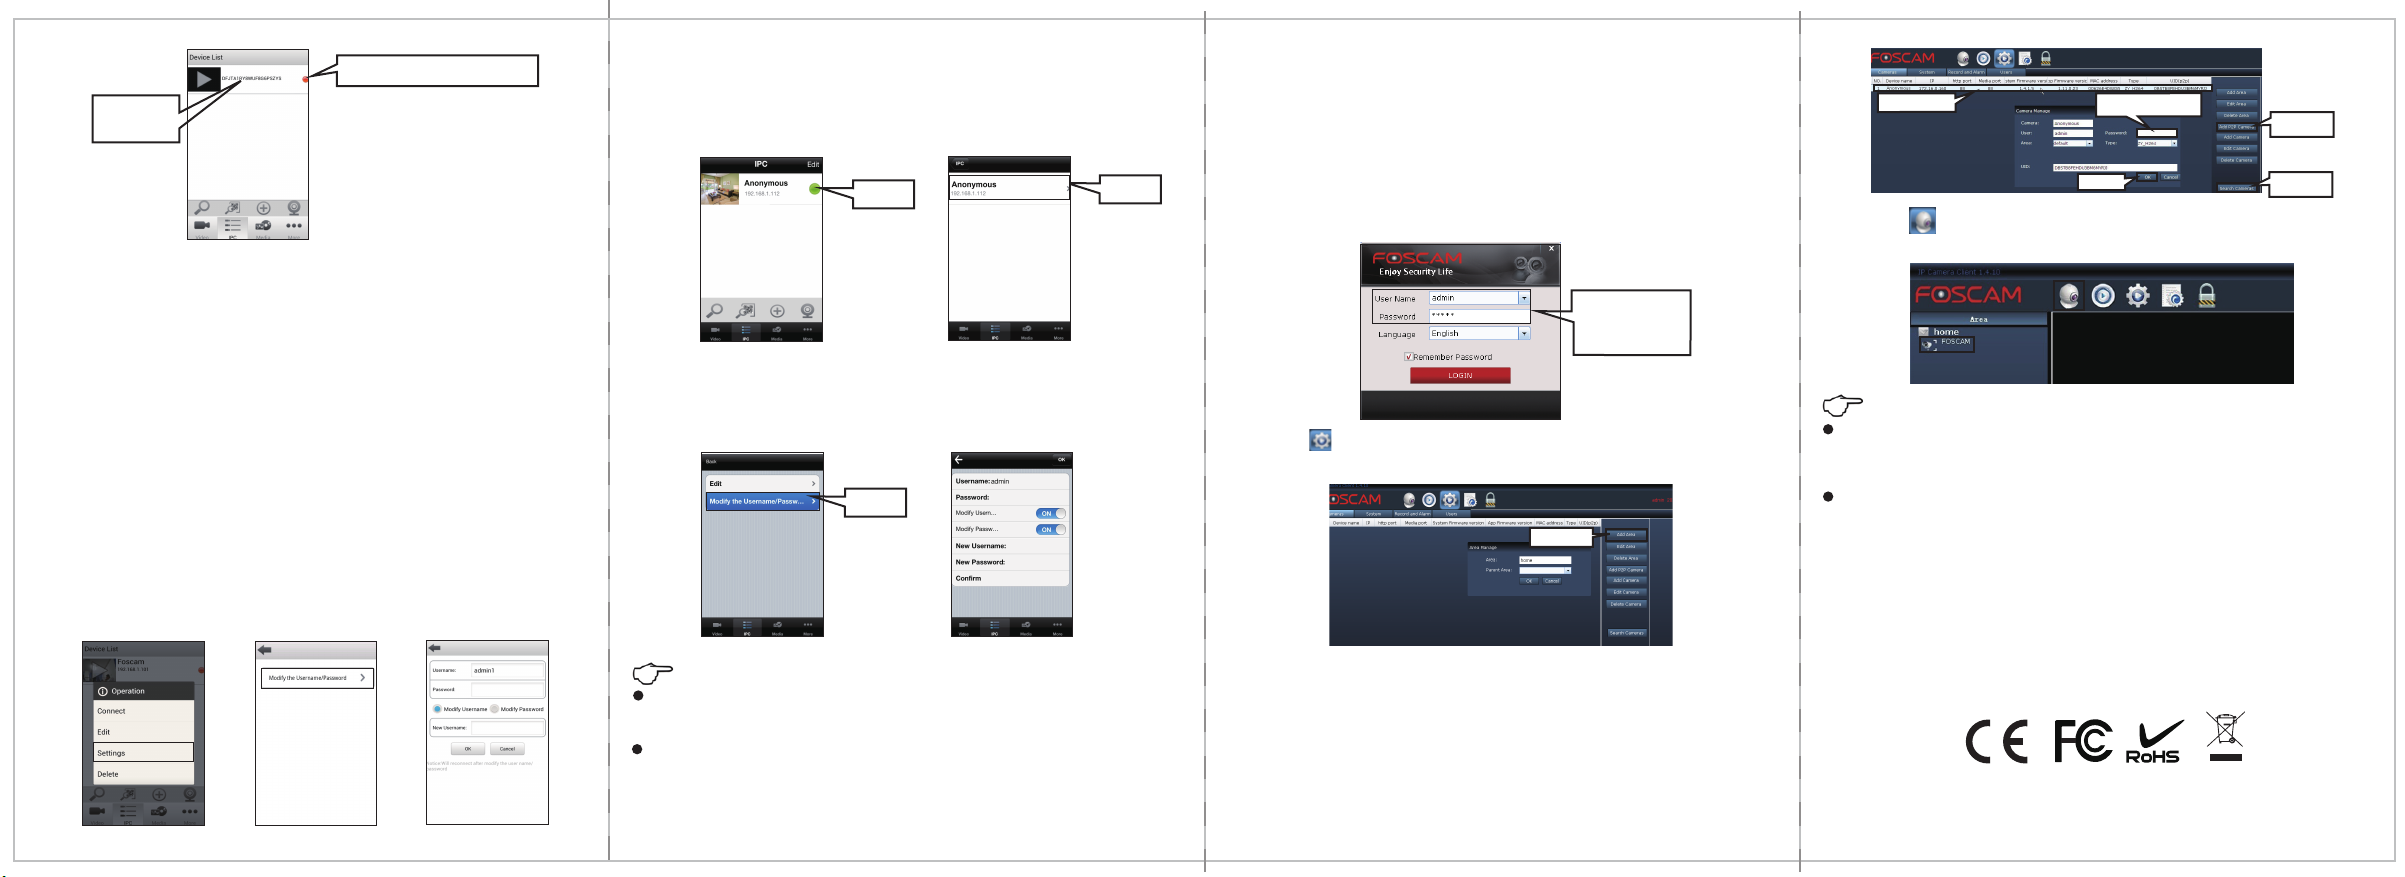
The green point means the connection
is successful.
Click here to
connect to the
camera.
If your IP Camera is the newest software version, when you
log in first time, it will come to the dialog of modifying the
username and password automatically. Input the new username
and password you like, then use the new username and
password to log in again.
3 Modify the Username and Password
by Smart Phone
Mobile phone connecting the camera after the success, recommend that
you modify the username and password.
★ Android devices
Press the camera in the IPC device list more than one second to pop-up
several options. Select Settings button, then tap the "Modify the
Username / Password". Enter the interface to modify the username
and password.
★ iOS devices
Click Edit in the IPC device list. The IPC device list appears. Click the
device has connected successfully.
Click Edit.
Tap the "Modify the Username / Password", enter the interface to
modify the username and password.
Click here.
Note:
If you want to know more details of the Android APP, refer to the
Android APP User Manual.
If you want to know more details of the iOS App, please refer to the iOS
App User Manual.
Click here.
4 Access the IP Camera by Personal Computer
① If you want to access your camera by windows PC, please install the
Central Management Software in the CD.If your PC doesn’t have CD driver,
you can download the latest software from our website.
② Double click the icon on your desktop to run the CMS software.Input
admin both in User Name and Password of the CMS software,then click
LOGIN.
The default User
Name and Password
of the CMS software
are both admin.
③ Choose on the top, and click Add Area, input an Area name then
click OK.
Click Add Area.
④ Click Search Cameras, the camera has been connected successfully will
be appears(If not searched, please check the state of camera network
connection, and whether the camera and computer are in the same LAN. ).
Select the camera.
⑤ Click Add P2P Camera, the camera information is automatically
displayed. Input Password of the camera(blank by default), keep the other
parameters as default, then click OK.
2.Select the camera.
4.Input the Password(blank
by default).
5.Click OK.
3.Click Add P2P
Camera.
1.Click Search
Cameras.
⑥ Choose on the top,and click the camera in the list, then you can
connect the camera and see the live video.
Note:
If you want to access the IP Camera by web UI or on MAC OS, please refer
to the IP Camera User Manual to use IP Camera Tool and configure the
DDNS for remote access.
If you want to know the more operation of the CMS software, please refer
to the Central Management Software User Manual.
5 Technical Support
If you have problems with your Foscam IP camera,please contact the
Foscam reseller you purchased from, or you can e-mail the Foscam
headquarter technical support team: tech@foscam.com.
Your valuable comments and suggestions on improving Foscam products
are welcomed!
ShenZhen Foscam Intelligent Technology Co., Ltd
www.foscam.com
 Loading...