

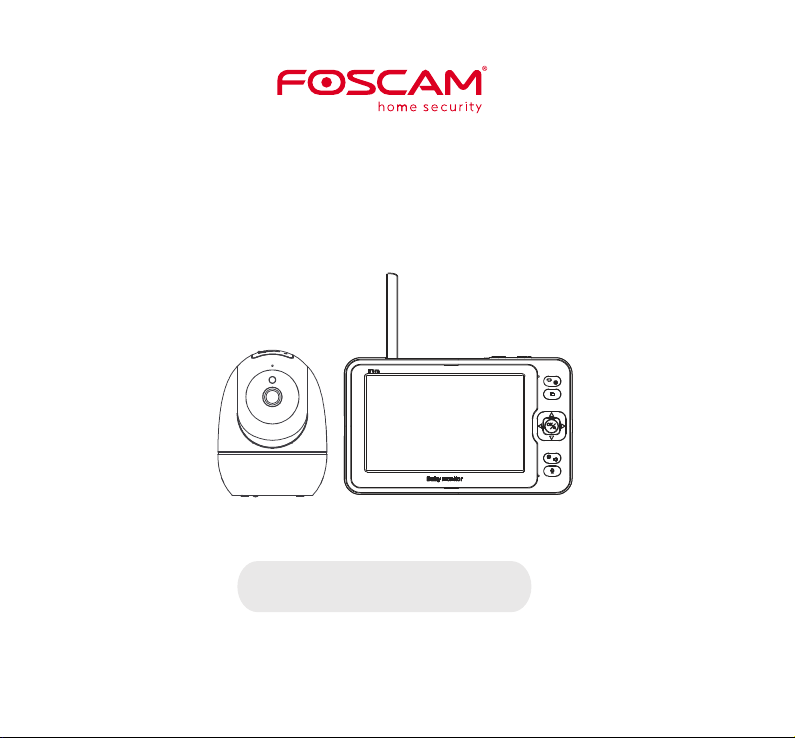
5 INCH 1080P FULL HD
Baby Monitor
User Manual
Please read this manual thoroughly before use and keep it well for future reference.
SAFETY CAUTIONS
Incorrect operation of the product may lead to safety risks. Therefore, we STRONGLY recommend you
read the instructions carefully before the first use.
Please ensure that the proper power supply is used before using the camera.
Please install the camera and bracket securely using the screws provided.
Please use this product within the temperature range. When the ambient temperature is too high or
too low, it may cause product failure.
To avoid the risk of fire or electric shock, please keep your camera in a cool, dry place.
Please keep the camera out of reach of small children.
This product is not a toy; children should use the product under adult supervision.
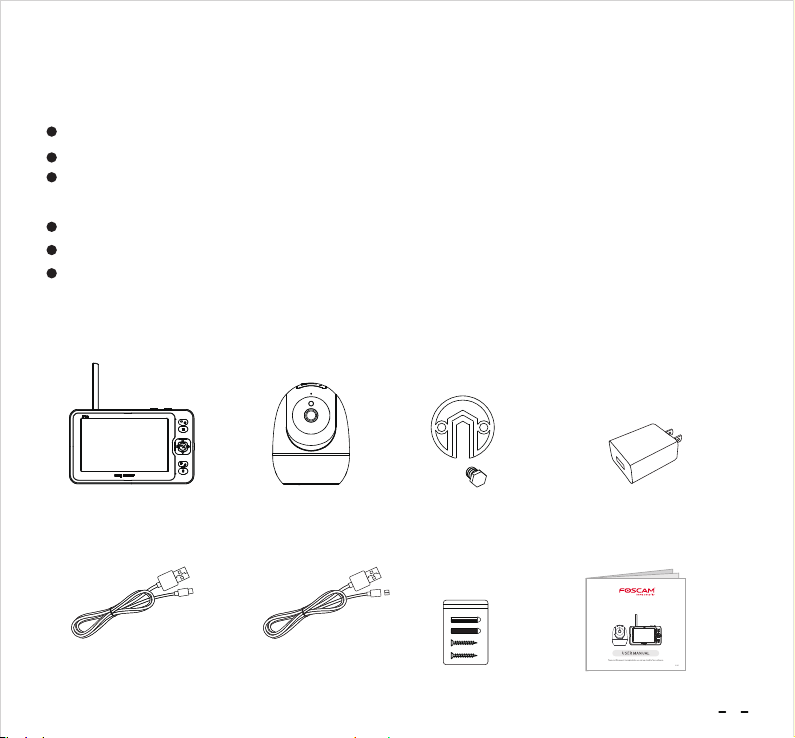
PACKING LIST
Monitor x1
Type-C Cable x1
(For monitor)
Camera x1
Micro USB Cable x1
(For camera)
Mounting Bracket x1
Screws x1
Power Adapter x2
5 INCH 1080P FULL HD
Baby Monitor
User Manual x1
1
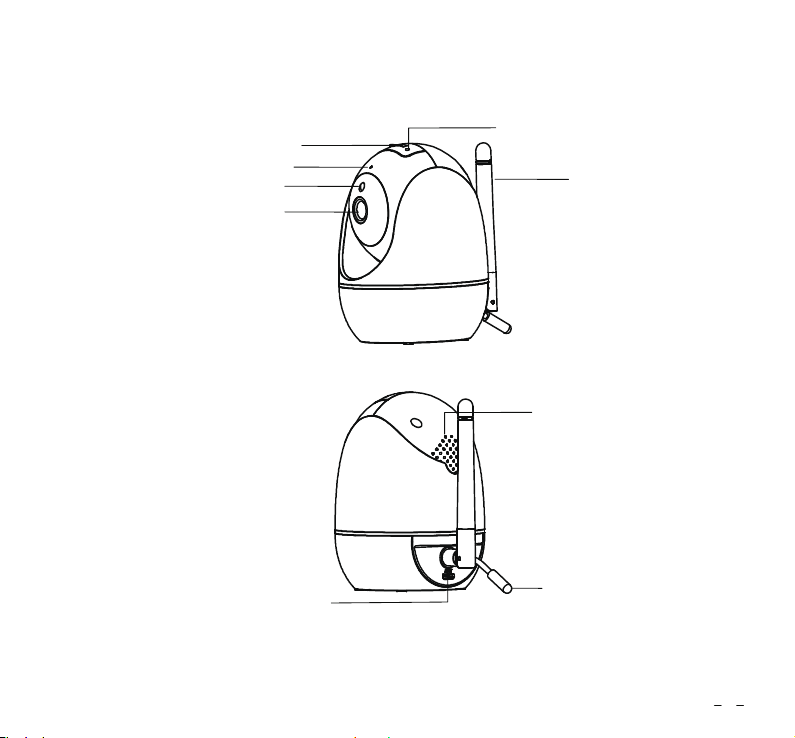
PRODUCT OVERVIEW
Camera
Micro SD Card Slot
Microphone
Night Vision Sensor
Camera Leins
Reset Button
Antenna
Speaker
Micro USB Port
Temperature Sensor
2

Monitor
Screen: Before the first use, please remove the protective film on the screen.
Power/Sleep Button: Long press to power on/off the monitor; short press to turn on/off the screen.
VOX: When you watch the live video, press it to turn on/off the sound detection.
Power Indicator: It is green when the battery is fully charged, and will turn red when the battery is low.
Back/Menu: Press it to enter menu page or as a back button.
Camera Switch: To switch among cameras or loop the live video if 2 or more cameras are connected
with the monitor.
Up: Press it to tilt the camera upward or to change your selection upward.
Left: Press it to pan the camera leftward or to change your selection leftward.
Right: Press it to pan the camera rightward or to change your selection rightward.
OK: Press it to zoom in/out or to confirm your selection.
Down: Press it to tilt the camera downward or to change your selection downward.
Volume/Brightness: Press it to bring up the Volume/Brightness menu, then press Left/Right/Up/Down
to adjust the monitor's volume or brightness.
Talk: Press and hold it to talk with your baby near the camera.
Microphone
3
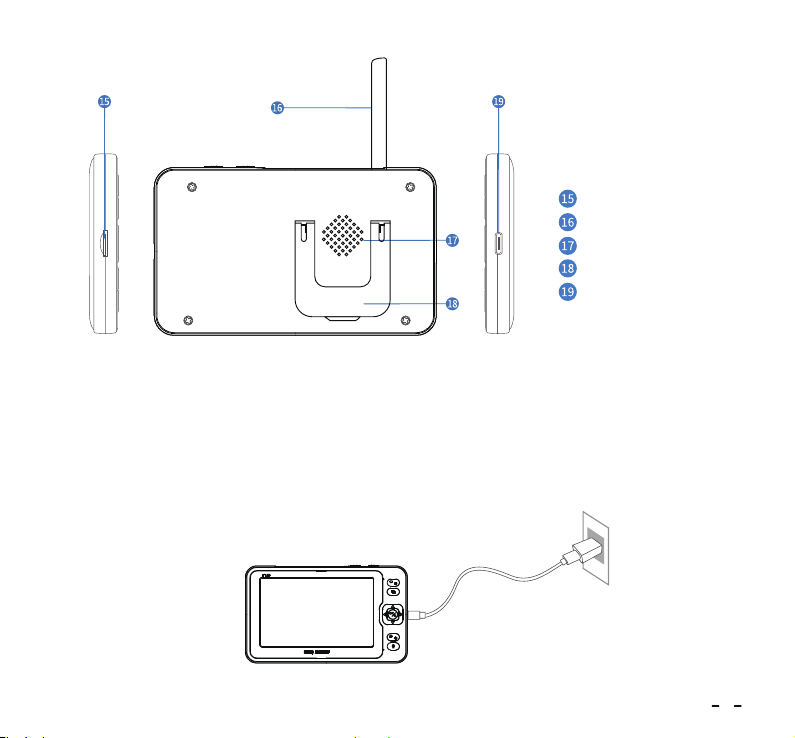
Memory Card Slot
Antenna
Speaker
Stand
Type-C Port
GETTING STARTED
Step 1:
Charge the monitor by connecting the Power Adapter to the monitor and a socket. It takes about 4 hours
for the monitor to be fully charged, and the battery lasts about 8 hours.
4

Step 2:
Connect the Power Adapter to the camera and a socket to power on the camera. There will be a beep
from the camera after it is powered on.
Step 3:
Place the camera at least 3ft/1m away from your baby.
Step 4:
Gently press and hold the Power Button for 3s to turn on the monitor, then you can see the live view.
Notes:
Generally, the camera has been paired with the monitor already. If it is not paired, please refer to
the next section to pair it manually.
Install a memory card to the monitor or camera before you power on it if you would like to record
videos.
After powering on your monitor, please set time & date firstly.
The monitor will not power on or will display abnormalities if its power is too low. Please try again
after 10 minutes of charging.
5
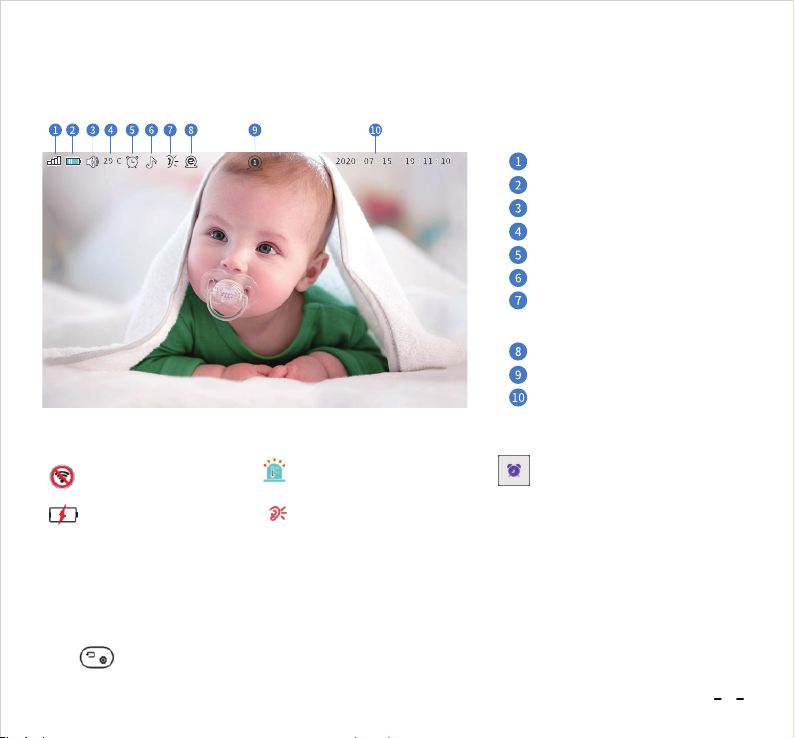
FUNCTION OVERVIEW
Monitoring Interface
Signal
Battery Power Status
Sound
Temperature
Feeding Reminder Enabled
Music Enabled
Sound Detection: it will turn
up if you enable VOX function.
Live Video Loop Enabled
Camera Channel
Date and Time
Other icons will be displayed on the monitoring interface when an alarm or notication for abnormality
is issued.
: No signal
: Low battery : Sound alarm
: Temperature alarm
Camera Setting
1. Pair a New Camera with the Monitor
Step 1:
Press to enter the menu page and select Cameras.
: Feeding reminder
6

Step 2:
Select an unpaired channel (e.g. Channel 2) and press OK, the monitor will start searching for a camera.
Tip:
A grey icon indicates that no camera is paired with this channel, while a green icon indicates
that a camera has been paired with this channel.
7
 Loading...