

Foscam FI8910W, IP Camera s User Manual
User Manual
Model: FI8910W
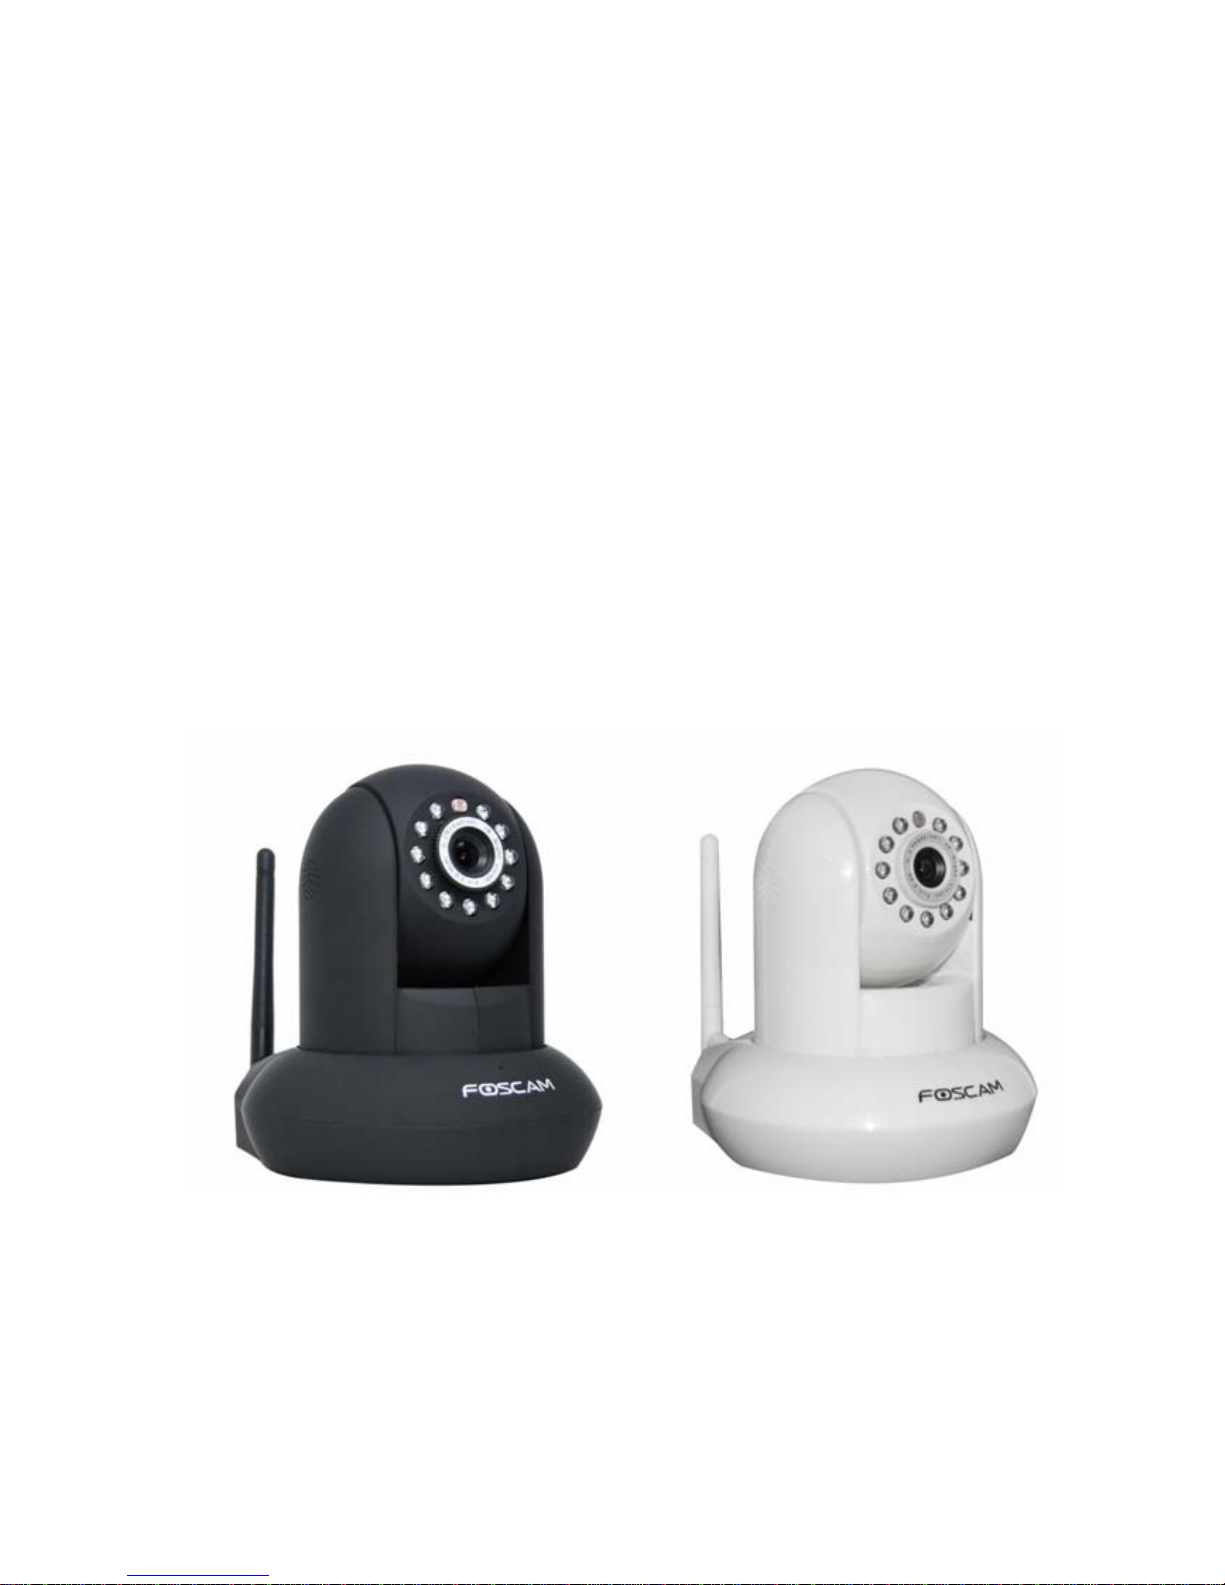
Indoor Pan/Tilt Wireless IP Camera
NIGHT VISION & REMOTE PAN / TILT ROTATE/
TWO WAY AUDIO
Color: Black Color: White

CONTENTS
1 WELCOME..................................................................................................................................................... 1
1.1 Features .................................................................................................................................................. 1
1.2 Packing List ............................................................................................................................................. 2
1.3 Product views .......................................................................................................................................... 2
1.4 Preparations before use .......................................................................................................................... 4
2 SOFTWARE OPERATION ............................................................................................................................. 6
2.1 IP Camera Tool ........................................................................................................................................ 6
2.2 Camera Login .......................................................................................................................................... 9
2.3 Device Status......................................................................................................................................... 14
2.4 For Visitor .............................................................................................................................................. 15
2.5 For Operator .......................................................................................................................................... 16
2.6 For Administrator ................................................................................................................................... 19
3 How to configure settings in For Administrator............................................................................................. 20
3.1 Alias Settings ......................................................................................................................................... 20
3.2 Date & Time Settings............................................................................................................................. 21
3.3 User Settings ......................................................................................................................................... 21
3.4 Multi-Device Settings ............................................................................................................................. 22
3.5 Basic Network Settings.......................................................................................................................... 26
3.6 Wireless LAN Settings ........................................................................................................................... 28
3.7 ADSL Settings........................................................................................................................................ 28
3.8 UPnP Settings ....................................................................................................................................... 29
3.9 DDNS Service Settings.......................................................................................................................... 29
3.10 Mail Service Settings ........................................................................................................................... 29
3.11 MSN Setting......................................................................................................................................... 30
3.12 FTP Service Settings ........................................................................................................................... 32
3.13 Alarm Service Settings......................................................................................................................... 34
3.14 PTZ Settings........................................................................................................................................ 38
3.15 Upgrade Device Firmware ................................................................................................................... 39
3.16 Backup & Restore Settings.................................................................................................................. 39
3.17 Restore Factory Settings ..................................................................................................................... 39
3.18 Reboot Device ..................................................................................................................................... 40

WWW.FOSCAM.COM FI8910W User Manual
Shenzhen Foscam Intelligent Technology Co., Limited
Tel: 86 755 2674 5668 Fax: 86 755 2674 5168
1
3.19 Log....................................................................................................................................................... 40
3.20 Back..................................................................................................................................................... 40
4 APPENDIX ................................................................................................................................................... 41
4.1 Frequently Asked Questions.................................................................................................................. 41
4.2 Default Parameters................................................................................................................................ 44
4.3 Specifications......................................................................................................................................... 45
5 OBTAINING TECHNICAL SUPPORT.......................................................................................................... 46
1 WELCOME
IPCAM is an integrated IP Camera solution based on the TCP/IP standard. It combines a high
quality digital video camera, with a powerful web server, to bring clear video to your desktop from
anywhere on your local network or the Internet.
The basic function of IPCAM is to provide remote video on the IP network. High quality video
images are transmitted at up to 30fps on the LAN/WAN by using MJPEG hardware compression
technology.
The WEB server within IPCAM supports various internet browsers including Internet Explorer.
Therefore the management and maintenance of your device is simplified, by using the network to
remotely configure, start-up, and upgrade the firmware of your IPCAM. You can use IPCAM to
remotely monitor your home or your office. Controlling the IPCAM and managing images is
simplified by using the provided web interface across the network utilising either wired or
wireless connectivity.
1.1 Features
● Powerful high-speed video protocol processor
● High Definition Color CMOS Sensor
● 300K Pixels
● IR night vision (Range: 8m)
● Pan 300 degree, tilt 120 degree
● Optimized MJPEG video compression for transmission
● Multi-level users’ management and passwords definition
● Embedded Web Server for users to visit by IE
● Wi-Fi compliant with wireless standards IEEE 802.11b/g/n
WWW.FOSCAM.COM FI8910W User Manual
● Supports IR_CUT
● Supports Dynamic IP (DDNS) and UPnP LAN and Internet (ADSL, Cable Modem)
● Motion detection activates alarm
● Supports image snapshot
● Supports multiple network protocols: HTTP/TCP/IP/UDP/STMP/DDNS/SNTP/DHCP/FTP
● Supports WEP/WPA/WPA2 encryption
● Supports Daylight Saving Time
● Supports MSN
● Supports Gmail as sender on mail service settings
●Supports audio on Firefox, Google Chrome and Safari
1.2 Packing List
Open the package and verify the contents with the following list:
• IPCAM × 1
• Wi-Fi Antenna×1 (only available for wireless model)
• DC Power Supply × 1
• Quick Installation Guide ×1
• CD × 1 (Includes IPCAM user manual, IP camera tool, FOSCAM Video Installation)
• Network Cable × 1
• Mounting bracket × 1 (option)
• Warranty Card × 1
NOTE: Please Contact us immediately if any parts are found to be missing or damaged.
1.3 Product views
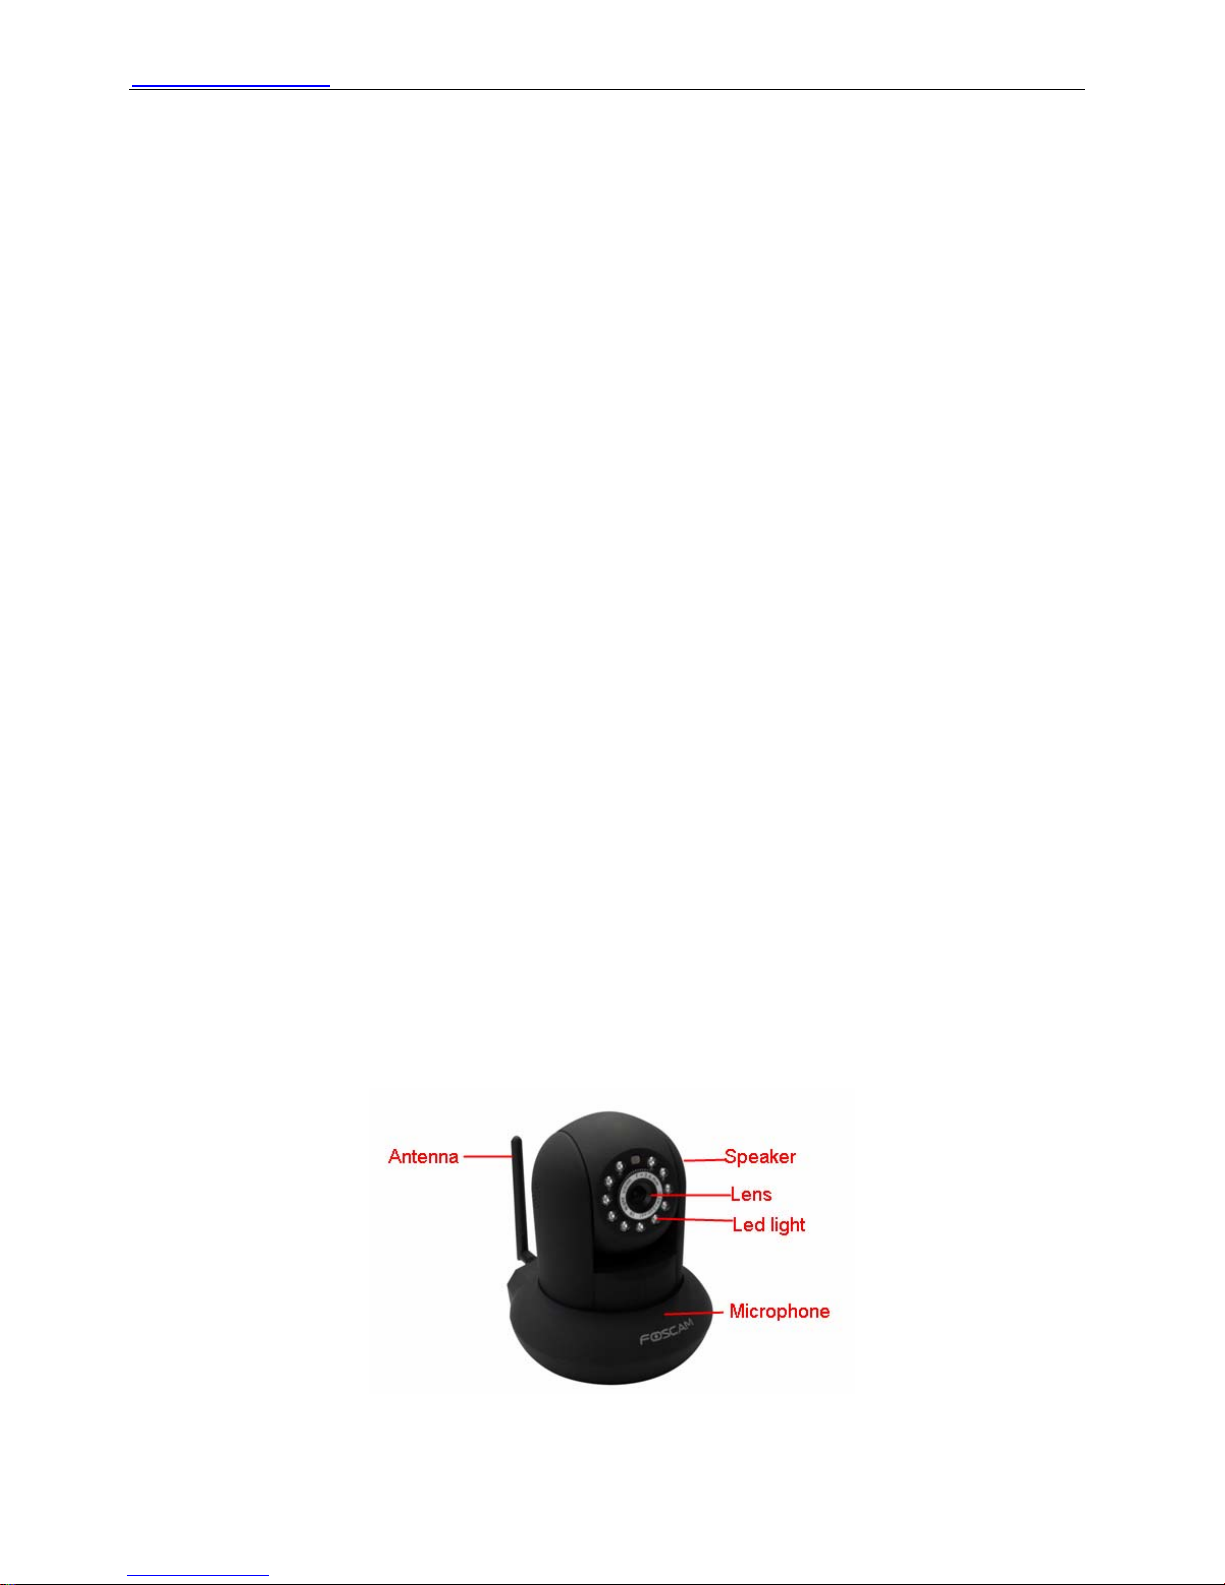
1.3.1 Front View
Figure 1.1
Infrared LED: 11 IR LEDs
Shenzhen Foscam Intelligent Technology Co., Limited
Tel: 86 755 2674 5668 Fax: 86 755 2674 5168
2
WWW.FOSCAM.COM FI8910W User Manual
LENS: CMOS sensor with fixed focus lens
WIFI Antenna: Wireless Antenna
Microphone: Built-in microphone
Speaker: Built-in speaker
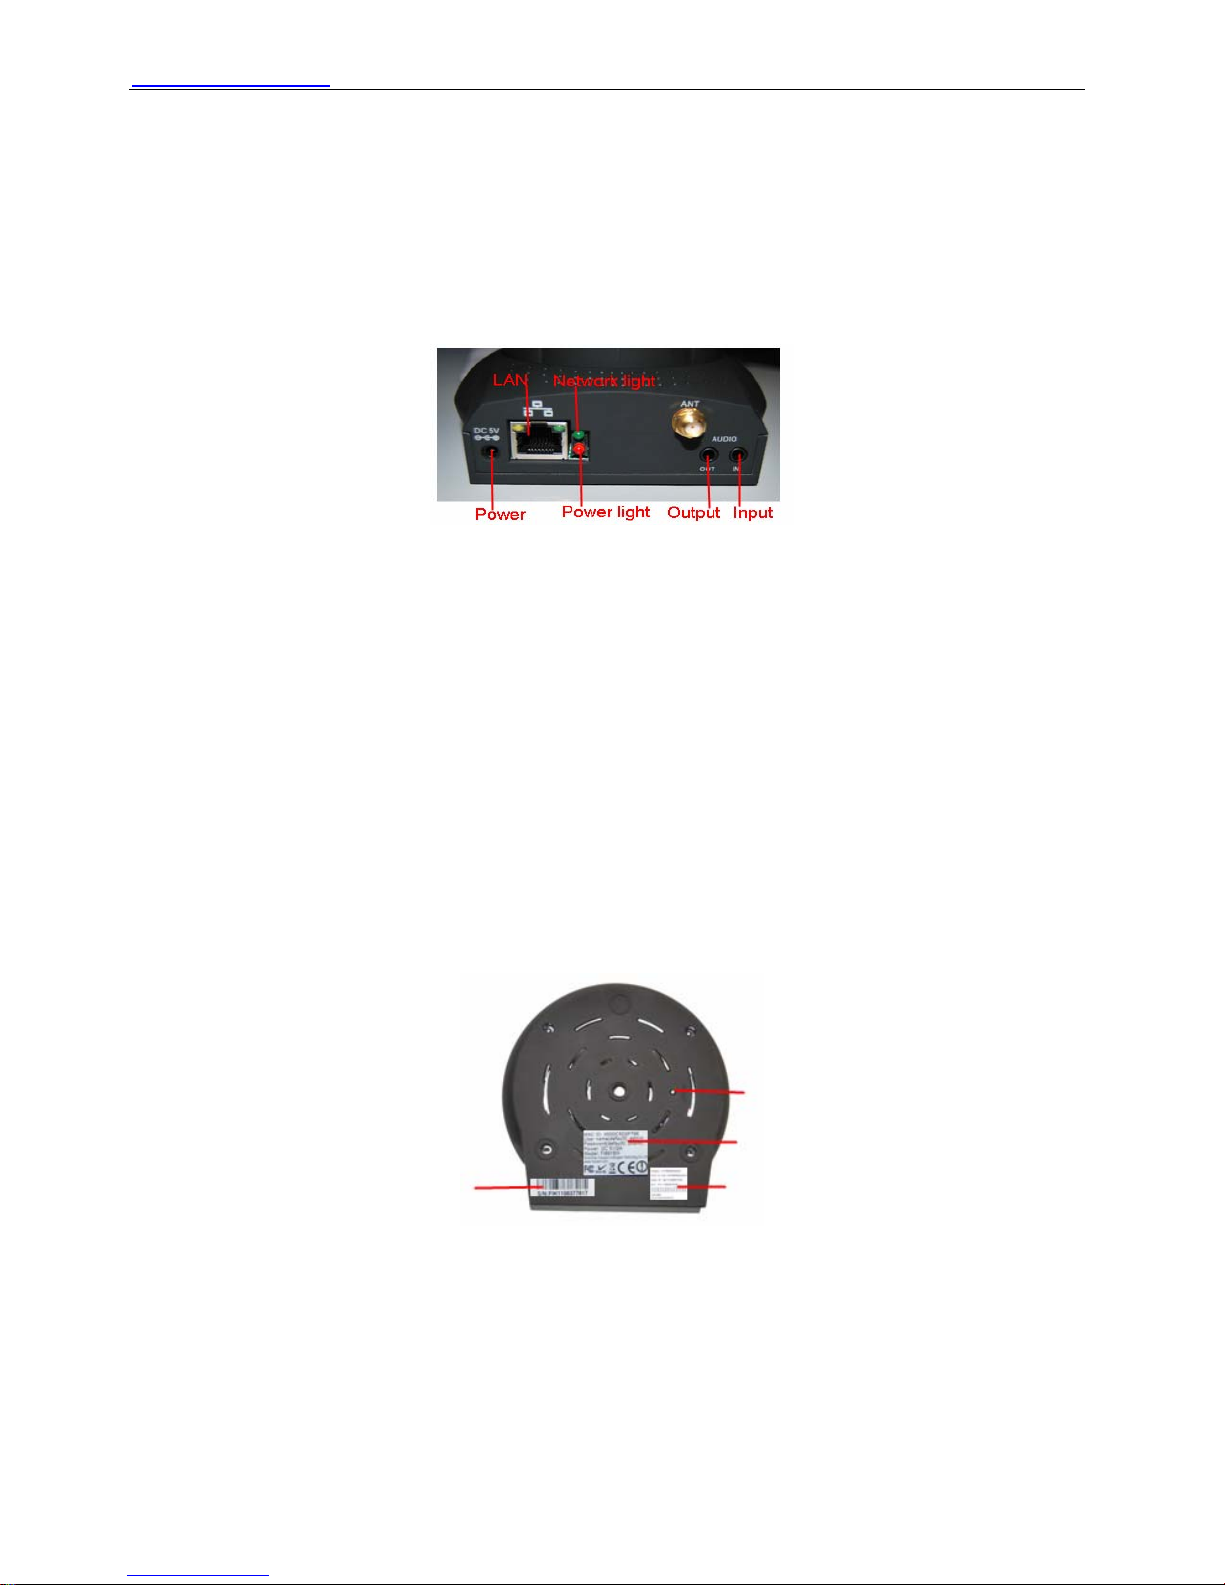
1.3.2 Back View
Figure 1.2
LAN: RJ-45/10-100 Base T
Power: DC 5V/2A Power supply
Network Light: The LED will blink when power and network cable are plugged in
Power Light: If the power adapter works well, the light will turn on
Audio Input: This jack is used to plug an external microphone
Audio Output: This jack is used to plug an external speaker
1.3.3 Bottom View
There are up to three labels located on the body of the camera; this is an important feature of
original Foscam cameras. If your camera does not have labels as shown in Figure 1.3 ,it may be
a clone one. Cloned Foscam cameras can not use original firmware and are not eligible for
warranty or technical services.
Reset button
MAC address of wired connection
S/N of FOSCAM
MAC address of wireless connection
Figure 1.3
Reset button: Press and hold down the RESET BUTTON for 15 seconds. when released the IP
camera will be reset back to factory default settings. You must power on the camera before
reset.
Shenzhen Foscam Intelligent Technology Co., Limited
Tel: 86 755 2674 5668 Fax: 86 755 2674 5168
3
WWW.FOSCAM.COM FI8910W User Manual
1.4 Preparations before use
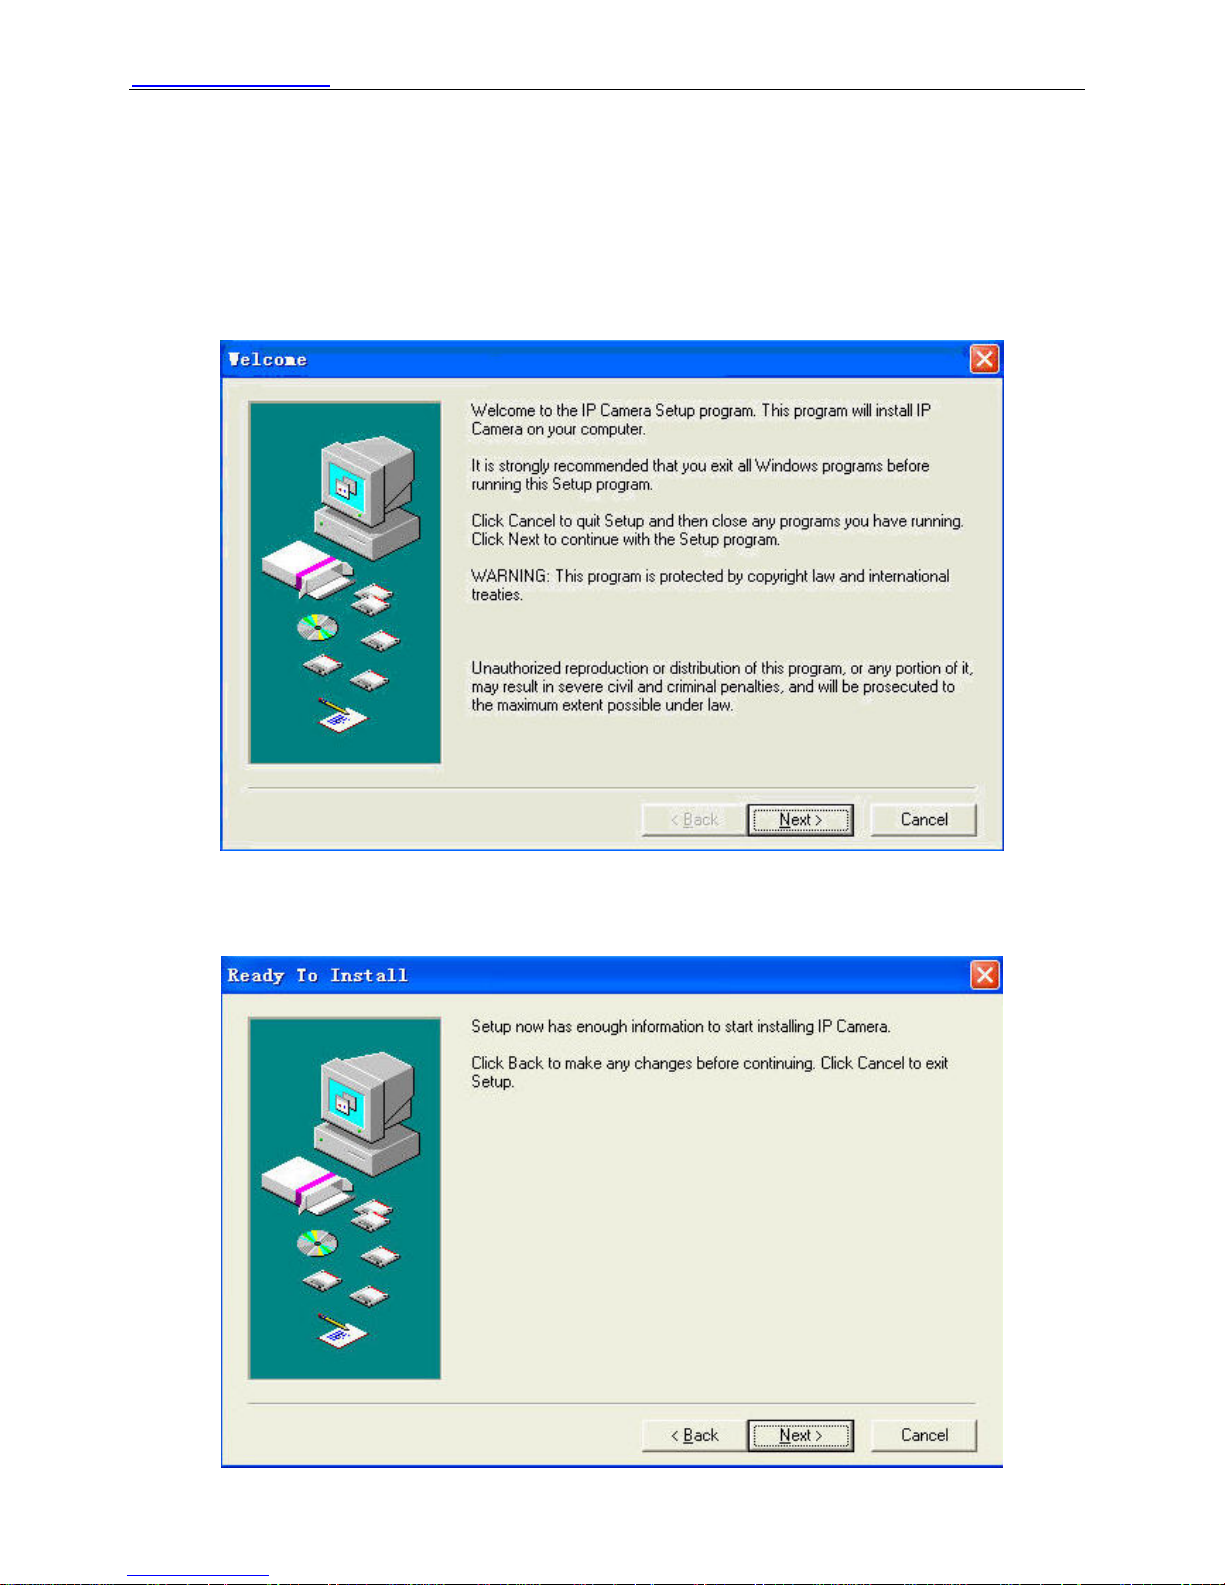
1.4.1 Software installation
1) Put the CD in to the CD drive of your computer. Browse the CD
2) Double click IPCamSetup.exe and install the software following the instructions.
Figure 1.4
3) Click Next to complete the software installation.
Shenzhen Foscam Intelligent Technology Co., Limited
Tel: 86 755 2674 5668 Fax: 86 755 2674 5168
4

WWW.FOSCAM.COM FI8910W User Manual
Figure 1.5
Figure 1.6
The computer restarts upon installation completion and the icon appears on the
desktop automatically.
NOTE: If you use Windows7 and could not find the icon on your desktop after installing the IP
camera tool, please check that the path of the camera software is correct.
For example, if it was pointing to C:\Windows\System32\IPCamera.exe.
Please correct this by pointing the shortcut to the correct path:
C:\Windows\SysWOW64\IPCamera.exe. This shortcut should work without any problems.
CAUTION: Before installing and using the product, please read the following precautions
carefully and make sure they are fully understood.
Use only the power adapter attached with the product. Using unauthorized power adaptes may
cause damage to your IP Camera. IP Camera terminal shall be installed in an indoor
environment where the rain or snow could not pour it.
1.4.2 Hardware preparation
CAUTION: Before installing and using the camera, please read the following precautions
carefully, making sure that they are fully understood and each step is carefully followed.
1) Adjust the antenna at the back of the camera.
2) Plug the network cable into the camera and then into your Cable/DSL router.
3) Plug the power adapter into the camera and then into the power outlet.
Shenzhen Foscam Intelligent Technology Co., Limited
Tel: 86 755 2674 5668 Fax: 86 755 2674 5168
5
WWW.FOSCAM.COM FI8910W User Manual
CAUTION: Make sure that only the power adapter supplied with your IPCAM is used. Using
a non-approved power adapter may damage the camera.
4) Turn on the power, the power light on the power adapter will be visible.
5) When the camera is powered up, If the network cable is plugged in correctly, the small green
light on the camera network socket will turn on, and the small yellow light will flash. The
network light will blink, about 1~2 times per second.
6) The camera takes approximately 30 seconds to start up before it displays an IP address on
the IP Camera Tool (details: 2.1
).
2 SOFTWARE OPERATION
2.1 IP Camera Tool
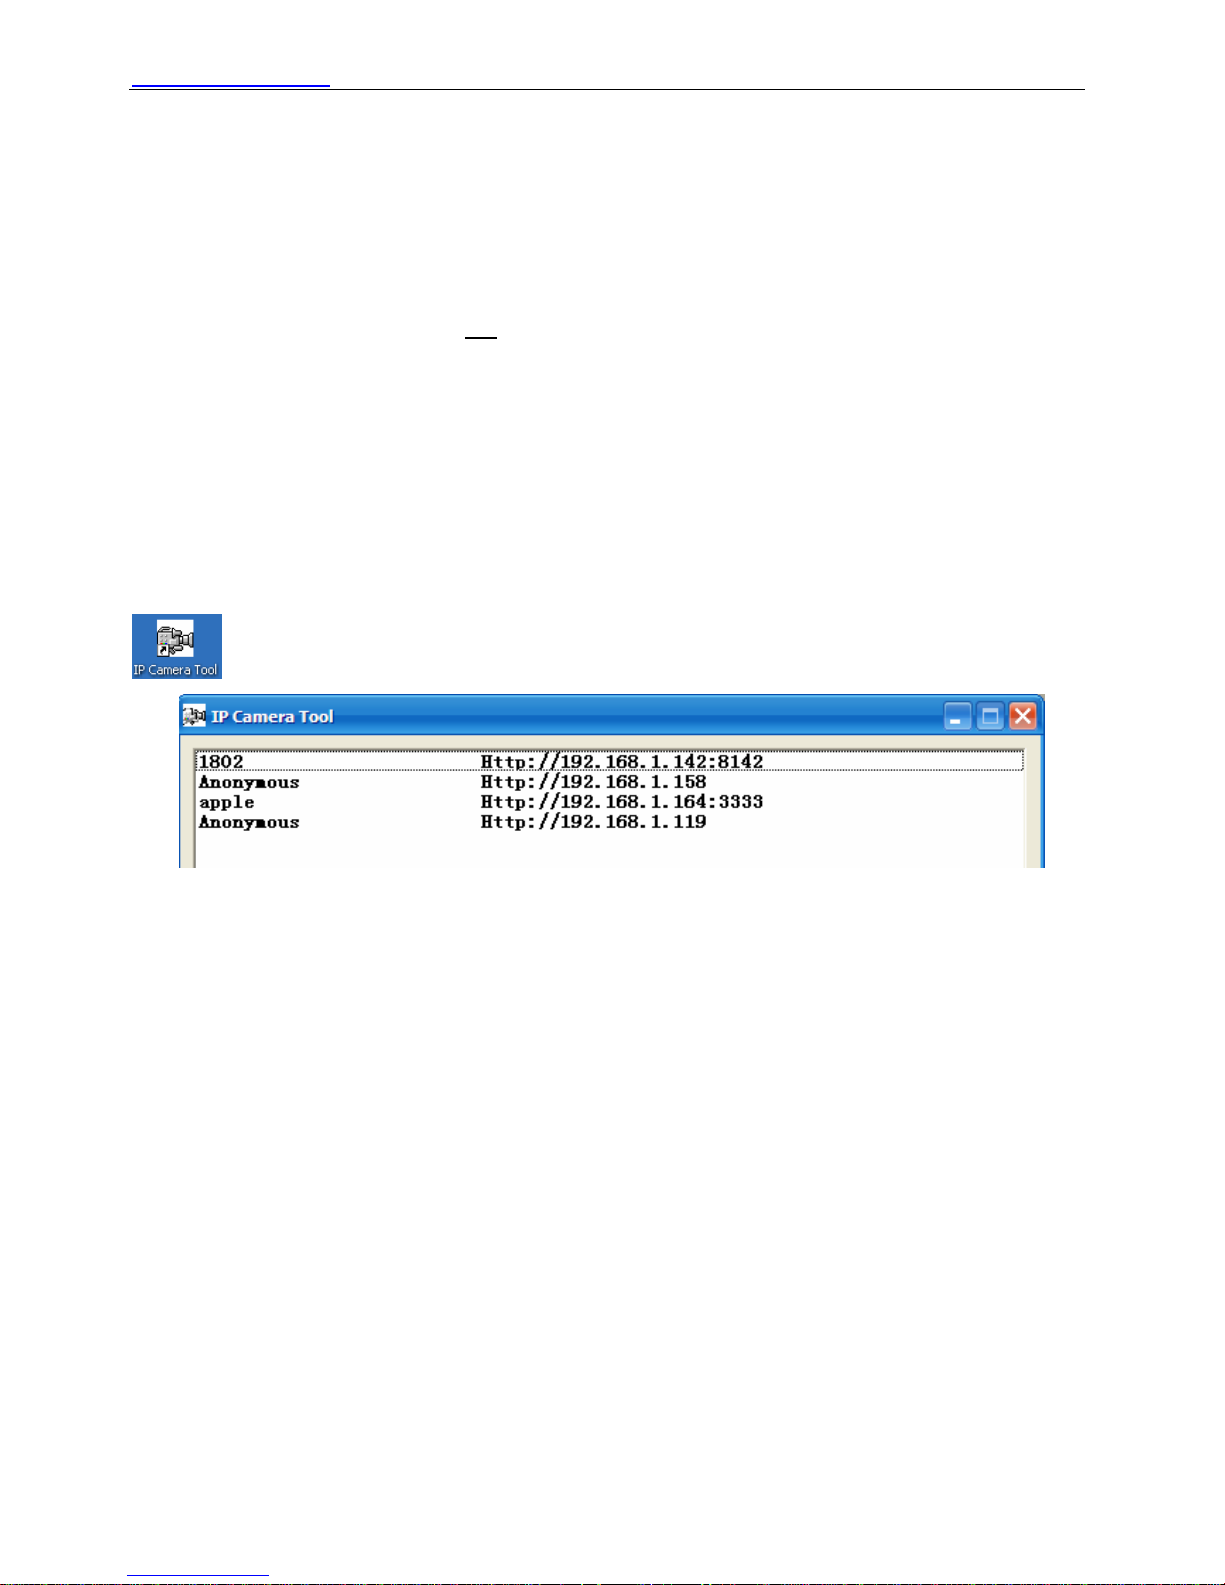
When the Device has been connected properly, you can double click the icon “IP Camera Tool”
and a dialog box as Figure 2.1 will pop up.
Figure 2.1
The software searches for IPCAMs automatically over the LAN.
There are 3 possible results:
1. No Cameras are found on the LAN. After about 1 minute of searching, the Result Field will
show “not found IP Server” and the program shut off automatically.
2. IP Cameras have been found within LAN. All the found IP Cameras will be listed and the
total number displayed in the result field as shown in Figure 2.1.
3. IP Cameras installed within the LAN do not share the same subnet with the monitoring
PC. A prompt is displayed with a “Subnet doesn’t match, dbclick to change!” message. Use
the left mouse button to select the prompt and then right click the mouse for available options,
choose Network Configuration to set the IP address of the Camera to the same subnet as the
LAN. (Figure 2.5) You can choose to obtain an IP from the DHCP server or set a static IP for the
camera. (Figure 2.4)
NOTE: If your camera is not displayed within the IP camera tool list, check if DHCP is enabled on
your router, and that the router MAC address filtering is not blocking your camera. Also make
sure that any firewall isn’t blocking the camera.
Six Options
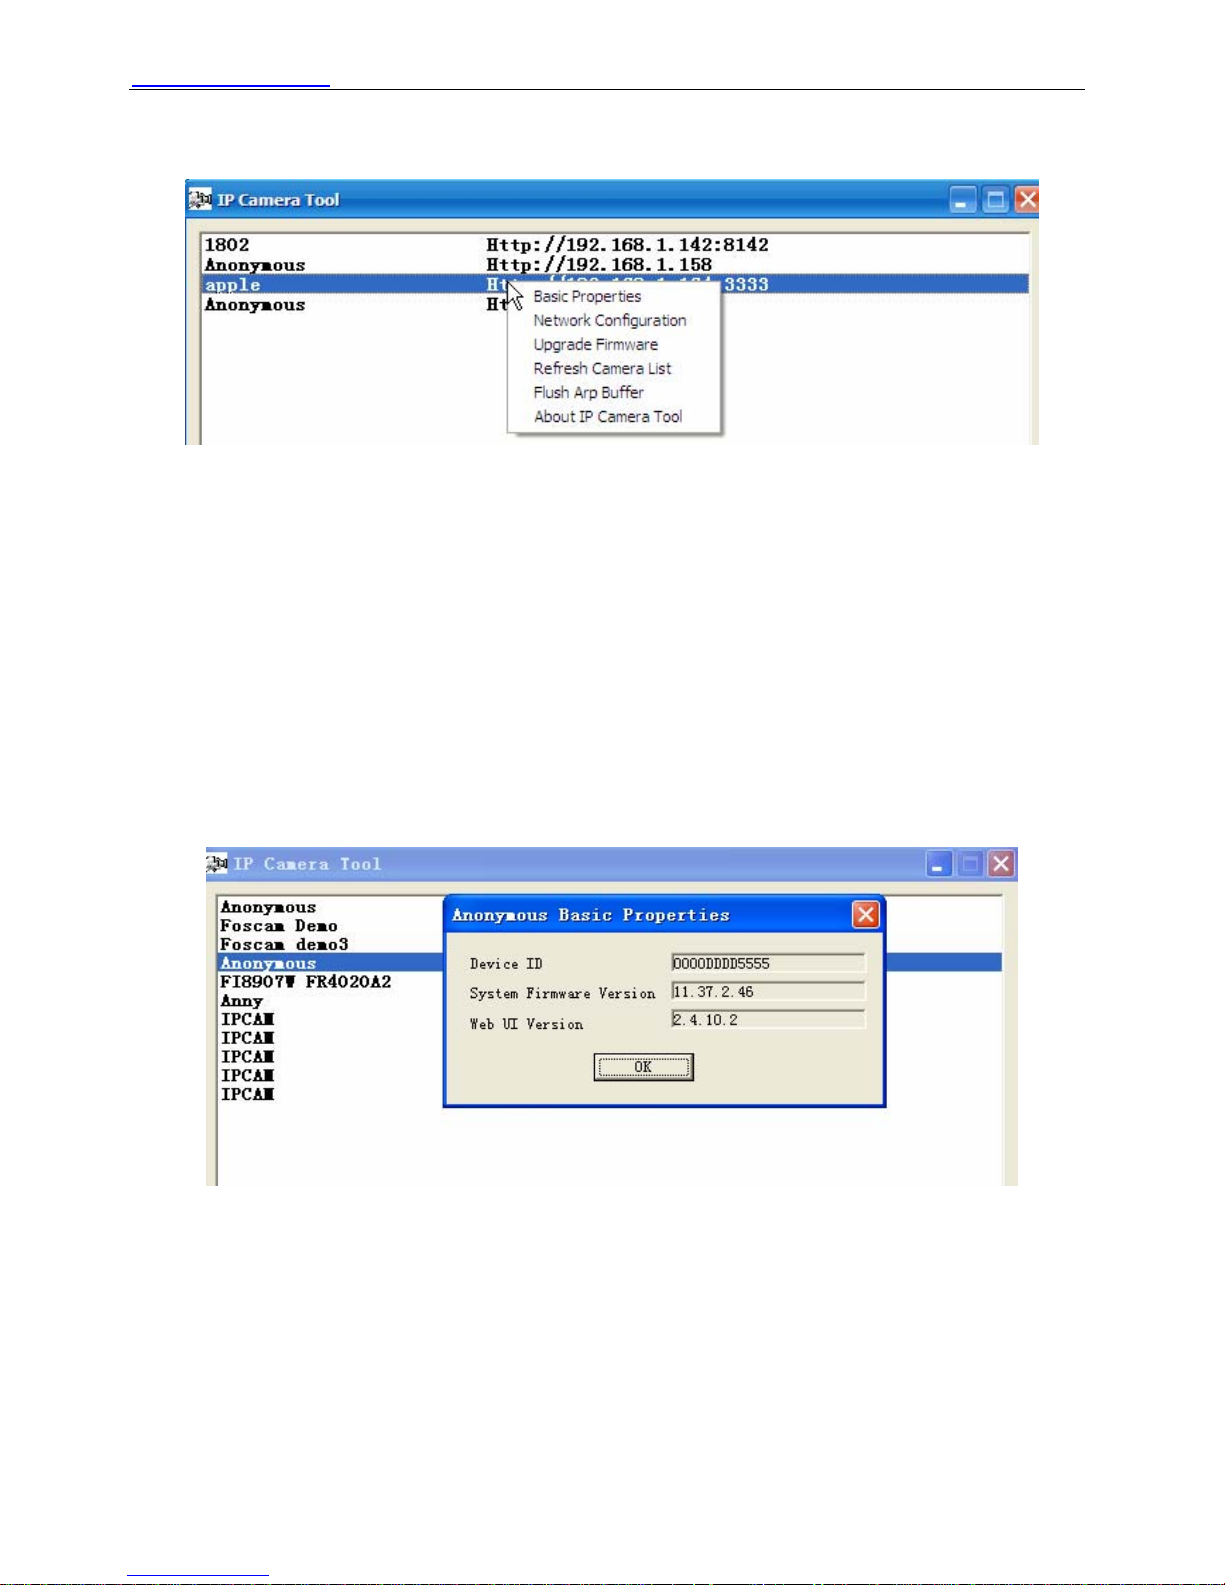
Choose the IP Camera list and right click; there are six options, Basic Properties, Network
Shenzhen Foscam Intelligent Technology Co., Limited
Tel: 86 755 2674 5668 Fax: 86 755 2674 5168
6
WWW.FOSCAM.COM FI8910W User Manual
Configuration, Upgrade Firmware, Refresh Camera List, Flush Arp Buffer and About IP Camera
Tool as shown Figure 2.2.
Figure 2.2
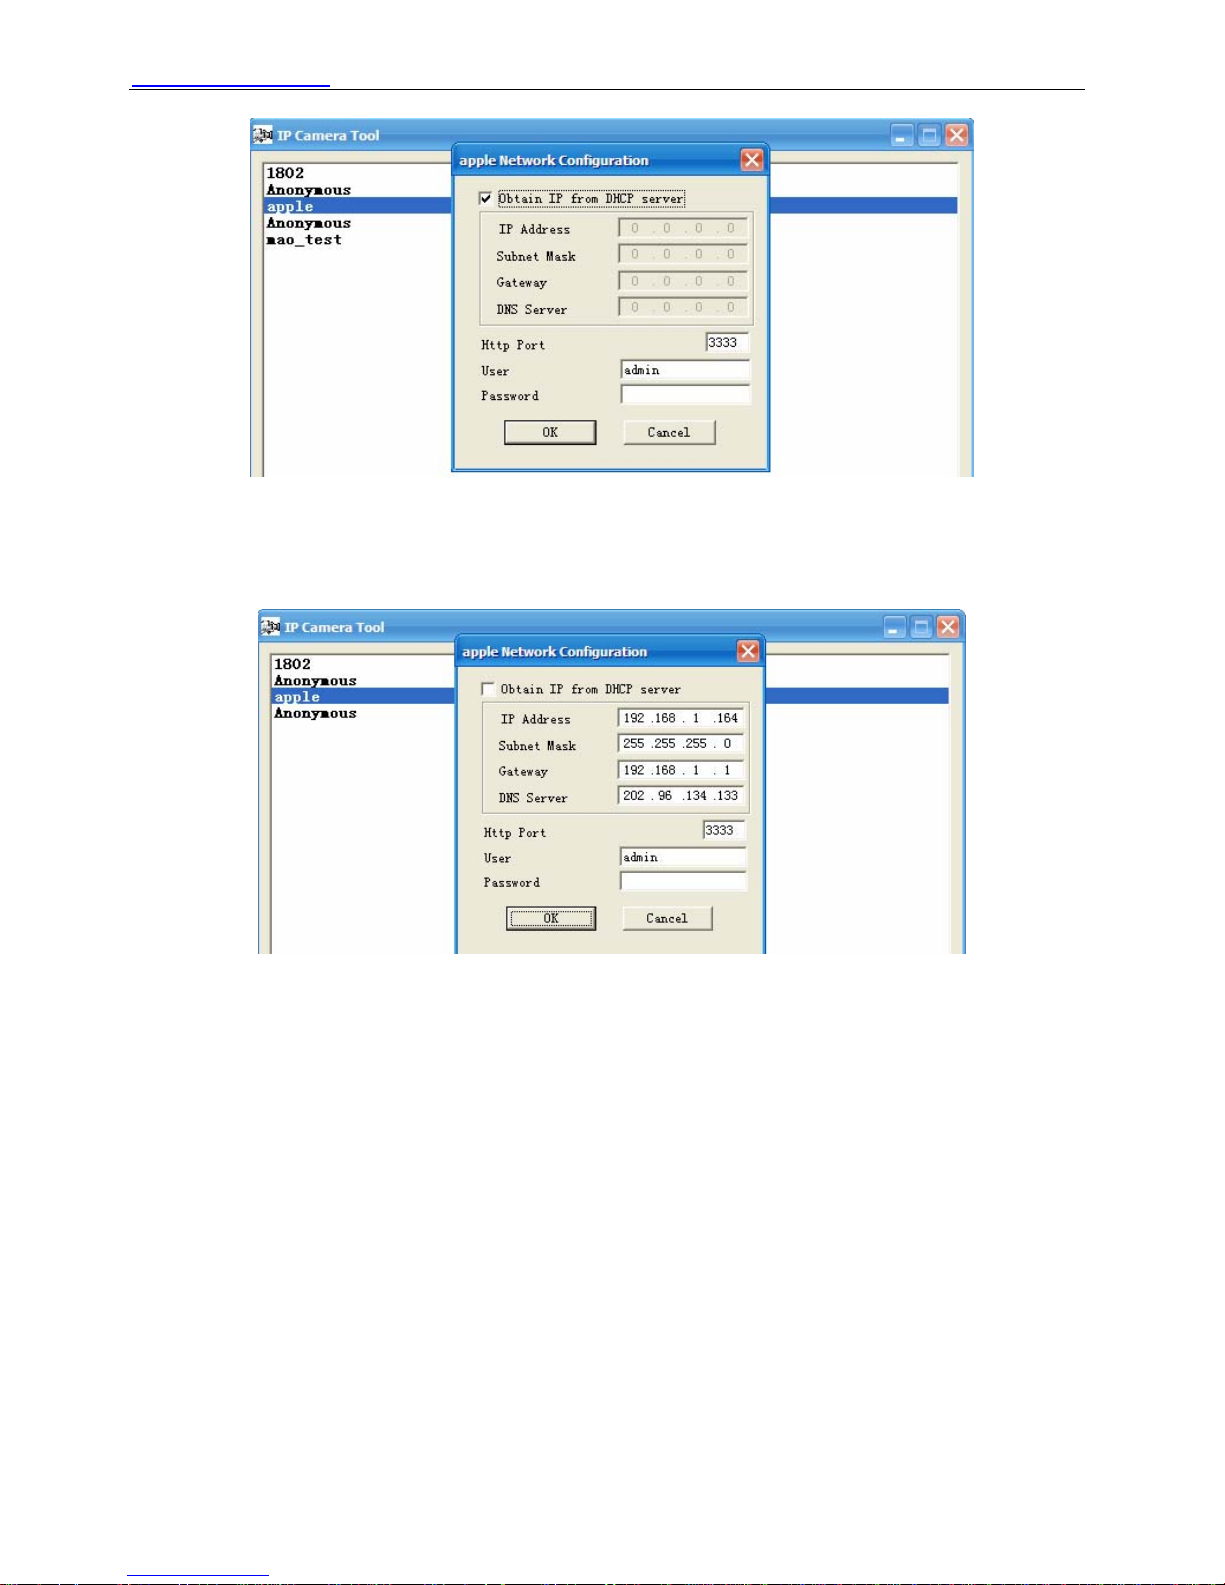
z Basic Properties
Device information displayed in the Basic Properties is Device ID, System Firmware Version,
Web UI Version. (Figure 2.3)
If there are several cameras on the list, you can choose basic properties to check the device ID
and determine the IP address allocated to each camera. For example Device ID is
00606E8C5058, the same MAC ID label is found on the bottom/back of the camera.
Each camera has its own MAC ID. If the camera’s IP is not found with the IP Camera Tool, the
router firewall may be blocking it. Therefore you can add this MAC ID to your router and give it a
fixed IP or add the MAC ID as a trusted site. There are two MAC addresses, one is the Wired
MAC ID and the other is the Wi-Fi MAC ID.
Figure 2.3
z Network Configuration
This page will allow you to configure the Network parameters.
Shenzhen Foscam Intelligent Technology Co., Limited
Tel: 86 755 2674 5668 Fax: 86 755 2674 5168
7
WWW.FOSCAM.COM FI8910W User Manual
Figure 2.4
Obtain IP from DHCP server: If checked, the device will obtain its IP from the DHCP server. In
other words, the camera will have a dynamic IP. (Make sure the Router to which the camera
connects has DHCP enabled).
Figure 2.5
IP Address: Fill in the IP address assigned.
Subnet Mask: Fill in the Subnet Mask of your network, normally this is: 255.255.255.0.You can
find the network subnet mask from your router or from your locally attached PC.
Gateway: Fill in the Gateway address. The gateway is normally your router’s LAN IP. You can
find the Gateway address from your locally attached PC.
DNS Server: Fill in the DNS address. It is recommended that you use the address from your
locally attached PC, which is normally your router’s LAN IP.
Http Port: The default port for HTTP is 80. Only change this if you understand the implications of
doing so.
NOTE: If the prompt “Subnet doesn’t match, dbclick to change!” appears, please enable
DHCP and choose obtain IP from DHCP server or reconfigure the camera again.
This section only details the most typical settings and how to configure wired connections during
installation. Other network configurations are broadly similar, although the specific parameters
that you must configure are necessarily different. A full description of all configurations or
configuring advanced IP solutions is beyond the scope of this manual.
Shenzhen Foscam Intelligent Technology Co., Limited
Tel: 86 755 2674 5668 Fax: 86 755 2674 5168
8
WWW.FOSCAM.COM FI8910W User Manual
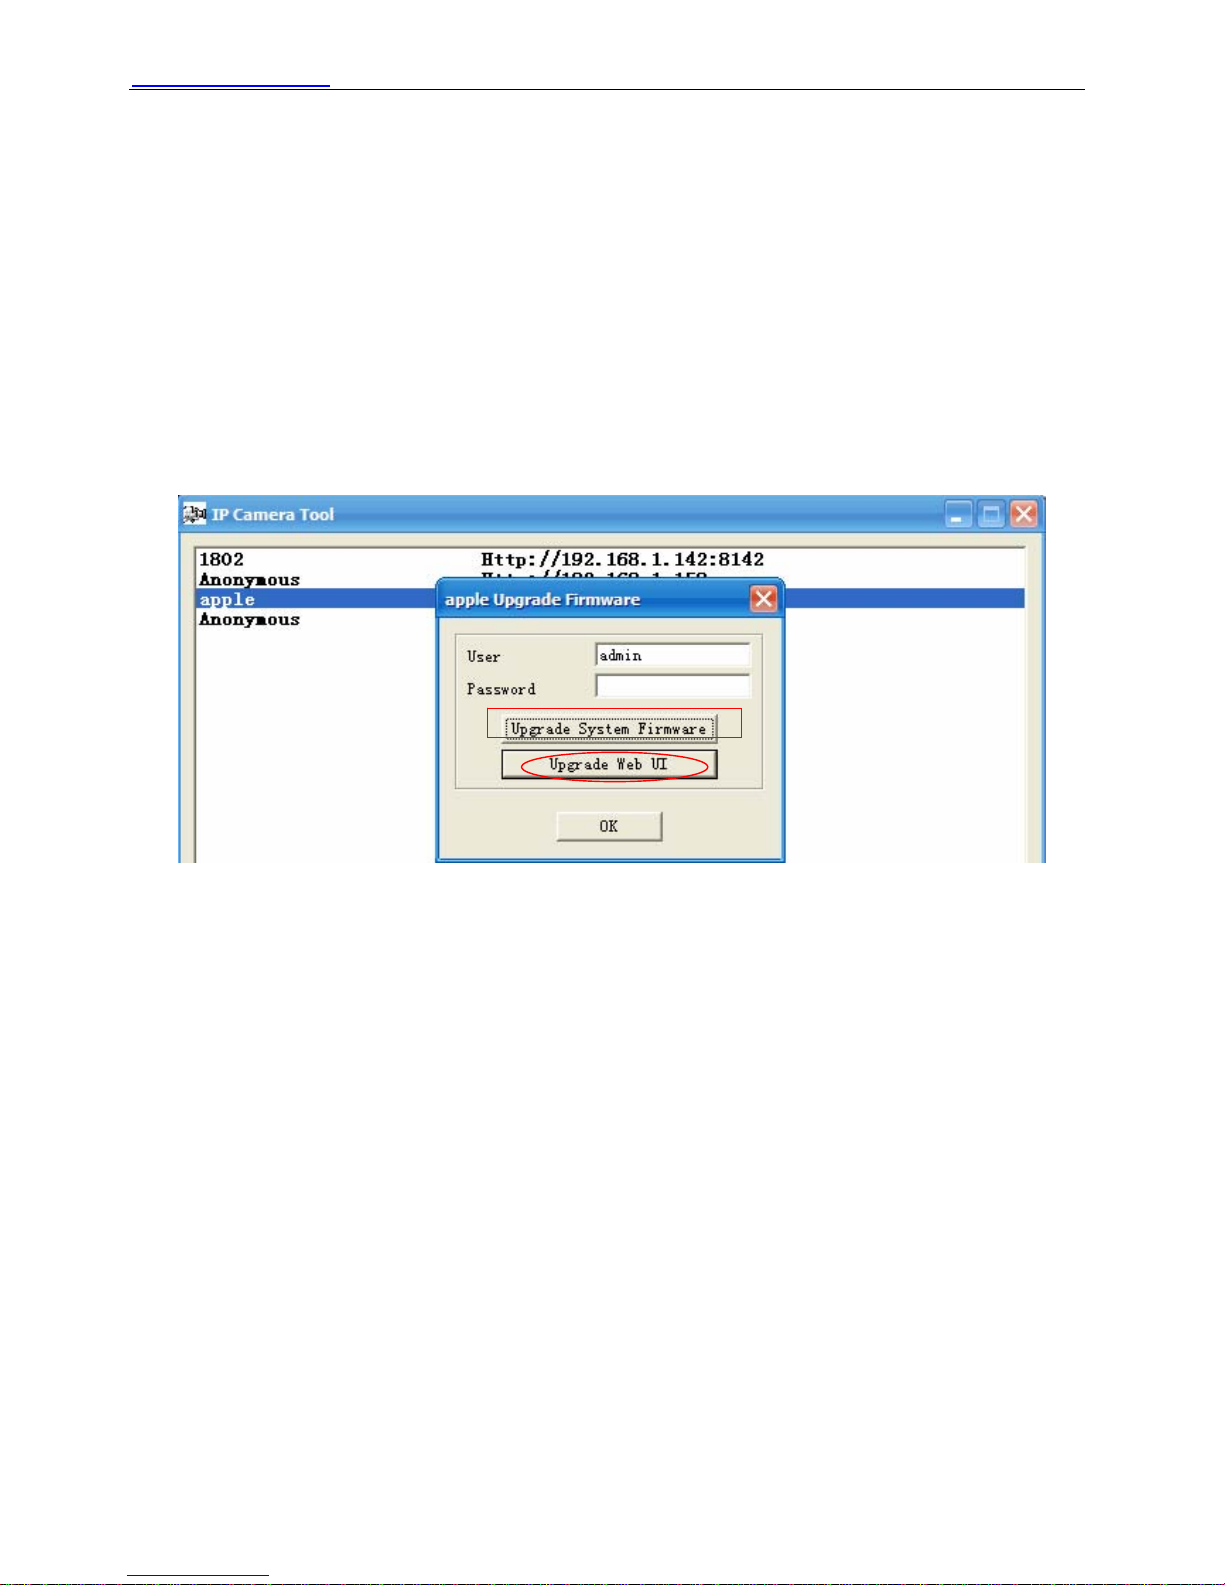
z Upgrade Firmware
Enter the correct Username and Password to upgrade the system Firmware and Web UI. If you
upgrade the camera, you must upgrade system firmware first and then upgrade web UI or you
may damage the camera. Please ensure you have download the correct firmware package for
your camera before upgrading. Read the upgrade documentation (readme.txt file) in the upgrade
package before you upgrade.
CAUTION: If your camera works well with the current firmware, we recommend not upgrading.
Please don’t upgrade the firmware unnecessarily. Your camera may be damaged if
misconfigured during an upgrade.
NOTE: Upon downloading the firmware check the sizes of the .bin files. They must match the
size in the readme.txt file. If not, please download the firmware again until the sizes are the same.
Your camera will not function correctly if a corrupt .bin file is used.
Upgrade system firmware first
Figure 2.6
z Refresh Camera List
Refresh camera list manually.
z Flush Arp Buffer
When both wired and wireless network interfaces of the camera have a fixed IP address, You
may encounter an issue with not being able to open the camera webpage. Flushing the Arp
buffer may help.
z About IP Camera Tool
Displays the version of the IP Camera Tool.
2.2 Camera Login
You can access the camera through the IP Camera Tool or IP Camera Tool, Internet Explorer,,
Firefox, Google Chrome, Safari or other stand browser directly.
1) Using the IP Camera Tool ,double click the IP address of the IP Camera listed (Figure
2.1).The browser you use will be opened automatically and display the camera login page.
(Figure 2.8)
2) You can also access the camera using Internet Explorer browser by typing in the camera’s IP
address. For example:
Shenzhen Foscam Intelligent Technology Co., Limited
Tel: 86 755 2674 5668 Fax: 86 755 2674 5168
9
WWW.FOSCAM.COM FI8910W User Manual
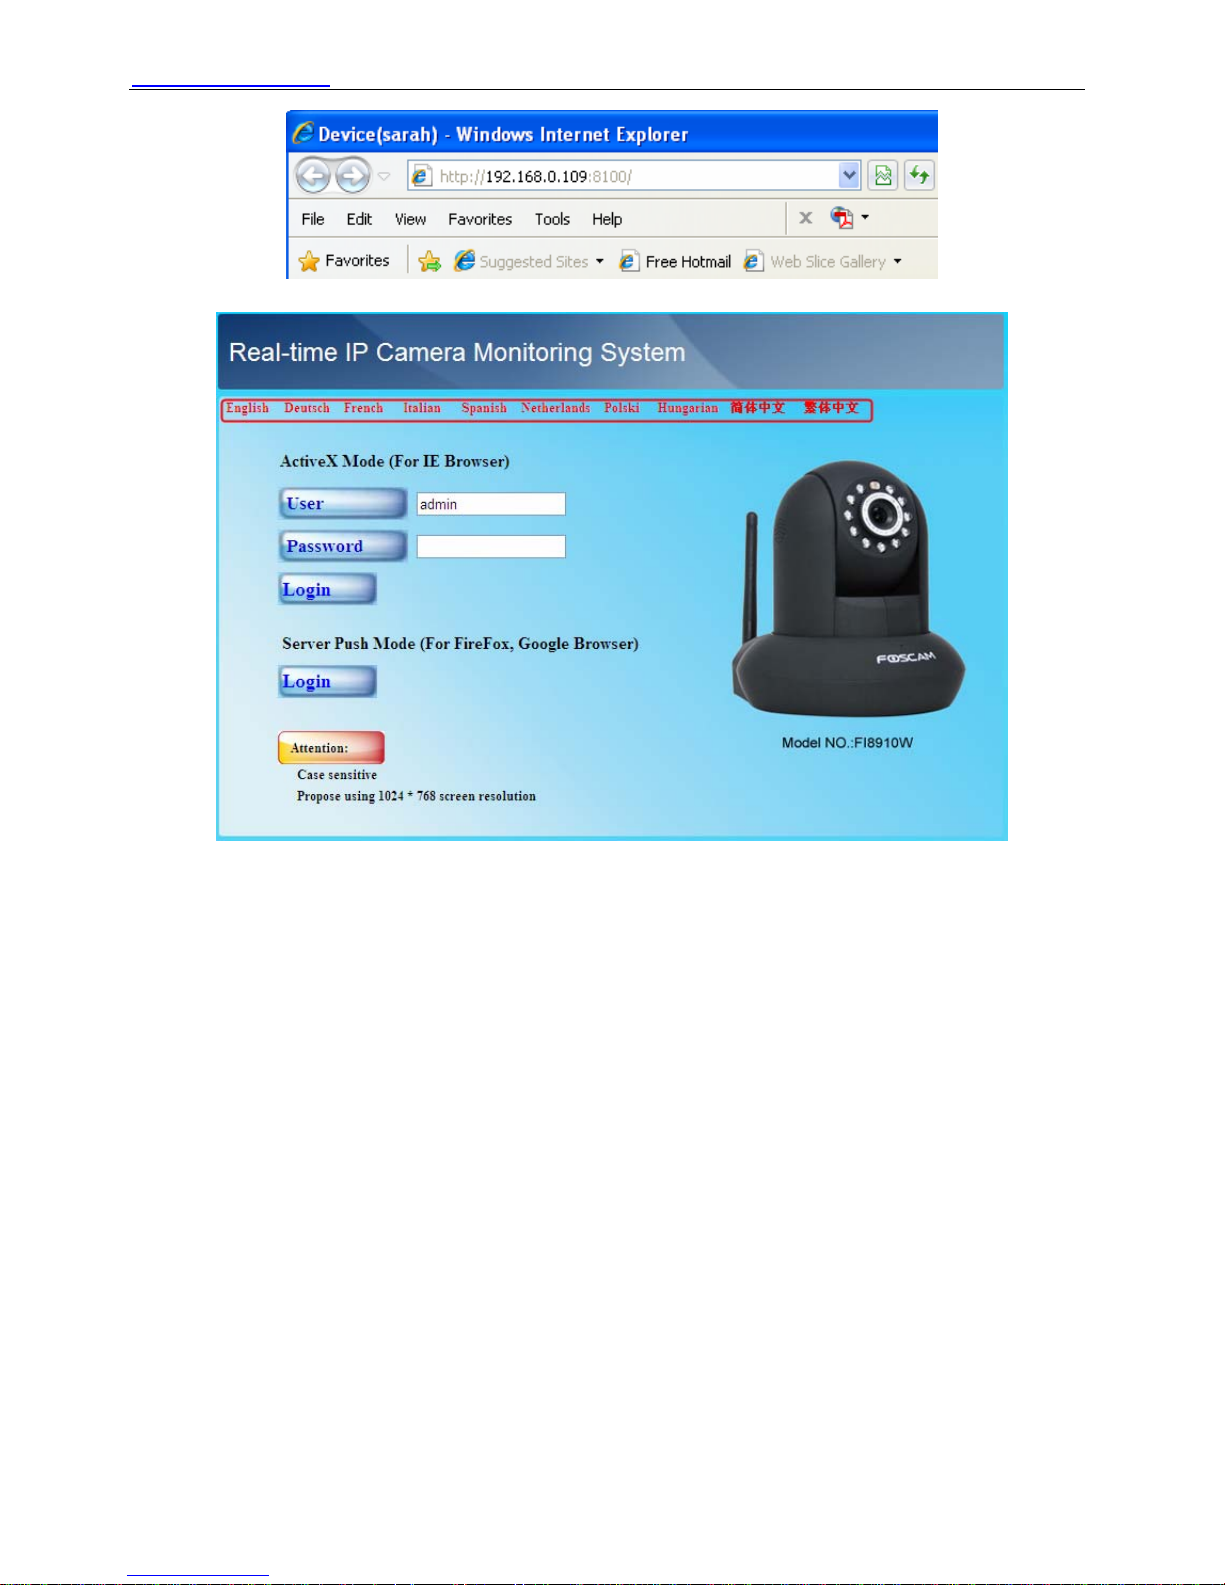
Figure 2.7
The interface supports ten languages
Figure 2.8
The default user is admin, with no password.
There are two modes to login. If you use IE browser, select activeX mode to login. If you use
Firefox or Google Chrome, select Server Push Mode to login. (Figure 2.9)
Shenzhen Foscam Intelligent Technology Co., Limited
Tel: 86 755 2674 5668 Fax: 86 755 2674 5168
10
WWW.FOSCAM.COM FI8910W User Manual
Default user is admin
No password
If you use IE browser, select
this login
If you use Firefox, Google Chrome,
Safari, select this login
Figure 2.9
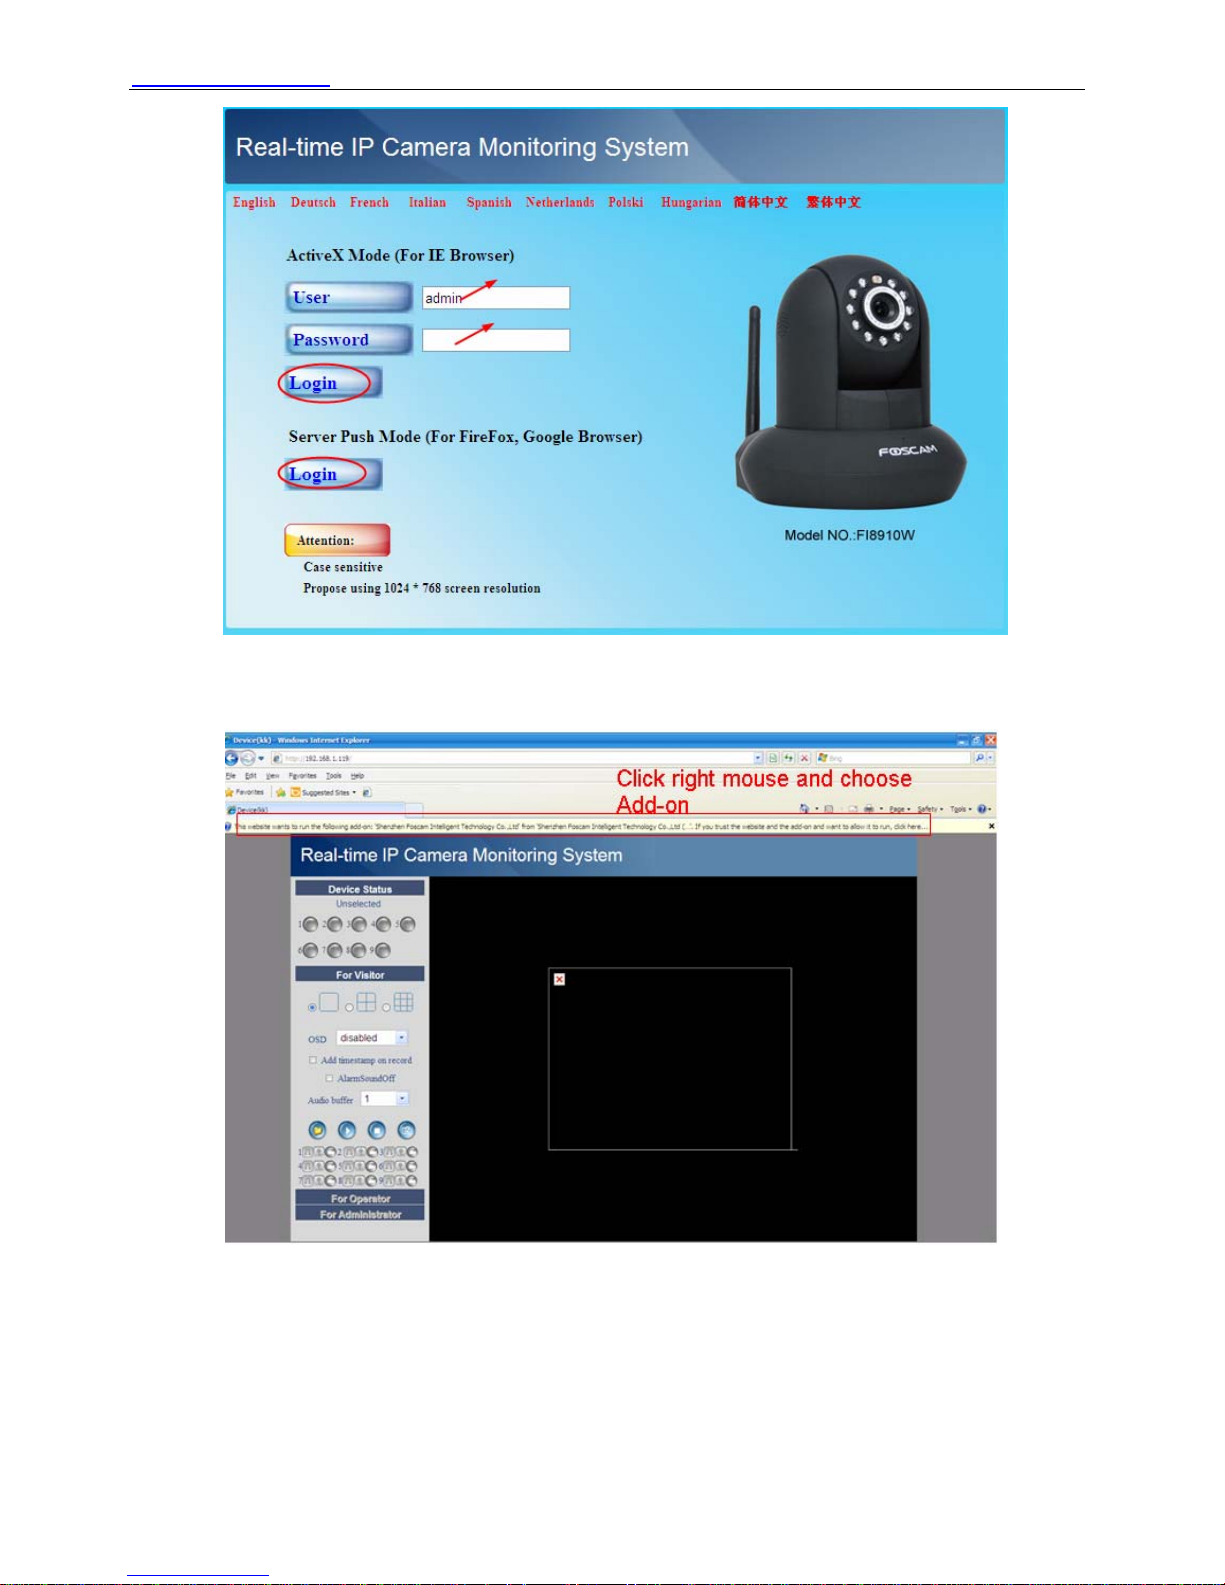
For IE browser
Fill in the user name and choose the first login button.
Figure 2.10
The first time you login the UI. You will receive an activeX prompt as in the picture above. (Figure
2.10) Right click on the active prompt and choose Run Add-on(Figure 2.11).
Shenzhen Foscam Intelligent Technology Co., Limited
Tel: 86 755 2674 5668 Fax: 86 755 2674 5168
11
WWW.FOSCAM.COM FI8910W User Manual
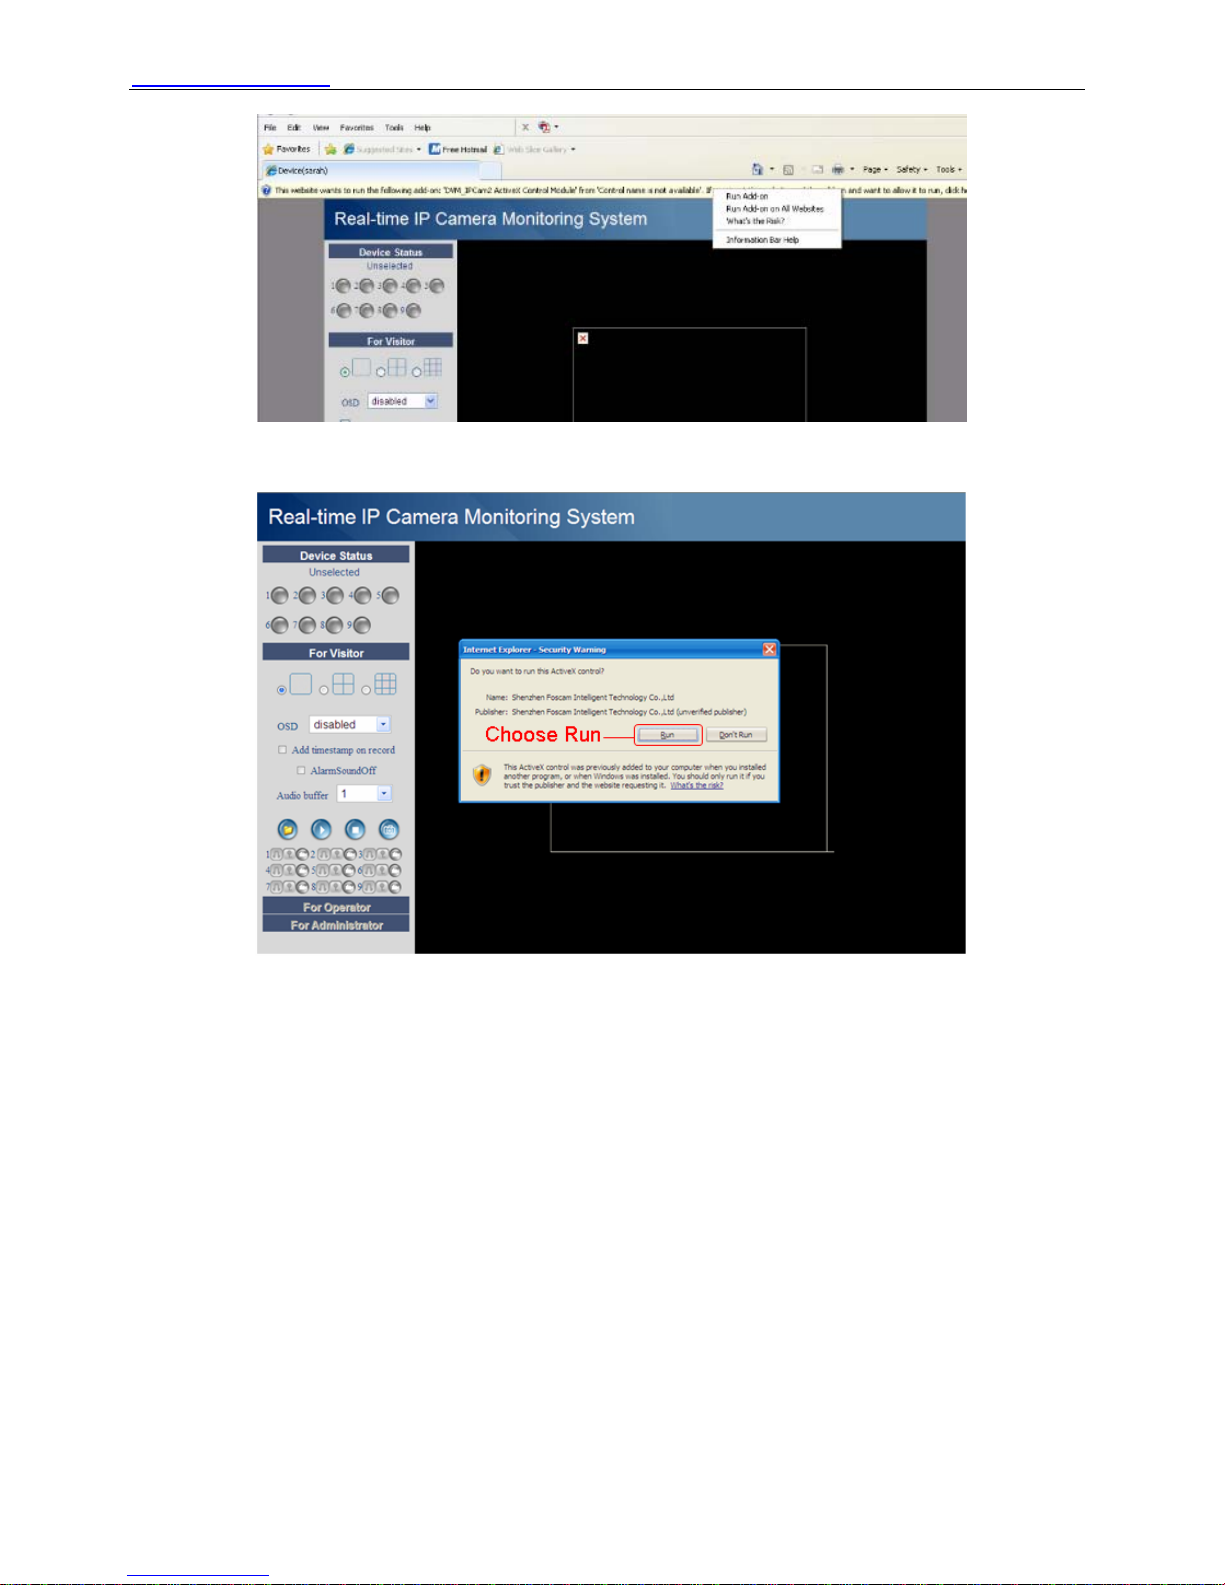
Figure 2.11
Select Run on the next prompt (Figure 2.12) which will return to the login screen.
Figure 2.12
Fill in the user name and select login again. You will see a live video. (Figure 2.13)
Shenzhen Foscam Intelligent Technology Co., Limited
Tel: 86 755 2674 5668 Fax: 86 755 2674 5168
12

WWW.FOSCAM.COM FI8910W User Manual
Figure 2.13
NOTE: If you cannot see live video after installing the activeX control. Only a red cross in
the center of the video or just a black screen, try changing to another port number to try. Try
using another port besides port 80 such as port 85, 8005 or 8100.
Make sure that all firewall or antivirus software on your computer does not block the active
download and installation. If you are unable to run the activeX control, try shutting down the
firewall or antivirus program.
For Firefox, Google Chrome, Safari or other standard browsers
Fill in the user name and choose the second login button. You may be asked for the user name
and password again before you login the User Interface. After successfully logging in, you will
see the Device Status of the camera.
.
Figure 2.14
Click Live Video, you will see the camera’s live video.
Shenzhen Foscam Intelligent Technology Co., Limited
Tel: 86 755 2674 5668 Fax: 86 755 2674 5168
13
 Loading...