

Page 1
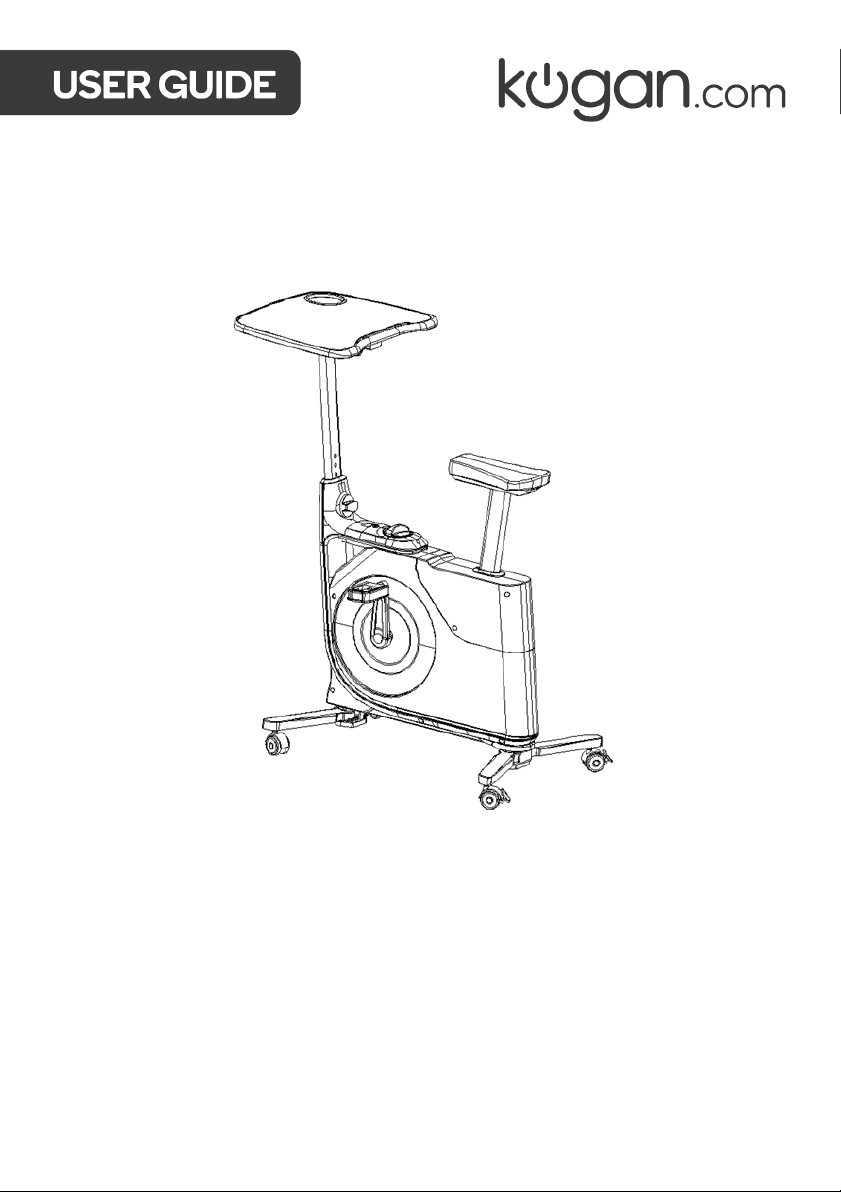
HOME & OFFICE EXERCISE BIKE WITH HEIGHT ADJUSTABLE DESK
FSDESKBIKWA, FSDESKBIKBA
Page 2

Page 3

SAFETY & WARNINGS
WARNING:
To reduce the risk of serious injury, read the following safety instructions before using
the equipment.
1. Read all warnings posted on the equipment. Follow all safety instructions in this
2. Read this manual and follow it carefully before using the equipment. Make sure
3. Do not allow children and pets to use or play on the equipment. Always keep
4. This equipment must be placed on a level and stable hard flooring or on a low pile
5. Inspect the equipment for worn or loose components prior to each use.
6. Tighten / replace any loose or worn components prior to using the equipment.
7. Always choose a workout appropriate to your strength and flexibility level. Know
8. Do not wear loose or dangling clothing while using the equipment.
9. Never exercise in bare feet or socks; always wear correct footwear, such as running,
10. Be careful to maintain your balance while getting on this product, using this
11. The equipment must not be used by persons weighing over 120kgs.
12. The equipment should be used by only one person at a time.
13. The equipment is for home usage only.
14. If any part is broken or defective, discontinue use of the equipment immediately
15. Make sure that adequate space is available for access to and passage around the
16. If you feel faint or dizzy, discontinue use of this equipment immediately. Serious
17. Consult your physician before beginning any exercise regime and follow their
manual.
that it is properly assembled and all fasteners are tightened before use.
children and pets away from the equipment when it is in use.
carpet. Do not position the equipment on loose rugs or uneven surfaces.
your limits and train within them. Always use common sense when exercising.
walking or cross-training shoes.
product and getting off this product; loss of balance may result in a fall and/or
serious bodily injury.
until it is repaired.
equipment; keep at least a distance of 1 metre from any obstructions while using
the machine.
bodily injury can occur if this equipment is not assembled and used correctly.
Serious bodily injury can also occur if all instructions are not followed.
recommendations in developing your own personal fitness program. You must NOT
use the exercise bike without your doctor’s consent if you:
a. Are pregnant
b. Have had a recent operation or surgery
c. Have knee, shoulder, back or neck injuries
d. Have a heart condition or cardio vascular disease, high blood pressure, acute
thrombosis, acute hernia
e. Have severe diabetes, epilepsy, severe migraines, malignant tumour
f. Have a pace maker, implants, artificial joint(s) or limb(s), stents or IUD, any
recent illnesses or infections
g. Have cancer
Page 4
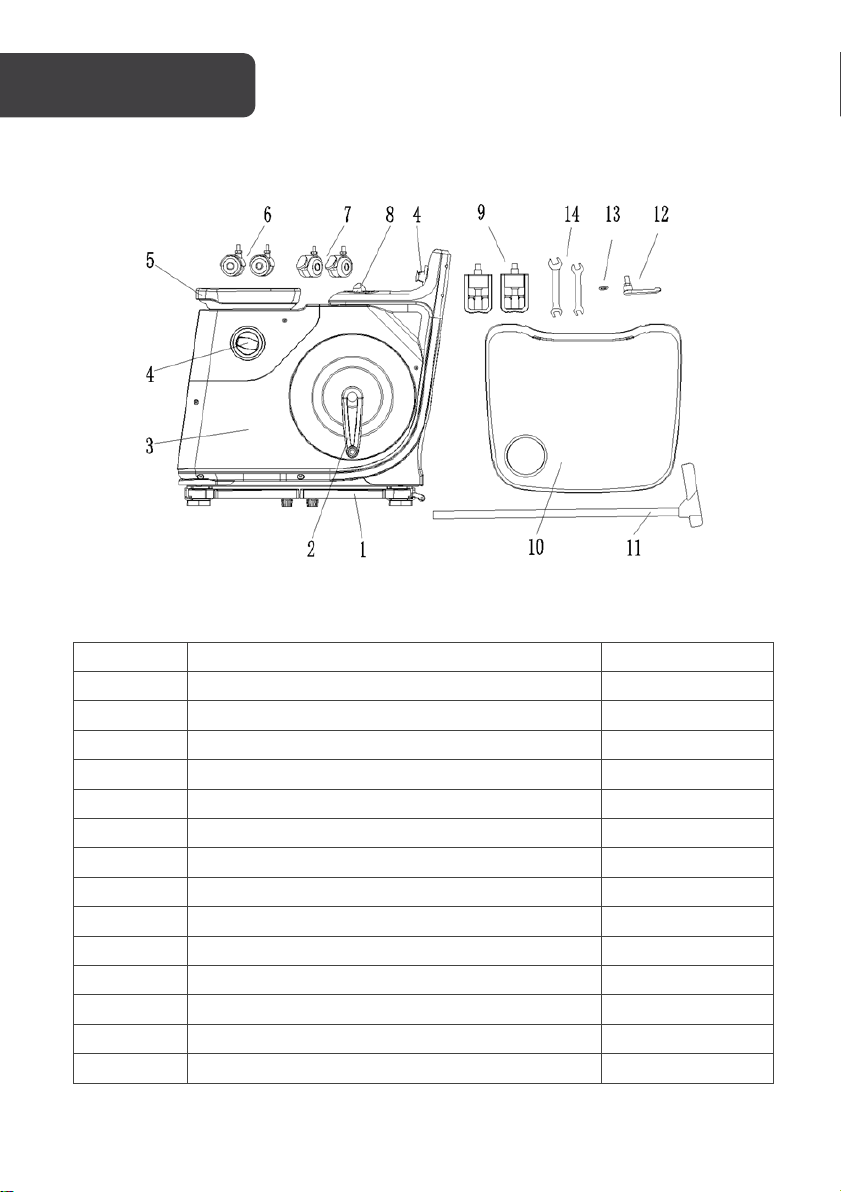
Part No.
Part Name
Qty.
2
Crank
2pcs
5
Seat
1pc
9
Pedal
2pcs
12
Table bolt
1pc
OVERVIEW
1 Stabiliser 4pcs
3 Main frame 1pc
4 Knob 2pcs
6 Front wheel (non-lockable) 2pcs
7 Rear wheel (lockable) 2pcs
8 Resistance dial 1pc
10 Ta b le 1pc
11 Post 1pc
13 Flat washer 1pc
14 Spanner 2pcs
Page 5
ASSEMBLY
Unpack in a clear area. Check the list on the previous page to ensure all parts are
present and in good condition, taking care to examine the packing materials. It is
recommended to retain packaging in case transportation of the product is required. If
any part is missing, contact Kogan.com.
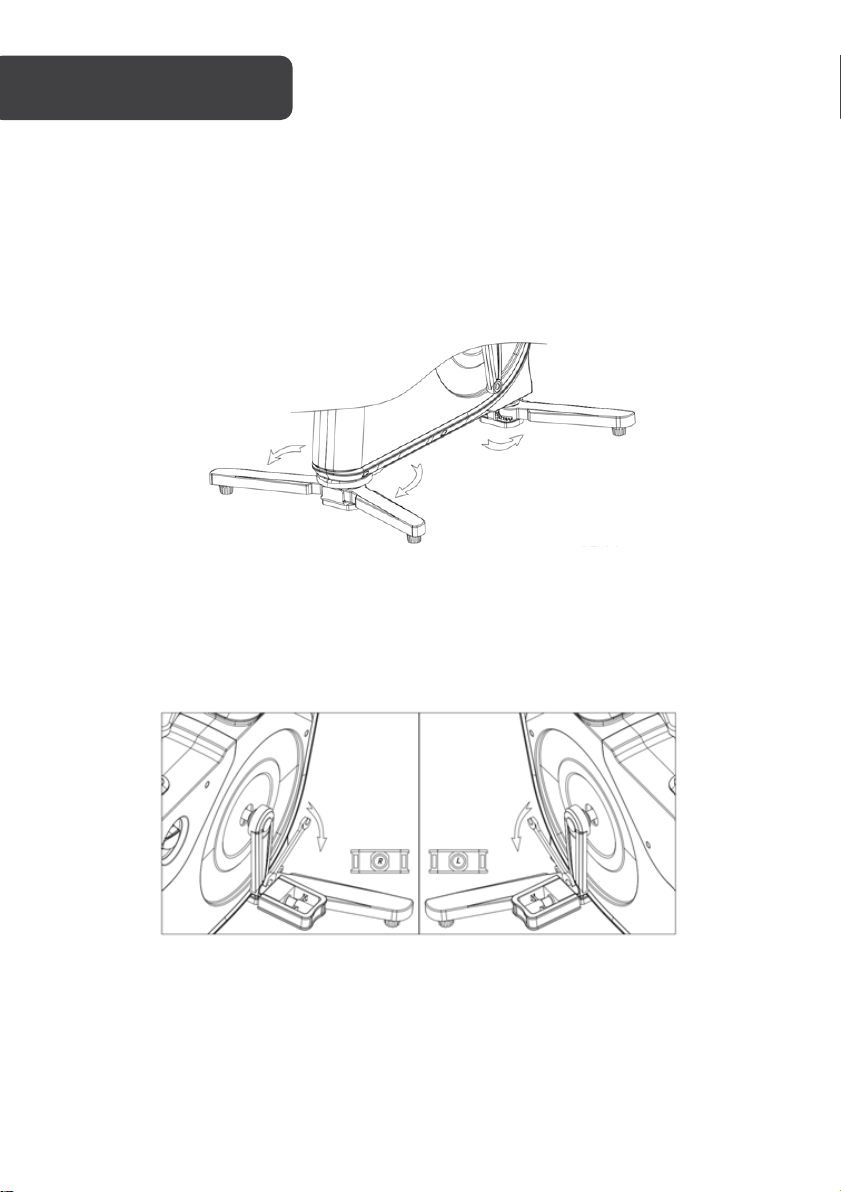
1. Place on the floor and unfold stabilisers to the maximum angle as shown below.
Page 6
2. Place the right pedal (marked R) on the right side crank arm and the left pedal (marked L) on the left side crank arm. Note the pedals are not interchangeable: incorrect installation may cause damage.
Thread the right pedal clockwise and the left pedal anticlockwiseonto their respective arms. Once hand tightened, use the supplied spanner to completely tighten the pedals.
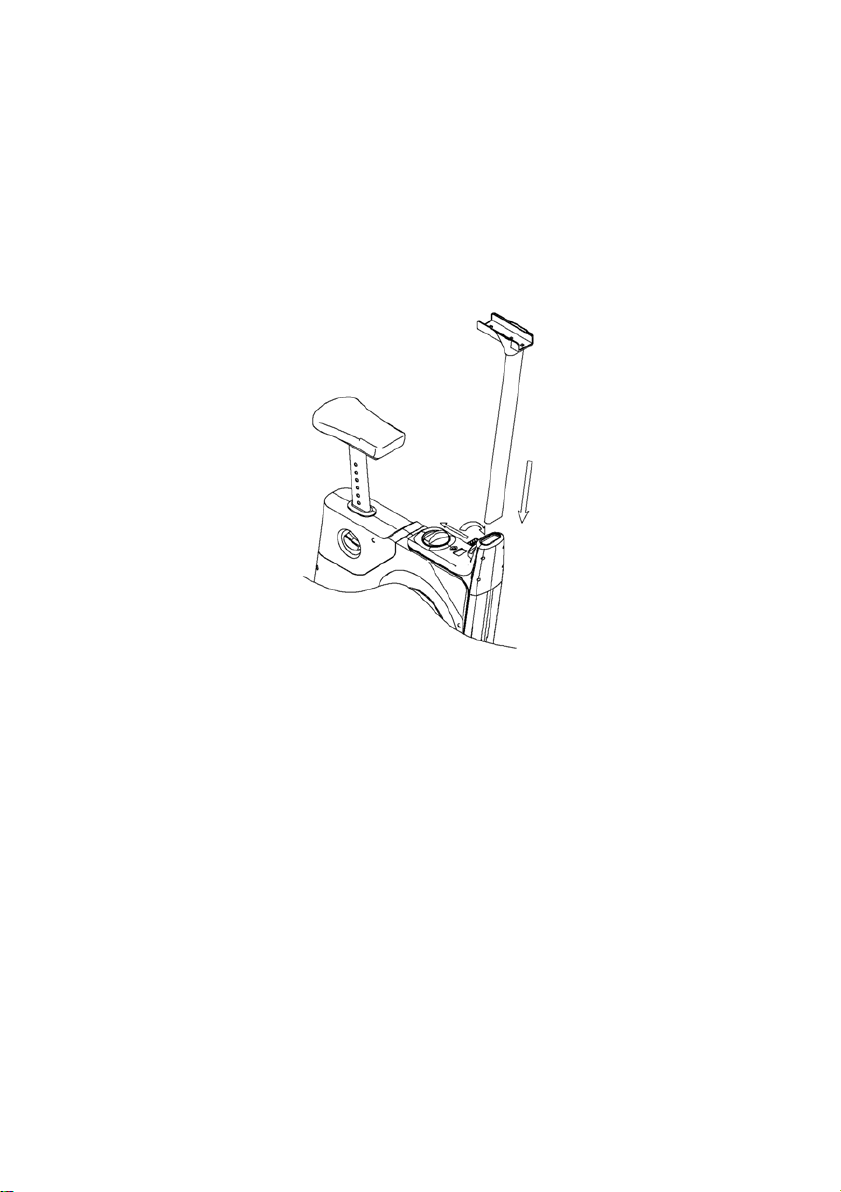
3. To insert the table post, turn the adjustment knob anticlockwiseto loosen.
Pull the knob outward and insert the post at the same time until the table post is fully inserted.
Release the knob and slowly pull up on the post until it locks in place. Verify that the post will not move up or down.
Tighten the knob by turning it clockwise until it is completely tightened.
Page 7
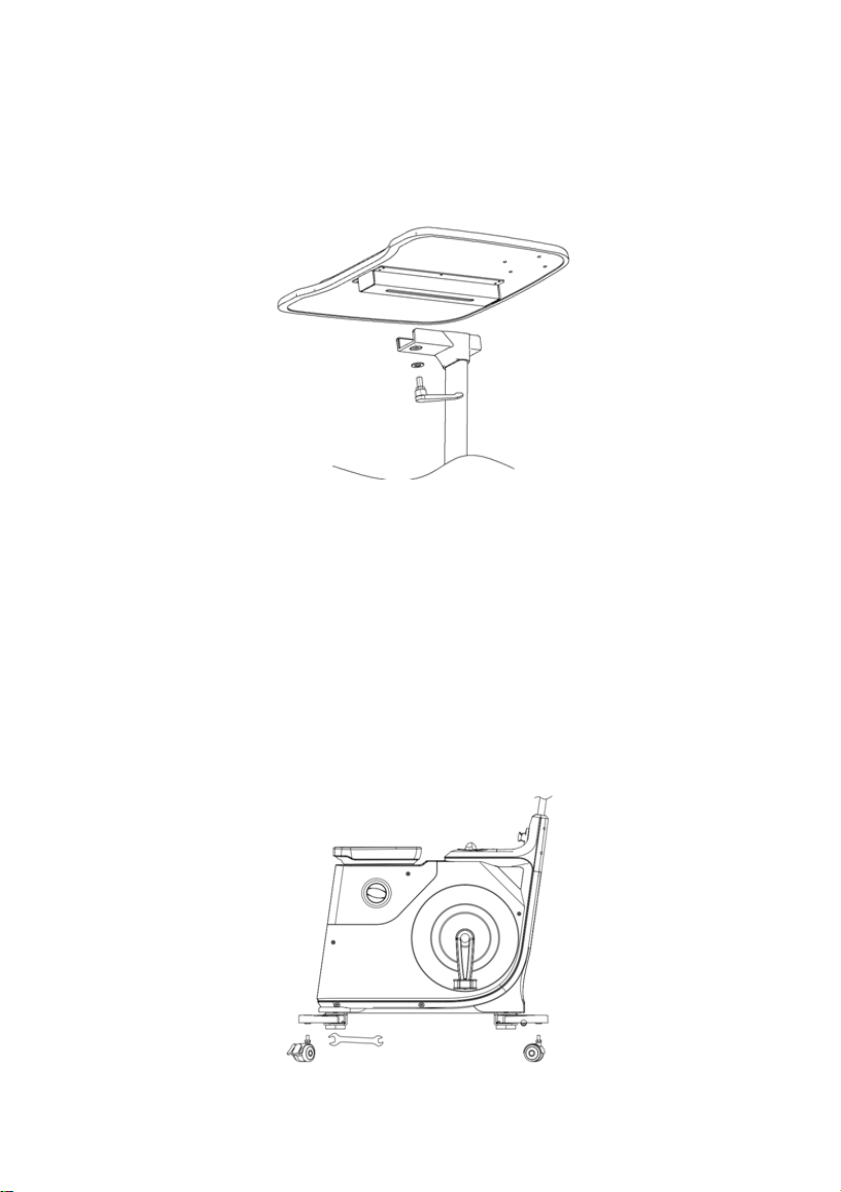
4. Place the table onto the post and secure by using the flat washer and bolt. Tighten the bolt by hand.
5. The front/rear wheels are optional and allow the equipment to be moved easily. To install:
Remove the foot pads (which are pre-attached to the underside of the stabilisers).
Attach the front and rear wheels to the front and rear stabilisers respectively and tighten using spanner.
Stand the product upright on the floor to check the stability. Adjust the wheels to better balance if it is not stable.
Page 8
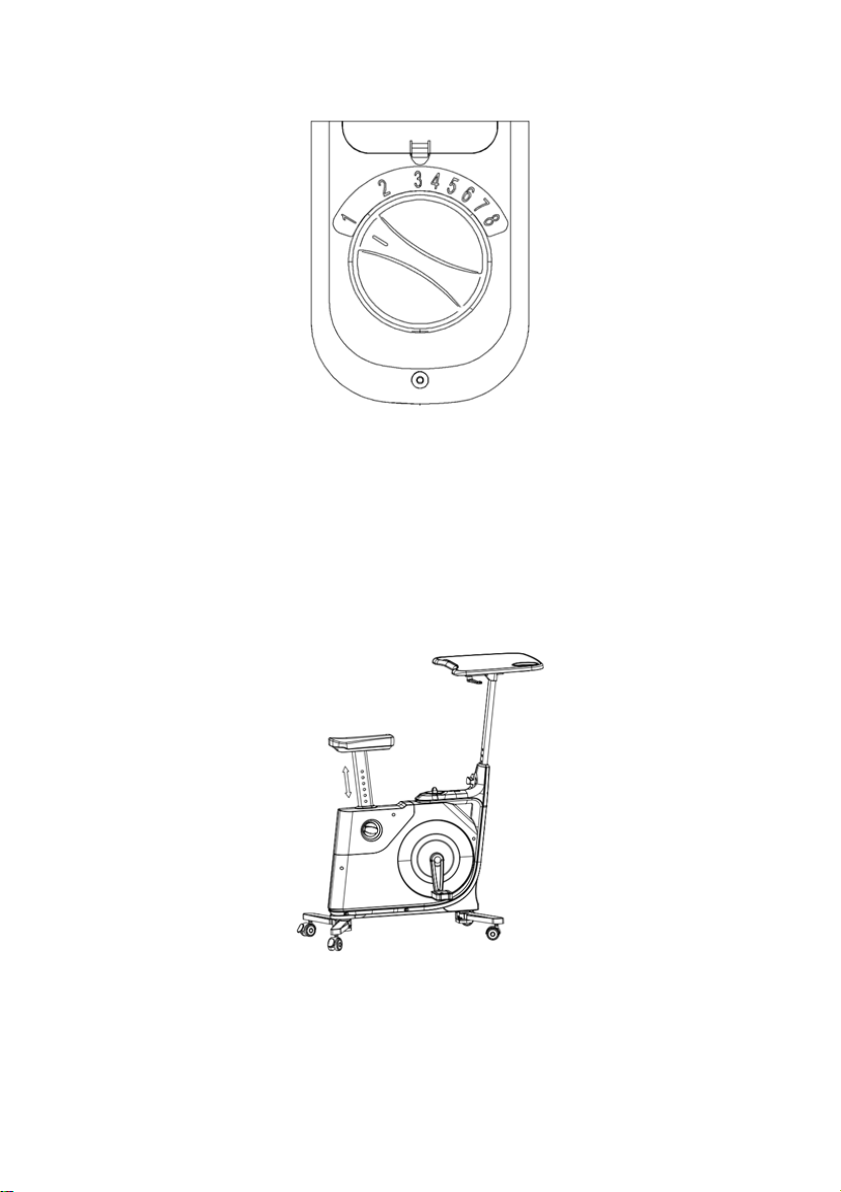
Resistance Adjustment
The resistance can be set from 1 (least) to 8 (most)
Turn the dial clockwise to increase the resistance and turn it anticlockwise to decrease the
resistance.
Seat Adjustment
NOTE: Do not completely remove the adjustment knob from the frame. To adjust the
seat, you will need to loosen the knob and then pull the knob outward.
Turn the seat adjustment knob anticlockwise to loosen. Pull the knob outward and move the
seat up/down at the same time. Once the required position is reached, release and tighten
the knob. Ensure that the seat is locked will not move by pulling up on the seat.
Page 9
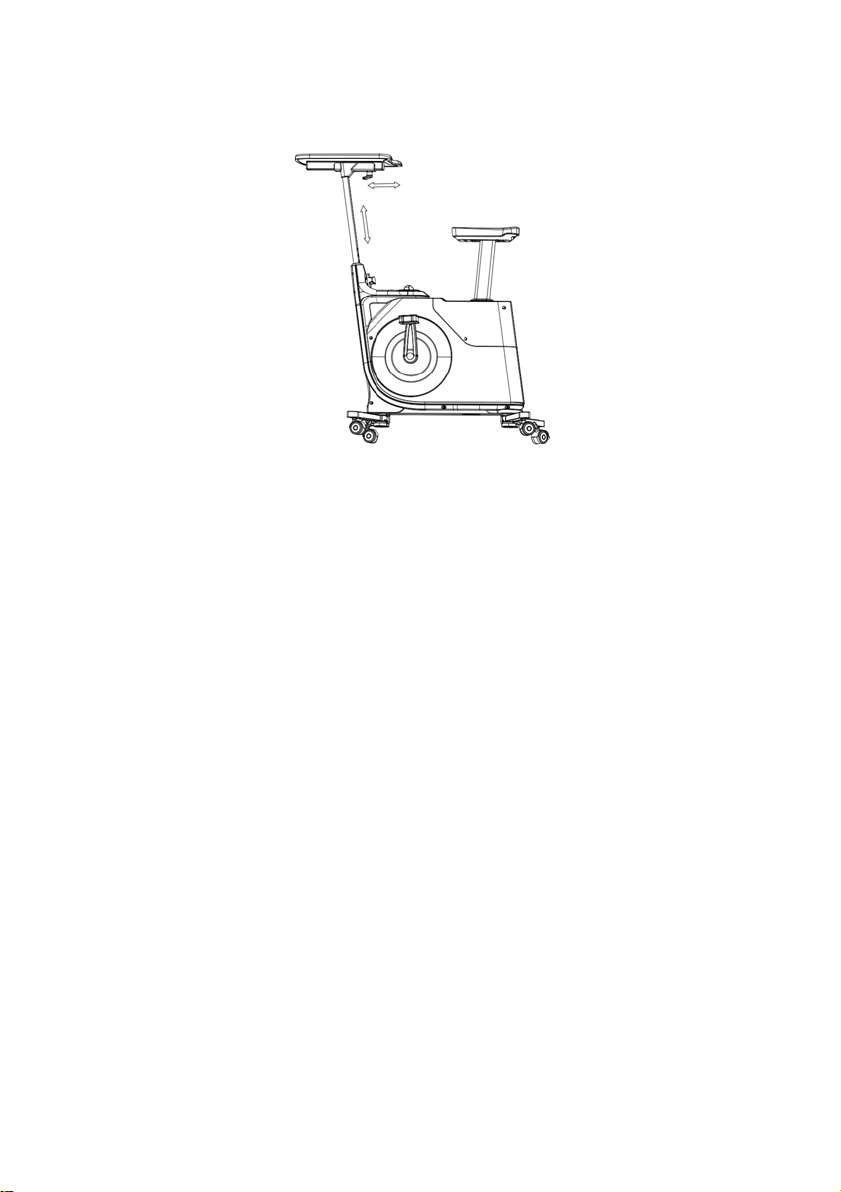
Table Adjustment
Turn the post adjustment knob anticlockwise to loosen. Pull the knob outward and move the
post up/down at the same time. Once the required position is reached, release and tighten
the knob. Ensure that the seat is locked will not move by pulling up on the seat.
Loosen the table bolt and move the table front or back. Once the required position is
reached, tighten the bolt so it does not move.
Page 10
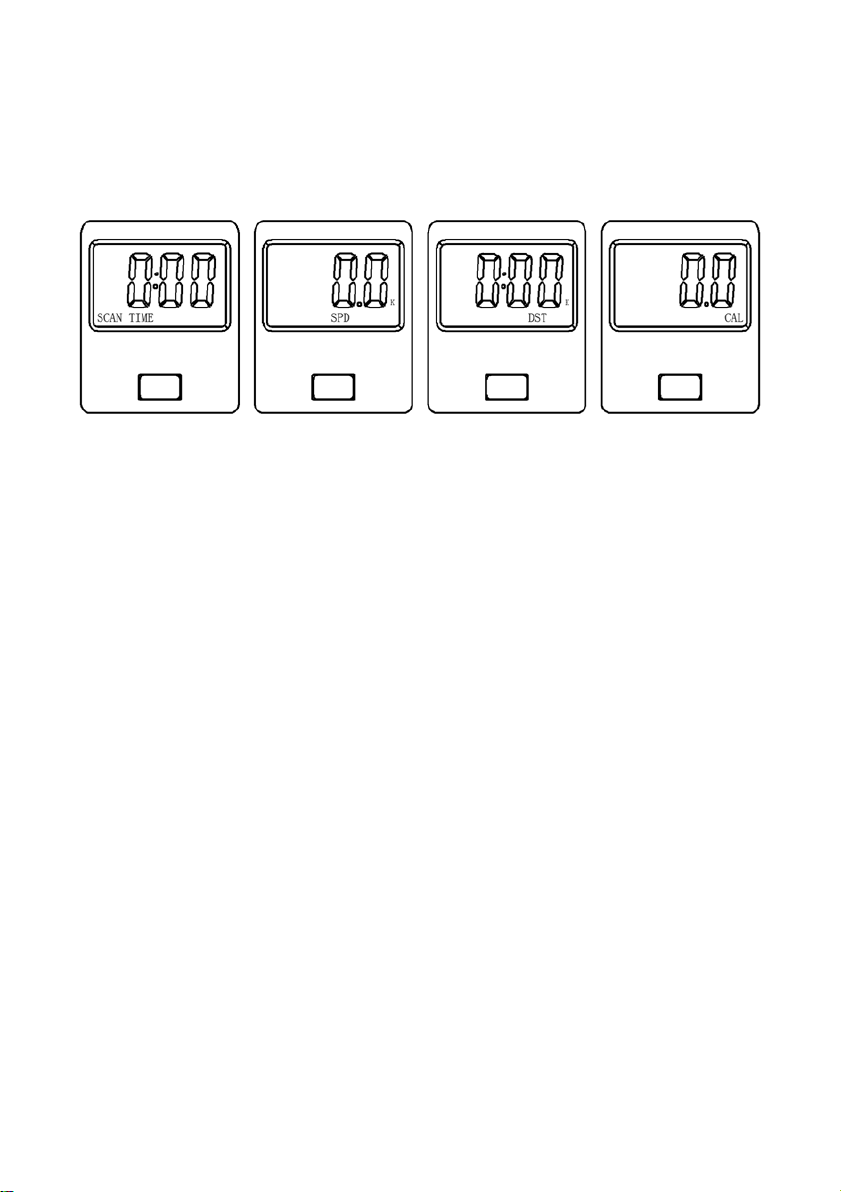
Monitor Display
NOTE: The monitor will not function without a CR2032 battery installed.
Display Button: The display will be blank when not in use. To use, simply start pedalling and
the monitor will display time/speed/distance/calories.
The display will automatically start in scan mode. During this mode, the scan icon on the
left side of the display will be visible and flashing. This mode will cycle through each of the
display functions during operation. To leave scan mode, press the display button (located
below the display screen) and release. This will select the next display function. This function
will remain on the display throughout operation. Press the display button again to toggle
through each of the display functions.
To reset the display, press and hold the display button until all icons are displayed. Release
the button and the display functions will now be reset to zero.
SCAN: This function allows the computer to scan or rotate through each workout data,
readout automatically (TIME, SPD, DIST and CAL). The scan function is in process when the
scan icon is illuminated and flashing on the left side of the display.
TIME: This function displays the duration of your workout.
SPEED: Displays your workout speed.
DISTANCE: This function displays the distance you have travelled during your workout.
CALORIES: This function displays the calories you have burned during your workout. The
calorie count is based on an average weight. Therefore, the results are only an estimate. This
result should not be used for medical purposes.
Page 11
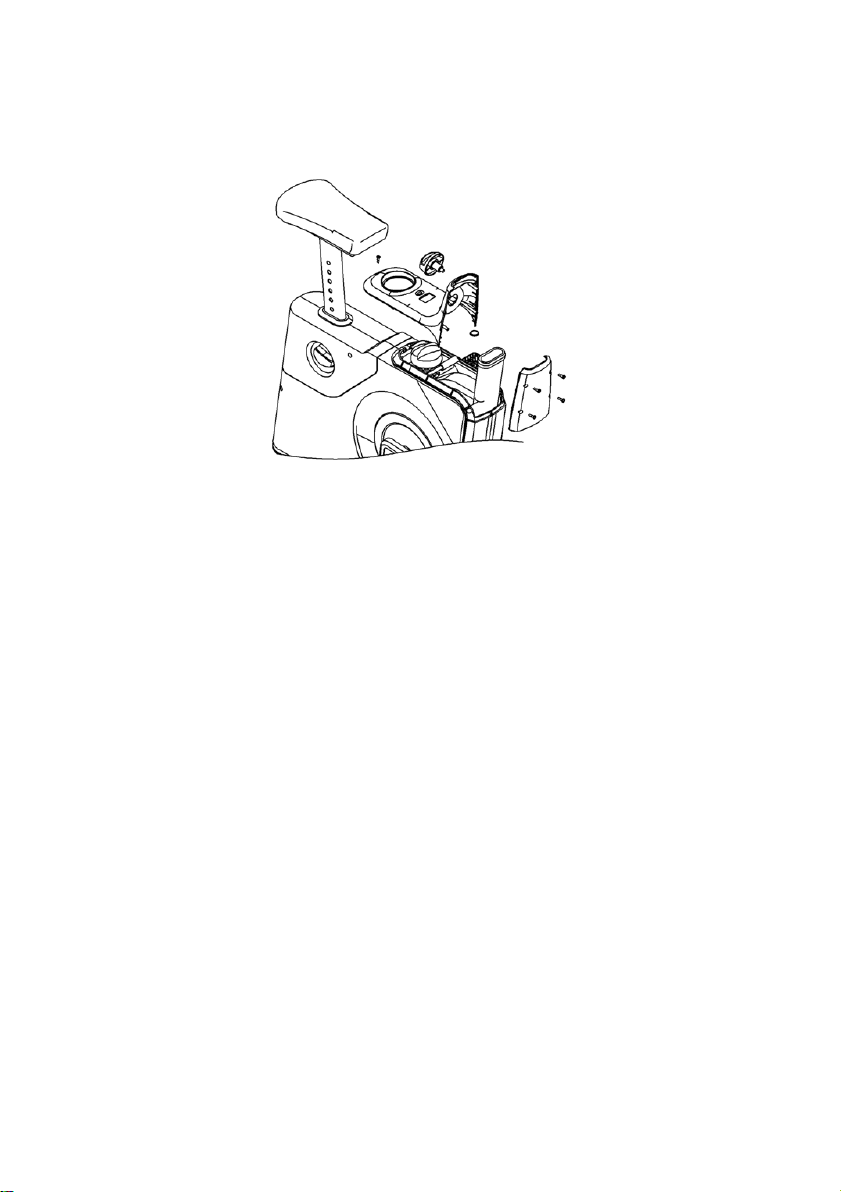
Battery Replacement
1. Remove the post and remove the knob from the main frame. Remove the five
screws as shown in above figure to make the monitor apart from the frame by
gently pulling the monitor out of the frame.
2. Turn the monitor back over and gently slide the monitor back onto the frame.
Ensure that the monitor is locked in place.
3. Turn over the monitor to expose the battery compartment. Take out the old battery
and insert a new one. Ensure the computer wires from the frame and monitor are
connected. Tighten the five screws.
Page 12

Need more information?
We hope that this user guide has given you
the assistance needed for a simple set-up.
For the most up-to-date guide for your product,
as well as any additional assistance you may require,
head online to help.kogan.com
 Loading...