

Page 1
Chassis Guide
5
5
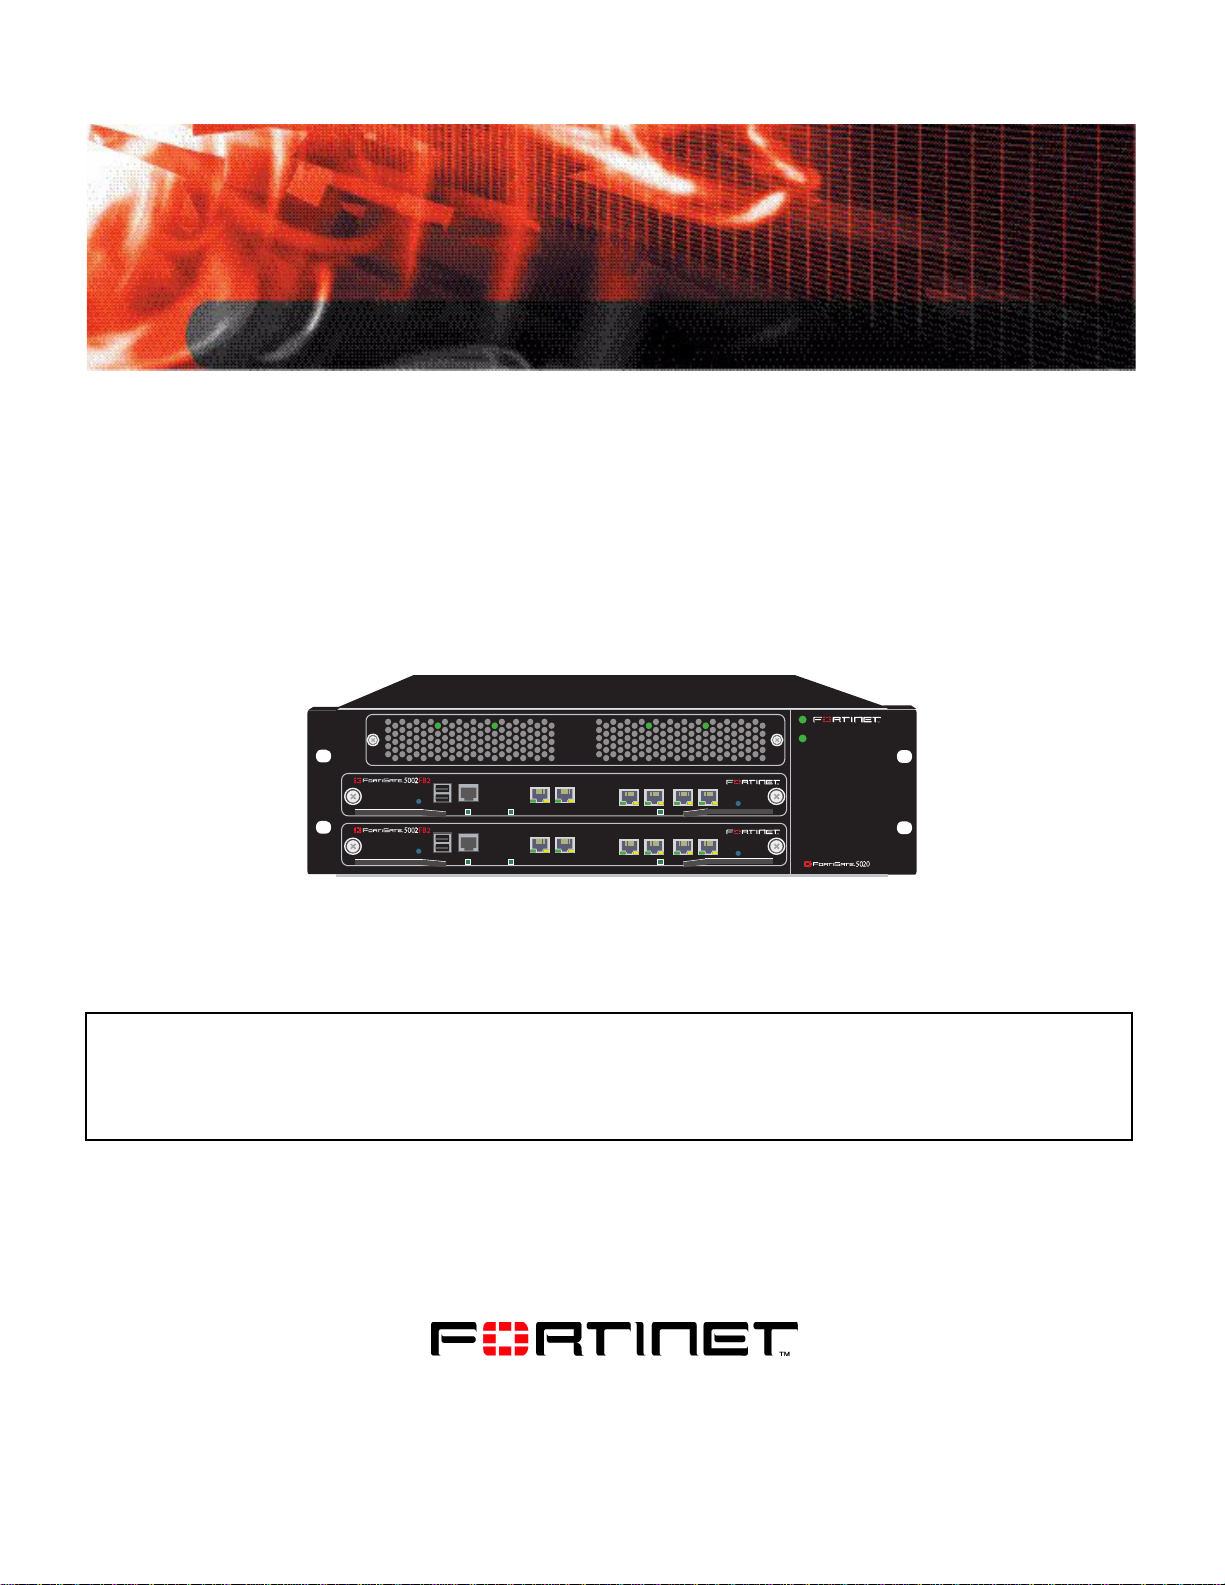
FortiGate-5020
PSU A
PSU B
USB
CONSOLE
RESET
RESET
STATUS
USB
CONSOLE
STATUS
162
PWR
162
PWR
3 4 5 6
IPM
3 4 5 6
IPM
ALT
ON/OFF
ALT
ON/OFF
A detailed guide to the features and capabilities FortiGate-5020 chassis. This FortiGate-5020 Chassis Guide
describes FortiGate-5020 hardware features, and how to install the FortiGate-5020 chassis.
The most recent versions of this and all FortiGate-5000 series documents are available from the FortiGate-5000
page of the Fortinet Technical Documentation web site (http://docs.forticare.com).
www.fortinet.com
FortiGate-5020 Chassis Guide
01-30000-0043-20061207
Page 2

Warnings and cautions
Only trained and qualified personnel should be allowed to install or maintain FortiGate-5000 series
equipment. Read and comply with all warnings, cautions and notices in this document.
CAUTION: Risk of Explosion if Battery is replaced by an Incorrect Type. Dispose of Used Batteries According
!
to the Instructions.
Caution: You should be aware of the following cautions and warnings before installing FortiGate-5000 series
!
hardware
• Turning off all power switches may not turn off all power to the FortiGate-5000 series equipment.
Except where noted, disconnect the FortiGate-5000 series equipment from all power sources,
telecommunications links and networks before installing, or removing FortiGate-5000 series
components, or performing other maintenance tasks. Failure to do this can result in personal injury or
equipment damage. Some circuitry in the Fort iGa te-5000 series equipment may continue to operate
even though all power switches are off.
• An easily accessible disconnect device, such as a circuit breaker, should be incorporated into the data
center wiring that connects power to the FortiGate-5000 series equipment.
• Install FortiGate-5000 series chassis at the lower positions of a rack to avoid making the rack top-heavy
and unstable.
• Do not insert metal objects or tools into open chassis slots.
• Electrostatic discharge (ESD) can damage FortiGate-5000 series equipment. Only perform the
procedures described in this document from an ESD workstation. If no such station is available, you
can provide some ESD protection by wearing an anti-static wrist or ankle strap and attaching it to an
ESD connector or to a metal part of a FortiGate chassis.
• Some FortiGate-500 0 series component s may overload yo ur supply circuit and imp act your overcurre nt
protection and supply wiring. Refer to nameplate ratings to address this concern.
• Make sure all FortiGate-5000 series components have reliable grounding. Fortinet recommends direct
connections to the branch circuit.
• If you install a FortiGate-5000 series component in a closed or multi-unit rack assembly, the operating
ambient temperature of the rack environment may be greater than room ambient. Make sure the
operating ambient temperature does not exceed the manufacturer's maximum rated ambient
temperature.
• Inst alling FortiGate-5000 series equipment in a rack should be such that the amount of airflow required
for safe operation of the equipment is not compromised.
• This equipment is for installation only in a Restricted Access Location (dedicated equipment room,
service closet or the like), in accordance with the National Electrical Code.
• Per the National Electrical Code, sizing of a Listed circuit breaker or branch circuit fuse and the supply
conductors to the equipment is based on the marked inpu t current rating. A p roduct with a marked input
current rating of 25 A is required to be placed on a 40 A branch circuit. The supply conductors will also
be sized according to the input current rating and also derated for the maximum rated operating
ambient temperature, Tma, of the equipment.
• FortiGate-5000 series equipment shall be installed and connected to an electrical supply source in
accordance with the applicable codes and re gu la tio ns for the location in which it is installed. Particular
attention shall be paid to use of correct wire type and size to comply with the applicable codes and
regulations for the installation / location. Connection of the supply wiring to the terminal block on the
equipment may be accomplished using Listed wire compression lugs, for example, Pressure Terminal
Connector made by Ideal Industries Inc. or equivalent which is suitable for A WG 10. Par ticular attenti on
shall be given to use of the appropriate compre ss ion too l spe cifie d by the compression lug
manufacturer, if one is specified.
FortiGate-5020 Chassis Guide
01-30000-0043-20061207
Page 3

Contents
Contents
Warnings and cautions..................................................................................... 2
FortiGate-5020 chassis...................................................... 5
FortiGate-5020 front panel................................................................................ 5
FortiGate-5020 back panel...................... ... .... ... ... ... .......................................... 6
Physical description of the FortiGate-5020 chassis....................................... 6
FortiGate-5020 hardware procedures .............................. 7
Mounting the FortiGate-5020 chassis.............................................................. 7
Air flow ....................................................... ... ... ... ... ....................................... 7
Connecting the FortiGate-5020 chassis to AC power.................................... 7
Turning on FortiGate-5020 chassis power...................................................... 8
Inserting FortiGate-5000 series modules into a FortiGate-5020 chassis..... 8
Base backplane communications and HA between
FortiGate-5020 chassis...................................................... 9
FortiGate-5020 base backplane interfaces ... ... ... ............................................. 9
FortiGate HA between two FortiGate-5020 chassis...................................... 10
Changing the HA heartbeat interface configuration .................................... 10
For more information....................................................... 13
Fortinet documentation .................................................................................. 13
Fortinet Tools and Documentation CD........................................................ 13
Fortinet Knowledge Center ........................................................................ 13
Comments on Fortinet technical documentation ................................ ........ 13
Customer service and technical support...................................................... 13
FortiGate-5020 Chassis Guide
01-30000-0043-20061207 3
Page 4

Contents
FortiGate-5020 Chassis Guide
4 01-30000-0043-20061207
Page 5
FortiGate-5020 chassis FortiGate-5020 front panel
5
5
FortiGate-5020 chassis
You can install one or two FortiGate-5000 series modules in the two slots of the
FortiGate-5020 ATCA chassis. The FortiGate-5020 is a 4U chassis that contains
two redundant AC to DC power supplies that connect to AC power. The
FortiGate-5020 chassis also includes an internal cooling fan tray. If both slots
contain FortiGate-5001SX modules, the FortiGate-5020 chassis provides a total
of 16 Gigabit ethernet FortiGate interfaces.
If you install the same FortiGate-5000 series module in both slots, you can
configure the modules to operate as an HA cluster . HA hear tbeat communications
between the modules uses the FortiGate-5020 backplane. No extra switching or
other connections are required.
The FortiGate-5020 chassis can only be connected to AC power. Two redundant
FortiGate-5020/5050 power supplies are factory installed in the FortiGate-5020
chassis.
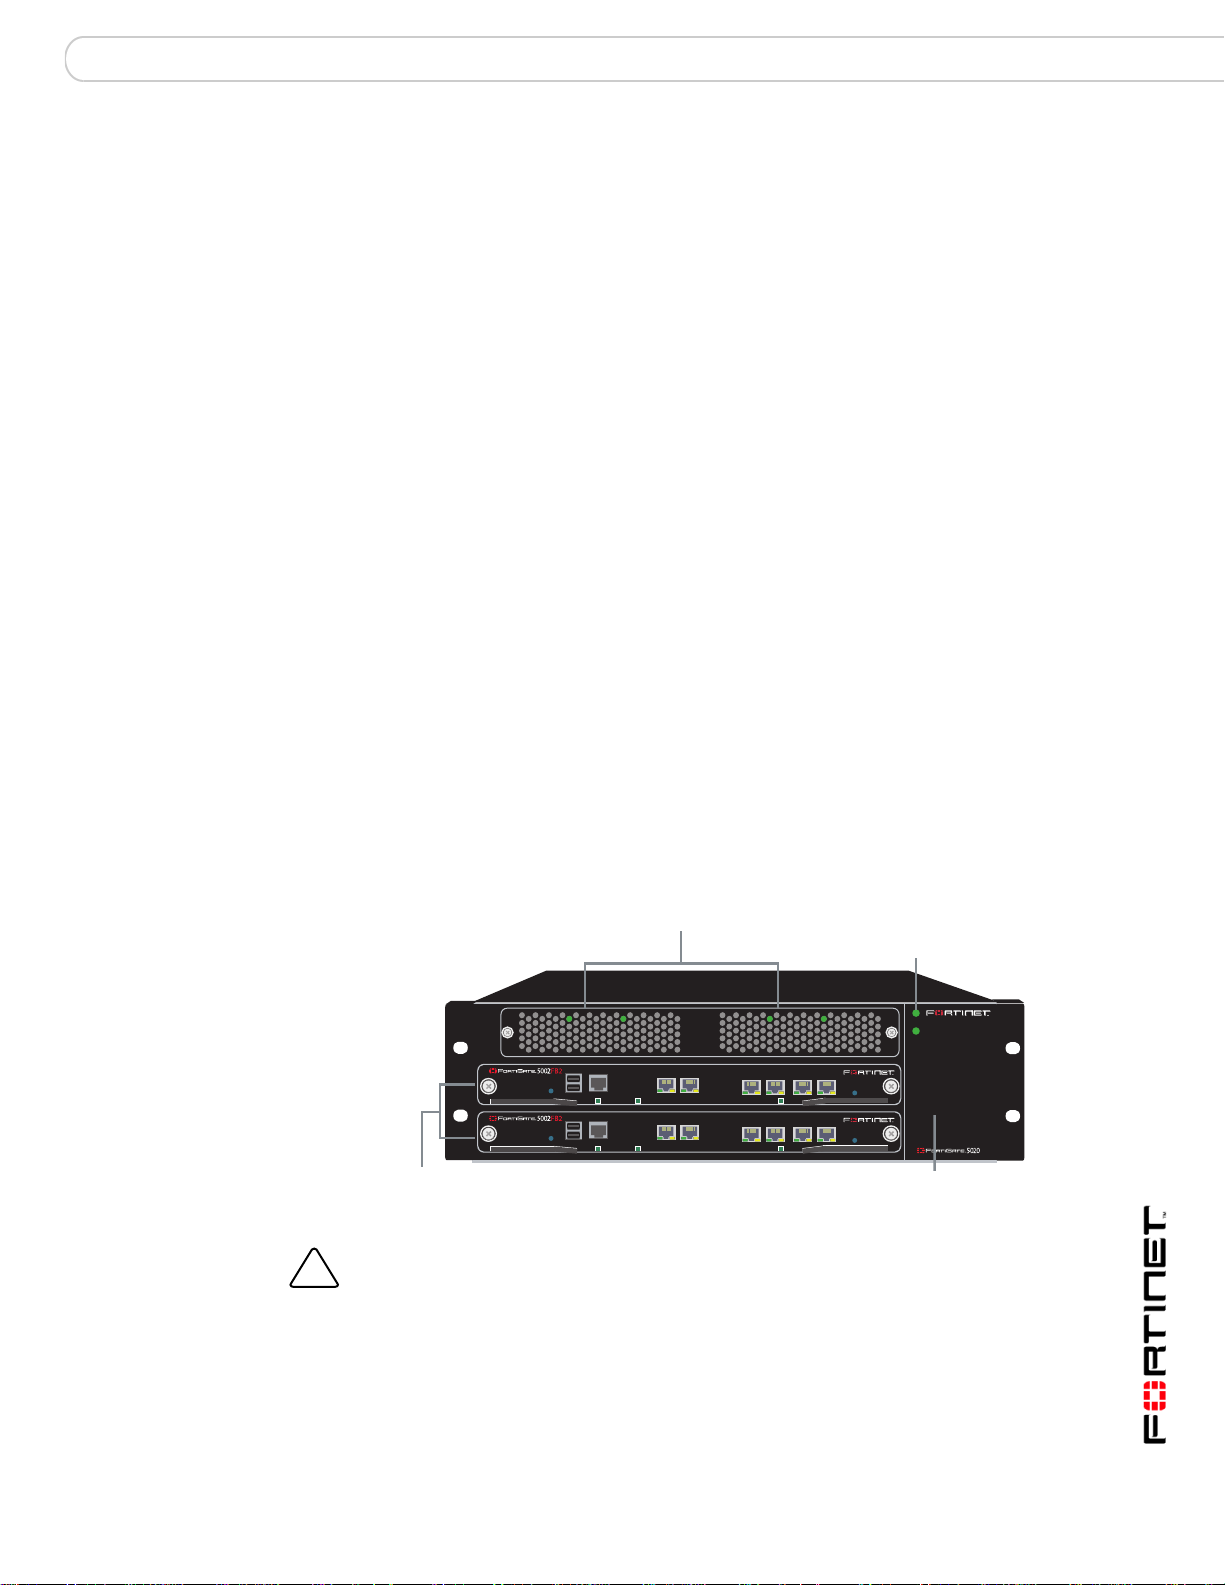
FortiGate-5020 front panel
Figure 1 shows the front of a FortiGate-5020 chassis. Two FortiGate-5002FB2
modules are installed. The FortiGate-5020/5050 power supplies are factory
installed behind the panel a t the top of the chassis. The power LEDs for the power
supplies are visible on the front panel as well.
Figure 1: FortiGate-5020 front panel with two FortiGate-5002FB2 modules
FortiGate-5002FB2
modules
Caution: Do not operate the FortiGate-5020 chassis with open slots on the front panel. For
optimum cooling performance and safety, the slots must contain a FortiGate-5000 series
!
module or an air baffle slot filler.
Hot-swappable FortiGate-5020/5050
power supplies (behind panel)
PSU A
USB
RESET
USB
RESET
CONSOLE
CONSOLE
162
STATUS
PWR
162
STATUS
PWR
PSU B
3 4 5 6
IPM
3 4 5 6
IPM
Hot swappable cooling fan tray
(accessable from back panel)
Power LEDs
PSU A
PSU B
ALT
ON/OFF
ALT
ON/OFF
FortiGate-5020 Chassis Guide
01-30000-0043-20061207 5
Page 6

FortiGate-5020 back panel FortiGate-5020 chassis
FortiGate-5020 back panel
Figure 2 shows the back of a FortiGate-5020 chassis. The chassis back panel
includes two redundant AC power connectors and provides access to the hot
swappable cooling fan tray. Each AC power connector includes a 25 Amp circuit
breaker that also functions as the on/off switch for the AC power connector. You
can use the power wire fixtures to secure AC power wires to prevent the power
wires from being accidently disconnected .
Figure 2: FortiGate-5020 chassis back panel
Circuit
breaker
AC power
connector
Hot swappable
cooling fan tray
AC power
connector
Power
wire
fixture
Circuit
breaker
Power
wire
fixture
Physical description of the FortiGate-5020 chassis
The FortiGate-5020 chassis is a 4U chassis that can be installed in a standard
19-inch rack. Table 1 describes the physical characteristics of the FortiGate-5020
chassis.
Table 1: FortiGate-5020 physical description
Dimensions 5.25 x 17 x 15.5 in. (13.3 x 43.2 x 39.4 cm)
(H x W x D)
Weight 35.5 lb. (16.1 kg)
Operating environment Temperature: -13 to 158 °F (-25 to 70°C)
Relative humidity: 5 to 95% (Non-condensing)
Storage environ m ent Temperature: -20 to 80°C
Relative humidity: 5 to 95% (Non-condensing)
Power dissipation Maximum: 800 watts
Power input 2x redundant 110 to 250 VAC
FortiGate-5020 Chassis Guide
6 01-30000-0043-20061207
Page 7

FortiGate-5020 hardware procedures Mounting the FortiGate-5020 chassis
FortiGate-5020 hardware procedures
This chapter describes:
• Mounting the FortiGate-5020 chassis
• Connecting the FortiGate-5020 chassis to AC power
• Turning on FortiGate-5020 chassis power
• Inserting FortiGate-5000 series modules into a FortiGate-5020 chassis
Mounting the FortiGate-5020 chassis
Note: Mount the FortiGate chassis before installing the FortiGate-5000 series modules.
The FortiGate-5020 chassis must be mounted in a standard 19-inch rack. The
chassis requires 4U of vertical space in the rack.
If you install the FortiGate-5020 chassis in a closed or multi-unit rack assembly,
the operating ambient temperat ur e of the rack en vir on m en t ma y be gre a ter tha n
room ambient temperature. Make sure the operating ambient temperature does
not exceed the manufacturer's maximum rated ambient temperature.
Caution: The FortiGate-5020 chassis should not be operated as a free-standing appliance.
!
Air flow
For rack installation, make sure that the amount of air flow required for safe
operation of the FortiGate-5020 chassis is not compromised.
Connecting the FortiGate-5020 chassis to AC power
The AC power connectors on the back of the FortiGate-5020 chassis provide
power to two factory installed redundant FortiGate-5020/5050 power supplies.
Each power supply distributes 800 W of 48VDC power to the entire
FortiGate-5020 chassis.
You can connect one AC power connector and switch the power connector on to
provide power to the FortiGate-5020 chassis. You can connect the second AC
power connector and switch the second power con nector on to provide redundant
power to the FortiGate-5020 chassis. For the most effective redundancy
protection, you should connect each AC power conne cto r to a d ifferent AC power
circuit.
AC input power characteristics:
• AC input voltage: 110 to 250 VAC
• AC input current: 10A
• Frequency: 47 to 63 Hz
FortiGate-5020 Chassis Guide
01-30000-0043-20061207 7
Page 8

T urning on FortiGate-5020 chassis power FortiGate-5020 hardware procedures
Turning on FortiGate-5020 chassis power
Once the FortiGate-5020 chassis is connected to two AC power sources you can
turn on the power by switching on the circuit breakers at the back of the
FortiGate-5020 chassis (see Figure 2 on page 6 for location of the circuit
breakers).
The FortiGate-5020 chassis should power up. If the FortiGate-5020 is operating
correctly, from the grille at the panel at the top of the FortiGate-5020 chassis you
should be able to see that the LEDs of both FortiGate-5020/5050 power supplies
are lit. As well the PSU A and PSU B LEDs on the right side of the chassis front
panel should be lit (see Figure 1 on page 5).
In addition, if any FortiGate-5000 series modules have been installed in the
chassis they should power on and their front panel LEDs should indicate that they
are operating normally. If any of these LEDs are not lit, there may be problems
with the FortiGate-5020/5050 power supplies.
Inserting FortiGate-5000 series modules into a FortiGate-5020 chassis
You can insert FortiGate-5001SX or FortiGate-5001FA2 modules into the
FortiGate-5020 chassis. Arrange the modules in slots as required for your
configuration. FortiGate-5001SX or FortiGate-5001FA2 modules can be installed
in both of the FortiGate-5020 slots.
Your FortiGate-5020 chassis may have been shipped with temporary slot filler
panels that include a warning message to read the FortiGate-5000 d ocumentation
before installing your product. The temporary slot fillers must be removed and all
slots filled; either with FortiGate-5001SX or FortiGate-5001FA2 modules or with
air baffle slot fillers. Air baffle slot fillers are similar to blank FortiGate-5000
modules and are required for proper cooling air flow.
Caution: FortiGate-5000 series modules must be protected from static discharge and
physical shock. Only handle or work with FortiGate-5000 series modules at a static-free
!
workstation. Always wear a grounded electrostatic discharge (ESD) preventive wrist or
ankle strap when handling FortiGate-5000 series modules.
Caution: Do not operate the FortiGate-5020 chassis with open slots on the front panel. For
optimum cooling performance and safety, the slots must contain a FortiGate-5000 series
!
module or an air baffle slot filler.
See the following documents for information about installing and removing the
FortiGate-5001SX or FortiGate-5001FA2 modules:
FortiGate-5001SX:
• FortiGate-5001SX Security System Guide
FortiGate-5001FA2:
• FortiGate-5001FA2 Security System Guide
FortiGate-5020 Chassis Guide
8 01-30000-0043-20061207
Page 9

Base backplane communications and HA between FortiGate-5020 chassis FortiGate-5020 base backplane interfaces
Base backplane communications and HA between FortiGate-5020 chassis
This chapter describes:
• FortiGate-5020 base backplane interfaces
• FortiGate HA between two FortiGate-5020 chassis
FortiGate-5020 base backplane interfaces
For the FortiGate-5020 chassis, you can use the FortiGate-5000 module base
backplane interfaces for HA heartbeat communication and data communication
between the two FortiGate modules installed in the same chassis. No changes to
the chassis configuration or additions to the chassis hardware are required. The
FortiGate-5020 chassis does not allow communication between different base
backplane channels or directly from the backplane to external networks. So the
base backplane interfaces can only be used for HA and data communication
between the FortiGate modules in the chassis, and only inside the same base
backplane channel.
Note: VLAN communication over the base backplane interfaces is available for
FortiGate-5000 modules installed in a FortiGate-5020 chassis. The FortiSwitch-5003 does
not support VLAN-tagged packets so VLAN communication is not available over the
FortiGate-5050 and FortiGate-5140 chassis base backplane interfaces.
For example, if you have two FortiGate-5001SX modules installed in a
FortiGate-5020 chassis, you can enable the base backplane interfa ces for data
communication and then you can communicate data from port9 on one
FortiGate-5001SX module to port9 of the other module. You can also
communicate data between port10 on one FortiGate-5001SX module and port10
on the other FortiGate-5001SX module. However, you cannot communicate data
between port9 on one FortiGate-5001SX module and port10 on the other
FortiGate-5001SX module.
Data communication between dif fer ent F ortiGate- 5000 modu les is supporte d. So,
for example, if you install a FortiGate-5001FA2 and a FortiGate-5001SX module
in the same FortiGate-5020 chassis, you can communicate between port9 of the
FortiGate-5001FA2 module and port9 of the FortiGate-5001SX module. You can
also communicate between port10 of the FortiGate-50 01FA2 and port10 on the
FortiGate-5001SX module.
FortiGate-5020 Chassis Guide
01-30000-0043-20061207 9
Page 10

FortiGate HA between two FortiGate-5020 chassis Base backplane communications and HA between FortiGate-5020 chassis
FortiGate HA between two FortiGate-5020 chassis
The FortiGate-5020 chassis does not support direct ethernet connections
between two or more FortiGate-5020 chassis. To configure HA for FortiGate
modules installed in two diff erent FortiGate-5020 chassis you must use one or two
of the front panel interfaces of the FortiGate modules as HA heartbeat interfaces.
Using two (or more) heartbeat interfaces is recommende d for redundancy.
The following diagram shows an example of how to connect four FortiGate5001SX units installed in two FortiGate-5020 chassis to make a cluster of 4
FortiGate-5001SX units.
This example cluster has a relatively basic network configuration. In the
configuration, port1 connects to an internal network and port2 connects to the
Internet. Port3 to port8 are available to be connected as HA heartbeat interfaces.
This example uses port7 and port8 as the HA heartbeat interfaces.
Figure 3: Network and HA heartbeat connections
Internal Network
port1 (internal network)
port7 (HA heartbeat)
Switch
Switch
PSU A
CONSOLE
ACC
PWR
CONSOLE
ACC
PWR
USB
1 2 3 4 5 6 7 8
USB
1 2 3 4 5 6 7 8
PSU B
STA IPM
STA IPM
Switch
port8 (HA heartbeat)
Switch
port2 (Internet)
Internet
Changing the HA heartbeat interface configuration
To configure FortiGate-5001SX cluster units for HA heartbeat interface
connections between modules installed in two FortiGate-5020 chassis, you must
change the default FortiGate-5001SX HA heartbeat interface configuration.
By default the FortiGate-5001SX HA heartbeat configuration uses port9 and
port10 (the backplane interfaces) for HA heartbeat interfaces. To configure HA
heartbeat interfaces for this example configuration, select port7 and port8 to be
HA heartbeat interfaces and unselect port9 and port10.
CONSOLE
ACC
PWR
CONSOLE
ACC
PWR
USB
1 2 3 4 5 6 7 8
USB
1 2 3 4 5 6 7 8
PSU A
PSU B
STA IPM
STA IPM
FortiGate-5020 Chassis Guide
10 01-30000-0043-20061207
Page 11

Base backplane communications and HA between FortiGate-5020 chassis FortiGate HA between two FortiGate-5020 chassis
Figure 4: FortiGate-5001SX HA heartbeat interface configuration
FortiGate-5020 Chassis Guide
01-30000-0043-20061207 11
Page 12

FortiGate HA between two FortiGate-5020 chassis Base backplane communications and HA between FortiGate-5020 chassis
FortiGate-5020 Chassis Guide
12 01-30000-0043-20061207
Page 13

For more information Fortinet documentation
For more information
Support for your Fortinet product is availab le as onlin e he lp fr om within the
web-based manager, from the Tools and Documentation CD included with the
product, on the Fortinet Technical Documentation web site, from the Fortinet
Knowledge Center web site, as well as from Fortinet Technical Support.
Fortinet documentation
The most up-to-date publications and previous releases of Fortinet product
documentation are available from the Fortinet Technical Documentation web site
at http://docs.forticare.com. FortiGate-5000 series documentation is located in its
own section of the site at http://docs.forticare.com/fgt5k.html.
Fortinet Tools and Documentation CD
All Fortinet documentation is available from th e Fortinet Tools and Document ation
CD shipped with your Fortinet product. The documents on this CD are current for
your product at shipping time. For the latest versions of all Fortinet documentation
see the Fortinet Technical Documentation web site at http://docs.forticare.com.
Fortinet Knowledge Center
Additional Fortinet technical documentation is available from the Fortinet
Knowledge Center. The knowledge center contains troubleshooting and how-to
articles, FAQs, technical notes, and more. Visit the Fortinet Knowledge Center at
http://kc.forticare.com.
Comments on Fortinet technical documentation
Please send information about any errors or omissions in this document, or any
Fortinet technical documentation, to techdoc@fortinet.com.
Customer service and technical support
Fortinet Technical Support provides services designed to make sure that your
Fortinet systems install quickly, configure easily, and operate reliably in your
network.
Please visit the Fortinet Technical Support web site at http://support.fortinet.com
to learn about the technical support services that Fortinet provides.
FortiGate-5020 Chassis Guide
01-30000-0043-20061207 13
Page 14

© Copyright 2006 Fortinet, Inc. All rights reserved. No part of this publication
including text, examples, diagrams or illustrations may be reproduced,
transmitted, or translated in any form or by any means, electronic, mechanical,
manual, optical or otherwise, for any purpose, without prior written permission of
Fortinet, Inc.
Trademarks
Dynamic Threat Prevention System (DTPS), APSecure, FortiASIC, FortiBIOS,
FortiBridge, FortiClient, FortiGate, FortiGate Unified Threat Management System,
FortiGuard, FortiGuard-Antispam, FortiGuard-Antivirus, FortiGuard-Intrusion,
FortiGuard-Web, FortiLog, FortiAnalyzer, FortiManager, Fortinet, FortiOS,
FortiPartner, FortiProtect, FortiReporter, FortiResponse, FortiShield, FortiVoIP,
and FortiWiFi are trademarks of Fortinet, Inc. in the United States and/or other
countries. The names of actual comp anies and products mentio ned herein may be
the trademarks of their respective owners.
Regulatory compliance
FCC Class A Part 15 CSA/CUS
Note: If you install a battery that is not the correct type, it could explode.
!
Dispose of used batteries according to local regulations.
www.fortinet.com
FortiGate-5020 Chassis Guide
01-30000-0043-20061207
 Loading...