

Fortinet FortiAP U422EV Quick Start Manual

FortiAP U422EV
Quick Start Guide
FortiAP-U422EV
QuickStart Guide
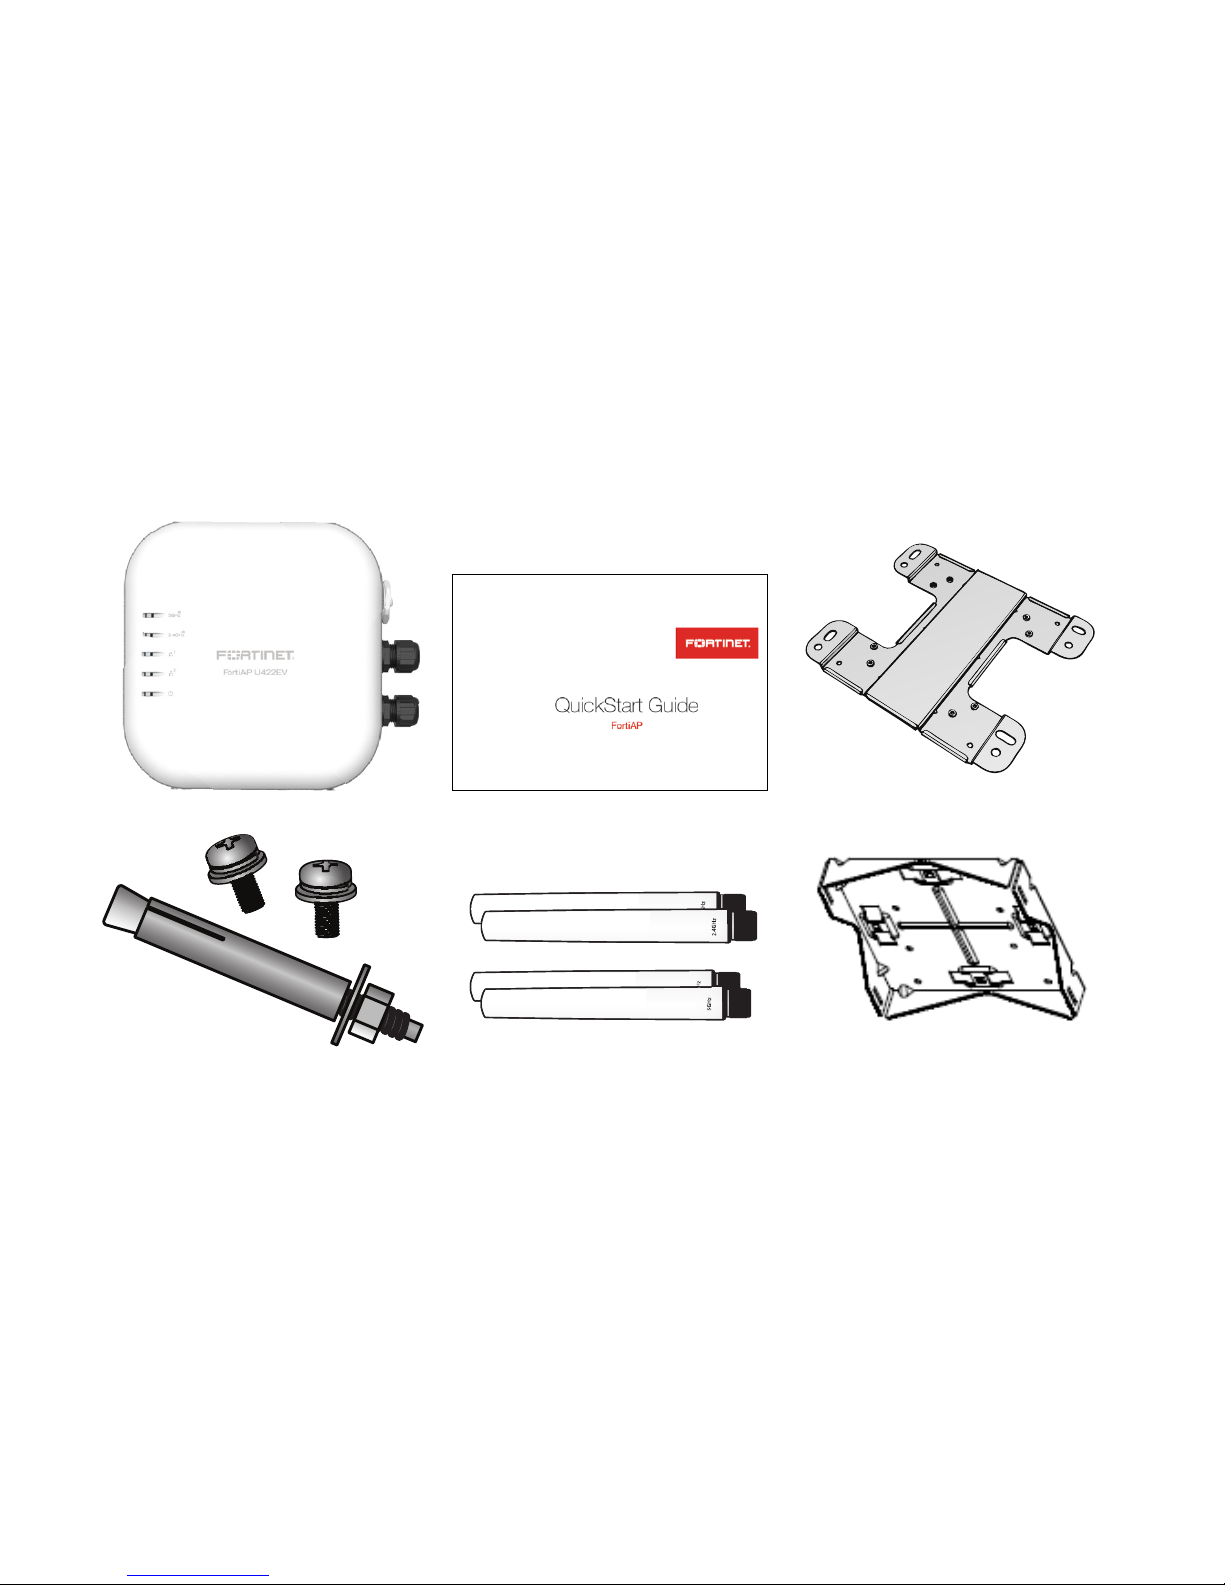
FAP-U422EV Box Includes
1
Mounting Screws (8) & Bolts (4)
Pole Mount Bracket
Wall Mount Bracket
2.4 GHz Antenna (4)
5 GHz Antenna (4)

FAP-U422EV Box Includes
Grounding Screw
PIN060 POE Adapter
Grounding Cable
7” Pole Mount Strap (2)
3” Pole Mount Strap (2)
2
Weatherproof Connector
Power Cable

About FAP-U422EV
IMPORTANT: Supported only from FortiWLC Release 8.4.0 or later and FortiGate with FortiOS Release 5.6.3 and later.
The FAP-U422EV is a dual radio, dual band 802.11ac Wave 2 access point and supports two 4x4 MIMO radios.
The device complies with the 802.3at PoE specications and operates with a default TX power of +24dBm in
2.4GHz channels and +23dBm in 5.0GHz channels.
The FAP-U422 EV is compatible with FortiWLC enterprise wireless LAN controllers, integrated FortiGate
enterprise rewall LAN controllers, and FortiCloud controllers.
This device can be wall mounted or pole mounted. Use the supplied hardware components to complete
installing the unit.
3
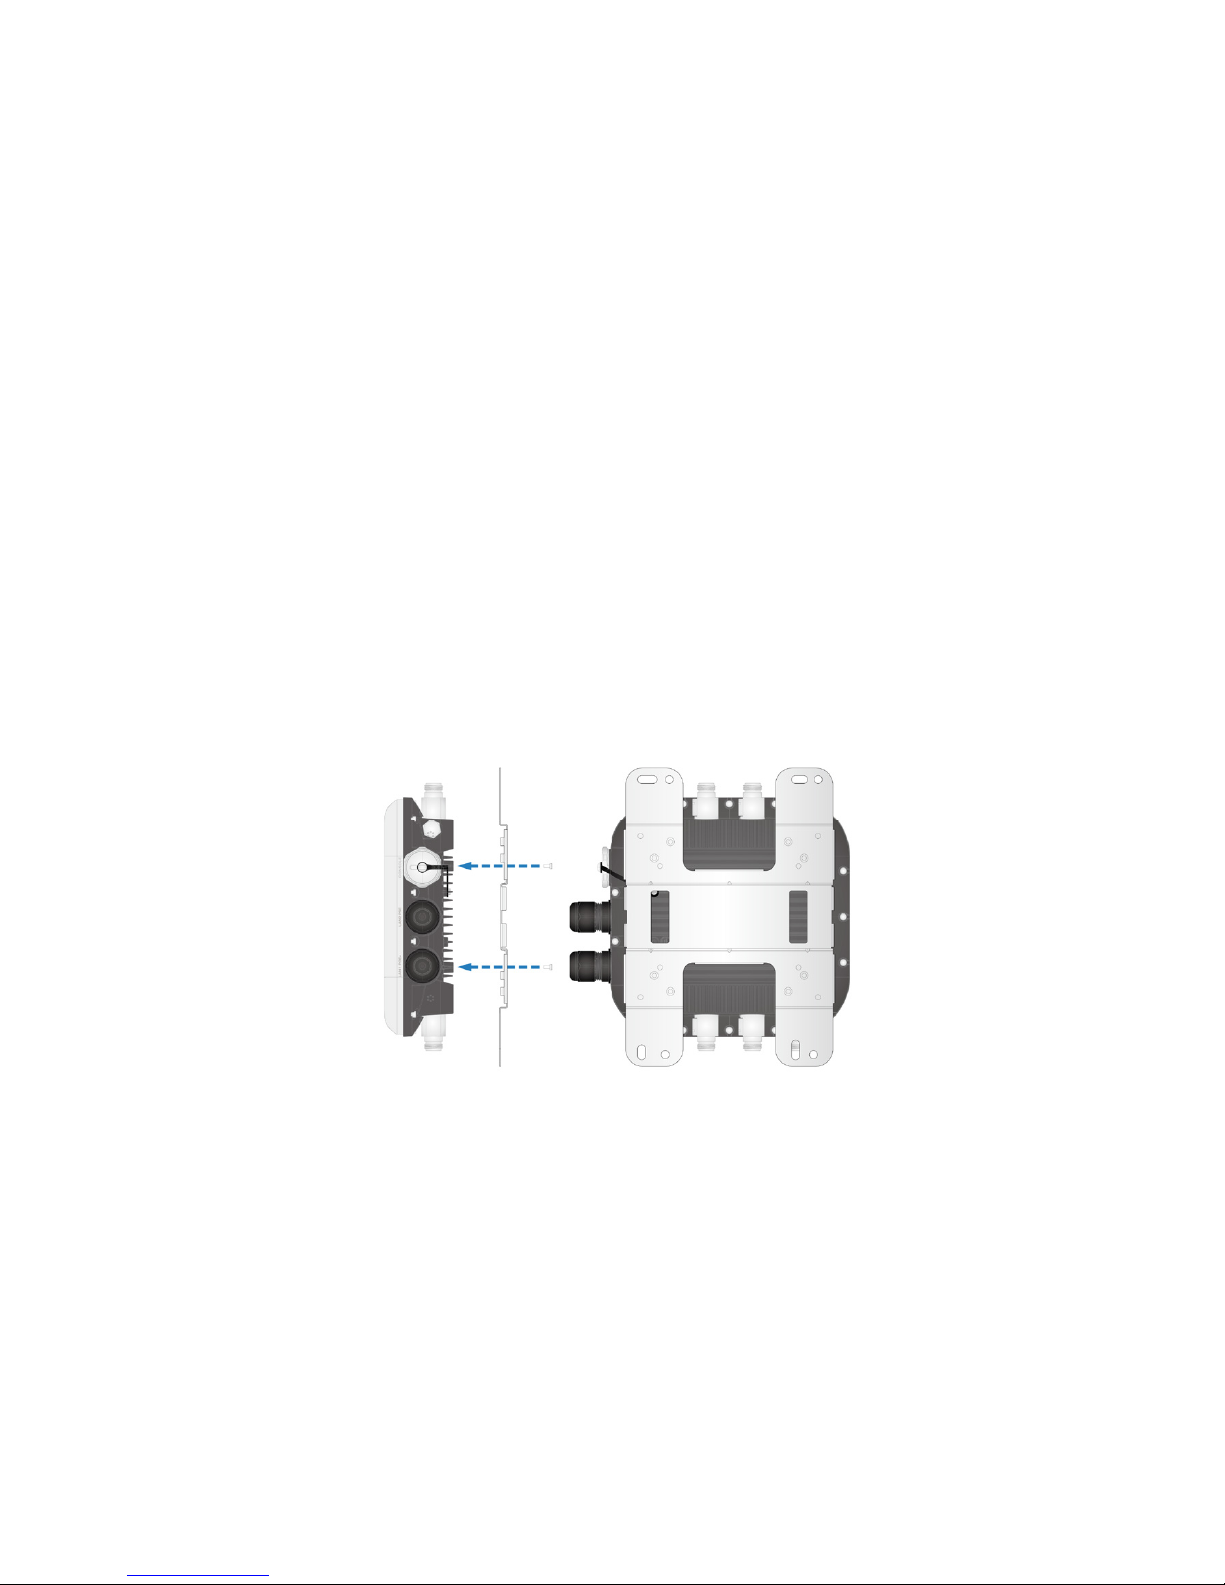
Follow this procedure to attach the unit to a wall using the supplied wall mount bracket.
1. Using the wall-mount base as a template, mark the location of the mounting bolt holes on a at wall
surface.
2. Drill the mounting holes in the marked locations and hammer the bolts into the openings.
3. Attach the wall-mount base securely to the back of the unit using the provided mounting screws.
4
Wall Mounting FAP-U422EV
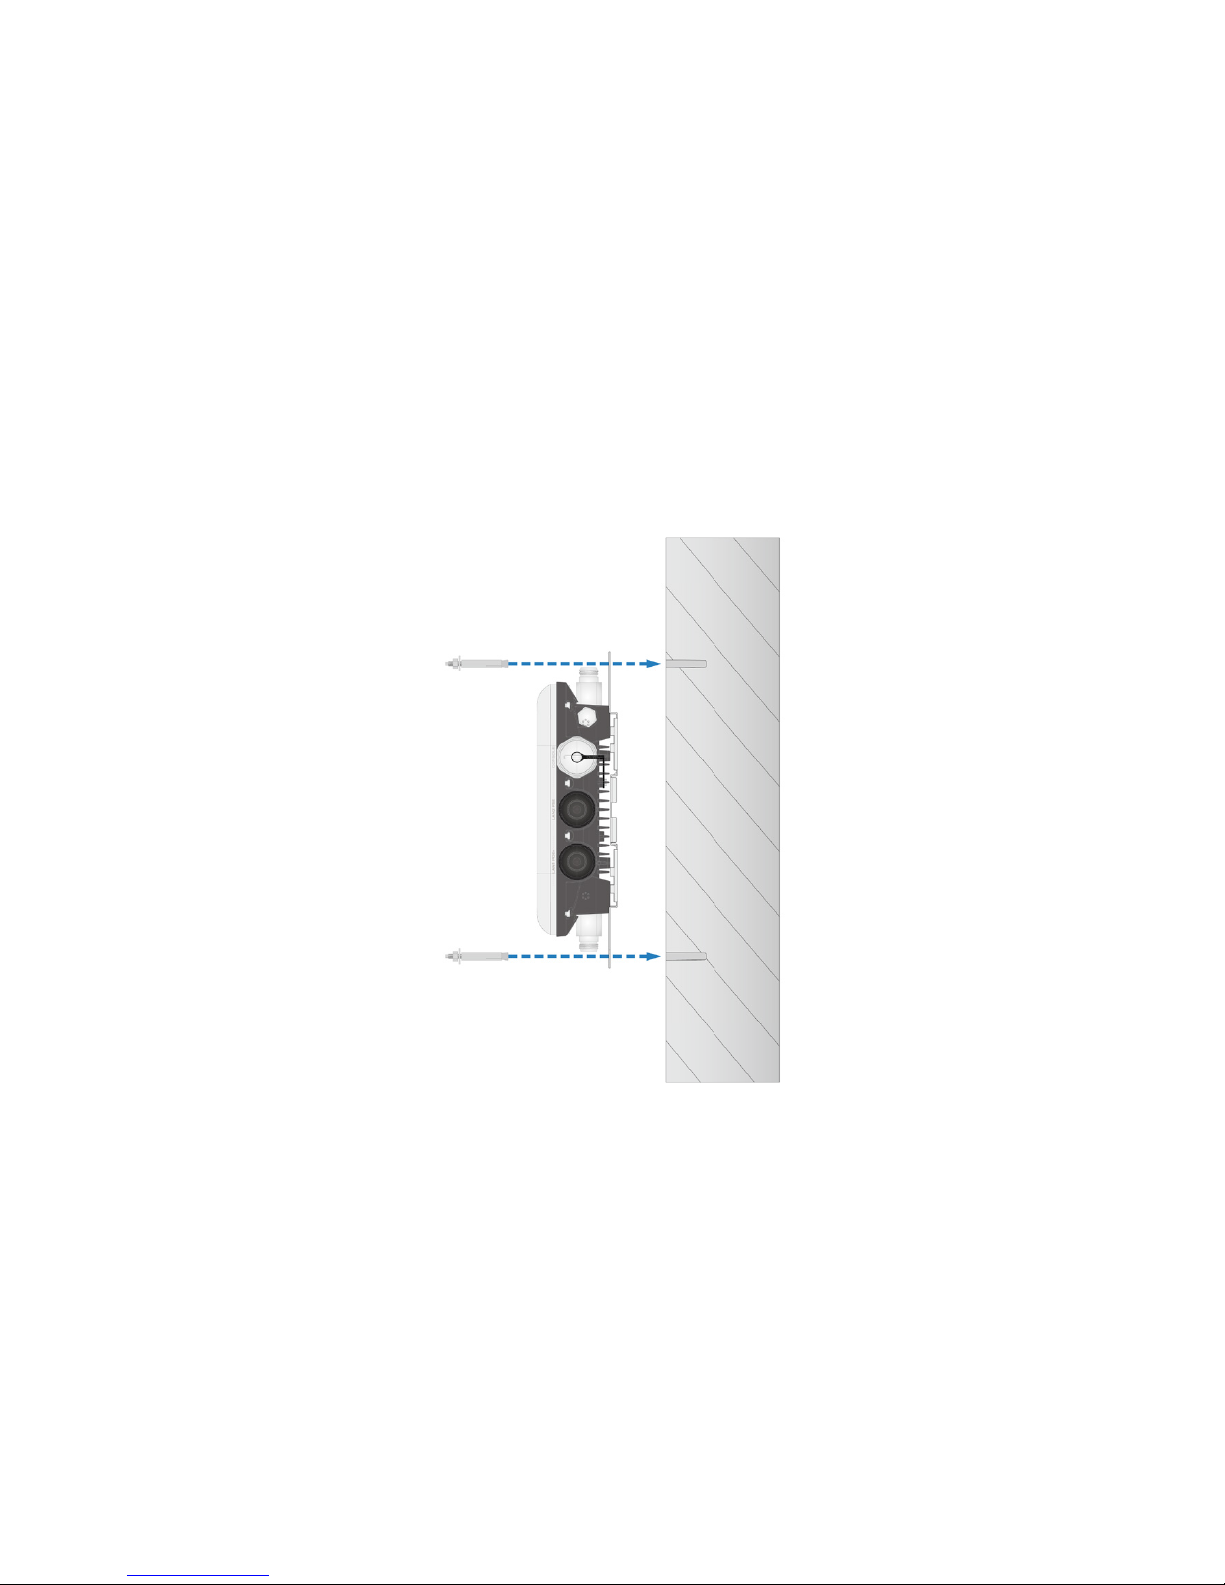
4. Attach the device onto the wall by using the mounting bolts to secure the mounting base to the wall.
5
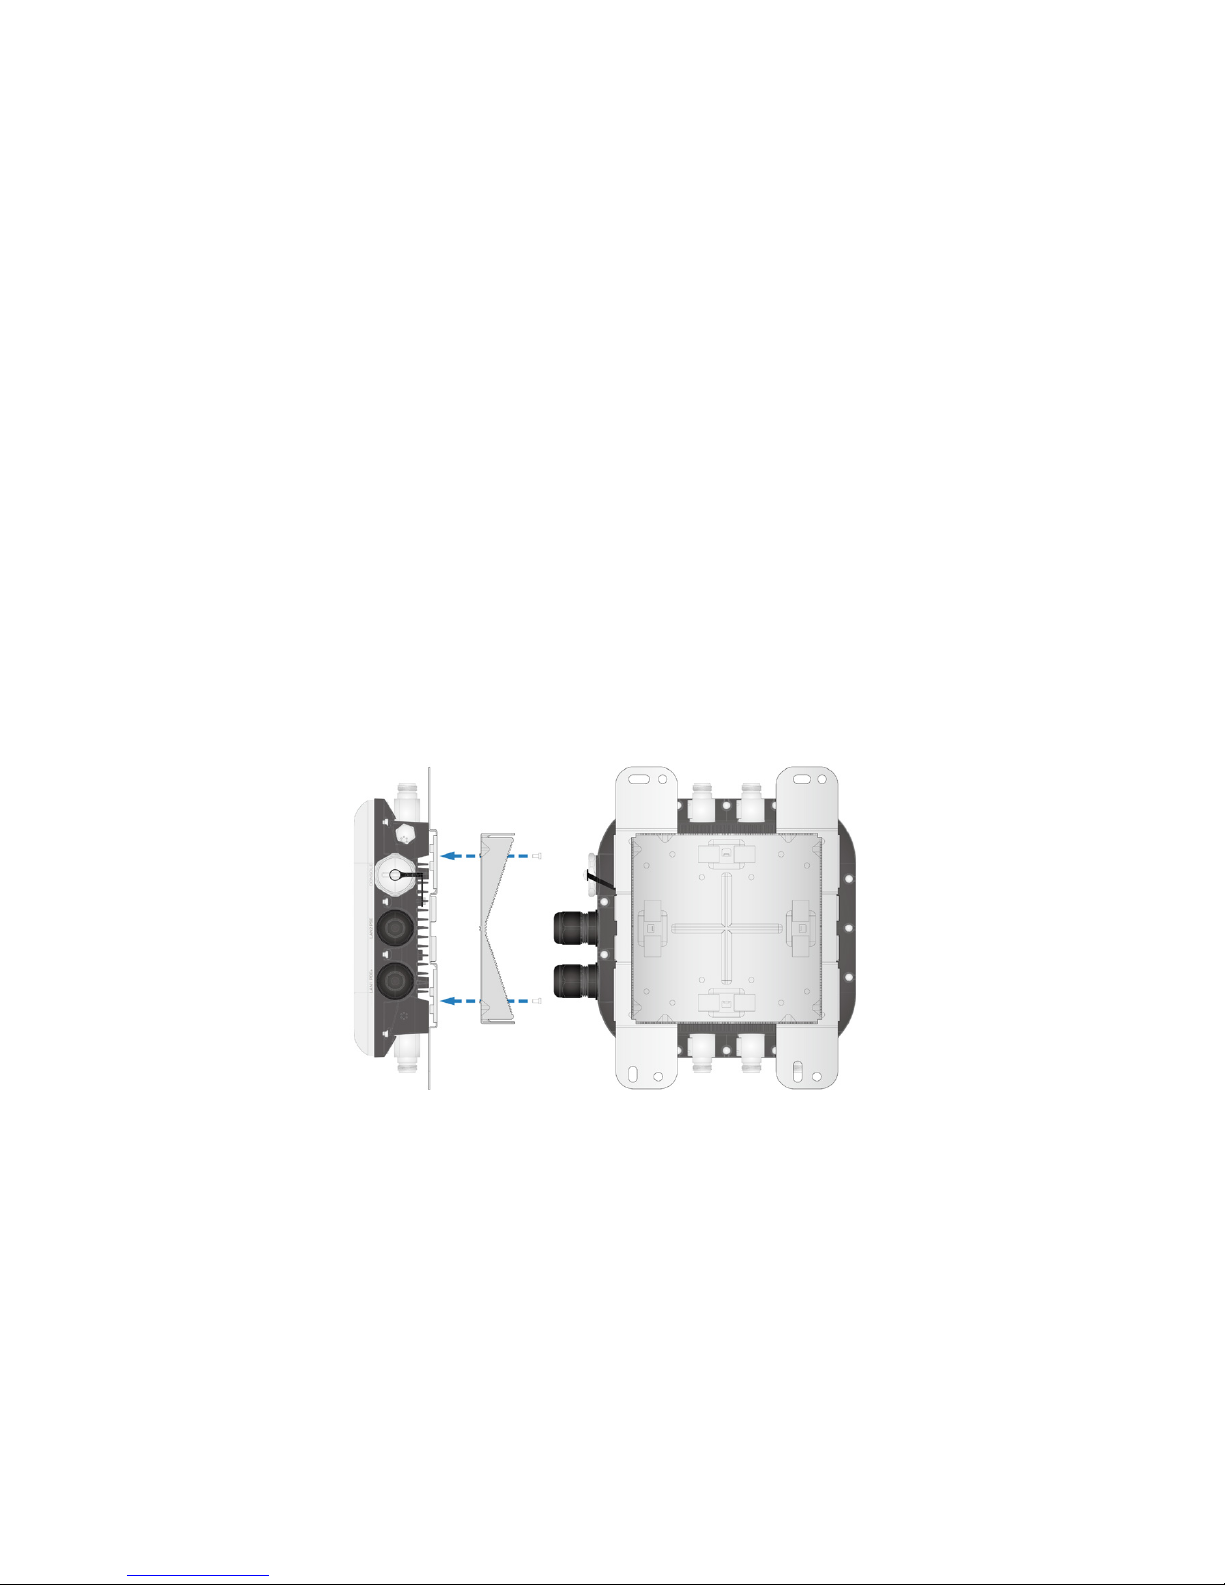
Follow this procedure to attach the unit to a pole vertically or horizontally using the supplied pole mount
bracket and straps.
1. Attach the wall-mount base securely to the back of the unit using the provided mounting screws.
2. Attach the pole-mount bracket securely to the wall-mount base using the provided mounting
screws.
6
Pole Mounting FAP-U422EV
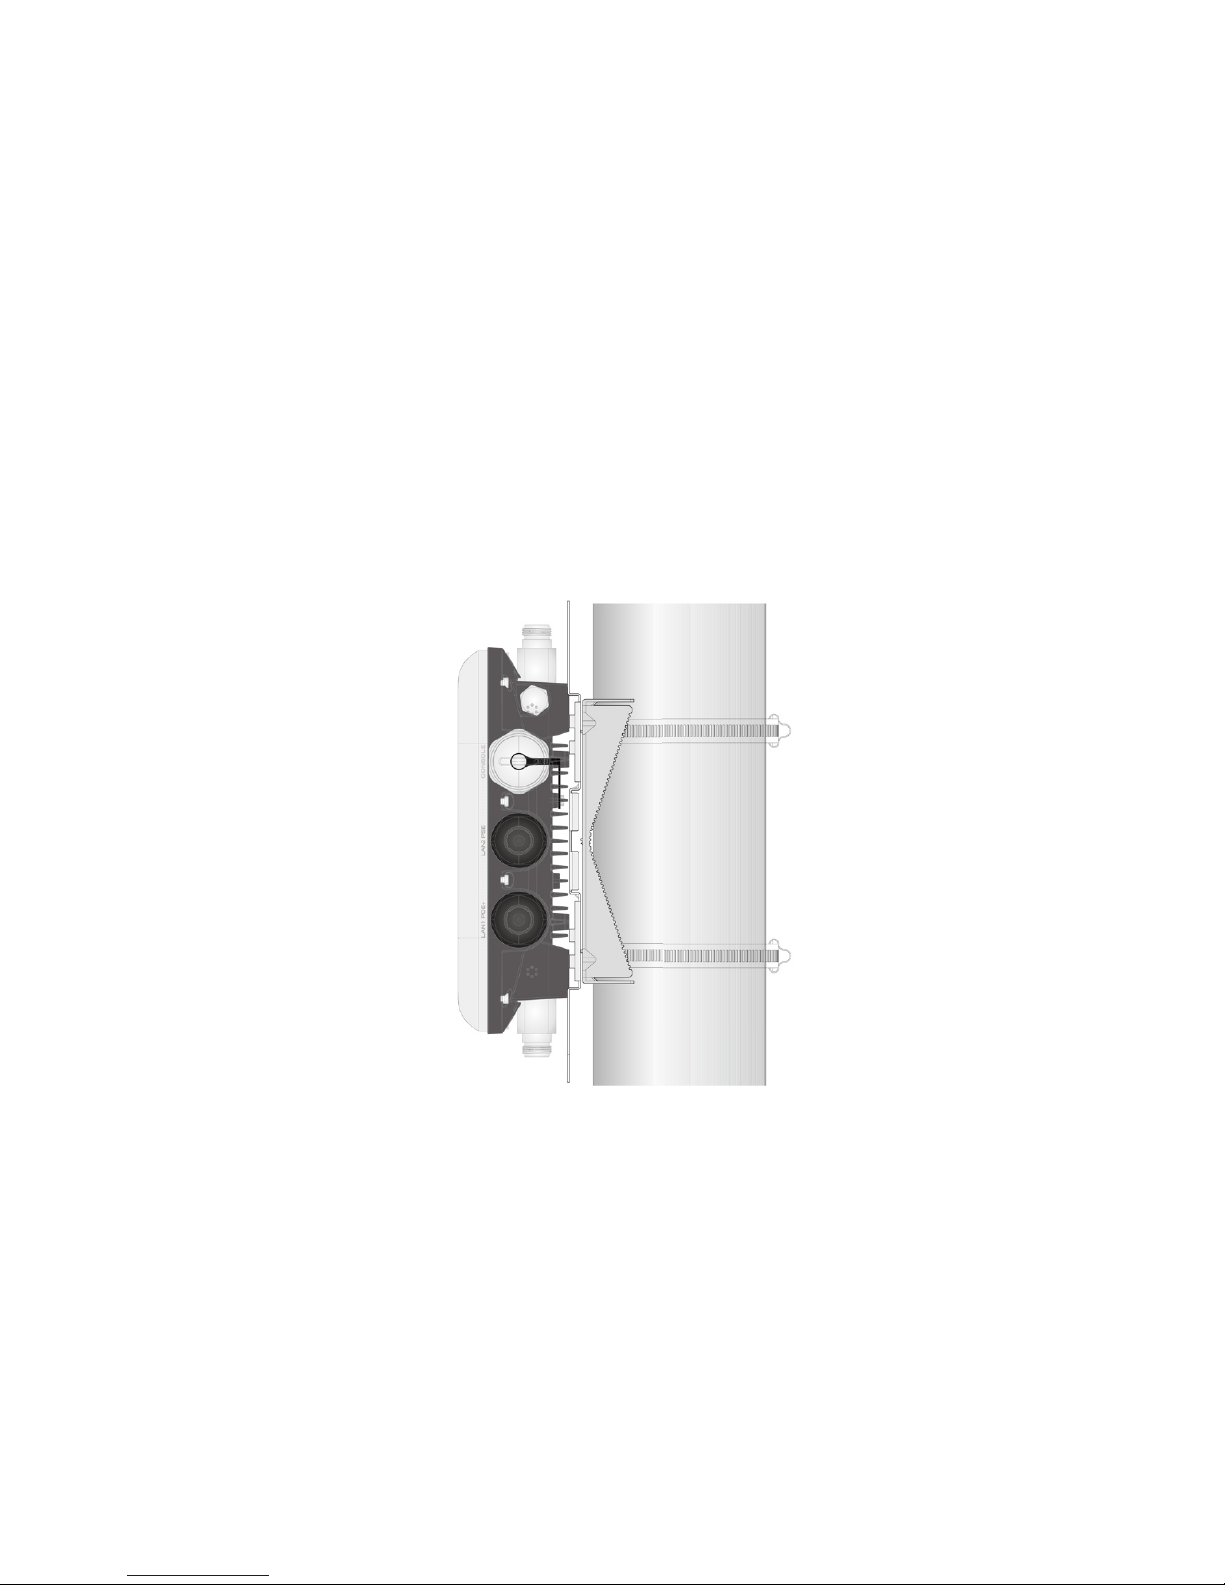
3. Loop the pole straps through the slots on the bracket and then around the pole.
The pole mounting straps can be attached for either vertical or horizontal mounting.
4. Tighten the straps with the provided screws to attach the unit securely to the pole.
7

Antennas
The FortiAP unit provides dual concurrent radio signals. Use the 2.4GHz antennas to access 2.4GHz radio
(IEEE 802.11b/g/n) signals and the 5GHz antennas to access 5GHz radio (IEEE 802.11a/n/ac) signals. To use
both radio frequencies concurrently, use all eight WiFi antennas.
1. Insert the antenna base rmly into the appropriate antenna mount.
2. Securely hand tighten the fastening collar
3. Repeat for the remaining antennas
Installing the WiFi Antennas
8

Antennas
9
A1
2.4G
A2
5.0G
A3
2.4G
A4
5.0G
A8
5.0G
A7
2.4G
A6
5.0G
A5
5.0G

2.4GHz Antennas MIMO Chain
A1 Chain 1
A7 Chain 2
A3 Chain 3
A5 Chain 4
5GHz Antennas MIMO Chain
A4 Chain 1
A6 Chain 2
A2 Chain 3
A8 Chain 4
Antennas
This is the MIMO chain information for the 2.4GHz and 5.0 GHz
antennas.
10
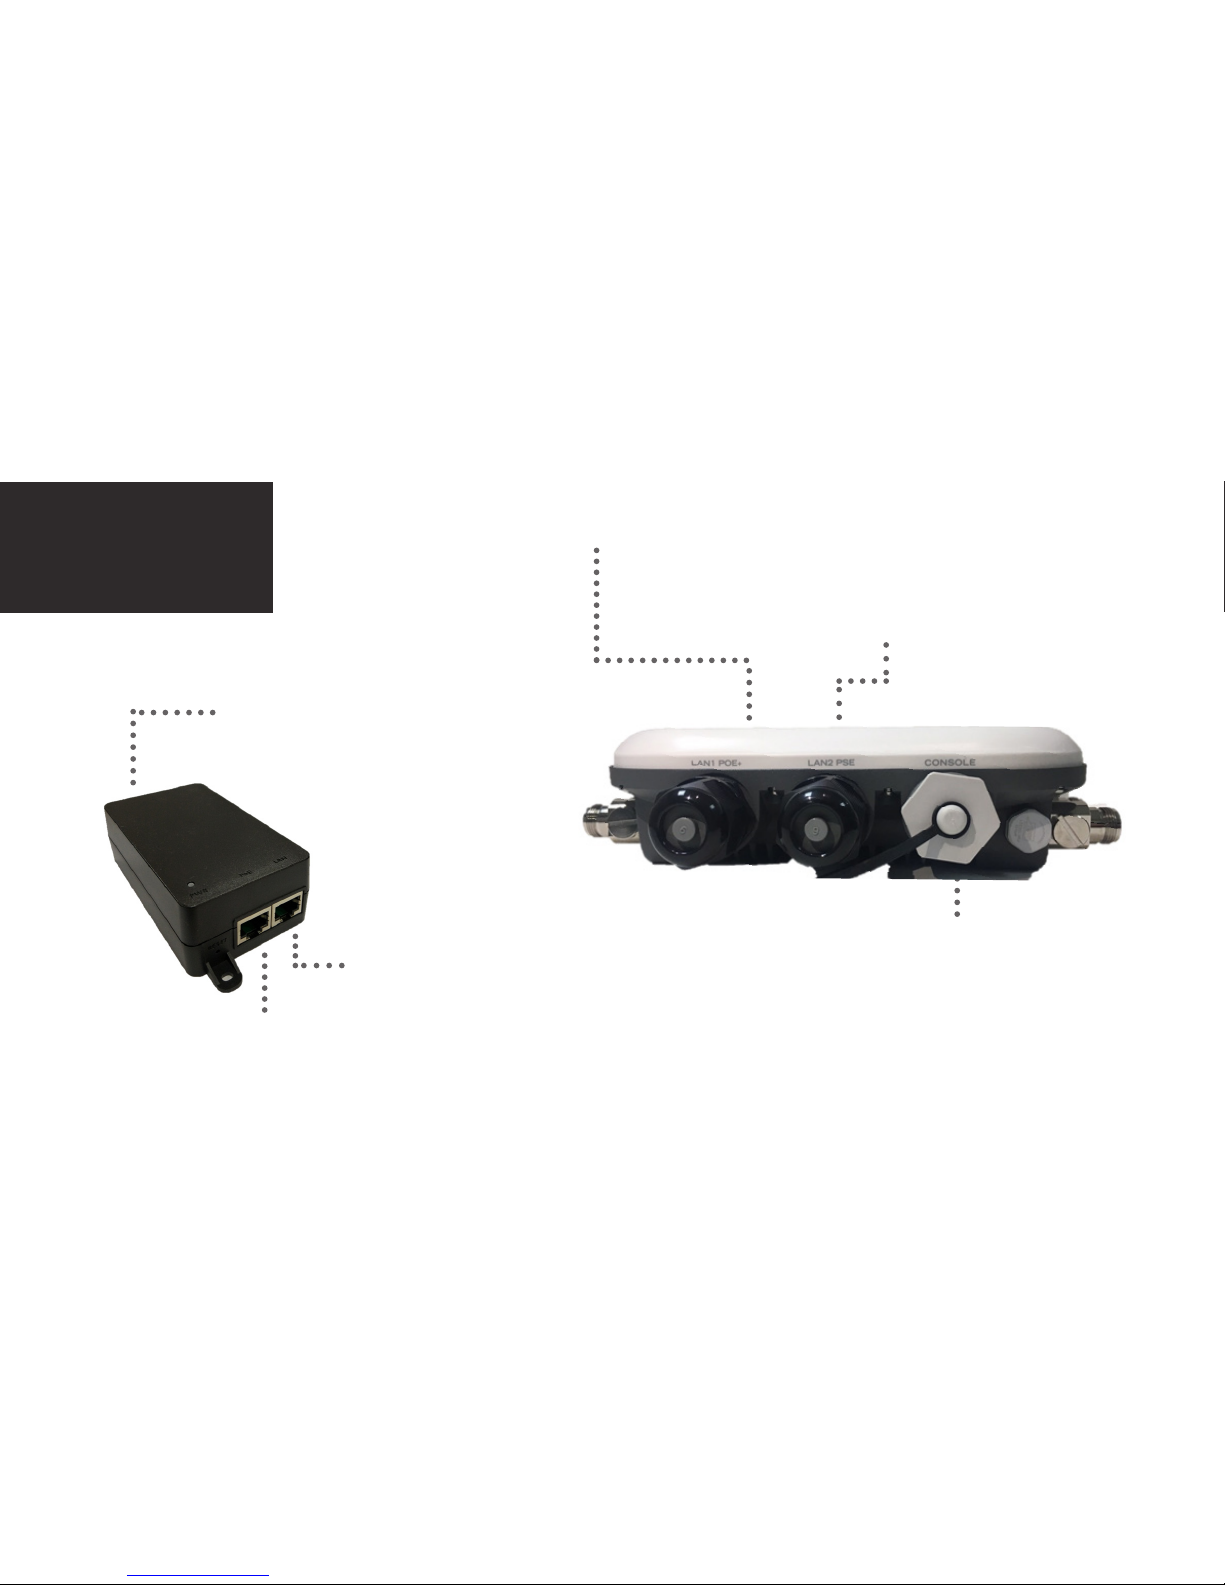
Ports
Ethernet Port (RJ-45) Gigabit Ethernet port
with Power over Ethernet (PoE)
support
Console Port (RJ-45)
Optional management computer
connection
Provides access to the Command-Line
Interface (CLI)
Serial Baud Rate 115200
11
AP Port (PoE output)
Network Port (RJ-45)
Gigabit Ethernet port for network
connection or internet
Power adapter connection
Ethernet Port (RJ-45) Gigabit Ethernet port
with Power Sourcing Eqipment
(PSE) support
 Loading...