

Page 1
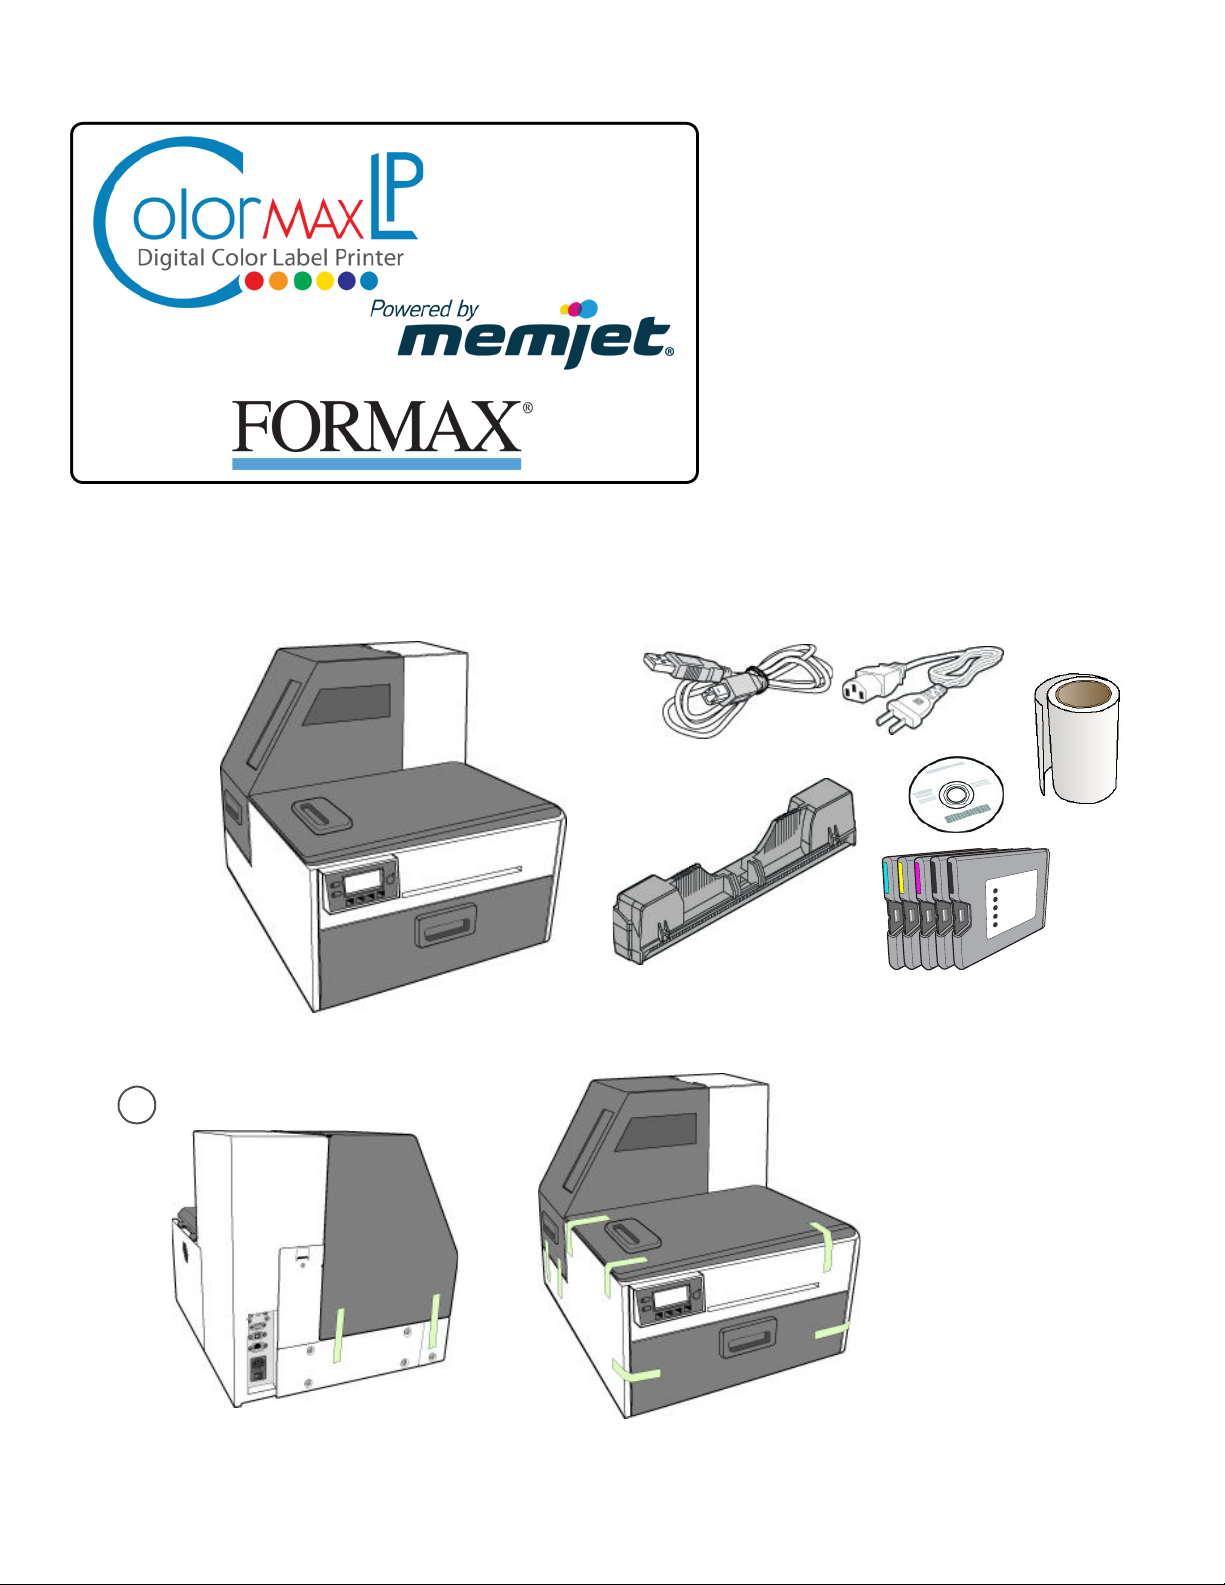
Unpack:
Quick Setup
and
Installation
Guide
For more detailed information, insert the
nstallation Disc into the PC and click the User
I
Guide button on the Setup Launcher main
page.
Remove tape and packing materials
1
Remove tapes.
a
(continued on next page)
Page 2
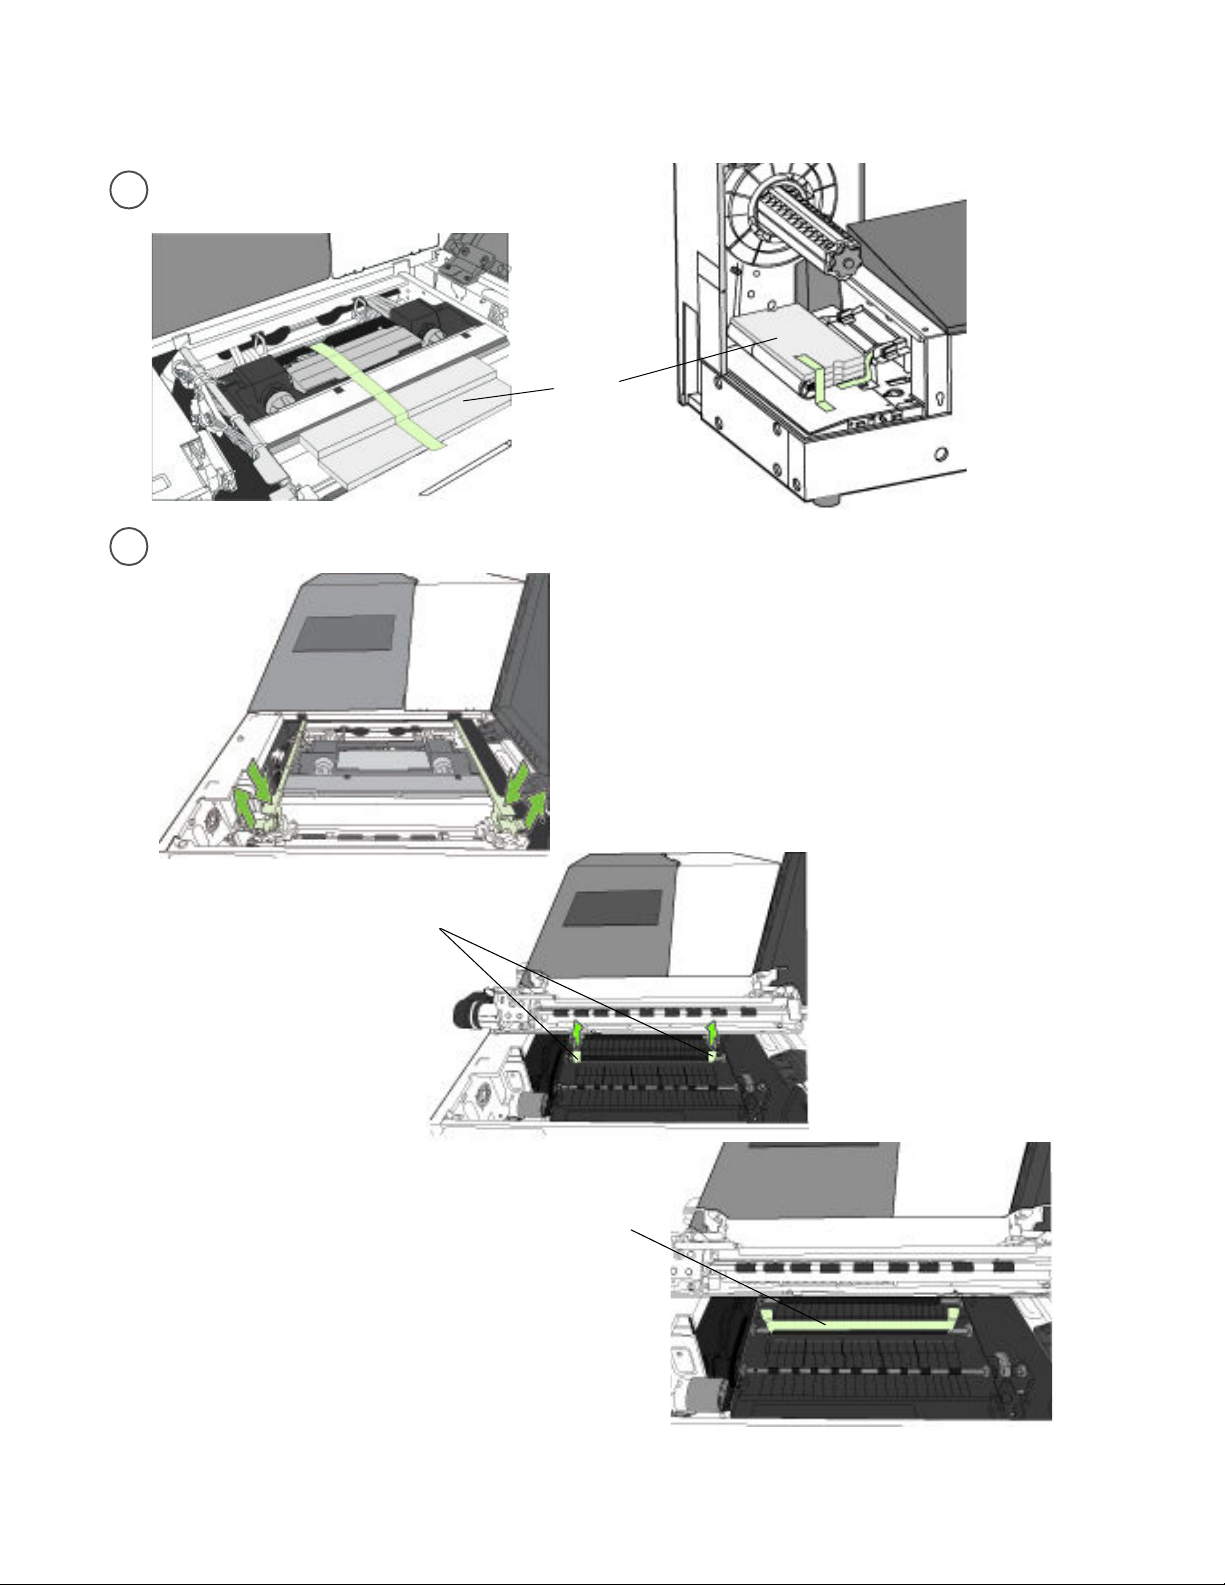
Remove tapes and foam.
b
Remove cardboard.
c
foam
Save the packing foam and cardboard!
Squeeze latches to open clamshell
Lift tabs
cardboard
Page 3
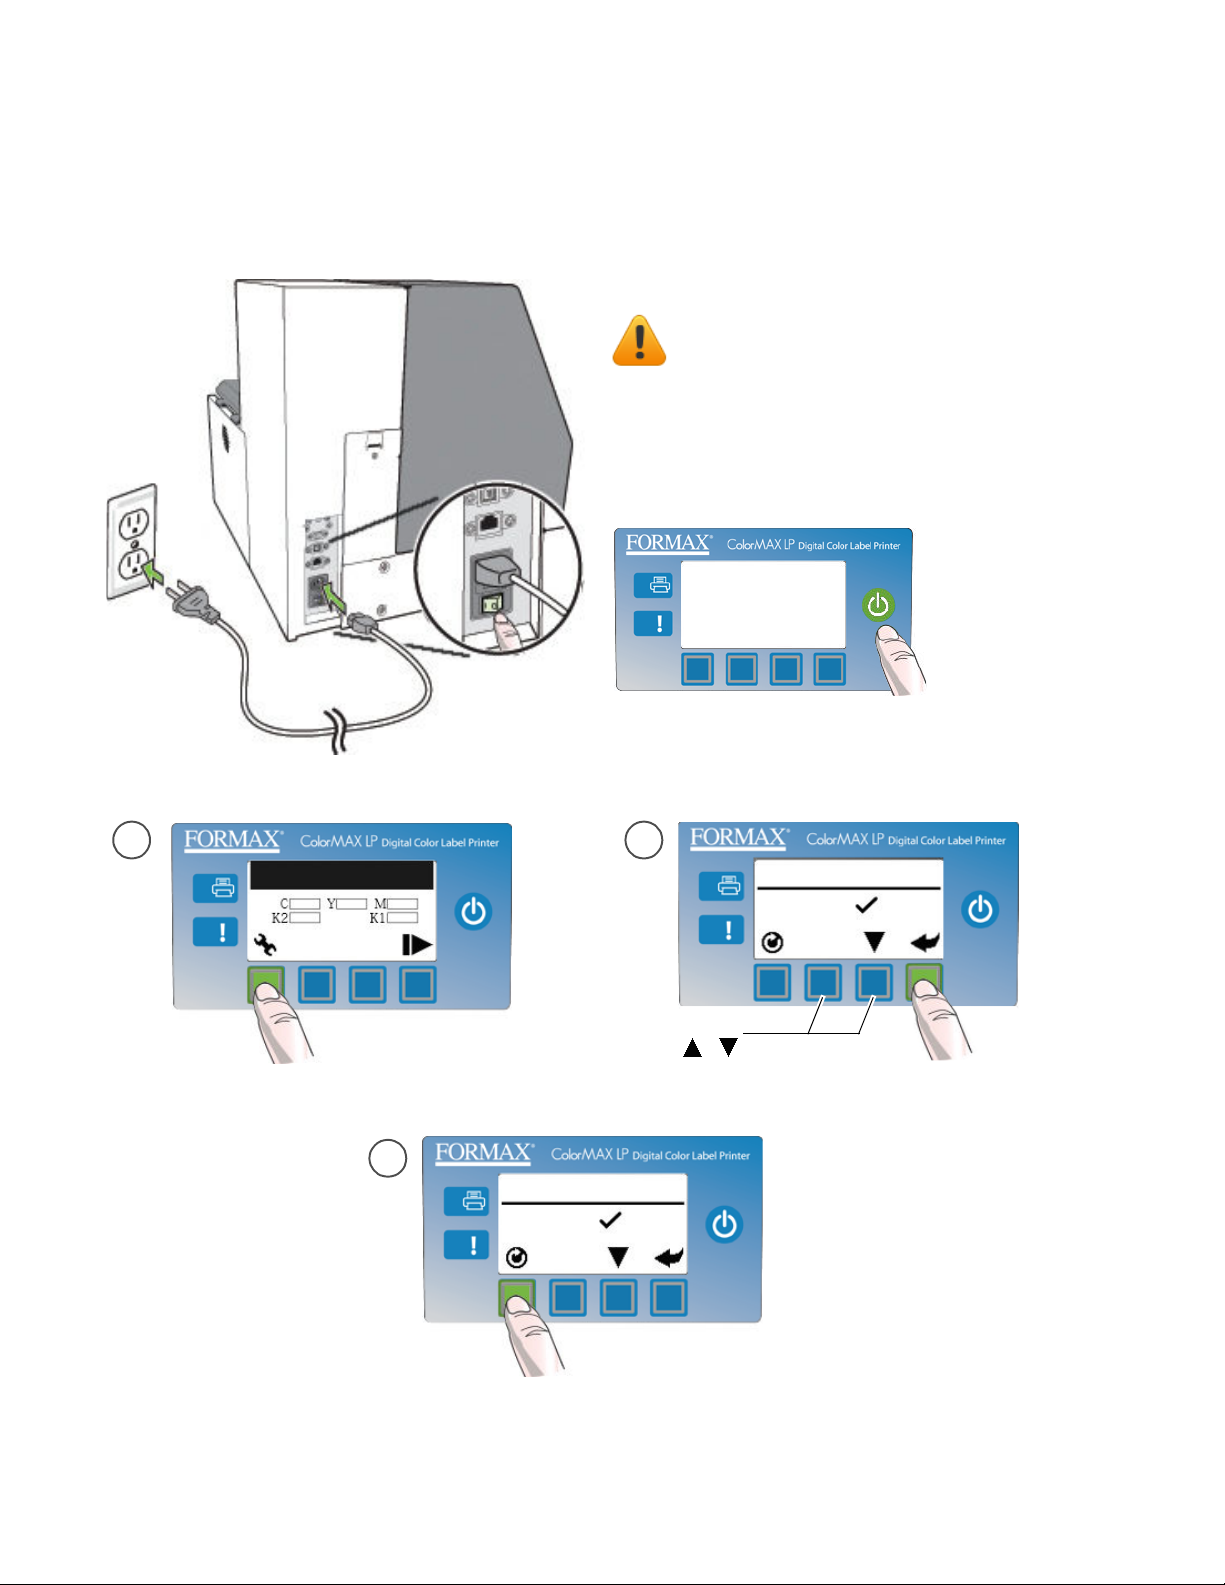
Connect power
2
Choose display language
Do not connect the printer to a PC until prompted
t
o do so during the Printer Driver Installation!
a
(Config)
Missing Printhead
c
b
LANGUAGE
If Language is
not displayed,
ress Select
p
For other languages,
press ,
If Language option is not available, see Selecting the Security Level
on page 12 of the User’s Manual.
LANGUAGE
1. English
(Return)
1. English
(Select)
Page 4

Install ink cartridges
3
b
a
c
Page 5

Install
4
printhead
a
Slowly remove tape from electrical contacts
f
and nozzles
electrical contacts
No less than 45°
b
Missing Printhead
(Config)
Wait for printhead latch to be released.
Open printhead latch fully.
c
CONFIGURATION
3. PRINTHEAD
nozzles
g
(Select)
PRINTHEAD
2. REPLACE
h
d
Remove caps.
d
Do not discard caps!
Remove cover from printhead
e
Do not discard the cover!
c
Check that ink is flowing through the tubes
on both sides of the printhead.
i
Control Panel
will read
Online when
ady
re
Page 6

Load sample media
5
e
a
b
Tighten knob fully.
f
c
Insert media until it stops. Wait for printer to load media.
g
d
Flat side against media roll.
Page 7

Print test label
6
Requires 6” x 4” (included as sample media) or 4” x 6” labels with inter-label gap.
Printer Online
(Config)
Sample PQ Plot 6x4
CONFIGURATION
2. MAINTENANCE
(Select)
MAINTENANCE
1. PRINT TEST PAGE
PRINT TEST PAGE
2. PQ PLOT 6x4
Top Section:
• Lines are defined with no missing nozzles
• Lines are printed in order: Yellow, Black, Cyan, Black,
Magenta
• Vertical dashed lines are straight
Middle Section:
• All yellow, black, cyan, black, magenta lines are printed
• No color mixing on the color bars
• Numbers 1, 3, 5 are visible
Bottom Section:
• Lines are defined with no missing nozzles
• Lines are printed in order: Yellow, Black, Cyan, Black,
Magenta
Overall:
• No streaking or smearing
Page 8

Install printer driver
7
Before installing printer driver, ensure the computer meets minimum system
requirements (see “System Requirements” in the User Manual Appendix).
To connect printer to computer using USB
a
b
To connect printer to network
Connect printer to network using Ethernet
a
Printer
If you will be using DHCP to set the IP
b
Address, skip to step c.
T
o assign the printer a Static IP address,
please see Selecting the Security Level in
Chapter one o f t h e Us e r Ma n u al b e fo re
proceeding to step c.
Network
c
Network
c
Connect USB cable when prompted.
d
Printer Computer
USB
d
e
 Loading...