

Page 1

6206 Series
Low-Volume Desktop Inserters
3/2013
OPERATOR MANUAL
Page 2

Table of Contents
Read this First ...............................................................................................11
Warning............................................................................................................1
About this manual............................................................................................1
Safety...............................................................................................................2
Country Specific Conditions.............................................................................3
End of Life........................................................................................................4
Meet your Document System ......................................................................52
Power Up..........................................................................................................5
Overview..........................................................................................................5
Control Panel and Home Menu........................................................................9
Job Menu.......................................................................................................10
Loading Documents.......................................................................................12
Loading BREs (option)...................................................................................14
Loading Envelopes.........................................................................................16
Filling the Sealing Liquid Bottle......................................................................18
Shut Down the System...................................................................................20
Processing Mail Sets ..................................................................................213
New Mail Sets................................................................................................21
Basic Mail Sets..............................................................................................22
Mail sets with BRE or inser ts.........................................................................22
Daily Mail.......................................................................................................23
Fold Only........................................................................................................24
Multi Feed......................................................................................................25
Change Fold Type..........................................................................................26
Address Position............................................................................................27
Run a Batch...................................................................................................27
Linking Feeders..............................................................................................28
Page 3

Working with Jobs ......................................................................................294
What Is A Job.................................................................................................29
Save Settings to a Job ...................................................................................30
Selecting a Job..............................................................................................31
Edit a Job.......................................................................................................32
Delete a Job...................................................................................................33
Advanced Settings .....................................................................................345
Introduction....................................................................................................34
Setting the Language, Date and Time............................................................34
Licensed Options...........................................................................................35
Add an Option................................................................................................36
Reading .......................................................................................................376
Introduction Reading......................................................................................37
BCR Code......................................................................................................39
Adjusting Reading Settings............................................................................46
Test Reading with BCR..................................................................................41
Process Mail Sets with BCR..........................................................................42
OMR Code.....................................................................................................43
Adjusting Reading Settings............................................................................46
Test Reading with OMR.................................................................................47
Process Mail Sets with OMR .........................................................................47
Online Services ...........................................................................................487
Online Services Introduction (OLS)...............................................................48
Connection Settings.......................................................................................48
LAN Configuration for OLS............................................................................49
Analogue Modem Configuration for OLS.......................................................50
Connecting To The Online Server..................................................................51
Viewing Connection Histor y...........................................................................52
Viewing Messages.........................................................................................53
Downloading and installing jobs and software with OLS................................54
Page 4

Operator Maintenance ................................................................................558
Maintenance Schedule..................................................................................55
Clean or Replace the Br ush...........................................................................56
Replace separation rollers of the document f eeder.......................................59
Fault Finding ...............................................................................................629
Error Messages..............................................................................................62
Clearing Stoppages.......................................................................................63
Calibrate Sensors...........................................................................................68
Troubleshooting..............................................................................................69
Troubleshooting Tables...................................................................................69
Specifications .............................................................................................7510
Technical Specifications.................................................................................75
Feeder and Stacker Capacities......................................................................76
Dimensions....................................................................................................76
Document and Inser t Specifications..............................................................77
Envelope Specifications.................................................................................78
EC Declaration of Conformity ....................................................................8111
EC Declaration of Conformity.........................................................................81
Page 5

Page 6

Read this First1
Warning
Ensure you have read and fully understood the safety requirements
in this section.
1
About this manual
Languages
According to the EC (European Commission) declaration following the Low Voltage Directive
(2006/95/EC), this operator manual must be available in the national language(s) of the
country where the system is delivered. Therefore, if you do not have an operator manual
in your country’s language(s), contact your authorized distributor.
Software
The software used for the reading option is based in part on the work of the Independent
JPEG Group.
Audience
This manual is meant for operators of the document system.
English
1
Page 7

Symbols
This manual uses the symbols listed below.
WARNING : Indicates a human safety hazard.
A TTENTION : A risk to the equipment or mail could result from an
action you may perform.
NOTE : A remark that explains different cases or specificities.
1
TIP : Advice to help save you time when processing your mail.
English
SUPERVISOR : Indicates that you have to use the supervisor
menu to perform the procedure.
Safety
Warnings
• Disconnect the power supply before performing any maintenance.
• Before connecting the system to the electrical supply, ensure that the system is
suitable for the local mains voltage. Refer to the serial plate on your system for voltage
requirements.
Precaution
The general process of automated document handling can sometimes create a build up of
static electricity. Therefore we recommend that the following measures are taken to reduce
the side effects of any electrostatic charge.
• Make sure that you operate the system within the recommended temperature and
humidity conditions.
• Make use of antistatic mats where appropriate.
• If necessary, make use of an ionizer to reduce static charge build up in the room
where the system is located.
Please contact your supplier for further information.
2
Page 8
Safety Precautions
• Only competent, trained personnel should operate this system. If non-trained
personnel do operate this system, the manufacturer will not accept responsibility
for any resulting accidents or injuries.
• Only skilled persons, who are aware of the risks involved, may open the protective
covers.
For safety reasons, the system will not function when the covers are open.
• Keep long hair, fingers, jewelry, etc. away from rotating and moving parts.
• The power connection must be easily accessible, preferably close to the system.
For safety reasons, it is essential that the system is connected to a socket outlet that
has a protective earth (ground) connection.
• Overcurrent protection in the equipment also relies on the branch circuit protection
(max. 20 A).
• The following part(s) is (are) considered the equipment disconnect device(s):
- Power supply cord plug or appliance coupler.
CAUTION: DOUBLE POLE / NEUTRAL FUSING
(this means that after operating of the fuse, parts of the equipment
that remain energized, might represent a hazard during servicing.)
Country Specific Conditions
1
English
Denmark
In Denmark, certain types of Class 1 appliances may be provided with a plug that does not
provide an adequate earth (ground) connection when inserted into a Danish socket outlet.
Make sure the system has a good functioning connection that has protective earthing (the
plug and socket outlet must match).
Japan
• Establish an earth (ground) connection before connecting the mains plug to the power
supply.
• First disconnect the power supply before removing the earth (ground) connection.
3
Page 9
End of Life
The objectives of the European Community's environment policy are, in particular, to
preserve, protect and improve the quality of the environment, protect human health and
utilize natural resources prudently and rationally. That policy is based on the precautionary
principle and principles that preventive action should be taken, that environmental damage
should as a priority be rectified at source.
Separating waste during collection is the precondition to ensure reuse and recycling of waste.
The proper disposal of electrical or electronic equipment is necessary to achieve the chosen
1
level of protection of human health and the environment in the European Community.
More particularly, certain materials and components of waste electrical and electronic
equipment need special treatment as improper handling or disposal on or into land, water
or air would represent a major threat to the environment and human health.
English
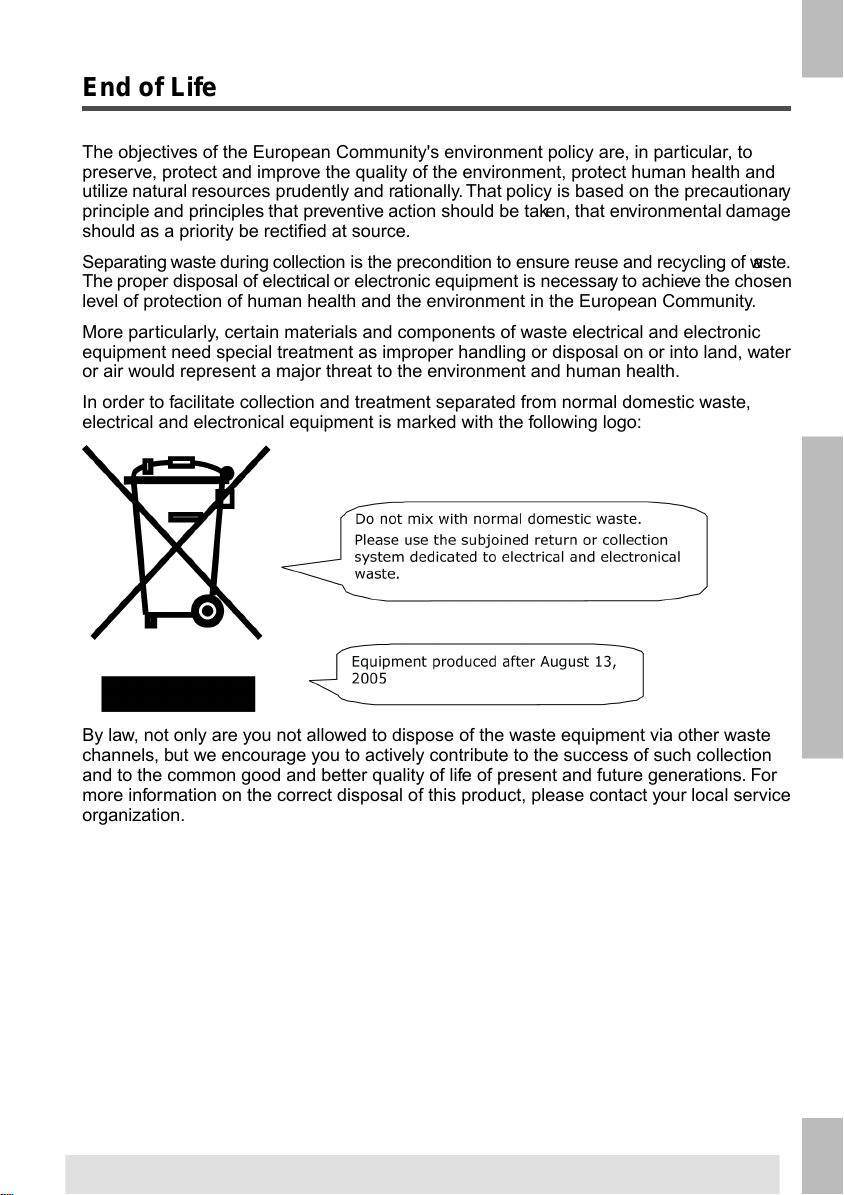
In order to facilitate collection and treatment separated from normal domestic waste,
electrical and electronical equipment is marked with the following logo:
By law, not only are you not allowed to dispose of the waste equipment via other waste
channels, but we encourage you to actively contribute to the success of such collection
and to the common good and better quality of life of present and future generations. For
more information on the correct disposal of this product, please contact your local service
organization.
4
Page 10

Meet your Document System2
Power Up
Make sure the system is connected to the power supply.
1.
Press the On/Off button next to the display.
The touch screen shows the Home Menu.
2
Overview
Introduction
The 6206 Series is a folding and inserting system for processing mail easily. The system:
• Feeds documents
• Folds the documents
• Inserts the documents into envelopes
• Seals the envelopes
• Stacks the envelopes
Automatic monitoring ensures the correct number of documents per envelope. The system
is equipped with a variety of special features: double feed control, feeder linking, multi feed,
daily mail, reading (option) and a vertical stacker.
English
5
Page 11

2
English
The figure shows an overview of the 6206 Series.
Envelope Hopper (1)
The envelopes are picked up and transported to the insert position (7) inside the system.
Document Feeders (3)
Depending on the configuration, one or two document feeders are available. The upper
feeder is the main document feeder, the lower feeder is the enclosure feeder. The system
can feed one or more documents (multi feed) from one feeder. The feeders have a double
feed control (DFC). DFC detects if one or more documents are fed at the same time.
If two document feeders are available, you can use Feeder Linking. This means that two
feeders can be linked as pairs.When the first feeder is empty, the system switches to the
other feeder, and vice versa. Meanwhile the empty feeder can be refilled without stopping
the system.
Daily Mail (2)
At the envelope hopper an extra document feeder is available for 'daily mail' (2). You can
use this feeder to process sets of documents that you cannot process automatically (for
example: stapled documents and sets with varying thickness).
6
Page 12

BRE or Insert Feeder (4) (Optional)
The system is (optionally) equipped with a special feeder for Business Reply Envelopes
(BRE) and other small inserts.
Collating Area (5)
All documents of a document set are assembled in the collating area.
Fold (8)
The fold unit folds the documents. The following fold types are possible (see Terminology):
• No fold
• V-fold
• C-fold
• Z-fold
• Double V-fold
Inserter (7)
After the documents are folded, the documents are transported to the inserter. The inserter
inserts the documents into a waiting envelope. The inserter seals the envelope or not,
depending on the settings.
Stacker (6)
When the envelope leaves the system it is stacked in the stacker.
2
English
7
Page 13

Connections
The document system has the following connections:
A: Power connection
B: LAN: for the Online Services connection
C: Mini USB port (device): for a connection to a PC, for service purposes only
D: USB port (host): for an analogue modem or connection to an USB flash drive
E: RS232 port: for the connection with a franking/mailing machine
2
English
8
Page 14

Control Panel and Home Menu
When you start the system the Home menu appears.
1. Depending on which screen is open, one of these two menu icons will be displayed:
•
- The Settings icon opens the Settings Menu.
•
- The Home icon opens the Home Menu.
2. ON/OFF Button: Turns the system ON or OFF. If the system is not used for one hour,
the system switches to power save mode. Press the ON/OFF button to switch back to user
mode.
3. Saved Jobs Screen: Displays a list of available settings (jobs).
4. Home Screen: Shows your document system with available feeders and settings.
5. STOP Button: Press the STOP button to complete the current mail set.
6. START Button: When you press the START button, the system starts to feed documents
and envelopes from feeders where material is detected. In other menus, the START button
will start to process mail sets.
2
English
9
Page 15

Job Menu
The New Job Menu is displayed when:
• The system is started.
•
The Home icon is pressed.
2
English
A green feeder indicates that the system detected documents or
envelopes in the indicated feeder.
10
Page 16

The following is a list of icons and their descriptions.
1. Home / Settings menu
2. Daily mail
Turns daily mail on/off.
3. Main Document feeder
Sets the number of documents to be fed from the
main document feeder.
4. Enclosure document
feeder
Sets the number of documents to be fed from the enclosure feeder.
5. Batch counter
Sets the number of sets that
must be processed for each
batch.
6. Sealing
Turns sealing on/off. When
sealing is off, the flap of the
nevlope is closed but not
moistened.
7. Reading
Turns reading on/off (BCR or
OMR).
Starts a test run.
9. Save
Saves the current job. You
can save a job after one set
is created.
10. Recycle bin
Deletes the current job.
11. Feeder Linking
Turns linking on/off. Linking
means that when one feeder
is empty, the system automatically starts feeding documents from the other feeder.
A symbol at the feeders
shows if the feeders are
linked or not.
12. Address Position
Sets the address position. If
the address is not fully visible
through the envelope window, use this button to adjust
the position.
13. Fold type
Sets the fold type.Which fold
types are available depends
on the documents and envelopes in the system.
14. BRE
Turns BRE feeder on/off.
15. Envelope hopper
Turns envelopes on/off. For
fold only mode, set the envel-
opes to No.
Information8. 1x
2
English
11
Page 17
Loading Documents
The table below shows how to load documents depending on the fold type, and the optional
Enclosure and BRE feeders. See the job information on the touch screen.
one document
feeder linking
document + enclosure
2
no fold
English
V-fold
C-fold
double V-fold
Z-fold
To load documents:
1. Rotate thumb wheel A to move the side guides apart on the feeder.
Address carrier
in upper feeder.
Face up and
leading.
Address carrier.
Face down and
trailing.
Address carrier.
Face up and
leading
Address carrier.
Face down and
trailing.
Address carrier
in upper feeder.
Face up and
leading.
Address carrier
in lower feeder.
Face down and
trailing.
document +
BRE/insert
Address carrier
in upper feeder.
Face up and
leading.
Address carrier
in upper feeder.
Face down and
trailing.
12
Page 18

2. Put a small stack of documents between the side guides.
3. Move the side guides toward the documents. The play between the side guides and
the documents should be about 0.5 mm (0.02'').
Use an envelope to measure the play. If an envelope fits between
the documents and the side guides over the whole length of the
feeder, the play is correct.
4. Place a stack of documents in the feeder, do not place more documents than indicated
by the "max" symbol on the feeder. See the previous figure for the correct orientation.
Make sure the paper touches the stop.
Refer to the specifications for the maximum amount of
documents you can load into the feeder.
2
English
13
Page 19

Loading BREs (option)
You can use the optional BRE feeder for small insert cards or BREs.
To load BREs:
1. Rotate thumb wheel A to move the side guides apart.
2. Pull back support B.
3. Put a small stack of documents or BREs between the side guides.
2
4. Release back support B.
5. Move the side guides toward the documents or BREs. The play between the side
English
guides and the documents should be about 0.5 mm (0.02'').
Use an envelope to measure the play. If an envelope fits between
the documents and the side guides, the play is correct.
14
Page 20

6. Place a stack of documents or BREs in the feeder. See the figure for the correct
orientation. In case you use BRE’s, ensure that the envelope flap is facing you and
in downward position, see picture.
Refer to the specifications for the maximum amount of documents
or BREs you can load into the feeder.
You can also use C5 BREs. These will be folded and inserted. If
you want to use C5 BREs, position them in the feeder as shown in
the figure.
2
English
15
Page 21

Loading Envelopes
Loading envelopes correctly will help prevent jams and mis-feeds.
To load envelopes:
1. Rotate thumb wheel A to move the side guides apart.
2
English
2. Pull back support C.
3. Put a small stack of envelopes between the side guides.
16
Page 22

4. Release back support C.
5. Move the side guides towards the envelopes. The play between the side guides and
the envelopes should be about 0.5 mm (0.02'').
Use an envelope to measure the play. If an envelope fits between
the envelopes and the side guides, the play is correct.
6. Extend supports B when you work with wide envelopes.
7. Place a stack of envelopes in the hopper (see figure).
2
Refer to the specifications for the maximum amount
of envelopes you can load into the feeder.
8. Set the side guides of the stacker according to the envelope width. Rotate B to move
the side guides. Use the indicators C on the fingers to determine the side guide position.
If necessary, remove extensions D.
English
17
Page 23

Filling the Sealing Liquid Bottle
The system uses sealing liquid for sealing envelopes. If the system is out of sealing liquid,
the mailing process continues but the envelopes will not be sealed properly. The sealing
liquid level detection system will warn you when your sealing liquid bottle is almost empty.
Fill the sealing liquid bottle as follows:
1. Push A to open the system.
2
English
18
Page 24

2. Remove the sealing liquid bottle.
3. Place the bottle on its bottom and turn the cap (bayonet thread) to open.
2
English
4. Fill the bottle with sealing liquid up to the filling level indicator and close it.
Fill the sealing liquid bottle with the sealing product that is
recommended by your dealer. Any other product or water can cause
problems with the functioning of your system.
19
Page 25

5. Place the bottle in the system. Ensure that bottle is placed correctly.
2
English
6. Close the system.
Shut Down the System
1.
Press the [On/Off] button to shut down the system.
When the system is busy, it completes and inserts the current set, stops and will be shut
down.
20
Page 26

Processing Mail Sets3
New Mail Sets
From the Home menu you can process new mail sets like:
• Basic mail sets
• Mail sets with inserts/BRE
• Daily mail
• Fold only
3
English
The system automatically detects documents, envelopes and BREs in the feeders. The
picture of the appropriate feeder changes color to indicate that documents are present.
Only the feeders where documents are present are used to process mail sets.
Make sure that the liquid reservoir is filled to enable sealing
envelopes.
Mail set options
In the Home menu you can set the following options for processing mail sets:
• Address position
• Batch processing
• Feeder linking
• Multi feed
• Other fold type
• Reading (option)
• Sealing on or off
21
Page 27

Basic Mail Sets
A basic mail set consists of documents from one or more document feeders. This set is
inserted into an envelope.
Before you start, make sure you have read the introduction on processing mail sets on
page 21.
3
1. Load the documents and envelopes into the feeders.
English
2. If necessary, change the fold type.
3. Press the Test Run [1x] icon to create one mail set and follow the instructions on
screen.
4. Press the green [Start] button to start the mail set production.
The system stops producing mail sets when one of the feeders is empty or the red [Stop]
button is pressed.
In a test run, the envelope is not sealed.
Mail sets with BRE or inserts
A mail set with BRE consists of documents from one or more document feeders and an
insert/BRE from the BRE feeder. This set is inserted into an envelope.
Before you start, make sure you have read the introduction on processing mail sets on
page 21.
In a test run, the envelope is not sealed.
1. Load the documents, BREs or inserts, and envelopes into the feeders.
2. Press the Test Run [1x] icon to create one mail set and follow the instructions on
screen.
3. Press the green [Start] button to start the mail set production.
The system stops producing mail sets when one of the feeders is empty or the red [Stop]
button is pressed.
22
Page 28

Daily Mail
Daily mail relates to small amounts of mail that each can have a different configuration.
You can insert the mail sets manually one by one into the system and add any BREs and
enclosures. The set is folded and inserted into an envelope. Fold only is also possible with
daily mail, see fold only on page 24.
Before you start, ensure you have read the introduction on processing mail sets on page
21.
The daily mail feeder has a fixed width (letter). We
recommend you to use only documents of this size.
1. Feed a daily mail set as indicated in the figure.
2. Press the Test Run [1x] icon to create one mail set and follow the instructions on the
screen.
3. Insert the next set into the daily mail feeder.
As soon as the system detects the daily mail set, the system folds and inserts it into an
envelope.
3
English
23
Page 29

Fold Only
If you only want to fold documents and do not want to insert a set into an envelope (fold
only).
1.
Remove the envelopes from the envelope hopper or set the envelope setting
3
in the Home menu to No. The display shows a warning that you have to select a fold
type.
English
2. By default the V-fold is selected, to change the fold type follow the instructions on the
screen.
3. Load documents in the document feeders, BRE feeder or daily mail feeder.
4. Press the Test Run [1x] icon to create one folded document set.
5. Press the green [Start] button to start the folding or in case of daily mail, feed the
daily mail set.
The document sets are folded and stacked in the stacker.
24
Page 30

Multi Feed
From a feeder, you can feed more than one document for your document set. This is called
Multi Feed.
Multi feed is not available on the BRE feeder.
1.
Press the Document Feeder icon next to one of the feeders.
2. Press the + or - button to set the number of sheets.
3. Press the [OK] button to confirm.
3
English
25
Page 31

Change Fold Type
In most cases, the system chooses the fold type automatically. If you want to use a different
fold type or change the location of the fold position, proceed as follows:
1.
Press the Fold Type icon to select a fold type.
3
English
After a testrun, at the fold type icon an (arrow) is visible.
2.
When you press the , the Fold Length screen is displayed.
The fold length screen allows you to define specific fold length settings. Or
select Automatic to let the system determine the fold length.
3. Press the [OK] button to confirm.
26
Page 32

Address Position
If the address on your mail is not correctly positioned behind the envelope window, change
the address position as follows:
1.
Press the Address Position icon. The address position screen appears.
2. Press the + or - button to adjust the address position in the envelope.
3. Press the [OK] button to confirm.
4. Press the Test Run [1x] icon to test the new address position.
3
English
Run a Batch
If you have to run a fixed number of mail sets, you use batch.
1. Load the documents, BREs or inserts, and envelopes into the feeders.
2. Set any options like feeder linking and multi feed.
3.
Press the Batch Counter icon to set the number of mail sets the system
should create.
4. Press the Test Run [1x] icon to create one mail set and follow the instructions on the
screen.
5. Press the green [Start] button to start the batch.
The system stops producing mail sets when the batch is finished, one of the feeders is
empty, or the red [Stop] button is pressed.
27
Page 33

Linking Feeders
If two document feeders are available, you can use feeder linking. This means that two
feeders can be linked as pairs.When the first feeder is empty, the system switches to the
other feeder, and vice versa. Meanwhile, the empty feeder can be refilled without stopping
the system. To link two feeders:
1.
Press the Feeder Linking icon. The Feeder Linking screen is displayed.
3
English
2. Select Yes and press the [OK] button to confirm.
Now both feeders are linked. In the home menu the link symbol appears.
If both feeders contain documents, the system starts feeding from the Main Document
Feeder.
28
Page 34

Working with Jobs4
What Is A Job
If you have to process a lot of mail sets of the same type (for example bills), you can save
the settings to a 'job'. The next time you just select the job and immediately start without
defining any settings.
The following settings are saved in a job:
• Address position
• Batch counter
• Envelope type
• Feeder linking on/off
• Fold type and fold lengths
• If BREs or insert cards should be included
• Reading settings
• Sealing on/off
• Which document feeders should be used and how many documents should be fed
from one feeder
4
English
29
Page 35

Save Settings to a Job
You can only save settings to a job, after a successful test run or batch.
To save your settings to a job:
1.
Press the icon in the job settings menu.
4
English
2. Follow the instructions on screen, enter a job name and press the [OK] button.
You can only save a job if you do at least one test run.
The job is saved, you can save up to 20 jobs.
30
Page 36

Selecting a Job
If you want to select an existing job:
1. From the Home menu select the Saved jobs tab.
The system displays the job settings of this job.You can sort the job list, select A-Z
to sort jobs alphabetically or select and sort on frequency.
If one of the feeders shows a warning symbol , it means the
selected job wants to use this feeder, but the system does not find
any documents or envelopes in this feeder.
4
English
2. Select a job from the job list.
3. Press the green [Start] button to start the job.
The system stops producing mail sets when a batch is finished, one of the f eeders is empty,
or the red [Stop] button is pressed.
31
Page 37

Edit a Job
If you want to edit a job:
1. Select a job from the job list.
4
English
2. Edit the job settings. See Job Menu on page 10.
3.
Press the save button .
4. Choose [Overwrite] to save the changes to the job.
The modified job is saved.
32
Page 38

Delete a Job
If you want to delete a job:
1. Select a job from the job list.
2.
Press the icon and press [OK] confirm.
The job is deleted.
4
English
33
Page 39

Advanced Settings5
Introduction
This section explains some advanced settings.The following is explained:
• How to set the language
5
English
• How to set the date and time
• How to add an option
Setting the Language, Date and Time
To set the language, date and time:
1.
Press the icon in the home menu to open the Settings Menu.
2. Press [Localisation] to change language settings.
34
Page 40

3. Press [Supervisor], [Date and Time Settings], to change time settings.
Licensed Options
You can add the following options with a license key (special code):
• Reading (barcode and OMR)
• Online Services
• Insert'n Frank (insert'n Mail)
For information about options that are a vailable to your system, please contact your service
organization.
5
English
35
Page 41

Add an Option
To add an option:
1.
Press the icon in the home menu to open the Settings Menu.
5
English
2. Press [Supervisor], [Licensed options]. The Licensed options menu appears. The
menu shows the options that are already available.
3. Press the [Add option] button.
4. Enter the license key of the option you want to add and press the [OK] button. The
option is added to the list.
36
Page 42

Reading6
Introduction Reading
The reading option allows the system to read special codes that are printed on the
documents. The code contains information about the processing of the documents. The
system can read two code types:
• BCR: BarCode Recognition
• OMR: Optical Mark Recognition
6
English
Depending on the settings, the code tells the system if:
• The document set is complete
• Enclosures must be added to the set
• The system must stop
• The set is complete (no pages are missing)
Service Technicians can set your reading function. Contact
your service provider for more information.
37
Page 43

General Requirements for Printing Codes
If you print documents for reading:
• Make sure the ribbon or toner quality is sufficient.
• Print the code in black.
• Codes on the same sheet must have equal intensity.
• Print the code at the same position on every sheet.
• Be aware of "background noise".The reading function can be disturbed by color
6
changes on the form; background design; or a logo or copy on the opposite side of
the sheet that will bleed through.
English
For more information on how to print a reading code on your
documents, contact your service organization.
38
Page 44

BCR Code
The following is the correct position of the BCR code on a document.The system can read
1D vertical and horizonal barcodes.
6
English
Minimum line thickness of a bar: 0.25 mm (0.01'').
The thickness ratio of thick bars versus thin bars: 2.2.
The white area in the picture shows the limits where the code can
be printed.
BCR License Types
There are two BCR license types:
• Basic
• Advanced
39
Page 45

BCR Basic License
For the BCR basic license the following functions are available:
• Page N of M: As long as N is below M, the document set is not complete. As soon
as N=M, the set is complete and will be inserted into an envelope.
• Insert/Accumulate: Defines when a document set is complete and must be inserted
into an envelope.
For BCR at least one of the two basic functions (page N of M or insert/accumulate) is
required.
6
BCR Advanced License
English
For the BCR advanced license the following functions are available:
• The basic functions (page N of M and insert/accumulate).
• Sheet sequence: every sheet has a number, regardless of the document set it is part
of. If a sheet is missing, an error is generated.
• Group sequence: every document in a set has the same group number. If one
document set is missing, an error is generated.
• Divert: the system stops. Remove the set from the collator.
• Stop: the system stops. Remove the set from the collator.
• Selective feed: if the system reads the function, an enclosure from the enclosure
feeder is added to the set. This function is printed on the last sheet of a set.
For BCR at least one of the two basic functions (page N of M or insert/accumulate) is
required.
Adjusting Reading Settings
To define the reading settings:
1. From the Settings Menu press [Reading], the reading menu appears.
40
Page 46

The following functions are available:
• Location of OMR, set the postion of the OMR code on a document: not relevant to
BCR.
• BCR configuration sheet: Set BCR configuration code by reading a sheet with a
configuration code: not relevant for OMR.
• Max. Number of Sheets: Define the maximum number of sheets in a document set.
Ensure that the number of sheets does not exceed the maximum folding capacity.
• Test Reading: Test if the reading settings are satisfactory.
Test Reading with BCR
Before you start a job with reading, execute a test to ensure that:
• The system finds the reading code on the document.
• The reading code is of sufficient quality.
To test reading:
1. From the Settings Menu, press [Reading].
2. Press the [Test reading] button.
3. Select a BCR job. Use your own reading job or use the default test BCR job.
4. Press the [Test] button and follow the instructions on screen.
The system tries to locate the barcode on the sheet.
If the system indicates 'No BCR read', check the following:
• The system could not find a code on the sheet, because of bad printing quality on
page 37.
• The system read a code, but it did not match the code type as defined in the system.
Contact the service organization for more information on the code definition.
6
English
41
Page 47

Process Mail Sets with BCR
To process mail sets with BCR, select a BCR job or proceed as follows:
The reading settings for OMR / BCR are set in the reading menu.
See Adjusting Reading Settings on page 46.
1. Load the documents and envelopes into the feeders. Place the documents with the
6
barcodes in the main document feeder, see for more information about the orientation:
BCR code on page 39.
English
The first sheet of a set always contains the address.The code must
appear in the same location on every page.
2. If necessary, change the fold type. A Z-fold is not possible.
3.
Press reading icon and choose Barcode.
4. Press the Test Run [1x] icon to create one mail set and follow the instructions on
screen.
5. Press the green [Start] button to start the mail set production.
42
Page 48

OMR Code
The following is the correct position of the OMR code on a document.
6
English
Minimum line thickness of a mark: 0.2 mm (0.008'')
Default the first mark from the top is set to: 100 mm (3.9'').
This parameter is set in the [Service Settings menu], [Reading], [Optical Mark
Reading]. The code must have a consistent number of marks on every page.
The white area in the picture shows the limits where the code can
be printed.
OMR License Types
There are two OMR license types:
• Basic
• Advanced
43
Page 49

OMR Basic License
For the OMR basic license, the following functions are available:
• Start Mark: Indicates the start of the code.
• Insert/Accumulate: Defines when a document set is complete and must be inserted
into an envelope.
• Parity check: By adding a parity mark the reading code can be checked. The sum of
the marks must be even.
• Safety Mark: Is used as an extra security.With skewed paper, the reading head can
6
English
miss part of the reading code. In these situations, the safety mark is not read, and
the system will give an error. The safety mark also indicates the end of the reading
code. This mark must always be present on the document if it is part of the code
definition.
44
The minimum code is one line: Insert/Accumulate. It is advised for
reliability to use the function Start Mark. The function Start Mark is
mandatory in case other functions are used.
Default “ no mark printed” means Accumulate and “mark printed”
means Insert. If required, the service organization can set the
function Insert/Accumulate to: “ no mark printed” means Insert and
“mark printed” means accumulate.
Page 50

OMR Advanced License
For the OMR advanced license the following functions are available:
• The basic functions from the OMR basic license.
• Divert: The system stops. Remove the set from the collator.
• Stop: The system stops. Remove the set from the collator.
• Selective Feed: If the system reads the function, an enclosure from the enclosure
feeder is added to the set.
• Sequence Check: Ensures that no documents are missing from the set; each sheet
has a number that is part of the reading code.
6
OMR General Remarks
• With OMR, the marks must always be used in the sequence as shown in the figure.
• If a function is suppressed, the following function will move upward by one line.
The mark definition is set by your service organization.
English
45
Page 51

Adjusting Reading Settings
To define the reading settings:
1. From the Settings Menu press [Reading], the reading menu appears.
6
English
The following functions are available:
• Location of OMR, set the postion of the OMR code on a document: not relevant to
BCR.
• BCR configuration sheet: Set BCR configuration code by reading a sheet with a
configuration code: not relevant for OMR.
• Max. Number of Sheets: Define the maximum number of sheets in a document set.
Ensure that the number of sheets does not exceed the maximum folding capacity.
• Test Reading: Test if the reading settings are satisfactory.
46
Page 52

Test Reading with OMR
Before you start a job with reading, execute a test to ensure that:
• The system finds the reading code on the document.
• The reading code is of sufficient quality.
To test reading:
1. From the Settings Menu, press [Reading].
2. Press the [Test reading] button.
3. Select an OMR job. Use your own reading job or use the default test OMR job.
4. Press the [Test] button and follow the instructions on screen.
The system tries to locate the OMR marks on the sheet.
If the system indicates 'No OMR read', check the following:
• The system could not find marks on the sheet, because of bad printing quality on
page 37.
• The system read marks, but it did not match OMR as defined in the system. Contact
the service organization for more information on the OMR definition.
Process Mail Sets with OMR
To process mail sets with OMR, select an OMR job or proceed as follows:
6
English
The reading settings for OMR / BCR are set in the reading menu.
See Adjusting Reading Settings on page 46.
1. Load the documents and envelopes into the feeders. Place the documents with the
OMR codes in the main document feeder, see for more information about the
orientation: OMR Code on page 43.
2. If necessary, change the fold type. A Z-fold is not possible.
3.
Press Reading icon and choose Optical Marks (OMR).
4. Press the Test run [1x] icon to create one mail set and follow the instructions on
screen.
5. Press the green [Start] button to start the mail set production.
47
Page 53

Online Services7
Online Services Introduction (OLS)
Online Services (optionally available) enables the document system to connect to a central
server.You can use Online Services for:
7
• Receiving software updates
• Online diagnosis of errors and system problems
• Receiving messages on new options, etc.
English
It is always the system that initiates the connection. It is not possible
to make a connection from outside to the system.
Connection Settings
Before you can connect to a central server, you must set the connection settings.You must
set these settings only the first time you use Online Services. You can connect with:
• Local Area Network (LAN)
• Analogue Modem (Optional)
48
Page 54

LAN Configuration for OLS
1. Connect your system to your local area network with a Internet Cable (LAN Cable).
2. From the Settings Menu press [Supervisor], and select [Communication Settings].
3. Select [LAN Settings].
4. Make the settings applicable to your situation and press [OK].
You can find detailed information about the OLS settings in the
installation guide that is delivered with this product. In case you do
not have this document, go to the following website:
kb.neopost.com, here you can find product information including
the installation guide.
7
English
5. Select [LAN Test] and then select [Test] to test the LAN settings.
6. Return to the Communication Settings Menu and then press Forward [>>].
49
Page 55

7. Select [Change].
8. Select [LAN] and press [OK].
9. Make your connection with the OLS server, see connecting to the online server on
page 51.
Analogue Modem Configuration for OLS
7
1. Ensure the analog modem is connected to the USB port on the system and to an
English
analog phone connection.
2. From the Settings Menu select [Supervisor], [Communication Settings].
3. Press [Analogue Modem Settings].
4. Make the settings applicable to your situation and press [OK].
You can find detailed information about the OLS settings in the
installation guide that is delivered with this product. In case you do
not have this document, go to the following website:
kb.neopost.com, here you can find product information including
the installation guide.
50
Page 56

5. Select the [Analogue Modem Test] to test the modem settings.
6. Return to the Communication Settings Menu and then press Forward [>>].
7. Select [Change].
8. Select [Analogue Modem] and press [OK].
9. Make your connection with the OLS server, see connecting to the online server on
page 51.
Connecting To The Online Server
To connect to the central server:
7
English
1. In the Settings Menu press [Online services].
51
Page 57

2. Press [Connect].
The system connects to a central server. Wait until the status becomes 'Idle'.
3. Press [Connection history] to find out if the connection was successful.
If an error occurs or you are not able to connect, read the error message for more
information. If the connection fails, execute the tests in Test OLS with LAN or Test OLS
with modem.
Viewing Connection History
7
The Connection history menu shows previous connections of the system to the server.
To view the connection history:
English
1. From the Settings Menu select [Online services].
2. Select [Connection history].
3. To view history details, select an event from the list.
52
Page 58

Viewing Messages
The Messages Menu shows the messages received from the server.
To view the messages:
Messages cannot be deleted, when new messages appear, the
oldest are removed from the messages list. The list displays up to
30 messages.
1. From the Settings Menu select [Online services].
2. Select [Messages]. A check mark indicates that the message is read, a star indicates
that the message is not read.
7
English
3. To view the contents of a message, select a message from the list and
select[Information].
In case the message is about a new job or new software, a button appears. If you press
this button you can install the new job or new software.
53
Page 59

Downloading and installing jobs and software with OLS
The Messages Menu shows the messages received from the server. In case there is new
software available download it as follows:
1. From the Settings Menu select [Online services].
2. Select [Messages]. A check mark indicates that the message is read, a star indicates
that the message is not read.
7
English
3. To view the contents of a message, select a message from the list. A menu appears
that shows more details about the message.
4. If there is a new job or new software available in the list, a button appears. Press this
button to install the new job or new software.
54
Page 60

Operator Maintenance8
Maintenance Schedule
Disconnect the mains supply before you do any maintenance to
the system.You are not allowed to service the system beyond what
is described in this operator manual. All other servicing must be
carried out by qualified service personnel only. Please contact
your service organization.
8
• Keep the system in proper condition: remove dust, paper remains, etc.
• When dirty, clean the sealing area and rubber rollers with a slightly wetted cloth,
soaked in warm water.
• When dirty or saturated, clean or replace the brushes of the envelope sealing on
page 56.
• When dirty, clean the feed rollers of the feeders. If necessary replace the separation
rollers on page 59.
• When dirty, clean the insert rollers.
• Make sure the sealing liquid bottle contains sufficient sealing liquid. If necessary refill
on page 18.
English
55
Page 61

Clean or Replace the Brush
The brush is used for sealing the envelopes. If the brush is dirty or if you have to replace
the brush, proceed as follows:
1. Open the system.
2. Remove the sealing liquid bottle before removing the brush. After removing the sealing
liquid bottle close the system again.
8
English
56
Page 62

3. From the Settings Menu select [Supervisor], select [Maintenance], select [Replace
brush].
4. Press [Open], the brush cover opens.
5. Open the system.
6. Remove the brush.
a.Lift the combiroller A.
b. Lift the pressplate B and keep it in the upright position with your hands.
c. Press the clips on the side of the brush inwards C and lift the brush from the brush
holder. Some force needs to be applied.
8
English
57
Page 63

7. Clean the brush or moisten the new brush with running tap water.
8
8. Replace the brush in the system.
English
9. In the replace brush menu press [Close], the brush cover closes.
10. Place the sealing liquid bottle and close the system.
58
Page 64

Replace separation rollers of the document feeder
Make sure you have spare parts kit 2828602K available.
To remove the separation rollers from the feeders:
1. Pull the document feeder out of the system.
2. Pull the flap with rollers out of the feeder tray.
8
English
59
Page 65

3. Pull the separation axle and roller out of the document feeder tray. Use the special
tool (available in the spare parts kit) to pick up the axle.
8
English
4. Attach the new separation axle to the tool.
5. Install the separation axle in the document feeder. The cupper part must fit into the
square hole in the feeder bottom. Push the axle until you hear a click.
60
Page 66

6. Place the new flap with the seperation rollers in the feeder.
7. Install the document feeder in the system. Push it into the system until you hear a
click.
8
English
61
Page 67

Fault Finding9
Error Messages
When an error occurs the touch screen shows a menu with the following information:
9
English
• An indication of the area in which the error occurred
• An error description
• A suggested solution
If the touch screen shows a solution, press the icon and follow the instructions on
screen.
Press the [i] button to view detailed information about the error and the possible actions
to avoid the error re-occurring.
In case of reading errors (when reading is enabled), the document stops in the collating
area. The operator must remove the document set and has to complete the set manually!
If you cannot solve the error, read more information in the online help or contact the service
organization.
Warning Screen
When a cover is opened, the touch screen shows a warning screen with the message
“Cover open”.
62
Page 68

Clearing Stoppages
In case of a stoppage the touch screen shows the location of the stoppage and shows
steps how to solve it. If a document or envelope is at an other location, check the following
locations:
• Document feeders: pull out the feeder trays
• BRE feeder: lift the feeder out of the system
• Inside the system:
1. Open the system.
2. Make sure that no paper is left at the indicated points.
9
English
63
Page 69

3. Squeeze C and open the collator area.
9
English
4. Rotate E to rotate the collator.
5. Open the envelope path: pull lever A and lift part F.
64
Page 70

6. Rotate wheel G to move the fold knife.
7. Push levers H and lift the folding pocket I out of the system.
9
English
65
Page 71

8. Lift B to lift the combi-roller. Rotate J to remove any envelopes.
9
English
66
Page 72

9. Lift moistening brushes K to remove any envelopes.
10. On the front side, push the grips at the bottom of the bottom cover as indicated in the
figure and remove the bottom cover from the system.
9
English
11. Remove any envelopes from the transport belt.
12. When ready, close all covers and close the system.
67
Page 73

Calibrate Sensors
If you get an error on dusty photocells, first you have to clean the photocells on the document
path or the envelope path. After cleaning the photocells you have to calibrate the sensors.
1. Remove all paper and envelopes from the system.
2. From the Settings Menu select [Supervisor], select [Maintenance],
select [Photocells].
9
English
3. Select [Calibrate] to start the calibration of the photocells.
After a short time, a message is displayed that shows the result of the calibration.
This icon means there is still paper at the cell or the cell is broken
This icon means the cell is dusty and must be cleaned.
68
Page 74

Troubleshooting
To solve problems:
When you contact the service organization, you will be asked for
the last error message.
1. Write down the error number. When you press the [ i ] button in the screen with the
error message, an error number is displayed.
2. Consult the troubleshooting table to solve the problem on page 69.
3. Switch the system off and on again to verify system operation.
4. When the error still occurs contact your service organization.
Troubleshooting Tables
Startup Problems
ReferenceRemedyPossible causeSymptom
The system cannot
be started.
The display does not
start up.
System not connected to the power supply.
system accidentally.
System not connected to the power supply.
system accidentally.
to the power supply.
to the mains the
power supply.
-Connect the system
-Switch the system on.You switched off the
-Close the covers.A cover is opened.
-Connect the system
-Switch the system on.You switched off the
9
English
69
Page 75

Envelope Sealing Problems
Envelope not closed
properly.
9
English
moistened.
Insufficient moistening.
The current job has
no envelope sealing.
Documents are not
correctly inserted.
Water level low.Flap not sufficiently
Brush dry.
Brush dirty.
The current job has
no envelope sealing.
Envelope does not
meet the specifications.
Poor envelope quality.
Make sure sealing is
on in the job menu.
guides of the document feeders are in
the correct position.
Check water level,
refill if needed.
Check brush, replace
if necessary by the
extra soaked brush.
Check brush, clean if
needed.
Replace brush.Brush worn out.
Make sure sealing is
on.
Use envelopes that
meet the specifications.
Seal an envelope
manually to test the
adhesion quality.
ReferenceRemedyPossible causeSymptom
See symptom “Flap
not sufficiently
moistened” in this
table.
Job menu on page
10
Loading documentsMake sure the side
Filling the sealing liquid bottle on page
18
Replace brush on
page 56
Clean brush on
page 56
Replace brush on
page 56
Envelope specifications
70
Page 76

Envelope Feeding Problems
Envelopes are double
fed.
Envelope stops
skewed.
regularly.
Flap is wrinkled and
sometimes not
opened.
Envelopes not placed
properly in the hopper.
Side guides set too
narrow.
Side guides of the
envelope hopper are
set too wide.
Side guides set too
narrow.
Envelope not within
specifications.
Flap sticks.
Flap curled.
Check and replace if
needed.
Refill hopper.Hopper is empty.No envelopes fed.
Check side guides
and adjust if needed.
Check side guides
and adjust if needed.
Refill hopper.Hopper almost empty.Envelopes are fed ir-
Check side guides
and adjust if needed.
Check specifications
and change envelopes if needed.
Store envelopes according to specifications.
Envelopes stored or
manufactured improperly.
ReferenceRemedyPossible causeSymptom
Loading envelopes
on page 16
Loading envelopes
on page 16
Loading envelopes
on page 16
Loading envelopes
on page 16
Loading envelopes
on page 16
Loading envelopes
on page 16
Envelope specifications
Envelope specifications
Envelope specifications
9
English
71
Page 77

Document Feeding Problems
No document fed.
9
Skewed documents
fed.
English
Poor or irregularly fed
documents.
Double documents
are fed.
Side guides set too
narrow.
Feeder trays are not
installed properly.
Side guides set too
wide.
Side guides set too
narrow.
Separation rollers are
worn out.
Different types of
documents fed.
Documents out of
specification.
guides.
Push the tray until it
locks.
guides.
guides.
Replace separation
rollers.
Use daily mail to process different document types.
Check document
specifications.
ReferenceRemedyPossible causeSymptom
Loading documentsRefill feeder.Feeder empty.
Loading documentsAdjust the side
Loading documentsAdjust the side
Loading documentsAdjust the side
Replace separation
rollers of document
feeder on page 59
Daily Mail on page
23
Document Specifications on page 77
72
Page 78

Insert Problems
Envelope leaves system at the back.
Insert failure.
ejected from sealer.
Address not readable
from window
Envelopes stacked
reversed in the hopper.
Envelope flap sticks.
Wrong envelope type
used (not according
to specifications).
Envelope throat incorrect.
Envelope glued inside.
Window not glued
properly.
skewed.
wide.
Fingers did not open
the envelope.
Address position not
correctly defined.
Place envelopes correctly in hopper.
Store envelopes according to specifications.
Change envelopes
according to specifications.
Check envelope specifications.
opes.
opes.
-Document set to
Choose envelope
within specifications.
Clean sealing area.Sealing area dirty.Envelope not always
Change address position.
ReferenceRemedyPossible causeSymptom
Loading envelopes
on page 16
Envelope specifications
9
Envelope specifications
English
Envelope specifications
-Eliminate faulty envel-
-Eliminate faulty envel-
Loading DocumentsAdjust side guides.Document set
Envelope specifications
Envelope specifications
Maintenance schedule on page 55
Address position on
page 27
73
Page 79

Other Problems
sensor'
No power save mode
after one hour
9
English
Sensors are dirty.Error message 'Dusty
The system shows an
error message orOnline Services is calling
Reset the system. If
the error persists,
calibrate the sensors.
ReferenceRemedyPossible causeSymptom
Calibrate sensors on
page 68
74
Page 80

Specifications10
Technical Specifications
Type
Theoretical max. speed
Power consumption - running mode
6206 Series Model
Fold and insert system for medium office
use
2400 inserts per hour, depending on the
application
220-240 VAC / 50 Hz / Maximum 2,5 A /
200 W
100-120 VAC / 60 Hz / Maximum 5 A / 185
W
100 VAC 50 Hz / Maximum 5 A / 200 W
100 VAC 60 Hz / Maximum 5 A / 200 W
< 0,5 WPower consumption - standby mode
100-240 VAC: -10% / +6%Voltage tolerance
230 VAC: -10% / +10%
EMC Certificate conform EMC-DirectiveApprovals
FCC Certificate conform 47CFR, part 15
CB Certificate conform IEC 60950-1
UL Listed I.T.E. (Information Technology
Equipment), conform UL-IEC 60950-1, file
E153801
Conform NEN-EN-IEC 60950-1 and derivatives
68 dB(A)Noise Level
10-40 °COperating temperature
20-65 %Humidity
10
English
75
Page 81

Feeder and Stacker Capacities
Document feeders
BRE feeder
10
Stacker
English
Dimensions
250 documents of 80 g/m² or 60 BRE's of
80 g/m²
max. 8 documents of 80 g/m²Daily mail feeder
250 BRE's of 80 g/m2, 250 insert cards of
160 g/m² or 1 mm (0.04") thickness
250 envelopes of 100 g/m²Envelope hopper
+/- 250 envelopes depending on the set
size and fold type
685 mm (26.9 '')Height
445 mm (17.5 '')Width
800 mm (31.5 '')Length
55 kg (121.1 lbs)Weight
76
Page 82

Document and Insert Specifications
Paper quality
Paper size
Paper size daily mail
Daily mail
Folding capacity
BRE/inserts
minimum 60 g/m² (15 lb bond)
maximum 120 g/m² (30 lb bond)
Booklets up to approximately 1 mm (0.4")
thickness
Minimum width: 130 mm (5.1")
Maximum width: 230 mm (9.1")
Minimum length: 90 mm (3.5")
Maximum length: 356 mm (14.0")
Fixed width: 216 mm (8.5", Letter size)
Do not place staples in the center of the
document, 75 mm (3") to either side of the
centre line.
V-fold - 8 sheets (max. 80 g/m²)
C-fold and Z-fold - 5 sheets (max. 80 g/m²)
Double V-fold - 2 sheets (max. 80 g/m²)
Enclosure sizes: standard BRE (Business
Reply Envelopes)
Maximum length: 158 mm (6.22") or C5,
229 (+/- 10) mm (9'') in portrait mode
Minimum weight: 75 g/m² (18.75 lb bond)
Maximum weight: 250 g/m² (62.5 lb bond)
Maximum weight (from document feeder):
120 g/m² (30 lb bond)
10
English
77
Page 83

Envelope Specifications
10
English
A
common
envelope
*The maximum flap height (C) for an envelope with a commercial type flap is 70 mm (2.7”)
small envelope
5.1"3.3 "1.3''1.3''6.3''8.7"Min size
FEDCBA
60 g/m²130 mm84 mm32 mm90 mm160 mm220 mmMin. size
2 mmA - 14 mmB - 6 mm54 mm*162 mm165 mm242 mmMax. size
15 lb
bond
0.08''A - 0.55''B - 0.02''2.1'' *2.1''6.5''9.5''Max. size
78
Page 84

10
English
JIHG
45° - 85°-0 - 26 mm68 mmThroat length
45° - 85°10 - 36 mm-43 mmThroat length
45° - 85°-0 - 1.0''2.7"Throat length
45° - 85°0.4 - 1.4''-1.7''Throat length
79
Page 85

Paper quality
Flaptypes
10
Seamtypes
English
Window size
Remarks
Minimum envelope weight: 75 g/m2
Maximum envelope weight: 120 g/m2
Between 45° to 85°Flap shoulder angle
Wallet
Mailpoint
Trapezoid
Commercial
Note: Open flap envelopes are not supported
GumAdhesive type
Side seam,
Diagonal seam,
Single side seam.
Maximum window width: Envelope width
minus 30 mm
Maximum window height: 50% of the envelope height
Maximum 2 mm of the window is not glued
Minimum windows distance to envelopside:
15 mm.
Mimimum windows distance to enveloptop:
15 mm to the envelope creaseline
Maximum set thickness is 2 mm (0.08")
Maximum insert specifications are based
on single sheets. When multiples are
handled, more room inside the envelope is
needed depending on the application.
In general more space between the set
width and the envelope width will improve
the performance of the system.
The specification of the paper handling
equipment is often wider than that of the
envelopes and documents handled.
We recommend that materials to be
handled are stored at a temperature of 20°C
(68°F) with a relative humidity factor of 50%.
If difference in temperature occurs between
store room and mailing area, the material
has to be stored near the system at least
24 hours before use.
80
 Loading...