

Page 1
Location of Spare Tire and Tools
The spare tire is located under the vehicle,
just forward of the rear bumper. The spare
tire winch drive nut is located at the rear
center of the cargo area, under a lid. The
jack, jack handle and lug nut wrench are
located behind the rear seat under the
carpeted lid in the cargo floor. The tools are
contained in a bag attached to the jack.
Fuses
If the vehicle’s electrical components are not
operating, a fuse may have blown. The fuse
panel is located below the instrument panel
on the driver’s side; remove the cover to
view the fuses. For more information
regarding changing fuses, refer to the
Roadside Emergencies chapter of your
Owner’s Guide.
Fuel Information
Use regular unleaded gasoline with an
(R+M)/2 octane rating of 87. Ford Motor
Company does not recommend using regular
unleaded gasoline with an octane rating
of 86 or lower in high altitude areas. The
advertised fuel capacity of the fuel tank is
equal to the rated refill capacity of the fuel
tank as listed in the Maintenance and
Specifications chapter of the Owner’s Guide.
Tire Pressure
Your vehicle’s tire pressure is properly set by
your authorized dealer according to the
recommended specifications found on the
vehicle’s tire label, located on the driver’s
door jamb. Check your tire pressure during
routine maintenance and seasonal changes.
If the Tire Pressure Monitoring System light
stays illuminated after starting, immediately
check the vehicle’s tire pressures.
Warning: Improperly inflated tires
can affect vehicle handling and
tire performance.
Rear Window Buffeting
When one or both of the rear windows are
open, the vehicle may demonstrate a wind
throb or buffeting noise; this noise is
common
among a wide range of vehicles
and can be eliminated by simply lowering
a front window approximately two to
three inches.
Fuel Pump Shut-Off Switch
The fuel pump shut-off switch is a device
intended to stop the electric fuel pump
when your vehicle has been involved in a
substantial jolt. The switch is located in the
passenger’s footwell, by the kick panel. After
a collision, if the engine cranks but does not
start, the fuel pump shut-off switch may
have been activated. For more information
regarding the fuel pump shut-
off switch,
refer to the Roadside Emergencies
chapter of
your Owner’s Guide.
Changing the Tires
The spare tire is not equipped with a Tire
Pressure Monitoring System (TPMS) sensor.
The TPMS warning light will illuminate when
the spare tire is in use. Replace the spare tire
with a road tire as soon as possible. If you
get a flat tire while driving, do not apply the
brake heavily; instead, gradually decrease
your speed, hold the steering wheel firmly
and slowly move to a safe place on the side
of the road.
Roadside Assistance
During your Mountaineer’s 3-year/36,000
mile limited warranty period, the assurance
and support of a 24-hour emergency
roadside assistance program is included.
Roadside assistance includes such services as
fuel delivery, tire changes, jump starts and
help when you are locked out of your
vehicle. Complete your roadside assistance
identification card and keep it handy (such
as in your wallet) for quick reference. This
identification card is located in your Mercury
Owner’s Information portfolio. To receive
roadside assistance in the United States, call
(800) 241-3673.
MERCURY MOUNTAINEERQUICK REFERENCE GUIDE
20
07
Ford Motor Company
Customer Relationship Center
P.O. Box 6248
Dearborn, MI 48121
1-800-392-3673 (FORD)
(TDD for the hearing impaired: 1-800-232-5952)
This Quick Reference Guide is not intended to
replace your Owner’s Guide which contains
more detailed information concerning the
features of your vehicle, as well as important
safety warnings designed to help reduce the risk
of injury to you and your occupants. Please read
your entire Owner’s Guide carefully as you begin
learning about your new vehicle and refer to
the appropriate sections when questions arise.
All information contained in this Quick Reference
Guide was accurate at the time of duplication.
We reserve the right to change features,
operation and/or functionality of any vehicle
specification at any time. Your Mercury
dealer is the best source for the most
current information.
For detailed operating and safety information,
please refer to your Owner’s Guide.
August 2006
First Printing
Quick Reference Guide Mercury Mountaineer
Litho in U.S.A.
*7L9J19G217AA*
7L9J-19G217-AA
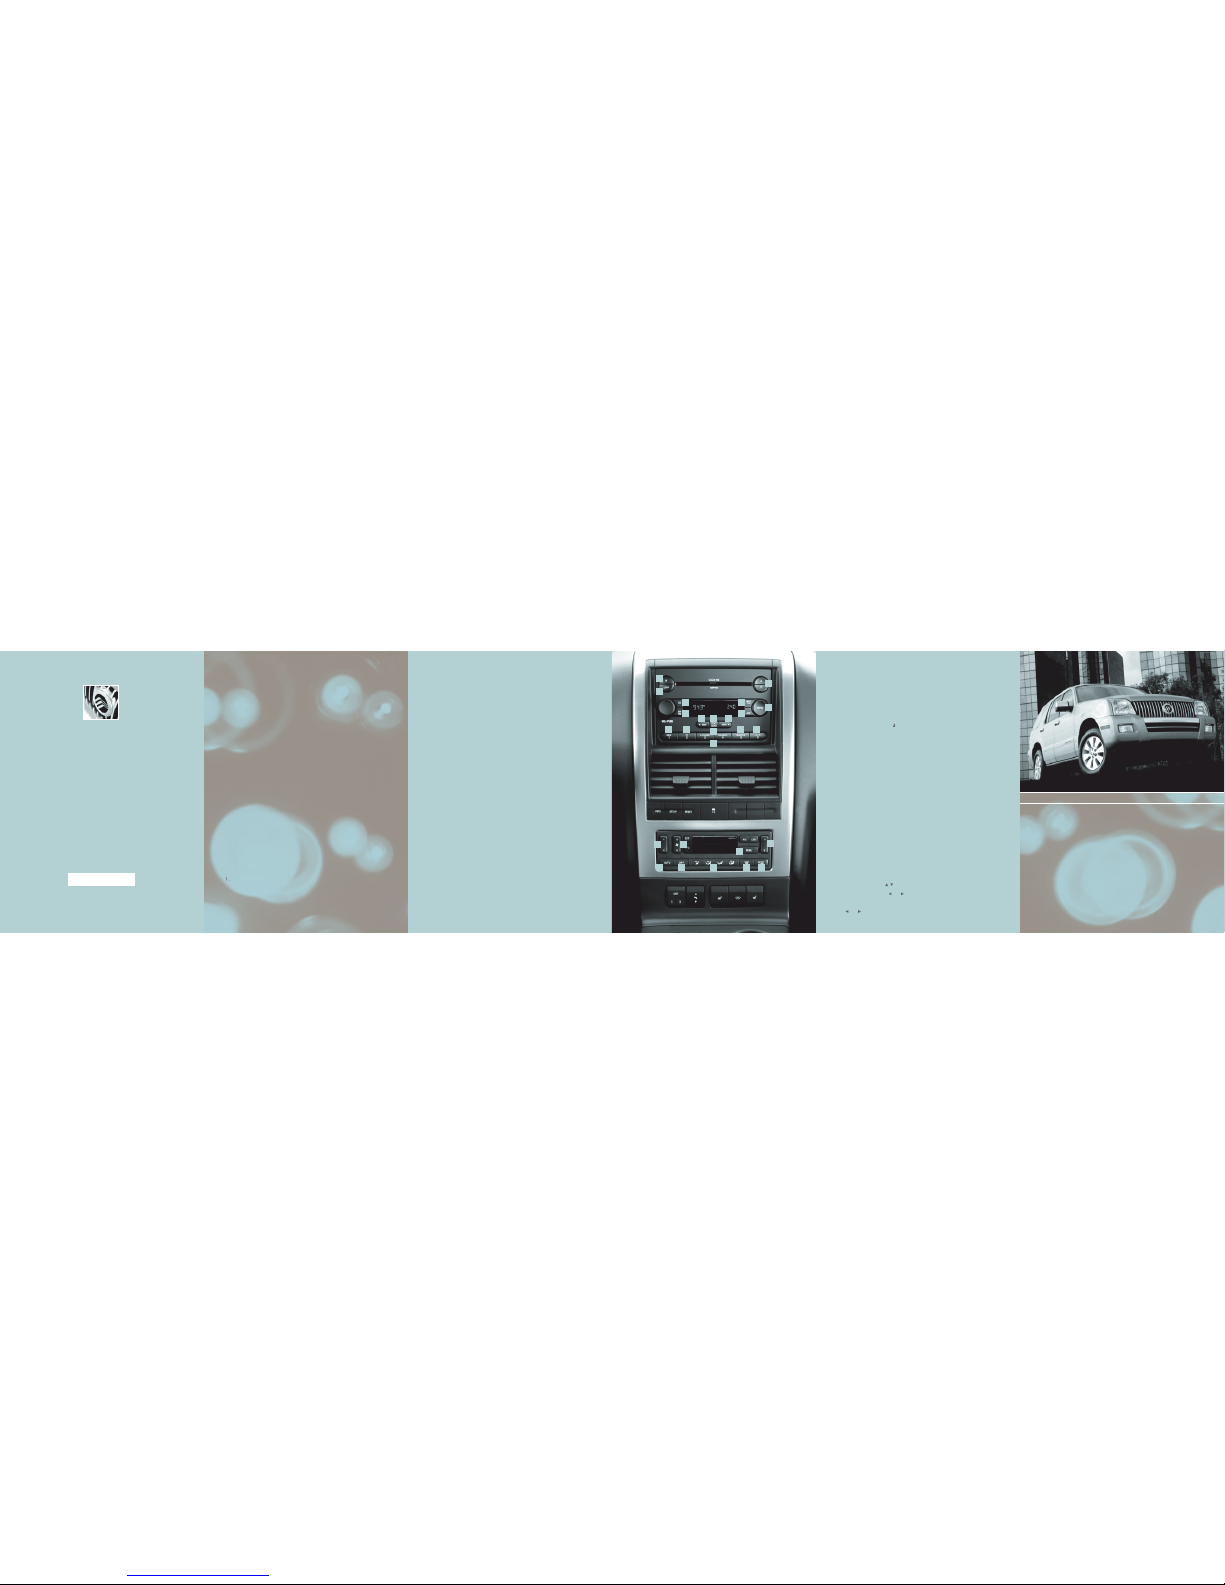
CENTERCONSOLE
Dual Automatic Temperature Control (DATC) System(if equipped)
If your Mountaineer came equipped with another climate system, refer to your Owner’s Guide
for detailed information.
1 Temperature controls
To control the temperature on the driver’s side in single zone mode, select any temperature
between 60°F and 90°F by pressing the driver temperature control. The climate system’s
display indicates the selected temperature. The passenger can also select any temperature
between 60°F and 90°F by pressing the passenger temperature control.
2 Fan Speed
Press to manually increase and decrease fan speed.
3 DUAL (Single / Dual Electric Temperature Control)
The control allows the driver to have full control of the cabin temperature settings (single
zone) or allows the passenger to have control of their individual temperature settings (dual
zone control). Press to turn on dual zone mode; press again to return to single zone.
4 AUTO
Press to select the desired temperature shown in the display window. The system will
automatically
determine the fan speed, the direction of the airflow, and outside or recirculated
air to heat or cool the vehicle to the selected temperature.
5 OFF
Outside air is shut out and the fan will not operate. Note:If your vehicle is equipped with
the auxiliary climate control system, the auxiliary fan can still operate with the front system off.
6 Manual Override Controls
Press to manually determine where airflow is directed. To return to fully automatic
control, press AUTO.
7 Windshield Defroster
Outside air is distributed through the windshield defroster vents.
8 Rear Window Defroster
The rear defroster control is located on the instrument panel. Press the rear defroster control
to clear the rear window of thin ice and fog. The ignition must be in the 3 (ON) position to
operate the rear window defroster. The defroster turns off automatically after ten minutes or
when the ignition is turned to the 1 (OFF/LOCK) or 2 (ACC) position. To manually turn off the
defroster before ten minutes have passed, push the control again.
Audiophile AM / FM In-Dash Six CD /
MP3 / Satellite Compatible
Sound System (if equipped)
If your Mountaineer came equipped with
another audio system, refer to your Owner’s
Guide for detailed information.
ACD Eject: Press and hold to auto eject all
CDs present in the system. Press and a
memory preset to eject from a specific slot.
BLOAD: Press LOAD and a memory preset
to load to a specific slot. Press and hold to
autoload up to six CDs.
CTune / Disc selector: Press and release to
manually advance up / down the radio
frequency or to select a desired disc. Press
and hold for a fast advance through radio
frequencies or all loaded discs. Also use in
menu mode to select various settings.
DCD: Press to enter CD mode. If a CD is
already loaded into the system, CD play will
begin where it ended last. If no CD is
loaded, NO DISC will appear in the display.
E AM / FM: Press to select AM / FM1 / FM2
frequency band.
FMUTE / Phone: Press to mute the
playing media. Press again to return to
the playing media.
SATELLITE RADIO CONTROLS(if equipped)
GAUX: Press repeatedly to cycle through
SAT1, SAT2, SAT3 (satellite radio mode if
equipped), LINE IN (auxiliary audio mode),
or FES/DVD (if equipped). Once Satellite
Radio mode is activated you may use the
following functions:
Press MENU until CATEGORY MODE
appears in the display. Press / to select
from various categories of music (country,
rock, etc.) and press and hold SEEK or
TEXT/SCAN to search for channels playing
that specific category of music.
Press SEEK to access the previous/next
channels. Press and release TEXT/SCAN to
display the current song title. Press again to
scroll through current song title, artist, channel category and the SIRIUS long channel
name. Press and hold for a brief sampling of
the next channels. Press again to stop.
H MENU: Press repeatedly to cycle through
the following modes: Autoset, Bass, Treble,
Balance, Fade, Occupancy mode, Speed
sensitive volume, Setting the clock, RBDS,
(Radio Broadcast Digital Signal), Track /
Folder Mode & Compression. For more
information on these menu items, refer to
your Owner’s Guide.
ISEEK: Press < to access the previous
strong station or track. Press > to access the
next strong station or track.
J TEXT/SCAN: Press and hold for a brief
sampling of radio stations or CD tracks.
Press again to stop. In CD / MP3 mode,
press TEXT to display track title, artist name
and disc title.
KREW (Rewind): Press to manually reverse
in a CD or MP3 track.
L FF (Fast forward):Press to manually
advance in a CD or MP3 track.
M FOLDER: In folder mode, press to access
the previous or next folder on MP3 discs, if
available.
NSHUFFLE: Press to play the tracks on the
current disc in random order.
OPLAY / PAUSE: This control is operational
in CD and DVD mode (if equipped). When
a CD or DVD is playing in the Family
Entertainment System, press this control to
play or pause the current CD / DVD. The CD
/ DVD status will display in the radio display.
PMemory Presets: To set a station, select
frequency band AM / FM1 / FM2, tune to a
station, press and hold a preset button (1-6)
until sound returns.
Essential Information Climate Control Audio System
4 5
6 7 8
1 2
A
B
E
H
I
K L
M
P
N O
F
I
C
D
G
J
1
3
Page 2
The 2007 Mercury Mountaineer
was engineered to enhance the
way you live and help
you handle
your driving environment.
Your new
vehicle
is equipped with many
sophisticated
features – some that
you will find to be intuitive, while
others may be new to you.
Please take a few moments to
familiarize yourself with your new
Mercury Mountaineer by reading
this Quick Reference Guide, which
discusses features, specifications
and general instruction.
For detailed information, refer to
your Owner’s Guide.
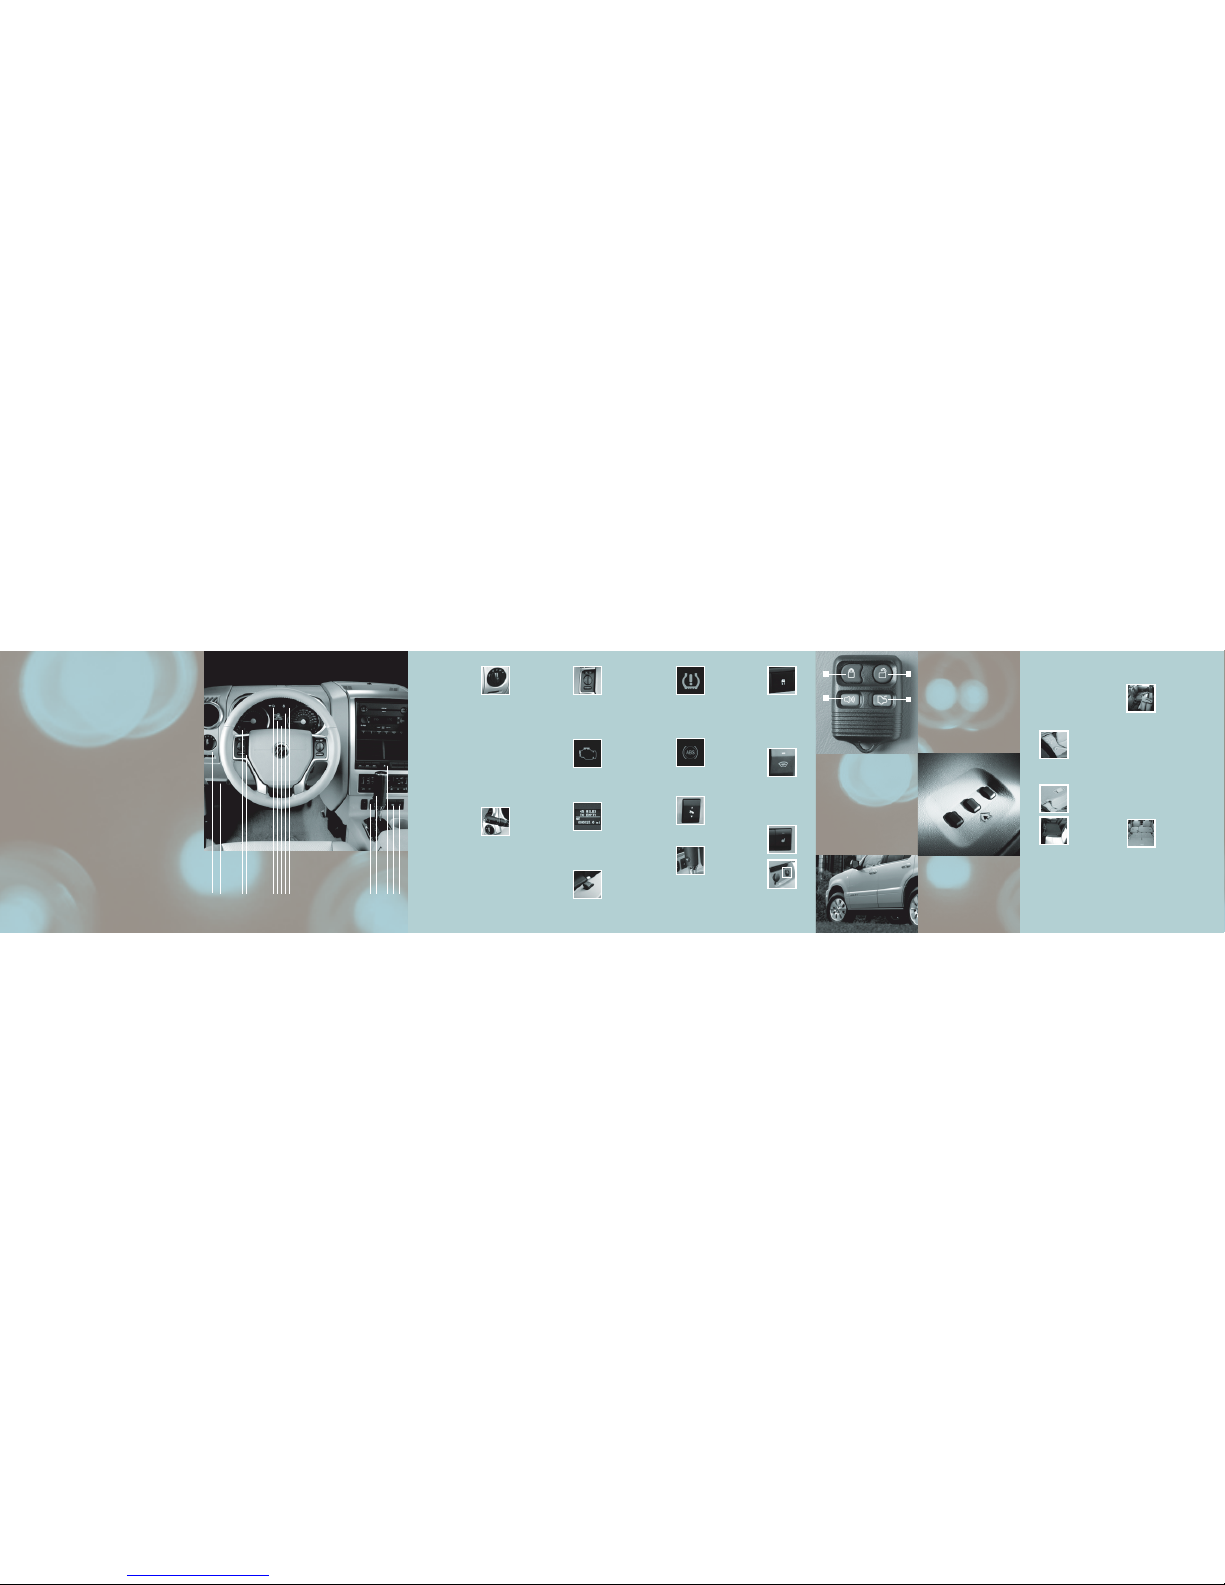
8 Tire Pressure Monitoring
System (TPMS) Warning
LightWhen the T ire Pressure
Monitoring System (TPMS)
warning light is lit, one or
more of your tires is
significantly under-inflated.
You should stop and check the tires as soon
as possible, and inflate them to the proper
pressure, as indicated on the vehicle’s tire label,
located on the B-Pillar or the edge of the driver’s door.
Driving on a significantly underinflated tire causes the tire to overheat and can
eventually
lead to tire failure. Note:Outside
temperatures affect tire pressure; refer to the
Owner’s Guide for additional tire information.
9 ABS Warning Light
Your anti-lock braking system
(ABS) detects the onset of
wheel lockup during brake
applications and helps
prevent wheels from locking
during extreme braking
situations. The ABS warning light will
illuminate when you start the
vehicle’s engine.
If the light remains illuminated,
continues to
flash, or fails to illuminate, see an authorized
dealer’s service department immediately.
10
Power Adjustable
Foot Pedals
( if equipped) Press
and hold the control to adjust
the position of the accelerator
and brake pedal forward or
away from you, to a maximum
of three (3) inches of travel.
The accelerator and brake
pedal should only be adjusted when the vehicle
is stopped and the gearshift lever is in the P
(Park) position.
11 Gearshift / Overdrive
(O/D) Control
Overdrive is the normal
driving position for the best
fuel economy, and can be
deactivated by pressing the
transmission control switch
on the side of the gearshift lever. This position
allows for all forward gears except overdrive,
provides engine braking, and should be used
when driving conditions cause excessive shifting from O/D to other gears, such as city traffic,
hilly terrain and trailer towing.
12 AdvanceTrac
®
with Roll
Stability Control (RSC)
The AdvanceTrac
®
with RSC
system enhances your
vehicle's stability during
maneuvers that require all
available tire traction, like in
wet / snowy / icy road conditions and / or
when performing emergency maneuvers.
In an emergency lane change, the driver will
experience better overall vehicle traction,
and have better control of the vehicle.
The AdvanceTrac
®
with RSC button allows
the driver to turn off certain features of
the AdvanceTrac
®
with RSC system for
vehicle speeds below 25 mph (40 km/h).
To deactivate, please refer to the Owner’s
Guide for additional information.
13 Heated Windshield
(if equipped)
The heated
windshield control is located on
the instrument panel just under
the climate controls behind the
gear shift lever. To activate the
heated windshield, push the
control. During initial start-up, the windshield
may have a shimmering appearance. This is normal operation and will only last for approximately
one minute. The heated windshield will turn off
automatically after a period of eight minutes if
the outside temperature is below 40°F or a period
of four minutes when the outside temperature is
above 40°F. To manually turn off the heated
windshield before the specified time has passed,
push the control switch again.
14 Heated Seats
(if equipped)
The heated seat
control is located in the lower
center of the instrument panel.
To operate
the heated seats,
push the control to activate
and push again to deactivate.
Auxiliary Input jack
Your vehicle is equipped with
an Auxiliary Input Jack (AIJ)
located just outside the
console bin. This allows you to
plug and play auxiliary audio
devices. Press AUX repeatedly
on your audio system to access. When LINE IN
appears in the display, plug in your auxiliary
audio device. For more detailed information,
please refer to your Owner’s
Guide.
1 Headlamp and Panel
Dimmer Control
The headlamp control
is located on the lower left
portion of the instrument
panel. The first clockwise
position controls the parking
lamps; the second clockwise position controls
the headlamps. If your vehicle is equipped with
fog lamps, pull the control out one position
to activate the lamps and aid visibility in
fog, snow or rain. The autolamps feature
(if equipped) automatically activates /
deactivates your headlamps as necessary.
To use the autolamps feature, rotate the
control counterclockwise; to deactivate the
feature, place the control in the O (Off) position.
2Parking Brake Release
Pull the release lever to release the parking
brake. Driving with the parking brake engaged
will cause the brakes to wear
out prematurely
and reduce fuel economy.
The parking brake is
not recommended to stop a moving vehicle.
However, if normal brakes fail, the parking
brake can be used to stop your vehicle in an
emergency. Because the parking brake applies
only the rear brakes, the vehicle’s stopping
distance will increase greatly and the handling
of your vehicle will be adversely affected.
3Turn Signal and Wiper /
Washer Control
Move the control down to
activate your left turn signal;
move the control up to
activate your right turn signal.
To use your windshield wiper
/ washers: for a single swipe, push the end of
the control briefly; push and hold for three
swipes with wash, or hold for a longer wash
(up to ten seconds). The bars of varying length
are for intermittent wipers. Rotate the
windshield wiper control upward for fast
intervals and downward for slow intervals.
The control ring on the right side of the control
operates the rear window wiper; rotate the
control to the INT1 (8-10 second interval) or
INT2 (3-4 second interval) position to activate
the rear window wiper. To wash the rear
window, rotate (and hold as desired) the rear
wiper / washer control to either position.
4 Speed Control
To engage speed control,
attain a vehicle speed of 30
mph or greater, press ON then
momentarily press SET +. To
set a higher speed, press and
hold SET +, then release the
control when you have reached your desired
speed. To set a lower speed, press and hold
SET – until you have reached your desired
speed, or depress the brake pedal and press
the SET + control. To return to a previously set
speed faster than 30 mph, press RES. To disengage speed controls, depress the brake pedal
or press OFF.
5
Service Engine Soon Light
The Service Engine Soon
indicator light is located
in
the instrument cluster and
illuminates when the engine
is started. If the light remains
illuminated, it may signal a
problem with the On Board Diagnostics System
(OBD-II). If the light is blinking, engine misfire
is occurring which could damage the vehicle’s
catalytic converter. If this occurs, drive in
a moderate fashion and have your vehicle
serviced immediately by an authorized dealer.
6 Message Center
With the ignition in the ON
position, the message center,
located in the instrument
cluster, displays important
vehicle information through
a constant monitoring of
vehicle systems. The message center displays
features such as trip odometer, compass,
distance
to empty, average fuel economy
and
a language selector. It also provides vehicle
system checks and will notify you of
potential vehicle problems with a display
of system warnings.
7 Hazard Flasher Control
The hazard flasher is located
on the steering column, just
behind the steering wheel.
Press the flasher control and
all front and rear direction
signals will flash; press the control
again to deactivate the feature.
This vehicle handles differently from an ordinary passenger car in driving conditions which may occur on streets and highways and
off-road. DRIVE WITH CARE AND WEAR A SAFETY BELT AT ALL TIMES. Ford urges you to read the Owner’s Guide and Driving Your
SUV or Truck Supplement for detailed information on safe driving precautions and instructions.
INSTRUMENT PANEL
21 3 11 12 135 8 1049 146
7
HomeLink® Wireless Control System
(if equipped) Located on the overhead console,
the Homelink® system provides a convenient
way
to replace up to three hand-held transmitters
with a single built-in device. This feature will
learn the radio frequency codes of most
transmitters to operate garage doors, entry gate
operators, security systems, entry door locks, and
home or office lighting. To set the HomeLink®
Wireless Control System, refer to your Owner’s
Guide. To operate, press and release the
appropriate HomeLink® button. Activation will
now occur for th e trained product (garage door,
gate opener, security system, entry door lock,
home or office lighting, etc.) For convenience, the
hand-held transmitter of the device may also be
used at any time.
Power Deployable Running Boards
(if equipped) The deployable running boards
automatically move when the doors are
opened to assist with entering and exiting the
vehicle. With automatic power deploy, the
running boards will extend out when the doors
are opened, and with automatic power stow, the
running boards will return to the stowed position
when the doors are closed.
To enable / disable the power running board
feature, refer to the Message Center section of
your Owner’s Guide.
Remote Entry System
The remote entry system allows you to lock or
unlock all vehicle doors and the liftgate, open
the liftgate window without a key, and activate
the panic alarm. Press control Cand release to
unlock the driver’s door. Press and release again
within three seconds to unlock the passenger
doors, the liftgate and liftgate glass. Press control A
and release to lock all the doors and liftgate.
Press control D to unlatch the liftgate window.
Press control Bto activate the alarm. The horn
will sound and the parklamps will flash for a
maximum of three minutes. Press the control
again or turn the ignition to the ON position to
deactivate. Press control Cto automatically move
the seat and adjustable pedals* to the desired
memory position*. The remote entry system can
also control the memory seat / adjustable pedals /
easy entry-exit feature*. For more information,
refer to your Owner’s Guide.
A
B
C
D
2nd Row Seats:The second row seats are
designed for maximum utility. They can
be positioned in up to three unique
configurations: Upright (seating) position,
Cargo mode, and E-Z entry mode
(if equipped with 3rd row seat).
Before folding down the 2nd row seats,
ensure that no objects such as books, purses,
or briefcases are on the
floor in front of or under
the seat. 1.Lower the
head restraints by pulling
on the strap. 2.Locate
the handle on the side of
the seat cushion by the
door. 3.Pull up on the handle and push
the seatback forward toward the front of
the vehicle.
To place the 2nd row
60/40 seats in cargo
mode: (if equipped with
a 3rd row seat) 1.Fold
down the 2nd row seat
as indicated. 2.Pull the
cargo mode lever up and
forward to release the
seat into a flat load floor
position. A moderate
force may be required to
move the seat forward
and down.
To return to the upright (seating) position from cargo mode:1. Place your hand
under the seat bottom and lift the seat up
(A moderate force may be required to move
the seat). 2.Return the seatback to the
upright position. Note:The seatback cannot
be returned to the upright position until the
seat is returned from the cargo mode
position and latched. If the seatback will not
raise, reposition the seat into cargo mode
and try lifting it again.
To enter the 3rd row
seat: (if equipped)
1.Fold the seatback down
(as indicated) and release
the side handle. 2.Pull
the side handle up again
until the rear of the seat
releases from the floor. 3.Rotate the seat
upward and away from the 3rd row.
To return the 2nd row seat to the
upright (seating) position from E-Z entry
mode:1. Return the seat from the E-Z entry
position and latch it to the floor with a
moderate speed. 2.Bring the seat back to
an upright position. Note:If the seatback
will not return to the upright position,
tumble the seat forward again and then
re-latch it to the floor. Be sure that cargo or
other objects are not trapped underneath
the seatback.
3rd Row Seats:
(if equipped) Before folding
the 3rd row seats, ensure that no objects such
as books, purses or briefcases are on the seat
cushions and that the seat belts are unbuckled.
1.Fold the head restraints down by pulling on
the strap
located under the
restraint.
2.Pull up on the
handle located behind the
seatback while pushing
the seatback forward and
down into the seat cushion.
Note:
For 3rd row power
folding seat (if equipped), the control buttons
are located on the driver-side rear quarter trim
panel (accessible from the liftgate area). Be sure
to fold the head restraints before powering the
3rd row seat into the folded position.
To return the 3rd row seats to the
upright (seating) position:1. Pull up on
the handle located on the seatback, rotating
the seatback upward until you hear a click,
locking it in the upright position. 2.Lift up
on the head restraint until it locks into its
original position.
Seating
*if equipped
 Loading...