

Page 1

FORD F-150 Owner's Manual
Page 2

The information contained in this publication was correct at the time of going to print. In the interest of
continuous development, we reserve the right to change specifications, design or equipment at any time
without notice or obligation. No part of this publication may be reproduced, transmitted, stored in a
retrieval system or translated into any language in any form by any means without our written permission.
Errors and omissions excepted.
© Ford Motor Company 2020
All rights reserved.
Part Number: 202007 20200831140540
California Proposition 65
WARNING: Operating, servicing and
maintaining a passenger vehicle or off-highway
motor vehicle can expose you to chemicals
including engine exhaust, carbon monoxide,
phthalates, and lead, which are known to the
State of California to cause cancer and birth
defects or other reproductive harm. To minimize
exposure, avoid breathing exhaust, do not idle the
engine except as necessary, service your vehicle
in a well-ventilated area and wear gloves or wash
your hands frequently when servicing your vehicle.
For more information go to
www.P65Warnings.ca.gov/passenger-vehicle.
WARNING: Battery posts, terminals and
related accessories contain lead and lead
compounds, chemicals known to the State of
California to cause cancer and reproductive harm.
Wash your hands after handling.
Page 3

Page 4

Contacting Us
Contacting Us ..................................................19
Introduction
About This Publication .................................21
Using This Publication .................................22
Symbols Glossary
Symbols Used on Your Vehicle ................23
Data Privacy
Data Privacy ....................................................26
Service Data .....................................................27
Event Data ........................................................27
Settings Data ..................................................28
Connected Vehicle Data .............................28
Mobile Device Data .......................................29
Emergency Call System Data ...................29
Visual Search
Steering Wheel ..............................................30
Instrument Panel ............................................31
Vehicle Interior ................................................32
Front Exterior ..................................................33
Rear Exterior ....................................................34
Child Safety
Child Safety Precautions ............................35
Child Restraint Anchor Points ..................36
Child Restraints ..............................................38
Installing Child Restraints ..........................39
Booster Seats .................................................46
Child Safety Locks ........................................48
Seatbelts
Seatbelt Precautions ...................................49
Fastening and Unfastening the Seatbelts
..........................................................................50
Sensitive Locking Mode ...............................51
Automatic Locking Mode ............................51
Adjusting the Seatbelts During
Pregnancy ....................................................52
Adjusting the Seatbelt Height ..................52
Adjusting the Seatbelt Length .................53
Seatbelt Reminder ........................................53
Checking the Seatbelts ...............................55
Seatbelt Extensions .....................................56
Personal Safety System™
What Is the Personal Safety System
...........................................................................57
How Does the Personal Safety System
Work ...............................................................57
Personal Safety System Components
...........................................................................57
Airbags
How Do the Front Airbags Work ..............58
How Do the Side Airbags Work ...............58
How Do the Knee Airbags Work ..............59
How Does the Safety Canopy™ Work
..........................................................................59
Airbag Precautions .......................................60
Properly Adjusting the Driver and Front
Passenger Seats .........................................61
Children and Airbags ....................................61
Front Passenger Sensing System ...........62
Crash Sensors and Airbag Indicator ......65
Disposing of Airbags ....................................66
Pedestrian Alert System
What Is the Pedestrian Alert System
...........................................................................67
911 Assist
What Is 911 Assist .........................................68
How Does 911 Assist Work ........................68
Emergency Call Requirements ................68
Emergency Call Limitations ......................69
1
F-150 (TFD) Canada/United States of America, enUSA, Edition date: 202007, First-Printing
Table of Contents
Page 5

Keys and Remote Controls
Remote Control Limitations ......................70
Using the Remote Control .........................70
Opening and Closing the Flip Key ...........70
Removing the Key Blade ..............................71
Sounding the Panic Alarm ..........................71
Locating Your Vehicle ....................................71
Changing the Remote Control Battery -
Vehicles With: Push Button Start ........72
Changing the Remote Control Battery -
Vehicles With: Flip Key .............................73
Replacing a Lost Key or Remote Control
...........................................................................74
Programming the Remote Control -
Vehicles With: Push Button Start ........75
Programming the Remote Control -
Vehicles With: Flip Key ............................76
Keys and Remote Controls –
Troubleshooting .........................................77
MyKey™
What Is MyKey ................................................78
MyKey Settings ...............................................78
Creating a MyKey - Vehicles With: Push
Button Start ................................................79
Creating a MyKey - Vehicles With: Flip
Key .................................................................80
Programming a MyKey ...............................80
Clearing All MyKeys .....................................80
Checking MyKey System Status .............80
Using MyKey With Remote Start
Systems .......................................................80
MyKey – Troubleshooting ...........................81
Doors and Locks
Operating the Doors From Outside Your
Vehicle ..........................................................84
Operating the Doors From Inside Your
Vehicle ..........................................................84
Autounlock ......................................................85
Autolock ...........................................................85
Mislock ..............................................................85
Doors and Locks Audible Warnings .......86
Doors and Locks – Troubleshooting
..........................................................................86
Keyless Entry
Locating the Keyless Entry Keypad ........87
Keyless Entry Limitations ...........................87
Master Access Code .....................................87
Keyless Entry Settings .................................87
Locking and Unlocking the Doors Using
Remote Keyless Entry .............................88
Locking and Unlocking the Doors Using
Keyless Entry Keypad ..............................89
Keyless Entry – Troubleshooting ............89
Easy Entry and Exit
How Does Easy Entry and Exit Work
..........................................................................90
Switching Easy Entry and Exit On and
Off ..................................................................90
Tailgate - Vehicles With:
Manual Tailgate
Opening the Tailgate ....................................91
Locking and Unlocking the Tailgate ........91
Removing and Installing the Tailgate
...........................................................................91
Tailgate Step ...................................................92
Bed Extender ..................................................93
Tailgate Work Surface .................................95
Tailgate - Vehicles With:
Power Tailgate
Opening the Tailgate ...................................96
Closing the Tailgate .....................................96
Removing and Installing the Tailgate
...........................................................................97
Tailgate Step ..................................................98
Bed Extender ..................................................99
Tailgate Work Surface ................................101
Tailgate – Troubleshooting ......................102
2
F-150 (TFD) Canada/United States of America, enUSA, Edition date: 202007, First-Printing
Table of Contents
Page 6

Tailgate - Vehicles With:
Remote Release Tailgate
Opening the Tailgate .................................104
Removing and Installing the Tailgate
........................................................................104
Tailgate Step .................................................105
Bed Extender ................................................106
Tailgate Work Surface ...............................108
Tailgate – Troubleshooting .....................109
Security
Passive Anti-Theft System ........................111
Anti-Theft Alarm System ...........................111
Anti-Theft Alarm System Settings .........112
Security – Troubleshooting .......................113
Power Running Boards
Power Running Board Precautions ........115
Power Running Board Settings ...............115
Power Running Board Kick Switch .........115
Deploying and Stowing the Power
Running Boards .........................................116
Power Running Boards –
Troubleshooting ........................................116
Steering Wheel
Adjusting the Steering Wheel - Vehicles
With: Manual Adjustable Steering
Column .........................................................117
Adjusting the Steering Wheel - Vehicles
With: Power Adjustable Steering
Column .........................................................117
Resetting the Stopping Position -
Vehicles With: Power Adjustable
Steering Column .......................................118
Horn ...................................................................118
Switching the Heated Steering Wheel
On and Off ..................................................118
Adjustable Pedals
Adjusting the Pedals ...................................119
Wipers and Washers
Wipers ..............................................................120
Autowipers .....................................................120
Checking the Wiper Blades .......................121
Replacing the Front Wiper Blades ..........121
Washers ...........................................................122
Wipers and Washers – Troubleshooting
.........................................................................122
Exterior Lighting
Exterior Lighting Control ...........................124
Headlamps .....................................................124
Headlamps – Troubleshooting ..............124
Autolamps ......................................................125
Exterior Lamps ..............................................125
Exterior Zone Lighting .................................127
Automatic High Beam Control ...............128
Automatic High Beam Control –
Troubleshooting ......................................130
Glare Free Lighting .......................................131
Glare Free Lighting – Troubleshooting
.........................................................................133
Adaptive Front Lighting .............................133
Interior Lighting
Switching All of the Interior Lamps On
and Off ........................................................135
Switching the Front Interior Lamps On
and Off ........................................................135
Switching the Rear Interior Lamps On
and Off ........................................................135
Interior Lamp Function ..............................135
Adjusting the Instrument Panel Lighting
Brightness ..................................................136
Ambient Lighting .........................................136
Windows
Opening and Closing the Windows .......137
Window Bounce-Back ...............................137
Locking the Rear Window Controls ......138
3
F-150 (TFD) Canada/United States of America, enUSA, Edition date: 202007, First-Printing
Table of Contents
Page 7

Opening and Closing the Sliding
Windows .....................................................138
Interior Mirror
Interior Mirror Precautions .......................139
Manually Dimming the Interior Mirror
.........................................................................139
Auto-Dimming Interior Mirror .................139
Exterior Mirrors
Adjusting the Exterior Mirrors .................140
Folding the Exterior Mirrors - Vehicles
With: Manual Folding Mirrors .............140
Folding the Exterior Mirrors - Vehicles
With: Power Folding Mirrors ................140
Extending the Exterior Mirrors .................141
Auto-Dimming Exterior Mirror .................141
Moonroof
Opening and Closing the Sun Shade
.........................................................................142
Opening and Closing the Moonroof ......142
Venting the Moonroof ................................142
Moonroof Bounce-Back ............................143
Instrument Cluster
Instrument Cluster Overview - Vehicles
With: 4.2 Inch Screen .............................144
Instrument Cluster Overview - Vehicles
With: 8 Inch Screen ................................145
Instrument Cluster Overview - Vehicles
With: 12.3 Inch Screen ...........................146
What Is the Tachometer ...........................146
What Is the Speedometer .......................146
Fuel Gauge .....................................................146
What Is the Engine Coolant Temperature
Gauge ...........................................................147
What Is the Engine Oil Pressure Gauge
.........................................................................147
What Is the Transmission Fluid
Temperature Gauge ................................147
What Is the Turbo Boost Gauge .............147
What Is the Diesel Exhaust Fluid Gauge
.........................................................................147
What Are the Instrument Cluster
Warning Lamps ........................................147
Instrument Cluster Warning Lamps ......148
What Are the Instrument Cluster
Indicators ....................................................149
Instrument Cluster Indicators .................149
Instrument Cluster Display
Using the Instrument Cluster Display
Controls ........................................................151
Instrument Cluster Display Main Menu -
Vehicles With: 4.2 Inch Screen ............151
Instrument Cluster Display Main Menu -
Vehicles With: 8 Inch Screen ...............152
Instrument Cluster Display Main Menu -
Vehicles With: 12.3 Inch Screen ..........152
Trip Computer - Vehicles With: 4.2 Inch
Screen ..........................................................152
Trip Computer - Vehicles With: 8 Inch
Screen/12.3 Inch Screen .......................153
Customizing the Instrument Cluster
Display .........................................................153
Personalized Settings ................................153
Hybrid Display Information ......................154
What Is Brake Coach ..................................154
What Is the Trip Summary .......................154
Remote Start
What Is Remote Start ................................155
Remote Start Precautions .......................155
Remote Start Limitations .........................155
Enabling Remote Start ..............................155
Remotely Starting and Stopping the
Vehicle .........................................................155
Extending the Remote Start Duration
.........................................................................156
Remote Start Remote Control Indicators
.........................................................................156
Remote Start Settings ...............................156
4
F-150 (TFD) Canada/United States of America, enUSA, Edition date: 202007, First-Printing
Table of Contents
Page 8

Climate Control - Vehicles
With: Automatic
Temperature Control
Identifying the Climate Control Unit .....158
Switching Climate Control On and Off
.........................................................................158
Switching Recirculated Air On and Off
.........................................................................158
Switching Air Conditioning On and Off
.........................................................................158
Switching Defrost On and Off ................158
Switching Maximum Defrost On and Off
.........................................................................158
Switching Maximum Cooling On and Off
.........................................................................159
Switching the Heated Wiper Park On and
Off .................................................................159
Switching the Heated Rear Window On
and Off ........................................................159
Switching the Heated Mirrors On and Off
.........................................................................159
Setting the Blower Motor Speed ...........159
Setting the Temperature ..........................159
Directing the Flow of Air ...........................160
Auto Mode .....................................................160
Climate Control Hints .................................161
Climate Control - Vehicles
With: Manual Temperature
Control
Identifying the Climate Control Unit .....163
Switching Climate Control On and Off
.........................................................................163
Switching Recirculated Air On and Off
.........................................................................163
Switching Air Conditioning On and Off
.........................................................................163
Switching Defrost On and Off ................163
Switching Maximum Defrost On and Off
.........................................................................163
Switching Maximum Cooling On and Off
.........................................................................164
Switching the Heated Rear Window On
and Off ........................................................164
Switching the Heated Mirrors On and Off
.........................................................................164
Setting the Blower Motor Speed ...........164
Setting the Temperature ..........................164
Directing the Flow of Air ...........................164
Climate Control Hints ................................165
Interior Air Quality
What Is the Cabin Air Filter ......................166
Replacing the Cabin Air Filter .................166
Front Seats
Front Seat Precautions ..............................167
Sitting in the Correct Position .................167
Manual Seats ................................................168
Power Seats ...................................................170
Massage Seats ..............................................173
Heated Seats .................................................174
Ventilated Seats ...........................................174
Rear Seats
Manual Seats ................................................176
Heated Seats .................................................177
Rear Occupant Alert System
What is the Rear Occupant Alert System
.........................................................................179
How Does the Rear Occupant Alert
System Work .............................................179
Rear Occupant Alert System Precautions
.........................................................................179
Rear Occupant Alert System Limitations
.........................................................................179
Switching Rear Occupant Alert System
On and Off ..................................................179
Rear Occupant Alert System Indicators
........................................................................180
Rear Occupant Alert System Audible
Warnings ....................................................180
5
F-150 (TFD) Canada/United States of America, enUSA, Edition date: 202007, First-Printing
Table of Contents
Page 9

Memory Function
What Is the Memory Function .................181
Memory Function Precautions ................181
Locating the Memory Function Buttons
..........................................................................181
Saving a Preset Position ............................181
Recalling a Preset Position .......................181
Garage Door Opener
What Is the Garage Door Opener ..........182
How Does the Garage Door Opener Work
.........................................................................182
Garage Door Opener Precautions .........182
Garage Door Opener Limitations ..........183
Programming the Garage Door Opener
to Your Hand-Held Transmitter .........183
Programming the Garage Door Opener
to Your Garage Door Opener Motor
.........................................................................184
Programming the Garage Door Opener
to Your Gate Opener Motor .................184
Clearing the Garage Door Opener .........185
Reprogramming the Garage Door Opener
.........................................................................185
Garage Door Opener Radio Frequencies
.........................................................................185
USB Ports
Locating the USB Ports ............................186
Playing Media Using the USB Port .......186
Charging a Device ........................................187
Power Outlet - Vehicles With:
Pickup Bed Power Generator
Outlet
What Is the Power Outlet ........................188
Power Outlet Precautions - Vehicles
With: 2kW ..................................................188
Power Outlet Precautions - Vehicles
With: 2.4kW/7.2kW .................................189
Locating the Power Outlet ......................190
Power Outlet Indicators - Vehicles With:
2kW ..............................................................190
Power Outlet Indicators - Vehicles With:
2.4kW/7.2kW ..............................................191
What Is Utility Idle Mode - Vehicles With:
Flip Key .........................................................191
Switching Utility Idle On and Off -
Vehicles With: Flip Key ...........................191
What Is Generator Mode ..........................192
Switching Generator Mode On and Off
.........................................................................192
Resetting Ground Fault Detection ........192
Resetting the Circuit Breaker - Vehicles
With: 7.2kW ................................................193
Power Outlet – Troubleshooting ...........194
Power Outlet - Vehicles With:
120V Power Outlet
What Is the Power Outlet .........................197
Power Outlet Precautions ........................197
Power Outlet Limitations ..........................197
Locating the Power Outlet .......................197
Power Outlet Indicators ............................198
Power Outlet - Vehicles With:
12V Power Outlet
What Is the Power Outlet ........................199
Power Outlet Precautions .......................199
Locating the Power Outlet ......................199
Center Console Work Surface
Using the Center Console Work Surface
- Vehicles With: Column Shift ...........200
Using the Center Console Work Surface
- Vehicles With: Console Shift ............201
Center Console Work Surface –
Troubleshooting ......................................202
Wireless Accessory Charger
What Is the Wireless Accessory Charger
........................................................................203
6
F-150 (TFD) Canada/United States of America, enUSA, Edition date: 202007, First-Printing
Table of Contents
Page 10

Wireless Accessory Charger Precautions
........................................................................203
Locating the Wireless Accessory Charger
........................................................................203
Charging a Wireless Device ....................203
Storage
Cup Holders ..................................................205
Glove Compartment .................................205
Under Seat Storage ...................................206
Glasses Holder ............................................208
Starting and Stopping the
Engine
Starting and Stopping the Engine –
Precautions ..............................................209
Ignition Switch .............................................209
Push Button Ignition Switch ....................210
Starting the Engine .....................................210
Engine Block Heater ....................................213
Stopping the Engine ...................................214
Automatic Engine Stop ............................215
Accessing the Passive Key Backup
Position .......................................................216
Starting and Stopping the Engine –
Troubleshooting .......................................216
Hybrid Electric Vehicle
Information
What is a Hybrid Electric Vehicle ...........221
How Does a Hybrid Electric Vehicle Work
.........................................................................221
Hybrid Electric Vehicle Driving
Characteristics ..........................................221
Low Engine Use Mode ................................221
Hybrid Electric Vehicle Information
Indicators ...................................................222
Hybrid Electric Vehicle Information –
Troubleshooting ......................................222
Auto-Start-Stop
What Is Auto-Start-Stop .........................224
Auto-Start-Stop Precautions ................224
Switching Auto-Start-Stop On and Off
........................................................................224
Stopping the Engine ..................................224
Restarting the Engine ................................224
Auto-Start-Stop Indicators .....................224
Auto-Start-Stop – Troubleshooting
........................................................................225
Fuel and Refueling
Fuel and Refueling Precautions .............227
Fuel Quality ...................................................227
Locating the Fuel Filler Funnel ...............232
Running Out of Fuel ...................................232
Refueling ........................................................233
Fuel Tank Capacity - Excluding: Hybrid
Electric Vehicle (HEV) ..........................238
Fuel Tank Capacity - Hybrid Electric
Vehicle (HEV) ..........................................239
Fuel and Refueling – Troubleshooting
........................................................................239
Diesel Particulate Filter
What Is the Diesel Particulate Filter .....240
How Does the Diesel Particulate Filter
Work ............................................................240
Diesel Particulate Filter Precautions
........................................................................240
Diesel Particulate Filter Requirements
.........................................................................241
Diesel Particulate Filter Manual
Regeneration .............................................241
Diesel Particulate Filter –
Troubleshooting ......................................243
Selective Catalytic Reduction
System - Diesel
What Is the Selective Catalytic
Reduction System ..................................245
How Does the Selective Catalytic
Reduction System Work ......................245
Selective Catalytic Reduction System
Precautions ...............................................245
7
F-150 (TFD) Canada/United States of America, enUSA, Edition date: 202007, First-Printing
Table of Contents
Page 11

Selective Catalytic Reduction System
Requirements ..........................................246
Selective Catalytic Reduction System
Guidelines .................................................246
Filling the Selective Catalytic Reduction
System Tank .............................................247
Checking the Selective Catalytic
Reduction System Status ...................249
Diesel Exhaust Fluid Capacity and
Specification ............................................249
Selective Catalytic Reduction System –
Troubleshooting .....................................249
Catalytic Converter
What Is the Catalytic Converter .............251
Catalytic Converter Precautions ............251
Catalytic Converter – Troubleshooting
.........................................................................251
High Voltage Battery - Hybrid
Electric Vehicle (HEV)
What Is the High Voltage Battery .........252
High Voltage Battery Precautions ........252
Automatic Transmission
Automatic Transmission Precautions
........................................................................253
Automatic Transmission Positions ......253
Shifting Your Vehicle Into Gear ..............254
Manually Shifting Gears ...........................254
Temporary Neutral Mode ........................255
Using Progressive Range Selection ......256
Automatic Return to Park (P) ................256
Stowing the Selector Lever - Vehicles
With: Console Shift ................................256
Manual Park Release .................................257
Four-Wheel Drive
How Does Four-Wheel Drive Work ......260
Four-Wheel Drive Precautions ..............260
Four-Wheel Drive Limitations .................261
Selecting a Four-Wheel Drive Mode ....262
Four-Wheel Drive Modes .........................263
Four-Wheel Drive Indicators ..................264
Four-Wheel Drive Driving Hints .............264
Four-Wheel Drive – Troubleshooting
........................................................................266
Electronic Locking Differential
What Is the Electronic Locking
Differential ................................................269
Electronic Locking Differential
Precautions ..............................................269
Switching the Electronic Locking
Differential On and Off - 4x4 .............269
Switching the Electronic Locking
Differential On and Off - 4x2 ...............271
Electronic Locking Differential Indicators
.........................................................................272
Electronic Locking Differential –
Troubleshooting ......................................272
Brakes
Brake Precautions .......................................273
Anti-Lock Braking System .......................273
Brake Over Accelerator .............................273
Locating the Brake Fluid Reservoir .......273
Checking the Brake Fluid ..........................273
Brake Fluid Specification .........................274
Brakes – Troubleshooting ........................274
Electric Parking Brake
What Is the Electric Parking Brake .......276
Applying the Electric Parking Brake ......276
Applying the Electric Parking Brake in an
Emergency ................................................276
Manually Releasing the Electric Parking
Brake ............................................................276
Automatically Releasing the Electric
Parking Brake ...........................................276
Electric Parking Brake Audible Warning
.........................................................................277
8
F-150 (TFD) Canada/United States of America, enUSA, Edition date: 202007, First-Printing
Table of Contents
Page 12

Releasing the Electric Parking Brake if
the Vehicle Battery Has Run Out of
Charge .........................................................277
Electric Parking Brake – Troubleshooting
.........................................................................277
Reverse Braking Assist
What Is Reverse Braking Assist .............279
How Does Reverse Braking Assist Work
........................................................................279
Reverse Braking Assist Precautions ......279
Switching Reverse Braking Assist On and
Off ................................................................280
Overriding Reverse Braking Assist .......280
Reverse Braking Assist Indicators ........280
Reverse Braking Assist –
Troubleshooting .....................................280
Hill Start Assist
What Is Hill Start Assist ...........................282
How Does Hill Start Assist Work ..........282
Hill Start Assist Precautions ...................282
Hill Start Assist – Troubleshooting ......282
Auto Hold
How Does Auto Hold Work .....................283
Switching Auto Hold On and Off ..........283
Using Auto Hold ..........................................283
Auto Hold Indicators ..................................283
Traction Control
What Is Traction Control .........................284
How Does Traction Control Work .........284
Switching Traction Control On and Off
........................................................................284
Traction Control Indicator .......................284
Traction Control – Troubleshooting .....285
Stability Control
How Does Stability Control Work ........286
Switching Stability Control On and Off
........................................................................287
Stability Control Indicator .......................288
Hill Descent Control
What Is Hill Descent Control ..................289
How Does Hill Descent Control Work
........................................................................289
Hill Descent Control Precautions .........289
Switching Hill Descent Control On and
Off ................................................................289
Setting the Hill Descent Speed .............289
Hill Descent Control Indicator ...............289
Hill Descent Control – Troubleshooting
.......................................................................290
Active Drive Assist
What Is Active Drive Assist ......................291
How Does Active Drive Assist Work ......291
Active Drive Assist Precautions ..............291
Active Drive Assist Requirements .........292
Active Drive Assist Limitations ..............292
Active Drive Assist Settings ....................292
Switching Active Drive Assist On and Off
........................................................................292
Active Drive Assist Alerts .........................292
Active Drive Assist Automatic
Cancellation .............................................293
Active Drive Assist Indicators .................293
Active Drive Assist – Troubleshooting
........................................................................294
Steering
Electric Power Steering ............................295
Steering – Troubleshooting ....................296
Parking Aids
Parking Aid Precautions ...........................297
Rear Parking Aid ..........................................297
Front Parking Aid ........................................298
Side Parking Aid ..........................................299
9
F-150 (TFD) Canada/United States of America, enUSA, Edition date: 202007, First-Printing
Table of Contents
Page 13

Parking Aid Indicators ..............................300
Parking Aids – Troubleshooting .............301
Rear View Camera
What Is the Rear View Camera .............302
Rear View Camera Precautions ............302
Locating the Rear View Camera ...........302
Rear View Camera Guide Lines .............302
Rear View Camera Settings ...................303
360 Degree Camera
What Is the 360 Degree Camera .........305
How Does the 360 Degree Camera Work
........................................................................305
360 Degree Camera Precautions ........305
360 Degree Camera Limitations ..........305
Locating the 360 Degree Cameras ......305
360 Degree Camera Guide Lines .........306
360 Degree Camera Settings ................307
Active Park Assist
What Is Active Park Assist ......................309
How Does Active Park Assist Work ......309
Active Park Assist Precautions .............309
Switching Active Park Assist On and Off
.......................................................................309
Entering a Parallel Parking Space .......309
Entering a Perpendicular Parking Space
.........................................................................310
Exiting a Parking Space ............................310
Active Park Assist – Troubleshooting
..........................................................................311
Cruise Control
What Is Cruise Control ...............................313
Switching Cruise Control On and Off
.........................................................................313
Setting the Cruise Control Speed ..........313
Canceling the Set Speed ..........................314
Resuming the Set Speed ..........................314
Cruise Control Indicators ..........................314
Adaptive Cruise Control
How Does Adaptive Cruise Control With
Stop and Go Work ...................................315
Adaptive Cruise Control Precautions
.........................................................................315
Adaptive Cruise Control Limitations
.........................................................................316
Switching Adaptive Cruise Control On
and Off .........................................................317
Adaptive Cruise Control Automatic
Cancellation ..............................................318
Setting the Adaptive Cruise Control
Speed ...........................................................318
Setting the Adaptive Cruise Control Gap
.........................................................................319
Canceling the Set Speed .........................320
Resuming the Set Speed .........................320
Overriding the Set Speed ..........................321
Adaptive Cruise Control Indicators .......321
Switching From Adaptive Cruise Control
to Cruise Control ......................................321
Lane Centering .............................................322
Intelligent Adaptive Cruise Control ......324
Adaptive Cruise Control –
Troubleshooting ......................................325
Drive Mode Control
What Is Drive Mode Control ...................328
How Does Drive Mode Control Work
........................................................................328
Selecting a Drive Mode .............................328
Drive Modes ..................................................329
Drive Mode Control – Troubleshooting
.........................................................................331
Lane Keeping System
What Is the Lane Keeping System .......333
How Does the Lane Keeping System
Work ............................................................333
Lane Keeping System Precautions ......333
10
F-150 (TFD) Canada/United States of America, enUSA, Edition date: 202007, First-Printing
Table of Contents
Page 14

Lane Keeping System Limitations ........333
Switching the Lane Keeping System On
and Off .......................................................334
Switching the Lane Keeping System
Mode ...........................................................334
Alert Mode .....................................................334
Aid Mode ........................................................335
Alert and Aid Mode ....................................335
Lane Keeping System Indicators ..........336
Lane Keeping System – Troubleshooting
........................................................................337
Blind Spot Information
System
What Is Blind Spot Information System
.......................................................................340
How Does Blind Spot Information
System Work ...........................................340
Blind Spot Information System
Precautions ..............................................340
Blind Spot Information System
Limitations ................................................340
Blind Spot Information System
Requirements ..........................................340
Switching Blind Spot Information
System On and Off ...............................340
Locating the Blind Spot Information
System Sensors .......................................341
Blind Spot Information System With
Trailer Coverage .......................................341
Blind Spot Information System
Indicators ...................................................343
Blind Spot Information System –
Troubleshooting ......................................343
Cross Traffic Alert
What Is Cross Traffic Alert ......................344
How Does Cross Traffic Alert Work ......344
Cross Traffic Alert Precautions .............344
Cross Traffic Alert Limitations ...............344
Switching Cross Traffic Alert On and Off
........................................................................344
Locating the Cross Traffic Alert Sensors
........................................................................345
Cross Traffic Alert With Trailer Coverage
........................................................................345
Cross Traffic Alert Indicators ..................345
Cross Traffic Alert – Troubleshooting
........................................................................346
Pre-Collision Assist
What Is Pre-Collision Assist ....................347
How Does Pre-Collision Assist Work
........................................................................347
Pre-Collision Assist Precautions ...........347
Pre-Collision Assist Limitations ............348
Switching Pre-Collision Assist On and
Off ................................................................349
Locating the Pre-Collision Assist Sensors
........................................................................349
Distance Indication ....................................350
Distance Alert ................................................351
Automatic Emergency Braking ...............351
Evasive Steering Assist .............................352
Pre-Collision Assist – Troubleshooting
........................................................................353
Driver Alert
What Is Driver Alert ....................................355
How Does Driver Alert Work ...................355
Driver Alert Precautions ...........................355
Driver Alert Limitations .............................355
Switching Driver Alert On and Off ........355
Driver Alert – Troubleshooting ..............356
Speed Sign Recognition
What Is Speed Sign Recognition ...........357
How Does Speed Sign Recognition Work
........................................................................357
Speed Sign Recognition Precautions
........................................................................357
Speed Sign Recognition Limitations
........................................................................357
Speed Sign Recognition Indicators ......357
11
F-150 (TFD) Canada/United States of America, enUSA, Edition date: 202007, First-Printing
Table of Contents
Page 15

Setting the Speed Sign Recognition
Speed Warning ........................................358
Setting the Speed Sign Recognition
Speed Tolerance .....................................358
Speed Sign Recognition –
Troubleshooting .....................................358
Load Carrying
Load Carrying Precautions .....................360
Using a Slide-In Camper ...........................361
Locating the Safety Compliance
Certification Labels ................................361
What Is the Gross Axle Weight Rating
.........................................................................361
What Is the Gross Vehicle Weight Rating
.........................................................................361
What Is the Gross Combined Weight
Rating ...........................................................361
Calculating Payload ...................................363
Calculating the Load Limit ......................363
Pickup Bed
Pickup Bed Precautions ...........................366
Pickup Bed Anchor Points ......................366
Tailgate Anchor Points .............................368
Pickup Bed Ramps ....................................368
Connecting a Trailer
Connecting a Trailer Precautions ...........371
Hitches .............................................................371
Connecting a Trailer ...................................372
Connecting a Trailer – Troubleshooting
........................................................................374
Towing a Trailer
Towing a Trailer Precautions ..................375
Trailer Brake Precautions .........................375
Towing a Trailer Limitations ....................375
Loading Your Trailer ...................................376
Trailer Towing Hints ...................................376
Launching or Retrieving a Boat or
Personal Watercraft ...............................377
Towing Weights and Dimensions .........378
Towing a Trailer – Troubleshooting .....404
Integrated Trailer Brake
Controller
What Is the Integrated Trailer Brake
Controller ..................................................405
Integrated Trailer Brake Controller
Precautions ..............................................405
Using the Integrated Trailer Brake
Controller ..................................................405
Adjusting the Integrated Trailer Brake
Controller Mode .....................................406
Integrated Trailer Brake Controller –
Troubleshooting ......................................407
Trailer Sway Control
How Does Trailer Sway Control Work
.......................................................................409
Trailer Sway Control Precautions ........409
Switching Trailer Sway Control On and
Off ...............................................................409
Trailer Reversing Aid -
Vehicles With: Pro Trailer
Backup Assist
What Is the Trailer Reversing Aid ..........410
How Does the Trailer Reversing Aid Work
........................................................................410
Trailer Reversing Aid Precautions .........410
Setting Up the Trailer Reversing Aid for
a Conventional Trailer ...........................410
Switching the Trailer Reversing Aid On
and Off ........................................................413
Using the Trailer Reversing Aid Controller
.........................................................................413
Using the Trailer Reverse Guidance
Views ............................................................414
Trailer Reversing Aid - Troubleshooting
.........................................................................416
12
F-150 (TFD) Canada/United States of America, enUSA, Edition date: 202007, First-Printing
Table of Contents
Page 16

Trailer Reversing Aid -
Vehicles With: Trailer
Reverse Guidance (TRG)
What Is the Trailer Reversing Aid .........420
How Does the Trailer Reversing Aid Work
........................................................................420
Trailer Reversing Aid Precautions ........420
Setting Up the Trailer Reversing Aid for
a Conventional Trailer ..........................420
Switching the Trailer Reversing Aid On
and Off ........................................................422
Using the Trailer Reverse Guidance
Views ...........................................................422
Trailer Reversing Aid - Troubleshooting
........................................................................424
Driving Hints
Off-Road Driving .........................................428
Cold Weather Precautions ......................430
Breaking-In ...................................................430
Driving Economically ................................430
Floor Mats .......................................................431
Snow Plowing - Vehicles
Without: Snow Plow Mode
Snow Plowing Precautions .....................432
Snow Plowing - Vehicles With:
Snow Plow Mode
Snow Plowing Precautions .....................433
Operating Your Vehicle With a
Snowplow .................................................433
Snowplow Mode .........................................434
Crash and Breakdown
Information
Roadside Assistance .................................436
High Voltage Battery Vehicle Precautions
- Hybrid Electric Vehicle (HEV) .........437
Switching the Hazard Flashers On and
Off ................................................................438
Jump Starting the Vehicle .......................438
Post-Crash Alert System ........................440
Automatic Crash Shutoff ........................440
Recovery Towing ........................................440
Transporting the Vehicle ..........................441
Towing Your Vehicle
Towing Your Vehicle Precautions .........443
Recreationally Towing Your Vehicle -
4x4 ...............................................................443
Recreationally Towing Your Vehicle - 4x2
........................................................................445
Emergency Towing ....................................445
Towing Your Vehicle – Troubleshooting
........................................................................445
Fuses
Fuse Precautions ........................................446
Under Hood Fuse Box ..............................446
Body Control Module Fuse Box ..............451
Identifying Fuse Types .............................454
Fuses – Troubleshooting .........................454
Maintenance
Maintenance Precautions .......................455
Opening and Closing the Hood .............455
Under Hood Overview - 2.7L EcoBoost™
.......................................................................456
Under Hood Overview - 3.0L Diesel .....457
Under Hood Overview - 3.3L .................458
Under Hood Overview - 3.5L Ecoboost™
.......................................................................459
Under Hood Overview - 3.5L, Hybrid
Electric Vehicle (HEV) .........................460
Under Hood Overview - 5.0L ..................461
Engine Oil ......................................................462
Checking the Coolant ...............................463
Engine Air Filter ............................................467
Draining the Fuel Filter Water Trap -
Diesel ..........................................................470
Changing the Fuel Filter - Diesel ............471
13
F-150 (TFD) Canada/United States of America, enUSA, Edition date: 202007, First-Printing
Table of Contents
Page 17

Changing the Fuel Filter - Gasoline .......471
Changing the 12V Battery .........................471
Adjusting the Headlamps ........................473
Exterior Bulbs ...............................................474
Interior Bulbs ................................................483
Drive Belt Routing - 2.7L EcoBoost™,
Vehicles With: Dual Generators ........483
Drive Belt Routing - 2.7L EcoBoost™,
Vehicles With: Single Generator .......483
Drive Belt Routing - 3.0L Diesel ............483
Drive Belt Routing - 3.3L ..........................484
Drive Belt Routing - 3.5L Ecoboost™,
Vehicles With: Single Generator .......484
Drive Belt Routing - 3.5L Ecoboost™,
Vehicles With: Dual Generators ........484
Drive Belt Routing - 3.5L, Hybrid Electric
Vehicle (HEV) ..........................................484
Drive Belt Routing - 5.0L, Vehicles With:
Single Generator ....................................485
Drive Belt Routing - 5.0L, Vehicles With:
Dual Generators .....................................485
Vehicle Care
Cleaning Products .....................................486
Cleaning the Exterior ................................486
Cleaning the Interior .................................488
Repairing Minor Paint Damage .............490
Waxing Your Vehicle .................................490
Storing Your Vehicle
Preparing Your Vehicle for Storage ......492
Removing Your Vehicle From Storage
........................................................................493
Wheel and Tire Information
Locating the Tire label .............................494
Department of Transportation Uniform
Tire Quality Grades ...............................494
Information on the Tire Sidewall .........495
Glossary of Tire Terminology .................500
Tire Replacement Requirements ..........501
Using Snow Chains ....................................503
Tire Care
Checking the Tire Pressures ...................505
Inflating the Tires .......................................505
Inspecting the Tire for Wear ..................506
Inspecting the Tire for Damage ............506
Inspecting the Wheel Valve Stems ......507
Tire Rotation .................................................507
Tire Pressure Monitoring
System
What Is the Tire Pressure Monitoring
System .......................................................509
Tire Pressure Monitoring System
Overview ...................................................509
Tire Pressure Monitoring System
Precautions ...............................................510
Tire Pressure Monitoring System
Limitations .................................................510
Viewing the Tire Pressures ........................511
Resetting Tire Pressure Monitoring
System ..........................................................511
Tire Pressure Monitoring System –
Troubleshooting .......................................514
Changing a Road Wheel
Changing a Flat Tire ...................................516
Wheel Nuts ...................................................523
Capacities and Specifications
Engine Specifications - 2.7L EcoBoost™
........................................................................524
Engine Specifications - 3.0L Diesel ......525
Engine Specifications - 3.3L ...................526
Engine Specifications - 3.5L Ecoboost™
........................................................................527
Engine Specifications - 3.5L, Hybrid
Electric Vehicle (HEV) ..........................528
Engine Specifications - 5.0L ..................529
Motorcraft Parts - 2.7L EcoBoost™ .....530
14
F-150 (TFD) Canada/United States of America, enUSA, Edition date: 202007, First-Printing
Table of Contents
Page 18

Motorcraft Parts - 3.0L Diesel .................531
Motorcraft Parts - 3.3L .............................532
Motorcraft Parts - 3.5L Ecoboost™ .....533
Motorcraft Parts - 3.5L, Hybrid Electric
Vehicle (HEV) ..........................................534
Motorcraft Parts - 5.0L .............................535
Engine Oil Capacity and Specification -
2.7L EcoBoost™ ......................................536
Engine Oil Capacity and Specification -
3.0L Diesel .................................................537
Engine Oil Capacity and Specification -
3.3L ..............................................................539
Engine Oil Capacity and Specification -
3.5L Ecoboost™ ......................................541
Engine Oil Capacity and Specification -
3.5L, Hybrid Electric Vehicle (HEV)
........................................................................543
Engine Oil Capacity and Specification -
5.0L ..............................................................545
Cooling System Capacity and
Specification - 2.7L EcoBoost™ .......547
Cooling System Capacity and
Specification - 3.0L Diesel .................548
Cooling System Capacity and
Specification - 3.3L ...............................548
Cooling System Capacity and
Specification - 3.5L Ecoboost™ ......549
Cooling System Capacity and
Specification - 3.5L, Hybrid Electric
Vehicle (HEV) ..........................................550
Cooling System Capacity and
Specification - 5.0L ...............................550
Fuel Tank Capacity - Gasoline, Excluding:
Hybrid Electric Vehicle (HEV) .............551
Fuel Tank Capacity - Diesel ....................552
Fuel Tank Capacity - Gasoline, Hybrid
Electric Vehicle (HEV) ..........................553
Air Conditioning System Capacity and
Specification - 2.7L EcoBoost™ .......554
Air Conditioning System Capacity and
Specification - 3.0L Diesel ..................555
Air Conditioning System Capacity and
Specification - 3.3L ...............................556
Air Conditioning System Capacity and
Specification - 3.5L Ecoboost™ .......557
Air Conditioning System Capacity and
Specification - 3.5L, Hybrid Electric
Vehicle (HEV) ..........................................558
Air Conditioning System Capacity and
Specification - 5.0L ...............................559
Washer Fluid Specification .....................559
Diesel Exhaust Fluid Capacity and
Specification ............................................560
Brake Fluid Specification ........................560
Transfer Case Fluid Capacity and
Specification .............................................561
Front Axle Fluid Capacity and
Specification ............................................562
Rear Axle Fluid Capacity and
Specification ............................................562
Vehicle Identification
Vehicle Identification Number ..............564
Connected Vehicle
What Is a Connected Vehicle .................565
Connected Vehicle Requirements .......565
Connected Vehicle Limitations .............565
Connecting the Vehicle to a Mobile
Network .....................................................565
Connecting the Vehicle to a Wi-Fi
Network .....................................................565
Connected Vehicle – Troubleshooting
.......................................................................566
Vehicle Wi-Fi Hotspot
Creating a Vehicle Wi-Fi Hotspot .........569
Changing the Vehicle Wi-Fi Hotspot
Name or Password ................................569
Audio System
Audio System Precautions ......................570
Switching the Audio Unit On and Off
........................................................................570
Selecting the Audio Source ....................570
Playing or Pausing the Audio Source
........................................................................570
Adjusting the Volume ...............................570
15
F-150 (TFD) Canada/United States of America, enUSA, Edition date: 202007, First-Printing
Table of Contents
Page 19

Switching Shuffle Mode On and Off
.........................................................................571
Switching Repeat Mode On and Off
.........................................................................571
Setting a Memory Preset ..........................571
Muting the Audio ..........................................571
Adjusting the Sound Settings .................571
Setting the Clock and Date ......................571
AM/FM Radio ................................................572
Switching the Display On and Off ........573
Digital Radio ..................................................573
Satellite Radio .............................................574
Audio System – Troubleshooting ..........577
Identifying the Audio Unit .......................580
Information and
Entertainment Display
Overview
Information and Entertainment Display
Precautions ...............................................581
Information and Entertainment Display
Limitations .................................................581
Status Bar ......................................................581
Feature Bar ...................................................582
Information On Demand Screen -
Vehicles With: 12.3 Inch Screen .........582
Voice Interaction
What is Voice Interaction ........................583
Setting the Wake Word ............................583
Beginning a Voice Interaction ................583
Voice Interaction Examples ....................583
Phone
Phone Precautions ....................................585
Connecting Your Phone ...........................585
Phone Menu .................................................585
Making and Receiving a Phone Call .....586
Sending and Receiving a Text Message
........................................................................587
Switching Text Message Notification On
and Off .......................................................588
Bluetooth®
Connecting a Bluetooth® Device ........589
Playing Media Using Bluetooth® .........589
Apps
App Precautions .........................................590
App Requirements ....................................590
Accessing Apps ..........................................590
Enabling Apps on an iOS Device ..........590
Enabling Apps on an Android Device
.......................................................................590
Switching Apple CarPlay On and Off
.........................................................................591
Switching Android Auto On and Off .....591
Personal Profiles
How Do Personal Profiles Work ............592
Enabling or Disabling Personal Profiles
........................................................................592
Creating a Personal Profile .....................593
Linking or Unlinking a Personal Profile to
a Remote Control ...................................593
Navigation
Accessing Navigation ...............................594
Navigation Map Updates ........................594
Adjusting the Map ......................................594
Live Traffic .....................................................594
Setting a Destination ................................594
Waypoints .....................................................595
Route Guidance ..........................................595
Trailer Towing Navigation ........................596
Vehicle System Updates
Updating the Vehicle Systems Wirelessly
........................................................................597
Performing a Master Reset .....................598
16
F-150 (TFD) Canada/United States of America, enUSA, Edition date: 202007, First-Printing
Table of Contents
Page 20

Accessories
Accessories ...................................................599
Ford Protect
What Is Ford Protect ................................600
Scheduled Maintenance
General Maintenance Information ......602
Normal Scheduled Maintenance .........605
Special Operating Conditions Scheduled
Maintenance - Diesel ...........................609
Special Operating Conditions Scheduled
Maintenance - Gasoline .......................614
Customer Information
Rollover Warning .........................................618
The Better Business Bureau Auto Line
Program - United States of America
........................................................................618
The Mediation and Arbitration Program
- Canada .....................................................619
Ordering a Canadian French Owner's
Manual ........................................................619
Reporting Safety Defects in the United
States .........................................................620
Reporting Safety Defects in Canada
.......................................................................620
Type Approvals ............................................622
California Proposition 65 - United States
of America .................................................641
Perchlorate ...................................................642
Replacement Parts Recommendation
........................................................................642
Mobile Communications Equipment
........................................................................642
End User License Agreement ................643
Emission Law - United States of America
.......................................................................668
Export Unique Options ............................669
Appendices
Electromagnetic Compatibility .............670
17
F-150 (TFD) Canada/United States of America, enUSA, Edition date: 202007, First-Printing
Table of Contents
Page 21

18
F-150 (TFD) Canada/United States of America, enUSA, Edition date: 202007, First-Printing
Page 22

If you require assistance or clarification on
policies or procedures, please contact the
customer relationship center.
United States
Ford Motor Company
Customer Relationship Center
PO Box 6248
Dearborn, MI 48126
1-800-392-3673 (FORD)
(TDD for the hearing impaired:
1-888-658-6805
www.ford.com/help/contact/
Canada
Customer Relationship Center
Ford Motor Company of Canada Limited
P.O. Box 2000
Oakville, Ontario L6J 5E4
1-800-565-3673 (FORD)
www.ford.ca
Facebook: FordServiceCA (English),
FordServiceQC (Francais)
Europe
Telephone: 02035644444
E-mail: [email protected]
Twitter: @forduk
Australia
Ford Motor Company
Attention: Customer Relationship Centre
Private Mail Bag 5
Fairlane Business Park #3
Campbellfield, Victoria, 3061
Telephone: 13 3673 (FORD)
E-mail: [email protected]
New Zealand
Ford Motor Company
Attention: Customer Relationship Centre
Private Bag 76912
Manukau City 2241
Telephone: 0800 367 369 (FORDNZ)
E-mail: [email protected]
Asia Pacific
E-mail: [email protected]
Caribbean, Central America and
Israel
Ford Motor Company
Ford Export Operations
Attention: Owner Relations
1555 Fairlane Drive
Fairlane Business Park #3
Allen Park, MI 48101
Fax: (313) 390-0804
Telephone: (313) 594-4857
E-mail: [email protected]
U.S. Virgin Islands and Puerto Rico
Ford Motor Company
Ford Export Operations
Attention: Owner Relations
1555 Fairlane Drive
Fairlane Business Park #3
Allen Park, MI 48101
Telephone: (800) 841-3673
E-mail: [email protected]
Argentina
Telephone: 0800-888-3673
Brazil
www.ford.com.br
North Africa
E-mail: [email protected]
Sub-Saharan Africa
E-mail: [email protected]
19
F-150 (TFD) Canada/United States of America, enUSA, Edition date: 202007, First-Printing
Contacting Us
Page 23

Puerto Rico
Ford International Business Development,
Inc.
P.O. Box 11957
Caparra Heights Station
San Juan, PR 00922-1957
1-800-392-3673 (FORD)
Fax: (313) 390-0804
E-mail: [email protected]
www.ford.com.pr
Middle East
Ford Middle East Customer Relationship
Center
P.O. Box 21740
Dubai, United Arab Emirates
Telephone: 80004441066
Toll-free number for the Kingdom of Saudi
Arabia: 8008443673
Mobily and Zain cell phone users in Saudi
Arabia: 800850078
Kuwait: 22280384
Local telephone number for Kuwait: +965
1 898900
Fax: +971 4 3327266
E-mail: [email protected]
www.me.ford.com
South Korea
Telephone: +82-02-1600-6003
E-mail: [email protected]
Ford Credit - US Only
Ford Credit offers a full range of financing
and lease plans to help you acquire your
vehicle. If you have financed or leased your
vehicle through Ford Credit, thank you for
your business.
For assistance call 1-800-727-7000, or for
more information about Ford Credit and
access to an account manager, visit
www.ford.com/finance.
20
F-150 (TFD) Canada/United States of America, enUSA, Edition date: 202007, First-Printing
Contacting Us
Page 24

ABOUT THIS PUBLICATION
WARNING: Driving while distracted
can result in loss of vehicle control, crash
and injury. We strongly recommend that
you use extreme caution when using any
device that may take your focus off the
road. Your primary responsibility is the
safe operation of your vehicle. We
recommend against the use of any
hand-held device while driving and
encourage the use of voice-operated
systems when possible. Make sure you
are aware of all applicable local laws
that may affect the use of electronic
devices while driving.
Thank you for choosing Ford. We
recommend that you take some time to
get to know your vehicle in order to benefit
from greater safety and pleasure from
driving it. Use this digital manual, that we
have also made available for your
continued use through the FordPass app
and your local Ford website to familiarize
yourself with the basics.
Note: To download the FordPass app, visit
your device's app store.
Note: To find the local Ford website, visit
https://corporate.ford.com/operations/
locations/global-links.html.
Note: Use and operate your vehicle in line
with all applicable laws and regulations.
Note: Pass on all printed owner’s
information when selling this vehicle.
Our digital resources include a
comprehensive digital Owner’s Manual
that is dynamically created according to
the features on your vehicle by using the
vehicle identification number. See
Locating the Vehicle Identification
Number (page 564). The digital Owner’ s
Manual includes visual and full text search
functions so that you can quickly locate
the information you are looking for. It also
includes links to a number of how-to
videos created to help you understand
some of the advanced technologies on
your vehicle.
Features and Options
Note: This publication describes product
features and options available throughout
the range of available models, sometimes
even before they are generally available. It
may describe options that are not available
on the vehicle you have purchased.
Illustrations
Note: Some of the illustrations in this
manual could show features as used in
different models, some can appear different
to you on your vehicle.
Location of Components
This manual may qualify the location of a
component as left-hand side or right-hand
side. The side is determined when facing
forward in the seat.
E154903
Right-hand side.A
Left-hand side.B
21
F-150 (TFD) Canada/United States of America, enUSA, Edition date: 202007, First-Printing
Introduction
Page 25

USING THIS PUBLICATION
To quickly locate information about your
vehicle, use the word search within the
Owner's Manual application.
22
F-150 (TFD) Canada/United States of America, enUSA, Edition date: 202007, First-Printing
Introduction
Page 26
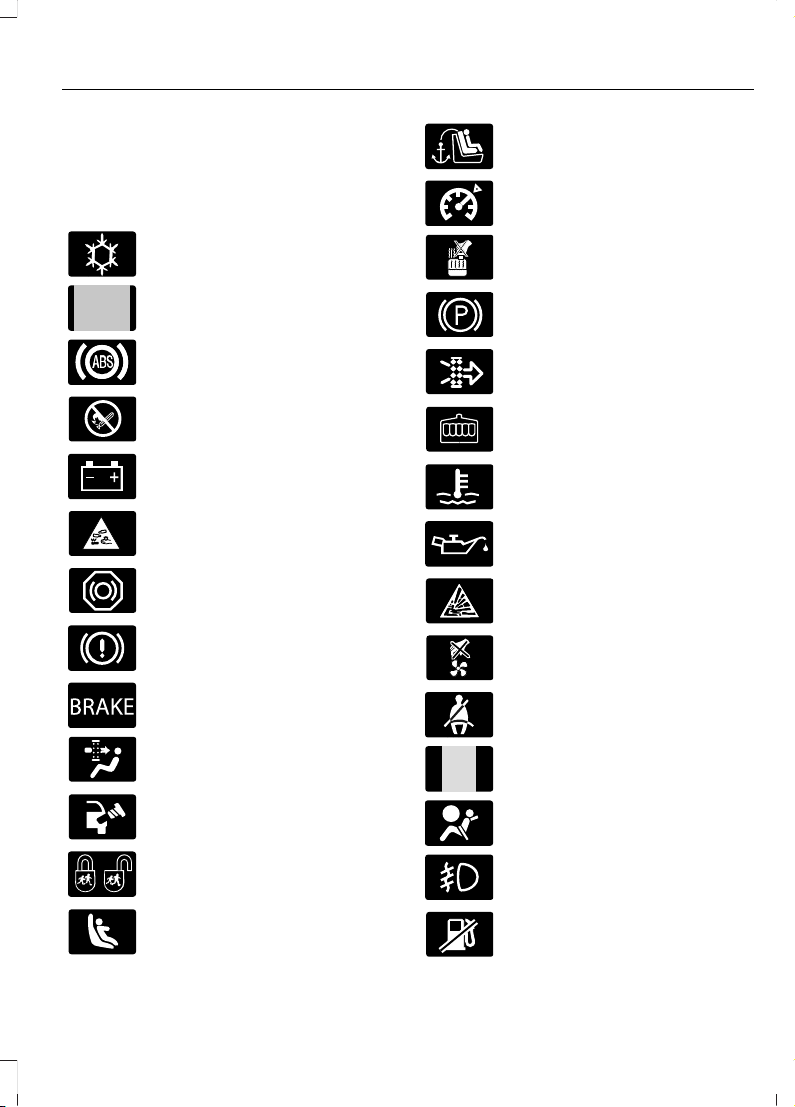
SYMBOLS USED ON YOUR VEHICLE
These are some of the symbols you may
see on your vehicle.
Air conditioning system
E231157
Air conditioning system lubricant
type
Anti-lock braking system
Avoid smoking, flames or sparks
Battery
Battery acid
Brake fluid - non petroleum
based
Brake system
E270480
Brake system
Cabin air filter
Check fuel cap
Child safety door lock or unlock
Child seat lower anchor
Child seat tether anchor
E332905
Cruise control
Do not open when hot
Electric Parking brake
Engine air filter
Engine coolant
Engine coolant temperature
Engine oil
Explosive gas
Fan warning
Fasten seatbelt
E231160
Flammable
Front airbag
Front fog lamps
Fuel pump reset
23
F-150 (TFD) Canada/United States of America, enUSA, Edition date: 202007, First-Printing
Symbols Glossary
Page 27
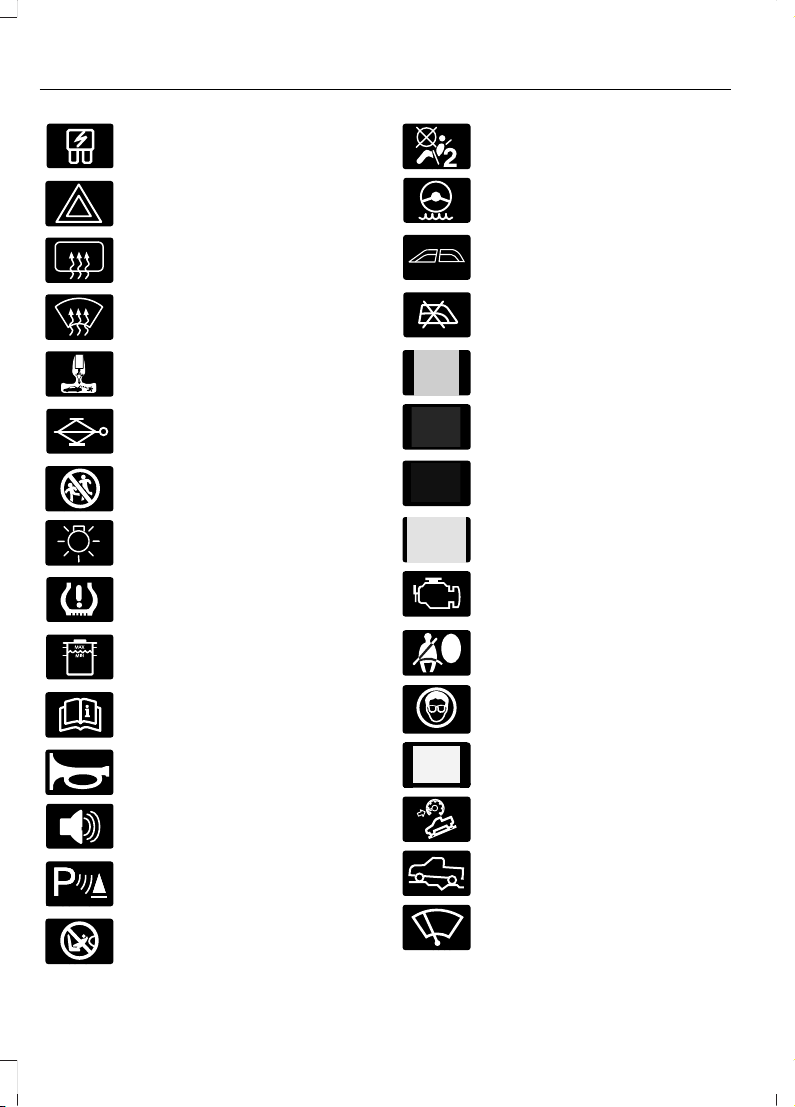
Fuse compartment
Hazard flashers
Heated rear window
Windshield defrosting system
Interior luggage compartment
release
Jack
Keep out of reach of children
Lighting control
Low tire pressure warning
Maintain correct fluid level
Note operating instructions
E270945
Horn control
Panic alarm
E139213
Parking aid
Passenger airbag activated
Passenger airbag deactivated
Power steering fluid
Power windows front/rear
Power window lockout
E231159
Requires registered technician
Safety alert
See Owner's Manual
E231158
See Service Manual
Malfunction Indicator Lamp
(MIL)
Side airbag
Shield the eyes
E138639
Stability control
Hill descent control
E332910
Trail control
Windshield wiping system
24
F-150 (TFD) Canada/United States of America, enUSA, Edition date: 202007, First-Printing
Symbols Glossary
Page 28

E132353
Windshield wash and wipe
25
F-150 (TFD) Canada/United States of America, enUSA, Edition date: 202007, First-Printing
Symbols Glossary
Page 29

WARNING: Do not connect
wireless plug-in devices to the data link
connector. Unauthorized third parties
could gain access to vehicle data and
impair the performance of safety related
systems. Only allow repair facilities that
follow our service and repair instructions
to connect their equipment to the data
link connector.
We respect your privacy and are
committed to protecting it. The
information contained in this manual was
correct at the time of publication but as
technology rapidly changes, we
recommend that you visit the local Ford
website for the latest information.
Your vehicle has electronic control units
that have data recording functionality and
the ability to permanently or temporarily
store data. This data could include
information on the condition and status of
your vehicle, vehicle maintenance
requirements, events and malfunctions.
The types of data that can be recorded are
described in this section. Some of the data
recorded is stored in event logs or error
logs.
Note: Error logs are reset following a service
or repair.
Note: We may provide information in
response to requests from law enforcement,
other government authorities and third
parties acting with lawful authority or
through a legal process. Such information
could be used by them in legal proceedings.
Data recorded includes, for example:
• Operating states of system
components, for example fuel level,
tire pressure and battery charge level.
• Vehicle and component status, for
example wheel speed, deceleration,
lateral acceleration and seatbelt
status.
• Events or errors in essential systems,
for example headlamps and brakes.
• System responses to driving situations,
for example airbag deployment and
stability control.
• Environmental conditions, for example
temperature.
Some of this data, when used in
combination with other information, for
example an accident report, damage to a
vehicle or eyewitness statements, could
be associated with a specific person.
Services That We Provide
If you use our services, we collect and use
data, for example account information,
vehicle location and driving characteristics,
that could identify you. We transmit this
data through a dedicated, protected
connection. We only collect and use data
to enable your use of our services to which
you have subscribed, with your consent or
where permitted by law. For additional
information, see the terms and conditions
of the services to which you have
subscribed.
For additional information about our
privacy policy, refer to the local Ford
website.
Services That Third Parties
Provide
We recommend that you review the terms
and conditions and data privacy
information for any services equipped with
your vehicle or to which you subscribe. We
take no responsibility for services that third
parties provide.
Where equipped, SiriusXM with 360L may
use the modem. To disable, turn off the
SiriusXM 360L or Vehicle Connectivity
setting. See Enabling and Disabling the
Modem (page 565).
26
F-150 (TFD) Canada/United States of America, enUSA, Edition date: 202007, First-Printing
Data Privacy
Page 30

SERVICE DATA
Service data recorders in your vehicle are
capable of collecting and storing
diagnostic information about your vehicle.
This potentially includes information about
the performance or status of various
systems and modules in the vehicle, such
as engine, throttle, steering or brake
systems. In order to properly diagnose and
service your vehicle, Ford Motor Company
(Ford of Canada in Canada), and service
and repair facilities may access or share
among them vehicle diagnostic
information received through a direct
connection to your vehicle when
diagnosing or servicing your vehicle.
Additionally, Ford Motor Company (Ford
of Canada, in Canada) may, where
permitted by law, use vehicle diagnostic
information for vehicle improvement or
with other information we may have about
you, for example, your contact information,
to offer you products or services that may
interest you. Data may be provided to our
service providers such as part suppliers
that may help diagnose malfunctions, and
who are similarly obligated to protect data.
We retain this data only as long as
necessary to perform these functions or to
comply with law. We may provide
information where required in response to
official requests to law enforcement or
other government authorities or third
parties acting with lawful authority or court
order, and such information may be used
in legal proceedings. For U.S. only (if
equipped), if you choose to use connected
apps and services, you consent that certain
diagnostic information may also be
accessed electronically by Ford Motor
Company and Ford authorized service
facilities, and that the diagnostic
information may be used to provide
services to you, personalizing your
experience, troubleshoot, and to improve
products and services and offer you
products and services that may interest
you, where permitted by law. For Canada
only, for more information, please review
the Ford of Canada privacy policy at
www.ford.ca, including our U.S. data
storage and use of service providers in
other jurisdictions who may be subject to
legal requirements in Canada, the United
States and other countries applicable to
them, for example, lawful requirements to
disclose personal information to
governmental authorities in those
countries.
EVENT DATA
This vehicle is equipped with an event data
recorder. The main purpose of an event
data recorder is to record, in certain crash
or near crash-like situations, such as an
airbag deployment or hitting a road
obstacle; this data will assist in
understanding how a vehicle’s systems
performed. The event data recorder is
designed to record data related to vehicle
dynamics and safety systems for a short
period of time, typically 30 seconds or less.
The event data recorder in this vehicle is
designed to record such data as:
• How various systems in your vehicle
were operating.
• Whether or not the driver and
passenger seatbelts were
buckled/fastened.
• How far (if at all) the driver was
depressing the accelerator and/or the
brake pedal.
• How fast the vehicle was traveling.
• Where the driver was positioning the
steering wheel.
This data can help provide a better
understanding of the circumstances in
which crashes and injuries occur.
27
F-150 (TFD) Canada/United States of America, enUSA, Edition date: 202007, First-Printing
Data Privacy
Page 31

Note: Event data recorder data is recorded
by your vehicle only if a non-trivial crash
situation occurs; no data is recorded by the
event data recorder under normal driving
conditions and no personal data or
information (for example name, gender,
age, and crash location) is recorded.
However, parties, such as law enforcement,
could combine the event data recorder data
with the type of personally identifying data
routinely acquired during a crash
investigation.
To read data recorded by an event data
recorder, special equipment is required,
and access to the vehicle or the event data
recorder is needed. In addition to the
vehicle manufacturer, other parties, such
as law enforcement, that have such special
equipment, can read the information if they
have access to the vehicle or the event
data recorder.
Active Drive Assist Driver Facing
Camera Data (If Equipped)
If active drive assist is active in certain
crash or near crash-like situations, such as
an airbag deployment or hitting a road
obstacle, the system may record driver
attentiveness, based on the direction of
eyes and duration, and photographs of the
driver seat area.
Note: No data is recorded under normal
driving conditions.
SETTINGS DATA
Your vehicle has electronic control units
that have the ability to store data based
on your personalized settings. The data is
stored locally in the vehicle or on devices
that you connect to it, for example, a USB
drive or digital music player. You can delete
some of this data and also choose whether
to share it through the services to which
you subscribe. See Enabling and
Disabling the Modem (page 565).
Comfort and Convenience Data
Data recorded includes, for example:
• Seat and steering wheel position.
• Climate control settings.
• Radio presets.
Entertainment Data
Data recorded includes, for example:
• Music, videos or album art.
• Contacts and corresponding address
book entries.
• Navigation destinations.
CONNECTED VEHICLE DATA
The modem has a SIM. The
modem was enabled when your
vehicle was built and periodically
sends messages to stay connected to the
cell phone network, receive automatic
software updates and send vehicle-related
information to us, for example diagnostic
information. These messages could
include information that identifies your
vehicle, the SIM and the electronic serial
number of the modem. Cell phone network
service providers could have access to
additional information, for example cell
phone network tower identification. For
additional information about our privacy
policy, visit www.FordConnected.com or
refer to your local Ford website.
Note: The modem continues to send this
information unless you disable the modem
or stop the modem from sharing vehicle
data by changing the modem settings. See
Connected Vehicle (page 565).
Note: The service can be unavailable or
interrupted for a number of reasons, for
example environmental or topographical
conditions and data plan coverage.
Note: To find out if your vehicle has a
modem, visit www.FordConnected.com.
28
F-150 (TFD) Canada/United States of America, enUSA, Edition date: 202007, First-Printing
Data Privacy
Page 32

MOBILE DEVICE DATA
If you connect a mobile device to your
vehicle, you can display data from your
device on the touchscreen for example,
music and album art. You can share your
vehicle data with mobile apps on your
device through the system. See App
Precautions (page 590).
The mobile apps function operates by your
connected device sending data to us in the
United States. The data is encrypted and
includes, for example, the vehicle
identification number of your vehicle, the
SYNC module serial number, odometer,
enabled apps, usage statistics and
debugging information. We retain it only
as long as necessary to provide the service,
to troubleshoot, for continuous
improvement and to offer you products
and services that may be of interest to you
according to your preferences and where
allowed by law.
If you connect a cell phone to the system,
the system creates a profile that links to
that cell phone. The cell phone profile
enables more mobile features and efficient
operation. The profile contains, for
example data from your phonebook, read
and unread text messages and call history,
including history of calls when your cell
phone was not connected to the system.
If you connect a media device, the system
creates and retains a media device index
of supported media content. The system
also records a short diagnostic log of
approximately 10 minutes of all recent
system activity.
The cell phone profile, media device index
and diagnostic log remain in your vehicle
unless you delete them and are generally
accessible only in your vehicle when you
connect your cell phone or media device.
If you no longer plan to use the system or
your vehicle, we recommend you use the
master reset function to erase the stored
information. See Connecting Your
Phone (page 585).
System data cannot be accessed without
special equipment and access to your
vehicle's module.
For additional information about our
privacy policy, refer to the local Ford
website.
Note: To find out if your vehicle has
connectivity technology, visit
www.FordConnected.com.
EMERGENCY CALL SYSTEM DATA (IF EQUIPPED)
When the emergency call system is active,
it may disclose to emergency services that
your vehicle has been in a crash involving
the deployment of an airbag or activation
of the fuel pump shut-off. Certain versions
or updates to the emergency call system
may also be capable of electronically or
verbally disclosing to emergency services
operators your vehicle location or other
details about your vehicle or crash to assist
emergency services operators to provide
the most appropriate emergency services.
If you do not want to disclose this
information, do not activate the emergency
call system.
Note: You cannot deactivate emergency
call systems that are required by law.
29
F-150 (TFD) Canada/United States of America, enUSA, Edition date: 202007, First-Printing
Data Privacy
Page 33
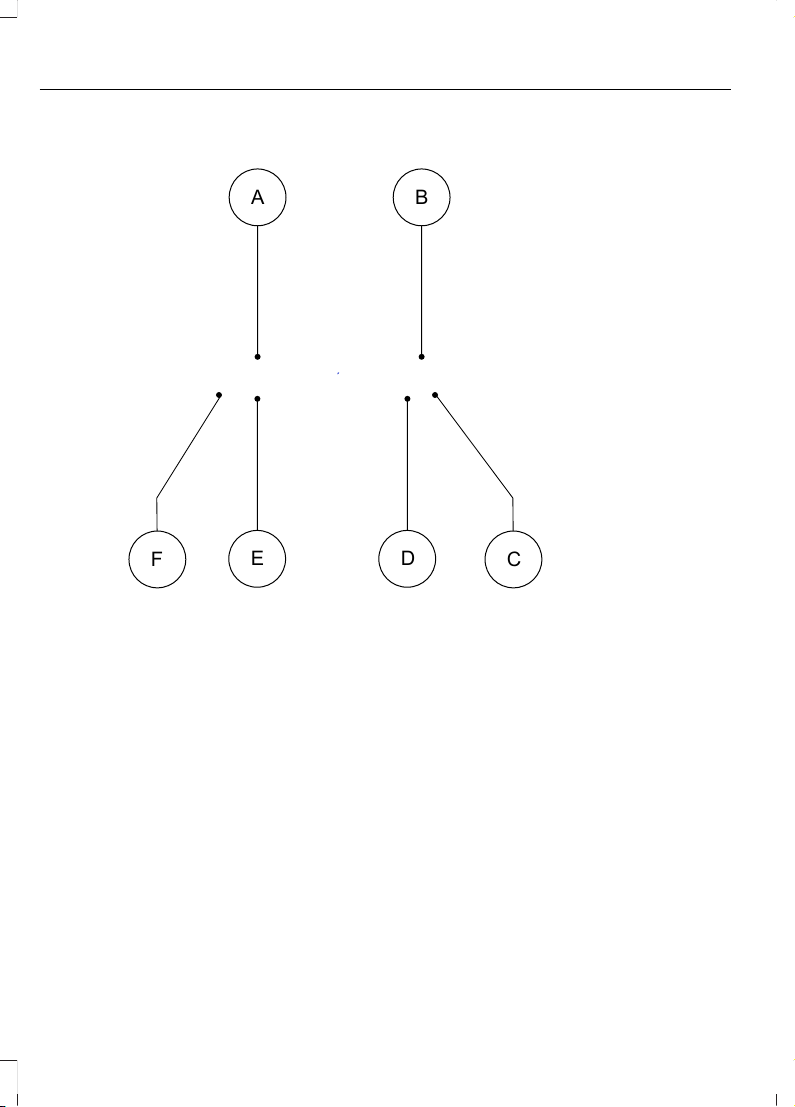
STEERING WHEEL
E310594
A B
CF
DE
See Switching Lane Centering On and Off (page 323).A
See Using the Instrument Cluster Display Controls (page 151).B
See Selecting a Radio Station (page 572).C
See Making and Receiving a Phone Call (page 586).D
See What is Voice Interaction (page 583).E
See Adjusting the Volume (page 570).F
30
F-150 (TFD) Canada/United States of America, enUSA, Edition date: 202007, First-Printing
Visual Search
Page 34
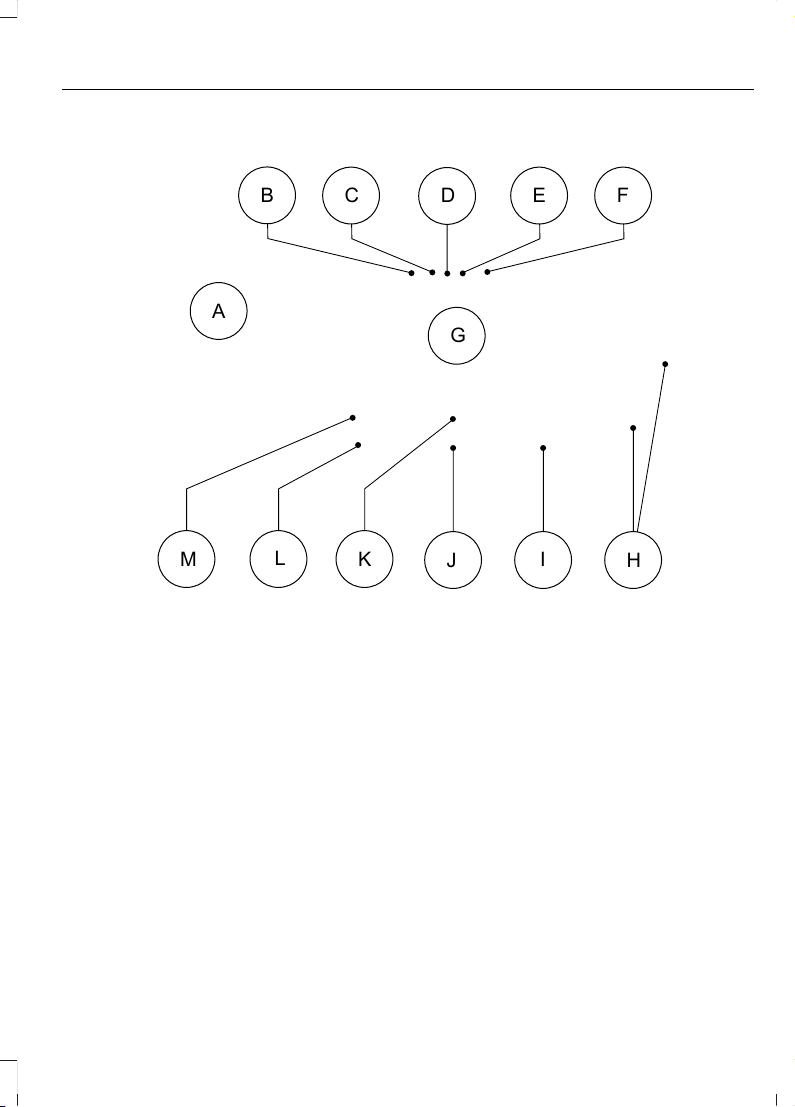
INSTRUMENT PANEL
E328453
A
B
C E F
D
G
H
I
J
K
L
M
See Instrument Cluster Overview (page 146). See Instrument Cluster
Overview (page 145). See Instrument Cluster Overview (page 144).
A
See Switching Traction Control On and Off (page 284).B
See Switching the 360 Degree Camera On and Off (page 307).C
See Switching Active Park Assist On and Off (page 309).D
See Switching the Hazard Flashers On and Off (page 438).E
See Switching Snowplow Mode On and Off (page 434).F
See Feature Bar (page 582).G
See Opening the Glove Compartment (page 205).H
See What Is the Power Outlet (page 199).I
See Identifying the Climate Control Unit (page 158). See Identifying the
Climate Control Unit (page 163).
J
See Identifying the Audio Unit (page 580).K
31
F-150 (TFD) Canada/United States of America, enUSA, Edition date: 202007, First-Printing
Visual Search
Page 35
See Selecting a Four-Wheel Drive Mode (page 262).L
See Using the Integrated Trailer Brake Controller (page 405).M
VEHICLE INTERIOR
E320265
A B
CD
See Shifting Using the Buttons on the Selector Lever (page 254).A
See Using the Center Console Work Surface (page 200). See Using the
Center Console Work Surface (page 201).
B
See Folding the Seats (page 176).C
See Sitting in the Correct Position (page 167).D
32
F-150 (TFD) Canada/United States of America, enUSA, Edition date: 202007, First-Printing
Visual Search
Page 36
FRONT EXTERIOR
E320690
A B C
DE
F
See Locating the 360 Degree Cameras (page 305).A
See What Is the Lane Keeping System (page 333).B
See Folding the Exterior Mirrors (page 140).C
See Deploying and Stowing the Power Running Boards (page 116).D
See Exterior Lighting Control (page 124).E
See Accessing the Front Towing Point (page 440).F
33
F-150 (TFD) Canada/United States of America, enUSA, Edition date: 202007, First-Printing
Visual Search
Page 37
REAR EXTERIOR
E320171
A
B C
D
E
FG
See Locating the Power Outlet (page 190).A
See Tailgate Work Surface (page 101).B
See Accessing the Tailgate Step (page 98).C
See Locating the 360 Degree Cameras (page 305).D
See Locating the Blind Spot Information System Sensors (page 341).E
See Locating the Rear Parking Aid Sensors (page 298).F
See Connecting a Trailer (page 372).G
34
F-150 (TFD) Canada/United States of America, enUSA, Edition date: 202007, First-Printing
Visual Search
Page 38

CHILD SAFETY PRECAUTIONS
WARNING: Always make sure your
child is secured properly in a device that
is appropriate for their height, age and
weight. Child safety restraints must be
bought separately from your vehicle.
Failure to follow these instructions and
guidelines may result in an increased risk
of serious injury or death to your child.
WARNING: All children are shaped
differently. The National Highway Traffic
Safety Administration and other safety
organizations, base their
recommendations for child restraints on
probable child height, age and weight
thresholds, or on the minimum
requirements of the law. We recommend
that you check with a NHTSA Certified
Child Passenger Safety Technician
(CPST) to make sure that you properly
install the child restraint in your vehicle
and that you consult your pediatrician to
make sure you have a child restraint
appropriate for your child. To locate a
child restraint fitting station and CPST,
contact NHTSA toll free at
1-888-327-4236 or go to
www.nhtsa.dot.gov. In Canada, contact
Transport Canada toll free at
1-800-333-0371 or go to www.tc.gc.ca
to find a Child Car Seat Clinic in your
area. Failure to properly restrain children
in child restraints made especially for
their height, age and weight, may result
in an increased risk of serious injury or
death to your child.
WARNING: On hot days, the
temperature inside the vehicle can rise
very quickly. Exposure of people or
animals to these high temperatures for
even a short time can cause death or
serious heat related injuries, including
brain damage. Small children are
particularly at risk.
WARNING: Do not place a
rearward facing child restraint in front of
an active airbag. Failure to follow this
instruction could result in personal injury
or death.
WARNING: Properly secure
children 12 years old and under in a rear
seating position whenever possible. If
you are unable to properly secure all
children in a rear seating position,
properly secure the largest child on the
front seat. If you must use a forward
facing child restraint on the front seat,
move the seat as far back as possible.
Failure to follow these instructions could
result in personal injury or death.
WARNING: Always carefully follow
the instructions and warnings provided
by the manufacturer of any child
restraint to determine if the restraint
device is appropriate for your child's size,
height, weight, or age. Follow the child
restraint manufacturer's instructions and
warnings provided for installation and
use in conjunction with the instructions
and warnings provided by your vehicle
manufacturer. A safety seat that is
improperly installed or utilized, is
inappropriate for your child's height, age,
or weight or does not properly fit the
child may increase the risk of serious
injury or death.
35
F-150 (TFD) Canada/United States of America, enUSA, Edition date: 202007, First-Printing
Child Safety
Page 39

WARNING: Do not allow a
passenger to hold a child on their lap
when your vehicle is moving. Failure to
follow this instruction could result in
personal injury or death in the event of a
sudden stop or crash.
WARNING: Do not use pillows,
books or towels to boost your child's
height. Failure to follow this instruction
could result in personal injury or death.
WARNING: Properly secure child
restraints or booster seats when they are
not in use. They could become projectiles
in a sudden stop or crash. Failure to
follow this instruction could result in
personal injury or death.
WARNING: Do not put the shoulder
section of the seatbelt or allow the child
to put the shoulder section of the
seatbelt under their arm or behind their
back. Failure to follow this instruction
could reduce the effectiveness of the
seatbelt and increase the risk of injury or
death in a crash.
WARNING: Do not leave children
or pets unattended in your vehicle.
Failure to follow this instruction could
result in personal injury or death.
When installing a child restraint with
seatbelts:
• Place the vehicle seat in the upright
position before you install the child
restraint.
• Use the correct seatbelt buckle for that
seating position.
• Insert the belt tongue into the buckle.
Make sure the tongue is securely
fastened in the buckle.
• Keep the buckle release button
pointing up and away from the child
restraint, with the tongue between the
child restraint and the release button,
to prevent accidental unbuckling.
• Put the seatbelt in the automatic
locking mode.
CHILD RESTRAINT ANCHOR POINTS
What Are the Child Restraint
Anchor Points
LATCH (Lower Anchors and Tethers for
CHildren)
Anchor points allow you to quickly and
safely install a child restraint.
Locating the Child Restraint Lower
Anchor Points (If Equipped)
Crew Cab
E308373
Super Cab
36
F-150 (TFD) Canada/United States of America, enUSA, Edition date: 202007, First-Printing
Child Safety
Page 40
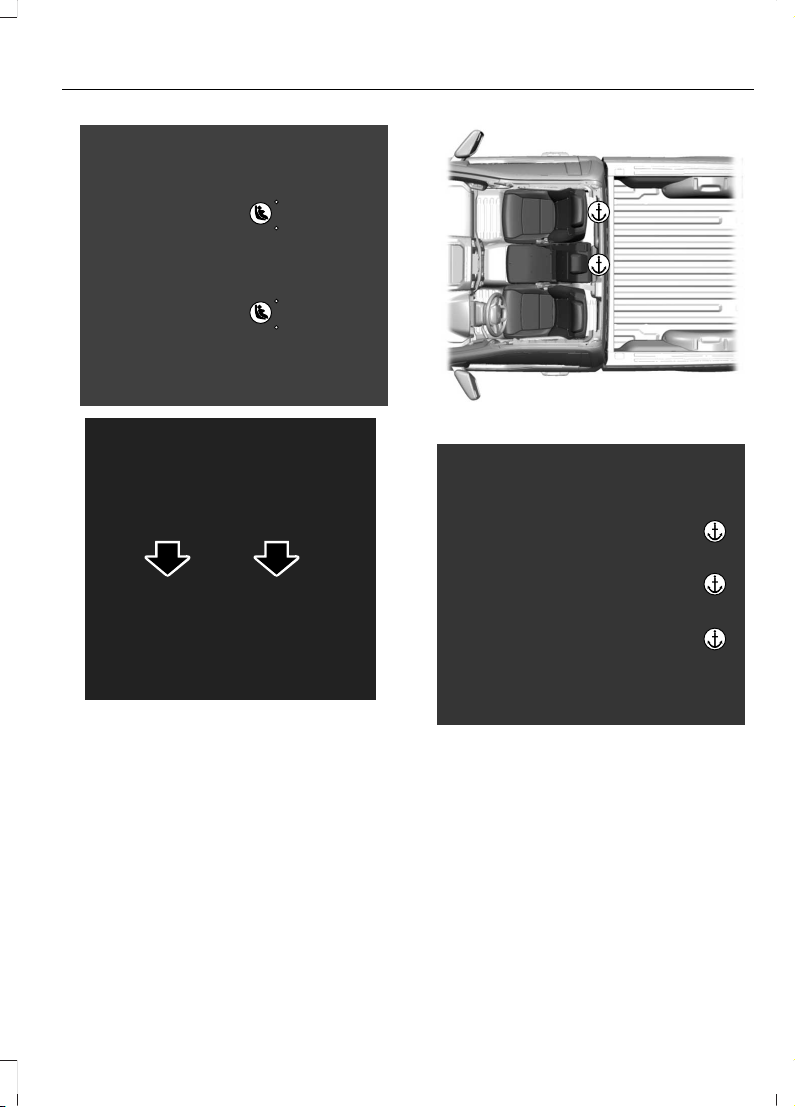
E308385
E312604
The lower child restraint anchors are at the
rear section of the rear seat between the
cushion and seat backrest.
Note: Regular Cab vehicles do not have
lower anchors.
Locating the Child Restraint Top
Tether Anchor Points
Regular Cab
E308389
Crew Cab
E308390
Super Cab
37
F-150 (TFD) Canada/United States of America, enUSA, Edition date: 202007, First-Printing
Child Safety
Page 41
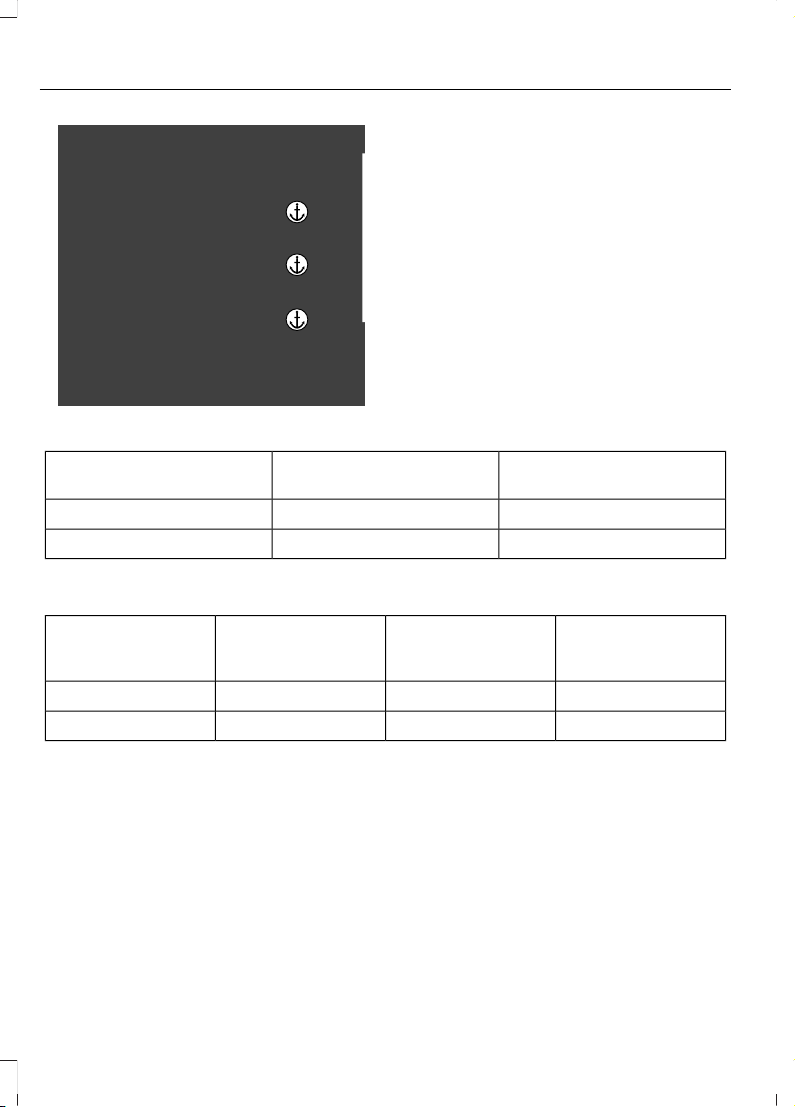
E308396
CHILD RESTRAINTS
Child Restraint Position
Information
Install the child restraint tightly against the
vehicle seat. It may be necessary to lift or
remove the head restraint.
Rear Facing Child Restraints
Seatbelt Only
LATCH (Lower Anchors
Only)
Combined Weight of Child
and Child Restraint
XXUp to 65 lb (29 kg)
XOver 65 lb (29 kg)
Forward Facing Child Restraints
Seatbelt and LATCH
(Lower Anchors and
Top Tether Anchor)
Seatbelt and Top
Tether Anchor
LATCH (Lower
Anchors and Top
Tether Anchor)
Combined Weight of
Child and Child
Restraint
XXXUp to 65 lb (29 kg)
XXOver 65 lb (29 kg)
38
F-150 (TFD) Canada/United States of America, enUSA, Edition date: 202007, First-Printing
Child Safety
Page 42

Child Restraints Recommendation
Recommended Restraint TypeChild Size, Height, Weight, or Age
Use a child restraint (sometimes
called an infant carrier, convertible
seat, or toddler seat).
Children weighing 40 lb (18 kg) or less (generally
age four or younger).
Use a belt-positioning booster
seat.
Children who have outgrown or no longer properly
fit in a child restraint (generally children who are
less than 57 in (1.45 m) tall, are greater than age
four and less than age 12, and between 40 lb (18 kg)
and 80 lb (36 kg) and upward to 100 lb (45 kg) if
recommended by your child restraint manufacturer).
Use a vehicle seatbelt having the
lap belt snug and low across the
hips, shoulder belt centered across
the shoulder and chest, and seat
backrest upright.
Children who have outgrown or no longer properly
fit in a belt-positioning booster seat (generally chil-
dren who are at least 57 in (1.45 m) tall or greater
than 80 lb (36 kg) or 100 lb (45 kg) if recommended
by child restraint manufacturer).
You are required by law to properly use
child restraints for infants and toddlers in
the United States, Canada and Mexico.
Many states and provinces require that
small children use approved booster seats
until they reach age eight, a height of 57 in
(1.45 m) tall, or 80 lb (36 kg). Check your
local and state or provincial laws for
specific requirements about the safety of
children in your vehicle.
When possible, properly restrain children
12 years of age and under in a rear seating
position of your vehicle. Accident statistics
suggest that children are safer when
properly restrained in the rear seating
positions than in a front seating position.
When installing a rear facing child restraint,
adjust the vehicle seats to avoid
interference between the child restraint
and the vehicle seat in front of the child
restraint.
INSTALLING CHILD RESTRAINTS
Using Seatbelts
WARNING: Depending on where
you secure a child restraint, and
depending on the child restraint design,
you may block access to certain seatbelt
buckle assemblies and LATCH lower
anchors, rendering those features
potentially unusable. To avoid risk of
injury, make sure occupants only use
seating positions where they are able to
be properly restrained.
Note: The following does not apply to the
front center position of Super Cab and Crew
Cab vehicles.
Note: Although the child restraint
illustrated is a forward facing child restraint,
the steps are the same for installing a rear
facing child restraint.
39
F-150 (TFD) Canada/United States of America, enUSA, Edition date: 202007, First-Printing
Child Safety
Page 43
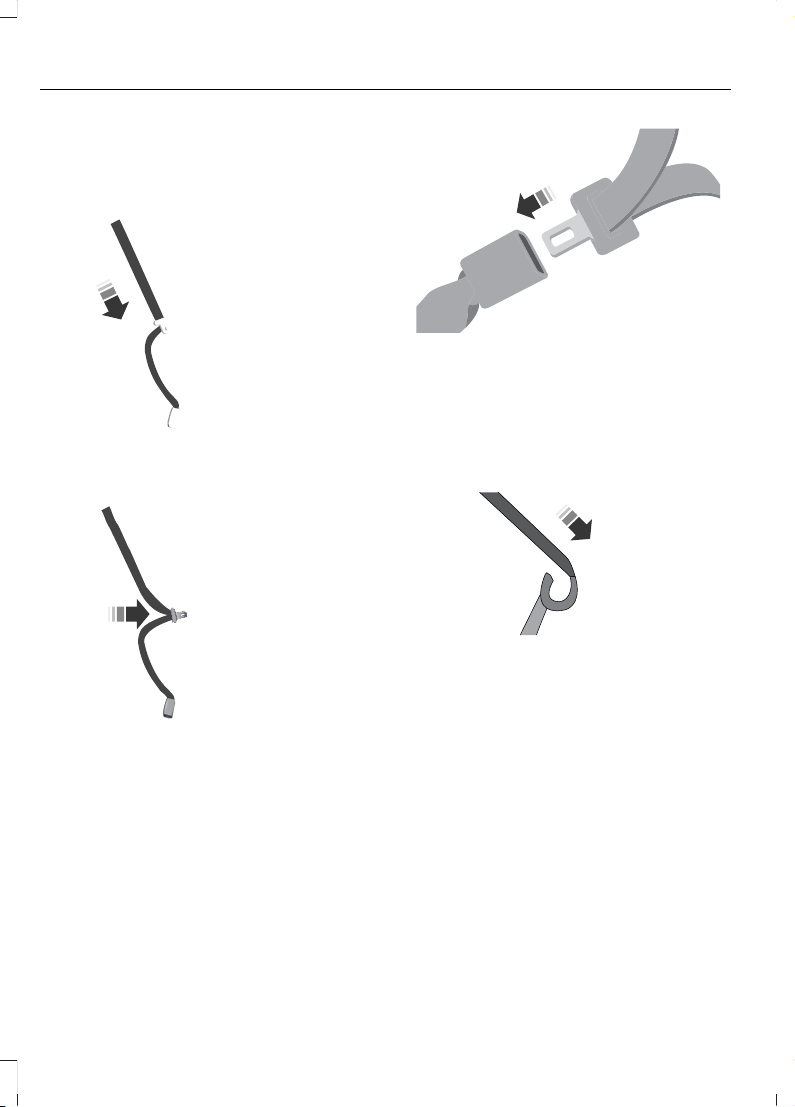
Perform the following steps when
installing a child restraint with seatbelts.
1. Position the child restraint in a seat
with a seatbelt.
E142529
2. Pull down on the shoulder belt and
then grasp the shoulder belt and lap
belt together.
E142530
3. While holding the shoulder and lap belt
portions together, route the tongue
through the child restraint according
to the child restraint manufacturer's
instructions. Make sure you did not
twist the belt webbing.
E142531
4. Insert the belt tongue into the proper
buckle for that seating position until
the latch engages. Make sure the
tongue is latched securely by pulling
on it.
E142875
5. To put the retractor in the automatic
locking mode, grasp the shoulder
portion of the belt and pull downward
until you pull all of the seatbelt out.
Note: The automatic locking mode is
available on the front passenger and rear
seats. This mode is also available on the
center seat of a Regular Cab. This vehicle
does not require the use of a locking clip.
6. Allow the belt to retract to remove
slack. The seatbelt clicks as it retracts
to indicate it is in the automatic locking
mode.
40
F-150 (TFD) Canada/United States of America, enUSA, Edition date: 202007, First-Printing
Child Safety
Page 44
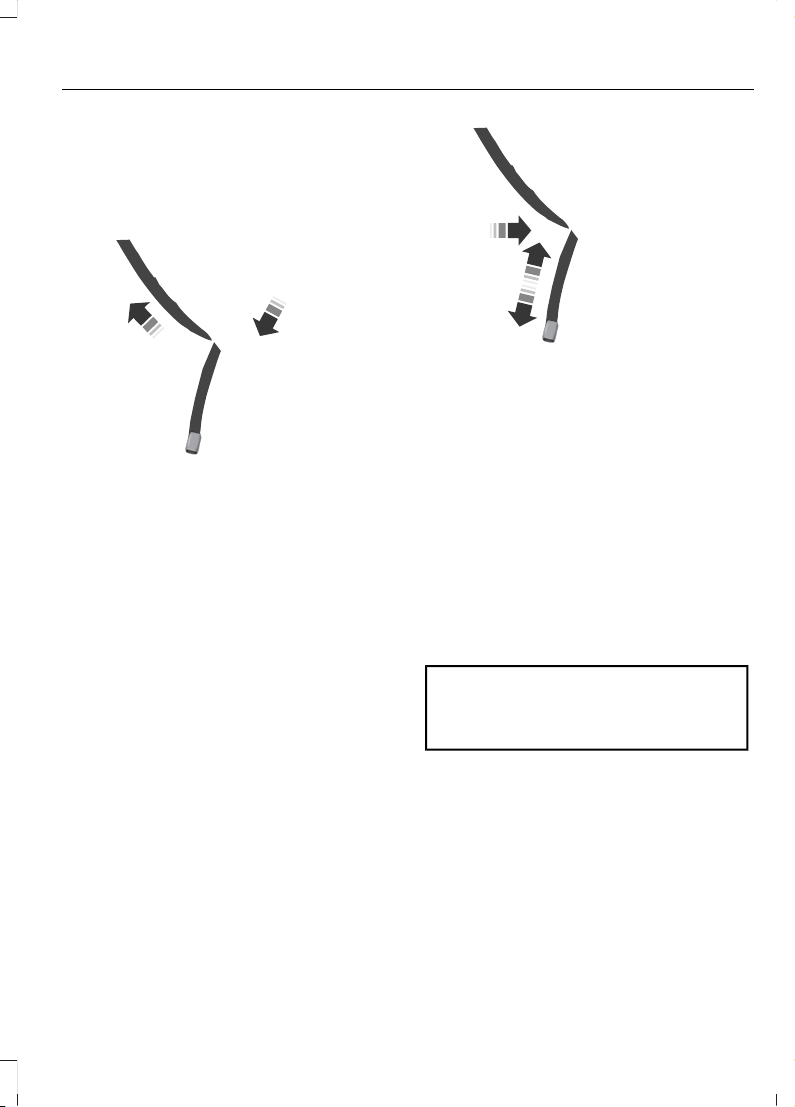
7. Pull the seatbelt out of the retractor to
make sure the retractor is in the
automatic locking mode. You should
not be able to pull more belt out. If the
retractor is not locked, unbuckle the
belt and repeat Steps 5 and 6.
E142533
8. Remove remaining slack from the belt.
Force the seat down with extra weight,
for example, by pressing down or
kneeling on the child restraint while
pulling up on the shoulder belt in order
to force slack from the belt. This is
necessary to remove the remaining
slack that exists once you add the extra
weight of the child to the child restraint.
It also helps to achieve the proper
snugness of the child restraint to your
vehicle. Sometimes, a slight lean
toward the buckle helps to remove
remaining slack from the belt.
9. If the child restraint has a tether strap,
attach it.
E142534
10. Before placing the child in the seat,
forcibly move the seat forward and
back to make sure the seat is securely
held in place.
To check this, grab the seat at the belt path
and attempt to move it side to side and
forward and back. There should be no
more than 1 in (2.5 cm) of movement.
We recommend checking with a NHTSA
Certified Child Passenger Safety
Technician to make certain the child
restraint is properly installed. In Canada,
check with Transport Canada for referral
to a Child Car Seat Clinic.
Using Seatbelts
WARNING: Always use both the
lap and shoulder portion of the seatbelt
in the center seating position.
Note: The following applies to the front
center position of Super Cab and Crew Cab
vehicles.
The seatbelt webbing below the tongue is
the lap portion of the seatbelt. The
webbing above the tongue is the shoulder
belt portion of the seatbelt.
1. Position the child restraint in the front
center seat.
41
F-150 (TFD) Canada/United States of America, enUSA, Edition date: 202007, First-Printing
Child Safety
Page 45
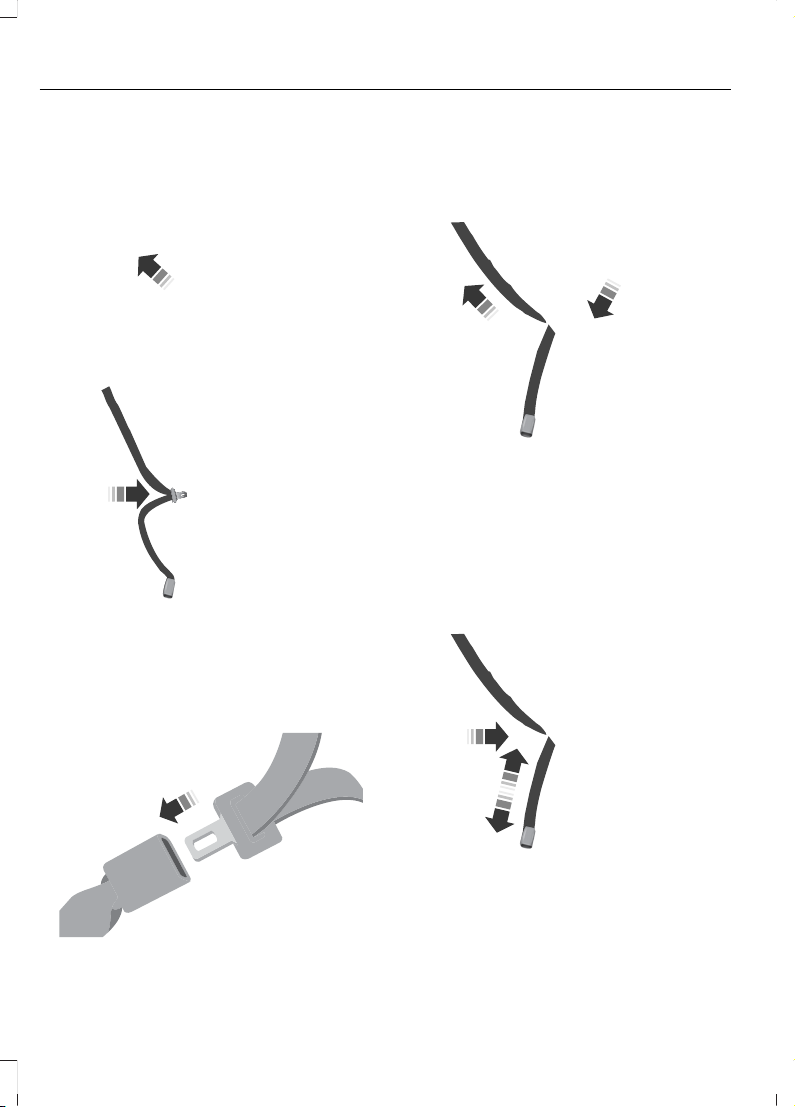
E162708
2. Slide the tongue up the webbing.
E142530
3. While holding both shoulder and lap
portions next to the tongue, route the
tongue and webbing through the child
restraint according to the child restraint
manufacturer's instructions. Make sure
you did not twist the belt webbing.
E142531
4. Insert the belt tongue into the proper
buckle for that seating position until
the latch engages. Make sure the
tongue is latched securely by pulling
on it.
E142533
5. When pushing down with your knee on
the child restraint, pull up on the
shoulder belt portion to tighten the lap
belt portion of the seatbelt.
6. Allow the seatbelt to retract and
remove any slack in the belt to securely
tighten the child restraint in the vehicle.
7. If the child restraint has a tether strap,
attach it.
E142534
42
F-150 (TFD) Canada/United States of America, enUSA, Edition date: 202007, First-Printing
Child Safety
Page 46

8. Before placing the child in the seat,
forcibly move the seat forward and
back to make sure the seat is securely
held in place. To check this, grab the
seat at the belt path and attempt to
move it side to side and forward and
back. There should be no more than
1 in (2.5 cm) of movement.
9. Check from time to time to be sure that
there is no slack in the lap and shoulder
belt. The shoulder belt must be snug
to keep the lap belt tight during a crash.
We recommend checking with a NHTSA
Certified Child Passenger Safety
Technician to make certain the child
restraint is properly installed. In Canada,
check with Transport Canada for referral
to a Child Car Seat Clinic.
Using Lower Anchors and Tethers
for Children
WARNING: Do not attach two child
safety restraints to the same anchor. In
a crash, one anchor may not be strong
enough to hold two child safety restraint
attachments and may break, causing
serious injury or death.
WARNING: Depending on where
you secure a child restraint, and
depending on the child restraint design,
you may block access to certain seatbelt
buckle assemblies and LATCH lower
anchors, rendering those features
potentially unusable. To avoid risk of
injury, make sure occupants only use
seating positions where they are able to
be properly restrained.
The Lower Anchors and Tethers for
CHildren (LATCH) system has three
vehicle anchor points:
• Two lower anchors where the vehicle
seat backrest and seat cushion meet,
called the seat bight.
• One top tether anchor behind that
seating position.
LATCH compatible child restraints have
two rigid or webbing mounted
attachments. These attachments connect
to the two lower anchors at the LATCH
equipped seating positions in your vehicle.
This type of attachment method
eliminates the need to use seatbelts to
attach the child restraint.
However, you can still use the seatbelt to
attach the child restraint if the lower
anchors are not used. For forward-facing
child restraints, you must also attach the
top tether strap to the proper top tether
anchor if a top tether strap has been
provided with your child restraint.
Follow the instructions later in this chapter
on attaching child restraints with tether
straps.
Installing a Child Restraint in a
Center Seat
WARNING: The standardized
spacing for LATCH lower anchors is 11 in
(280 mm) center to center. Do not use
LATCH lower anchors for the center
seating position unless the child restraint
manufacturer's instructions permit and
specify using anchors spaced at least as
far apart as those in this vehicle.
The lower anchors at the center of the
second row rear seat are spaced 25.7 in
(652 mm) apart. The standardized spacing
for LATCH lower anchors is 11 in (280 mm)
center to center.
43
F-150 (TFD) Canada/United States of America, enUSA, Edition date: 202007, First-Printing
Child Safety
Page 47

You cannot install a child restraint with
rigid LATCH attachments at the center
seating position. You can only use LATCH
compatible child restraints with
attachments on belt webbing at this
seating position provided that the child
restraint manufacturer's instructions
permit use with the anchor spacing stated.
Do not attach a child restraint to any lower
anchor if another child restraint is attached
to that anchor.
Each time you use the child restraint, check
that the seat is properly attached to the
lower anchors and tether anchor, if
applicable. Tug the child restraint from side
to side and forward and back where it is
secured to the vehicle. The seat should
move less than 1 in (2.5 cm).
If you did not properly anchor the child
restraint, the risk of a child being injured in
a crash greatly increases.
Combining the Seatbelt and Lower
Anchors for Attaching Child
Restraints
When used in combination, you may attach
either the seatbelt or the LATCH lower
anchors first, provided a proper installation
is achieved. Attach the tether strap
afterward, if it is included with the child
restraint.
Using Tether Straps
Many forward-facing child restraints
include a tether strap which extends from
the back of the child restraint and hooks
to an anchoring point called the top tether
anchor. Tether straps are available as an
accessory for many older child restraints.
Contact the manufacturer of your child
restraint for information about ordering a
tether strap, or to obtain a longer tether
strap if the tether strap on your child
restraint does not reach the appropriate
top tether anchor in the vehicle.
Attach the tether strap only to the
appropriate tether anchor. The tether strap
may not work properly if attached
somewhere other than the correct tether
anchor.
If you install a child restraint with rigid
LATCH attachments, do not tighten the
tether strap enough to lift the child
restraint off the vehicle seat cushion when
the child is seated in it. Keep the tether
strap just snug without lifting the front of
the child restraint. Keeping the child
restraint just touching the vehicle seat
gives the best protection in a severe crash.
Once you have installed the child restraint
using either the seatbelt, the lower anchors
of the LATCH system, or both, you can
attach the top tether strap.
Attaching the Front Seat Tether
Strap
Regular Cab
E175295
1. Route the child restraint tether strap
over the back of the seat and under the
head restraint.
44
F-150 (TFD) Canada/United States of America, enUSA, Edition date: 202007, First-Printing
Child Safety
Page 48
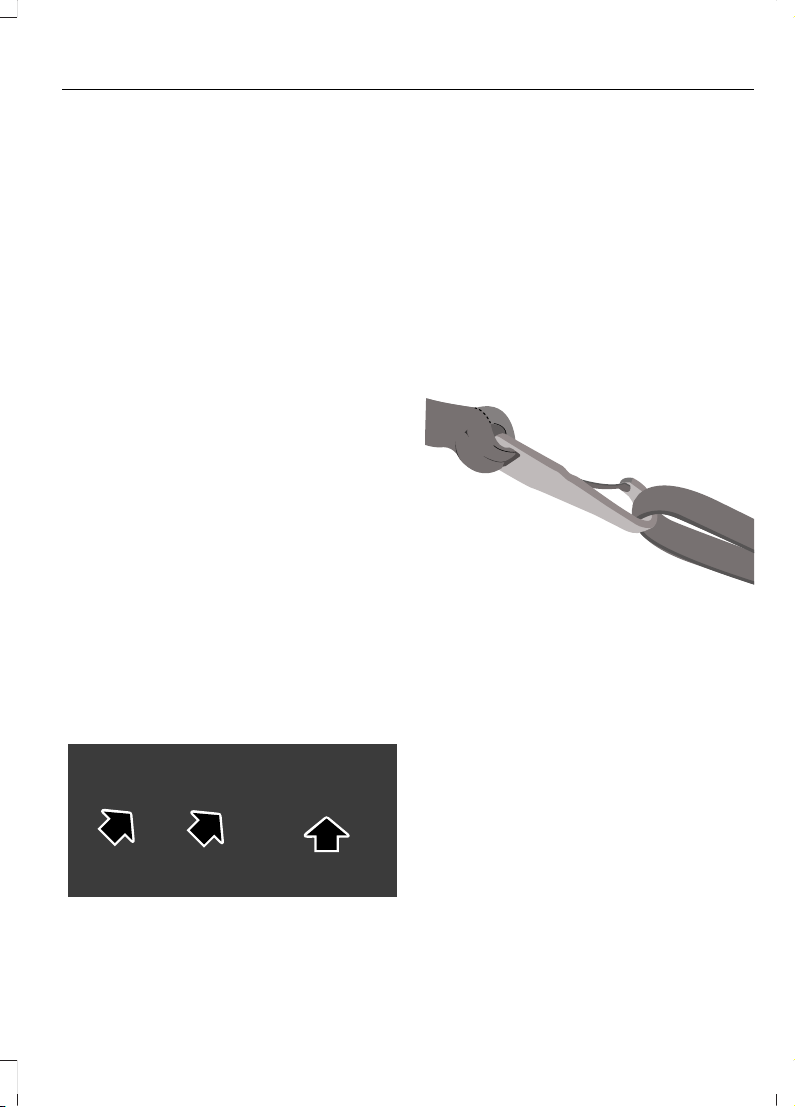
Note: For vehicles with adjustable head
restraints, route the tether strap under the
head restraint and between the head
restraint posts. Otherwise, route the tether
strap over the top of the seat backrest.
2. Locate the correct anchor for the
selected seating position. You may
need to pull the seat backrest forward
to access the tether anchors. Make sure
the seat is locked in the upright position
before installing the child restraint.
3. Clip the tether strap to the anchor.
4. Tighten the child restraint tether strap
according to the manufacturer's
instructions.
If you incorrectly clip the tether strap, the
child restraint may not be retained properly
in the event of a crash.
If you did not properly anchor the child
restraint, the risk of a child being injured in
a crash greatly increases.
If your child restraint system has a tether
strap, and the child restraint manufacturer
recommends its use, we also recommend
its use.
Attaching the Rear Seat Tether
Strap (If Equipped)
Crew Cab and Super Cab
E309318
There are three loops of webbing above
the back of the rear seat. Use these loops
as routing loops and anchor loops for up
to three child restraint tether straps.
For example, you can use the center loop
as a routing loop for a child restraint in the
center rear seat and as an anchoring loop
for child restraints installed in the
outermost rear seats.
Many tether straps cannot be tightened if
the tether strap is hooked to the loop
directly behind the child restraint.
To provide a tight tether strap:
E309384
1. Route the vehicle tether loop between
the head restraint posts, then route the
child restraint tether strap through the
loop, forward of the head restraint.
2. Hook the strap to the vehicle tether
anchor loop in the adjacent seating
position. If using the driver side, pass
the strap behind the shoulder belt for
the center seat. Put the tether strap
through the routing loop. The head
restraint support post holds the child
restraint tightly, but the head restraint
post is not strong enough to hold the
child restraint during a crash.
3. Tighten the tether strap according to
the child restraint manufacturer's
instructions.
45
F-150 (TFD) Canada/United States of America, enUSA, Edition date: 202007, First-Printing
Child Safety
Page 49
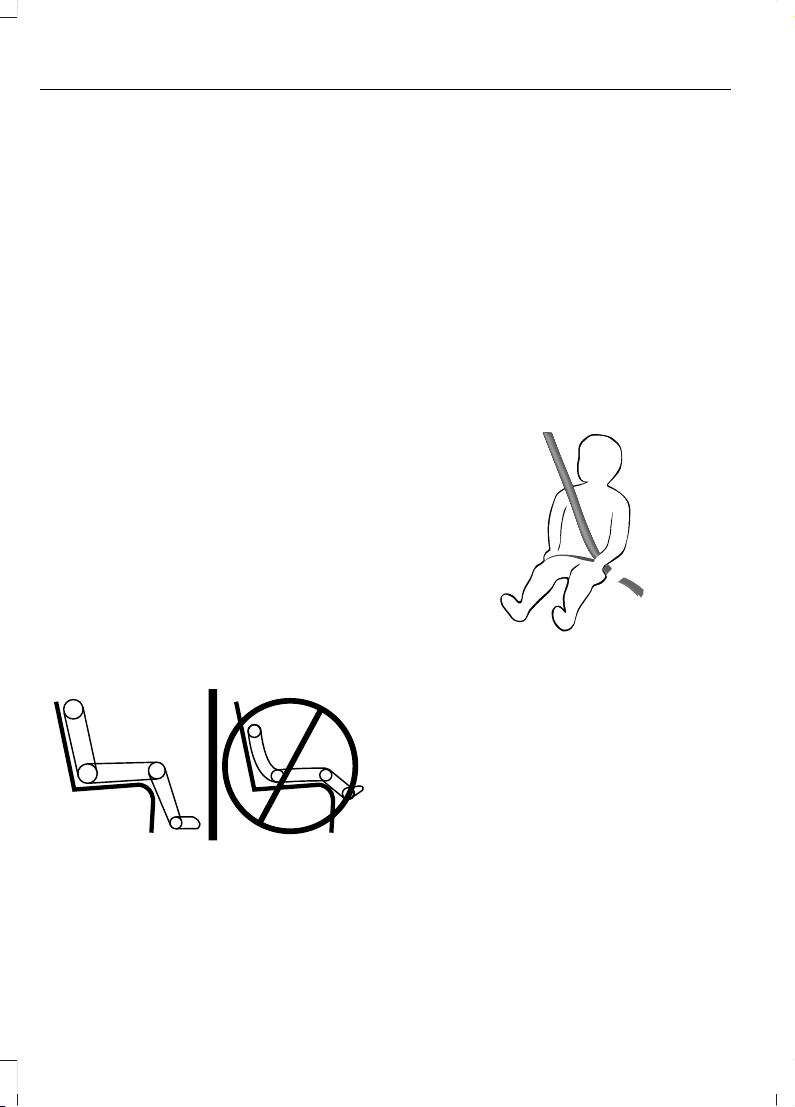
If you did not properly anchor the child
restraint, the risk of a child being injured in
a crash greatly increases.
If your child restraint system has a tether
strap, and the child restraint manufacturer
recommends its use, we also recommend
its use.
BOOSTER SEATS
Use a belt-positioning booster seat for
children who have outgrown or no longer
properly fit in a child restraint and meet
the following criteria.
• Generally children who are less than
57 in (1.45 m) tall.
• Are greater than age four (4) and less
than age twelve (12).
• Are between 40 lb (18 kg) and 80 lb
(36 kg) and upward to 100 lb (45 kg).
Many state and provincial laws require that
children use approved booster seats until
they reach age eight, a height of 57 in
(1.45 m) tall, or 80 lb (36 kg).
Booster seats should be used until you can
answer yes to all of these questions when
seated without a booster seat:
E142595
• Can the child sit all the way back
against their vehicle seat backrest with
knees bent comfortably at the edge of
the seat cushion?
• Can the child sit without slouching?
• Does the lap belt rest low across the
hips?
• Is the shoulder belt centered on the
shoulder and chest?
• Can the child stay seated like this for
the whole trip?
Always use booster seats in conjunction
with your vehicle lap and shoulder belt.
Types of Booster Seats
E68924
• Backless booster seats
If your backless booster seat has a
removable shield, remove the shield.
If a vehicle seating position has a low seat
backrest or no head restraint, a backless
booster seat may place your child's head,
as measured at the tops of the ears, above
the top of the seat. In this case, move the
backless booster to another seating
position with a higher seat backrest or
head restraint and lap and shoulder belts,
or consider using a high-back booster seat.
46
F-150 (TFD) Canada/United States of America, enUSA, Edition date: 202007, First-Printing
Child Safety
Page 50
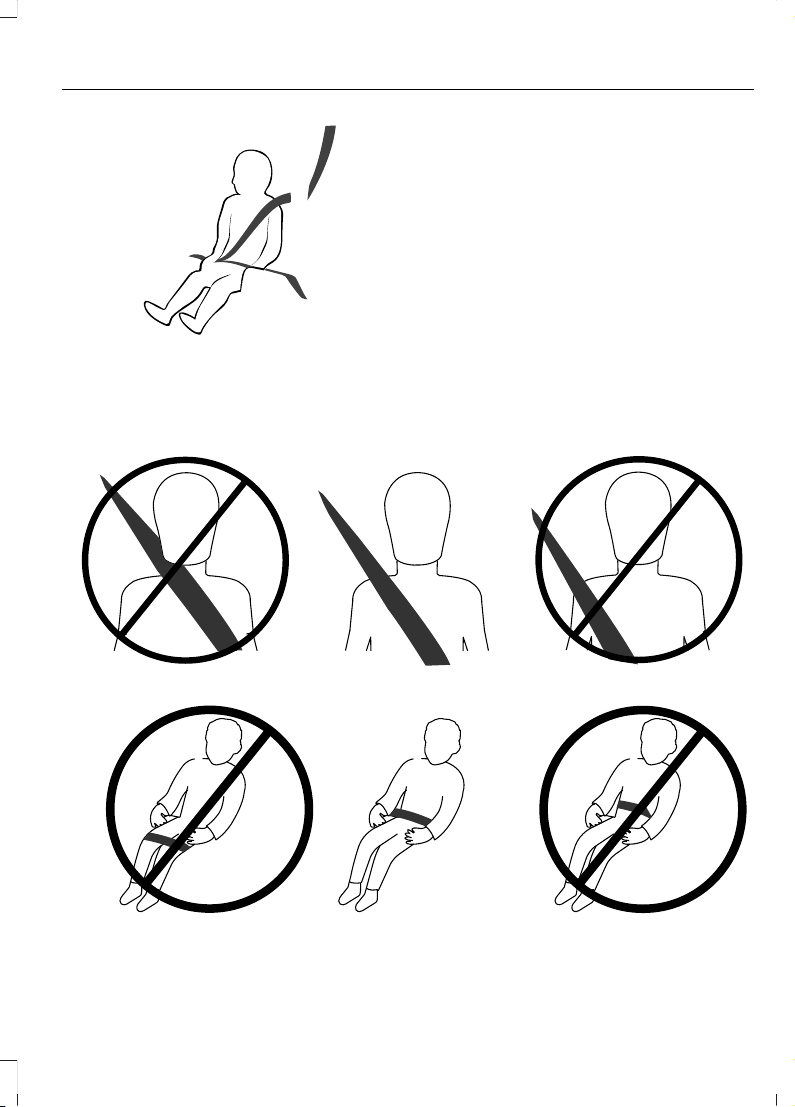
E70710
• High-back booster seats
If, with a backless booster seat, you cannot
find a seating position that adequately
supports your child's head, a high-back
booster seat would be a better choice.
Children and booster seats vary in size and
shape. Choose a booster that keeps the
lap belt low and snug across the hips,
never up across the stomach, and lets you
adjust the shoulder belt to cross the chest
and rest snugly near the center of the
shoulder.
The following drawings compare the ideal
fit to a shoulder belt uncomfortably close
to the neck and a shoulder belt that could
slip off the shoulder. The drawings also
show how the lap belt should be low and
snug across the child's hips.
E142596
E142597
47
F-150 (TFD) Canada/United States of America, enUSA, Edition date: 202007, First-Printing
Child Safety
Page 51
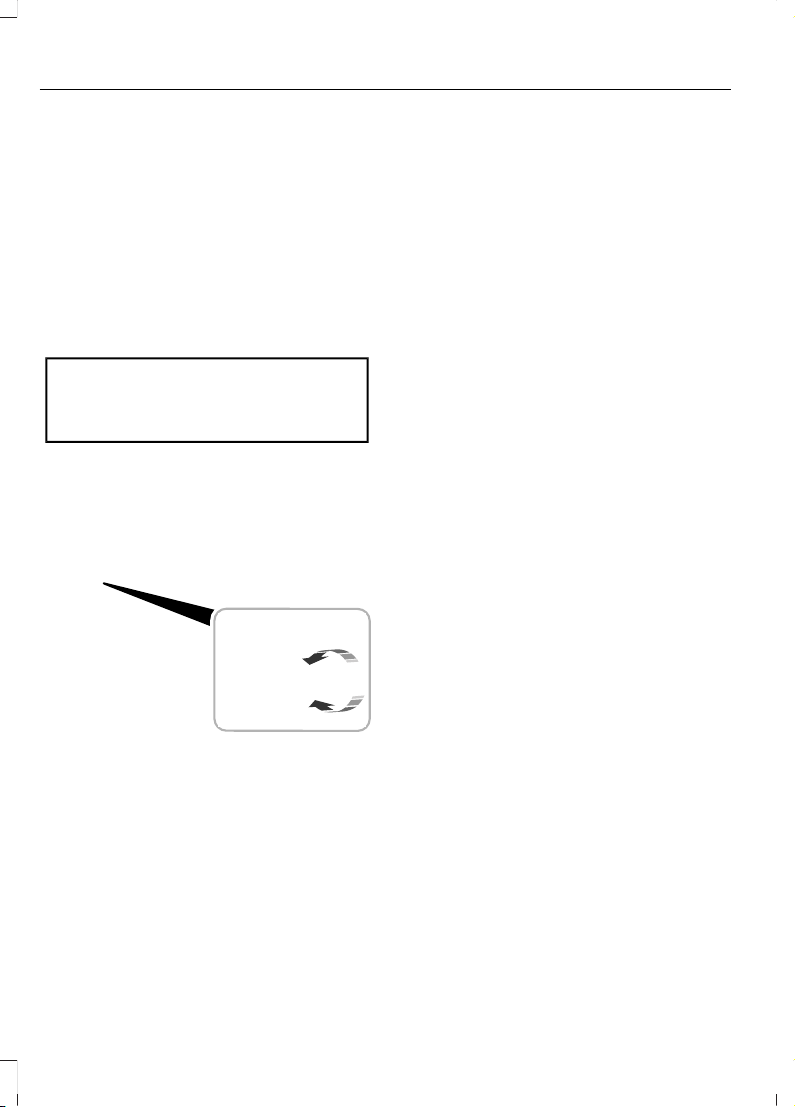
If the booster seat slides on the vehicle
seat upon which it is being used, placing a
rubberized mesh sold as shelf or carpet
liner under the booster seat may improve
this condition. Do not use any item thicker
than this under the booster seat. Check
with the booster seat manufacturer's
instructions.
CHILD SAFETY LOCKS (IF
EQUIPPED)
WARNING: You cannot open the
rear doors from inside if you have put the
child safety locks on.
E238364
A child safety lock is on the rear edge of
each rear door. You must switch the child
safety lock separately on each door.
Left-Hand Side
Turn the key clockwise to switch the child
lock on and counterclockwise to switch it
off.
Right-Hand Side
Turn the key counterclockwise to switch
the child lock on and clockwise to switch
it off.
48
F-150 (TFD) Canada/United States of America, enUSA, Edition date: 202007, First-Printing
Child Safety
Page 52

SEATBELT PRECAUTIONS
WARNING: Always drive and ride
with your seatback upright and the lap
belt snug and low across the hips.
WARNING: Children must always
be properly restrained.
WARNING: Do not allow a
passenger to hold a child on their lap
when your vehicle is moving. Failure to
follow this instruction could result in
personal injury or death in the event of a
sudden stop or crash.
WARNING: All occupants of your
vehicle, including the driver, should
always properly wear their seatbelts,
even when an airbag supplemental
restraint system is provided. Failure to
properly wear your seatbelt could
seriously increase the risk of injury or
death.
WARNING: It is extremely
dangerous to ride in a cargo area, inside
or outside of a vehicle. In a crash, people
riding in these areas are more likely to be
seriously injured or killed. Do not allow
people to ride in any area of your vehicle
that is not equipped with seats and
seatbelts. Make sure everyone in your
vehicle is in a seat and properly using a
seatbelt. Failure to follow this warning
could result in serious personal injury or
death.
WARNING: In a rollover crash, an
unbelted person is significantly more
likely to die than a person wearing a
seatbelt.
WARNING: Each seating position
in your vehicle has a specific seatbelt
assembly made up of one buckle and
one tongue designed to be used as a pair.
Use the shoulder belt on the outside
shoulder only. Never wear the shoulder
belt under the arm. Never use a single
seatbelt for more than one person.
WARNING: Even with advanced
restraints systems, properly restrain
children 12 and under in a rear seating
position. Failure to follow this could
seriously increase the risk of injury or
death.
WARNING: Seatbelts and seats
may be hot in a vehicle that is in the
sunshine. The hot seatbelts or seats may
burn a small child. Check seat covers and
buckles before you place a child
anywhere near them.
WARNING: If your vehicle is
involved in a crash, have the seatbelts
and associated components inspected
as soon as possible. Failure to follow this
instruction could result in personal injury
or death.
All seating positions in this vehicle have
seatbelts. All occupants of the vehicle
should properly wear their seatbelts, even
when an airbag supplemental restraint
system is provided.
The seatbelt system consists of:
• Lap and shoulder seatbelts.
• A shoulder seatbelt with automatic
locking mode, except driver seatbelt.
• Height adjusters at the front outermost
seating positions.
• Seatbelt pretensioners at the front
outermost and rear outermost seating
positions.
49
F-150 (TFD) Canada/United States of America, enUSA, Edition date: 202007, First-Printing
Seatbelts
Page 53
A seatbelt warning light and
chime.
Crash sensors and monitoring
system with readiness indicator.
The seatbelt pretensioners are designed
to tighten the seatbelts when activated. In
frontal and near-frontal crashes, the
seatbelt pretensioners may be activated
alone or, if the crash is of sufficient severity,
together with the front airbags. In side
crashes and rollovers, the pretensioners
will be activated when the Safety Canopy
is activated.
FASTENING AND UNFASTENING THE SEATBELTS
This applies to all seating positions, except
for the front center position of Super Cab
and Crew Cab.
E142587
1. Insert the seatbelt tongue into the
buckle until you hear a snap and feel it
latch.
E142588
2. Press the button to release the
seatbelt.
Using the Seatbelt With Cinch
Tongue
This applies to the front center seating
position of Super Cab and Crew Cab.
The cinch tongue slides up and down the
seatbelt webbing when you stow the
seatbelt or when you put the seatbelts on.
When you buckle the seatbelt, the cinch
tongue allows you to shorten the lap
portion, but pinches the webbing to keep
the lap portion from getting longer. The
cinch tongue is designed to slip during a
crash, so wear the shoulder belt properly
and do not allow any slack in either the lap
or shoulder portions.
Fastening the Cinch Tongue
WARNING: Always drive and ride
with your seatback upright and the lap
belt snug and low across the hips.
1. Pull the seatbelt from the retractor so
that the shoulder belt portion of the
seatbelt crosses your shoulder and
chest.
2. Make sure the belt is not twisted. If the
belt is twisted, remove the twist.
50
F-150 (TFD) Canada/United States of America, enUSA, Edition date: 202007, First-Printing
Seatbelts
Page 54

3. Insert the belt tongue into the proper
buckle for your seating position until
you hear a snap and feel it latch.
4. Make sure you securely fasten the
tongue to the buckle by pulling on the
tongue.
While you are fastened in the seatbelt, the
seatbelt with a cinch tongue adjusts to
your movement. However, if you brake
hard, turn hard, or if your vehicle receives
an impact of 5 mph (8 km/h) or more, the
seatbelt locks and helps reduce your
forward movement.
SENSITIVE LOCKING MODE
What is Sensitive Locking Mode
Sensitive locking mode is a seatbelt
retractor feature that allows shoulder belt
length adjustment according to your
movements and locking in response to
vehicle movement.
How Does Sensitive Locking Mode
Work
If the driver suddenly brakes, turns a corner
sharply, or the vehicle receives an impact
of about 5 mph (8 km/h) or more, the
seatbelts lock to help reduce forward
movement of the driver and passengers.
In addition, the seatbelt retractor locks if
you pull the seatbelt webbing out too
quickly. If the retractor locks, slowly lower
the height adjuster to allow the seatbelt
to retract.
If the retractor does not unlock, pull the
seatbelt out slowly then feed a small
length of webbing back toward the stowed
position.
For rear seatbelts, recline the rear seat
backrest or push the seat backrest cushion
away from the seatbelt. Feed a small
length of webbing back toward the stowed
position.
AUTOMATIC LOCKING MODE
What Is Automatic Locking Mode
This feature keeps the seatbelts
pre-locked. The belt still retracts to remove
any slack in the shoulder belt.
When to Use Automatic Locking
Mode
Use this mode any time you install a child
restraint in a front seating position in a
Regular Cab, Super Cab, Crew Cab or any
rear seating position of a Super Cab or
Crew Cab. The optional front seat center
seatbelt in the Super Cab and Crew Cab
has a cinch mechanism. Properly restrain
children 12 years old and under in a rear
seat whenever possible. See Child Safety
(page 35).
Note: Automatic locking mode is not
available on the driver seatbelt.
Engaging Automatic Locking Mode
E142591
51
F-150 (TFD) Canada/United States of America, enUSA, Edition date: 202007, First-Printing
Seatbelts
Page 55
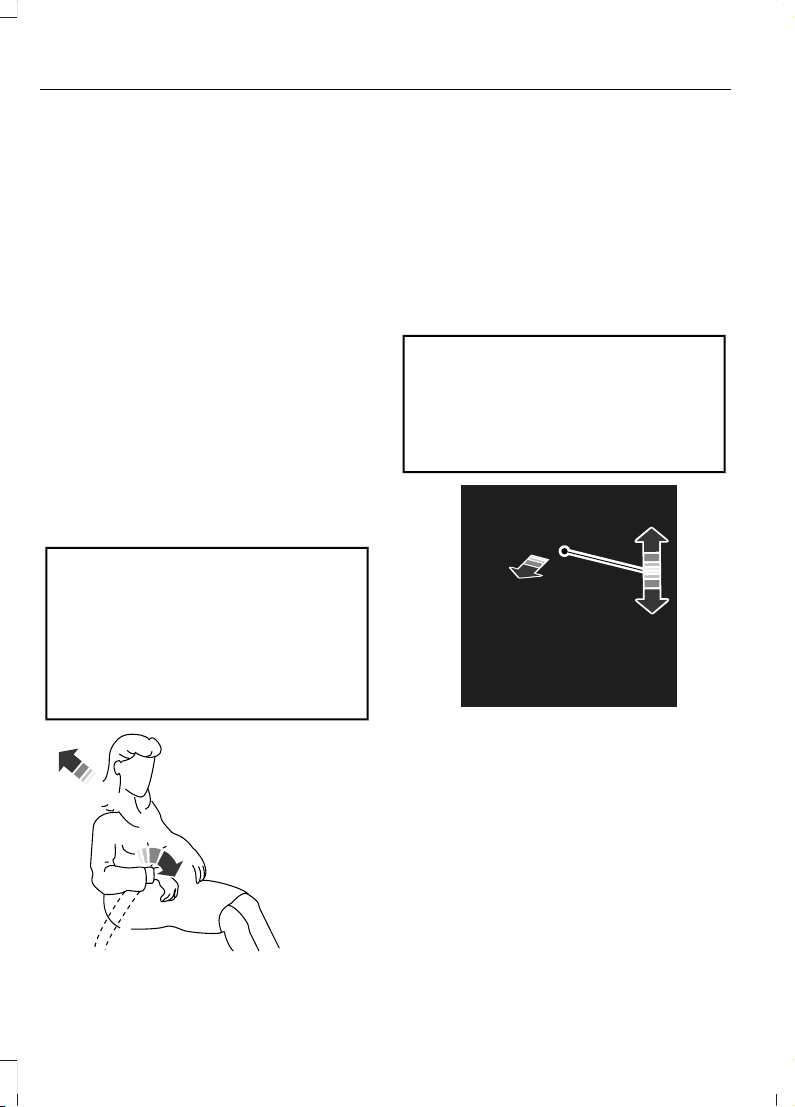
1. Fasten the combination lap and
shoulder belt.
2. Grasp the shoulder portion and pull
downward until you pull the entire belt
out.
3. Allow the belt to retract. As the belt
retracts, you will hear a clicking sound.
This indicates the seatbelt is now in the
automatic locking mode.
Disengaging Automatic Locking
Mode
Unbuckle the combination lap and
shoulder belt and allow it to retract
completely to disengage the automatic
locking mode and activate the vehicle
sensitive locking mode.
ADJUSTING THE SEATBELTS DURING PREGNANCY
WARNING: Always ride and drive
with your seatback upright and properly
fasten your seatbelt. Fit the lap portion
of the seatbelt snugly and low across
the hips. Position the shoulder portion of
the seatbelt across your chest. Pregnant
women must follow this practice. See
the following figure.
E142590
Pregnant women should always wear their
seatbelt. Position the lap belt portion of a
combination lap and shoulder belt low
across the hips below the belly and worn
as tight as comfort allows. Position the
shoulder belt to cross the middle of the
shoulder and the center of the chest.
ADJUSTING THE SEATBELT HEIGHT
WARNING: Position the seatbelt
height adjuster so that the seatbelt rests
across the middle of your shoulder.
Failure to adjust the seatbelt correctly
could reduce its effectiveness and
increase the risk of injury in a crash.
E145664
1. Pull the button and slide the height
adjuster up or down.
2. Release the button and pull down on
the height adjuster to make sure it is
locked in place.
52
F-150 (TFD) Canada/United States of America, enUSA, Edition date: 202007, First-Printing
Seatbelts
Page 56

ADJUSTING THE SEATBELT LENGTH
E162708
1. Pull some seatbelt webbing out of the
shoulder belt retractor.
2. While holding the webbing below the
tongue, grasp the metal tip of the
tongue so that it is parallel to the
webbing and slide the tongue up.
3. Provide enough lap belt length so that
the tongue can reach the buckle.
SEATBELT REMINDER
How Does the Seatbelt Reminder
Work
This feature supplements the seatbelt
warning function by providing additional
reminders that intermittently sound a tone
and illuminate the seatbelt warning lamp
when you are in the driver seat or you have
a front seat passenger and a seatbelt is
unbuckled.
The system uses information from the
front passenger sensing system to
determine if a front seat passenger is
present and therefore potentially in need
of a warning. To avoid the system
switching on the Belt-Minder feature for
objects you place on the front passenger
seat, only the front seat passengers receive
warnings as determined by the front
passenger sensing system.
If the Belt-Minder warnings expire
(warnings for about five minutes) for one
passenger (driver or front passenger), the
other passenger can still cause the
Belt-Minder feature to switch on.
53
F-150 (TFD) Canada/United States of America, enUSA, Edition date: 202007, First-Printing
Seatbelts
Page 57

ThenIf
The Belt-Minder feature will not activate.You and the front seat passenger buckle
your seatbelts before you switch the ignition on or less than 1–2 minutes elapse after
you switch the ignition on...
The Belt-Minder feature activates, the
seatbelt warning lamp illuminates and an
indicator tone sounds for 6 seconds every
25 seconds, repeating for about 5 minutes
or until you and the front seat passenger
buckle your seatbelts.
You or the front seat passenger do not
buckle your seatbelts before your vehicle
reaches at least 6.0 mph (9.7 km/h) and
1–2 minutes elapse after you switch the
ignition on...
The Belt-Minder feature activates, the
seatbelt warning lamp illuminates and an
indicator tone sounds for 6 seconds every
25 seconds, repeating for about 5 minutes
or until you and the front seat passenger
buckle your seatbelts.
The seatbelt for the driver or front
passenger is unbuckled for about 1 minute
while the vehicle is traveling at least
6.0 mph (9.7 km/h) and more than 1–2
minutes elapse after you switch the ignition
on...
54
F-150 (TFD) Canada/United States of America, enUSA, Edition date: 202007, First-Printing
Seatbelts
Page 58

Seatbelt Reminder Indicators
A warning lamp illuminates if the ignition
is on, a front seat is occupied and the
seatbelt has not been fastened.
The warning lamp illuminates
until you fasten your seatbelt.
Seatbelt Reminder Audible
Warnings
A warning tone sounds if the warning lamp
illuminates and your vehicle exceeds a
relatively low speed.
The warning tone sounds for up to five
minutes or until you fasten your seatbelt.
Switching the Seatbelt Reminder
On and Off
WARNING: While the system
allows you to deactivate it, this system
is designed to improve your chances of
being safely belted and surviving an
accident. We recommend you leave the
system activated for yourself and others
who may use the vehicle.
Note: The driver and front passenger
warnings switch off independently. When
you perform this procedure for one seating
position, do not buckle the other position as
this cancels the process.
Note: If you are using MyKey, you cannot
disable the seatbelt reminder. Also, if the
seatbelt reminder has been previously
disabled, it will be re-enabled during the use
of MyKey. See MyKey™ (page 78).
Read Steps 1 - 4 before proceeding with
the programming procedure.
Make sure that:
• The parking brake is set.
• The transmission is in park (P).
• The ignition is off.
• The driver and front passenger
seatbelts are unfastened.
1. Switch the ignition on. Do not start the
engine.
2. Wait about one minute until the
seatbelt warning light switches off.
After Step 2, wait an additional five
seconds before proceeding with Step
3. Once you start Step 3, you must
complete the procedure within 30
seconds.
3. For the seating position you are
switching off, buckle then unbuckle the
seatbelt three times at a moderate
speed, ending in the unbuckled state.
After Step 3, the seatbelt warning light
switches on.
4. When the seatbelt warning light is on,
buckle then unbuckle the seatbelt.
After Step 4, the seatbelt warning light
flashes for confirmation.
This switches the feature off for that
seating position if it is currently on.
This switches the feature on for that
seating position if it is currently off.
CHECKING THE SEATBELTS
Check the seatbelts and child restraints
periodically to make sure they work
properly and are not damaged. Make sure
there are no nicks, tears or cuts. Replace if
necessary.
Check all of the following seatbelt
assemblies after a crash.
• Retractors.
• Buckles.
• Front seatbelt buckle assemblies.
55
F-150 (TFD) Canada/United States of America, enUSA, Edition date: 202007, First-Printing
Seatbelts
Page 59

• Shoulder belt height adjusters.
• Shoulder belt guide on seat backrest.
• Child restraint LATCH and tether
anchors.
• Attaching hardware.
Read the child restraint manufacturer's
instructions for additional inspection and
maintenance information specific to the
child restraint.
We recommend that all seatbelt
assemblies in use in vehicles involved in a
crash be replaced. However, if the crash
was minor and an authorized dealer finds
that the belts do not show damage and
continue to operate properly, they do not
need to be replaced. Seatbelt assemblies
not in use during a crash should also be
checked and replaced if either damage or
improper operation is noted.
Properly care for seatbelts. See Cleaning
Seatbelts (page 490).
SEATBELT EXTENSIONS
WARNING: Persons who fit into
the vehicle's seatbelt should not use an
extension. Unnecessary use could result
in serious personal injury in the event of
a crash.
WARNING: Only use extensions
provided free of charge by our dealers.
The dealer will provide an extension
designed specifically for this vehicle,
model year and seating position. The use
of an extension intended for another
vehicle, model year or seating position
may not offer you the full protection of
your vehicle's seatbelt restraint system.
WARNING: Never use seatbelt
extensions to install child restraints.
WARNING: Do not use extensions
to change the way the seatbelt fits
across the torso, over the lap or to make
the seatbelt buckle easier to reach.
If, because of body size or driving position,
it is not possible to properly fasten the
seatbelt over your lap and shoulder, an
extension that is compatible with the
seatbelts is available free of charge from
our dealers. Only use our seatbelt
extensions made by the original equipment
seatbelt manufacturer with our seatbelts.
Ask your authorized dealer if your extension
is compatible with your vehicle restraint
system.
56
F-150 (TFD) Canada/United States of America, enUSA, Edition date: 202007, First-Printing
Seatbelts
Page 60

WHAT IS THE PERSONAL SAFETY SYSTEM
Personal Safety System
An advanced safety system that protects
occupants in frontal crashes.
HOW DOES THE PERSONAL SAFETY SYSTEM WORK
This system provides an improved level of
frontal crash protection to front seat
occupants and is designed to reduce the
risk of airbag-related injuries. The system
analyzes occupant conditions and crash
severity before activating the appropriate
safety devices. During a crash, the
restraints control module may deploy the
seatbelt pretensioners, and one or both
stages of the dual-stage airbags based on
crash severity and occupant conditions.
PERSONAL SAFETY SYSTEM COMPONENTS
• Driver and passenger dual-stage airbag
supplemental restraints.
• Front seat outermost seatbelts with
pretensioners, energy management
retractors and seatbelt usage sensors.
• Front passenger sensing system.
• Passenger airbag off and on indicators.
• Front crash severity sensors.
• Restraints control module with impact
and safing sensors.
• Restraint system warning light and
tone.
• The electrical wiring for the airbags,
crash sensors, seatbelt pretensioners,
front seatbelt usage sensors, front
passenger sensing system and
indicator lights.
57
F-150 (TFD) Canada/United States of America, enUSA, Edition date: 202007, First-Printing
Personal Safety System™
Page 61
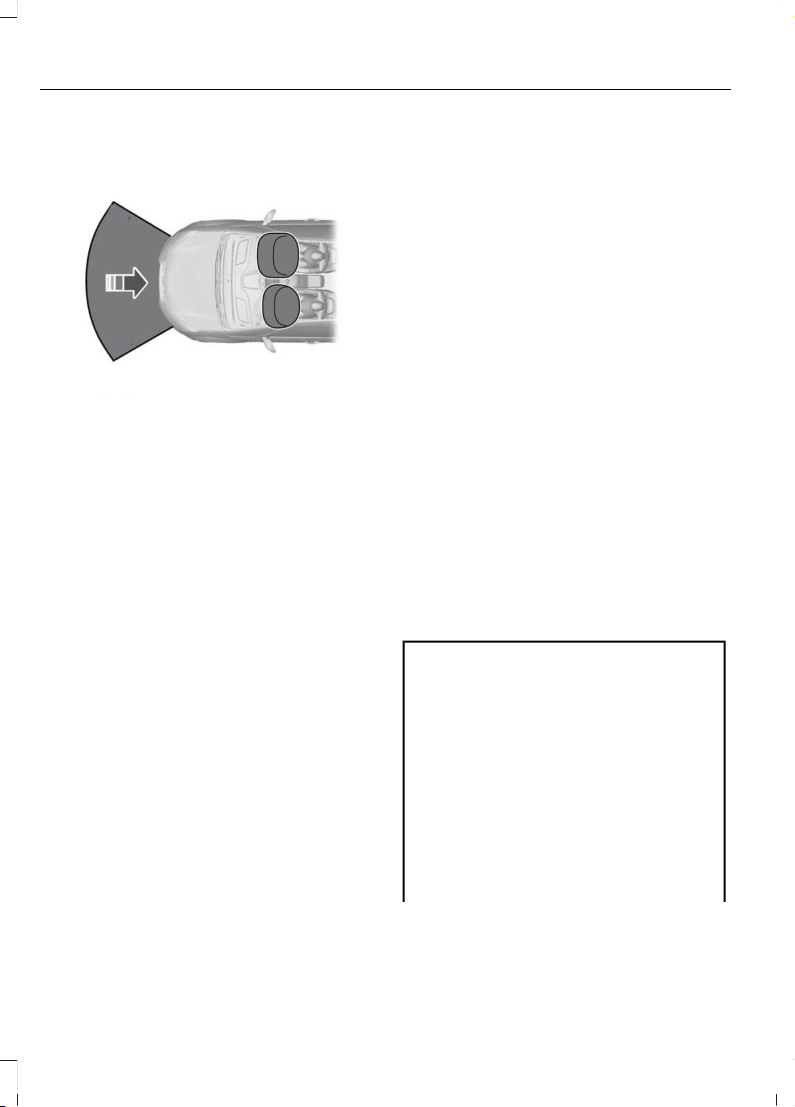
HOW DO THE FRONT AIRBAGS WORK
E151127
The driver and front passenger airbags
deploy during significant frontal and near
frontal crashes.
The driver and passenger front airbag
system consists of:
• Driver and passenger airbag modules.
• Front passenger sensing system.
• Crash sensors and monitoring system
with readiness indicator. See Crash
Sensors and Airbag Indicator (page
65).
The airbags are a supplemental restraint
system and are designed to work with the
seatbelts to help protect the driver and
right front passenger from certain upper
body injuries. Airbags do not inflate slowly;
there is a risk of injury from a deploying
airbag.
Note: You will hear a loud bang and see a
cloud of harmless powdery residue if an
airbag deploys. This is normal.
The airbags inflate and deflate rapidly
upon activation. After airbag deployment,
it is normal to notice a smoke-like, powdery
residue or smell the burnt propellant. This
may consist of cornstarch, talcum powder
(to lubricate the bag) or sodium
compounds (for example, baking soda)
that result from the combustion process
that inflates the airbag. Small amounts of
sodium hydroxide may be present which
may irritate the skin and eyes, but none of
the residue is toxic.
Contact with a deploying airbag may cause
abrasions or swelling. Temporary hearing
loss is also a possibility as a result of the
noise associated with a deploying airbag.
Because airbags must inflate rapidly and
with considerable force, there is the risk of
death or serious injuries such as fractures,
facial and eye injuries or internal injuries,
particularly to occupants who are not
properly restrained or are otherwise out of
position at the time of airbag deployment.
Thus, it is extremely important that
occupants be properly restrained as far
away from the airbag module as possible
while maintaining vehicle control.
Routine maintenance of the airbags is not
required.
HOW DO THE SIDE AIRBAGS WORK
WARNING: Do not place objects
or mount equipment on or near the
airbag cover, on the side of the front or
rear seatbacks, or in areas that may
come into contact with a deploying
airbag. Failure to follow these
instructions may increase the risk of
personal injury in the event of a crash.
WARNING: Accessory seat covers
not released by Ford could prevent the
deployment of the airbags and increase
the risk of injuries in a crash.
58
F-150 (TFD) Canada/United States of America, enUSA, Edition date: 202007, First-Printing
Airbags
Page 62
WARNING: Do not lean your head
on the door. The side airbag could injure
you as it deploys from the side of the
seatback.
The side airbags are on the outermost side
of the seat backrests of the front seats. In
certain sideways crashes or rollovers, the
airbags will be inflated. The airbag was
designed to inflate between the door panel
and occupant to further enhance the
protection provided to occupants in side
impact crashes.
E152533
The system consists of the following:
• A label or embossed side panel
indicating that side airbags are fitted
to your vehicle.
• Side airbags inside the driver and front
passenger seat backrests.
• Crash sensors and monitoring system
with readiness indicator. See Crash
Sensors and Airbag Indicator (page
65).
HOW DO THE KNEE AIRBAGS WORK
Driver and passenger knee airbags are
under or within the instrument panel.
During a crash, the restraints control
module may activate the driver and
passenger knee airbags (individually or
both) based on crash severity and
respective occupant conditions. Under
certain crash and occupant conditions, the
driver and passenger knee airbags may
deploy (individually or both) but the
corresponding front airbag may not
activate. It is important to be properly
seated and restrained to reduce the risk of
death or serious injury.
Make sure the knee airbags are
operating properly. See Crash
Sensors and Airbag Indicator
(page 65).
HOW DOES THE SAFETY CANOPY™ WORK
WARNING: Do not place objects
or mount equipment on or near the
headliner at the siderail that may come
into contact with a deploying curtain
airbag. Failure to follow these
instructions may increase the risk of
personal injury in the event of a crash.
WARNING: Do not lean your head
on the door. The curtain airbag could
injure you as it deploys from the
headliner.
WARNING: To reduce risk of injury,
do not obstruct or place objects in the
deployment path of the airbag.
59
F-150 (TFD) Canada/United States of America, enUSA, Edition date: 202007, First-Printing
Airbags
Page 63
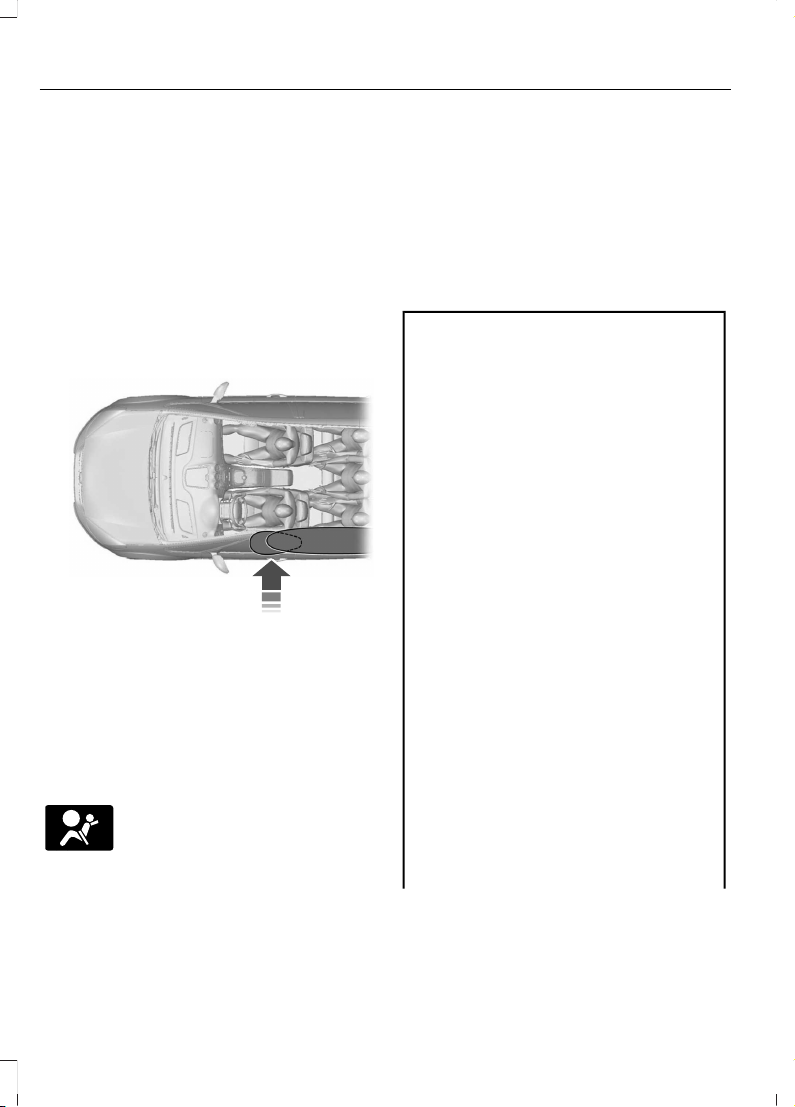
The Safety Canopy deploys during
significant side crashes or when a certain
likelihood of a rollover event is detected
by the rollover sensor. The Safety Canopy
is mounted to the roof side-rail sheet
metal, behind the headliner, above each
row of seats. In certain sideways crashes
or rollover events, the Safety Canopy will
be activated, regardless of which seats are
occupied. The Safety Canopy inflates
between the side window area and
occupants to further enhance protection
provided in side impact crashes and
rollover events.
E75004
The system consists of the following:
• Safety Canopy curtain airbags above
the trim panels over the front and rear
side windows identified by a label or
wording on the headliner or roof-pillar
trim.
• A flexible headliner which opens above
the side doors to allow air curtain
deployment
· Crash sensors and monitoring
system with a readiness
indicator. See Crash Sensors
and Airbag Indicator (page 65).
Properly restrain children 12 years old and
under in the rear seats. The Safety Canopy
will not interfere with children restrained
using a properly installed child or booster
seat because it is designed to inflate
downward from the headliner above the
doors along the side window opening.
AIRBAG PRECAUTIONS
WARNING: Airbags do not inflate
slowly or gently, and the risk of injury
from a deploying airbag is the greatest
close to the trim covering the airbag
module.
WARNING: All occupants of your
vehicle, including the driver, should
always properly wear their seatbelts,
even when an airbag supplemental
restraint system is provided. Failure to
properly wear your seatbelt could
seriously increase the risk of injury or
death.
WARNING: Properly secure
children 12 years old and under in a rear
seating position whenever possible. If
you are unable to properly secure all
children in a rear seating position,
properly secure the largest child on the
front seat. If you must use a forward
facing child restraint on the front seat,
move the seat as far back as possible.
Failure to follow these instructions could
result in personal injury or death.
WARNING: Do not place your arms
on the airbag cover or through the
steering wheel. Failure to follow this
instruction could result in personal injury.
60
F-150 (TFD) Canada/United States of America, enUSA, Edition date: 202007, First-Printing
Airbags
Page 64

WARNING: Keep the areas in front
of the airbags free from obstruction. Do
not affix anything to or over the airbag
covers. Objects could become projectiles
during airbag deployment. Failure to
follow this instruction could result in
personal injury or death.
WARNING: To reduce risk of injury,
do not obstruct or place objects in the
deployment path of the airbag.
WARNING: Do not place a
rearward facing child restraint in front of
an active airbag. Failure to follow this
instruction could result in personal injury
or death.
WARNING: Do not attempt to
service, repair, or modify the
supplementary restraint system or
associated components. Failure to
follow this instruction could result in
personal injury or death.
WARNING: Several airbag system
components get hot after inflation. To
reduce the risk of injury, do not touch
them after inflation.
WARNING: If a supplementary
restraint system component has
deployed, it will not function again. Have
the system and associated components
inspected as soon as possible. Failure to
follow this instruction could result in
personal injury or death.
PROPERLY ADJUSTING THE DRIVER AND FRONT PASSENGER SEATS
WARNING: National Highway
Traffic Safety Administration (NHTSA)
recommends a minimum distance of at
least 10 in (25 cm) between an
occupant's chest and the driver airbag
module.
To properly position yourself away from
the airbag:
• Move your seat to the rear as far as you
can while still reaching the pedals
comfortably.
• Recline the seat slightly one or two
degrees from the upright position.
After all occupants have adjusted their
seats and put on seatbelts, it is very
important that they continue to sit
properly. Properly seated occupants sit
upright, lean against the seat backrest, and
center themselves on the seat cushion,
with their feet comfortably extended on
the floor. Sitting improperly can increase
the chance of injury in a crash event. For
example, if an occupant slouches, lies
down, turns sideways, sits forward, leans
forward or sideways, or puts one or both
feet up, the chance of injury during a crash
greatly increases.
CHILDREN AND AIRBAGS
WARNING: Do not place a
rearward facing child restraint in front of
an active airbag. Failure to follow this
instruction could result in personal injury
or death.
61
F-150 (TFD) Canada/United States of America, enUSA, Edition date: 202007, First-Printing
Airbags
Page 65

E142846
Children must always be properly
restrained. Accident statistics suggest that
children are safer when properly restrained
in the rear seating positions than in the
front seating position. Failure to follow
these instructions may increase the risk of
injury in a crash.
If two adults and a child occupy a vehicle
without rear seats, properly restrain the
child in the center front seat unless doing
so would interfere with driving your vehicle.
This provides lap and shoulder belt
protection for all occupants, and airbag
protection for the adults. A child or infant
properly restrained in the center front seat
should not incur risk of serious injury from
the airbags.
FRONT PASSENGER SENSING SYSTEM
What Is the Front Passenger
Sensing System
This system detects a properly seated
occupant and determines if the front
passenger airbag should be enabled.
How Does the Front Passenger
Sensing System Work
The system uses a passenger airbag status
indicator which illuminates indicating that
the front passenger frontal airbag is either
enabled or disabled.
Note: When you first switch the ignition on,
the passenger airbag status indicator off
and on lamps illuminate for a short period
to confirm they are functional.
E181984
The indicator lamps are in the overhead
console.
The front passenger sensing system is
designed to disable the front passenger
frontal airbag under these conditions:
• The front passenger seat is
unoccupied.
• The system determines an infant is
present in a child restraint.
• A passenger takes their weight off of
the seat for a period of time.
• If there is a problem with the airbag
system or the passenger sensing
system.
Even with this technology, parents are
strongly encouraged to always properly
restrain children in the rear seat.
62
F-150 (TFD) Canada/United States of America, enUSA, Edition date: 202007, First-Printing
Airbags
Page 66

• When the front passenger sensing
system disables the front passenger
frontal airbag, the passenger airbag
status indicator illuminates the off
lamp.
• If you have installed the child restraint
and the passenger airbag status
indicator illuminates the on lamp,
switch your vehicle off, remove the
child restraint from your vehicle and
reinstall the restraint following the
child restraint manufacturer's
instructions.
The front passenger sensing system works
with sensors that are part of the front
passenger seat and seatbelt. The sensors
are designed to detect the presence of a
properly seated occupant and determine
if the front passenger frontal airbag should
be enabled.
• When the front passenger sensing
system enables the front passenger
frontal airbag, the passenger airbag
status indicator illuminates the on
lamp.
If a person of adult size is sitting in the front
passenger seat, but the passenger airbag
status indicator off lamp is illuminated, it
is possible that the person is not sitting
properly in the seat. If this happens:
• Switch your vehicle off and ask the
person to place the seat backrest in an
upright position.
• Have the person sit upright in the seat,
centered on the seat cushion, with the
person's legs comfortably extended.
• Restart your vehicle and have the
person remain in this position for about
two minutes. This allows the system
to detect that person and enable the
passenger frontal airbag.
• If the indicator off lamp remains
illuminated even after this, you should
advise the person to ride in the rear
seat.
After all occupants have adjusted their
seats and put on seatbelts, it is very
important that they continue to sit upright,
leaning against the seat backrest, and
centered on the seat cushion, with their
feet comfortably extended on the floor.
Sitting improperly can increase the chance
of injury in a crash event. For example, if
an occupant slouches, lies down, turns
sideways, sits forward, leans forward or
sideways, or puts one or both feet up, the
chance of injury during a crash greatly
increases.
If you think that the state of the passenger
airbag status indicator lamp is incorrect,
check for the following:
• Objects lodged underneath the seat.
• Objects between the seat cushion and
the center console.
• Objects hanging off the seat backrest.
• Objects stowed in the seat backrest
map pocket.
• Objects placed on the occupant's lap.
• Cargo interference with the seat
• Other passengers pushing or pulling on
the seat.
• Rear passenger feet and knees resting
or pushing on the seat.
The listed conditions could cause the
weight of a properly seated occupant to
be incorrectly interpreted by the front
passenger sensing system. The person in
the front passenger seat could appear
heavier or lighter due to the conditions
listed.
Make sure the front passenger
sensing system is operating
properly. See Crash Sensors
and Airbag Indicator (page 65).
If the airbag readiness light is on, do the
following:
63
F-150 (TFD) Canada/United States of America, enUSA, Edition date: 202007, First-Printing
Airbags
Page 67

• Pull your vehicle over.
• Switch your vehicle off.
• Check for any objects lodged
underneath the front passenger seat
or cargo interfering with the seat.
• Remove the obstruction if found.
• Restart your vehicle.
• Wait at least two minutes and verify
that the airbag readiness light in the
instrument cluster is no longer
illuminated.
• If the airbag readiness light in the
instrument cluster remains illuminated,
there may be a problem due to the
front passenger sensing system.
Do not attempt to repair or service the
system. Take your vehicle in for service
immediately.
If it is necessary to modify an advanced
front airbag system to accommodate a
person with disabilities, contact your
Customer Relationship Center. See
Contacting Us (page 19).
Front Passenger Sensing System
Precautions
WARNING: Sitting improperly, out
of position or with the seatback reclined
too far can take weight off the seat
cushion and affect the decision of the
passenger sensing system, resulting in
serious injury or death in the event of a
crash. Always sit upright against your
seat back, with your feet on the floor.
WARNING: Any alteration or
modification to the front passenger seat
may affect the performance of the front
passenger sensing system. This could
seriously increase the risk of injury or
death.
Front Passenger Sensing System Indicators
Passenger AirbagPassenger Airbag Status
Indicator
Occupant
DisabledOFF: IlluminatedEmpty
ON: Not Illuminated
DisabledOFF: IlluminatedChild
ON: Not Illuminated
EnabledOFF: Not IlluminatedAdult
ON: Illuminated
64
F-150 (TFD) Canada/United States of America, enUSA, Edition date: 202007, First-Printing
Airbags
Page 68

CRASH SENSORS AND AIRBAG INDICATOR
WARNING: Modifying or adding
equipment to the front end of your
vehicle (including hood, bumper system,
frame, front end body structure, tow
hooks and hood pins) may affect the
performance of the airbag system,
increasing the risk of injury. Do not
modify or add equipment to the front
end of your vehicle.
Your vehicle has a collection of crash and
occupant sensors. These sensors provide
information to the restraints control
module which activates the following:
• Front seatbelt pretensioners.
• Driver airbag.
• Passenger airbag.
• Knee airbag(s).
• Seat mounted side airbags.
• Safety Canopy.
Based on the type of crash, the restraints
control module deploys the appropriate
safety devices.
The restraints control module also
monitors the readiness of the above safety
devices plus the crash and occupant
sensors. The readiness of the safety
system is indicated by a warning indicator
light in the instrument cluster or by a
backup tone if the warning light is not
working. Routine maintenance of the
airbag is not required.
A difficulty with the system is indicated by
one or more of the following:
The readiness light will not
illuminate immediately after you
switch the ignition on.
• The readiness light either flashes or
stays on.
• You hear a series of five tones. The
tone pattern repeats periodically until
the problem, the light or both are
repaired.
If any of these things happen, even
intermittently, have the supplemental
restraint system serviced immediately.
Unless serviced, the system may not
function properly in the event of a crash.
The fact that the seatbelt pretensioners
or front airbags did not activate for both
front seat occupants in a crash does not
mean that something is wrong with the
system. Rather, it means the restraints
control module determined the accident
conditions (crash severity, seatbelt usage)
were not appropriate to activate these
safety devices.
• The front airbags activate only in
frontal and near-frontal crashes. Front
airbags may activate in rollovers, side
impacts or rear impacts if the crash
causes sufficient frontal deceleration.
• The seatbelt pretensioners activate in
frontal, near-frontal and side crashes,
and in rollovers.
• The knee airbag(s) deploy based on
crash severity and occupant conditions.
• The side airbags inflate in certain side
impact crashes or rollover events. Side
airbags may activate in other types of
crashes if the vehicle experiences
sufficient sideways motion or
deformation.
• The Safety Canopy inflates in certain
side impact crashes or rollover events.
The Safety Canopy may activate in
other types of crashes if the vehicle
experiences sufficient sideways motion
or deformation, or a certain likelihood
of rollover.
65
F-150 (TFD) Canada/United States of America, enUSA, Edition date: 202007, First-Printing
Airbags
Page 69

DISPOSING OF AIRBAGS
Contact your authorized dealer as soon as
possible. Airbags must be disposed of by
qualified personnel.
66
F-150 (TFD) Canada/United States of America, enUSA, Edition date: 202007, First-Printing
Airbags
Page 70

WHAT IS THE PEDESTRIAN ALERT SYSTEM
Due to the quiet operation of hybrid and
electric vehicles at low speeds, the system
creates a subtle sound to alert pedestrians.
The system is on when your vehicle is
running and not in park (P). Some sound
may be audible in the passenger
compartment.
67
F-150 (TFD) Canada/United States of America, enUSA, Edition date: 202007, First-Printing
Pedestrian Alert System (If Equipped)
Page 71

WHAT IS 911 ASSIST
911 Assist is a SYNC system feature that
can call for help.
For more information, visit
www.owner.ford.com .
HOW DOES 911 ASSIST WORK
If a crash deploys an airbag, excluding knee
airbags and rear inflatable seatbelts, or
activates the fuel pump shut-off, your
vehicle may be able to contact emergency
services by dialing 911 through a paired and
connected Bluetooth-enabled phone.
Not all crashes will deploy an airbag or
activate the fuel pump shut-off. If a
connected cell phone sustains damage or
loses its connection to SYNC during a
crash, SYNC will search for and try to
connect to a previously paired cell phone.
SYNC will then attempt to call the
emergency services.
Before making the call:
• SYNC provides about 10 seconds to
cancel the call. If you fail to cancel the
call, SYNC attempts to dial 911.
• SYNC says the following, or a similar
message: "SYNC will attempt to call
911, to cancel the call, press Cancel on
your screen or press and hold the
phone button on your steering wheel."
If you do not cancel the call and SYNC
makes a successful call a pre-recorded
message plays for the 911 operator. The
occupants in your vehicle are able to talk
with the operator. Be prepared to provide
your name, phone number and location
immediately because not all 911 systems
are capable of receiving this information
electronically.
During an emergency call the system
transmits vehicle data to the emergency
service.
EMERGENCY CALL REQUIREMENTS
WARNING: Do not wait for 911
Assist to make an emergency call if you
can do it yourself. Dial emergency
services immediately to avoid delayed
response time which could increase the
risk of serious injury or death after a
crash. If you do not hear 911 Assist within
five seconds of the crash, the system or
phone may be damaged or
non-functional.
WARNING: Always place your
phone in a secure location in your vehicle
so it does not become a projectile or get
damaged in a crash. Failure to do so may
cause serious injury to someone or
damage the phone which could prevent
911 Assist from working properly.
WARNING: Unless the 911 Assist
setting is set on before a crash, the
system will not dial for help which could
delay response time, potentially
increasing the risk of serious injury or
death after a crash.
• SYNC must be powered and working
properly at the time of the incident and
throughout feature activation and use.
• The 911 Assist feature must be set on
before the incident.
• You must pair and connect a
Bluetooth-enabled and compatible
cell phone to SYNC.
• A connected Bluetooth-enabled phone
must have the ability to make and
maintain an outgoing call at the time
of the incident.
68
F-150 (TFD) Canada/United States of America, enUSA, Edition date: 202007, First-Printing
911 Assist (If Equipped)
Page 72

• A connected Bluetooth-enabled phone
must have adequate network coverage,
battery power and signal strength.
• The vehicle must have battery power
and be located in the U.S., Canada or
in a territory in which 911 is the
emergency number.
Note: If any user sets 911 Assist to on or off,
that setting applies for all paired phones. If
911 Assist is off and the phone is connected
to SYNC, an icon displays on the status bar.
Note: Every phone operates differently.
While SYNC 911 Assist works with most
cellular phones, some may have trouble
using this feature.
EMERGENCY CALL LIMITATIONS
The SYNC 911 Assist feature only operates
in the U.S., Canada or in a territory in which
911 is the emergency number. The following
are limitations of this feature:
• Your cellular phone or 911 Assist
hardware sustains damage in a crash.
• The vehicle's battery or the SYNC
system has no power.
• The phone(s) thrown from your vehicle
are the ones paired and connected to
the system.
69
F-150 (TFD) Canada/United States of America, enUSA, Edition date: 202007, First-Printing
911 Assist (If Equipped)
Page 73
REMOTE CONTROL LIMITATIONS
WARNING: Changes or
modifications not expressively approved
by the party responsible for compliance
could void the user's authority to operate
the equipment. The term "IC:" before the
radio certification number only signifies
that Industry Canada technical
specifications were met.
This device complies with Part 15 of the
FCC Rules and with Industry Canada
license-exempt RSS standard(s).
Operation is subject to the following two
conditions: (1) This device may not cause
harmful interference, and (2) This device
must accept any interference received,
including interference that may cause
undesired operation.
Make sure a valid remote control is within
5 ft (1.5 m) from the front door handles
and rear of vehicle.
The system may not function if:
• The remote control remains stationary
for about a minute.
• The vehicle battery has no charge.
• The remote control battery has no
charge.
• There is interference causing issues
with the remote control frequencies.
• The remote control is too close to
metal objects or electronic devices, for
example keys or a cell phone.
USING THE REMOTE CONTROL
Use your remote control to access various
vehicle systems.
Note: The buttons on your remote may vary
depending on the vehicle region or options.
Unlock
E138629
Press the button to unlock all
doors. See Unlocking and
Locking the Doors Using the
Remote Control (page 84).
Lock
E138623
Press the button to lock all
doors. See Unlocking and
Locking the Doors Using the
Remote Control (page 84).
Remote Start (If Equipped)
E138625
Press the button to remote start.
See Remotely Starting and
Stopping the Vehicle (page
155).
Tailgate (If Equipped)
E191530
Press the button to open the
tailgate. See Opening the
Tailgate Using the Remote
Control (page 104).
Panic Alarm (If Equipped)
E138624
Press the button to sound the
panic alarm. See Sounding the
Panic Alarm (page 71).
OPENING AND CLOSING THE FLIP KEY
Opening Your Flip Key
Press the round button on the remote
control to extend the flip key.
70
F-150 (TFD) Canada/United States of America, enUSA, Edition date: 202007, First-Printing
Keys and Remote Controls
Page 74
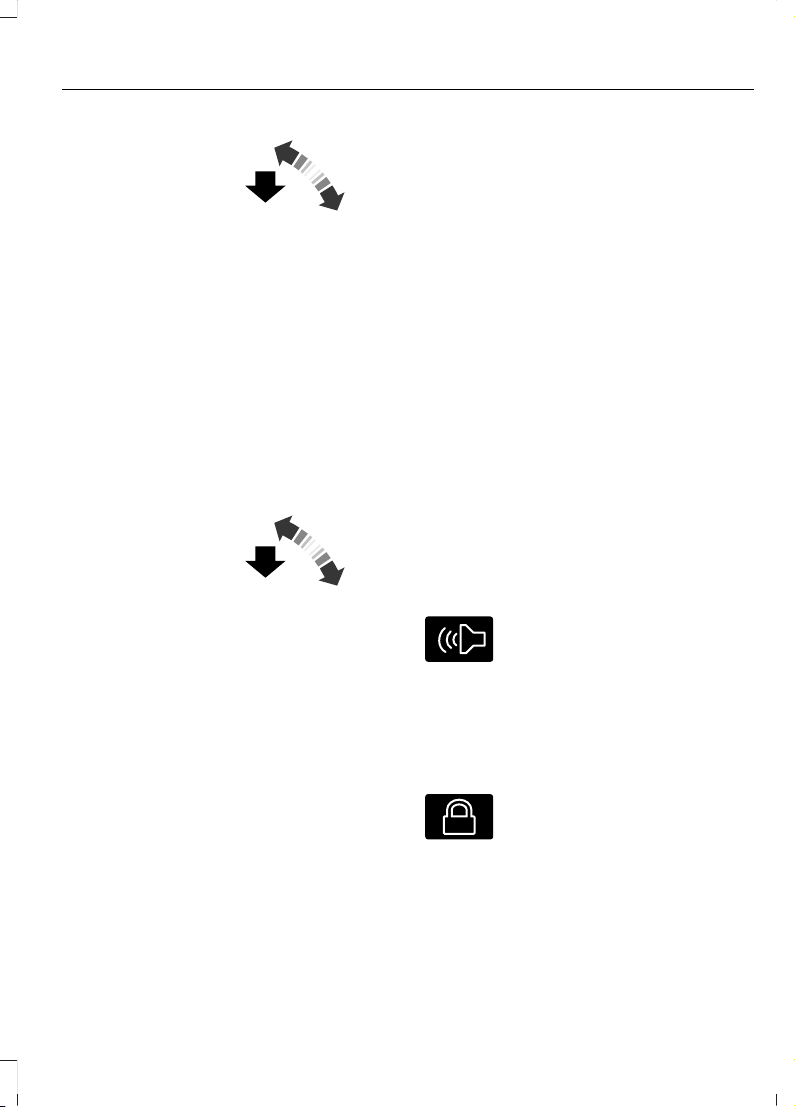
E191532
Note: Inspect the key blade for debris.
Periodically clean with a brush.
Closing Your Flip Key
Press and hold the round button on the
remote control to fold the key blade when
not in use.
E191532
REMOVING THE KEY BLADE
E322866
Push the release button on your passive
key and pull the key blade out.
SOUNDING THE PANIC ALARM
E138624
Press the button to sound the
panic alarm. Press the button
again, or switch the ignition on
to turn it off.
Note: The panic alarm only operates when
the ignition is off.
LOCATING YOUR VEHICLE
E138623
Press the lock button twice
within three seconds. The turn
signal lamps flash.
Note: We recommend you use this method
to locate your vehicle.
71
F-150 (TFD) Canada/United States of America, enUSA, Edition date: 202007, First-Printing
Keys and Remote Controls
Page 75
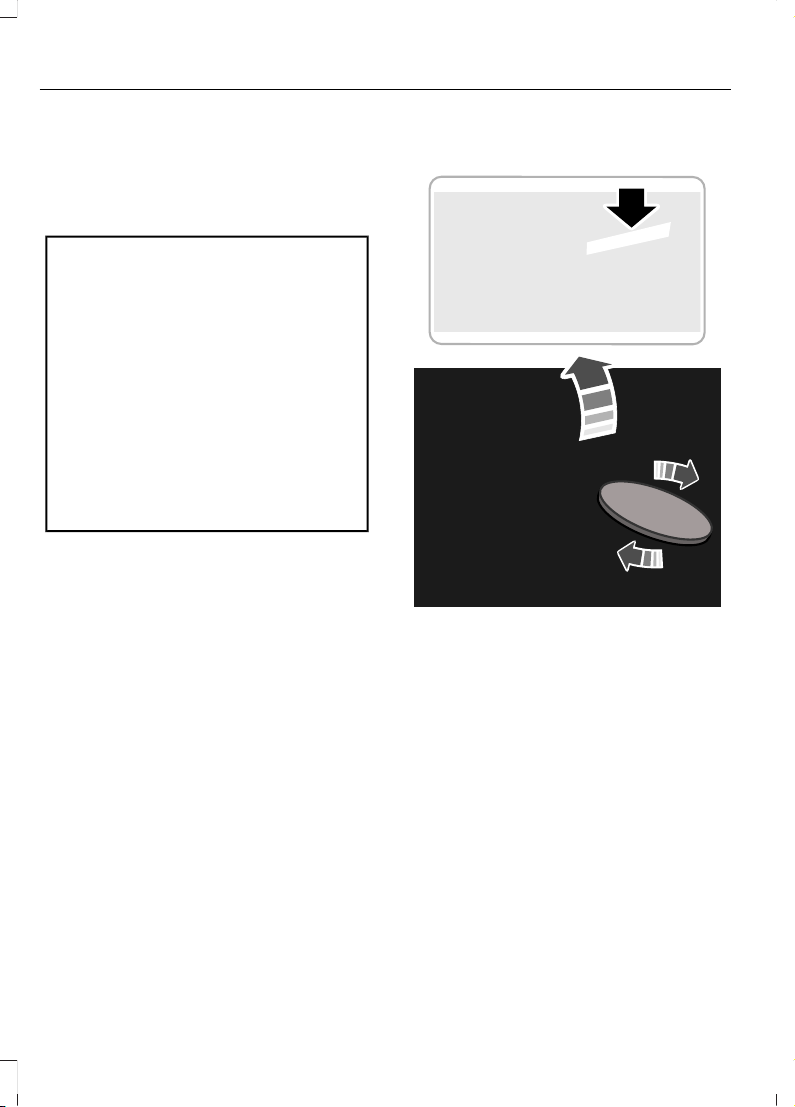
CHANGING THE REMOTE
CONTROL BATTERY VEHICLES WITH: PUSH
BUTTON START
WARNING: Keep batteries away
from children to prevent ingestion.
Failure to follow this instruction could
result in personal injury or death. If
ingested, immediately seek medical
attention.
WARNING: If the battery
compartment does not securely close,
stop using the remote control and
replace it as soon as possible. In the
meantime, keep the remote control away
from children. Failure to follow this
instruction could result in personal injury
or death.
The remote control uses one coin-type
3-volt lithium battery CR2450 or
equivalent.
E322866
1. Push the release button and pull the
key blade out.
E303824
2. Twist a thin coin under the tab hidden
behind the key blade head to remove
the battery cover.
72
F-150 (TFD) Canada/United States of America, enUSA, Edition date: 202007, First-Printing
Keys and Remote Controls
Page 76
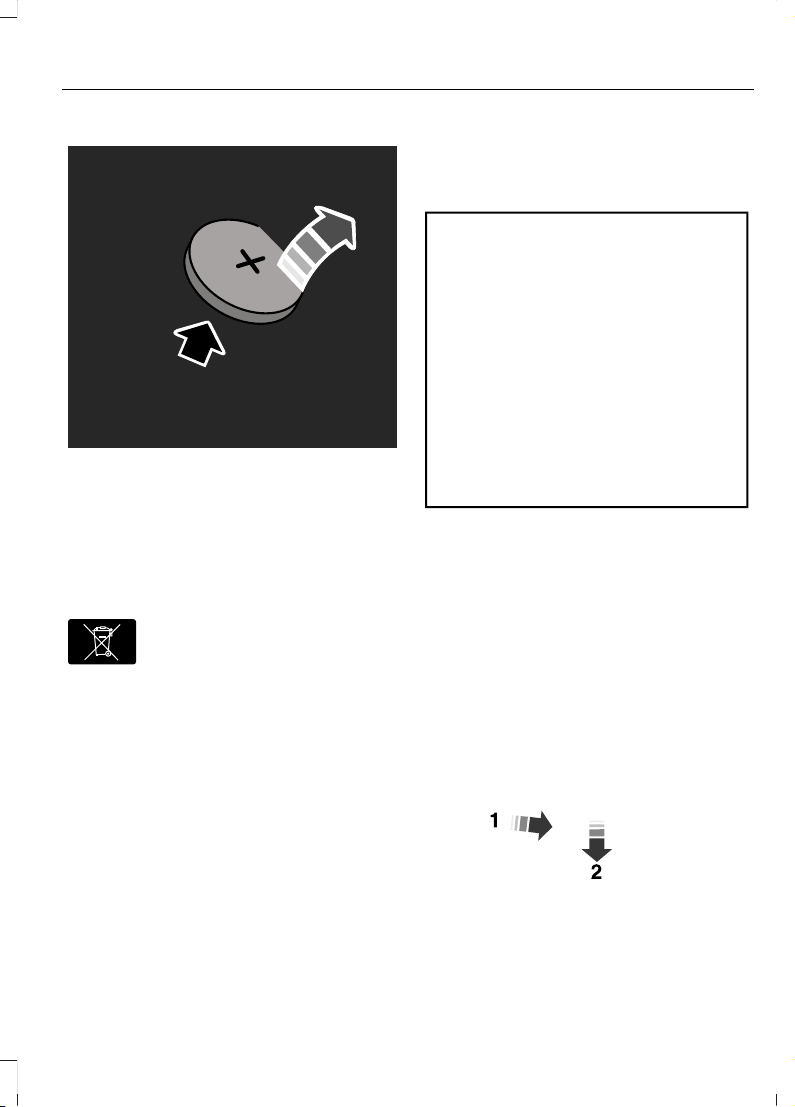
E218402
3. Insert a screwdriver, and carefully
remove the battery.
4. Install a new battery with the + facing
upward.
5. Reinstall the battery housing cover
onto the transmitter and install the key
blade.
E107998
Dispose of old batteries in an
environmentally friendly way.
Seek advice from your local
authority about recycling old batteries.
Note: Do not wipe off any grease on the
battery terminals or on the back surface of
the circuit board.
Note: Replacing the battery does not erase
the programmed key from your vehicle. The
remote control should operate normally.
CHANGING THE REMOTE
CONTROL BATTERY VEHICLES WITH: FLIP KEY
WARNING: Keep batteries away
from children to prevent ingestion.
Failure to follow this instruction could
result in personal injury or death. If
ingested, immediately seek medical
attention.
WARNING: If the battery
compartment does not securely close,
stop using the remote control and
replace it as soon as possible. In the
meantime, keep the remote control away
from children. Failure to follow this
instruction could result in personal injury
or death.
Battery Replacement Procedure
The remote control uses one coin-type
3-volt lithium battery CR2032 or
equivalent.
Press the button to release the key blade
before beginning the procedure.
E191533
1. Insert a screwdriver, in the position
shown and gently push the clip.
2. Press the clip down to release the
battery cover.
73
F-150 (TFD) Canada/United States of America, enUSA, Edition date: 202007, First-Printing
Keys and Remote Controls
Page 77
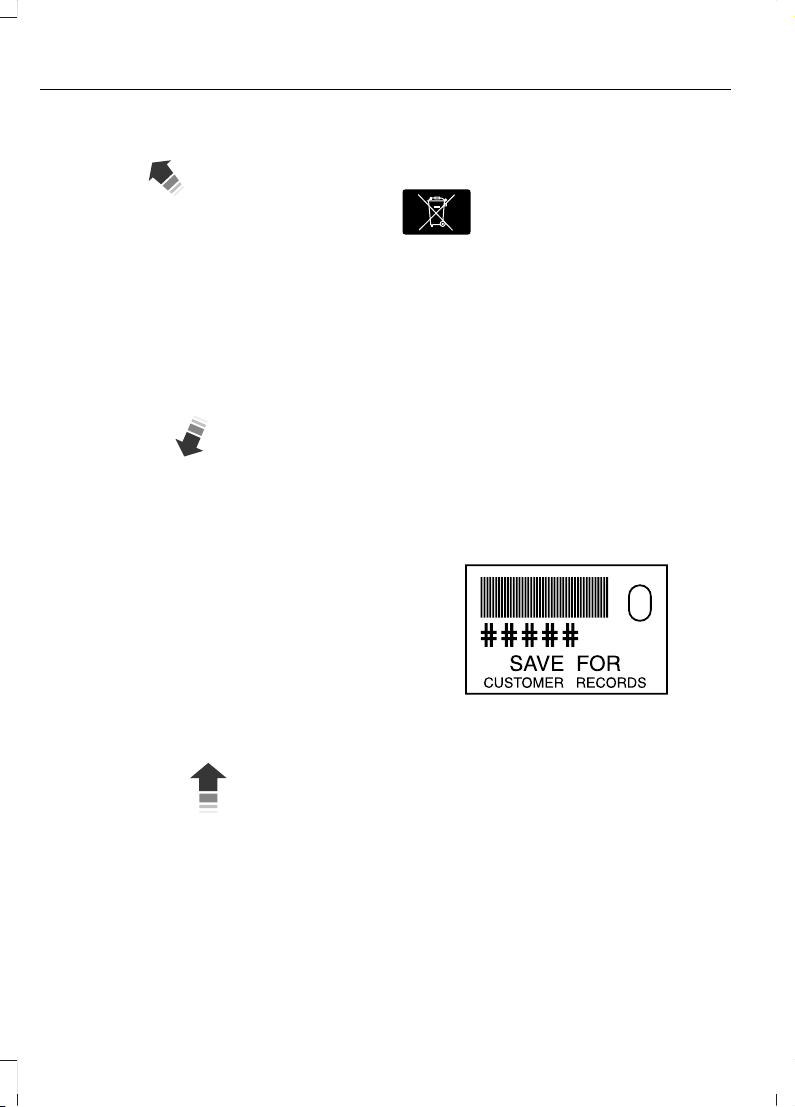
E151799
3. Carefully remove the cover.
E151800
4. Insert a screwdriver as shown to
release the battery.
E151801
Note: Do not touch the battery contacts or
the printed circuit board with the
screwdriver.
5. Remove the battery.
6. Install a new battery with the + facing
up.
7. Replace the battery cover.
E107998
Dispose of old batteries in an
environmentally friendly way.
Seek advice from your local
authority about recycling old batteries.
Note: Do not wipe off any grease on the
battery terminals or on the back surface of
the circuit board.
Note: Replacing the battery does not erase
the programmed key from your vehicle. The
remote control should operate normally.
REPLACING A LOST KEY OR REMOTE CONTROL
You can purchase replacement keys or
remote controls from an authorized dealer.
Authorized dealers can program remote
controls for your vehicle.
E151795
Note: Your vehicle keys came with a
security label that provides important key
cut information. Keep the label in a safe
place for future reference.
74
F-150 (TFD) Canada/United States of America, enUSA, Edition date: 202007, First-Printing
Keys and Remote Controls
Page 78

PROGRAMMING THE REMOTE CONTROL - VEHICLES WITH: PUSH BUTTON START
General Information
You must have two previously
programmed remote controls inside your
vehicle and the new unprogrammed
remote controls readily accessible. Contact
an authorized dealer to have the spare
remote control programmed if two
previously programmed remotes are not
available. Make sure that your vehicle is
off before beginning this procedure. Make
sure that you close all the doors before
beginning and that they remain closed
throughout the procedure. Perform all
steps within 30 seconds of starting the
sequence. Stop and wait for at least one
minute before starting again if you perform
any steps out of sequence.
Read and understand the entire procedure
before you begin.
Note: You can program a maximum of four
remote controls to your vehicle.
Note: If your programmed remote controls
are lost or stolen and you do not have an
extra coded remote, you need to have your
vehicle towed to an authorized dealer. Store
an extra programmed remote away from
your vehicle in a safe place to help prevent
any inconvenience. Contact an authorized
dealer to purchase additional spare or
replacement remotes.
Steps for Programming Your Spare
Remote Control
Note: Your vehicle is equipped with one of
the following center consoles.
Programming Backup Location
E312216
E269950
1. Place the first programmed remote in
the backup slot inside the center
console with your foot off the brake
pedal, press and release the push
button ignition switch.
2. Wait five seconds and then press and
release the push button ignition switch
again.
3. Remove the remote control.
4. Within 10 seconds, place a second
programmed remote control in the
backup slot. Press and release the
push button ignition switch.
5. Wait five seconds and then press and
release the push button ignition switch
again. Keep the ignition on for at least
three seconds, but no more than 10
seconds.
6. Remove the remote control.
75
F-150 (TFD) Canada/United States of America, enUSA, Edition date: 202007, First-Printing
Keys and Remote Controls
Page 79

7. Place the unprogrammed remote
control in the backup slot and press
and release the push button ignition
switch.
Programming is now complete. With your
foot on the brake pedal, press the push
button ignition switch to verify the remote
control functions operate and your vehicle
starts with the new remote control.
If programming was not successful, wait
10 seconds and repeat Steps 1 through 7.
If you are still unsuccessful, take your
vehicle to an authorized dealer.
PROGRAMMING THE REMOTE CONTROL - VEHICLES WITH: FLIP KEY
General Information
You can program your own remote control
to your vehicle. This procedure programs
both the engine immobilizer keycode and
the remote entry portion of the remote
control to your vehicle.
Only use remote controls with an
integrated mechanical key.
You must have two previously
programmed coded remote controls and
the new un–programmed remote readily
accessible. Contact an authorized dealer
to have the spare remote control
programmed if the two previously
programmed coded remote controls are
not available.
Read and understand the entire procedure
before you begin.
Steps for Programming Your Spare
Remote Control
1. Insert the first previously programmed
coded key into the ignition.
2. Switch the ignition from off to on. Keep
the ignition on for at least three
seconds, but no more than 10 seconds.
3. Switch the ignition off and remove the
first coded key from the ignition.
4. After three seconds but within 10
seconds of switching the ignition off,
insert the second previously coded key
into the ignition.
5. Switch the ignition from off to on. Keep
the ignition on for at least three
seconds, but no more than 10 seconds.
6. Switch the ignition off and remove the
second previously programmed coded
key from the ignition.
7. After three seconds but within 10
seconds of switching the ignition off
and removing the previously
programmed coded key, insert the new
un–programmed key into the ignition.
8. Switch the ignition from off to on. Keep
the ignition on for at least six seconds
until you hear the door locks cycle.
9. Remove the newly programmed coded
key from the ignition.
The key starts the engine if programming
is successful. You can operate the keyless
remote entry system with the new remote
control with integrated key.
If programming was not successful, wait
20 seconds and repeat Steps 1 through 8.
If you are still unsuccessful, take your
vehicle to an authorized dealer.
Note: You can program a maximum of six
coded remote controls to your vehicle.
76
F-150 (TFD) Canada/United States of America, enUSA, Edition date: 202007, First-Printing
Keys and Remote Controls
Page 80

KEYS AND REMOTE CONTROLS – TROUBLESHOOTING
Keys and Remote Controls – Information Messages
ActionMessage
Replace remote control battery.Key Battery Low Replace
Soon
77
F-150 (TFD) Canada/United States of America, enUSA, Edition date: 202007, First-Printing
Keys and Remote Controls
Page 81

WHAT IS MYKEY
MyKey
MyKey allows you to program keys with
restricted driving modes to promote good
driving habits.
MYKEY SETTINGS
Non-Configurable MyKey Settings
Seatbelt Reminder or BeltMinder™
MyKey mutes the audio system until the
front seat passengers buckle the front seat
belts.
Note: If your vehicle includes an AM/FM
radio or a very basic audio system, then the
radio may not mute.
Satellite Radio (If Equipped)
Some Satellite radio channels have
restricted access to adult radio content.
Early Low Fuel
The low fuel level warning lamp turns on
earlier.
Driving and Parking Aids
You cannot configure settings for parking
aids, blind spot information system, and
cross traffic alert. These systems turn on
when the vehicle turns on, and you cannot
switch them off with a MyKey.
You cannot configure settings for
pre-collision assist and lane keeping. These
systems turn on when the vehicle turns on,
but you can switch them off with a MyKey.
A new destination in the navigation system
can only be set using voice commands
when using a MyKey, and with your vehicle
moving.
Note: MyKey drivers may be able to switch
the lane departure warning feature off, but
this feature turns back on automatically
with every new key cycle.
Configurable MyKey Settings
You can configure the following settings
after creating a MyKey. See Creating a
MyKey (page 80).
Speed Limit
WARNING: Do not set MyKey
maximum speed limit to a limit that will
prevent the driver from maintaining a
safe speed considering posted speed
limits and prevailing road conditions. The
driver is always responsible to drive in
accordance with local laws and
prevailing conditions. Failure to do so
could result in accident or injury.
You can set a speed limit for your vehicle.
Warning messages appear in the
information display and a tone sounds if
your vehicle reaches the set speed. You
cannot override the set speed when using
a MyKey.
Speed Minder
You can set a speed reminder for your
vehicle. Warning messages appear in the
information display and a tone sounds if
your vehicle exceeds the set speed.
Audio System Volume Limit
The audio system maximum volume is
reduced. A message appears in the
information display if you attempt to
exceed the volume limit. Automatic
volume control turns off.
78
F-150 (TFD) Canada/United States of America, enUSA, Edition date: 202007, First-Printing
MyKey™ (If Equipped)
Page 82

Emergency Assistance
If you set emergency assistance to always
on, you cannot switch it off with a MyKey.
Do Not Disturb
If you set do not disturb to always on, you
cannot switch it off with a MyKey.
Note: If a phone is connected using Apple
CarPlay or Android Auto while driving with
a MyKey, the driver can receive phone calls
and text messages even if the do not disturb
restriction is on, and if the vehicle is
equipped with satellite radio, the adult
content is not restricted.
Traction Control
If you set traction control to always on, you
cannot switch it off with a MyKey.
CREATING A MYKEY VEHICLES WITH: PUSH
BUTTON START
Vehicles with a center console shifter:
E312216
1. Remove the mat from the center
console cup holder.
2. Remove the key blade from the
transmitter.
3. Place the remote control in the backup
slot with the buttons facing toward the
front of the vehicle.
4. Switch the ignition on using an admin
key.
5. Press Settings on the touchscreen.
6. Press Vehicle Settings.
7. Press MyKey.
8. Press Create MyKey.
9. Press Yes.
Note: After you confirm the creation of a
MyKey, we recommend that you label this
key.
Vehicles with a column shifter.
E269950
1. Raise the front center seat storage lid.
2. Place the remote control in the backup
slot with the buttons facing toward the
front of the vehicle.
3. Switch the ignition on using an admin
key.
4. Press Settings on the touchscreen.
5. Press Vehicle Settings.
6. Press MyKey.
7. Press Create MyKey.
8. Press Yes.
Note: After you confirm the creation of a
MyKey, we recommend that you label this
key.
79
F-150 (TFD) Canada/United States of America, enUSA, Edition date: 202007, First-Printing
MyKey™ (If Equipped)
Page 83

CREATING A MYKEY VEHICLES WITH: FLIP KEY
1. Switch the ignition on using an admin
key.
2. Press Settings on the touchscreen.
3. Press Vehicle Settings.
4. Press MyKey.
5. Press Create MyKey.
6. Press Yes.
Note: After you confirm the creation of a
MyKey, we recommend that you label this
key.
PROGRAMMING A MYKEY
You can program any remote control to
become a restricted MyKey, but you must
leave one unmodified as an admin key.
1. Switch the ignition on using an admin
key.
2. Press Settings on the touchscreen.
3. Press Vehicle Settings.
4. Press MyKey.
5. Select a setting and press the OK
button.
6. Configure the setting
CLEARING ALL MYKEYS
When you clear all MyKeys, you remove all
restrictions and return all MyKeys to their
original admin key status.
1. Switch the ignition on using an admin
key.
2. Press Settings on the touchscreen.
3. Press Vehicle Settings.
4. Press MyKey.
5. Press Clear All MyKeys.
6. Press Yes.
CHECKING MYKEY SYSTEM STATUS
You can find information about the
distance traveled using a MyKey, and the
number of admin keys and MyKeys created
for your vehicle.
1. Switch the ignition on.
2. Press Settings on the touchscreen.
3. Press Vehicle Settings.
4. Press MyKey.
5. Press MyKey Information.
USING MYKEY WITH REMOTE START SYSTEMS (IF EQUIPPED)
MyKey is not compatible with unapproved,
aftermarket remote start systems. If you
choose to install a remote start system,
see an authorized dealer for an approved
remote start system.
80
F-150 (TFD) Canada/United States of America, enUSA, Edition date: 202007, First-Printing
MyKey™ (If Equipped)
Page 84

MYKEY – TROUBLESHOOTING
MyKey – Information Messages - Vehicles With: Push Button Start
DescriptionMessage
Displays when trying to create a MyKey and the admin key is
not placed in the backup position. See Creating a MyKey
(page 79).
Place Key in Backup
Location
Displays when trying to create a MyKey with a key already
designated as a MyKey.
Key is Already a MyKey
Displays to confirm that the key is restricted after you switch
the ignition off.
This Key restricted at
Next Key Cycle. Label
Key as MyKey
81
F-150 (TFD) Canada/United States of America, enUSA, Edition date: 202007, First-Printing
MyKey™ (If Equipped)
Page 85

MyKey – Information Messages - Vehicles With: Flip Key
DescriptionMessage
Displays when trying to create a MyKey with a key already
designated as a MyKey.
Key is Already a MyKey
Displays to confirm that the key is restricted after you switch
the ignition off.
This Key restricted at
Next Key Cycle. Label
Key as MyKey
82
F-150 (TFD) Canada/United States of America, enUSA, Edition date: 202007, First-Printing
MyKey™ (If Equipped)
Page 86

MyKey – Frequently Asked
Questions - Vehicles With: Push
Button Start
What is an admin key?
An admin key is a key that you have
not created as a MyKey. See Creating
a MyKey (page 79).
Why am I not able to create a MyKey?
You have not placed the admin key in
the backup position. See Creating a
MyKey (page 79). The key used to
switch the ignition on is not an admin
key. The key used to switch the ignition
on is the only admin key. There has to
be at least one admin key. You did not
switch the ignition off after creating
the last MyKey.
Why am I not able to program a MyKey?
The admin key is not inside your
vehicle. The key used to switch the
ignition on is not an admin key. You
have not created any MyKeys. See
Creating a MyKey (page 79).
Why am I not able to clear the MyKeys?
The admin key is not inside your
vehicle. The key used to switch the
ignition on is not an admin key. You
have not created any MyKeys. See
Creating a MyKey (page 79).
Why is the MyKey distance not
accumulating?
The key used to start the engine is an
admin key. An admin key and a MyKey
are inside your vehicle. You have not
created any MyKeys. See Creating a
MyKey (page 79). You have cleared
the MyKeys. See Clearing All
MyKeys (page 80).
Why am I not able to start the engine
with a MyKey?
An admin key and a MyKey are inside
your vehicle. The system recognizes
only the admin key when both are
present.
MyKey – Frequently Asked
Questions - Vehicles With: Flip Key
What is an admin key?
An admin key is a key that you have
not created as a MyKey. See Creating
a MyKey (page 80).
Why am I not able to create a MyKey?
The key used to switch the ignition on
is not an admin key. The key used to
switch the ignition on is the only admin
key. There has to be at least one admin
key.
Why am I not able to program a MyKey?
The key used to switch the ignition on
is not an admin key. You have not
created any MyKeys. See Creating a
MyKey (page 80).
Why am I not able to clear the MyKeys?
The key used to switch the ignition on
is not an admin key. You have not
created any MyKeys. See Creating a
MyKey (page 80).
Why is the MyKey distance not
accumulating?
The key used to start the engine is an
admin key. You have not created any
MyKeys. See Creating a MyKey
(page 80). You have cleared the
MyKeys. See Clearing All MyKeys
(page 80).
83
F-150 (TFD) Canada/United States of America, enUSA, Edition date: 202007, First-Printing
MyKey™ (If Equipped)
Page 87
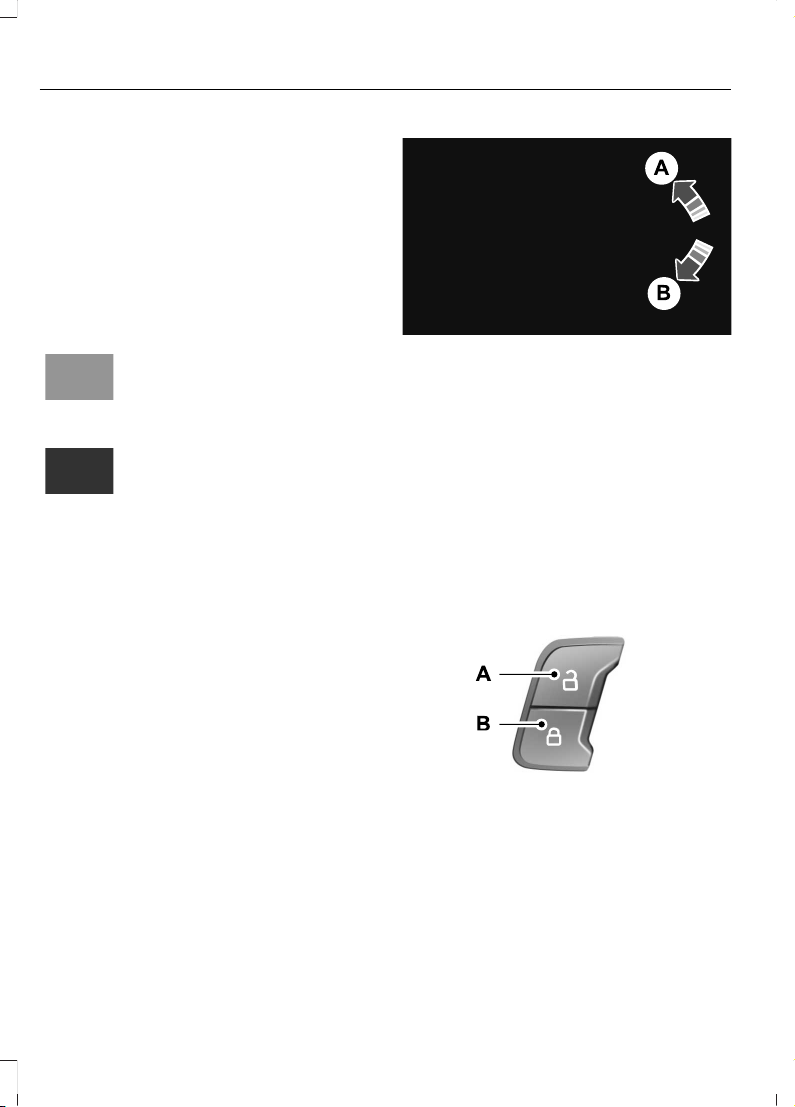
OPERATING THE DOORS FROM OUTSIDE YOUR VEHICLE
Unlocking and Locking the Doors
Using the Remote Control (If Equipped)
You can only use the remote control when
your vehicle is stationary.
Unlocking the Doors
E267112
Press the button to unlock all
doors.
Locking the Doors
E267111
Press the button to lock all
doors. One short flash of the
turn signal lamps confirms that
your vehicle has locked.
Note: For more information on operating
the doors from outside your vehicle
Unlocking and Locking the Doors
Using the Key Blade
If there is a power door lock fault you can
use the key blade to lock and unlock the
doors.
E333745
Lock.A
Unlock.B
OPERATING THE DOORS FROM INSIDE YOUR VEHICLE
Individually Unlocking and Locking
the Doors Using the Locking
Button
The power door lock control is on the driver
and front passenger door panels.
E138628
Unlock.A
Lock.B
84
F-150 (TFD) Canada/United States of America, enUSA, Edition date: 202007, First-Printing
Doors and Locks
Page 88

Opening the Doors From Inside
Your Vehicle - Crew Cab
Pull the interior door handle twice to
unlock and open a rear door. The first pull
unlocks the door and the second pull
opens the door.
AUTOUNLOCK (If Equipped)
What Is Autounlock
Autounlock is an unlocking feature that
unlocks the vehicle doors when your
vehicle comes to a stop.
Autounlock Requirements
Autounlock unlocks all the doors when all
of the following occur:
• The ignition is on, all the doors are
closed and your vehicle is moving at a
speed greater than 12 mph (20 km/h).
• Your vehicle comes to a stop.
• You open the driver door within 10
minutes of switching the ignition off or
to the accessory position.
Switching Autounlock On and Off
1. Press Settings on the touchscreen.
2. Press Vehicle Settings.
3. Switch Autounlock on or off.
AUTOLOCK (If Equipped)
What Is Autolock
Autolock is a locking feature that locks
your vehicle doors when you start driving.
Autolock Requirements
Autolock locks all the doors when all of the
following occur:
• All doors are closed.
• The ignition is on.
• Your vehicle reaches a speed greater
than 12 mph (20 km/h).
Switching Autolock On and Off
1. Press Settings on the touchscreen.
2. Press Vehicle Settings.
3. Switch Autolock on or off.
MISLOCK (If Equipped)
What Is Mislock
Mislock is a locking feature that warns you
if your vehicle has not locked.
Mislock Limitations
When you press the lock button once, the
direction indicators do not flash if:
• Any door or the tailgate is open.
• The hood is open.
If you switch mislock off, the horn does not
sound if you press the lock button on the
remote control when a door is open.
Switching Mislock On and Off
1. Press Settings on the touchscreen.
2. Press Vehicle Settings.
3. Switch Mislock Chirp on or off.
85
F-150 (TFD) Canada/United States of America, enUSA, Edition date: 202007, First-Printing
Doors and Locks
Page 89
DOORS AND LOCKS AUDIBLE WARNINGS
Door Ajar Audible Warning
Sounds when a door is not fully closed and
your vehicle is moving.
DOORS AND LOCKS – TROUBLESHOOTING
Doors and Locks – Warning Lamps
Door Ajar Warning Lamp
E249859
It illuminates when you switch
the ignition on and remains on if
any door or the hood is open.
Doors and Locks – Information Messages
ActionMessage
Displays if a door is open. Fully close the door.Driver Door Ajar
Passenger Door Ajar
Rear Left Door Ajar
Rear Right Door Ajar
86
F-150 (TFD) Canada/United States of America, enUSA, Edition date: 202007, First-Printing
Doors and Locks
Page 90

LOCATING THE KEYLESS ENTRY KEYPAD (IF EQUIPPED)
The keypad is near the driver window and
illuminates when you touch it.
KEYLESS ENTRY LIMITATIONS
Make sure your remote control is within 3 ft
(1 m) from the front door handles and the
tailgate.
The system could not function if:
• The remote control remains stationary
for about a minute.
• The vehicle battery has no charge.
• The remote control battery has no
charge.
• There is interference causing issues
with the remote control frequencies.
• The remote control is too close to
metal objects or electronic devices, for
example keys or a cell phone.
MASTER ACCESS CODE (If
Equipped)
What Is the Master Access Code
The master access code is a factory-set
five-digit entry code. You can operate the
keypad with the master access code at
any time. The master access code is on the
owner’s wallet card in the glove box and
is available from an authorized dealer.
KEYLESS ENTRY SETTINGS
Switching Keyless Entry On and
Off
1. Switch the ignition on using an original
key that has not been created as a
MyKey.
2. Press Settings on the touchscreen.
3. Press Vehicle Settings.
4. Press Locks.
Reprogramming the Unlocking
Function
You can enable two-stage unlocking
function allowing you to unlock only the
driver door when you touch the unlock
sensor.
Press and hold both the lock and unlock
buttons on the remote control for four
seconds to disable or enable two-stage
unlocking.
If you program the unlocking function so
that only the driver door unlocks, you can
unlock all of the other doors from inside
your vehicle using the power door lock
control. You can unlock individual doors
by pulling the interior door handles on
those doors.
87
F-150 (TFD) Canada/United States of America, enUSA, Edition date: 202007, First-Printing
Keyless Entry (If Equipped)
Page 91
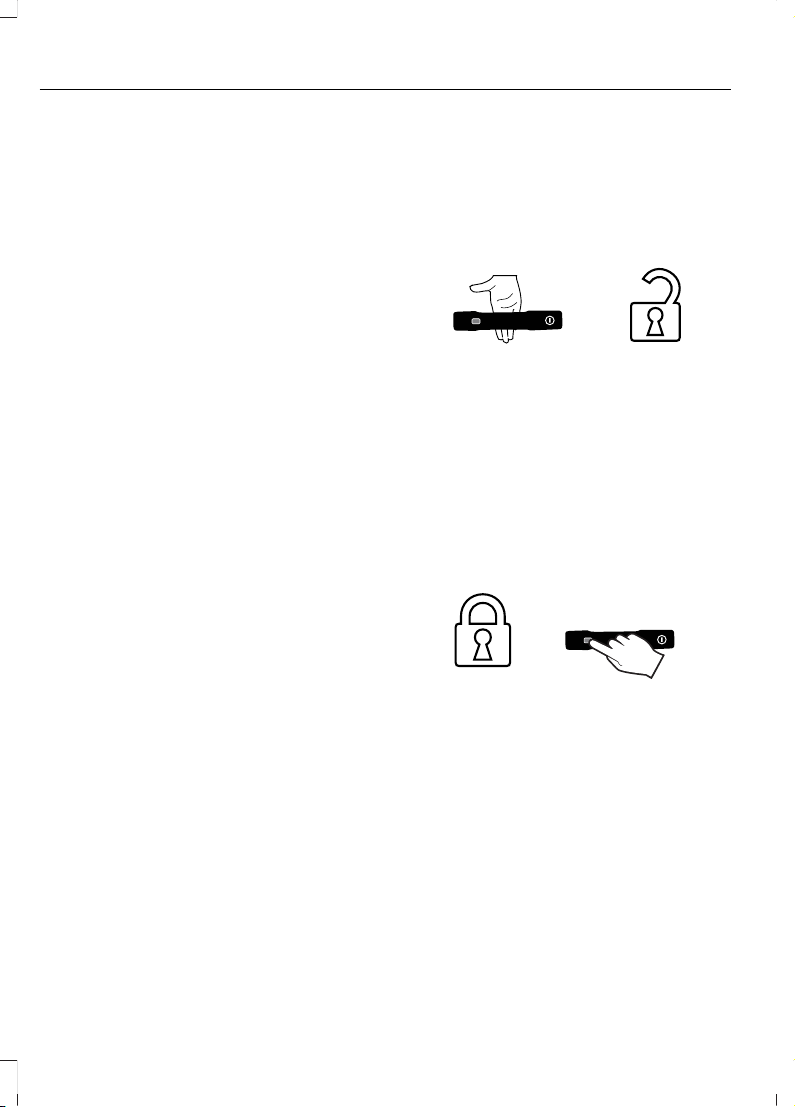
Creating Personal Access Codes
To create your own personal access code:
1. Enter the factory-set code.
2. Press 1·2 on the keypad within five
seconds.
3. Enter your personal five-digit code.
4. Press 1·2 on the keypad to save
personal code one.
The doors lock then unlock to confirm that
programming was successful.
To program additional personal access
codes, repeat Steps 1-3, then for Step 4:
• Press 3·4 to save personal code two.
• Press 5·6 to save personal code three.
• Press 7·8 to save personal code four.
• Press 9·0 to save personal code five.
Hints:
• Do not set a code that uses five of the
same number.
• Do not use five numbers in sequential
order.
• The factory-set code works even if you
have set your own personal code.
Clearing All Personal Access
Codes
1. Enter the factory-set five-digit code.
2. Press and release 1·2 on the keypad
within five seconds.
3. Press and hold 1·2 for a few seconds.
This must be done within five seconds
of completing Step 2.
All personal codes erase and only the
factory-set five-digit code works.
LOCKING AND UNLOCKING THE DOORS USING REMOTE KEYLESS ENTRY
Unlocking the Doors
E333747
With your passive key within 5 ft (1.5 m) of
your vehicle, touch the unlock sensor on
the back of the door handle for a brief
period and then pull on the door handle to
unlock, being careful not to touch the lock
sensor at the same time or pull on the door
handle too quickly. The intelligent access
system requires a brief delay to
authenticate your intelligent access key.
Locking the Doors
E333746
With your passive key within 3 ft (1 m) of
your vehicle, touch the outer door handle
lock sensor for approximately one second
to lock, being careful to not touch the
unlock sensor on the back of the door
handle at the same time. After locking, you
can immediately pull on the door handle
to confirm locking occurred without
inadvertently unlocking.
88
F-150 (TFD) Canada/United States of America, enUSA, Edition date: 202007, First-Printing
Keyless Entry (If Equipped)
Page 92

LOCKING AND UNLOCKING THE DOORS USING KEYLESS ENTRY KEYPAD
Unlocking the Doors
Enter the factory-set five-digit code or your
personal code. You must press each
number within five seconds of each other.
• Press 3-4 within five seconds to unlock
all doors.
• Press 5-6 within five seconds to release
or open the tailgate, if available.
Locking the Doors
Press and hold 7·8 and 9·0 at the same
time with the driver door closed.
Note: You do not need to enter the five digit
code first.
KEYLESS ENTRY – TROUBLESHOOTING
Keyless Entry – Frequently Asked
Questions
Why does the keypad not accept the
access code?
If you enter the access code too fast
on the keypad, the unlock function
may not work. Slowly re-enter the
access code.
Why does the passive key not work?
The system deactivates passive keys
left inside your vehicle when you lock
it. You cannot switch the ignition on
using a deactivated passive key. Press
the unlock button on the remote
control to reactivate a passive key.
Why does the keypad not function?
The keypad goes into an anti-scan
mode if you enter a wrong code seven
times. The anti-scan mode disables
the keypad for one minute and the red
light flashes.
89
F-150 (TFD) Canada/United States of America, enUSA, Edition date: 202007, First-Printing
Keyless Entry (If Equipped)
Page 93

HOW DOES EASY ENTRY AND EXIT WORK
Easy entry and exit moves the driver seat
rearward up to 2 in (5 cm) and the steering
column up when you switch the ignition
off. The driver seat and steering column
return to their previous positions when you
switch the ignition on.
Note: Depending on your vehicle, the
column may move up and in.
SWITCHING EASY ENTRY AND EXIT ON AND OFF
1. Press Settings on the touchscreen.
2. Press Vehicle.
3. Select Easy Entry/Exit.
If you press any adjustment or memory
button when in easy exit mode, the system
cancels the operation.
90
F-150 (TFD) Canada/United States of America, enUSA, Edition date: 202007, First-Printing
Easy Entry and Exit (If Equipped)
Page 94
OPENING THE TAILGATE
Opening the Tailgate From Outside
Your Vehicle
E333071
Pull up on the handle to release the
tailgate.
Note: You may need to unlock the tailgate
first.
LOCKING AND UNLOCKING THE TAILGATE
E332901
Lock.A
Unlock.B
1. Insert the ignition key into the tailgate
lock.
2. Turn it to the left to lock the tailgate.
3. Turn it to the right to unlock the
tailgate.
REMOVING AND INSTALLING THE TAILGATE
WARNING: Always properly secure
cargo to prevent shifting cargo or cargo
falling from the vehicle. Failure to do so
could result in compromised vehicle
stability and serious personal injury to
vehicle occupants or others.
Note: Skip to Step 4 if your vehicle does
not have power door locks.
E189556
1. Unlatch the tailgate.
2. Disconnect the power door locks in-line
connector. It is under the pickup box
on the right-hand side of the vehicle
near the spare tire.
3. Install a protective cap on the in-line
connector portion that remains under
the pickup box.
Note: A protective cap should be in the
glove compartment.
91
F-150 (TFD) Canada/United States of America, enUSA, Edition date: 202007, First-Printing
Tailgate - Vehicles With: Manual Tailgate
Page 95
4. Partially lower the tailgate. Carefully
feed the tailgate harness up through
the gap between the pickup box and
the bumper and place it out of the way
under the pickup box.
5. Lower the tailgate.
E311529
6. Use a screwdriver to gently pry the
spring clip on each connector past the
head of the support screw. Disconnect
the cable.
7. Disconnect the other cable.
Note: To avoid damaging the tailgate, you
may need assistance when removing. The
tailgate weighs approximately 97 lb (44 kg).
8. Lift the tailgate to 45 degrees from the
horizontal position.
9. Lift the right-hand side off its hinge.
10. Lift the tailgate to 80 degrees from
the horizontal position.
11. Remove the tailgate from the
left-hand side hinge by sliding it to
the right.
12. Install the tailgate in reverse order.
TAILGATE STEP (If Equipped)
Accessing the Tailgate Step
Integrated Tailgate Step
1. Lower the tailgate.
2. Push the button in the center of the
step molding. The step pops out
slightly.
E187718
3. Pull the step out fully. Lower the step
to its lowest position.
E189557
4. Pull the yellow handle stop backward
out of the tailgate until it fully extends.
5. To lock the handle in place, rotate the
handle up from the horizontal to the
vertical position until you hear a click.
Note: Do not tow with the step or grab
handle.
Replace the slip resistance tape or grab
handle molding if it appears as worn or
damaged.
92
F-150 (TFD) Canada/United States of America, enUSA, Edition date: 202007, First-Printing
Tailgate - Vehicles With: Manual Tailgate
Page 96
To reduce the risk of falling:
• Only operate the step when your
vehicle is on a level surface.
• Only operate the step in areas with
sufficient lighting.
• Make sure you use the grab handle
when climbing on the step.
• Do not use the step with bare feet.
• Make sure the step is clean before use.
• Keep the step load below the total
maximum load of 350 lb (159 kg).
Stowing the Tailgate Step
1. Press the yellow button on the handle
to lower and then press the yellow
lever at the bottom of the handle to
unlock. Rotate the handle down from
the vertical to the horizontal position
and push it into the tailgate.
2. Rotate the step up until it is horizontal,
then push it back into the tailgate until
the step is secure.
Note: Make sure to close and fully latch the
step before moving your vehicle. Do not
drive with the step or grab handle open.
Note: The power tailgate cannot close if
the step is opened. A warning message
appears and a chime sounds. After stowing
step the power close function is restored.
BED EXTENDER (If Equipped)
Bed Extender Precautions
Note: Do not use the bed extender when
driving off road.
Note: Make sure to engage the locking pins
and knobs fully before driving your vehicle.
Note: Make sure to secure all cargo.
Note: Do not exceed 150 lb (68 kg) on the
tailgate when your vehicle is moving.
Note: Do not keep the bed extender in the
tailgate mode when you are not using it for
restraining cargo. Always keep the bed
extender in the grocery mode or the stowed
position with the tailgate closed.
Using the Bed Extender
E311521
1. Pull the locking pin toward the center
of your vehicle.
93
F-150 (TFD) Canada/United States of America, enUSA, Edition date: 202007, First-Printing
Tailgate - Vehicles With: Manual Tailgate
Page 97
E311522
2. Open the latches to release the panels.
A
B
A
203
A
A
E311523
3. Rotate the panels toward the tailgate.
Repeat steps 1-3 on the other side of
your vehicle.
E311524
4. Connect the two panels. Rotate both
knobs one-quarter turn clockwise to
secure the panels.
E311520
5. Insert the latch rod into the tailgate
hole.
6. Engage both sides of the locking pins
into their holes in the pick-up box.
94
F-150 (TFD) Canada/United States of America, enUSA, Edition date: 202007, First-Printing
Tailgate - Vehicles With: Manual Tailgate
Page 98
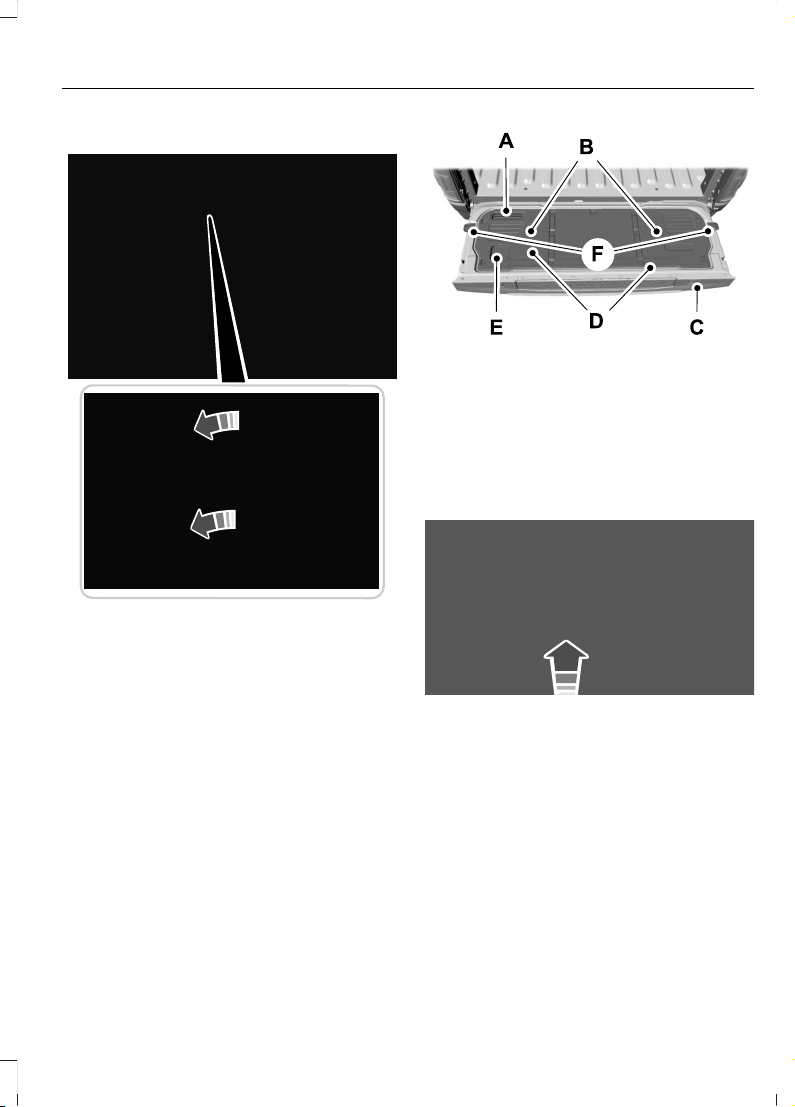
Grocery Mode
E311519
1. Follow steps 1-4.
2. Before engaging the locking pins, rotate
the panels away from the tailgate.
3. Engage both sides of the locking pins
into their holes in the pick-up box.
4. Close the tailgate.
TAILGATE WORK SURFACE (IF
EQUIPPED)
The tailgate work surface is a durable and
functional surface on the inside portion of
your tailgate you can use to perform
various tasks.
To use the tailgate work surface, fold down
the tailgate.
E308677
Tablet stand.A
Tool inset.B
Clamp pocket.C
Standard and metric ruler.D
Cup holder.E
Tailgate anchors.F
E336605
The tailgate work surface contains clamp
pockets that allows you to secure work
material.
Note: When you have finished using the
tailgate work surface, make sure you remove
all of your belongings, then close the
tailgate.
95
F-150 (TFD) Canada/United States of America, enUSA, Edition date: 202007, First-Printing
Tailgate - Vehicles With: Manual Tailgate
Page 99

OPENING THE TAILGATE
Opening the Tailgate From Inside
Your Vehicle
The vehicle must be in park (P) to operate
the power tailgate.
E308661
Press the button on the
instrument panel.
Note: A tone sounds while the tailgate
opens.
Note: The tailgate stops and reverses if it
detects an obstruction when opening.
Note: An alert sounds if the electronic
tailgate is disabled.
Opening the Tailgate From Outside
Your Vehicle
1. Unlock the vehicle with the remote
control or power door unlock control.
Note: If an intelligent access transmitter is
within 3 ft (1 m) of the tailgate, the tailgate
unlocks when you press the tailgate release
button.
E187693
2. Press the button in the top of the
tailgate handle.
Opening the Tailgate Using the
Remote Control
E191530
Press the remote control button
twice within three seconds.
CLOSING THE TAILGATE
Closing the Tailgate From Inside
Your Vehicle
E308661
Press the button on the
instrument panel.
Note: The tailgate stops and reverses if it
detects an obstruction when closing.
Closing the Tailgate From Outside
Your Vehicle
You can close the power tailgate by:
• Pressing the tailgate button on your
remote control twice within three
seconds.
• Pressing the button on the instrument
panel.
• Pressing the button on the tailgate.
Note: The tailgate stops and reverses if it
detects an obstruction when closing.
Lift-to-Close
To close the tailgate automatically using
lift-to-close, lift the tailgate approximately
4 in (10 cm) and hold it for a few seconds.
Note: If the tailgate position is more than
halfway between open and close, it may not
close automatically.
Manual Close
You can close the tailgate manually when
you lift the tailgate in a continuous motion.
96
F-150 (TFD) Canada/United States of America, enUSA, Edition date: 202007, First-Printing
Tailgate - Vehicles With: Power Tailgate
Page 100
If you stop the tailgate motion, the
lift-to-close feature can engage and power
close the tailgate.
Putting the Tailgate in Manual Mode
You can put the tailgate in manual mode
through the vehicle settings in your
touchscreen.
Note: In manual mode, the tailgate only
functions by the tailgate release button and
messaging is reduced.
Closing the Tailgate Using the
Remote Control
E191530
Press the remote control button
twice within three seconds.
REMOVING AND INSTALLING THE TAILGATE
WARNING: Always properly secure
cargo to prevent shifting cargo or cargo
falling from the vehicle. Failure to do so
could result in compromised vehicle
stability and serious personal injury to
vehicle occupants or others.
E189556
1. Put the tailgate into manual mode by
accessing the vehicle settings using the
touchscreen.
2. Open the tailgate.
3. Disconnect the power door locks in-line
connector. It is under the pickup box
on the right-hand side of the vehicle
near the spare tire.
4. Install a protective cap on the in-line
connector portion that remains under
the pickup box.
Note: The protective cap is in the glove
compartment.
5. Partially raise the tailgate. Carefully
feed the tailgate harness up through
the gap between the pickup box and
the bumper and place it out of the way
under the pickup box.
6. Fully lower the tailgate.
E310339
7. Remove the retaining screw.
97
F-150 (TFD) Canada/United States of America, enUSA, Edition date: 202007, First-Printing
Tailgate - Vehicles With: Power Tailgate
 Loading...