


 Loading...
FontLab® 4.6
for Windows®
User Manual

FontLab 4
Copyright ©1992-2003 by FontLab, Ltd. All rights reserved.
No part of this publication may be reproduced, stored in a retrieval system, or transmitted, in any form or by any means, electronic, mechanical, photocopying, recording, or otherwise, without the prior written consent of the publisher. Any software referred to herein is furnished under license and may only be used or copied in accordance with the terms of such license.
FontLab, FontLab logo, ScanFont, TypeTool, SigMaker, AsiaFont Studio, FontAudit and VectorPaint are either registered trademarks or trademarks of FontLab, Ltd. in the United States and/or other countries.
Apple, the Apple Logo, Mac, Mac OS, Macintosh and TrueType are trademarks of Apple Computer, Inc., registered in the United States and other countries.
Adobe, PostScript, Type Manager and Illustrator are trademarks of Adobe Systems Incorporated which may be registered in certain jurisdictions.
Windows, Windows 95, Windows 98, Windows XP and Windows NT are either registered trademarks or trademarks of Microsoft Corporation in the United States and/or other countries.
IBM is a registered trademark of International Business Machines Corporation.
Macromedia, Fontographer and Freehand are registered trademarks of Macromedia, Inc.
Other brand or product names are the trademarks or registered trademarks of their respective holders.
THIS PUBLICATION AND THE INFORMATION HEREIN IS FURNISHED AS IS, IS SUBJECT TO CHANGE WITHOUT NOTICE, AND SHOULD NOT BE CONSTRUED AS A COMMITMENT BY FONTLAB, LTD.
FONTLAB, LTD. ASSUMES NO RESPONSIBILITY OR LIABILITY FOR ANY ERRORS OR INACCURACIES, MAKES NO WARRANTY OF ANY KIND (EXPRESS, IMPLIED OR STATUTORY) WITH RESPECT TO THIS PUBLICATION, AND EXPRESSLY DISCLAIMS ANY AND ALL WARRANTIES OF MERCHANTABILITY, FITNESS FOR PARTICULAR PURPOSES AND NONINFRINGEMENT OF THIRD PARTY RIGHTS.
User manual release 4.60 [8/2003]
2

Contents
Contents
CONTENTS |
3 |
INTRODUCTION |
15 |
About this Manual |
16 |
System Requirements |
18 |
FONTLAB USER INTERFACE |
19 |
Basic Terms |
20 |
Getting Started |
24 |
Customizing FontLab’s User Interface |
26 |
Customizing Toolbars |
27 |
Customizing Menus |
29 |
Customizing Individual Items |
30 |
Converting a Menu to a Toolbar |
32 |
Customization of the Keyboard |
33 |
Links to External Programs |
35 |
Faster Method to Customize Commands |
36 |
FontLab Windows |
37 |
Font Window |
38 |
Glyph Window |
40 |
Metrics Window |
44 |
Panels |
48 |
EDITING FONTS |
51 |
Opening Fonts |
52 |
Font Formats |
55 |
Import Options |
56 |
Creating a New Font |
61 |
The Font Window |
62 |
Encoding Modes |
66 |
Characters, Codes and Glyphs |
67 |
Names Mode |
71 |
The Unicode Standard |
74 |
3

FontLab 4
Unicode Ranges |
75 |
Codepages |
78 |
Using the Font Window |
82 |
Navigating |
83 |
Selecting |
84 |
Context Menu |
85 |
Moving Glyphs |
88 |
Saving the Font |
90 |
Autosave |
92 |
Copying and Pasting Glyphs |
93 |
The Paste Special Command |
94 |
Copying Glyphs to Another Font |
95 |
Appending Glyphs to the Font |
96 |
Copying Composite Glyphs |
97 |
Duplicating Unicode Indexes |
98 |
Deleting Glyphs |
99 |
Creating New Glyphs |
100 |
Highlighting Glyphs |
101 |
Marking Glyphs |
101 |
Glyph Collection |
103 |
Searching for Glyphs |
106 |
Renaming Glyphs |
108 |
Reencoding the Font |
110 |
Unicode-Related Operations |
113 |
Generating Unicode Indexes |
113 |
Generating Names |
115 |
Removing Unicode Information |
116 |
The Font Map Panel |
117 |
Managing Double-Byte Codepages |
119 |
Notes |
120 |
Sorting Glyphs |
121 |
Working with Multiple Fonts |
122 |
Windows List |
123 |
Fonts Panel |
124 |
Merging Fonts |
126 |
Saving and Opening a Workspace |
127 |
Applying Actions |
128 |
Blending Fonts |
129 |
Exporting and Printing |
132 |
4

Contents
Font Formats |
132 |
Export Options |
135 |
Type 1 Export Options |
137 |
TrueType Export Options |
141 |
OpenType Export Options |
146 |
Recommended Export Options |
148 |
Printing Fonts |
149 |
Font Window Options |
151 |
View Options |
152 |
Tuning Options |
153 |
THE FONT HEADER |
155 |
Font Info Dialog Box |
156 |
Command Bar |
158 |
Copying Font Info |
159 |
Font Names |
160 |
Basic Identification and Names |
161 |
Accessing MyFonts.com Database |
164 |
OpenType-Specific Names |
166 |
Non-English and Special Names |
167 |
Copyright Information |
171 |
Font Embedding |
172 |
Designer Information |
173 |
License Information |
174 |
Font Identification |
175 |
Version Information |
175 |
Basic Font Identification |
176 |
PANOSE™ Identification |
178 |
Other Identification Systems |
180 |
Metrics and Dimensions |
182 |
Font UPM Value |
182 |
Basic Font Dimensions |
183 |
Advanced Vertical Metrics |
184 |
Superscript and Subscript |
187 |
Encoding and Unicode |
188 |
Supported Codepages |
189 |
Supported Unicode Ranges |
191 |
Hinting Settings |
192 |
Alignment Zones |
193 |
Type 1 Standard Stems |
195 |
Global Hinting Parameters |
197 |
Format-Specific Options |
199 |
Type 1 Export Options |
200 |
TrueType Export Options |
201 |
TrueType Mapping Settings |
202 |
Device-Dependent Metrics |
203 |
5

FontLab 4
Font Smoothing Control |
205 |
[head] Table Settings |
207 |
Basic PCLT options |
208 |
PCLT Identification |
209 |
PCLT Metrics and Font Description |
210 |
PCLT Codepages |
211 |
THE GLYPH WINDOW |
213 |
Glyph Window Contents |
214 |
The Glyphs Bar |
217 |
Selecting a Glyph for Editing |
219 |
Changing the View in the Glyph Window |
220 |
Quick Zoom Selection |
222 |
Tools and Operations |
224 |
Edit Mode |
226 |
Editing Layers |
228 |
Easier Way to Control Editing Layers |
231 |
Outline Layer |
232 |
Contours |
234 |
Outline Appearance |
240 |
FontAudit |
245 |
Moving Nodes |
248 |
Using the Keyboard |
251 |
Non-node editing |
252 |
Changing Connection Type |
254 |
Deleting Nodes |
255 |
Deleting Lines and Curves |
256 |
Eraser Tool |
257 |
Inserting Nodes |
258 |
Using the Drawing Tool |
259 |
Adding Points to a Contour |
261 |
Converting Primitives |
262 |
Breaking and Joining Outlines |
263 |
Node Commands |
264 |
Node Properties |
266 |
Previewing Glyphs |
268 |
Selections |
276 |
Using the Magic Wand Tool |
277 |
Moving the Selection |
278 |
Copying the Selection |
278 |
Transforming the Selection |
281 |
Selection Commands |
285 |
Selection Properties Panel |
286 |
Transformation Panel |
287 |
Find and Replace Operation |
289 |
Building an Outline From Blocks |
291 |
6

Contents
Outline Actions |
296 |
Creating Contours |
297 |
Merging and Intersecting Contours |
301 |
Outline Optimization |
302 |
Metrics |
303 |
Editing Metrics |
304 |
Baseline Properties Panel |
306 |
Metrics Properties Panel |
306 |
Grid Layer |
307 |
Guidelines Layer |
308 |
Editing Guidelines |
309 |
Guidelines Popup Menu |
311 |
Guidelines Tracking |
312 |
Guidelines Properties Panel |
313 |
Mask Layer |
314 |
Editing Mask |
315 |
Mask Operations |
316 |
Assigning a Mask |
317 |
Specifying Mask Appearance |
318 |
Template Layer |
320 |
Background Layer |
321 |
Background Positioning |
323 |
Hints And Links Layer |
324 |
Links |
325 |
Editing Hints |
326 |
Hints Tracking |
327 |
Editing Links |
328 |
Hint and Link Popup Menu |
329 |
Hint Commands |
330 |
Autohinting Options |
331 |
Hint Properties Panel |
333 |
Link Properties Panel |
333 |
Anchors Layer |
334 |
Moving Anchors |
335 |
Removing Anchors |
335 |
Renaming Anchors |
335 |
Changing Anchor Color |
335 |
Anchor Properties |
336 |
Using Anchors to Build Composites |
337 |
Using the Anchors Panel |
340 |
Creating Composites and Ligatures |
342 |
Aliases Table |
344 |
Vertical Metrics |
345 |
Alignment Zones |
346 |
7

FontLab 4
Sketch Mode |
347 |
Moving Points |
350 |
Changing Point Type |
350 |
Removing Points |
350 |
Inserting Points |
351 |
Reversing Contours |
351 |
Selecting Points |
352 |
Moving the Selection |
353 |
Transforming the Selection |
353 |
Selection Operations |
354 |
Breaking and Joining the Sketch Outline |
354 |
Converting to Outline |
355 |
VectorPaint Mode |
356 |
Freehand Select Tool |
358 |
Pen (Contour) Tool |
359 |
Brush Tool |
360 |
VectorPaint Options |
362 |
Line Tool |
363 |
Polygon Tool |
364 |
Ellipse and Rectangle Tools |
365 |
Text Tool |
366 |
Meter Mode |
367 |
Setting Guidelines, Anchors and Sidebearings |
369 |
Outline Operations |
370 |
Interpolation |
371 |
Envelope |
375 |
Curve |
378 |
Set |
379 |
Reversing a Contour’s Direction |
380 |
Rearranging Contours |
381 |
Working with Composite Glyphs |
382 |
Adding a Component |
383 |
Decomposing |
384 |
Component Positioning |
384 |
Component Properties |
387 |
Using the Primitives Panel |
388 |
Importing and Exporting Glyphs |
391 |
Printing a Glyph |
393 |
EDITING FONT METRICS |
395 |
What are Font Metrics? |
396 |
8

Contents
Kerning |
397 |
Metrics Files |
398 |
Metrics Window |
399 |
Selecting a String for Previewing or Metrics Editing |
402 |
Editing an Underline |
407 |
Editing Metrics |
408 |
Manual Metrics Editing |
409 |
Using the Keyboard |
410 |
Using the Metrics Table |
411 |
The Measurement Line |
413 |
Automatic Metrics Generation |
414 |
Quick Save and Quick Open |
416 |
Editing Kerning |
417 |
Manual Kerning Editing |
418 |
Using the Keyboard |
419 |
Using the Table |
420 |
Using the Kerning Dialog |
421 |
Automatic Kerning Generation |
423 |
Resetting Kerning |
425 |
Adjusting Metrics and Kerning |
426 |
Class-Based Kerning |
428 |
Classes Panel |
429 |
Class Definition |
431 |
Defining the Class |
432 |
Key Glyph |
433 |
Editing Class-Based Kerning |
434 |
Kerning Assistance |
435 |
Metrics Assistance |
438 |
Class-Based Kerning and OpenType Fonts |
440 |
Opening Metrics Files |
441 |
Saving Metrics Files |
443 |
Printing a Sample String |
444 |
TRANSFORMATIONS |
445 |
The Transform Dialog Box |
446 |
Transformation Actions |
448 |
Outline Transformation |
449 |
Hints and Guidelines Transformation |
457 |
Metrics Transformation |
459 |
Effects |
462 |
Transform Range Dialog Box |
468 |
Transformation Range |
469 |
9

FontLab 4
Transformation Program |
471 |
Using the Preview Window |
472 |
Saving and Opening a Transformation Program |
473 |
Transforming Fonts |
474 |
HINTING |
477 |
Font Scaling, PPM |
478 |
Coordinate Rounding, Gridfitting |
479 |
TrueType And Type 1 Hints |
480 |
Type 1 Hints |
481 |
Font-Level Type 1 Hints |
482 |
Alignment Zones |
483 |
Standard Stem Widths |
487 |
Additional Control Data |
490 |
Stem Hint Programming |
492 |
Type 1 Hinting Tool |
495 |
Inserting And Removing Replacement Points |
497 |
Adding and removing hints |
498 |
Editing Hints |
499 |
Autoreplacing |
500 |
Preview Panel |
500 |
Some Examples |
505 |
TrueType Instructions |
506 |
Font Parameters |
508 |
Visual TrueType Hints |
509 |
TrueType Hinting Tool |
510 |
Toolbar |
512 |
Layers |
514 |
Options Panel |
515 |
TrueType Preview Panel |
516 |
Program Panel |
518 |
Alignment Instructions |
521 |
Alignment Zones |
521 |
AlignTop and AlignBottom Instructions |
522 |
Hinting Alignment Zones |
523 |
Align Instruction |
524 |
Links |
527 |
Standard Stems |
528 |
Single Links |
529 |
10
Contents
Double Links |
534 |
Interpolation |
538 |
Delta Instructions |
540 |
Middle Delta Instructions |
541 |
Final Delta Instructions |
546 |
Removing Instructions |
548 |
Standard Stems |
549 |
Advanced Options |
554 |
Context Menu |
555 |
Hinting Sidebearings |
561 |
Hinting Composite Glyphs |
562 |
Automatic TrueType Hinting |
563 |
Working With Bitmaps |
564 |
Importing Bitmaps |
565 |
Editing Bitmaps |
566 |
Highlight Differences |
568 |
Exporting Bitmaps |
569 |
Hinting Strategies |
570 |
Middle Delta or Final Delta |
570 |
Single Link or Double Link |
572 |
Hinting White Space |
574 |
Hinting Serifs |
576 |
Hinting Diagonals |
577 |
Hinting Symmetrical Characters |
578 |
Interpolate or Not |
579 |
MULTIPLE MASTER FONTS |
581 |
Multiple Master Fonts Theory |
582 |
Design Axes and Dynamic Range |
584 |
Standard Axes |
586 |
Design Coordinates and Weight Vectors |
589 |
Extrapolation |
591 |
Anisotropic Interpolation |
592 |
The Axis Graph |
593 |
Multiple Master Fonts in FontLab |
594 |
Creation of MM Fonts in FontLab |
595 |
Defining an Axis |
596 |
Selecting a Master Font |
598 |
Using an Axis Panel |
600 |
Previewing the Intermediate Design |
604 |
Designing Master Fonts |
605 |
Multiple Master Metrics |
614 |
11

FontLab 4
Editing Axis Settings |
615 |
Removing an Axis |
616 |
Multiple Master and Font Info |
617 |
Multiple Master Font Metrics |
619 |
Editing the Axis Graph |
620 |
Generating a Single-Master Font |
623 |
Expanding the Master |
624 |
Hinting Multiple Master Fonts |
625 |
Generating a Multiple Master Type 1 Font |
626 |
OPENTYPE FONTS |
627 |
Font Features |
628 |
Features and Lookups |
630 |
Scripts and Languages |
631 |
OpenType Font Formats |
632 |
OpenType Tables |
634 |
Feature Definition Language |
635 |
Language Syntax |
636 |
OpenType and FontLab |
647 |
Importing OpenType Fonts |
648 |
OpenType Panels |
649 |
OpenType Panel |
649 |
Adding and Removing Features |
651 |
Reordering Features |
652 |
Entering the Glyph and Class Names |
653 |
Renaming Glyphs and Classes |
654 |
Compiling the Feature Definitions |
655 |
The Output Panel |
657 |
OpenType Features Preview Panel |
658 |
Converting the Kerning |
660 |
Feature Development Process |
661 |
Substitution Lookups |
662 |
Single Substitution |
663 |
Ligature Substitution |
665 |
Alternate Substitution |
667 |
Context-Dependent Substitutions |
668 |
Positioning Lookups |
672 |
Glyph Geometry |
673 |
Value Record |
674 |
Single Positioning |
675 |
Pair Positioning |
676 |
Known Features |
679 |
OpenType Glyph Properties |
683 |
Caret Positioning |
684 |
12

Contents
Exporting OpenType Fonts |
685 |
FontLab and VOLT |
687 |
MACRO PROGRAMMING |
689 |
The Python Programming Language |
690 |
Installing Python |
691 |
Macro Toolbar |
692 |
Assign to Keyboard |
694 |
Integrating into Menus |
695 |
Macro Tool |
696 |
Edit Macro Panel |
697 |
Naming the Programs |
698 |
First Steps |
699 |
FontLab Python Classes |
701 |
FontLab |
702 |
Font |
704 |
Glyph |
706 |
INDEX |
709 |
13

Introduction
Introduction
Thank you for purchasing FontLab 4.6 – a new version of our professional font editor.
The key features of FontLab 4.6 are:
•Outline editors with more than 20 tools and 200-level undo/redo
•Import and export of fonts in OpenType, TrueType and PostScript Type 1 formats with up to 6,400 characters.
•Import, export and native-mode editing of Multiple Master fonts
•Import and export of individual glyphs in EPS format
•Multiple Master-enabled metric and kerning editing module with customisable autospacing and autokerning features
•OpenType feature editing and testing
•Import of OpenType features from existing fonts
•Import and export of font metrics files in PFM and AFM format
•Professional-level manual and automatic Type 1 and TrueType hinting
•Automatic transformation of glyphs with more than 25 filters
•Library of predefined customisable graphics primitives
•Automatic testing of glyph outlines with our unique FontAudit technology
•Integrated Macro language based on the industry-standard Python language
•New Unique Sketch mode with easy drawing tools
•VectorPaint tools
•Support of 4 encoding modes and an unlimited number of encoding tables
•Easy-to-use completely customisable drag/drop-based user interface
•Popup menus and property panels everywhere
•Sample printing of fonts, sample strings and individual glyphs
•Automatic Multiple Master-compatible font blending
•OpenType-based Kerning and Metrics assistants
•Smooth outline preview
15

FontLab 4
About this Manual
This manual covers the Windows version of FontLab 4.6.
The following chapters describe all of FontLab’s features in full detail. They are organized to cover all the functions in their usual sequence.
FontLab User Interface
This chapter covers the basic definitions of the FontLab user interface and its customization and gives a short description of all the FontLab editing windows and panels.
Editing Fonts
This chapter explains how to modify fonts, copy characters, change encoding tables, select characters for editing, and edit font info fields.
The Font Header
This chapter provides a detailed description of the Font Header data and the FontLab tools intended to manage it.
The Glyph Window
FontLab includes powerful outline-editing tools that are described in this chapter.
Editing Font Metrics
If you want to create a professional-looking font you have to edit the font’s metric data. The glyphs’ widths, sidebearings, and kerning can be edited in FontLab automatically or manually. This chapter shows you how.
Transformations
From scale to drop shadow, from autohinting to autospacing - more than 25 transformation filters can help you instantly expand your font collection. This chapter gives detailed descriptions of all the transformations and their usage in FontLab.
16

Introduction
Hinting
To make your Type 1 or TrueType fonts look great everywhere you have to set hints. FontLab includes hinting tools that were previously available only in high-end font editing systems. Hinting can be a complicated process, so read this chapter carefully to get the best results.
Multiple Master Fonts
Opening, editing and exporting Multiple Master fonts; adding and removing design axes; editing the Design Map Graph – everything you ever wanted to know about multiple master fonts is in this chapter.
OpenType Fonts
This chapter covers FontLab tools, panels and features that deal with creation and editing of OpenType font features: ligatures, small caps, fractions, alternative glyphs, etc.
Macro Programming
This chapter includes a short description and demonstration of the Python programming language and its integration into the FontLab user interface. Python can be used to create custom tools and operations within FontLab. A brief description of the FontLab classes exported to Python is provided.
17

FontLab 4
System Requirements
The Windows version of FontLab requires one of the following hardware and software configurations:
A PC computer capable of running one of the following versions of Windows: Windows 98, Windows ME, Windows NT 4.0, Windows 2000 or Windows XP with one of these operating systems installed.
At least 10Mb of free space on the HDD and at least 64 Mb RAM. FontLab will start on 32Mb RAM but you will need more RAM to open bigger fonts.
18

FontLab User Interface
FontLab User Interface
Before we start talking about fonts and the FontLab font-editing features let’s spend some time learning the FontLab user interface. For the most part it is a standard Windows interface so if you know how to navigate in Windows or in Microsoft Office you will feel comfortable with FontLab. In other parts it is unique and that is where we will focus.
Most of the interface elements in FontLab 4 are completely customizable and from this chapter you will learn how to change the FontLab interface so it will best fit your needs.
Please note that further in the book we will refer to menu commands, toolbar buttons and keyboard shortcuts as they appear in the default FontLab environment, prior to any modifications you may make.
1
19

FontLab 4
Basic Terms
We cannot go any further without defining a few terms that are critical to understanding FontLab and fonts in general.
Character
The minimal unit of the written language – a part of the alphabet, a symbol.
Any picture that can be recognized as having the same meaning represents the same character:
All the pictures above mean the character ‘A’
Please note that sometimes pictures that look the same represent different characters:
Latin ‘A’
Cyrillic ‘A’
Greek ‘Alpha’
Characters have codes that are used to store text data on a computer.
Glyph
The basic element of the font, literally – an image that is printed. All glyphs are unique, even if they represent the same character.
Glyphs are used to represent characters. Please note that many different glyphs may be used to represent the same character, even in the same font:
20
FontLab User Interface
Font
An organized collection of glyphs and font header information. Usually glyphs that are united in a font have some similarities in design and other properties.
In the past, a “font” was defined as a single size of the characters of a particular typeface. Now, since fonts are scalable, the term “font” covers all possible sizes of the same typeface design.
Encoding
When text is printed an important process takes place: character to glyph mapping. The source text (in computer form) is a list of codes that represents a list of characters. A font (see above) is a collection of glyphs. So there must be some way to relate characters to glyphs so that when the computer’s operating system encounters a certain character it knows which glyph to print. This “mapping” (or “vector”) is called the encoding. Sometimes the encoding information resides within the font itself as part of the header and other times it is in a separate file.
Font Family
It is important to know the difference between a font and a font family. A font family is a set of fonts that represents some design idea. “Times” is a font family (sometimes called typeface). “Times Bold Italic” is a font.
A font family may include from one to a few dozen fonts.
21
FontLab 4
Glyph name
The only identification of a glyph (other than its visual appearance) is its name. A Western glyph name consists of Latin characters, digits and punctuation. It is highly recommended you name glyphs in accordance with the following rules:
1.No spaces.
2.No digits at the beginning.
3.Only ‘.’ And ‘_’ punctuation marks are allowed in the name.
Menu
When we refer to menu items in the main FontLab menu, we will use the following notation:
[top menu item]/[sub-item]
For example:
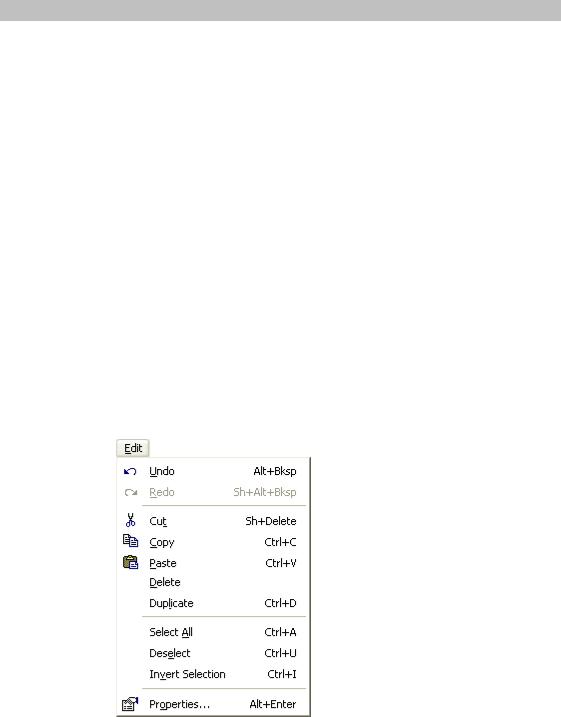
Edit > Copy means: click the word Edit on the menu bar and select the Copy command from the menu:
22
FontLab User Interface
Directories
When we have to refer to one of the directories created during FontLab installation, we will use the following syntax:
FontLab/[directory name]
Where FontLab is the name of the folder where you have installed FontLab 4 (usually /Program Files/FontLab/FontLab4) and [directory name] is the name of the directory, as in the example below:
FontLab/data
Mouse
Click the mouse on some |
Position the mouse cursor on the object and click the |
object |
left mouse button |
Right-click some object |
Position the cursor on the object and click the right |
|
mouse button |
Ctrl-click something |
Position the cursor over “something”, hold down the |
|
CTRL key on the keyboard and click the left mouse |
|
button. |
Drag some object |
Position the cursor on the object, press the left mouse |
|
button and move the mouse to move the object. |
|
Release the mouse button when you’re done. |
|
|
Context Menu |
|
Most windows and panels in FontLab have attached context menus. To open the context menu, right-click an empty area in the window or panel.
23

FontLab 4
Getting Started
When you run FontLab 4 for the first time (to run FontLab double-click on
its icon  ) you will see a welcome screen for a few seconds and then the FontLab window:
Like almost all Windows programs FontLab has a menu, a few toolbars and a status bar at the bottom.
There is nothing special about the FontLab menu except that you can position it any place on the screen. The usual location is at the top of the screen, but if you want to put it somewhere else, just drag it there:
The same thing can be done with any toolbar – you can leave them at the top or drag them anywhere.
24

FontLab User Interface
You can easily choose which toolbars you want to see: use the Toolbars command in the View menu or simply click the right mouse button on a menu, toolbar, or toolbar docking panel and you’ll get exactly the same menu:
Following is a list of common toolbars with a few comments about each:
Standard |
Contains basic commands like file open and save, copy/paste, print |
|
and help |
Panels |
Controls the appearance of FontLab panels – shared windows used |
|
to control most professional FontLab features |
Options |
Controls the appearance of basic Editing layers |
Tools |
Probably the most important toolbar – gives access to editing tools |
|
that you will use to work on glyph shapes |
Macro |
Opens the Macro Call panel which gives quick access to pre-written |
|
macro programs that can automate various font-editing tasks |
You may notice a few italic terms. We will describe them later. Specifically, panels and Glyph window will be described in a few pages; Editing layers in the “Glyph Window” chapter; and macro programs in “Macro Programming” chapter.
OK, we are almost ready to open a sample font, but before we do lets’ talk about customization of the FontLab user interface.
25

FontLab 4
Customizing FontLab’s User
Interface
As you may infer from the title of this section most of the FontLab user interface (which means menus, toolbars and keyboard shortcuts) is customizable. We believe our default interface is the easiest to use, but if for some reason you don’t like it, you are free to make any changes you want. If you don’t want to change anything in the FontLab user interface, you can fast forward to the next section.
The general idea of customization is simple: there is a long list of commands that you can use and three kind of controls: menus, toolbars and keyboard shortcuts. Through customization you can assign any command to a menu item, button on a toolbar or combination of keys pressed on a keyboard. In addition you can organize commands in popup menus or toolbars.
Most of the customization commands are concentrated in the Customize panel that you can open with the Customize… command from the Tools menu or the same command located in the context menu which appears if you right-click on a menu, toolbar or toolbar dock area:
The customization dialog box consist of several pages:
Commands |
List of all the available commands grouped into several categories |
Toolbars |
Customization of toolbars. There is an option to create new |
|
toolbars. |
Tools |
On this page you can “connect” an external program to a menu item |
|
in FontLab’s Tools menu |
Keyboard |
Customization of keyboard shortcuts |
Menu |
Customization of menus |
|
|
While the Customize dialog box is open all interface elements are in “editable” mode, so you can simply drag-drop buttons and menu items between different toolbars. You can also customize the appearance of menu items and toolbar buttons.
26

FontLab User Interface
Customizing Toolbars
To move a button within a toolbar just press the left mouse button on it; drag it to the new location and drop it. If you drag the button slightly further to the right, a separator bar will be added between it and the previous button:
To move a button to another toolbar, just drag-drop it there. To copy a button, hold the CTRL key while you drag the button.
To remove a button from a toolbar, drag it out of the toolbar:
In FontLab there is very little difference between a menu and a toolbar, so you can rearrange, copy or remove menu items just like you did with toolbar buttons:
You can also drag a menu item onto a toolbar to add a toolbar button. Hold the CTRL key to copy the item.
27

FontLab 4
To get access to all the FontLab commands, open the Commands page in the Customize dialog box:
In the list select a group of commands and use the list of commands in the right list as a source of menu items and toolbar buttons: just drag the commands from there.
28

FontLab User Interface
Customizing Menus
If you want to create a new popup menu, just select the New Menu group in the left menu and drag it onto the main menu bar or any of the toolbars. A new menu appears and you can start adding commands to it using the drag-drop technique described above.
With the Customize dialog not only can you customize the main menu, but also most of the context menus which appear when you right-click FontLab windows. Open the Menu page in the Customize dialog box and choose a context menu in the right combo box:
A menu appears on screen and you can customize it by dragging commands from the toolbar, other menus or the list of the commands on the Commands page.
To reset changes you’ve made in menus, use the Reset buttons on the Menu page of the Customize dialog box. Use the left Reset command to reset changes in the main menu and the right Reset button to reset changes in the context menus.
29

FontLab 4
Customizing Individual Items
You can customize the appearance of any menu item or toolbar button. The following appearances are available for most items:
Image
Text
Image and Text
To change the appearance of the menu item or toolbar button position the mouse cursor on the button and click the right mouse button. Select the new appearance method in the context menu:
Most commands in FontLab have pre-designed images, but you can easily create your own images for any toolbar button or menu command. To do so, select the Button Appearance… command in the button’s context menu:
30
Loading...