

Page 1

®
71X Series
Process Calibrators
Calibration Manual
PN 686540
January 1998 Rev. 11, 3/12
© 1998-2012 Fluke Corporation, All rights reserved. Printed in U.S.A. Specifications are subject to change without notice.
All product names are trademarks of their respective companies.
Page 2

LIMITED WARRANTY & LIMITATION OF LIABILITY
Each Fluke product is warranted to be free from defects in material and workmanship under normal use and
service. The warranty period for the 712, 714, 715, 717 1G, 717 30G, 717 100G, 717 300G, 717 500G, 717
1000G, 717 1500G, 717 3000G , 717 5000G, 718 1G, 718 30G, 718 100G, 718 300G, and 718Ex
Calibrators is three years and begins on the date of shipment. The warranty period for the 718 Pump
assembly is one year and begins on the date of shipment. Parts, product repairs and services are warranted
for 90 days. This warranty extends only to the original buyer or end-user customer of a Fluke authorized
reseller, and does not apply to fuses, disposable batteries or to any product which, in Fluke's opinion, has
been misused, altered, neglected or damaged by accident or abnormal conditions of operation or handling.
Fluke warrants that software will operate substantially in accordance with its functional specifications for 90
days and that it has been properly recorded on non-defective media. Fluke does not warrant that software
will be error free or operate without interruption.
Fluke authorized resellers shall extend this warranty on new and unused products to end-user customers
only but have no authority to extend a greater or different warranty on behalf of Fluke. Warranty support is
available if product is purchased through a Fluke authorized sales outlet or Buyer has paid the applicable
international price. Fluke reserves the right to invoice Buyer for importation costs of repair/replacement parts
when product purchased in one country is submitted for repair in another country.
Fluke's warranty obligation is limited, at Fluke's option, to refund of the purchase price, free of charge repair,
or replacement of a defective product which is returned to a Fluke authorized service center within the
warranty period.
To obtain warranty service, contact your nearest Fluke authorized service center or send the product, with a
description of the difficulty, postage and insurance prepaid (FOB Destination), to the nearest Fluke
authorized service center. Fluke assumes no risk for damage in transit. Following warranty repair, the
product will be returned to Buyer, transportation prepaid (FOB Destination). If Fluke determines that the
failure was caused by misuse, alteration, accident or abnormal condition of operation or handling, Fluke will
provide an estimate of repair costs and obtain authorization before commencing the work. Following repair,
the product will be returned to the Buyer transportation prepaid and the Buyer will be billed for the repair and
return transportation charges (FOB Shipping Point).
THIS WARRANTY IS BUYER'S SOLE AND EXCLUSIVE REMEDY AND IS IN LIEU OF ALL OTHER
WARRANTIES, EXPRESS OR IMPLIED, INCLUDING BUT NOT LIMITED TO ANY IMPLIED WARRANTY
OF MERCHANTABILITY OR FITNESS FOR A PARTICULAR PURPOSE. FLUKE SHALL NOT BE LIABLE
FOR ANY SPECIAL, INDIRECT, INCIDENTAL OR CONSEQUENTIAL DAMAGES OR LOSSES,
INCLUDING LOSS OF DATA, WHETHER ARISING FROM BREACH OF WARRANTY OR BASED ON
CONTRACT, TORT, RELIANCE OR ANY OTHER THEORY.
Since some countries or states do not allow limitation of the term of an implied warranty, or exclusion or
limitation of incidental or consequential damages, the limitations and exclusions of this warranty may not
apply to every buyer. If any provision of this Warranty is held invalid or unenforceable by a court of
competent jurisdiction, such holding will not affect the validity or enforceability of any other provision.
To locate an authorized service center, visit us on the World Wide Web at
using the phone numbers listed in this manual.
www.fluke.com or call Fluke
Fluke Corporation Fluke Europe B.V.
P.O. Box 9090 P.O. Box 1186
Everett WA 98206-9090 5602 B.D.
U.S.A Eindhoven, The Netherlands
Page 3

Table of Contents
Title Page
Introduction ........................................................................................................ 1
How to Contact Fluke ........................................................................................ 1
Precautions and Safety Information ................................................................... 2
Explanation of International Symbols ............................................................... 5
Specifications ..................................................................................................... 6
712 Specifications ......................................................................................... 7
Firmware V1.1 and Earlier ........................................................................ 7
Firmware V1.2 through V1.9 .................................................................... 8
Firmware V2.0 and Later .......................................................................... 9
714 Specifications ......................................................................................... 11
Firmware Earlier than v2.0........................................................................ 11
Firmware V2.0 and Later .......................................................................... 12
715 Specifications ......................................................................................... 13
Firmware Earlier than V2.0 ....................................................................... 13
Firmware 2.0 and Later ............................................................................. 14
717 Specifications ......................................................................................... 15
718 and 718Ex Specifications ....................................................................... 18
719 Specifications ......................................................................................... 20
Basic Maintenance ............................................................................................. 21
Cleaning ......................................................................................................... 21
Replacing the Battery .................................................................................... 21
718Ex Approved Batteries ............................................................................ 23
Replacing the Fuse ........................................................................................ 23
Required Equipment .......................................................................................... 25
Verification ........................................................................................................ 27
Preparing for Verification .............................................................................. 27
712 Verification (V1.1 and Earlier) ............................................................... 27
Resistance Measure Verification ............................................................... 27
Resistance Source Verification ................................................................. 28
Keypad Test .............................................................................................. 28
Display Verification .................................................................................. 28
712 Verification (V1.2 through V1.9) ........................................................... 29
712 Verification (V2.0 and Later) ................................................................. 30
714 Verification (Earlier than V2.0) .............................................................. 31
Thermocouple Measure Verification ........................................................ 31
iii
Page 4

71X Series
Calibration Manual
Thermocouple Source Verification ........................................................... 32
Keypad Test .............................................................................................. 33
Display Verification .................................................................................. 33
714 Verification (V2.0 and Later) ................................................................. 33
Thermocouple Measure Verification ........................................................ 33
Thermocouple Source Verification ........................................................... 34
715 Verification (Earlier than V2.0) .............................................................. 35
DC Voltage Source Verification ............................................................... 35
DC Current Source Verification ................................................................ 35
Keypad Test .............................................................................................. 36
DC Current Measure Verification ............................................................. 36
DC Voltage Measure Verification ............................................................. 37
Display Verification .................................................................................. 37
715 Verification (V2.0 and Later) ................................................................. 38
DC Voltage Source Verification ............................................................... 38
DC Current Source Verification ................................................................ 38
DC Current Measure Verification ............................................................. 39
DC Voltage Measure Verification ............................................................. 39
717 Verification ............................................................................................. 40
Pressure Verification ................................................................................. 40
mA Measure Verification .......................................................................... 48
mA Loop Power Verification .................................................................... 49
Sensor Jack Verification ........................................................................... 49
718 and 718Ex Verification ........................................................................... 49
Pressure Verification ................................................................................. 49
Leak Test Verification ............................................................................... 53
mA Measure Verification .......................................................................... 53
mA Loop Power Verification (718 Only) ................................................. 54
Sensor Jack Verification ........................................................................... 54
Display Verification .................................................................................. 54
719 Verification ............................................................................................. 54
Display Verification .................................................................................. 54
Pressure Verification ................................................................................. 54
Leak Test Verification ............................................................................... 56
mA Measure Verification .......................................................................... 56
mA Source Verification ............................................................................ 57
mA Loop Power Verification .................................................................... 58
Sensor Jack Verification ........................................................................... 58
Calibration ......................................................................................................... 58
Preparing for Calibration ............................................................................... 58
712 Calibration (V1.1 and Earlier) ................................................................ 59
Millivolts Measure .................................................................................... 59
Resistance Measure ................................................................................... 60
mA Measure .............................................................................................. 60
712 Calibration (V1.2 through V1.9) ............................................................ 61
712 Calibration (V2.0 and Later) .................................................................. 62
OHMS INPUT .......................................................................................... 63
OHMS OUTPUT Low Range ................................................................... 63
OHMS OUTPUT High Range .................................................................. 63
714 Calibration (Earlier than V2.0) ............................................................... 64
Temperature Measure ................................................................................ 64
perature Source .................................................................................. 64
Tem
Thermocouple Block Calibration .............................................................. 64
714 Calibration (V2.0 and Later) .................................................................. 65
mV OUTPUT ............................................................................................ 65
iv
Page 5

Contents (continued)
mV INPUT ................................................................................................ 65
CJC ............................................................................................................ 66
715 Calibration (Earlier than V2.0) ............................................................... 66
mA/Volts Measure .................................................................................... 66
mA/Volts Source Measure ........................................................................ 67
715 Calibration (V2.0 and Later) .................................................................. 67
V INPUT ................................................................................................... 68
mV INPUT ................................................................................................ 68
mA INPUT ................................................................................................ 68
V OUTPUT ............................................................................................... 69
mV OUTPUT ............................................................................................ 69
mA OUTPUT ............................................................................................ 69
717 Calibration (Earlier than V2.0) ............................................................... 70
mA Measure .............................................................................................. 70
Pressure Measure ...................................................................................... 70
717 Calibration (V2.0 to V3.9) ...................................................................... 72
mA Measure .............................................................................................. 72
Pressure Measure ...................................................................................... 72
717 Calibration (V4.0 and Later) .................................................................. 73
mA Measure .............................................................................................. 73
Pressure Measure ...................................................................................... 74
718 Calibration (Earlier than V2.0) ............................................................... 75
mA Measure .............................................................................................. 75
Pressure Measure ...................................................................................... 76
718 Calibration (V2.0 to V3.9) ...................................................................... 77
mA Measure .............................................................................................. 77
Pressure Measure ...................................................................................... 78
718 Calibration (V4.0 and Later) .................................................................. 79
mA Measure .............................................................................................. 79
Pressure Measure ...................................................................................... 80
718Ex Calibration .......................................................................................... 81
719 Calibration (V1.0) ................................................................................... 83
mA Measure .............................................................................................. 83
mA Output Calibration .............................................................................. 84
Pressure Measure ...................................................................................... 84
Replacement Parts and Accessories ................................................................... 86
v
Page 6

71X Series
Calibration Manual
vi
Page 7

List of Tables
Table Title Page
1. International Symbols ............................................................................................ 5
2. General Specifications ............................................................................................ 6
3. 712 Supported RTD Types ..................................................................................... 7
4. 712 RTD and Ohms Simulation ............................................................................. 7
5. 712 RTD and Ohms Measurement ......................................................................... 8
6. RTD Specifications ................................................................................................ 8
7. Ohms Specifications ............................................................................................... 9
8. RTD Specifications ................................................................................................ 9
9. Ohms Measurement Specifications ........................................................................ 10
10. Ohms Source Specifications ................................................................................... 10
11. 714 Temperature Measure and Thermocouple Simulate ........................................ 11
12. 714 Millivolt Measure and Source ......................................................................... 11
13. 714 Temperature Measure and Thermocouple Simulate ........................................ 12
14. 714 Millivolt Measure and Source ......................................................................... 12
15. 715 DC V Input and Output ................................................................................... 13
16. 715 DC mA Input and Output ................................................................................ 13
17. 715 DC V Input and Output ................................................................................... 14
18. 715 DC mA Input and Output ................................................................................ 14
19. 717 Pressure Specifications .................................................................................... 15
20. Pressure Display, Pressure Module Input .............................................................. 16
21. DC mA Input .......................................................................................................... 16
22. 717 Range and Resolution ..................................................................................... 17
23. Pressure Specifications ........................................................................................... 18
24. Pressure Display, Pressure Module Input .............................................................. 18
25. DC mA Input Input ................................................................................................ 19
26. 718 Range and Resolution ..................................................................................... 19
27. 719 Pressure Sensor Input ...................................................................................... 20
28. 719 Pressure Module Input .................................................................................... 20
29. 719 DC mA Measure and Source ........................................................................... 20
30. 719 Pressure Source ............................................................................................... 20
31. 718Ex Approved Batteries ..................................................................................... 23
32. Verifying a Blown Fuse ......................................................................................... 23
33. Required Calibration Equipment ............................................................................ 25
34. 712 Resistance Measure Verification ..................................................................... 27
35. 712 Resistance Source Verification ....................................................................... 28
vii
Page 8

71X Series
Calibration Manual
36. 712 Verification RTD Values ................................................................................ 29
37. 712 Verification Resistance Values ....................................................................... 29
38. 712 Verification Outputs ........................................................................................ 30
39. 712 Verification RTD Values ................................................................................ 30
40. 712 Verification Resistance Values ....................................................................... 31
41. 712 Verification Outputs ........................................................................................ 31
42. 714 Thermocouple Measure Verification ............................................................... 31
43. 714 Thermocouple Measure Verification (mA) ..................................................... 32
44. 714 Thermocouple Source Verification (mA) ........................................................ 32
45. 714 Thermocouple Source Verification (Temperature) ......................................... 32
46. 714 Thermocouple Measure Verification ............................................................... 33
47. 714 Thermocouple Measure Verification (mA) ..................................................... 34
48. 714 Thermocouple Source Verification (mA) ........................................................ 34
49. 714 Thermocouple Source Verification (Temperature) ......................................... 34
50. 715 DC Voltage Source Verification (0.000 to 10.000 V) ..................................... 35
51. 715 DC Voltage Source Verification (0.00 to 100.00 V) ....................................... 35
52. 715 DC Current Source Verification ...................................................................... 35
53. 715 DC Current Measure Verification ................................................................... 36
54. 715 DC Voltage Measure Verification (10.0000 to 0.0000 V) .............................. 37
55. 715 DC Voltage Measure Verification (0.0000 mV to 100.0000 mV) .................. 37
56. 715 DC Voltage Source Verification (0.000 to 20.000 V) ..................................... 38
57. 715 DC Voltage Source Verification (0.00 to 200.00 mV) .................................... 38
58. 715 DC Current Source Verification ...................................................................... 38
59. 715 DC Current Measure Verification ................................................................... 39
60. 715 DC Voltage Measure Verification (25.0000 to 0.0000 V) .............................. 39
61. 715 DC Voltage Measure Verification (0.0000 mV to 200.0000 mV) .................. 40
62. 717 Pressure Verification ....................................................................................... 41
63. 717 mA Measure Verification ................................................................................ 48
64. 718 and 718Ex Pressure Verification ..................................................................... 50
64. 718 and 718Ex Pressure Verification ..................................................................... 51
64. 718 and 718Ex Pressure Verification ..................................................................... 52
65. 718 Leak Test Verification ..................................................................................... 53
66. 718 and 718Ex mA Measure Verification .............................................................. 53
67. 719 Pressure Verification ....................................................................................... 55
68. 719 Leak Test Verification ..................................................................................... 56
69. 719 mA Measure Verification ................................................................................ 56
70. 719 mA Source Verification .................................................................................. 57
71. Replaceable Parts and Accessories ......................................................................... 86
viii
Page 9

List of Figures
Figure Title Page
1. Proper Use of Tools (717, 718, and 718Ex Models) .............................................. 4
2. Replacing the Battery ............................................................................................. 21
3. Replacing the Battery (718 and 719 only) ............................................................. 22
4. 718Ex Battery Replacement ................................................................................... 22
5. Replacing the Fuses (715 shown) ........................................................................... 24
6. Replacing the Fuse (718 shown) ............................................................................ 25
ix
Page 10

71X Series
Calibration Manual
x
Page 11

Introduction
The information provided in this document is for the use of
qualified personnel only. Do not perform the verification tests
or calibration procedures described in this manual unless you
are qualified to do so.
The information in this manual deals with the 71X Series Process Calibrators (hereafter
referred to as “the Calibrator” or the “71X Calibrator”). The 71X Series includes the
712,714, 715, 717 1G, 717 30G, 717 100G, 717-15G, 717 300G, 717 500G, 717 1000G,
717 1500G, 717 3000G, 717 5000G, 717-10000G, 718 1G, 718 30G, 718 100G, 718
300G, and the 718Ex 30G, 718Ex 100G, and the 719 models.
This manual provides the following information:
• Precautions and safety information
• Specifications
• Basic maintenance (cleaning, replacing the battery and fuses)
• Verification test procedures
• Calibration and calibration adjustment procedures
• Accessories and replaceable parts
How to Contact Fluke
To contact Fluke, call one of the following telephone numbers:
XW Warning
• Technical Support USA: 1-800-44-FLUKE (1-800-443-5853)
• Calibration/Repair USA: 1-888-99-FLUKE (1-888-993-5853)
• Canada: 1-800-36-FLUKE (1-800-363-5853)
• Europe: +31 402-675-200
• Japan: +81-3-6714-3114
• Singapore: +65-6799-5566
• Anywhere in the world: +1-425-446-5500
Or, visit Fluke's website at www.fluke.com.
To register your product, visit http://register.fluke.com.
To view, print, or download the latest manual supplement, visit
http://us.fluke.com/usen/support/manuals.
1
Page 12

71X Series
Calibration Manual
Precautions and Safety Information
Use the Calibrator only as specified in this manual. Otherwise, the protection provided by
the Calibrator may be impaired.
A Warning statement identifies conditions and actions that pose hazard(s) to the user; a
Caution statement identifies conditions and actions that may damage the calibrator. The
following Warning and Caution statement applies to all of the 71X Calibrators unless
noted:
XW Warning
To avoid possible electric shock or personal injury:
• Use the 718Ex Calibrator only as described in the User
Manual and the Fluke 718Ex CCD (Concept Control
Drawing) or the protection provided by the calibrator
may be impaired.
• Follow all equipment safety procedures.
• Inspect the Calibrator before use. Do not use it if it
appears damaged.
• Check the test leads for continuity, damaged insulation,
or exposed metal. Replace damaged test leads.
• When using probes, keep fingers behind the finger
guards on the probes.
• Make sure the battery door is closed before using the
Calibrator.
• Never apply more than 30.0 V between the input
terminals, or between any terminal and earth ground.
• Applying more than 30.0 V to the input terminals
invalidates the 718Ex Calibrator’s Ex Approval and may
result in permanent damage to the unit so it can no
longer be used.
• Use the proper terminals, mode, and range for the
measuring or sourcing application.
• When making connections, connect the COM test probe
before the live test probe. When disconnecting,
disconnect the live probe before the COM probe.
• Never use the 718Ex Calibrator with the red holster
removed.
• Never open the 718Ex Calibrator case. Opening the case
invalidates the Calibrator’s Ex Approval.
2
• Replace the battery as soon as the (low battery)
symbol appears to avoid false readings that can lead to
electric shock. Remove the 718Ex Calibrator from the Exhazardous area before opening the battery door.
• Use only type 9 V batteries, properly installed in the
meter case, to power the meter. For the 718Ex, refer to
“718Ex Approved Batteries”.
Page 13

Process Calibrators
Precautions and Safety Information
• Remove test leads from the Calibrator before opening
the battery door.
• When servicing the Calibrator, use only specified
replacement parts.
• Do not allow water inside the case.
• When using the Calibrator’s internal pressure sensor, do
not connect a pressure module at the Calibrator to avoid
misleading readings. If both a pressure module and the
internal pressure sensor are connected, the Calibrator
displays ONLY the pressure module measurement. To
avoid misleading readings, disconnect the pressure
module connector at the Calibrator.
• Remove test leads or attached thermocouple miniplug
(714 only) from the calibrator before opening the battery
door.
• Do not operate the calibrator around explosive gas,
vapor or dust.
• 717, 718, 719, and 718Ex only: To avoid a violent release
of pressure in a pressurized system, shut off the valve
and slowly bleed off the pressure before you attach or
detach the calibrator pressure fitting to the pressure line.
• For 718 (non-Ex) and 719 only: Use only two 9 V
batteries, properly installed in the calibrator case, to
power the calibrator.
• For 717 and 718: Turn off circuit power before
connecting the calibrator mA and COM terminals in the
circuit. Place calibrator in series with the circuit.
• Do not use in a damp or wet environment.
WCaution
• To prevent damage to the unit under test, be sure the
Calibrator is in the correct mode before connecting the
test leads.
• The 71X Series Calibrators contain parts that can be
damaged by static discharge. If you open the case,
follow the standard practices for handling static
sensitive devices. Refer to “Static Awareness”.
• Models, 717, 718, and 719 only: To avoid mechanically
damaging the calibrator, do not apply torque between
the pressure fitting and the calibrator case. See Figure 1
for the proper use of tools.
3
Page 14

71X Series
Calibration Manual
• To avoid overpressure damage, do not apply pressure
that exceeds limits listed in the Users Manual for the
specific product.
• 717, 718, and 719 only: To avoid corrosion in the
pressure sensor, use the calibrator only with media
compatible with glass, ceramic, silicon, RTV, nitrile,
(Buna -N) type 303 stainless steel, and nickel.
• 718, 719 and 718Ex only: To avoid damage to the pump,
use with dry air and non-corrosive gases only. Use of
the optional Fluke 700-ILF In-Line Filter may help isolate
the pump from contaminates.
Hold in
fixed
position
Figure 1. Proper Use of Tools (717, 718, and 718Ex Models)
kf01f.eps
4
Page 15
Process Calibrators
Explanation of International Symbols
Explanation of International Symbols
The following symbols are used on the calibrator or in this calibration manual. Table 1
explains their meaning.
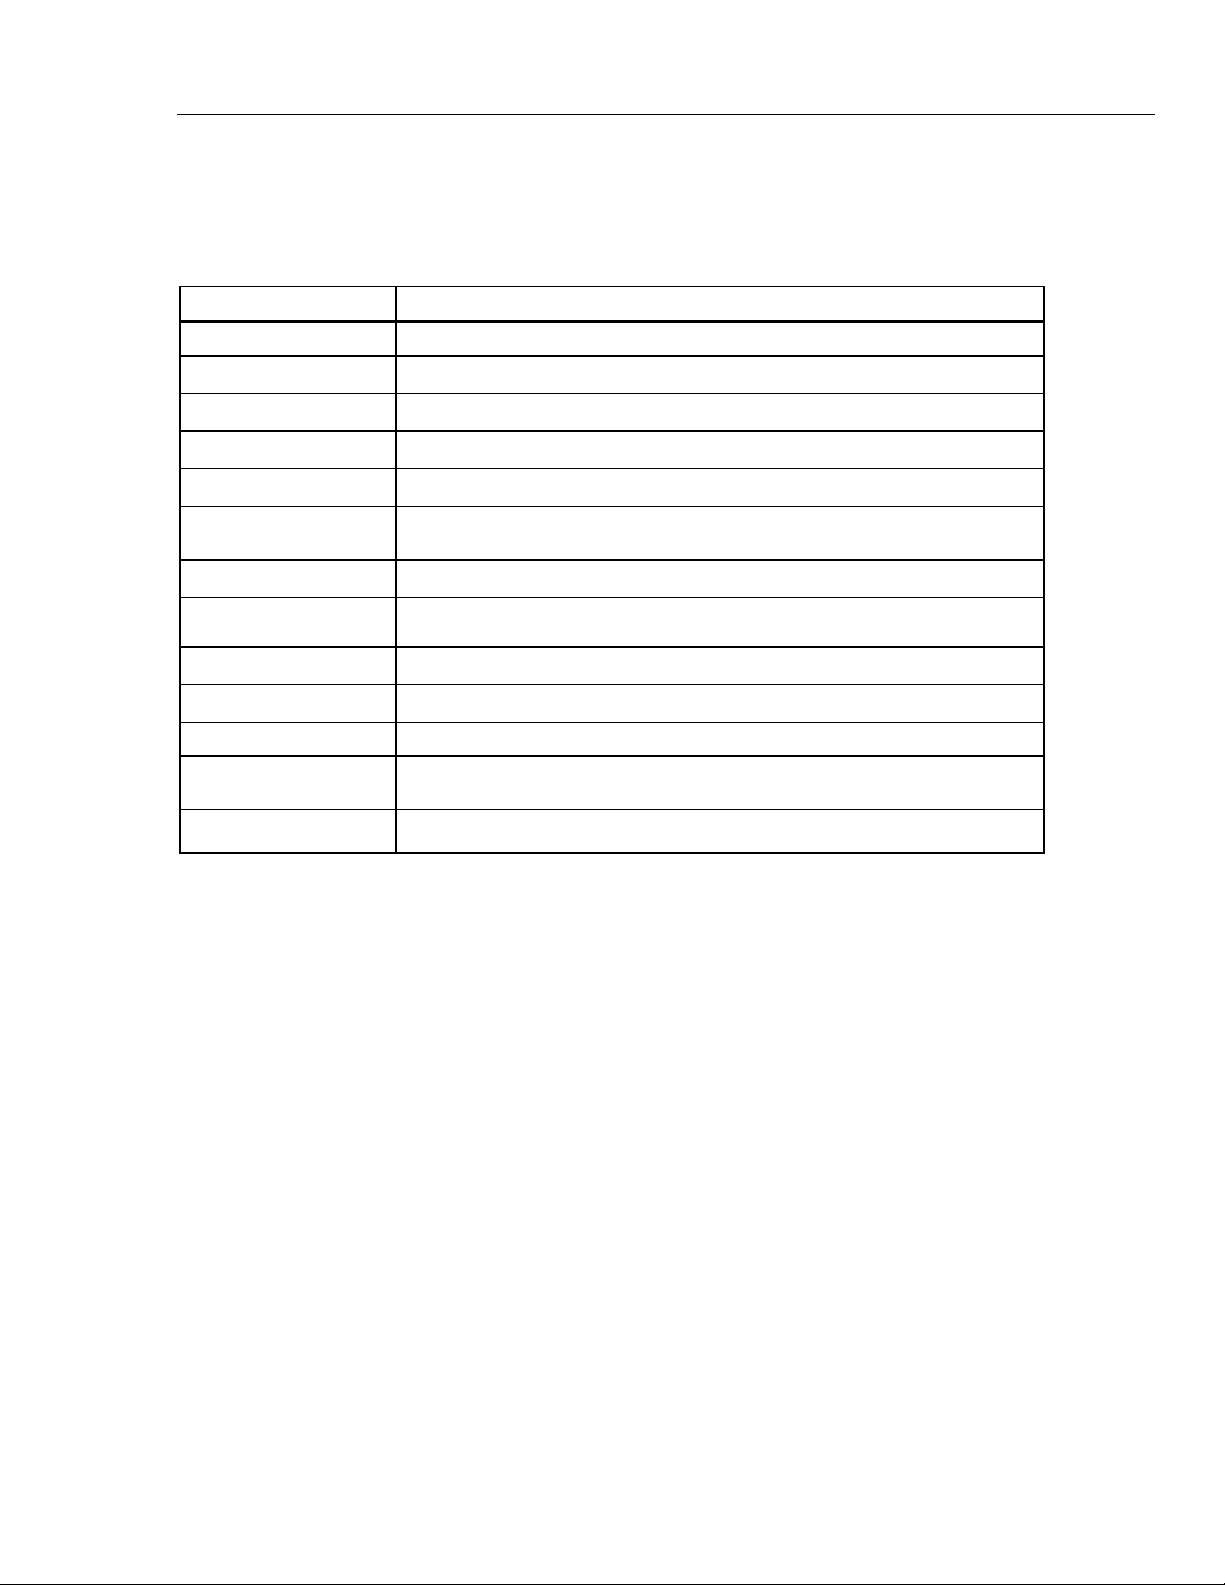
Table 1. International Symbols
Symbol Meaning
I
M
X
W
T
)
f
P
(
+
J
~
Power ON/OFF
Earth ground
Fuse
Battery
Hazardous Voltage
Refer to the instrument instruction sheet or Users Manual for information about
this feature
Double insulated
Conforms to relevant Canadian and US Standards.
Pressure
Conforms to European Union directives
Conforms to ATEX requirements.
Do not dispose of this product as unsorted municipal waste. Go to Fluke’s
website for recycling information.
Conforms to relevant Australian standards.
5
Page 16

71X Series
Calibration Manual
Specifications
Maximum voltage applied between any terminal
and earth ground or between any two terminals: 30 V
Storage temperature: 712: -20 °C to 60 °C, 718Ex: -40 °C to 71 °C, 719: -30 °C to 60 °C
(718Ex) Pressure Sensor Media: Non-corrosive gasses only
Operating temperature: -10 °C to 55 °C
Operating altitude: 3000 meters maximum
Relative humidity: 95 % up to 30 °C
Vibration: Random 2 g, 5 Hz to 500 Hz
Shock: 1 meter drop test
Safety: 712, 714, 715, 717
Safety: 718
Safety: 718Ex
719
Power requirements: 712, 714, 715, 717 Single 9 V battery (ANSI/NEDA 1604A or IEC 6LR61)
Power requirements: 718 Two 9 V batteries (ANSI/NEDA 1604A or IEC 6LR61)
Power requirements: 718Ex See “718Ex Approved Batteries”.
Size: 712, 714, 715, 717
Size: 718, 718Ex, 719
Weight:
Specifications for the 71X Calibrators are based on a one-year calibration cycle and apply
for ambient temperatures from + 18 °C to + 28 °C unless stated otherwise. “Counts” are
the number of increments or decrements of the least significant digit. General
specifications for all models are in Table 2.
Table 2. General Specifications
All other models: -40 °C to 60 °C
75 % up to 40 °C
45 % up to 50 °C
35 % up to 55 °C
Certified as compliant to CAN/CSA C22.2 No. 1010.1:1992 NRTL
Complies with ANSI/ISA S82.01-1994
Certified as compliant to CAN/CSA C22.2 No. 1010.2:1995
Complies with ANSI/ISA S82.01-1995
Certified as compliant to CAN/CSA C22.2 No. 1010.2:1995
Complies with ANSI/ISA S82.01-1995. Complies with IEC 61010-195 CAT I, 30 V;
• P ( II 1 G Ex ia IIC T4
0344 KEMA 04ATEX1061 X
•
) Class I Div. 1 Groups A-D T4
LR110460 AEx ia IIC T4
• Ta = -10 °C… +55 °C
• CE: Complies with EN61010-1 and EN61326
712
714
715
717 30G, 717 100G
718 30G and 718 100G and
718Ex 30G and 718Ex 100G
719
Complies with EN/IEC 61010-1 2nd ed.,
CSA-C22.0 No. 61010-1-04
34.9 mm H x 87 mm W x 187 mm L;
With holster and Flex-Stand:
52 mm H x 98 mm W x 201 mm L
60 mm H x 87 mm W x 210 mm L;
With holster: 66 mm H x 94 mm W x 216 mm L
337 g; With holster and Flex-Stand: 587 g
332 g; With holster and Flex-Stand: 584 g
349 g; With holster and Flex-Stand: 601 g
369 g; With holster and Flex-Stand: 624 g
737 g; With holster: 992G
912 g; With holster
6
Page 17

Process Calibrators
Specifications
712 Specifications
712 Calibrator specifications vary based on the version of the instrument. To display the
firmware version for your instrument, start with the 712 off, push and hold, then push
the power button. Find the section heading below for the displayed version and use the
specification tables in that section to test and calibrate the instrument.
Firmware V1.1 and Earlier
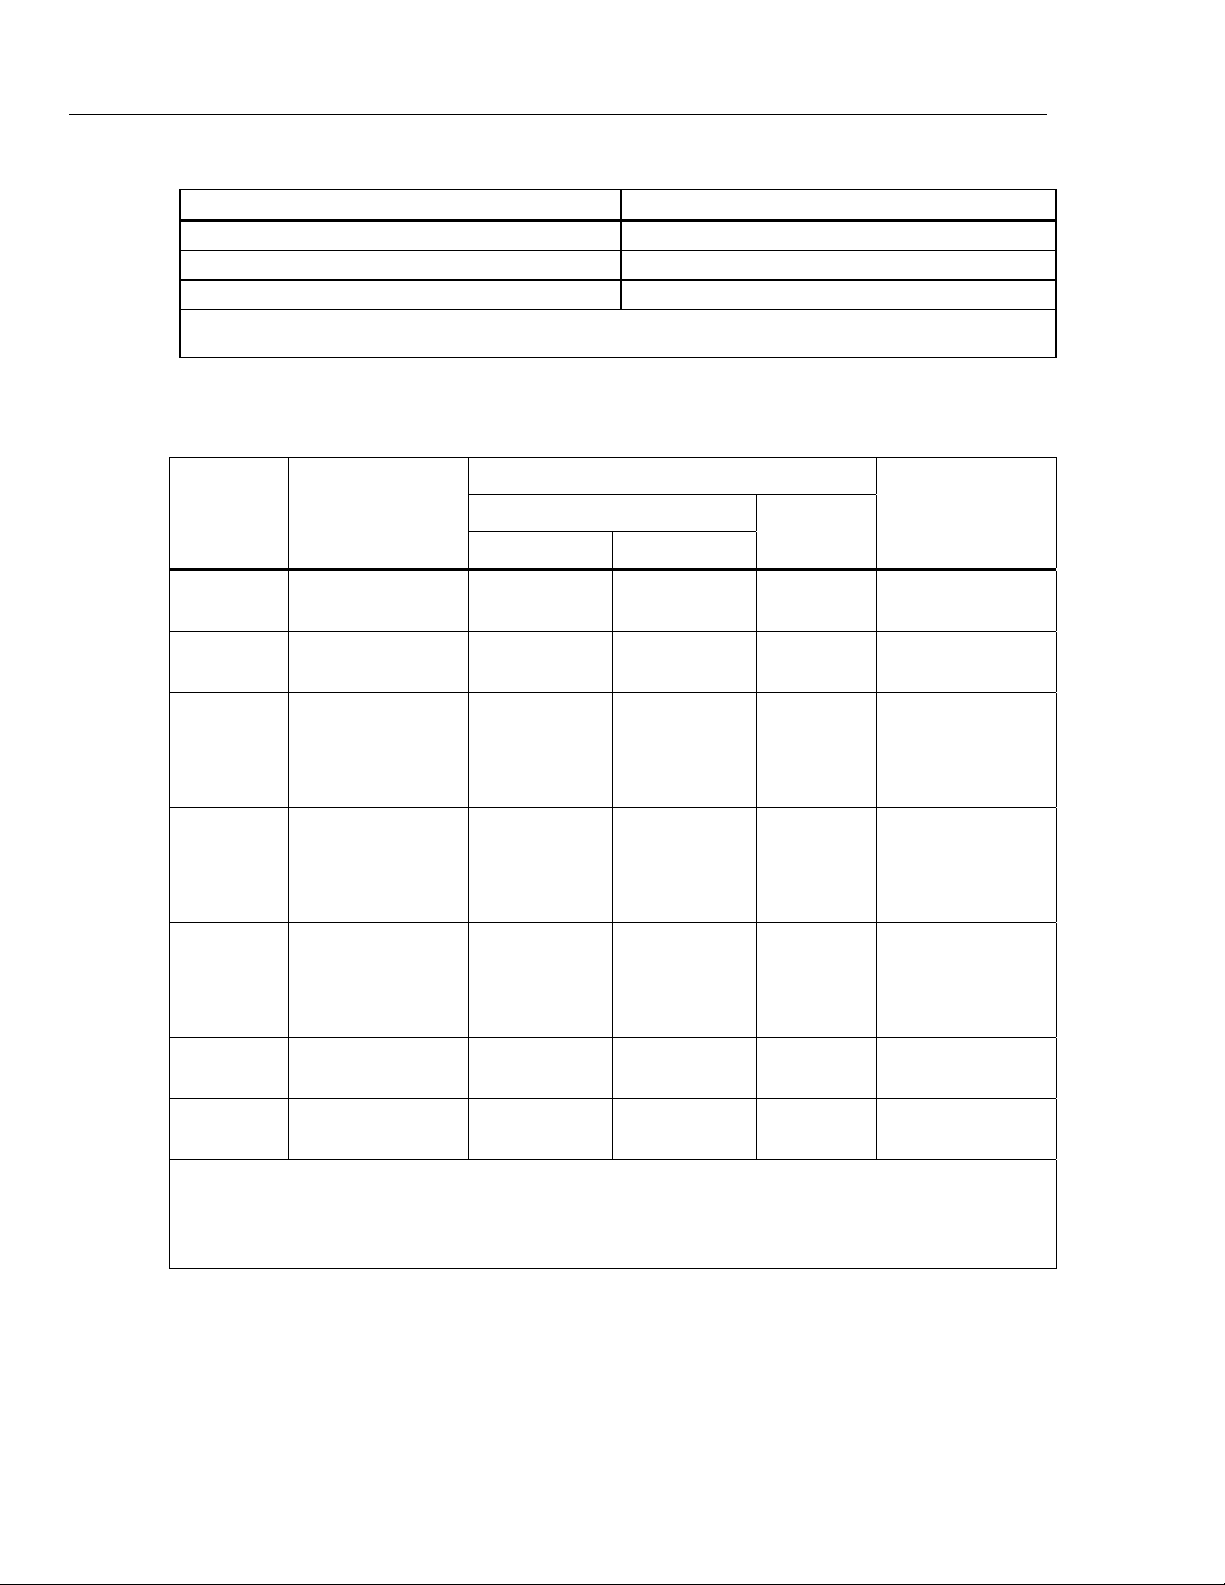
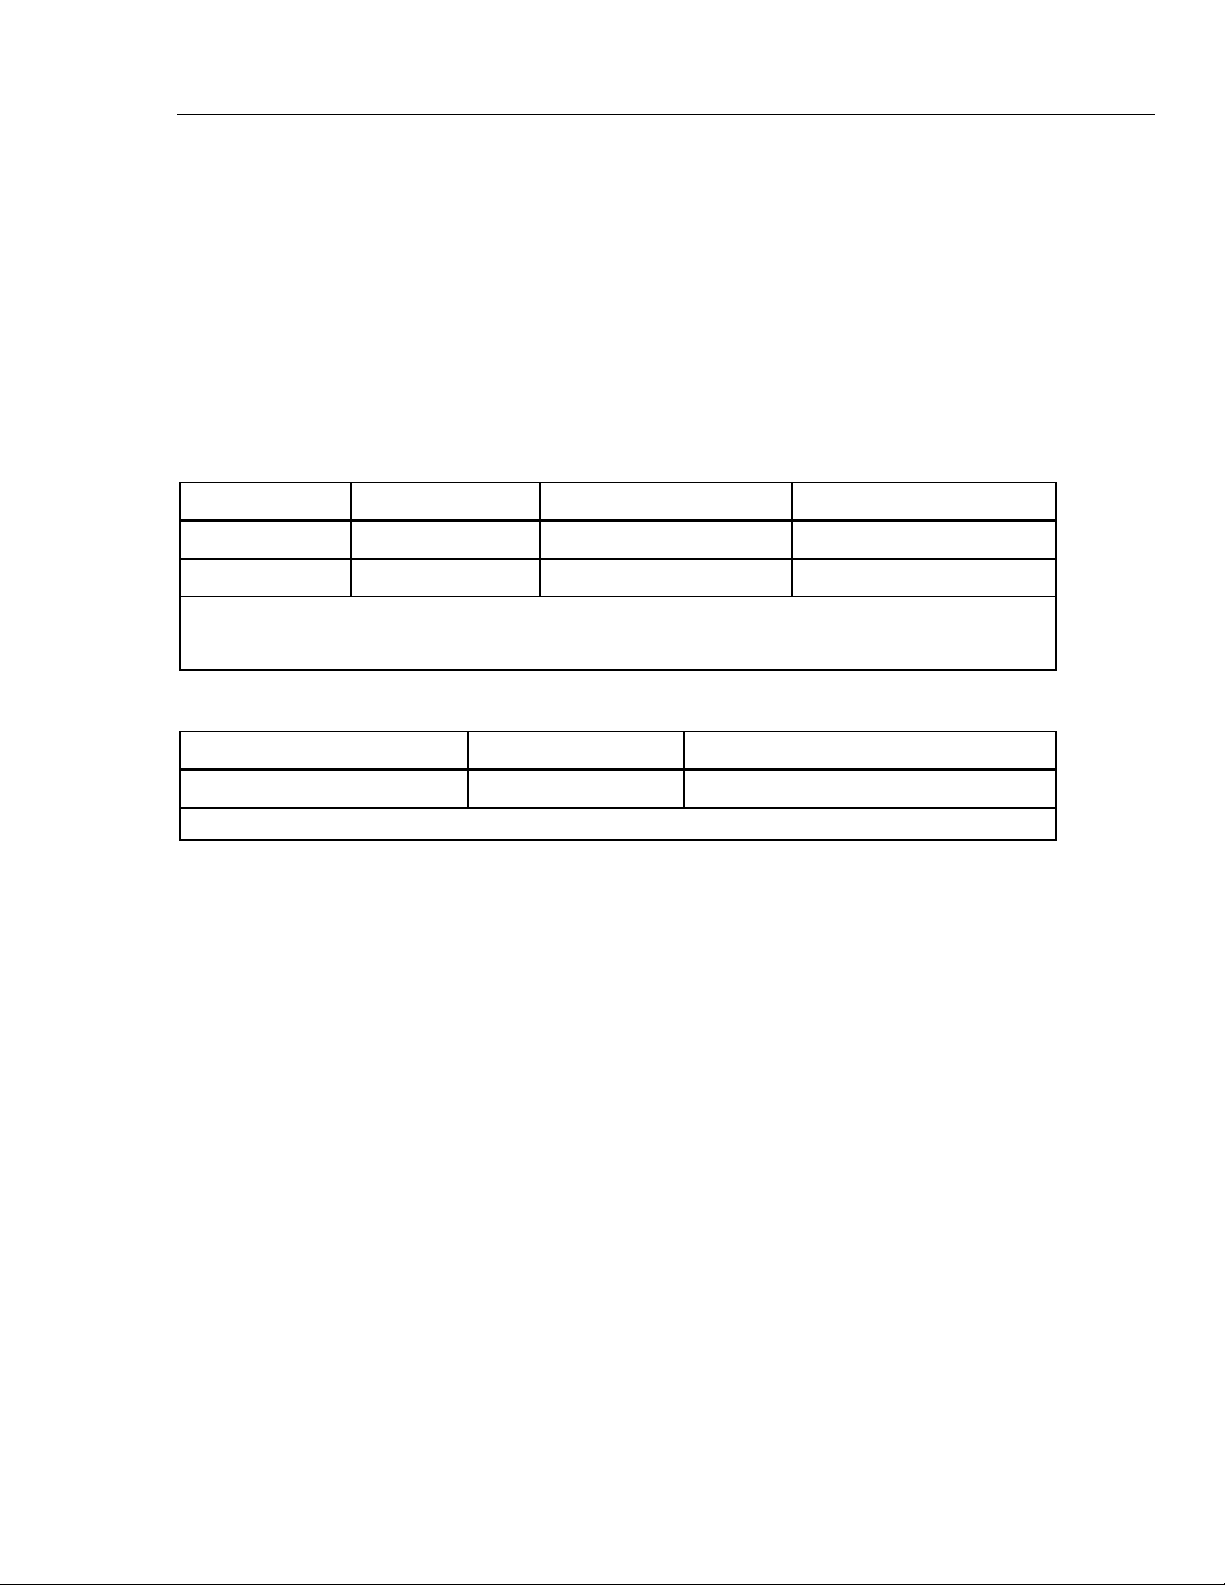
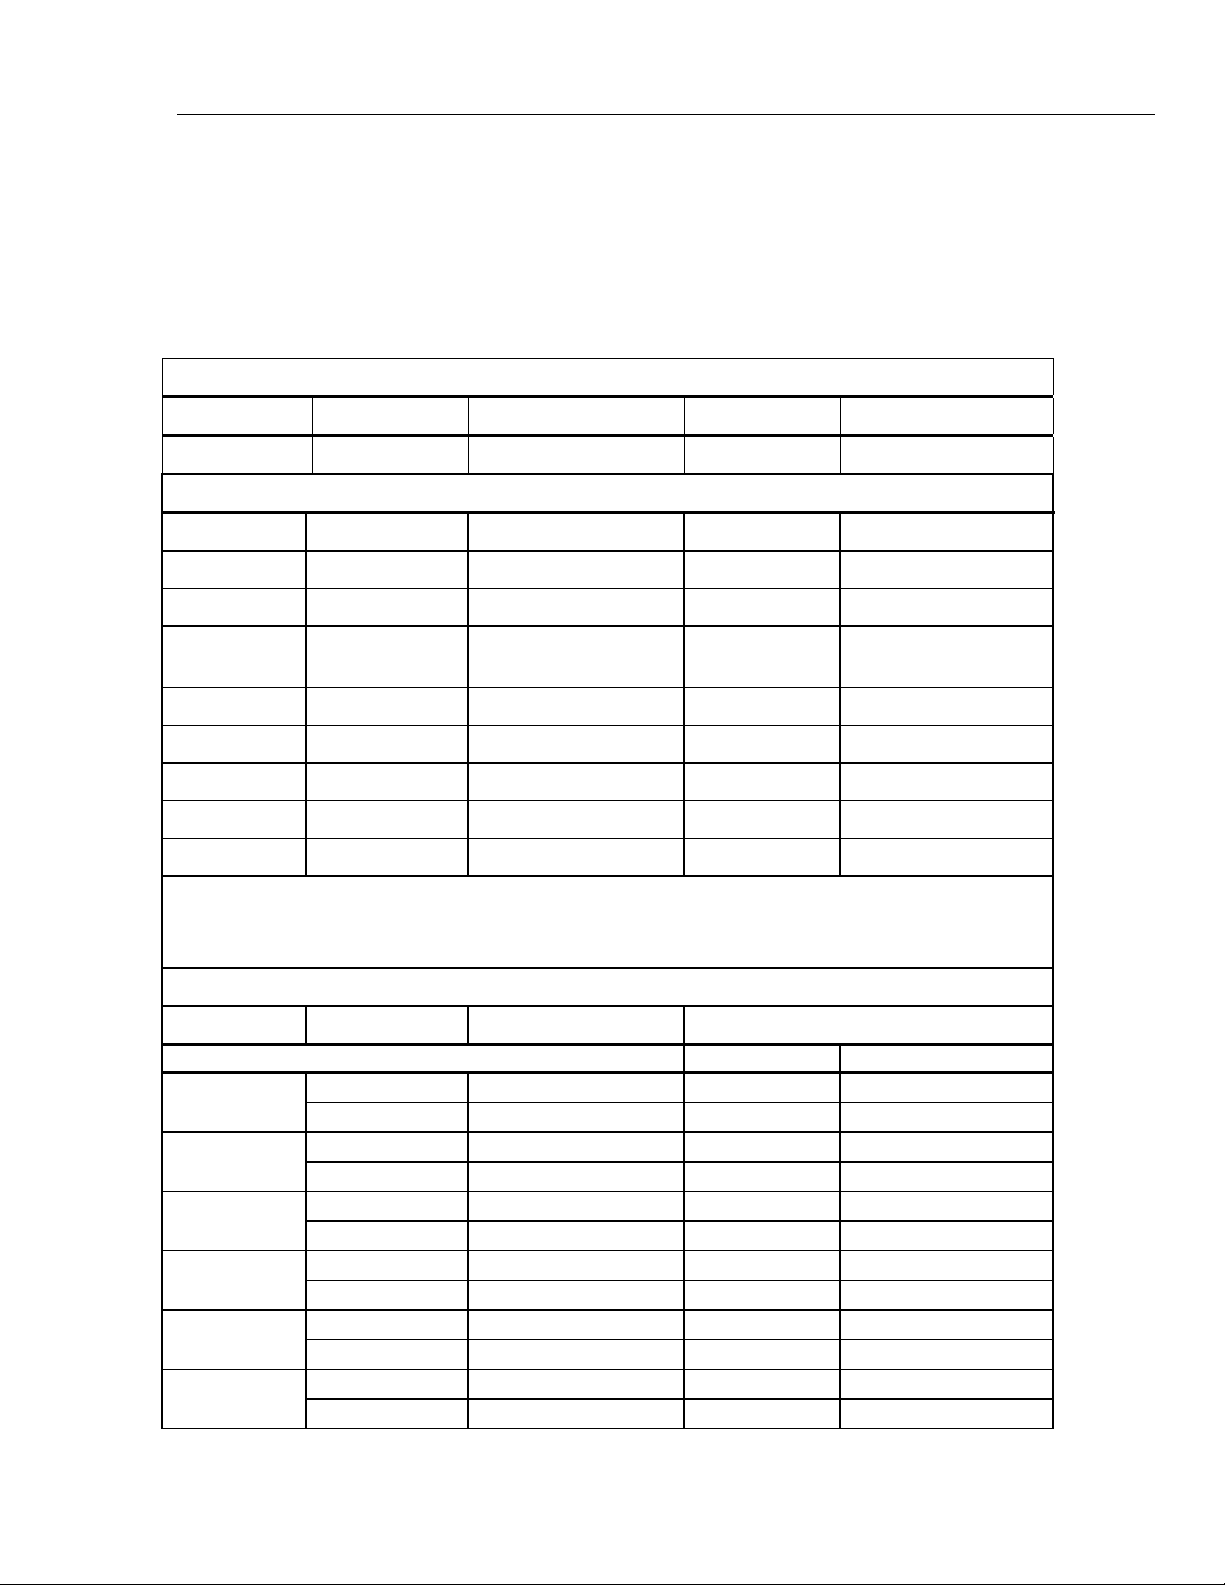
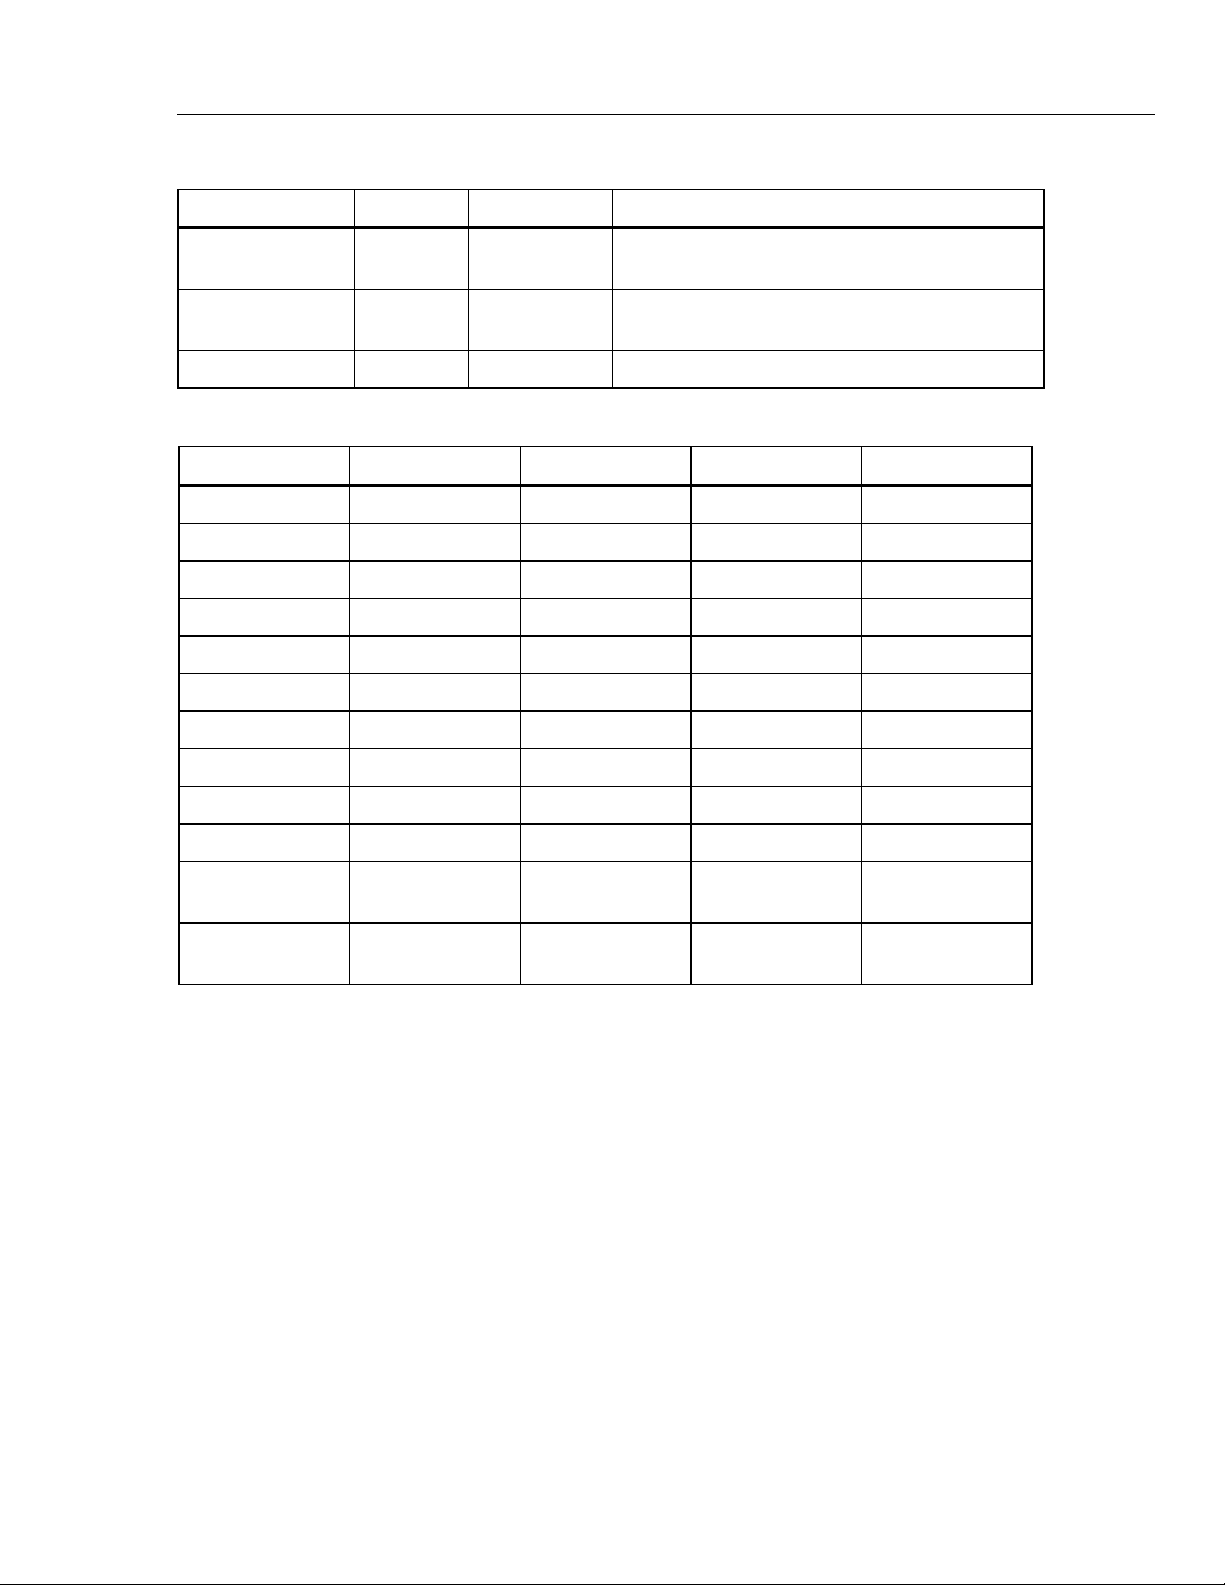
Table 3. 712 Supported RTD Types
RTD
Type
Ni 120 -80.0 to 260.0 0.15 to 2.00
Pt 100 385 -200.0 to 800.0 0.15 to 2.00
Pt 200 385 -200.0 to 630.0 0.15 to 2.00
Pt 500 385 -200.0 to 630.0 0.05 to 0.80
Pt 1000 385 -200.0 to 630.0 0.05 to 0.40
Pt 100 392 -200.0 to 630.0 0.15 to 2.00
Pt 100 JIS -200.0 to 630.0 0.15 to 2.00
Range and Resolution for
2
R
R
R
Temperature Range and Resolution Allowable Excitation
°C
Ohms Simulate and Measure
15.0 Ω to 400.0 Ω
400.0 Ω to 1500.0 Ω
1500.0 Ω to 3200.0 Ω
mA
0.15 to 2.00
0.05 to 0.80
0.05 to 0.40
1
Addresses pulsed transmitters and PICs with pulses ≥ 100 ms.
1: This column is for simulate mode only. It shows the allowable excitation current from an ohmmeter or
RTD measurement device connected to the calibrator.
2: The R annunciator signifies “resistance,” not an RTD type. Select it the same way as an RTD type.
Resolution
RTD: 0.1 °C
Ohms: 0.1 Ω
Temperature Coefficient
0.005 % of ohms range per °C for temperature ranges –10 °C to 18 °C and 28 °C to
55 °C. Ohms ranges are 400 Ω, 1.5 kΩ, and 3.2 kΩ.
Table 4. 712 RTD and Ohms Simulation
Ohms Range Excitation Current from Measurement Device
15 Ω to 400 Ω
15 Ω to 400 Ω
400 Ω to 1.5 kΩ
1.5 kΩ to 3.2 kΩ
Maximum input voltage: 30 V
0.15 mA to 0.5 mA 0.15
0.5 mA to 2 mA 0.1
0.05 mA to 0.8 mA 0.5
0.05 mA to 0.4 mA 1
Accuracy, ±Ω
7
Page 18
71X Series
Calibration Manual
Table 5. 712 RTD and Ohms Measurement
Ohms Range
15 Ω to 400 Ω
400 Ω to 1.5 kΩ
1.5 kΩ to 3.2 kΩ
Maximum input voltage: 30 V
Excitation current from 712: 0.3 mA
Firmware V1.2 through V1.9
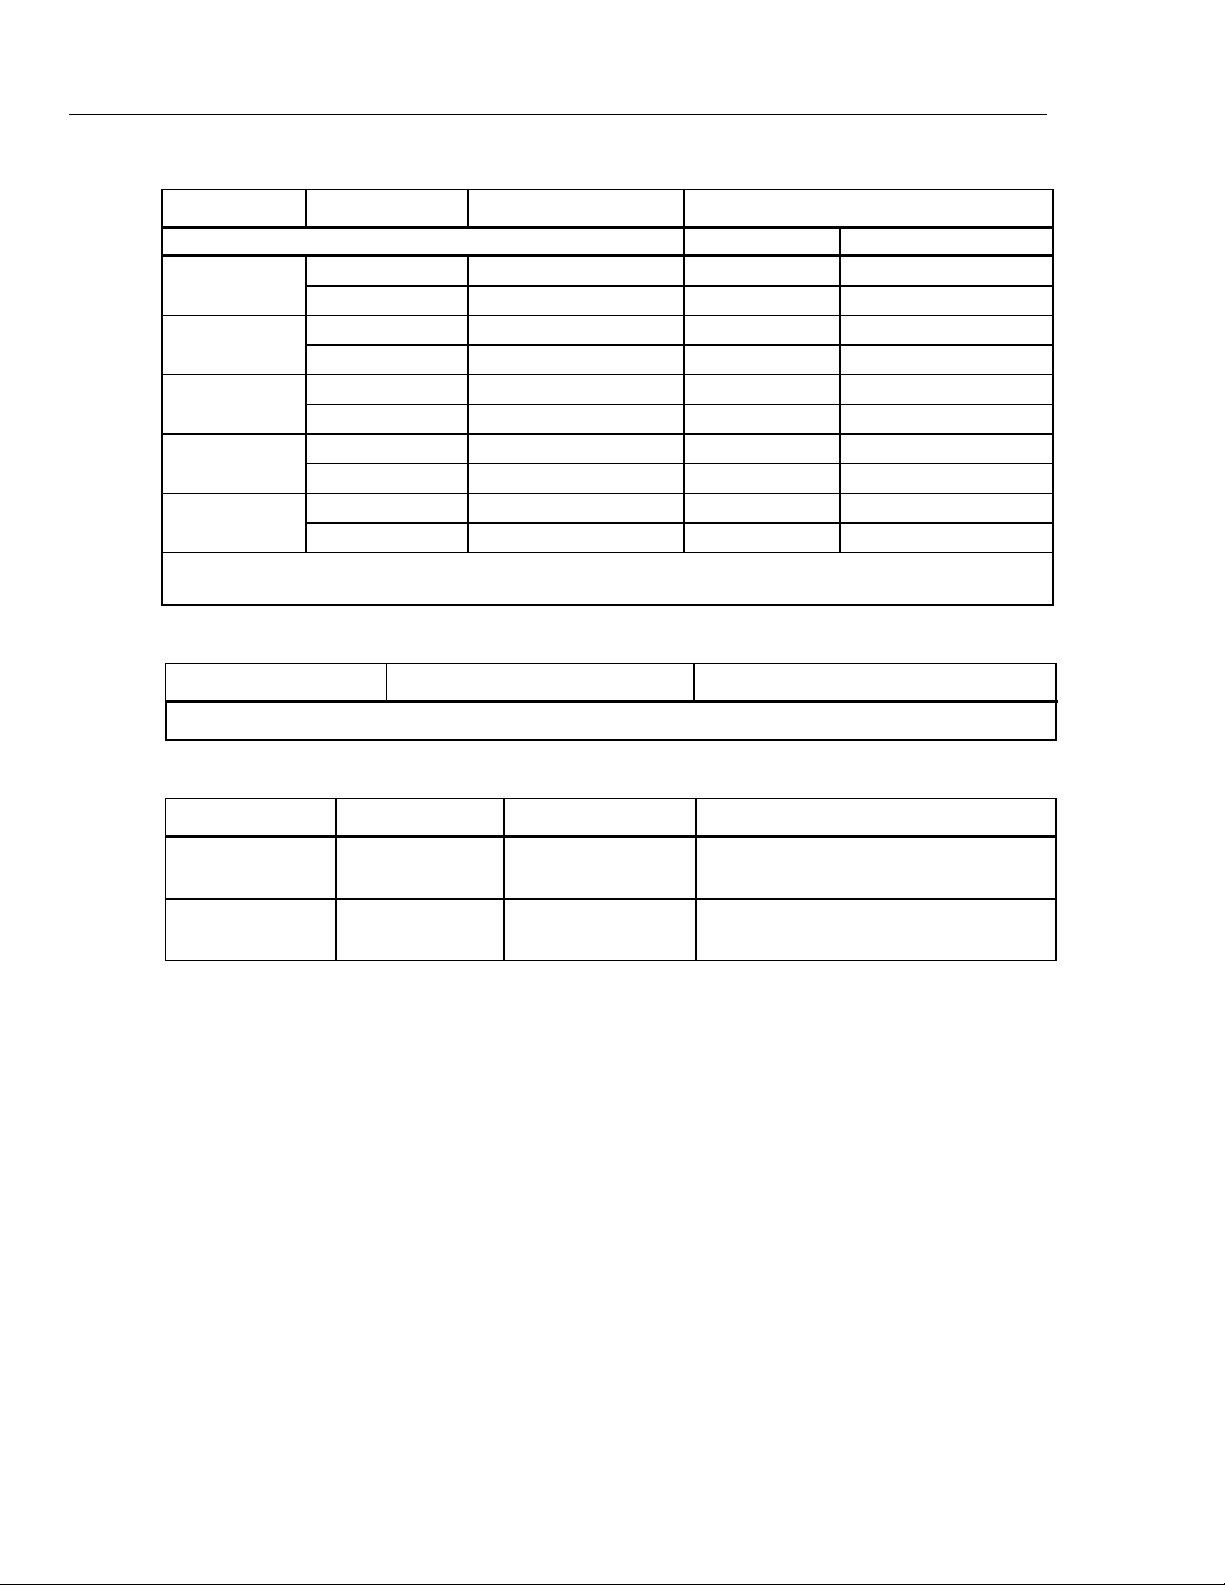
RTD
Type
Ni 120 -80.0 to 260.0
Pt 100 385 -200.0 to 800.0
Pt 200 385 -200.0 to 250.0
Range ˚C (˚F)
(-112.0 to 500.0)
(-328.0 to 1472.0)
(-328.0 to 482.0)
250.0 to 630.0
(482.0 to 1166.0)
Accuracy, Four-Wire ±Ω
0.1
0.5
1
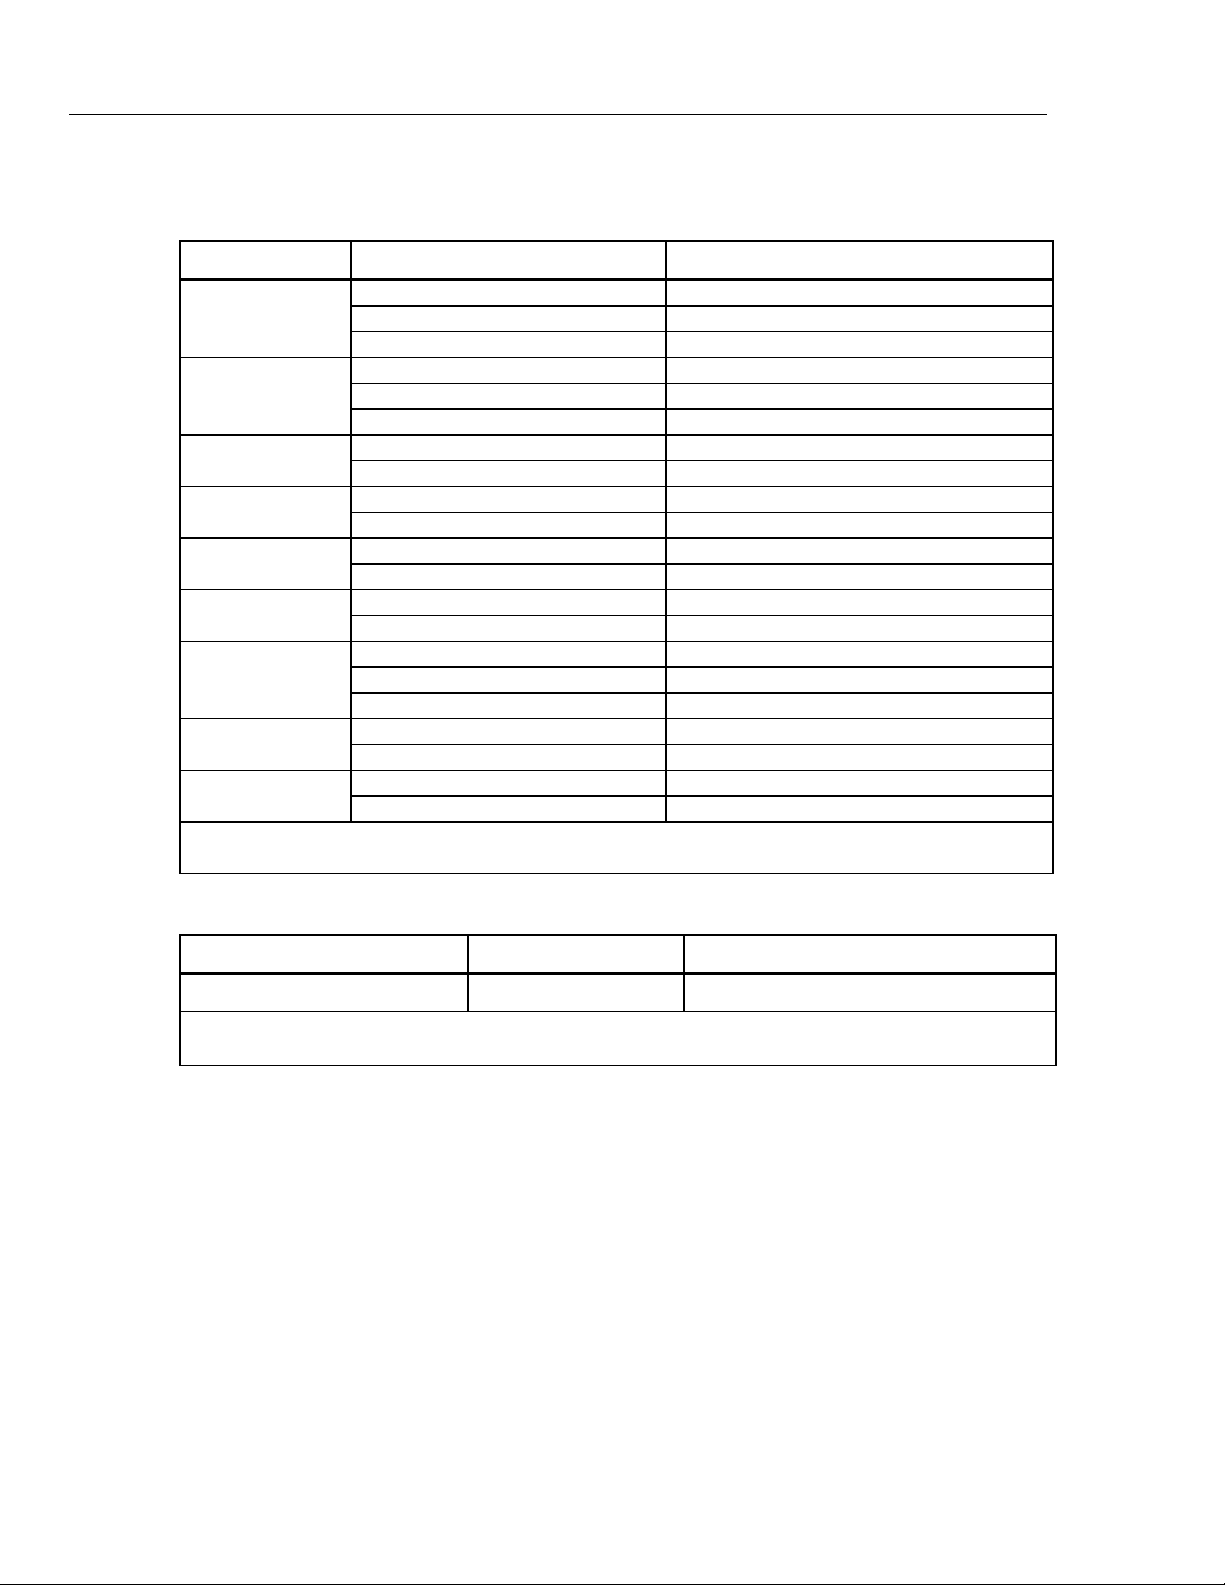
Table 6. RTD Specifications
Accuracy (˚C)
Input
4-Wire 2-Wire & 3-Wire
0.2 0.3 0.2 0.1 to 3.0
0.33 0.5 0.33 0.1 to 3.0
0.2
0.8
0.3
1.6
Output
0.2
0.8
Allowable
Excitation (mA)
0.1 to 3.0
Pt 500 385 -200.0 to 500.0
(-328.0 to 932.0)
500.0 to 630.0
(932.0 to 1166.0)
Pt 1000 385 -200.0 to 100.0
(-328.0 to 212.0)
100.0 to 630.0
(212.0 to 1166.0)
Pt 100 392
(3926)
Pt 100 JIS
(3916)
Addresses pulsed transmitters and PLCs with pulses as short as 5 ms.
Allowable Excitation is for Output mode only. It shows the allowable excitation current from an ohmmeter or
RTD measurement device connected to the calibrator.
Excitation current from 712: 0.2 mA.
Maximum input voltage: 30 V
-200.0 to 630.0
(-328.0 to 1166.0)
-200.0 to 630.0
(-328.0 to 1166.0)
0.3
0.4
0.2
0.2
0.3 0.5 0.3 0.1 to 3.0
0.3 0.5 0.3 0.1 to 3.0
0.6
0.9
0.4
0.5
0.3
0.4
0.2
0.2
0.05 to 0.8
0.05 to 0.4
8
Page 19
Process Calibrators
Specifications
Table 7. Ohms Specifications
Ohms Range
0 Ω to 400 Ω 0.1 0.15 0.1 to 0.5
400 Ω to 1.5 kΩ 0.5 0.5 0.05 to 0.8
1.5 kΩ to 3.2 kΩ 1 1 0.05 to 0.4
Allowable Excitation is for Output mode only. It shows the allowable excitation current from an ohmmeter or
RTD measurement device connected to the calibrator.
Excitation current from 712: 0.2 mA.
Maximum input voltage: 30 V
Input Accuracy
4-Wire
±Ω
Output
Accuracy
±Ω
0.1 0.5 to 3.0
Allowable Excitation (mA)
Resolution
RTD: 0.1 °C
Ohms: 0.1 Ω
Rev 1.3 or Later: < 400 Ω 0.01 Ω
> 400 Ω 0.1 Ω
Temperature Coefficient
0.005 % of ohms range per °C for temperature ranges –10 °C to 18 °C and 28 °C to
55 °C. Ohms ranges are 400 Ω, 1.5 kΩ, and 3.2 kΩ.
Firmware V2.0 and Later
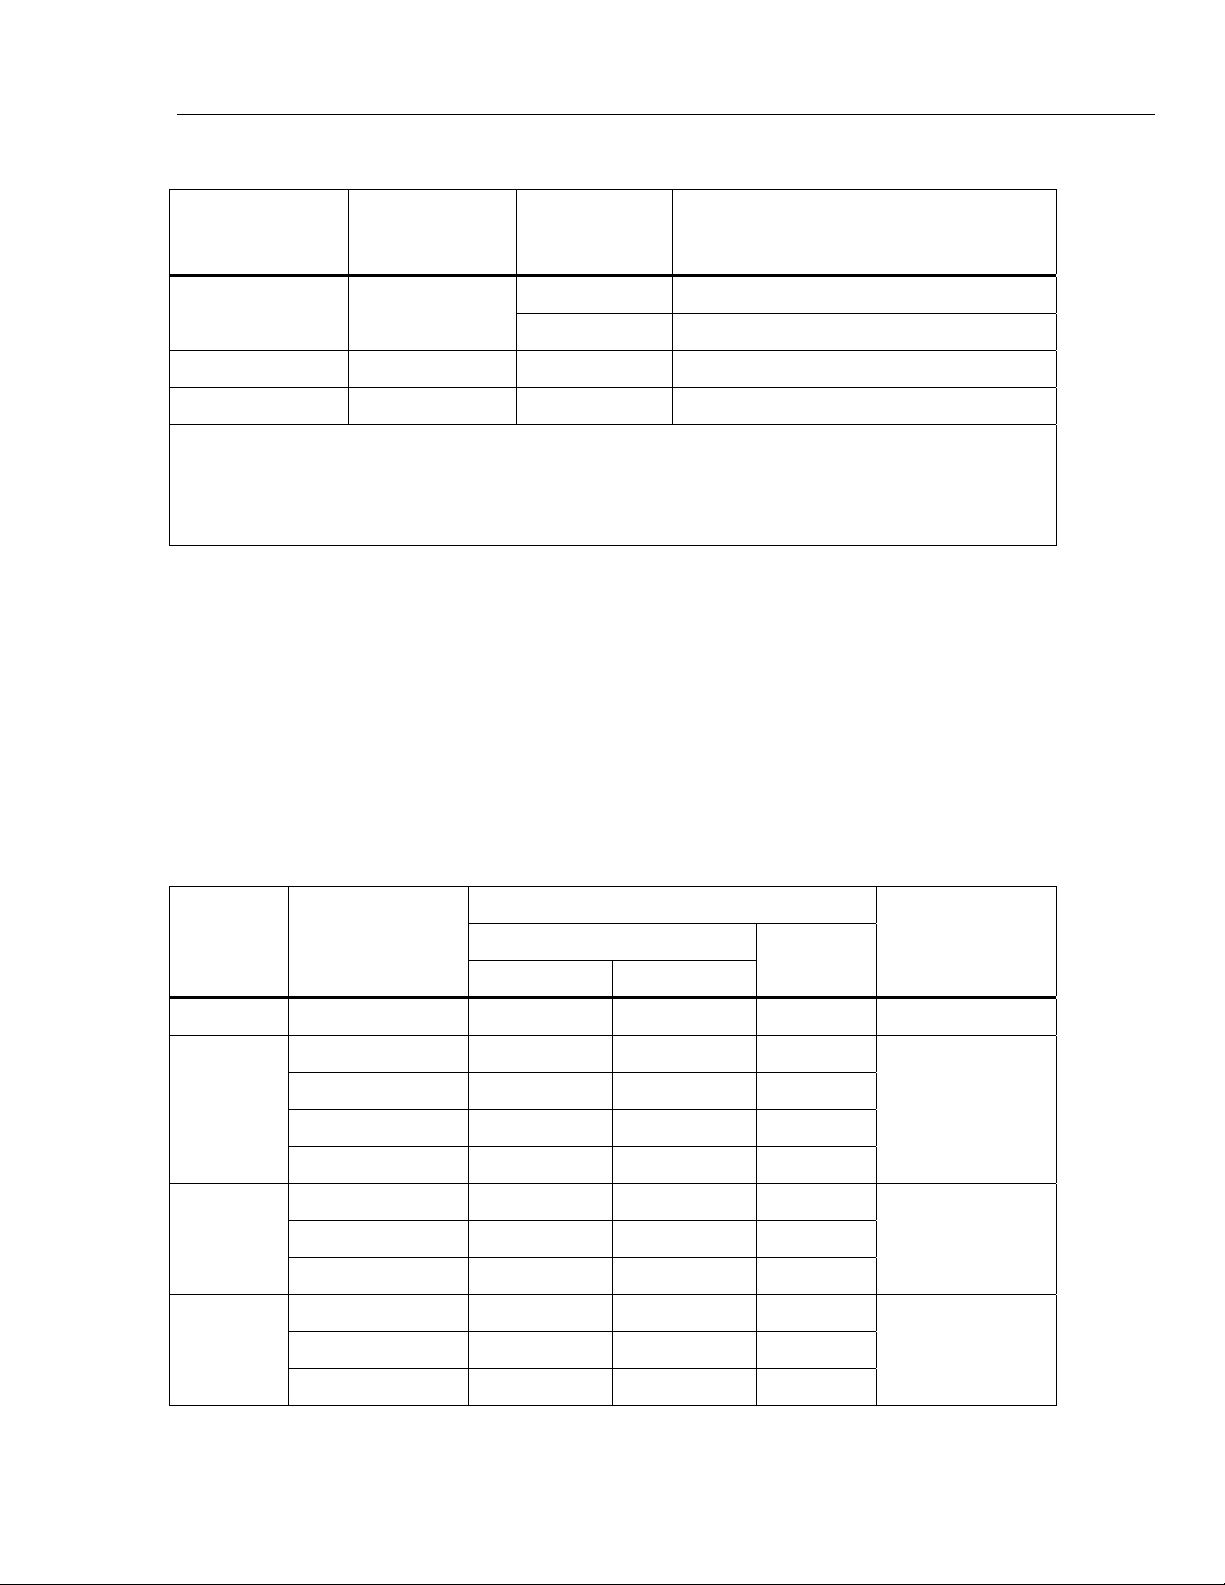
Table 8. RTD Specifications
Accuracy (˚C) *
RTD
Type
Ni 120 -80.0 to 260.0 0.20 0.25 0.2 0.1 to 3.0
Pt 100 385 -200.0 to 100.0 0.20 0.28 0.2 0.1 to 3.0
Pt 200 385 -200.0 to 100.0 0.80 1.00 0.8 0.05 to 0.8
Pt 500 385 -200.0 to 100.0 0.40 0.60 0.4 0.05 to 0.8
Range ˚C
4-Wire 2-Wire & 3-Wire
100.0 to 300.0 0.30 0.40 0.3
300.0 to 600.0 0.40 0.52 0.4
600.0 to 800.0 0.50 0.65 0.5
100.0 to 300.0 0.90 1.15 0.9
300.0 to 630.0 1.00 1.20 1.0
100.0 to 300.0 0.50 0.75 0.5
300.0 to 630.0 0.60 0.90 0.6
Input
Source
Allowable
Excitation (mA)
9
Page 20
71X Series
Calibration Manual
RTD
Type
Pt 1000 385 -200.0 to 100.0 0.20 0.25 0.2 0.05 to 0.4
Table 8. RTD Specifications (cont.)
Accuracy (˚C) *
Range ˚C
4-Wire 2-Wire & 3-Wire
100.0 to 300.0 0.30 0.40 0.3
300.0 to 630.0 0.40 0.52 0.4
Input
Source
Allowable
Excitation (mA)
Pt 100 392
(3926)
Pt 100 JIS
3916
Addresses pulsed transmitters and PLCs with pulses as short as 5 ms.
Excitation current from 712: 0.2 mA.
Maximum input voltage: 30 V
*2-wire: Does not include lead resistance
3-wire: Assumes matched leads
Excitation current: 0.2 mA.
Maximum input voltage: 30 V
*2-wire: Does not include lead resistance
3-wire: Assumes matched leads
-200.0 to 100.0 0.20 0.28 0.2 0.1 to 3.0
100.0 to 300.0 0.30 0.40 0.3
300.0 TO 630.0 0.40 0.52 0.4
-200.0 to 100.0 0.20 0.28 0.2 0.1 to 3.0
100.0 to 300.0 0.30 0.40 0.3
300.0 to 630.0 0.40 0.52 0.4
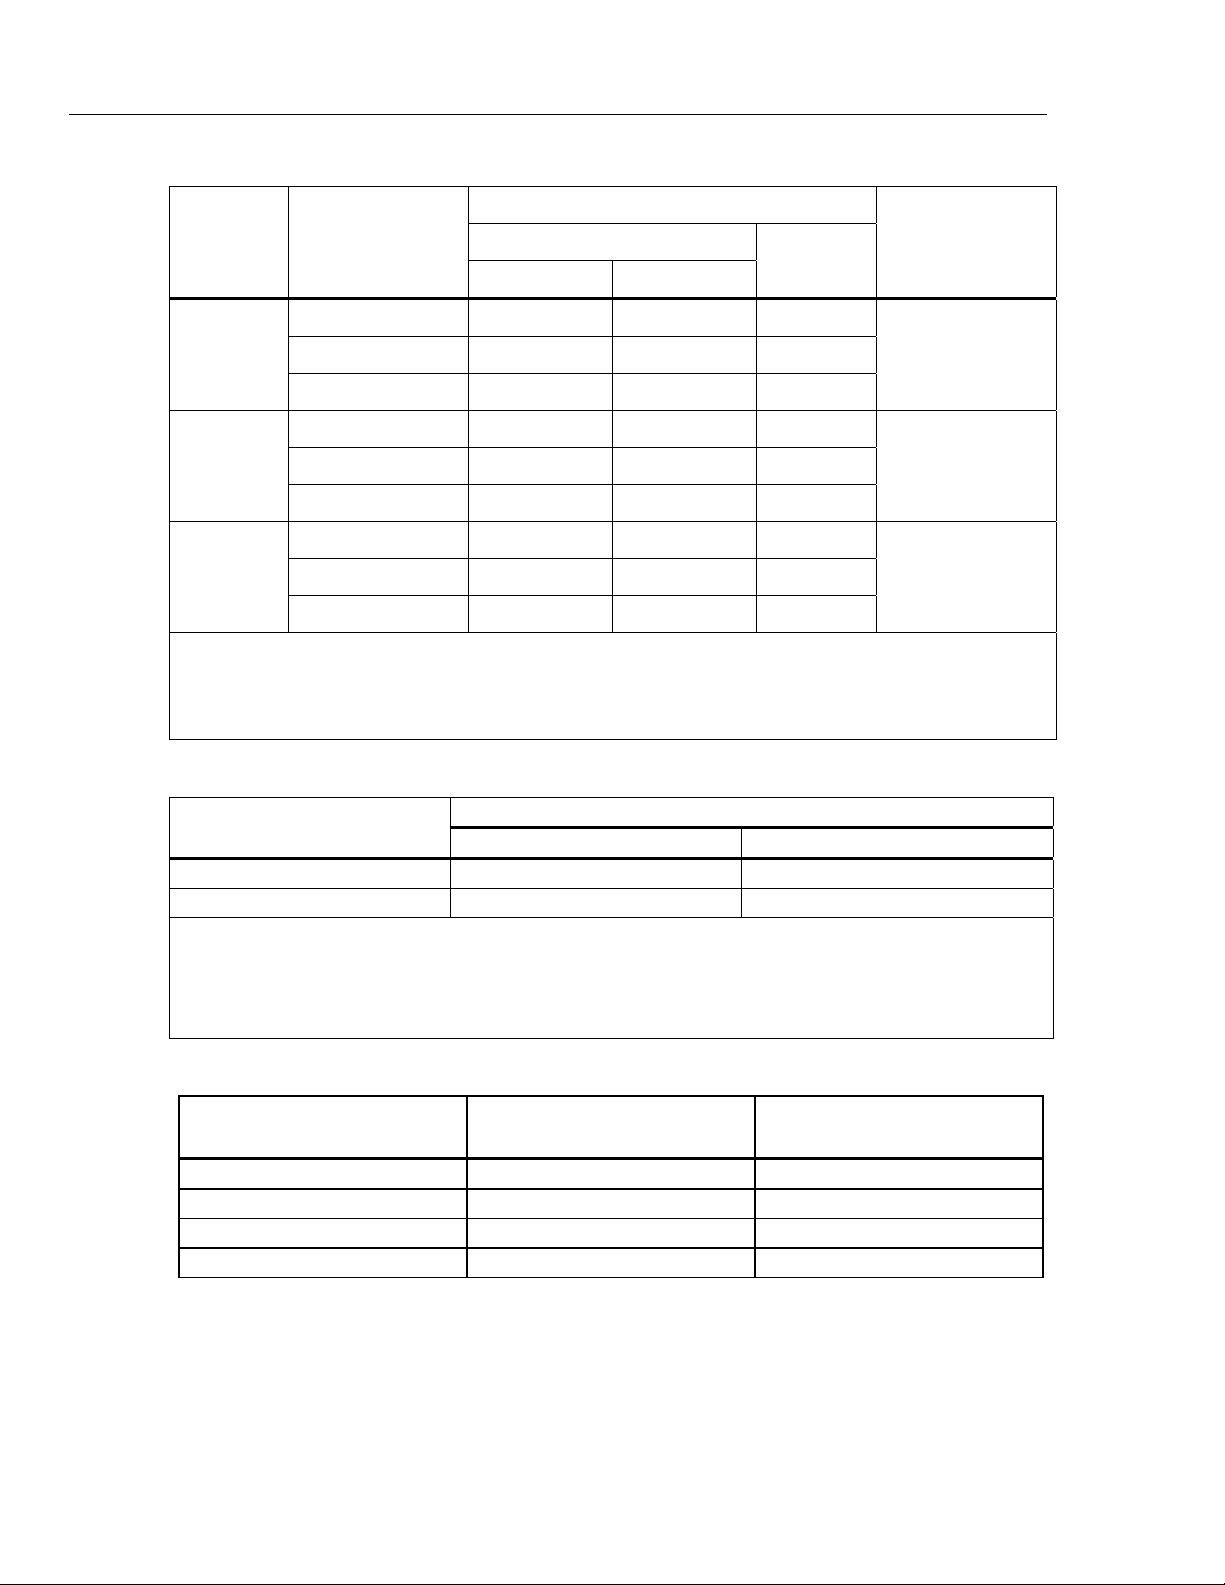
Table 9. Ohms Measurement Specifications
Ohms Range
0 Ω to 400 Ω 0.025 % ±0.05 Ω 0.025 % ±0.1 Ω
400 Ω to 4000 Ω 0.025 % ±0.05 Ω 0.025 % ±0.55 Ω
4-Wire 2- and 3-wire
Accuracy *
10
Ohms Range
5 to 400 Ω 0.1 to 0.5 mA 0.025 % ±0.1 Ω
5 to 400 Ω 0.5 to 3.0 mA 0.025 % ±0.05 Ω
400 to 1500 Ω 0.05 to 0.8 mA 0.025 % ±0.5 Ω
1500 to 4000 Ω 0.05 to 0.4 mA 0.025 % ±0.5 Ω
Resolution
RTD: 0.1 °C
Ohms: 0.1 Ω
Rev 1.3 or Later: < 400 Ω 0.01 Ω
> 400 Ω 0.1 Ω
Table 10. Ohms Source Specifications
Excitation Current from
Measurement Device
Accuracy
Page 21
Process Calibrators
Specifications
Temperature Coefficient
0.005 % of ohms range per °C for temperature ranges –10 °C to 18 °C and 28 °C to
55 °C. Ohms ranges are 400 Ω, 1.5 kΩ, and 4.0 kΩ.
714 Specifications
714 Calibrator specifications vary based on the version of the instrument. To display the
firmware version for your instrument, start with the 714 off, push and hold , then push
the power button. Find the section heading below for the displayed version and use the
specification tables in that section to test and calibrate the instrument.
Firmware Earlier than v2.0
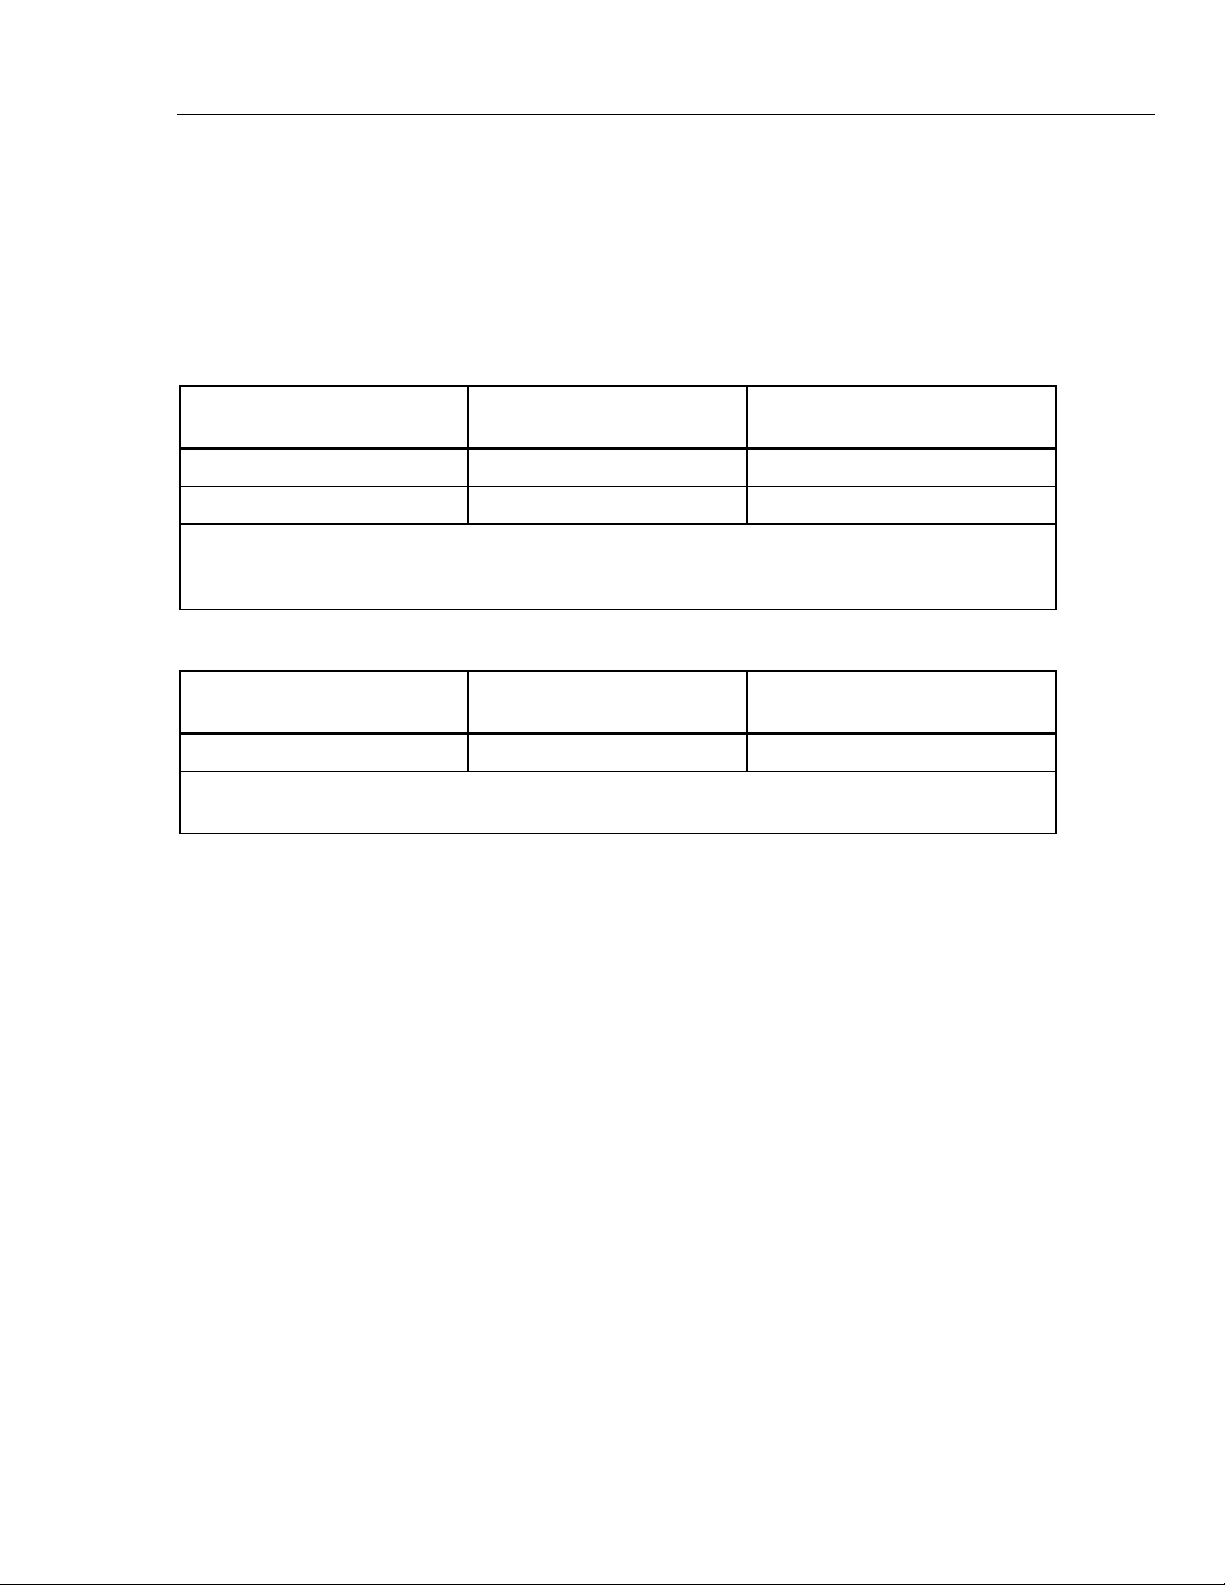
Table 11. 714 Temperature Measure and Thermocouple Simulate
TC Type Resolution Error Reference Junction Error
J, K, T, E, L, U 0.1 °C ±(0.3 °C + 10 μV) ±0.2 °C
B, R, S 1 °C ±(0.3 °C + 10 μV) ±0.2 °C
Maximum input voltage: 30 V
Temperature Coefficient: 0.05 x specified accuracy per °C for temperature ranges – 10 °C to 18 °C and
28 °C to 55 °C
Table 12. 714 Millivolt Measure and Source
Range Resolution Accuracy
-10 mV to 75 mV 0.01 mV ±(0.025 % of range (75 mV) + 1 count)
Maximum input voltage: 30 V
11
Page 22
71X Series
Calibration Manual
Firmware V2.0 and Later
Maximum input voltage: 30 V
* Includes 0.2 °C cold junction compensation (CJC) error
Table 13. 714 Temperature Measure and Thermocouple Simulate
TC Type Range °C Accuracy °C *
J
K
T
E
R
S
B
L
U
-210.0 to 0.0 0.6
0.0 to 800.0 0.4
800.0 to 1200.0 0.5
-200.0 to 0.0 0.8
0.0 to 1000.0 0.5
1000.0 to 1372.0 0.7
-250.0 to 0.0 0.8
0.0 to 400.0 0.4
-250.0 to -100.0 0.8
-100.0 to 1000.0 0.4
-20.0 to 0.0 2.0
0.0 to 1787.0 1.4
-20.0 to 0.0 2.0
0.0 to 1767.0 1.4
600.0 to 800.0 1.4
800.0 to 1000.0 1.5
1000.0 to 1820.0 1.7
-200.0 to 0.0 0.45
0.0 to 900.0 0.4
-200.0 to 0.0 0.7
0.0 to 600.0 0.45
Range Resolution Accuracy
-10 mV to 75 mV 0.001 mV 0.015 % ± 10 µV
Maximum input voltage: 30 V
Maximum source current is 1.0 mA
Table 14. 714 Millivolt Measure and Source
12
Page 23
Process Calibrators
Specifications
715 Specifications
715 Calibrator specifications vary based on the version of the instrument. To display the
firmware version for your instrument, start with the 715 off, push and hold , then push
the power button. Find the section heading below for the displayed version and use the
specification tables in that section to test and calibrate the instrument.
Firmware Earlier than V2.0
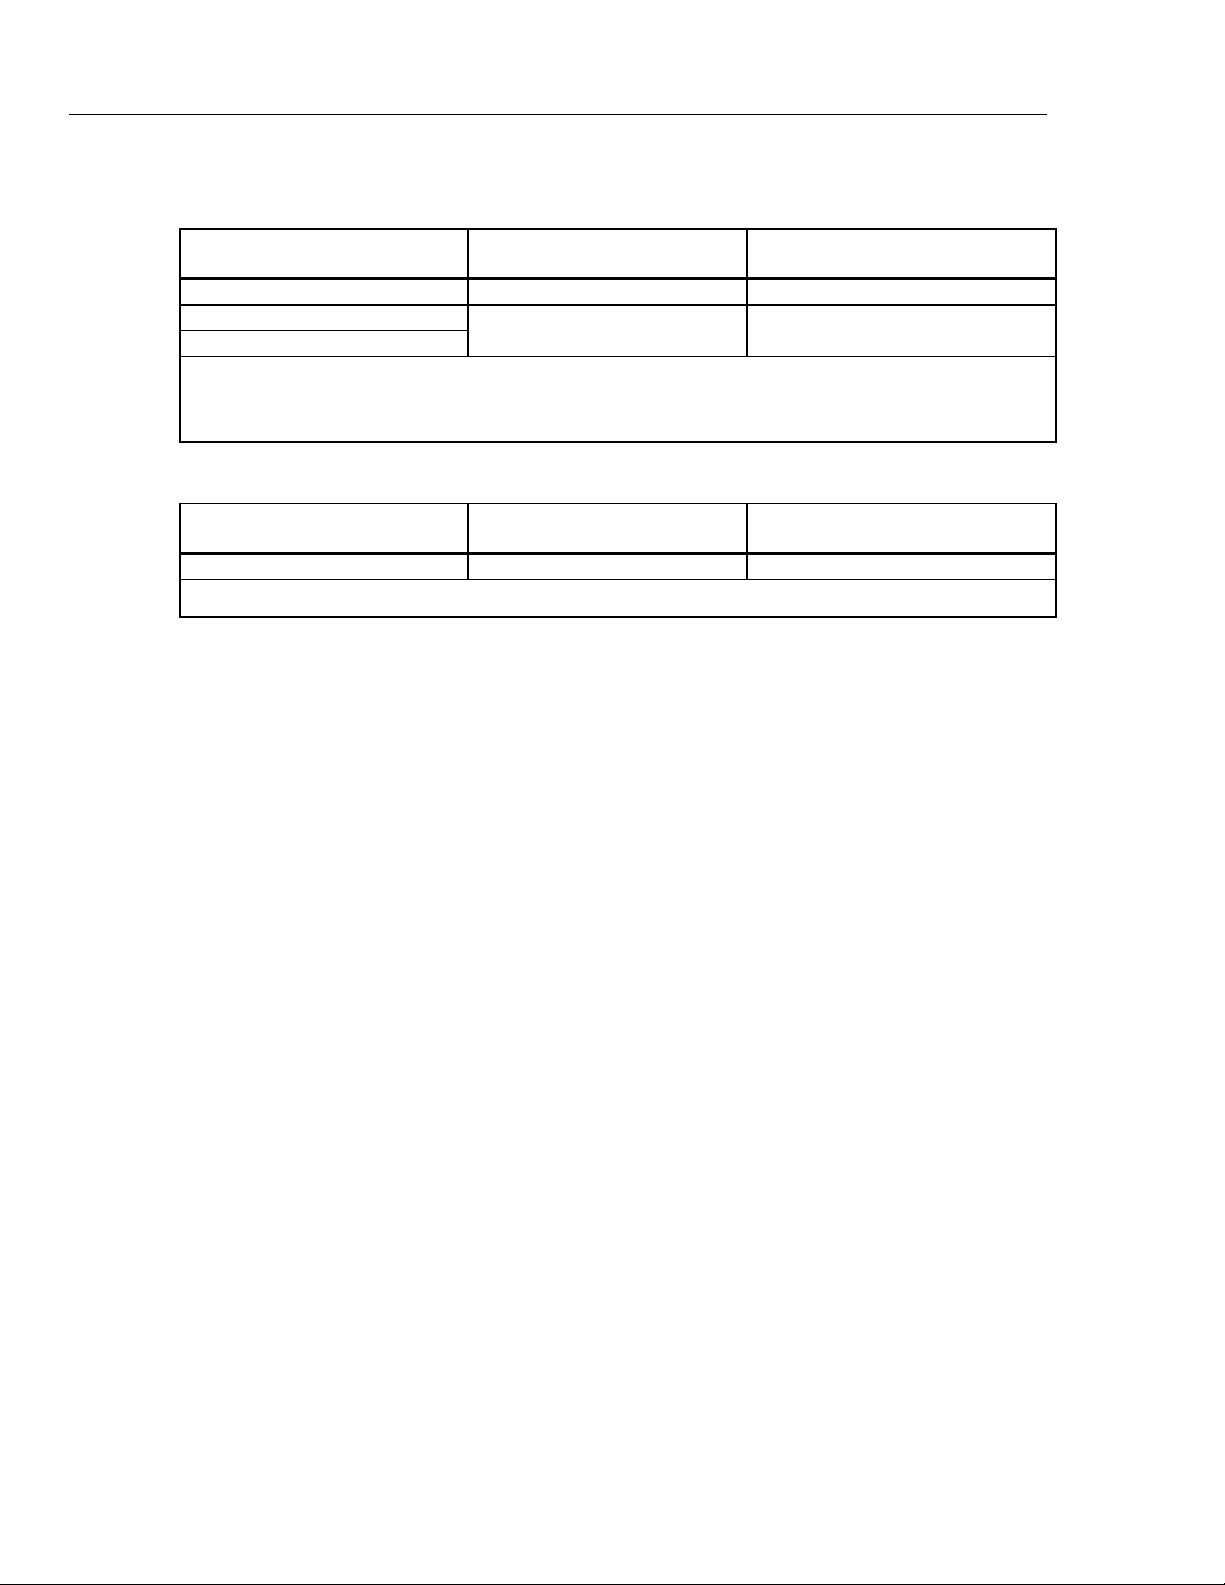
Table 15. 715 DC V Input and Output
Range Resolution
100 mV 0.01 mV 0.02 % + 2
10 V 0.001 V 0.02 % + 2
Input impedance: 2 MΩ (nominal), < 100 pF
Overvoltage protection: 30 V
Voltage drive capability: 1 mA
Table 16. 715 DC mA Input and Output
Range Resolution
24 mA 0.001 mA 0.02 % + 2
Overload protection: 125 mA, 250 V fast acting fuse
mA Output: 0 % = 4 mA, 100 % = 20 mA
Temperature Coefficient
0.005 % of ohms range per °C for temperature ranges – 10 °C to 18 °C and 28 °C to
55 °C
Source mode
Compliance: 1000 Ω at 20 mA for battery voltage ≥ 6.8 V (700 Ω at 20 mA for battery
voltage 5.8 to 6.8 V)
Accuracy,
±(% of Reading + Counts)
Accuracy,
±(% of Reading + Counts)
Simulate mode
External loop voltage requirement: 24 V nominal, 30 V maximum, 12 V minimum
Loop Power
24 V ±10 %
13
Page 24
71X Series
Calibration Manual
Firmware 2.0 and Later
Table 17. 715 DC V Input and Output
Range Resolution
200 mV 0.01 mV 0.015 % + 2
20 V output
25 V input
Input impedance: 1 MΩ (nominal), < 100 pF
Overvoltage protection: fuseless
Voltage drive capability: 1 mA
Table 18. 715 DC mA Input and Output
Range Resolution
24 mA 0.001 mA 0.01 % + 2
Overload protection: fuseless
Temperature Coefficient
0.005 % of ohms range per °C for temperature ranges – 10 °C to 18 °C and 28 °C to
55 °C
Source mode
Compliance: 1000 Ω at 20 mA for battery voltage ≥ 6.8 V (700 Ω at 20 mA for battery
voltage 5.8 to 6.8 V)
Accuracy,
±(% of Reading + Counts)
0.001 V 0.01 % + 2
Accuracy,
±(% of Reading + Counts)
Simulate mode
External loop voltage requirement: 24 V nominal, 30 V maximum, 12 V minimum
Loop Power
24 V Nominal
14
Page 25
Process Calibrators
Specifications
717 Specifications
Accuracy is specified for 1 year after calibration at operation temperatures of -10 °C to +
55 °C. To show the firmware version, start with the unit off and push and hold the lower
center button, it will be or , then push .
Pressure
Table 19. 717 Pressure Specifications
Version 1.2 or Lower
Model Range SI Range Metric Max SI Max Metric
717-30 G (0 to 30) PSI 0 to 206.85 kPa 90 PSI 620 kPa
Version 1.3 to 3.9
717-1G (-1 to 1) PSI (-7 to 7) kPa 5 PSI 34.5 kPa
717-30G (-12 to 30) PSI (-83 to 207) kPa 60 PSI 413 kPa
717-100G (-12 to 100) PSI (-83 to 690) kPa 200 PSI 1379 kPa or 1.4 mPa
717-300G (-12 to 300) PSI
717-500G (0 to 500) PSI 3447 kPa or 3.4 mPa 1000 PSI 6895 kPa or 6.9 mPa
717-1000G (0-1000) PSI 6895 kPa or 6.9 mPa 2000 PSI 13790 kPa or 13.8 mPa
717-1500G (0-1500) PSI 10342 kPa or 10.3 mPa 3000 PSI 20684 kPa or 20.7 mPa
717-3000G (0-3000) PSI 20684 kpa or 20.7 mPa 6000 PSI 41369 kPa or 41.4 mPa
717-5000G (0-5000) PSI 34474 kPa or 34.5 mPa 10000 PSI 68948 kPa or 69 mPa
Accuracy: Pressure Accuracy is ±0.05 % of positive range 18 °C to 28 °C.
Temperature coefficient: 0.01 % of range per °C for temperature ranges of between 10 °C to 18 °C and
28 °C to 55 °C.
Model Range Max Accuracy
717 1G
717 15G
717 30G
717 100G
717 300G
717 500G
-1 to 1 PSI 5 PSI 0.050 % 0.050 %
-7 to 7 kPa 34.5 kPa
-12 to 15 PSI 30 PSI 0.025 % 0.035 %
-83 to 103 kPa 207 kPa
-12 to 30 PSI 60 PSI 0.025 % 0.035 %
-83 to 207 kPa 413 kPa
-12 to 100 PSI 200 PSI 0.025 % 0.035 %
-83 to 690 kPa 1.4 mPa
-12 to 300 PSI 375 PSI 0.035 % 0.050 %
-83 to 2.1 mPa 2.6 mPa
0 to 500 PSI 1000 PSI 0.025 % 0.035 %
0 to 3.4 mPa 6.9 mPa
(-83 to 2068) kPa or
2.1 mPa
Version 4.0 or Higher
375 PSI 2586 kPa or 2.6 mPa
[1]
6 month 1 year
15
Page 26
71X Series
Calibration Manual
Model Range Max Accuracy
Table 19. 717 Pressure Specifications (cont.)
[1]
717 1000G
717 1500G
717 3000G
717 5000G
717 10000G
0 to 1000 PSI 2000 PSI 0.025 % 0.035 %
0 to 6.9 mPa 13.8 mPa
0 to 1500 PSI 3000 PSI 0.025 % 0.035 %
0 to 10.3 mPa 20.7 mPa
0 to 3000 PSI 6000 PSI 0.025 % 0.035 %
0 to 20.7 mPa 41.4 mPa
0 to 5000 PSI 10000 PSI 0.025 % 0.035 %
0 to 34.5 mPa 69 mPa
0 to 10000 PSI 15000 PSI 0.035 % 0.050 %
0 to 69 mPa 103.4 mPa
6 month 1 year
[1] In an RF field of 1 V/m to 3 V/m between the frequencies of 1.4 GHz to 2.0 GHz, add 120 counts to
specified accuracy.
Table 20. Pressure Display, Pressure Module Input
Range Resolution Accuracy
Refer to the Instruction Sheet for the pressure module
Table 21. DC mA Input
Range Resolution Accuracy,±( % of Reading + Counts)
717 Version 2.9
or lower 24 mA 0.001 mA 0.025 + 1
717 Version 3.0
24 mA 0.001 mA 0.015 + 2
or higher
16
Page 27
Process Calibrators
Specifications
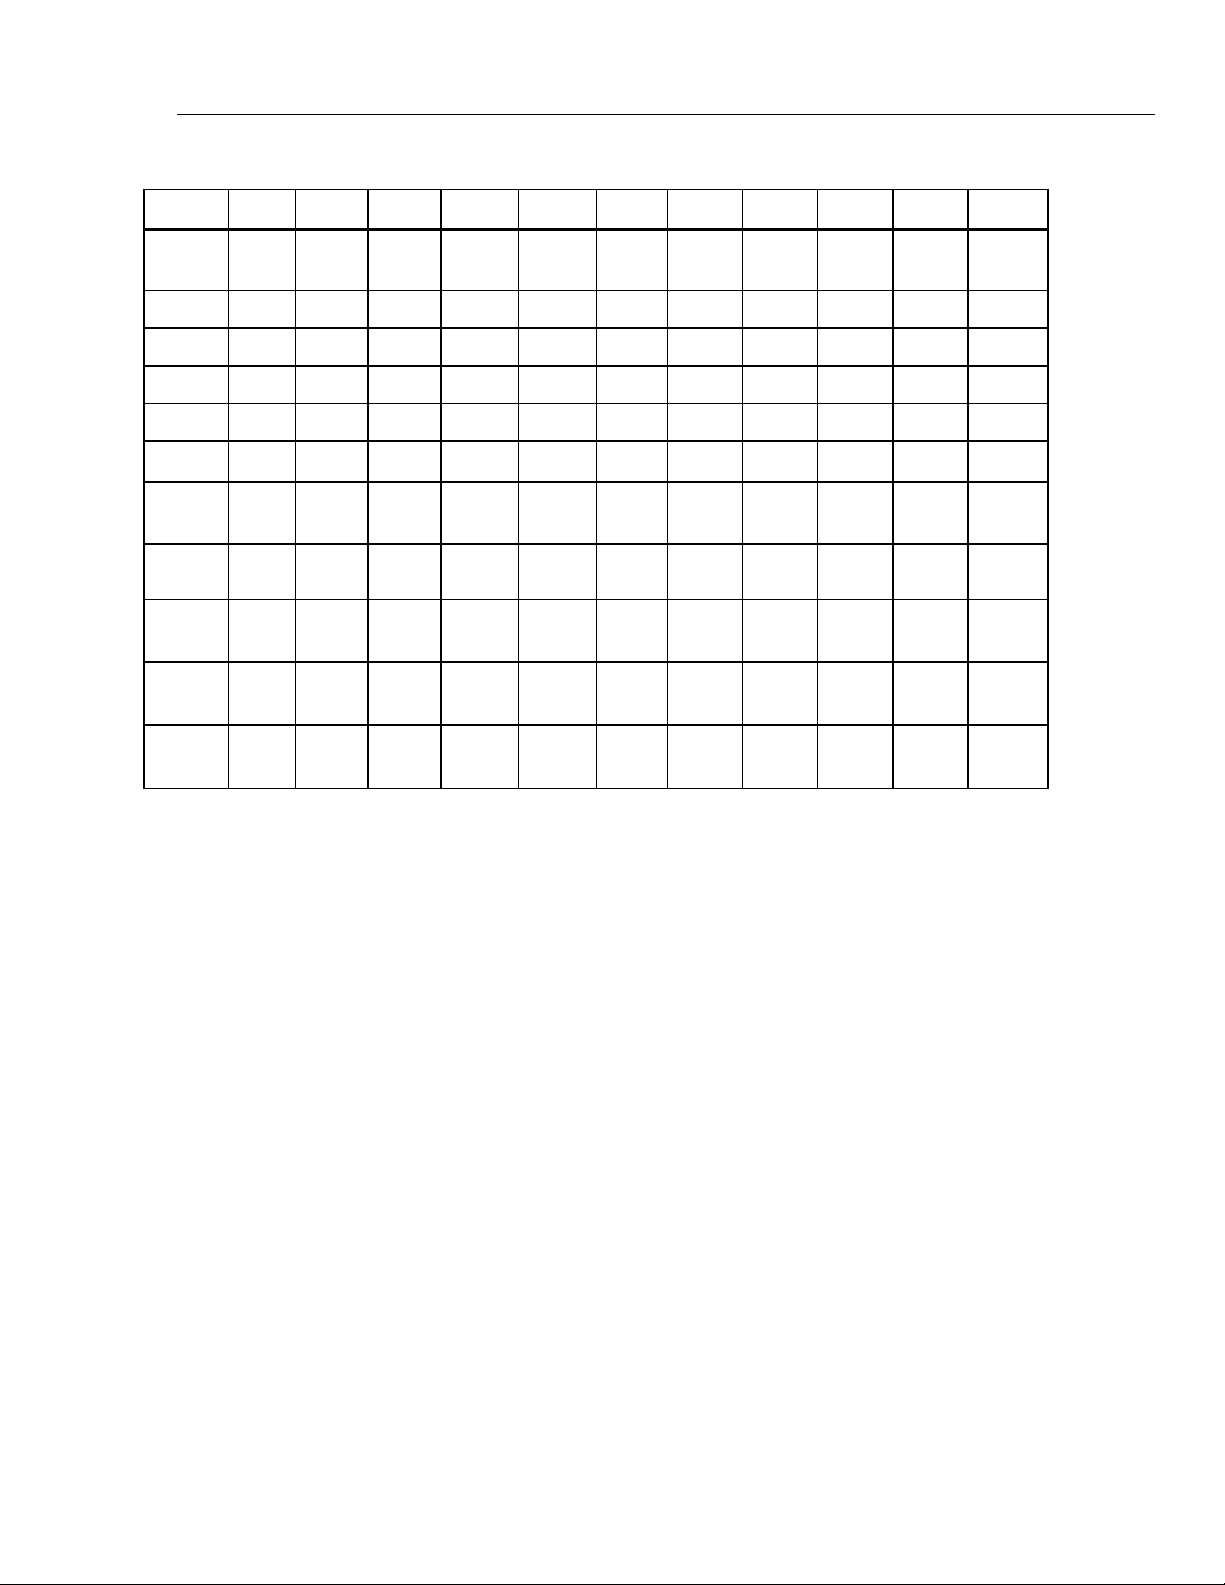
Table 22. 717 Range and Resolution
1 15 30 100 300 500 1000 1500 3000 5000 10000
Range -1 to 1 -12 to
15
PSI 1.0000 15.000 30.000 100.00 300.00 500.00 1000.0 1500.0 3000.0 5000.0 10000
bar 0.0689 1.0342 2.0684 6.8947 20.684 34.474 68.947 103.42 206.84 344.74 689.48
mbar 68.948 1034.2 2068.4 6894.8 20684 34474 68948 NA NA NA NA
kPa 6.8948 103.42 206.84 689.48 2068.4 3447.4 6894.8 10342 20684 34474 68948
kg/cm2 0.0703 1.0546 2.1092 7.0307 21.092 35.153 70.307 105.46 210.92 351.53 703.06
cmH20@
4 °C
cmH20@
20 °C
inH20@
4 °C
inH20@
20 °C
mmHg@
0 °C
70.309 1054.6 2109.3 7030.9 21093 35154 70309 NA NA NA NA
70.434 1056.5 2113.0 7043.4 21130 35217 70434 NA NA NA NA
27.681 415.12 830.42 2768.1 8304.2 13840 27681 41521 83042 NA NA
27.730 415.95 831.89 2773.0 8318.9 13865 27730 41595 83189 NA NA
51.715 776.25 1551.5 5171.5 15515 25858 51715 NA NA NA NA
-12 to
30
-12 to
100
-12 to
300
0 to
500
0 to
1000
0 to
1500
0 to
3000
0 to
5000
0 to
10000
Overload Protection
Fuseless overvoltage protection
Temperature Coefficient
0.005 % of range per °C for temperature ranges of between −10 °C to 18 °C and 28 °C to
55 °C.
Loop Supply
24 V dc nominal
Pressure Module Input
Determined by pressure module
17
Page 28
71X Series
Calibration Manual
718 and 718Ex Specifications
718-1G (-1 to 1) PSI (-7 to 7) kPa 5 PSI 34.5 kPa
718-30G (-12 to 30) PSI (-83 to 207) kPa 60 PSI 413 kPa
718-100G (-12 to 100) PSI (-83 to 690) kPa 200 PSI 1379 kPa or 1.4 mPa
718-300G (-12 to 300) PSI (-83 to 2068) kPa or 2.1 mPa 375 PSI 2586 kPa or 2.6 mPa
Accuracy: Pressure Accuracy is ±0.05% of positive range
Temperature coefficient: .01 % of range per °C for temperature ranges of between −10 °C to 18 °C and
28 °C to 55 °C.
Accuracy is specified for 1 year after calibration at operating temperatures of -10 °C to +
55 °C.
To display firmware version, start with the unit off, push and hold or then push
.
Table 23. Pressure Specifications
718 Version 1.3 to 3.9
718 Ex Versions Under 1.9
Model Range SI Range Metric Max SI Max Metric
718 Version 4.0 or Higher
718 Ex V 2.0 and Higher
Accuracy [1]
Model Range Max
6 month 1 year
-1 to 1 PSI 5 PSI
718-1G
-7 to 7 kPa 34.5 kPa
-12 to 30 PSI 60 PSI
718-30G
-83 to 207 kPa 413 kPa
-12 to 100 PSI 200 PSI
718-100G
-83 to 690 kPa 1.4 mPa
-12 to 300 PSI 375 PSI
718-300G
-83 to 2.1 mPa 2.6 mPa
[1] In an RF field of 1 V/m to 3 V/m between the frequencies of 1.4 GHz to 2.0 GHz, add 120 counts to
specified accuracy.
Table 24. Pressure Display, Pressure Module Input
Pressure accuracy is ± % of
positive range
0.050 % 0.050 %
0.025 % 0.035 %
0.025 % 0.035 %
0.035 % 0.050 %
18
Range Resolution Accuracy
Refer to the Instruction Sheet for the pressure module
Page 29
Process Calibrators
Specifications
Table 25. DC mA Input
Range Resolution Accuracy, ±( % of Reading + Counts)
718: Version 2.9
and lower
718: Version 3.0
and higher
718 EX 24 mA 0.001 mA 0.02 + 2
1 30 100 300
Range -1 to 1 -12 to 30 -12 to 100 -12 to 300
PSI 1.0000 30.000 100.00 300.00
bar 0.0689 2.0684 6.8947 20.684
mbar 68.948 2068.4 6894.8 20684
kPa 6.8948 206.84 689.48 2068.4
kg/cm2 0.0703 2.1092 7.0307 21.092
cmH2O@ 4 °C 70.309 2109.3 7030.9 21093
cmH2O@ 20 °C 70.434 2113.0 7043.4 21130
inH2O@ 4 °C 27.681 830.42 2768.1 8304.2
24 mA 0.001 mA 0.025 + 1
24 mA 0.001 mA 0.015 + 2
Table 26. 718 Range and Resolution
inH2O@ 20 °C 27.730 831.89 2773.0 8318.9
mmHg@
0 °C
inHg@
0 °C
51.715 1551.5 5171.5 15515
2.0360 61.081 203.60 610.81
Overload Protection
Fuseless overvoltage protection
Temperature Coefficient
0.005 % of range per °C for temperature ranges of between −10 °C to 18 °C and 28 °C to
55 °C.
Loop Supply
718: 24 V dc nominal
718 EX: No loop Supply
Pressure Module Input
Determined by pressure module
19
Page 30
71X Series
Calibration Manual
719 Specifications
Specifications are based on a one year calibration cycle and apply for ambient
temperature from +18 °C to +28 °C unless stated otherwise. Counts are the number of
increments or decrements of the least significant digit.
Table 27. 719 Pressure Sensor Input
Model Range Resolution Accuracy
[1]
Max Non- destructive Pressure
30G
100G
Temperature coefficient: 0.01 % of range per °C for temperature ranges -10 °C to 18 °C and 28 °C to
55 °C
[1] In an RF field of 3 V/m between the frequencies of 1.6 GHz and 2.0 GHz, add 120 counts to specified
accuracy.
(determined by Pressure Module)
24 mA 0.001 mA 0.015 + 2
Maximum load on mA source is 1000 Ω. With HART resistor on, maximum load is 750 Ω.
Fuseless overload protection
Temperature coefficient: 0.005 % of range per °C for temperature ranges -10 °C to 18 °C and 28 °C to
55 °C
[1] In an RF field of 3 V/m between the frequencies of 150 MHz and 250 MHz, add 75 counts to
specified accuracy.
-12 to
30.0 PSI
-12 to
100.0 PSI
Range Resolution Accuracy
Range Resolution
0.001 ±0.025 % of positive
Range
0.01
Table 28. 719 Pressure Module Input
Table 29. 719 DC mA Measure and Source
(6 month calibration)
±0.035 % of positive
Range
(1 year calibration)
60 PSI
200 PSI
Accuracy
±(% of Reading + Counts)
[1]
20
Loop Supply
24 V dc nominal
Table 30. 719 Pressure Source
Model Range
30G -11 to 36.0 PSI
100G -11 to 120.0 PSI
Page 31

static awareness
A Message From
Fluke Corporation
Some semiconductors and custom IC's can be
damaged by electrostatic discharge during
handling. This notice explains how you can
minimize the chances of destroying such devices
by:
1. Knowing that there is a problem.
2. Learning the guidelines for handling them.
3. Using the procedures, packaging, and
bench techniques that are recommended.
The following practices should be followed to minimize damage to S.S. (static sensitive) devices.
1. MINIMIZE HANDLING
2. KEEP PARTS IN ORIGINAL CONTAINERS
UNTIL READY FOR USE.
3. DISCHARGE PERSONAL STATIC BEFORE
HANDLING DEVICES. USE A HIGH RESIS TANCE GROUNDING WRIST STRAP.
4. HANDLE S.S. DEVICES BY THE BODY.
Page 32

5. USE STATIC SHIELDING CONTAINERS FOR
HANDLING AND TRANSPORT.
6. DO NOT SLIDE S.S. DEVICES OVER
ANY SURFACE.
8. WHEN REMOVING PLUG-IN ASSEMBLIES
HANDLE ONLY BY NON-CONDUCTIVE
EDGES AND NEVER TOUCH OPEN EDGE
CONNECTOR EXCEPT AT STATIC-FREE
WORK STATION. PLACING SHORTING
STRIPS ON EDGE CONNECTOR HELPS
PROTECT INSTALLED S.S. DEVICES.
9. HANDLE S.S. DEVICES ONLY AT A
STATIC-FREE WORK STATION.
7. AVOID PLASTIC,VINYL AND STYROFOAM
IN WORK AREA.
PORTIONS REPRINTED
WITH PERMISSION FROM TEKTRONIX INC.
AND GERNER DYNAMICS, POMONA DIV.
Dow Chemical
10. ONLY ANTI-STATIC TYPE SOLDER SUCKERS SHOULD BE USED.
11. ONLY GROUNDED-TIP SOLDERING
IRONS SHOULD BE USED.
Page 33

Process Calibrators
Basic Maintenance
Basic Maintenance
For maintenance procedures not described in this manual, contact an authorized service
center.
Cleaning
Periodically wipe the case with a damp cloth and mild detergent. Do not use abrasives or
solvents.
Replacing the Battery
XWWarning
To avoid false readings, which could lead to possible electric
shock or personal injury, replace the battery as soon as the
battery indicator () appears.
To replace the battery in models 712, 714, 715, and 717, refer to Figure 2.
To replace batteries in 718 and 719 models, refer to Figure 3.
To replace the battery in model 718Ex, refer to Figure 4 and Table 31.
Figure 2. Replacing the Battery
21
it07i.eps
Page 34

71X Series
Calibration Manual
Figure 3. Replacing the Battery (718 and 719 only)
Hex Head
Wrench
Wh008f.eps
22
wh009f.eps
Figure 4. 718Ex Battery Replacement
Page 35

Process Calibrators
r
Basic Maintenance
718Ex Approved Batteries
For a list of 718Ex approved batteries, refer to Table 31.
Table 31. 718Ex Approved Batteries
Battery Manufacturer Type
Alkaline, 9 volt Duracell 6LR61/MN1604
Alkaline Ultra, 9 volt Duracell 6LR61/MX1604
Alkaline Energizer, 9 volt Eveready 6LR61/522
Alkaline Power Line Industrial Battery, 9 volt Panasonic 6LR61.9V
Replacing the Fuse
XW Warning
To avoid personal injury or damage to the calibrator, use only a
0.125A 250V fast fuse, Littelfuse
To check if the fuse(s) are blown, refer to Table 32.
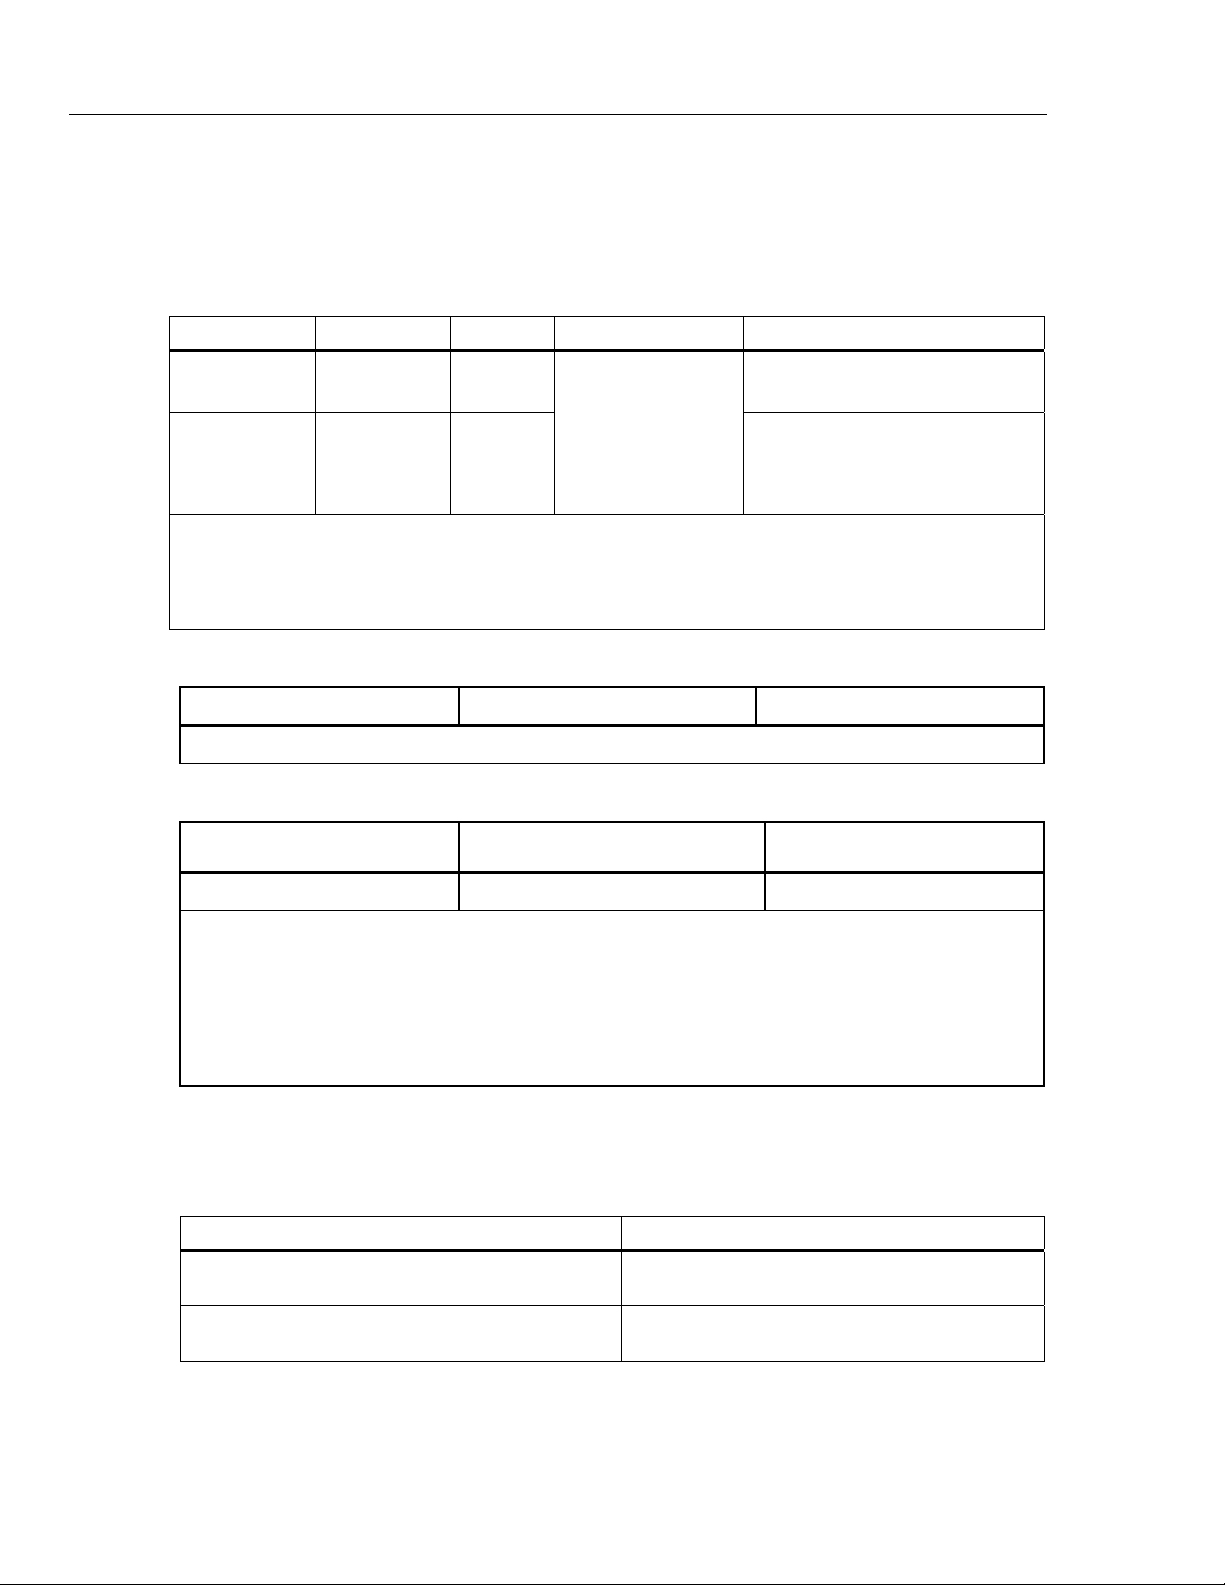
Table 32. Verifying a Blown Fuse
Calibrator Model Determining a Blown Fuse
2AG.
Put the calibrator in simulate mode (OUTPUT on the display), and check for prope
712 V1.1
712 V1.2
712 ≥V2.0 Fuseless overvoltage protection.
717 Series <V1.9
718 Series <V1.9
717 Series ≥V2.0
718 Series ≥V2.0
719 Series
714 <V1.9
714 ≥V2.0 Fuseless overvoltage protection.
715
715 ≥V2.0 Fuseless overvoltage protection.
718Ex
resistance at the calibrator’s OUTPUT terminals. An open or very high impedance
suggests fuse F1 is blown.
Fuse F1 is probably blown if no current comes from the center jacks when in input
2W mode. Fuse F2 is probably blown when output mode will not work.
Fuse F1 is probably blown if the mA measurement display reading does not
respond to current applied to the current (mA) inputs.
Fuseless overvoltage protection.
Fuse F1 is probably blown if, in the input mode, the calibrator always reads OL,
even with a thermocouple connected.
Fuse F1 is probably blown if:
• in the mA input mode, the calibrator always reads 0.000, even with a signal
applied.
• in the mA output mode, with a short across the mA OUTPUT jacks, OL is
flashing on the display.
Fuse F2 is probably blown if:
• in the V output mode, with the test leads removed from the calibrator, the
display flashes OL.
• in the V input mode, the calibrator always displays OL, even with a signal
applied that is within the measurement range.
No user serviceable fuse. An open fuse voids safety certification. The unit should
be returned to Fluke for repair.
23
Page 36

71X Series
Calibration Manual
Replace the fuse(s) as follows, refer to Figures 5 and 6:
1. Remove the test leads and turn the calibrator off.
2. Remove the battery door.
3. Remove the three Phillips-head screws from the case bottom and turn the case over.
4. Gently lift the top cover from the end nearest the input jacks until it unsnaps from the
bottom cover.
5. Replace the fuse(s) with a 0.125 A 250 V fast fuse, Littelfuse
type 2AG.
F1 and F2 are the same type on the 715 and 712 V1.2.
6. (712, 714, and 715 only)
Fit the top and bottom covers together, engaging the two snaps. Make sure that the
gasket is properly seated. Reinstall the three screws.
(717 and 718 only)
Carefully fit the case top and circuit board assembly together, making sure that the Oring is properly seated between the pressure sensor and the pressure fitting on the
case top. Fit the case bottom onto the case top, engaging the two snaps near the
display end of the case. Reinstall the three screws.
7. Replace the battery door.
mV
V
%
mA
F2
F1
Figure 5. Replacing the Fuses (715 shown)
Snaps
it08f.eps
24
Page 37

Process Calibrators
Required Equipment
F1
Snaps
Figure 6. Replacing the Fuse (718 shown)
Required Equipment
The equipment required to perform the verification and calibration procedures in this
manual is identified in Table 33.
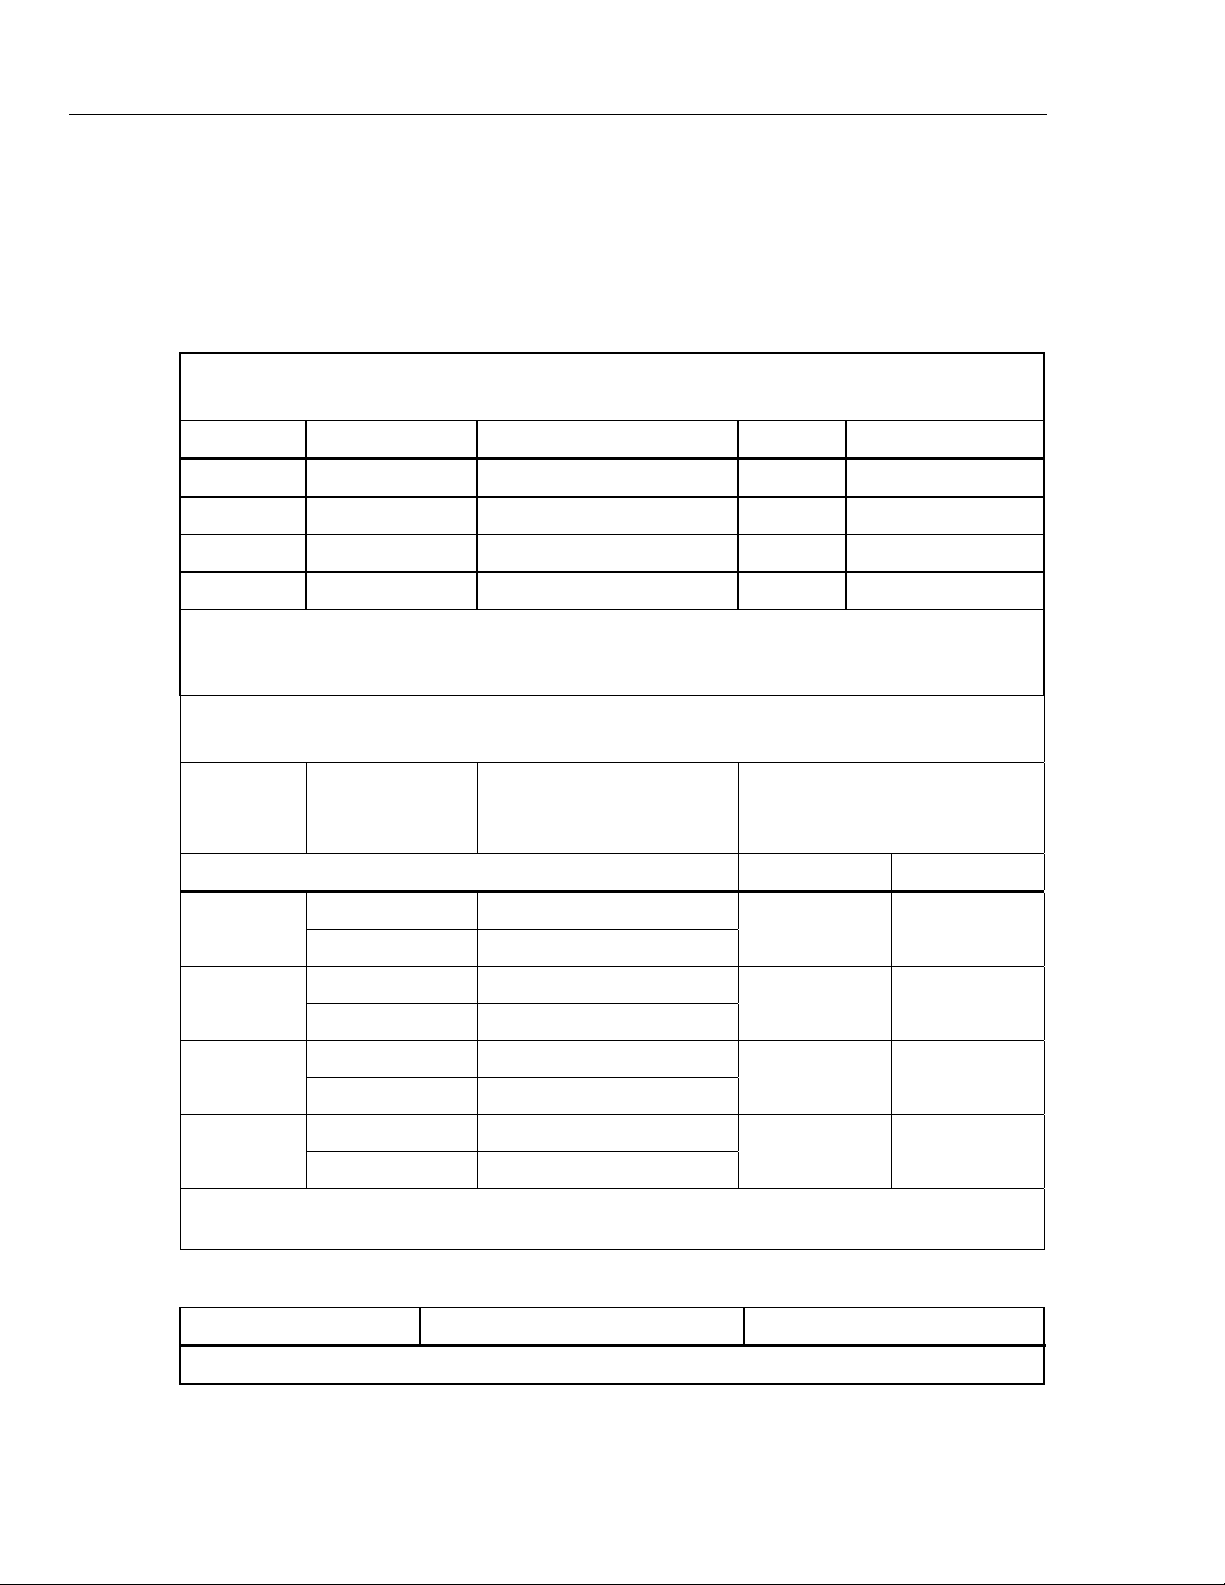
Table 33. Required Calibration Equipment
Calibrator
Model
712
Equipment Minimum Specifications
DC Calibrator
Reference Multimeter
Four Test Leads 5500A/LEADS
5 to 3000 Ω
Accuracy: 70 ppm + 0.025 Ω
5 to 3000 Ω
Accuracy: 70 ppm + 0.037 Ω
Recommended
Model
Fluke 5520A
Fluke 8508A
Wh003f.eps
25
Page 38

71X Series
Calibration Manual
Table 33. Required Calibration Equipment (cont.)
Calibrator
Model
714
715
717
718/718Ex
719
Equipment Minimum Specifications
DC Calibrator -10 to 75 mV
Accuracy: 0.006 % + 0.25 mV
Reference
Multimeter
TC to Banana Test
Leads
Type J TC Test
Lead
DC Calibrator 0 to 10 Volts
Reference
Multimeter
Two Test Leads
DC Calibrator 0 to 24 mA Fluke 5520A
Reference
Multimeter
Dead Weight Tester -12 to 10000 PSIG
Two Test Leads 5500A/LEADS
700P Pressure
Module
Load Resistors 1 kΩ & 2 kΩ 10% 0.5W
DC Calibrator 0 to 24 mA Fluke 5520A
Reference
Multimeter
Dead Weight Tester -12 to 300 PSIG
Two Test Leads 5500A/LEADS
700P Pressure
Module
Load Resistors 1 kΩ & 2 kΩ 10% 0.5 W
DC Calibrator 0 to 24 mA Fluke 5520A
Reference
Multimeter
Dead Weight Tester -12 to 100 PSIG
Two Test Leads 5500A/LEADS
700P Pressure
Module
Load Resistors 1.2 kΩ & 10% 0.5 W
-10 to 75 mV
Accuracy: 0.006 % + 0.25 mV
Copper Mini-Jack to Copper Wire
5500A/LEADS
Accuracy: 0.005 % + 0.5 mV
0 to 10 Volts
Accuracy: 0.005 % + 0.5 mV
0 to 24 mA
Accuracy: 0.006 % + 0.25 mA
Accuracy: 0.006 % of range
0 to 24 mA
Accuracy: 0.006 % + 0.25 mA
Accuracy: 0.006 % of range
0 to 24 mA
Accuracy: 0.006 % + 0.25 mA
Accuracy: 0.006 % of range
Recommended
Model
Fluke 5520A
Fluke 8508A
Fluke 5520A
Fluke 8508A
Fluke 8508A
Fluke 8508A
Fluke 8508A
DHI PPC3
26
Page 39

Process Calibrators
Verification
Verification
The following verification tests check the accuracy of each calibrator function against the
calibrator’s specifications. If the calibrator fails any of these tests, calibration adjustment
or repair is required. Fluke recommends that you calibrate your 71X Calibrator once a
year to ensure that it performs according to its specifications.
To perform the verification tests, it is not necessary to open the case or adjust the
calibrator. Simply make the required connections, apply the designated source stimulus
and determine if the measurements fall within the acceptable range indicated.
Note
Throughout this section, the 71X Calibrator may be referred to as the
“UUT” (unit under test). Later 71x calibrators use automatic shutdown to
preserve the batteries. When turned on, the displays will show PS followed
by a number. The number designates minutes until shutdown. If the number
is less than 10, use the arrow keys to set to 15 minutes or more.
Preparing for Verification
To prepare for verification, do the following:
1. Make sure fuse(s) in the UUT are intact. By referring to Table 32, you should not
have to open the unit.
2. Make sure you have the required test equipment available. (Refer to Table 33.)
3. Turn on and warm up the test equipment for the time required.
4. Allow UUT to come to ambient temperature. Turn it on and allow 5 minutes for
warm-up of the UUT.
712 Verification (V1.1 and Earlier)
Resistance Measure Verification
1. Push the green
key to turn on the 712. Push the key, the key, so that the
display indicates:
INPUT TYPE R 4W
2. Configure the 712 Calibrator into a 4-wire ohms measurement:
• Connect two test leads from the NORMAL jacks of the 5520A to the INPUT
jacks (two middle jacks) on the 712 Calibrator (black to black, red to red).
• Connect two additional test leads, also from the NORMAL jacks of the 5520A,
to the 712 Calibrator (black wire to the 712 red jack labeled [3W NC] and red
wire to the red jack labeled [4W NC]). All four input jacks of the 712 should now
be configured in a 4-wire ohms measurement.
3. Set the Fluke 5520A to the settings in Table 34, and verify the reading as displayed
on the 712 Calibrator:
Table 34. 712 Resistance Measure Verification
Fluke 5520A Fluke 712
207.5 Ω 207.4 to 207.6 Ω
950.0 Ω 949.5 to 950.5 Ω
2350.0 Ω 2349.0 to 2351.0 Ω
27
Page 40

71X Series
Calibration Manual
Resistance Source Verification
4. Disconnect the test leads.
1. Using four test leads, connect the four jacks of Fluke 8508A (Ω Sense 'Hi & Lo' and
Input 'Hi & Lo') to the two middle jacks of the 712 Calibrator (black to black; red to
red). This puts the Fluke 8508A in a 4-wire configuration.
2. On the Fluke 8508A , select four-wire ohms measurement and up-range to the 1 kΩ
range. Use the 1 kΩ range for the first test point, and use the 10 kΩ range for the last
two test points. Correct ranging is important in supplying the correct excitation
current back into the 712 Calibrator. Otherwise the specifications may change, or the
measurements may be incorrect.
3. Push the
OUTPUT
Using the large (,), and small (,), scroll keys, source the resistance settings
in Table 35, verifying the readings on the Fluke 8508A display:
Keypad Test
1. Push and hold the large to source 950.0 Ω.
2. Push and hold the small scroll key. Verify the numbers scrolling on the display
changes in 0.1 increments, then changes in 1.0 increments, then in 10.0 increments.
3. Push and hold the small
changes in 0.1 decrements, then changes in 1.0 decrements, then in 10.0 decrements.
4. Disconnect all test leads from the 712 Calibrator and push the
calibrator off.
key on the 712 Calibrator so that the display indicates:
Table 35. 712 Resistance Source Verification
Fluke 712 Fluke 8508A
207.5 Ω .2074 to .2076 kΩ
950.0 Ω .9495 to .9505 kΩ
2350.0 Ω 2.349 to 2.351 kΩ
scroll key. Verify the numbers scrolling on the display
key to turn the
28
Display Verification
1. Push and hold the
the green key. This locks the 712 in a mode where all display segments are on. All
segments will stay on until the
2. Check to see that all segments of the LCD are displayed.
3. Turn the 712 off.
The 712 verification test is complete.
key and then turn the 712 back on by pressing and releasing
key is released.
Page 41

Process Calibrators
Verification
712 Verification (V1.2 through V1.9)
1. Push button until Input comes up on the display.
2. Push until PT100 392 JIS is on the display.
3. Push until 4W is on the display. Set temperature standard to C.
4. Set the 5520A to 2-wire output with 2-wire compensation turned off; then make 2-
wire connections on the 5520A to 4-wire connections on the 712. Set the 5520A to
PT 3916 (ITS-90) mode.
5. Set the 5520A to output the RTD (resistance) values in Table 36. Verify that the
temperature readings are within the limits shown for 4-wire UUT.
Table 36. 712 Verification RTD Values
5520A Outputs (C) 3-wire 712 Readings ( C) 4-wire 712 Readings ( C)
-180 (25.799 Ω) -179.5 to -180.5 -179.7 to -180.3
100 (139.171 Ω) 99.5 to 100.5 99.7 to 100.3
550 (300.822 Ω) 549.5 to 550.5 549.7 to 550.3
6. Remove the 4-wire connection on the 712 (rightmost connection). Push once and
verify that 3W is on the display and that the temperature readings are within the
limits shown for 3-wire readings. Push to return to 4W mode.
7. Restore the 4-wire connection to the 712 and maintain 2-wire connection on the
5520A.
8. Push until Ω is displayed.
9. Set the 5520A to source resistance, to a 2-wire output, with 2-wire compensation
turned off.
10. Set the 5520A to source the resistance values in Table 37. Verify that the resistance
values on the 712 are within the limits shown.
Table 37. 712 Verification Resistance Values
5520A Outputs (Ω) 4-wire 712 Readings (Ω)
5.00 4.90 to 5.10
300.00 299.90 to 300.10
1500.0 1499.5 to 1500.5
3000.0 2999.0 to 3001.0
11. Make 2-wire connections on the 712 to 4-wire connections on the Fluke 8508A . Set
the Fluke 8508A to measure 4-wire resistance.
12. Push until OUTPUT is displayed.
13. Set the 712 to output the resistance values in Table 38. Verify that the Fluke 8508A
readings are within the limits shown.
29
Page 42

71X Series
Calibration Manual
712 Verification (V2.0 and Later)
Table 38. 712 Verification Outputs
712 Outputs (Ohms) Fluke 8508A Readings (Ohms)
5.00 4.90 to 5.10
300.00 299.90 to 300.10
1500.0 1499.5 to 1500.5
3000.0 2999.0 to 3001.0
14. Disconnect all connections to the 712. The 712 verification test is complete.
1. Push button until Input comes up on the display.
2. Push until PT100 392 JIS is on the display.
3. Push until 4W is on the display. Set temperature standard to C.
4. Set the 5520A to 2-wire output with 2-wire compensation turned off; then make 2-
wire connections on the 5520A to 4-wire connections on the 712. Set the 5520A to
PT 3916 (ITS-90) mode.
5. Set the 5520A to output the RTD (resistance) values in Table 39. Verify that the
temperature readings are within the limits shown for 4-wire UUT.
Table 39. 712 Verification RTD Values
5520A Outputs (C) 3-wire 712 Readings ( C) 4-wire 712 Readings ( C)
-180 (25.799 Ω) -179.72 to -180.28 -179.8 to -180.2
100 (139.171 Ω) 99.6 to 100.4 99.7 to 100.3
300 (213.957 Ω) 299.7 to 300.3 299.6 to 300.4
550 (300.822 Ω) 549.48 to 550.52 549.6 to 550.4
6. Remove the 4-wire connection on the 712 (rightmost connection). Push once and
verify that 3W is on the display and that the temperature readings are within the
limits shown for 3-wire readings. Push to return to 4W mode.
7. Restore the 4-wire connection to the 712 and maintain 2-wire connection on the
5520A.
8. Push until Ω is displayed.
9. Set the 5520A to source resistance, to a 2-wire output, with 2-wire compensation
turned off.
10. Set the 5520A to source the resistance values in Table 40. Verify that the resistance
values on the 712 are within the limits shown.
30
Page 43

Process Calibrators
Verification
Table 40. 712 Verification Resistance Values
5520A Outputs (Ω) 4-wire 712 Readings (Ω)
5.00 4.899 to 5.101
300.00 299.825 to 300.175
1500.0 1499.525 to 1500.475
30000.0 2999.15 to 3000.85
11. Make 2-wire connections on the 712 to 4-wire connections on the Fluke 8508A. Set
the Fluke 8508A to measure 4-wire resistance.
12. Push until OUTPUT is displayed.
13. Set the 712 to output the resistance values in Table 41. Verify that the Fluke 8508A
readings are within the limits shown.
Table 41. 712 Verification Outputs
712 Outputs (Ohms) Fluke 8508A Readings (Ohms)
5.00 4.899 to 5.101
300.00 299.825 to 300.175
1500.0 1499.525 to 1500.475
30000.0 2999.15 to 3000.85
14. Disconnect all connections to the 712. The 712 verification test is complete.
714 Verification (Earlier than V2.0)
Thermocouple Measure Verification
1. Push the
key to turn on the 714 Calibrator. Push the key and the key so
that the display indicates:
INPUT xx.x °C
where xx.x is some variable number; or OL (overload) may be indicated.
2. Push the
key to measure Type J thermocouple and connect the Type J
thermocouple test lead from the TC jack of the Fluke 5520A to the TC jack on the
714 Calibrator, observing correct polarity.
3. Set the Fluke 5520A to output in Type J thermocouple, push the Okey, and set the
5520A to the settings in Table 42, verifying the display readings on the 714:
Table 42. 714 Thermocouple Measure Verification
Fluke 5520A Fluke 714
-200.00 °C -200.9 °C to -199.1 °C
0.00 °C -0.7 °C to +0.7 °C
1200.00 °C 1199.3 °C to 1200.7 °C
31
Page 44

71X Series
Calibration Manual
4. Disconnect the Type J thermocouple test lead and install the two-wire copper test
lead from the Fluke 5520A NORMAL jacks to the 714 Calibrator TC jack, observing
correct polarity.
5. On the 714 push the
key until "mV" is shown on the display.
6. Set the Fluke 5520A to the settings in Table 43, and verify the display readings on
the 714 Calibrator.
Table 43. 714 Thermocouple Measure Verification (mA)
Fluke 5520A Fluke 714
-10.0000 mV -10.03 to -9.97 mV
30.0000 mV 29.97 to 30.03 mV
75.0000 mV 74.97 to 75.03 mV
7. Disconnect the copper test lead from the Fluke 5520A.
Thermocouple Source Verification
1. Set the Fluke 8508A to VDC and 200 mV range. Connect the two-wire copper test
lead from the TC jack on the 714 Calibrator to the INPUT jacks of the Fluke 8508A.
2. Push the
key on the 714 Calibrator to indicate:
OUPUT 0.00 mV
3. On the 714, push the large and scroll keys to source the voltages in Table 44
while verifying the readings on the Fluke 8508A.
Table 44. 714 Thermocouple Source Verification (mA)
Fluke 714 Fluke 8508A
-10.00 mV -10.028 to -9.972 mV
30.00 mV 29.972 to 30.028 mV
75.00 mV 74.972 to 75.028 mV
4. Push the key on the 714 Calibrator to TYPE J and disconnect the copper wire
test lead.
5. Connect the Type J thermocouple test lead from the Fluke 5520A TC jack to the TC
jack on the 714 Calibrator, observing correct polarity.
6. Set the Fluke 5520A to U with 'Type J' input. On the 714, push the large
and
scroll keys to source the temperatures in Table 45 while verifying the readings on
the 5520A:
Table 45. 714 Thermocouple Source Verification (Temperature)
Fluke 714 Fluke 5520A
0.0 °C -0.70 °C to +0.70 °C
-200.0 °C -200.94 °C to -199.06 °C
1200 °C 1199.33 °C to 1200.67 °C
32
Page 45

Process Calibrators
Verification
Keypad Test
1. On the 714 Calibrator, push the large
scroll key to 800.0 °C.
2. Push and hold the small
scroll key, verifying that the numbers scrolling on the
display change in 0.1 increments, then change in 1.0 increments, then change in 10.0
increments.
3. Push and hold the
scroll key, verifying that the numbers scrolling on the display
change in 0.1 decrements, then change in 1.0 decrements, then change in 10.0
decrements.
4. Scroll to 800.0 °C.
5. Push the
key on the 714 Calibrator. The display should change to:
OUTPUT 1472.0 °F
6. Disconnect the Type J test lead from the 714 Calibrator and push the key to turn
the calibrator off.
Display Verification
1. Push and hold the key and then push and release the green key. This locks the
714 in a mode where all display segments are on. All segments will stay on until the
key is released.
2. Check to see that all segments of the display are showing.
3. Turn the 714 off.
The 714 verification test is now complete.
714 Verification (V2.0 and Later)
Thermocouple Measure Verification
1. Push the
key to turn on the 714 Calibrator. Push the key and the key so
that the display indicates:
INPUT xx.x °C
where xx.x is some variable number; or OL (overload) may be indicated.
2. Push the
key to measure Type J thermocouple and connect the Type J
thermocouple test lead from the TC jack of the Fluke 5520A to the TC jack on the
714 Calibrator, observing correct polarity.
3. Set the Fluke 5520A to output in Type J thermocouple, push the Okey, and set the
5520A to the settings in Table 46, verifying the display readings on the 714:
Table 46. 714 Thermocouple Measure Verification
Fluke 5520A Fluke 714
-200.00 °C -200.6 °C to -199.4 °C
0.00 °C -0.4 °C to +0.4 °C
800.00 °C 799.6 °C to 800.4 °C
1200.00 °C 1199.5 °C to 1200.5 °C
7. Disconnect the Type J thermocouple test lead and install the two-wire copper test
lead from the Fluke 5520A NORMAL jacks to the 714 Calibrator TC jack, observing
correct polarity.
33
Page 46

71X Series
Calibration Manual
Thermocouple Source Verification
8. On the 714 push the key until "mV" is shown on the display.
9. Set the Fluke 5520A to the settings in Table 47, and verify the display readings on
the 714 Calibrator.
Table 47. 714 Thermocouple Measure Verification (mA)
Fluke 5520A Fluke 714
-10.0000 mV -10.012 to -9.988 mV
30.0000 mV 29.985 to 30.025 mV
75.0000 mV 74.979 to 75.021 mV
10. Disconnect the copper test lead from the Fluke 5520A.
1. Set the Fluke 8508A to VDC and 200 mV range. Connect the two-wire copper test
lead from the TC jack on the 714 Calibrator to the INPUT jacks of the Fluke 8508A.
2. Push the
key on the 714 Calibrator to indicate:
OUPUT 0.00 mV
3. On the 714, push the large and scroll keys to source the voltages in Table 48
while verifying the readings on the Fluke 8508A.
Table 48. 714 Thermocouple Source Verification (mA)
Fluke 714 Fluke 8508A
-10.00 mV -10.012 to -9.988 mV
30.00 mV 29.985 to 30.025 mV
75.00 mV 74.979 to 75.021 mV
4. Push the key on the 714 Calibrator to TYPE J and disconnect the copper wire
test lead.
5. Connect the Type J thermocouple test lead from the Fluke 5520A TC jack to the TC
jack on the 714 Calibrator, observing correct polarity.
6. Set the Fluke 5520A to U with 'Type J' input. On the 714, push the large
and
scroll keys to source the temperatures in Table 49 while verifying the readings on
the 5520A:
Table 49. 714 Thermocouple Source Verification (Temperature)
Fluke 714 Fluke 5520A
34
-200.0 °C -200.6 °C to -199.4 °C
0.0 °C -0.4 °C to +0.4 °C
800.00 °C 799.6 °C to 800.4 °C
1200 °C 1199.5 °C to 1200.5 °C
The 714 verification test is now complete.
Page 47

Process Calibrators
Verification
715 Verification (Earlier than V2.0)
DC Voltage Source Verification
1. On the 715 Calibrator turn the green key on.
2. Push the and the key so that the display indicates:
OUTPUT 0.000 V
3. Connect test leads from the Fluke 8508A input HI & LO jacks to the voltage jacks on
the 715 Calibrator (black to COM and red to V).
4. Using the large scroll button of the 715 Calibrator, push to step to the voltages in
Table 50, verifying the output on the Fluke 8508A:
Table 50. 715 DC Voltage Source Verification (0.000 to 10.000 V)
Fluke 715 Fluke 8508A
0.000 V -0.002 V to + 0.002 V
5.000 V 4.997 V to 5.003 V
10.000 V 9.996 V to 10.004 V
5. Push the key on the 715 Calibrator. Display should change to:
OUTPUT 0.00 mV
6. Using the large key scroll button of the 715 Calibrator, push to step to the
voltages in Table 51, verifying the output on the Fluke 8508A.
Table 51. 715 DC Voltage Source Verification (0.00 to 100.00 V)
Fluke 715 Fluke 8508A
0.00 mV -0.02 mV to + 0.02 mV
50.00 mV 49.97 mV to 50.03 mV
100.00 mV 99.96 mV to 100.04 mV
DC Current Source Verification
1. Disconnect the Fluke 8508A. Push the key on the 715 Calibrator. The display
should change to:
OUTPUT 0.000 mA
2. Connect test leads from the 715 Calibrator's mA output jacks (black to V jack and red
to +LOOP jack) to the Fluke 8508A input mA jacks (black to I- and red to I+).
3. Set the Fluke 8508A function to [
the 715 Calibrator, push to step to the current outputs in
Table 52, verifying the readings on the Fluke 8508A.
DC CURRENT]. Using the large scroll button of
Table 52. 715 DC Current Source Verification
Fluke 715 Fluke 8508A
4.000 mA 3.9972 mA to 4.0028 mA
12.000 mA 11.9956 mA to 12.0044 mA
24.000 mA 23.9932 mA to 24.0068 mA
35
Page 48

71X Series
Calibration Manual
Keypad Test
DC Current Measure Verification
1. Using the large scroll key, push to step down to 12.000 mA.
2. Using the small scroll key, push to verify that the numbers scrolling on the
display change in .001 increments; then change in .01 increments; then change in 0.1
increments.
3. Using the small scroll key, push to verify that the numbers scrolling on the
display change in .001 decrements; then change in .01 decrements; then change in 0.1
decrements.
4. Scroll to 12.000 mA.
5. Push the key on the 715 Calibrator. Display should change to:
OUTPUT 50.00 mA %
1. Push key on the 715 Calibrator. Display should indicate closely to:
INPUT -25.00 mA %
2. Push the key and the display should change to:
INPUT 0.000 mA
3. Connect a test lead from Red AUX terminal of the 5520A to the Fluke 8508A I+
terminal.
4. Connect a test lead from Black AUX terminal of the 5520A to the 715 Calibrator
Com terminal.
5. Connect a test lead from I- terminal of the Fluke 8508A to the 715 Calibrator mA
terminal.
6. Adjust the 5520A if necessary so that the current shown on the Fluke 8508A is the
same as the 5520A values shown in Table 53.
7. Verify that the display readings on the 715 Calibrator are within the limits.
Table 53. 715 DC Current Measure Verification
Fluke 5520A Fluke 715
24.0000 mA 23.993 mA to 24.007 mA
12.0000 mA 11.996 mA to 12.004 mA
4.0000 mA 3.998 mA to 4.002 mA
36
Page 49

Process Calibrators
Verification
DC Voltage Measure Verification
1. Push the key on the 715 Calibrator. Display should change to:
INPUT 0.000 V
2. Connect test leads from the output NORMAL jacks of the Fluke 5520A to the voltage
jacks on the 715 Calibrator (black to COM jack and red to the V jack).
3. Set the Fluke 5520A for the voltage settings in Table 54, and verify the display
readings on the 715 Calibrator.
Table 54. 715 DC Voltage Measure Verification (10.0000 to 0.0000 V)
Fluke 5520A Flu ke 715
10.00000 V 9.996 V to 10.004 V
5.00000 V 4.997 V to 5.003 V
0.0000 V -0.002 V to +0.002 V
4. Push the key on the 715 Calibrator. Display should indicate closely to:
INPUT 0.00 mV
5. Set the Fluke 5520A for the mV settings in Table 55, and verify display readings on
the 715 Calibrator.
Table 55. 715 DC Voltage Measure Verification (0.0000 mV to 100.0000 mV)
Fluke 5520A Fluke 715
50.0000 mV 49.97 mV to 50.03 mV
100.0000 mV 99.96 mV to 100.04 mV
6. Disconnect the test leads from 715 Calibrator and turn the green key off.
Display Verification
1. Push and hold the key and then turn the 715 back on by pressing and releasing
the green key. This locks the 715 in a mode where all display segments are on. All
segments will stay on until the key is released.
2. Check to see that all segments of the LCD are displayed.
3. Turn the 715 off.
The 715 verification test is complete.
0.0000 mV -0.02 mV to + 0.02 mV
37
Page 50

71X Series
Calibration Manual
715 Verification (V2.0 and Later)
DC Voltage Source Verification
1. On the 715 Calibrator turn the green key on.
2. Push the and the key so that the display indicates:
OUTPUT 0.000 V
3. Connect test leads from the Fluke 8508A input HI & LO jacks to the voltage jacks on
the 715 Calibrator (black to COM and red to V).
4. Using the large scroll button of the 715 Calibrator, push to step to the voltages in
Table 56, verifying the output on the Fluke 8508A:
Table 56. 715 DC Voltage Source Verification (0.000 to 20.000 V)
Fluke 715 Fluke 8508A
0.000 V -0.002 V to + 0.002 V
5.000 V 4.998 V to 5.002 V
15.000 V 14.997 V to 15.003 V
5. Push the key on the 715 Calibrator. Display should change to:
OUTPUT 0.00 mV
6. Using the large key scroll button of the 715 Calibrator, push to step to the
voltages in Table 57, verifying the output on the Fluke 8508A.
Table 57. 715 DC Voltage Source Verification (0.00 to 200.00 mV)
Fluke 715 Fluke 8508A
0.00 mV -0.02 mV to + 0.02 mV
50.00 mV 49.98 mV to 50.02 mV
150.00 mV 149.96 mV to 150.04 mV
DC Current Source Verification
1. Disconnect the Fluke 8508A. Push the key on the 715 Calibrator. The display
should change to:
OUTPUT 0.000 mA
2. Connect test leads from the 715 Calibrator's mA output jacks (black to V jack and red
to +LOOP jack) to the Fluke 8508A input mA jacks (black to I- and red to I+).
3. Set the Fluke 8508A function to [
the 715 Calibrator, push to step to the current outputs in
Table 58, verifying the readings on the Fluke 8508A.
DC CURRENT]. Using the large scroll button of
38
Table 58. 715 DC Current Source Verification
Fluke 715 Fluke 8508A
4.000 mA 3.9976 mA to 4.0024 mA
12.000 mA 11.9968 mA to 12.0032 mA
24.000 mA 23.9956 mA to 24.0044 mA
Page 51

Process Calibrators
Verification
DC Current Measure Verification
1. Push key on the 715 Calibrator. Display should indicate closely to:
INPUT -25.00 mA %
2. Push the key and the display should change to:
INPUT 0.000 mA
3. Connect a test lead from Red AUX terminal of the 5520A to the Fluke 8508A I+
terminal.
4. Connect a test lead from Black AUX terminal of the 5520A to the 715 Calibrator
Com terminal.
5. Connect a test lead from I- terminal of the Fluke 8508A to the 715 Calibrator mA
terminal.
6. Adjust the 5520A if necessary so that the current shown on the Fluke 8508A is the
same as the 5520A values shown in Table 59.
7. Verify that the display readings on the 715 Calibrator are within the limits.
Table 59. 715 DC Current Measure Verification
Fluke 5520A Fluke 715
24.0000 mA 23.993 mA to 24.007 mA
12.0000 mA 11.996 mA to 12.004 mA
4.0000 mA 3.998 mA to 4.002 mA
DC Voltage Measure Verification
1. Push the key on the 715 Calibrator. Display should change to:
INPUT 0.000 V
2. Connect test leads from the output NORMAL jacks of the Fluke 5520A to the voltage
jacks on the 715 Calibrator (black to COM jack and red to the V jack).
3. Set the Fluke 5520A for the voltage settings in Table 60, and verify the display
readings on the 715 Calibrator.
Table 60. 715 DC Voltage Measure Verification (25.0000 to 0.0000 V)
Fluke 5520A Flu ke 715
20.00000 V 19.996 V to 20.004 V
10.00000 V 9.997 V to 10.003 V
0.0000 V -0.002 V to +0.002 V
4. Push the key on the 715 Calibrator. Display should indicate closely to:
INPUT 0.00 mV
5. Set the Fluke 5520A for the mV settings in Table 61, and verify display readings on
the 715 Calibrator.
39
Page 52

71X Series
Calibration Manual
717 Verification
Pressure Verification
Table 61. 715 DC Voltage Measure Verification (0.0000 mV to 200.0000 mV)
Fluke 5520A Fluke 715
0.0000 mV -0.02 mV to + 0.02 mV
50.0000 mV 49.98 mV to 50.02 mV
150.0000 mV 149.96 mV to 150.04 mV
6. Disconnect the test leads from 715 Calibrator and turn the green key off.
The 715 verification test is complete.
1. Carefully attach the pressure fitting of the deadweight tester to the pressure port of
the 717 30G Calibrator.
Note
Use Plenty of TEFLON tape when attaching pressure fitting.
The display should read 0.00 PSI with the deadweight tester opened up to ambient air. If
not, push the
key until display reads 0.00 PSI.
2. Set up the deadweight tester for the sequence of PSI inputs from Table 62 to be
injected into the pressure port of the 717 Calibrator.
3. Ensure the pressure has stabilized at each input before verifying the display reading.
40
Page 53

Process Calibrators
Verification
Table 62. 717 Pressure Verification
Version 3.9 or Below
717 1G 717 30G
Input Pressure Display Reading Input Pressure Display Reading
0 PSI 0.0005 to -0.0005 0 PSI -0.015 to 0.015
0.1 PSI 0.1005 to 0.0995 6 PSI 5.985 to 6.015
0.2 PSI 0.2005 to 0.1995 12 PSI 11.985 to 12.015
0.3 PSI 0.3005 to 0.2995 18 PSI 17.985 to 18.015
0.4 PSI 0.4005 to 0.3995 24 PSI 23.985 to 24.015
0.5 PSI 0.5005 to 0.4995 30 PSI 29.985 to 30.015
0.6 PSI 0.6005 to 0.5995 24 PSI 23.985 to 24.015
0.7 PSI 0.6005 to 0.6995 18 PSI 17.985 to 18.015
0.8 PSI 0.8005 to 0.7995 12 PSI 11.985 to 12.015
0.9 PSI 0.9005 to 0.8995 6 PSI 5.985 to 6.015
1 PSI 1.0005 to 0.9995 -12 PSI * -12.015 to -11.985
-0.2 PSI -0.1995 to -0.2005
-0.4 PSI -0.3995 to -0.4005
-0.6 PSI -0.5995 to -0.6005
-0.8 PSI -0.7995 to -0.8005
-1 PSI -0.9995 to -1.0005
717 100G 717 300G
0 PSI -0.05 to 0.05 0 PSI 0.15 to -0.15
20 PSI 19.95 to 20.05 60 PSI 60.15 to 59.85
40 PSI 39.95 to 40.05 120 PSI 120.15 to 119.85
60 PSI 59.95 to 60.05 180 PSI 180.15 to 179.85
80 PSI 79.95 to 80.05 240 PSI 240.15 to 239.85
100 PSI 99.95 to 100.05 300 PSI 300.15 to 299.85
80 PSI 79.95 to 80.05 240 PSI 240.15 to 239.85
60 PSI 59.95 to 60.05 180 PSI 180.15 to 179.85
40 PSI 39.95 to 40.05 120 PSI 120.15 to 119.85
20 PSI 19.95 to 20.05 60 PSI 60.15 to 59.85
* -12 PSI -12.05 to -11.95 -12 PSI -11.85 to -12.15
41
Page 54

71X Series
Calibration Manual
0 PSI 0.25 to -0.25 0 PSI 0.5 to -0.5
100 PSI 100.25 to 99.75 200 PSI 200.5 to 199.5
200 PSI 200.25 to 199.75 400 PSI 400.5 to 399.5
300 PSI 300.25 to 299.75 600 PSI 600.5 to 599.5
400 PSI 400.25 to 399.75 800 PSI 800.5 to 799.5
500 PSI 500.25 to 499.75 1000 PSI 1000.5 to 999.5
400 PSI 400.25 to 399.75 800 PSI 800.5 to 799.5
300 PSI 300.25 to 299.75 600 PSI 600.5 to 599.5
200 PSI 200.25 to 199.75 400 PSI 400.5 to 399.5
100 PSI 100.25 to 99.75 200 PSI 200.5 to 199.5
Table 62. 717 Pressure Verification (cont.)
Version 3.9 or Below
*717 500G 717 1000G
Input Pressure Display Reading Input Pressure Display Reading
717 1500G 717 3000G
Input Pressure Display Reading Input Pressure Display Reading
0 PSI 0.8 to -0.8 0 PSI 1.5 to -1.5
300 PSI 300.8 to 299.3 600.0 PSI 601.5 to 598.5
600 PSI 600.8 to 599.3 1200.0 PSI 1201.5 to 1198.5
900 PSI 900.8 to 899.3 1800.0 PSI 1801.5 to 1798.5
1200 PSI 1200.8 to 1199.3 2400.0 PSI 2401.5 to 2398.5
1500 PSI 1500.8 to 1499.3 3000.0 PSI 3001.5 to 2998.5
1200 PSI 1200.8 to 1199.3 2400.0 PSI 2401.5 to 2398.5
900 PSI 900.8 to 899.3 1800.0 PSI 1801.5 to 1798.5
600 PSI 600.8 to 599.3 1200.0 PSI 1201.5 to 1198.5
300 PSI 300.8 to 299.3 600.0 PSI 601.5 to 598.5
42
Page 55

Process Calibrators
Verification
Table 62. 717 Pressure Verification (cont.)
717 5000G
Input Pressure Display Reading
0 PSI 2.5 to -2.5
1000 PSI 1002.5 to 997.5
2000 PSI 2002.5 to 1997.5
3000 PSI 3002.5 to 2997.5
4000 PSI 4002.5 to 3997.5
5000 PSI 5002.5 to 4997.5
4000 PSI 4002.5 to 3997.5
3000 PSI 3002.5 to 2997.5
2000 PSI 2002.5 to 1997.5
1000 PSI 1002.5 to 997.5
*Vacuum is only specified for V1.3 and later. To display the firmware version, start with the 717 off, push
and hold , then push the power button.
43
Page 56

71X Series
Calibration Manual
Table 62. 717 Pressure Verification (cont.)
Version 4.0 or Higher
717 1G 717 15G
Input
Pressure
0 PSI 0.0005 to
0.1 PSI 0.1005 to
0.2 PSI 0.2005 to
0.3 PSI 0.3005 to
0.4 PSI 0.4005 to
0.5 PSI 0.5005 to
0.6 PSI 0.6005 to
0.7 PSI 0.7005 to
6-Month
Display
Reading
-0.0005
0.0995
0.1995
0.2995
0.3995
0.4995
0.5995
0.6995
1-Year
Display
Reading
0.0005 to
-0.0005
0.1005 to
0.0995
0.2005 to
0.1995
0.3005 to
0.2995
0.4005 to
0.3995
0.5005 to
0.4995
0.6005 to
0.5995
0.7005 to
0.6995
Input
Pressure
0 PSI -0.004 to
3 PSI
6 PSI
9 PSI
12 PSI 11.996 to
15 PSI 14.996 to
12 PSI 11.996 to
9 PSI
6-Month
Display
Reading
0.004
2.996 to 3.004 2.995 to 3.005
5.996 to 6.004 5.995 to 6.005
8.996 to 9.004 8.995 to 9.005
12.004
15.004
12.004
8.996 to 9.004 8.995 to 9.005
1-Year
Display
Reading
-0.005 to
0.005
11.995 to
12.005
14.995 to
15.005
11.995 to
12.005
0.8 PSI 0.8005 to
0.7995
0.9 PSI 0.9005 to
0.8995
1 PSI 1.0005 to
0.9995
-0.2 PSI -0.1995 to
-0.2005
-0.4 PSI -0.3995 to
-0.4005
-0.6 PSI -0.5995 to
-0.6005
-0.8 PSI -0.7995 to
-0.8005
-1 PSI -0.9995 to
-1.0005
0.8005 to
0.7995
0.9005 to
0.8995
1.0005 to
0.9995
-0.1995 to
-0.2005
-0.3995 to
-0.4005
-0.5995 to
-0.6005
-0.7995 to
-0.8005
-0.9995 to
-1.0005
6 PSI
3 PSI
-6 PSI -6.004 to -
-12 PSI -12.004 to
5.996 to 6.004 5.995 to 6.005
2.996 to 3.004 2.995 to 3.005
5.996
-11.996
-6.005 to -
5.995
-12.005 to
-11.995
44
Page 57

Process Calibrators
Verification
Table 62. 717 Pressure Verification (cont.)
Version 4.0 or Higher
717 30G 717 100G
Input
Pressure
0 PSI -0.008 to 0.008 -0.011 to 0.011 0 PSI -0.03 to -0.03 -0.04 to -0.04
6 PSI 5.992 to 6.008 5.989 to 6.011 20 PSI 19.97 to 20.03 19.96 to 20.04
12 PSI
18 PSI
24 PSI
30 PSI
24 PSI
18 PSI
12 PSI
6-Month
Display
Reading
11.992 to
12.008
17.992 to
18.008
23.992 to
24.008
29.992 to
30.008
23.992 to
24.008
17.992 to
18.008
11.992 to
12.008
1-Year
Display
Reading
11.988 to
12.011
17.989 to
18.011
23.989 to
24.011
29.989 to
30.011
23.989 to
24.011
17.989 to
18.011
11.989 to
12.011
Input
Pressure
40 PSI 39.97 to 40.03 39.96 to 40.04
60 PSI 59.97 to 60.03 59.96 to 60.04
80 PSI 79.97 to 80.03 79.96 to 80.04
100 PSI 99.97 to 100.03 99.96 to 100.04
80 PSI 79.97 to 80.03 79.96 to 80.04
60 PSI 59.97 to 60.03 59.96 to 60.04
40 PSI 39.97 to 40.03 39.96 to 40.04
6-Month
Display
Reading
1-Year
Display
Reading
6 PSI 5.992 to 6.008 5.989 to 6.011 20 PSI 19.97 to 20.03 19.96 to 20.04
-12 PSI
-12.008 to
-11.992
-12.011 to
-11.989
-12 PSI -12.03 to -11.97 -12.04 to -11.96
45
Page 58

71X Series
Calibration Manual
Table 62. 717 Pressure Verification (cont.)
Version 4.0 or Higher
717 300G *717 500G
Input
Pressure
0 PSI -0.11 to 0.11 -0.15 to 0.15 0 PSI -0.13 to 0.13 -0.18 to 0.18
60 PSI 59.89 to 60.11 59.85 to 60.15 100 PSI 99.87 to 100.13 99.82 to 100.18
120 PSI
180 PSI
240 PSI
300 PSI
240 PSI
180 PSI
120 PSI
6-Month
Display
Reading
119.89 to
120.11
179.89 to
180.11
239.89 to
240.11
299.89 to
300.11
239.89 to
240.11
179.89 to
180.11
119.89 to
120.11
1-Year
Display
Reading
119.85 to
120.15
179.85 to
180.15
239.85 to
240.15
299.85 to
300.15
239.85 to
240.15
179.85 to
180.15
119.85 to
120.15
Input
Pressure
200 PSI
300 PSI
400 PSI
500 PSI
400 PSI
300 PSI
200 PSI
6-Month
Display
Reading
199.87 to
200.13
299.87 to
300.13
399.87 to
400.13
499.87 to
500.13
499.87 to
400.13
299.87 to
300.13
199.87 to
200.13
1-Year
Display
Reading
199.82 to
200.18
299.82 to
300.18
399.82 to
400.18
499.82 to
500.18
499.82 to
400.18
299.82 to
300.18
199.82 to
200.18
60 PSI 59.89 to 60.11 59.85 to 60.15 100 PSI 99.87 to 100.13 99.82 to 100.18
-12 PSI
-12.11 to -
11.89
-12.15 to
-11.85
46
Page 59

Process Calibrators
Verification
Table 62. 717 Pressure Verification (cont.)
Version 4.0 or Higher
717 1000G 717 1500G
Input
Pressure
0 PSI -0.3 to 0.3 -0.4 to 0.4 0 PSI -0.4 to 0.4 -0.5 to 0.5
200 PSI 199.7 to 200.3 199.6 to 200.4 300 PSI 299.6 to 300.4 299.5 to 300.5
400 PSI 399.7 to 400.3 399.6 to 400.4 600 PSI 599.6 to 600.4 599.5 to 600.5
600 PSI 599.7 to 600.3 599.6 to 600.4 900 PSI 899.6 to 900.4 899.5 to 900.5
800 PSI 799.7 to 800.3 799.6 to 800.4 1200 PSI 1199.6 to 1200.4
1000 PSI 999.7 to 1000.3 999.6 to 1000.4 1500 PSI 1499.6 to 1500.4
800 PSI 799.7 to 800.3 799.6 to 800.4 1200 PSI 1199.6 to 1200.4
600 PSI 599.7 to 600.3 599.6 to 600.4 900 PSI 899.6 to 900.4 899.5 to 900.5
400 PSI 399.7 to 400.3 399.6 to 400.4 600 PSI 599.6 to 600.4 599.5 to 600.5
200 PSI 199.7 to 200.3 199.6 to 200.4 300 PSI 299.6 to 300.4 299.5 to 300.5
0 PSI -0.8 to -0.8 -1.1 to -1.1 0 PSI -1.3 to 1.3 -1.8 to 1.8
6-Month
Display
Reading
717 3000G 717 5000G
1-Year
Display
Reading
Input
Pressure
6-Month
Display
Reading
1-Year
Display
Reading
1199.5 to
1200.5
1499.5 to
1500.5
1199.5 to
1200.5
600.0 PSI 599.2 to 600.8 598.9 to 601.1 1000 PSI 998.7 to 1001.3 998.2 to 1001.8
1200.0 PSI 1199.2 to 1200.8
1800.0 PSI 1799.2 to 1800.8
2400.0 PSI 2399.2 to 2400.8
3000.0 PSI 2999.2 to 3000.8
2400.0 PSI 2399.2 to 2400.8
1800.0 PSI 1799.2 to 1800.8
1200.0 PSI 1199.2 to 1200.8
600.0 PSI 599.2 to 600.8 598.9 to 601.1 1000 PSI 998.7 to 1001.3 998.2 to 1001.8
1198.9 to
1201.1
1798.9 to
1801.1
2398.9 to
2401.1
2998.9 to
3001.1
2398.9 to
2401.1
1798.9 to
1801.1
1198.9 to
1201.1
2000 PSI 1998.7 to 2001.3
3000 PSI 2998.7 to 3001.3
4000 PSI 3998.7 to 4001.3
5000 PSI 4998.7 to 5001.3
4000 PSI 3998.7 to 4001.3
3000 PSI 2998.7 to 3001.3
2000 PSI 1998.7 to 2001.3
1998.2 to
2001.8
2998.2 to
3001.8
3998.2 to
4001.8
4998.2 to
5001.8
3998.2 to
4001.8
2998.2 to
3001.8
1998.2 to
2001.8
47
Page 60

71X Series
Calibration Manual
0 PSI -4 to 4 -5 to 5
2000 PSI 1996 to 2004 1995 to 2005
4000 PSI 3996 to 4004 3995 to 4005
6000 PSI 5996 to 6004 5995 to 6005
8000 PSI 7996 to 8004 7995 to 8005
10000 PSI 9996 to 10004 9995 to 10005
8000 PSI 7996 to 8004 7995 to 8005
6000 PSI 5996 to 6004 5995 to 6005
4000 PSI 3996 to 4004 3995 to 4005
Table 62. 717 Pressure Verification (cont.)
Version 4.0 or Higher
717 10000G
Input Pressure 6-Month Display Reading 1-Year Display Reading
2000 PSI 1996 to 2004 1995 to 2005
*To display the firmware version, start with the 717 off, push and hold the center bottom button ( or ),
then push the power button.
4. Carefully vent all pressure and disconnect the 717 from the deadweight tester.
mA Measure Verification
1. Push
to turn power on. The display should read:
---------- mA
then change to:
0.000 mA 0.00PSI
2. Connect a test lead from Red AUX terminal of the 5520A to the Fluke 8508A I+
terminal.
3. Connect a test lead from Black AUX terminal of the 5520A to the 717 Calibrator
Com terminal.
4. Connect a test lead from I- terminal of the Fluke 8508A to the 717 Calibrator mA
terminal.
5. Adjust the 5520A if necessary so that the current shown on the Fluke 8508A is the
same as the 5520A values shown in Table 63.
6. Verify that the display readings on the 717 Calibrator are within the limits.
48
Table 63. 717 mA Measure Verification
Fluke 5520A Fluke 717 (V2.9 and lower) Fluke 717 (V3.0 and higher)
4.0000 mA 3.998 mA to 4.002 mA 3.997 mA to 4.003 mA
12.0000 mA 11.996 mA to 12.004 mA 11.996 mA to 12.004 mA
24.0000 mA 23.993 mA to 24.007 mA 23.994 mA to 24.006 mA
Page 61

Process Calibrators
Verification
7. Disconnect the test leads and push to turn the power off.
mA Loop Power Verification
1. Hold down both LOOP POWER keys ( and ) at the same until the screen
reads:
---------- LOOP mA
then release the keys.
2. Apply 1 kΩ to the mA jacks from the decade box or other resistor sources. The
display should read over 19 mA but less than OL.
3. Push
to turn the power off.
Sensor Jack Verification
1. Make sure nothing is connected to the sensor port of the Fluke 717.
2. Turn power on. The display should read:
---------- mA
then change to:
0.000 PSI
3. Plug the Fluke Pressure Module into the sensor port on the Fluke 717. The display
should change to:
---------- mA
A pressure value should appear on the screen after all of the calibration constants
have been down loaded.
4. Disconnect the Fluke Pressure Module and push
718 and 718Ex Verification
This procedure is appropriate for the 718 and 718Ex. When the steps vary, the step will
be labeled (718 Only) or (718Ex Only).
Pressure Verification
To avoid a violent release of pressure or vacuum, always
depressurize the system slowly using the pressure/vacuum
release control before detaching any pressure line.
to turn the Fluke 717 off.
WWarning
1. Carefully attach the pressure fitting of the deadweight tester to the pressure port of
the Calibrator.
Note
The use of TEFLON tape at the pressure fitting strengthens the seal.
2. Push the green key to turn the calibrator on.
3. The display should read 0.00 PSI with the deadweight tester opened up to ambient
air. If not, push the
key until display does read 0.00 PSI.
4. Depending if the instrument being tested is a 718(Ex) 1G, 30G, 100G, or 300G, set
up the deadweight tester for the sequence of PSI inputs from Table 64 to be injected
into the pressure port of the Calibrator.
5. Ensure the pressure has stabilized at each input before verifying the display reading.
6. Carefully vent all pressure and disconnect the calibrator from the deadweight tester.
49
Page 62

71X Series
Calibration Manual
Pressure
0 PSI 0.0005 to -0.0005 0 PSI -0.015 to 0.015
0.1 PSI 0.1005 to 0.0995 6 PSI 5.985 to 6.015
0.2 PSI 0.2005 to 0.1995 12 PSI 11.985 to 12.015
0.3 PSI 0.3005 to 0.2995 18 PSI 17.985 to 18.015
0.4 PSI 0.4005 to 0.3995 24 PSI 23.985 to 24.015
0.5 PSI 0.5005 to 0.4995 30 PSI 29.985 to 30.015
0.6 PSI 0.6005 to 0.5995 24 PSI 23.985 to 24.015
0.7 PSI 0.7005 to 0.6995 18 PSI 17.985 to 18.015
0.8 PSI 0.8005 to 0.7995 12 PSI 11.985 to 12.015
0.9 PSI 0.9005 to 0.8995 6 PSI 5.985 to 6.015
1 PSI 1.0005 to 0.9995 -12 PSI * -12.015 to -11.985
-0.2 PSI -0.1995 to -0.2005
-0.4 PSI -0.3.995 to -0.4005
-0.6 PSI -0.5995 to -0.6005
-0.8 PSI -0.7995 to -0.8005
-1 PSI -0.9995 to -1.0005
Pressure
Note
When verifying vacuum pressure make sure the pressure/vacuum switch is
in the vacuum position. Forward (clockwise) is for pressure and backward
(counter-clockwise) is for vacuum.
Table 64. 718 and 718Ex Pressure Verification
718 Version 3.9 or Below
718Ex V1.9 and Below
718 1G 718 and 718Ex 30G
Input
718 and 718Ex 100G 718 and 718Ex 300G
Input
Display
Reading
Display
Reading
Input
Pressure
718 Version 3.9 or Below
718Ex Version 1.9 or Below
Input
Pressure
Display
Reading
Display
Reading
50
0 PSI -0.05 to 0.05 0 PSI 0.15 to -0.15
20 PSI 19.95 to 20.05 60 PSI 60.15 to 59.85
40 PSI 39.95 to 40.05 120 PSI 120.15 to 119.85
60 PSI 59.95 to 60.05 180 PSI 180.15 to 179.85
80 PSI 79.95 to 80.05 240 PSI 240.15 to 239.85
100 PSI 99.95 to 100.05 300 PSI 300.15 to 299.85
80 PSI 79.95 to 80.05 240 PSI 240.15 to 239.85
60 PSI 59.95 to 60.05 180 PSI 180.15 to 179.85
40 PSI 39.95 to 40.05 120 PSI 120.15 to 119.85
20 PSI 19.95 to 20.05 60 PSI 60.15 to 59.85
* -12 PSI -12.05 to -11.95 -12 PSI -11.85 to -12.15
*Vacuum is only specified for V1.3 and later. To display the firmware version, start with the 717 off, push and
hold , then push the power button.
Page 63

Process Calibrators
r
Verification
Table 64. 718 and 718Ex Pressure Verification (cont.)
718 Version 4.0 or Higher
718Ex Version 2.0 and Highe
718 1G Version 4.0 or greater 718 and 718Ex 30G
Input
Pressure
0 PSI
0.1 PSI
0.2 PSI
0.3 PSI
0.4 PSI
0.5 PSI
0.6 PSI
0.7 PSI
0.8 PSI
0.9 PSI
1 PSI
-0.2 PSI
-0.4 PSI
-0.6 PSI
-0.8 PSI
-1 PSI
6-Month
Display
Reading
0.0005 to
-0.0005
0.1005 to
0.0995
0.2005 to
0.1995
0.3005 to
0.2995
0.4005 to
0.3995
0.5005 to
0.4995
0.6005 to
0.5995
0.7005 to
0.6995
0.8005 to
0.7995
0.9005 to
0.8995
1.0005 to
0.9995
-0.1995 to
-0.2005
-0.3995 to
-0.4005
-0.5995 to
-0.6005
-0.7995 to
-0.8005
-0.9995 to
-1.0005
1-Year
Display
Reading
0.0005 to
-0.0005
0.1005 to
0.0995
0.2005 to
0.1995
0.3005 to
0.2995
0.4005 to
0.3995
0.5005 to
0.4995
0.6005 to
0.5995
0.7005 to
0.6995
0.8005 to
0.7995
0.9005 to
0.8995
1.0005 to
0.9995
-0.1995 to
-0.2005
-0.3995 to
-0.4005
-0.5995 to
-0.6005
-0.7995 to
-0.8005
-0.9995 to
-1.0005
Input
Pressure
0 PSI -0.008 to 0.008 -0.011 to 0.011
6 PSI 5.992 to 6.008 5.989 to 6.011
12 PSI
18 PSI
24 PSI
30 PSI
24 PSI
18 PSI
12 PSI
6 PSI
-12 PSI
6-Month
Display
Reading
11.992 to
12.008
17.992 to
18.008
23.992 to
24.008
29.992 to
30.008
23.992 to
24.008
17.992 to
18.008
11.992 to
12.008
5.992 to
6.008
-12.008 to -
11.992
1-Year
Display
Reading
11.988 to
12.011
17.989 to
18.011
23.989to 24.011
29.989 to
30.011
23.989 to
24.011
17.989 to
18.011
11.989 to
12.011
5.989 to
6.011
-12.011
to -
11.989
51
Page 64

71X Series
Calibration Manual
0 PSI -0.03 to -0.03 -0.04 to -0.04 0 PSI -0.11 to 0.11 -0.15 to 0.15
20 PSI 19.97 to 20.03 19.96 to 20.04 60 PSI 59.89 to 60.11 59.85 to 60.15
Table 64. 718 and 718Ex Pressure Verification (cont.)
718 and 718Ex 100G 718 and 718Ex 300G
40 PSI 39.97 to 40.03 39.96 to 40.04 120 PSI
60 PSI 59.97 to 60.03 59.96 to 60.04 180 PSI
80 PSI 79.97 to 80.03 79.96 to 80.04 240 PSI
100 PSI 99.97 to 100.03 99.96 to 100.04 300 PSI
80 PSI 79.97 to 80.03 79.96 to 80.04 240 PSI
60 PSI 59.97 to 60.03 59.96 to 60.04 180 PSI
40 PSI 39.97 to 40.03 39.96 to 40.04 120 PSI
20 PSI 19.97 to 20.03 19.96 to 20.04 60 PSI 59.89 to 60.11 59.85 to 60.15
-12 PSI
-12.03 to -
11.97
-12.04 to -
11.96
-12 PSI -12.11 to -11.89 -12.15 to -11.85
119.89 to
120.11
179.89 to
180.11
239.89 to
240.11
299.89 to
300.11
239.89 to
240.11
179.89 to
180.11
119.89 to
120.11
119.85 to 120.15
179.85 to 180.15
239.85 to 240.15
299.85 to 300.15
239.85 to 240.15
179.85 to 180.15
119.85 to 120.15
52
Page 65

Process Calibrators
Verification
Leak Test Verification
1. Seal off the pressure sensor input port.
2. Using the fine adjust knob, pressure-vacuum switch and internal pump, set the
calibrator to (approximately) the values in Table 65. Let the unit sit for one minute,
then record the displayed value.
3. Wait for one more minute, then record a second reading. The difference between the
first and the second reading is the leak rate.
Table 65. 718 Leak Test Verification
718 1G 718 30G
Adjusted Pressure Maximum Leak Rate Adjusted Pressure Maximum Leak Rate
-1.000 PSI
1.000 PSI 3.000 PSI
718 100G 718 300G
Adjusted Pressure Maximum Leak Rate Adjusted Pressure Maximum Leak Rate
-10.00 PSI
3.00 PSI 3.00 PSI
100.00 PSI 100.00 PSI
0.005 PSI/min
0.10 PSI/min
-10.000 PSI
0.05 PSI/min
30.000 PSI
-10.00 PSI
0.3 PSI/min
mA Measure Verification
The display should indicate:
0.000mA 0.00 PSI
1. Connect a test lead from Red AUX terminal of the 5520A to the Fluke 8508A I+
terminal.
2. Connect a test lead from Black AUX terminal of the 5520A to the Calibrator Com
terminal.
3. Connect a test lead from I- terminal of the Fluke 8508A to the Calibrator mA
terminal.
4. Adjust the 5520A if necessary so that the current shown on the Fluke 8508A is the
same as the 5520A values shown in Table 66.
5. Verify that the display readings on the Calibrator are within the limits.
Table 66. 718 and 718Ex mA Measure Verification
Fluke 5520A Fluke 718 (V2.9 and lower) Fluke 718 (V3.0 and higher) Fluke 718Ex
4.0000 mA 3.998 mA to 4.002 mA 3.997 mA to 4.003 mA 3.997 mA to 4.003 mA
12.0000 mA 11.996 mA to 12.004 mA 11.996 mA to 12.004 mA 11.996 mA to 12.004 mA
24.0000 mA 23.993 mA to 24.007 mA 23.994 mA to 24.006 mA 23.993 mA to 24.007 mA
6. Disconnect the test leads and turn off the 718 Calibrator.
53
Page 66

71X Series
Calibration Manual
mA Loop Power Verification (718 Only)
1. Hold down both LOOP POWER keys ( and ) at the same time until the
screen reads:
---------- LOOP mA
then release the keys.
2. Apply 1 kΩ to the mA jacks from the decade box or other resistor source. The
display should read over 19 mA but less than OL.
3. Push
Sensor Jack Verification
1. Make sure nothing is connected to the sensor port of the calibrator. Push
to turn the calibrator off.
the calibrator on. The display should read:
----------
then change to:
0.000
2. Plug the Fluke Pressure Module into the sensor port of the Fluke 718. The display
should change to:
----------
A pressure value should appear on the screen after all of the calibration constants
have been downloaded.
3. Disconnect the Fluke Pressure Module and push to turn the calibrator off.
Display Verification
1. Push and hold the
718 in a mode where all display segments are on. All segments will stay on until the
key is released.
2. Check to see that all segments of the display are showing.
3. Turn the calibrator off. The 718 and 718Ex verification test is now complete.
to turn
key and then push and release the green key. This locks the
54
719 Verification
This procedure is appropriate for the 719.
Display Verification
1. Push and hold . This locks the 719 in a mode where all display segments are on.
2. Check to see that all segments of the display are showing.
Pressure Verification
To avoid a violent release of pressure or vacuum, always
depressurize the system slowly using the pressure/vacuum
release control before detaching any pressure line.
1. Carefully attach the pressure fitting of the deadweight tester to the pressure port of
The use of TEFLON tape at the pressure fitting strengthens the seal.
All segments will stay on until is released.
the Calibrator.
WWarning
Note
Page 67

Process Calibrators
Verification
2. Push to turn the Calibrator on.
3. The display should read 0 PSI for the 30G and 0.00 PSI for the 100G with the
deadweight tester opened up to ambient air. If not, push until display reads 0.00
PSI or 0.000 PSI.
Note
The 719 vent should be closed and the pressure/vacuum switch should be in
the Pressure position for pressure measurements.
When verifying vacuum measurement, make sure the pressure/vacuum
switch is in the Vacuum position. Clockwise is for pressure and counterclockwise is for vacuum.
4. Setup the deadweight tester for the sequence of PSI inputs from Table 67 for the 719
being tested (30G or 100G). Ensure the pressure has stabilized at each input before
verifying the display reading. Then proceed to the next value.
5. When complete, vent all pressure and disconnect the calibrator from the deadweight
tester.
Table 67. 719 Pressure Verification
719 30G 719 100G
Input
Pressure
0 PSI Push Push 0 PSI Push Push
6 PSI 5.992 to 6.008 5.989 to 6.011 20 PSI 19.97 to 20.03 19.96 to 20.04
12 PSI 11.992 to 12.008 11.989 to 12.011 40 PSI 39.97 to 40.03 39.96 to 40.04
18 PSI 17.992 to 18.008 17.989 to 18.011 60 PSI 59.97 to 60.03 59.96 to 60.04
24 PSI 23.992 to 24.008 23.989 to 24.011 80 PSI 79.97 to 80.03 79.96 to 80.04
30 PSI 29.992 to 30.008 29.989 to 30.011 100 PSI 99.97 to 100.03 99.96 to 100.04
24 PSI 23.992 to 24.008 23.989 to 24.011 80 PSI 79.97 to 80.03 79.96 to 80.04
18 PSI 17.992 to 18.008 17.989 to 18.011 60 PSI 59.97 to 60.03 59.96 to 60.04
12 PSI 11.992 to 12.008 11.989 to 12.011 40 PSI 39.97 to 40.03 39.96 to 40.04
6 PSI 5.992 to 6.008 5.989 to 6.011 20 PSI 19.97 to 20.03 19.96 to 20.04
-12 PSI -12.008 to -11.992 -12.011 to -11.989 -12 PSI -12.03 to -11.97 -12.04 to -11.96
Display Reading
(6-Month Spec)
Display Reading
(1-Year Spec)
Input
Pressure
Display Reading
(6-Month Spec)
Display Reading
(1-Year Spec)
55
Page 68

71X Series
Calibration Manual
Leak Test Verification
Adjusted Pressure Maximum Leak Rate Adjusted Pressure Maximum Leak Rate
-10.00 PSI 0.05 PSI/min -10.00 PSI 0.1 PSI/min
3.00 PSI 3.00 PSI
30.00 PSI 100.00 PSI
mA Measure Verification
1. Seal off the pressure sensor input port.
2. Using the fine adjust knob, pressure-vacuum switch and internal pump, set the
Calibrator to the values in Table 68. Let the unit sit for one minute, then record the
displayed value.
3. Wait for one more minute, then record a second reading. The difference between the
first and the second reading is the leak rate.
Table 68. 719 Leak Test Verification
719 30G 719 100G
The lower display should indicate:
0.000mA
1. Connect a test lead from Red AUX terminal of the 5520A to the Fluke 8508A I+
terminal.
2. Connect a test lead from Black AUX terminal of the 5520A to the Calibrator COM
terminal.
3. Connect a test lead from I- terminal of the Fluke 8508A to the Calibrator mA
terminal.
4. Adjust the 5520A so that the current shown on the Fluke 8508A is the same as the
5520A values shown in Table 69.
5. Verify that the display readings on the Calibrator are within the limits.
Table 69. 719 mA Measure Verification
Fluke 5520A Fluke 719
4.0000 mA 3.997 mA to 4.003 mA
12.0000 mA 11.996 mA to 12.004 mA
24.0000 mA 23.993 mA to 24.007 mA
6. Disconnect the test leads and turn off the 719 Calibrator.
56
Page 69

Process Calibrators
Verification
mA Source Verification
1. Turn ON the 719 Calibrator.
When the display indicates a pressure and current value, for example:
0.00 PSI
0.000mA
2. Push three times, The lower display should read:
Source 4.000mA
The lower display will flash 4.000mA / OL until the circuit is complete.
3. Connect a test lead from Red Calibrator mA terminal to the Fluke 8508A I+ terminal.
4. Connect a test lead from the I-terminal of the Fluke 8508A to the Calibrator COM
terminal.
5. Set the 8508A to DC mA.
6. Change the output mA value by pressing (Steps are 4 mA, 8 mA, 12 mA, 16 mA,
20 mA), or scroll the mA output value between 0…24 mA using or .
7. Verify that the current readings on the Fluke 8508 are within the limits shown in
Table 70.
8. Disconnect the test leads and turn off the 719 Calibrator.
Table 70. 719 mA Source Verification
Fluke 719 Fluke 8508A
4.0000 mA 3.9974 mA to 4.0026 mA
12.0000 mA 11.9962 mA to 12.0038 mA
24.0000 mA 23.9944 mA to 24.0066 mA
57
Page 70

71X Series
Calibration Manual
mA Loop Power Verification
Sensor Jack Verification
1. While turning the Calibrator on, hold down both LOOP POWER keys (and ).
The screen reads:
--------- LOOP mA
2. Release the keys.
3. Apply 1.2 kΩ to the mA jacks from the decade box or other resistor source. The
lower display should read over 19 mA but less than OL.
4. Push to turn the calibrator off.
1. Make sure nothing is connected to the sensor port of the calibrator. Push to turn the
calibrator on. The display should read:
---------
2. Change to a near zero value, similar to:
0.000
3. Plug the Fluke Pressure Module into the sensor port of the Fluke 719. The display
should change to:
---------
After a short wait, a pressure value should appear on the display.
4. Disconnect the Fluke Pressure Module and push to turn the calibrator off.
The 719 verification test is now complete.
Calibration
Re-calibration (obtaining new calibration-constants) is required only if a calibrator fails
verification. Always re-verify after a re-calibration.
Throughout this section, the 71X Calibrator may be referred to as the
“UUT” (unit under test).
Preparing for Calibration
To prepare for calibration, do the following:
1. Make sure fuse(s) in the UUT are intact. By referring to Table 38, you should not
have to open the unit.
2. Make sure you have the required test equipment available. (Refer to Table 39.)
3. Turn on and warm up the test equipment for the time required.
4. Allow UUT to come to ambient temperature. Turn it on and allow 5 minutes for
warm-up of the UUT.
Note
58
Page 71

Process Calibrators
Calibration
712 Calibration (V1.1 and Earlier)
Millivolts Measure
1. Hold down the
and the key at the same time, then push and release the
key.
2. When the display momentarily shows CAL , release both the
and the keys.
This puts the 712 into Cal Mode. The 712 should display:
INPUT 0.00 mV
3. Connect the test lead from the NORMAL jacks of the Fluke 5520A to the INPUT
jacks (two middle jacks) on the 712 Calibrator (black to black, red to red).
4. Set the Fluke 5520A to 0.0000 mV and push O. Push any key on the 712
Calibrator. The display should read:
INPUT ----- mV
then change to:
INPUT 0.00 mV
5. Push any key on the 712 Calibrator. The display should read:
INPUT ----- mV
then change to:
INPUT 160.00 mV
6. Set the Fluke 5520A to 160.0000 mV.
7. Push any key on the 712 Calibrator. The display should read:
INPUT ----- mV
then change to:
INPUT 320.00 mV
8. Set the Fluke 5520A to 320.0000 mV.
9. Push any key on the 712 Calibrator. The display should read:
INPUT ----- mV
then change to:
INPUT 640.00 mV
10. Set the Fluke 5520A to 640.000 mV.
11. Push any key on the 712 Calibrator. The display should read:
INPUT ----- mV
then change to:
INPUT 1280.00 mV
12. Set the Fluke 5520A to 1280.000 mV.
13. Push any key on the 712 Calibrator. The display should read:
INPUT ----- mV
then change to:
INPUT 400.00 R 4W
59
Page 72

71X Series
Calibration Manual
Resistance Measure
mA Measure
1. Connect two additional test leads from the NORMAL jacks of the 5520A to the 712
Calibrator (black wire to the 712 red jack labeled [3W NC] and red wire to the red
jack labeled [4W NC]. All four input jacks of the 712 should now be in a 4-wire
ohms measurement configuration.
2. Set the Fluke 5520A to 400.00 Ω and push O.
3. Push any key on the 712 Calibrator. The display should read:
INPUT ----- R 4W
then change to:
INPUT -----
1. Disconnect all four test leads from the Fluke 5520A and the 712 Calibrator.
2. Connect the two test leads from the AUX jacks on the Fluke 5520A to the middle
jacks on the 712 Calibrator (black to black; red to red).
3. Push any key on the 712 Calibrator. The display will change to:
INPUT 0.00 mA
4. Set the Fluke 5520A to 0.00000 mA and push O.
5. Push any key on the 712 Calibrator. The display should read:
INPUT ----- mA
then change to:
INPUT 0.00 mA
6. Again, push any key on the 712 Calibrator, still with a 0.00000 mA input from the
Fluke 5520A. The display should read:
INPUT ----- mA
then change to:
INPUT 2.000 mA
7. Set the Fluke 5520A to 2.00000 mA.
8. Push any key on the 712 Calibrator. The display should read:
INPUT ----- mA
then change to:
INPUT 0.500 mA
9. Set the Fluke 5520A to 0.50000 mA.
10. Push any key on the 712 Calibrator. The display should read:
INPUT ----- mA
60
11. Push any key on the 712 Calibrator and the unit will automatically reset itself, with
all segments momentarily being displayed. Calibrator is now out of CAL mode. Push
key to turn the calibrator off and disconnect all test leads.
the
Page 73

Process Calibrators
Calibration
712 Calibration (V1.2 through V1.9)
1. Hold down and while turning the power on.
2. Hold the two keys until CAL is displayed, then release the two keys. The display
should read:
INPUT 15 Ω
3. Connect the two test leads from the NORMAL jacks of the 5520A to the INPUT
jacks (two middle jacks) on the 712 Calibrator (black to black, red to red).
4. Connect two additional test leads, also from the NORMAL jacks of the 5520A, to the
712 Calibrator (black wire to the 712 red jack labeled [3W NC] and red wire to the
red jack labeled [4W NC]). All four input jacks of the 712 should now be configured
in a 4-wire ohm measurement.
5. Set the Fluke 5520A to 15Ω and push O.
6. Push . The display should read:
INPUT ----- Ω,
then change to:
INPUT 350 Ω
7. Set the Fluke 5520A to 350 Ω.
8. Push . The display should read:
INPUT ----- Ω
then change to:
INPUT 500 Ω.
9. Set the Fluke 5520A to 500 Ω.
10. Push . The display should read:
INPUT ----- Ω
then change to:
INPUT 3200 Ω
11. Set the Fluke 5520A to 3200 Ω.
12. Push . The display should read:
INPUT ----- Ω.
then change to:
OUTPUT 17-50 Ω.
13. Using four test leads, connect the four jacks of Fluke 8508A (Ω Sense 'Hi & Lo' and
Input 'Hi & Lo') to the two middle jacks of the 712 Calibrator (black to black; red to
red). This puts the Fluke 8508A in a 4-wire configuration.
14. Set the 3458A to the 1000 Ω range.
15. Push and until the 712 display matches the Fluke 8508A.
16. Push . The display should read:
OUTPUT ----- Ω
then change to:
OUTPUT 350.00 0.
17. Push and until the 712 display matches the Fluke 8508A.
61
Page 74

71X Series
Calibration Manual
18. Push . The display should read:
OUTPUT ----- Ω
then change to:
OUTPUT 126.00 Ω
19. Put the Fluke 8508A in the 10 kΩ range.
20. Push and until the 712 display matches the Fluke 8508A.
21. Push . The display should read:
OUTPUT ----- Ω
then change to:
OUTPUT 2535.0 Ω
22. Push and until the 712 display matches the Fluke 8508A.
23. Push . The display should read:
OUTPUT ----- Ω
then the unit will reset.
24. Push the power key to turn the unit off and disconnect the test leads.
712 Calibration (V2.0 and Later)
1. Hold down and while turning the power on.
2. The display shows CAL for 1 second and then xxx, where xxx is the number the
times the unit has been through a calibration adjustment. When the two keys are
released, PASS is displayed. One second later a zero is displayed for the most
significant of the three digit password. Use the two small arrows to change the
number. After setting each digit, push
will go into calibration. If the password was wrong, the 712 will go into normal
operation mode. The password is 217.
3. The calibration will be performed in the following order:
OHMS INPUT
OHMS OUTPUT low range
OHMS OUTPUT high range
. If the password entry was correct, the 712
62
Page 75

Process Calibrators
Calibration
OHMS INPUT
1. In OHMS INPUT mode, the unit will display “C 15” for 1 second and then display
the OHMS input using the default calibration.
2. Connect the test leads from the 5520 main Jacks to the 712 jacks in 4 wire
configuration (2 wires at 5520, 4 wires at 712). The unit should read 15.0 Ω ±5%.
3. Push
4. Source 400 Ω from the 5520. The unit should read 400.0 Ω ±5%.
5. Push
6. Source 3200 Ω from the 5520. The unit should read 3200.0Ω ±5%.
7. Push
8. Push
OHMS OUTPUT Low Range
1. In OHMS OUTPUT low range mode, the unit will display “ 15.00” and will source
2. Connect the 712 to the DMM in OHMS read using 4 wire mode connection (2 wires
3. Adjust the value for OHMS OUTPUT using the arrows on the 712 keypad to source
4. Push
5. Adjust using the arrows on the keypad to source exactly 400.00 Ω.
to go to the next calibration point. “C 400” will be displayed for 1 second
and then it will display the ohms input.
to go to the next calibration point. “C3200” will be displayed for 1 second
and then it will display the ohms input.
to complete OHMS INPUT calibration. “CHEC” will be displayed for 1
second. The new calibration constants are applied and the OHMS INPUT calibration
can be checked.
to go to the next mode.
OHMS using the default calibration.
at 712, 4 wires at DMM). The DMM should read 15.00 Ω ±5%.
exactly 15.00 Ω.
to go to the next calibration point. “400.00” will be displayed
6. Push
7. Push
OHMS OUTPUT High Range
1. In OHMS OUTPUT high range mode, the unit will display “ 20.0” and will source
2. Adjust the value for OHMS OUTPUT using the arrows on the 712 keypad to source
3. Push
4. Adjust using the arrows on the keypad to source exactly 4000.0 Ω.
5. Push
6. Push
to complete OHMS OUTPUT low range calibration. “CHEC” will be
displayed for 1 second. The new calibration constants are applied and the calibration
can be checked.
to go to the next mode.
OHMS using the default calibration. Keep the connections from the previous mode.
The DMM should read 20.0 Ω ±5%.
exactly 20.0 Ω.
to go to the next calibration point. “4000.0” will be displayed.
to complete OHMS OUTPUT high range calibration. “CHEC” will be
displayed for 1 second. The new calibration constants are applied and the calibration
can be checked.
to complete calibration.
63
Page 76

71X Series
Calibration Manual
714 Calibration (Earlier than V2.0)
Temperature Measure
1. On the 714 Calibrator push and hold the
pressing and releasing the key.
and keys, then turn on the 714 by
2. When the display momentarily shows CAL, release both the
puts the 714 into the Cal Mode. The 714 should display:
INPUT 0.00 mV
3. Connect the two-wire copper test lead (banana jacks to mini-connector) from the
NORMAL jacks of the Fluke 5520A to the TC jack on the 714 Calibrator, observing
correct polarity.
4. Set the Fluke 5520A to 0.0000 mV and push O.
5. Push any key on the 714 Calibrator. The display should read:
INPUT -------- mV
then change to:
INPUT 77.00 mV
6. Set the Fluke 5520A to 77.0000 mV.
7. Push any key on the 714 Calibrator. The display should read:
INPUT -------- mV
then change to:
OUTPUT mV
Temperature Source
1. Remove the copper test lead from the 714 Calibrator.
and keys. This
Note
Copper wire must be used during this step.
64
2. Push any key on the 714 Calibrator. The display should read:
OUTPUT ------ mV
After a few seconds, the display should change to:
TYPE J 0.0 °C
Thermocouple Block Calibration
1. Connect the Type-J thermocouple test lead from the TC jack on the Fluke 5520A to
the TC jack on the 714 Calibrator, observing correct polarity.
Note
Type-J thermocouple wire (not copper) must be used.
2. Set the Fluke 5520A to source Type-J thermocouple at 0.0 °C. Push O.
3. Push any key on the 714 Calibrator. The display will very quickly flash:
TYPE J ------ °C
then read:
TYPE J HOLD °C
4. Wait for three to five minutes. The longer the waiting period, the more accurate the
Thermo-block calibration will be.
5. Push any key on the 714 Calibrator. The display should read:
Page 77

Process Calibrators
Calibration
TYPE J ------ °C
then change to:
TYPE J 0.xx °C
This number represents the absolute error of the "CJC" sensor and should be below
1°C.
6. Push any key on the 714 Calibrator. The 714 should reset itself, displaying all
segments momentarily. The display should then change to:
INPUT xx.x °C
where xx.x is some variable number; or OL (overload) may be indicated.
7. Push the key to turn the calibrator off and remove the Type J thermocouple test
lead.
714 Calibration (V2.0 and Later)
1. On the 714 Calibrator push and hold the
and keys, then turn on the 714 by
pressing and releasing the key.
2. The display shows CAL for 1 second and then xxx, where xxx is the number the
times the unit has been through a calibration adjustment. When the two keys are
released, PASS is displayed. One second later a zero is displayed for the most
significant of the three digit password. Use the two small arrows to change the
number. After setting each digit, push the °C/°F key. If the password entry was
correct, the 714 will go into calibration. If the password was wrong, the 714 will go
into normal operation mode. The password is 417.
3. The calibration will be performed in the following order:
mV OUTPUT
1. In mV OUTPUT mode, the unit will display “C -10” for 1 second followed by “ –
10.000”. The calibrator is now sourcing mV using the default calibration. The 714
should source approximately –10.000mV through copper wire.
2. Adjust the source value using the up and down big arrows for gross and small arrows
for fine, until you read -10.000mV.
3. Push
second and then “ 75.000”. The 714 should source approximately 75.000mV.
4. Adjust the source value until you read 75.000 mV on the DMM.
5. Push
mV INPUT
1. In mV INPUT mode, the unit will display “C -10” for 1 second and then will display
the input voltage using the default calibration.
2. Source -10.000 mV from the 5520. The unit should read approximately –10.000 mV
through copper wire.
mV OUTPUT
mV INPUT
CJC
key to go to the next calibration point. “C 75” will be displayed for 1
to complete mV OUTPUT calibration.
3. Push
to go to the next calibration point. “C 75” will be displayed for 1 second
and then the input voltage.
4. Source 75.000 mV from the 5520. The unit should read approximately 75.000mV .
65
Page 78

71X Series
Calibration Manual
5. Push to complete mV INPUT calibration. “CHEC” will be displayed for 1
second. The new calibration constants are applied and the mV INPUT calibration can
be checked.
6. Push
to go to the next mode.
CJC
1. In CJC Cal Mode the unit will display “C CJC” for 1 second followed by IN 0°C for
another second. Next it will display the difference between the temperature as
measured by the CJC sensor and the temperature measured by a J type thermocouple.
2. Use the 5520 with J Type thermocouple wire to input a J type thermocouple signal of
0°C with CJC on.
3. When the number displayed on the 714 is stable, push the
calibration.
715 Calibration (Earlier than V2.0)
mA/Volts Measure
1. On the 715 Calibrator, hold down the
push and release the
key.
2. When the display momentarily shows CAL , release the
CAL shows momentarily, the 715 will display:
INPUT 0.000 mA
3. Connect two test leads from the AUX jacks of the Fluke 5520A to the middle mA
input jacks on the 715 Calibrator (black to COM jack and red to mA jack).
4. Set the Fluke 5520A to 0.00000 mA and push O.
to complete the
and the keys at the same time, then
and the keys. After
5. Push any key on the 715 Calibrator. The display should read:
INPUT ----- mA
then change to:
INPUT 24.000 mA
6. Set the Fluke 5520A to 24.0000 mA.
7. Push any key on the 715 Calibrator. The display should read:
INPUT ----- mA
then change to:
INPUT 0.000 V
8. Connect test lead from the NORMAL output jacks of the Fluke 5520A to the voltage
jacks on the 715 Calibrator (black to COM jack and red to the V jack).
9. Set the Fluke 5520A to 0.0000 mV and push O.
10. Push any key on the 715. A relay will click and the display should read:
INPUT ----- V
then change to:
INPUT 10.000 V
11. Set the Fluke 5520A to 10.00000 V.
66
Page 79

Process Calibrators
Calibration
12. Push any key on the 715 Calibrator. The display should read:
INPUT ----- V
then change to:
INPUT 0.00 mV
13. Set the Fluke 5520A to 0.0000 mV.
14. Push any key on the 715 Calibrator. The display should read:
INPUT ----- mV
then change to:
INPUT 100.00 mV
15. Set the Fluke 5520A to 100.0000 mV.
16. Push any key on the 715 Calibrator. The display should read:
INPUT ----- mV
then change to:
OUTPUT mV
mA/Volts Source Measure
1. Remove all test leads from the 715 Calibrator.
2. Push any key on the 715 Calibrator. Display should change to:
OUTPUT ----- mV
After a couple of seconds, display should change to:
OUTPUT ----- V
After a couple more seconds, display should change to:
OUTPUT mA
3. Take one single test lead and plug one end into the V jack and the other end into the
+LOOP jack of the 715 Calibrator (places a short between the two jacks).
4. Push any key on the 715 Calibrator. Display should read:
OUTPUT ----- mA
5. The 715 will then reset itself with all segments momentarily being displayed, then
change to:
OUTPUT 0.0000 V
The 715 is now out of the CAL mode. Turn the green key to turn the calibrator off.
715 Calibration (V2.0 and Later)
1. On the 715 Calibrator, hold down the
push and release the
key.
2. The display shows CAL for 1 second and then xxx, where xxx is the number the
times the unit has been through a calibration adjustment. When the two keys are
released, PASS is displayed. One second later, a zero is displayed for the most
significant of the three digit password. The 715 password is 517. Use the two small
arrows to change the number. After setting each digit, push
entry was correct, 715 will go into calibration mode and the letter “K” will appear on
the display. If the password was wrong, 715 will go into normal operation mode.
and the keys at the same time, then
. If the password
67
Page 80

71X Series
Calibration Manual
V INPUT
3. The calibration will be performed in the following order:
V INPUT
mV INPUT
mA INPUT
V OUTPUT
mV OUTPUT
mA OUTPUT
1. In V INPUT mode, the unit displays “CAL 0” for 1 second followed by the input
voltage using the default calibration.
2. Connect the test leads from the 5520 main Jacks to the V and COM and source 0.0 V.
The unit should read 0.000V ±0.010V.
3. Push
4. Source 25V from the 5520. The unit should read 25.000V with 5% tolerance.
5. Push
6. Set the 5520 to 0.0 and push mA_% key to go to the next mode.
mV INPUT
1. In mV INPUT mode, the unit displays “CAL 0” for 1 second followed by the input
2. Source 0.0 mV from 5520. The unit should read 0.00mV ±0.10mV.
3. Push
4. Source 200mV from the 5520. The unit should read 200.00V with 5% tolerance.
5. Push
6. Push
mA INPUT
1. In mA INPUT mode, the unit displays “CAL 0” for 1 second followed by the input
to go to the next calibration point. “CAL 25” will be displayed for 1
second and then the input voltage.
to complete V INPUT calibration. “CHEC” will be displayed for 1 second.
The new calibration constants are applied and the V INPUT calibration can be
checked.
voltage using the default calibration.
to go to the next calibration point. “C 200” will be displayed for 1 second
and then the input voltage.
to complete mV INPUT calibration. “CHEC” will be displayed for 1
second. The new calibration constants are applied and the mV INPUT calibration can
be checked.
to go to the next mode
mA using the default calibration.
68
2. Move the red test lead to mA jack.
3. Source 0.0 mA from 5520 using the AUX jacks. The unit should read 0.000mA
±0.010mA.
4. Push
5. Source 24mA from the 5520. The unit should read 24.000mA with 5% tolerance.
6. Push
7. Set the 5520 to STBY mode and push
to go to the next calibration point. “CAL24” will be displayed for 1
second and then the input mA.
to complete mA INPUT calibration. “CHEC” will be displayed for 1
second. The new calibration constants are applied and the mA INPUT calibration can
be checked.
to go to the next mode.
Page 81

Process Calibrators
Calibration
V OUTPUT
1. In V OUTPUT mode, the unit displays “C 0” for 1 second followed by “ .0000”. The
Calibrator is now sourcing V using the default calibration.
2. Connect the test leads from V and COM to V and COM of ….DMM. The 715 should
source 0.000V ±0.010V.
3. Adjust the source value using the up and down big arrows for gross and small arrows
for fine adjustment, until you read 0.000V on the DMM.
4. Push
and then “ .0000”. The 715 should source 20V with 5% tolerance.
5. Adjust the source value until you read 20.000 on the DMM.
6. Push
second. The new calibration constants are applied and the V OUTPUT calibration
can be checked.
7. Push
mV OUTPUT
1. In mV OUTPUT mode, the unit displays “C 0” for 1 second followed by “ 0.000”.
The calibrator is now sourcing mV using the default calibration. 715 should source
0.00mV ±0.10mV.
2. Adjust the source value using the up and down big arrows for gross and small arrows
for fine, until you read 0.00mV on the DMM.
3. Push
and then “ 0.000”. The 715 should source 200.00mV with 5% tolerance.
4. Adjust the source value until you read 200.00 mV on the DMM.
5. Push
second. The new calibration constants are applied and the mV OUTPUT calibration
can be checked.
6. Push
to go to the next calibration point. “C 20” will be displayed for 1 second
to complete V OUTPUT calibration. “CHEC” will be displayed for 1
to go to the next mode.
to go to the next calibration point. “C 200” will be displayed for 1 second
to complete mV OUTPUT calibration. “CHEC” will be displayed for 1
to go to the next mode.
mA OUTPUT
1. In mA OUTPUT mode, the unit displays “C 1” for 1 second followed by “ .0000”.
The calibrator is now sourcing mA using the default calibration.
2. Connect the test leads from LOOP (red) and V (black) to mA and COM jacks of
….DMM. The 715 should source 1.000mA ±0.010mA.
3. Adjust the source value using the up and down big arrows for gross and small arrows
for fine adjustment, until you read 1.000mA on the DMM.
4. Push
5. Adjust the source value until you read 21.000mA on the DMM.
6. Push
7. Push
69
to go to the next calibration point. “C 21” will be displayed for 1 second
and then “ .0000”. The 715 should source 21mA with 5% tolerance.
to complete mA OUTPUT calibration. “CHEC” will be displayed for 1
second. The new calibration constants are applied and the mA OUTPUT calibration
can be checked.
to complete the calibration and go to the normal mode.
Page 82

71X Series
Calibration Manual
717 Calibration (Earlier than V2.0)
mA Measure
1. Hold down the and the keys at the same time, then push the green
When the display shows CAL momentarily, release the and the keys
immediately. After CAL shows, the display will automatically read:
CAL 0.000mA
2. Connect the test leads from the AUX jacks of the Fluke 5520A to the mA jacks on
the 717 Calibrator (Black to Black and Red to Red).
3. Set the Fluke 5520A to 0.00000 mA and push O.
4. Push any key on the 717 Calibrator. The display should change to:
------- 0.000mA
then to:
CAL 24.000mA
5. Set the Fluke 5520A to 24.0000 mA.
6. Push any key on the 717 Calibrator. Display should change from:
------- 24.000mA
to:
key.
rAnGE
Pressure Measure
1. Remove test leads from the 717 Calibrator and carefully attach the pressure fitting to
the pressure jack on the 717 Calibrator.
The use of TEFLON tape at the pressure fittings strengthens the seal.
2. For the 717 100G push the key. For the 717 30G, push the
will flash for a short time:
------ rAnGE
then display:
CAL 0.00 PSI
3. Vent the system to ambient air to ensure 0.00 PSI.
4. Push any key on the 717 Calibrator. The display will change to read:
CAL ------ PSI
then depending on the model selected in step 2, change to either:
CAL 30.000 PSI
CAL 100.00 PSI
or
5. Set up the deadweight tester for 30 PSI (or 100 PSI) to be injected into the pressure
port of the 717 Calibrator.
Note
key. The display
70
Page 83

Process Calibrators
Calibration
6. Once the pressure has stabilized, push any key on the 717 Calibrator. The display
should read:
CAL ------ PSI
then depending on the model selected in step 2, change to either:
CAL 15.000 PSI
CAL 50.000 PSI
or
7. Set the deadweight tester for 15 PSI (or 50 PSI) to be injected into the pressure port
of the 717 calibrator.
8. Once the pressure has stabilized, push any key on the 717 Calibrator. The display
should read:
CAL ------ PSI
then the calibrator will be out of CAL mode and in OPERATE mode. The display
should read:
0.000mA XX.xx PSI (where XX.xx is the applied pressure)
If the display reads
CALU, continue to step 9. If the 717 Calibrator is no longer in
CAL mode, skip to step 11.
9. Push to go to vacuum calibration. (Pressing any other key will end the
calibration.) If you chose to calibrate vacuum, the display should read:
CAL -12.000 PSI
10. Apply -12 PSI, wait for the vacuum standard to stabilize, then push any key. The
display should show:
-------------------
11. The unit will then reset power. The 717 is now out of the CAL mode and in the
normal mode of operation. Vent all pressure/vacuum.
71
Page 84

71X Series
Calibration Manual
717 Calibration (V2.0 to V3.9)
mA Measure
Note
For versions 3.00 and later, has changed to .
1. Hold down both and on the 717 Pressure Calibrator. Push and release .
2. The display shows CAL xxx, as long as and are pressed. Where xxx is a
number, indicating the number of times the 717 has been through the calibration
adjustment. When and are released,
PASS is displayed. The password is
required before you can enter the calibration mode. The password is 817. Enter the
most significant digit first. The password appears below
PASS. Use to increase
the displayed number, to decrease it. When the required digit appears, push
to proceed to the next digit, or the password check. If the password entry was correct,
the 717 will go to the CAL mode. If the password is incorrect,
BAD PASS shows on
the display and then the 717 returns to the normal operation mode. In the CAL mode,
the 717 should display:
0.000 mA
in the upper display and
CAL 0 mA
on the lower line of the display.
The upper display shows an uncalibrated reading. This reading is approximately
±10 % of full scale of the applied reading. When is pressed, the calibration value
is calculated relative to this reading. The lower display indicates what function and
point is being calibrated.
3. Connect the test leads from the AUX jacks of the Fluke 5520A to the mA jacks on
the 717 Calibrator (black to black and red to red).
4. Set the Fluke 5520A to 0.00000 mA and push O.
5. When 0.0 mA is sourced from the 5520A the upper display indicates about
"0.000 mA". When is pushed, the unit establishes the calibration constant for
that point and the lower display changes to "CAL 24 mA". The upper display still
reflects the applied current so it does not change until after step 6 when 24 mA is
applied."
6. Set the Fluke 5520A to 24.0000 mA.
7. The upper display reads approximately 24.000 mA. Push on the 717 Calibrator.
CHEC appears on the lower display.
8. The CHEC mode allows for a quick check of the calibration constants that have just
been stored. Changes to the applied current are reflected in the display. Push to
continue. The lower display changes to:
rAnGE
Pressure Measure
The 717 Pressure Calibrator has built-in temperature compensation. Instruments being
calibrated should be in a stable temperature environment for several minutes before
calibration. Calibration facilities should be maintained near 23 °C nominal.
Re-calibration (re-characterization) is performed in terms of ‘PSI’ pressure units. Inputs
using other pressure units (ie. kPa and bar) must be mathematically converted.
72
Note
For versions 3.00 and later, has changed to .
Page 85

Process Calibrators
Calibration
1. Remove two-wire test lead from the 717 Calibrator and carefully attach the pressure
fitting of the deadweight tester to the pressure jack on the 717 Calibrator.
Note
The use of TEFLON tape at the pressure fittings strengthens the seal.
2. The lower display shows rAnGE. This is an indication to choose the correct model of
the 717 Calibrator. Choose the correct range. The appropriate range for the 717 is as
follows:
717 1G (1)
717 30G (30)
717 100G (100)
The upper display shows 30, which is the default pressure range. Pressing
2.0) changes the sensor range to 100 PSI, pressing
version 3.0 push to uprange, hold to down range. Match the displayed range to the
measurement range of the 717.
3. After selecting the proper range, push
4. Vent the system to ambient air to ensure 0.00 PSI.
5. The lower display indicates C 0 PSI and the upper display indicates the current
reading. When the unit is vented (step 5) the upper display will read 0.00 ±
approximately 10 % of full scale. When
the next pressure to apply. Apply the requested pressure that shows on the lower
display and when the upper reading is stable, push
appears on the display.
6. The CHEC mode allows for a quick check of the calibration constants that have just
been stored. Changes to the applied pressure reflect on the display. Push
continue. The unit will then reset power.
7. The 717 Calibrator is now out of the CAL mode and into the normal mode of
operation. Carefully vent all pressure, push to turn the calibrator off, and
disconnect all pressure fittings.
717 300G (300)
717 500G (500)
717 1000G (1000)
changes it back to 30 PSI. For a ≥
on the 717 Calibrator.
is pressed, the lower display indicates
717 1500G (1500)
717 3000G (3000)
717 5000G (5000)
(≤ version
. Repeat this until CHEC
to
717 Calibration (V4.0 and Later)
mA Measure
1. Hold down and on the 717. Push and release .
2. The display shows CAL xxx, while and are pushed. xxx is a number that
shows you the number of times the 717 has gone through the calibration adjustment.
When and are released, PASS is shown.
3. A password is necessary to get in to calibration mode. The password is 817. Record
the most significant digit first. The password is shown below PASS. Use to
increase the number shown, to decrease it. When the necessary digit is shown,
push to go to the next digit, or the password check. If the password entry is
correct, the 717 goes to the CAL mode. If the password is incorrect, BAD PASS
shows on the display and the 717 changes back to normal operation mode.
4. In the CAL mode the upper display shows an uncalibrated indication. This indication
is approximately ±10 % of full scale of the applied reading. When is pushed, the
calibration value is calculated relative to this indication. The lower display shows the
function and point that you are to calibrate.
73
Page 86

71X Series
Calibration Manual
In mA Measurement Calibration mode, the 717 will show:
mA on the upper display
and
CAL 0 mA on the lower display
5. Connect the test leads from the AUX jacks of the Fluke 5520A to the mA jacks on
the 717 (black to black and red to red).
6. Set the Fluke 5520A to 0.00000 mA.
7. When 0.0 mA is sourced from the 5520A, the upper display shows approximately
0.000 mA. When is pushed, the unit makes the calibration constant for that point
and the lower display changes to CAL 12 mA. The upper display continues to show
the applied current so it does not change until after 12 mA is applied.
8. Set the Fluke 5520A to 12.0000 mA. The upper display shows approximately 12.000
mA.
9. Push on the 717.
10. When 12.000 mA is sourced from the 5520A, the upper display shows approximately
24.000 mA. When is pushed, the 717 makes the calibration constant for that
point and the lower display changes to CAL 24 mA. The upper display continues to
show the applied current so it does not change until after 24 mA is applied.
11. Set the Fluke 5520A to 24.0000 mA.
The upper display shows approximately 24.000 mA.
12. Push on the 717. CHEC is shown on the lower display. The CHEC mode lets
you quickly examine the calibration constants that you have just stored. Changes to
the applied current are shown on the display.
13. Push to continue. The lower display changes to:
rAnGE
Pressure Measure
The 717 has built-in temperature compensation. A stable temperature environment is
necessary when you calibrate the Instruments. Calibration facilities must be kept near
23 °C nominal. Re-calibration (recharacterization) is done in terms of PSI pressure units.
Inputs that use other pressure units (kPa and bar, for example) must be mathematically
converted.
1. Disconnect the test lead from the 717 mA jacks and carefully attach the pressure
fitting of the deadweight tester to the 717 pressure jack.
Use TEFLON tape at the pressure fittings to strengthen the seal.
The lower display shows rAnGE.
The upper display must show the full-scale range for the 717, for example:
Note
74
• For the 717 15G, upper display shows 15.
• For the 717 100G, upper display shows 100.
2. After you measure the correct range, push to continue.
3. Vent the system to ambient air to make sure 0.00 PSI or 0.000 PSI.
Page 87

Process Calibrators
Calibration
The lower display shows 0 PSI and the upper display shows the current indication.
When the unit is vented, the upper display reads 0.00 ± approximately10 % of full
scale. When is pushed, the lower display shows the subsequent pressure to
apply.
4. Apply the requested pressure that shows on the lower display and when the upper
indication is stable, push .
5. Do step 4 again until the lower display shows negative pressure.
6. Apply requested negative pressures, push . CHEC is shown on the lower display.
7. The CHEC mode lets you quickly examine the calibration constants that have just
been stored. Changes to the applied pressure are shown on the display.
8. Push to continue. The Calibrator will restart in normal mode.
9. The 717 is now out of the calibration mode and into the normal mode of operation.
Carefully vent all pressure, push to turn the 717 off.
10. Disconnect all pressure fittings.
718 Calibration (Earlier than V2.0)
mA Measure
1. On the 718 Pressure Calibrator hold down both the
and keys. Push and
release the key.
2. When the display momentarily shows CAL, release the
and the keys. This
puts the 718 into Cal Mode. The 718 should display:
CAL 0.000 mA
3. Connect the test leads from the AUX jacks of the Fluke 5520A to the mA jacks on
the 718 Calibrator (black to black and red to red).
4. Set the Fluke 5520A to 0.00000 mA and push O.
5. Push any key on the 718 Calibrator. The display should read:
----- 0.000 mA
then change to:
CAL 24.000 mA
6. Set the Fluke 5520A to 24.0000 mA.
7. Push any key on the 718 Calibrator. The display should read:
----- 24.00 mA
then change to:
rAnGE
75
Page 88

71X Series
Calibration Manual
Pressure Measure
The 718 Pressure Calibrators have built-in temperature compensation. Instruments being
calibrated should be in a stable temperature environment for several minutes before
calibration. Calibration facilities should be maintained near 23 °C nominal.
Re-calibration (re-characterization) is performed in terms of ‘PSI’ pressure units. Inputs using
other pressure units (ie. kPa and bar) must be mathematically converted.
1. Remove two-wire test lead from the 718 Calibrator and carefully attach the pressure
fitting of the deadweight tester to the pressure jack on the 718 Calibrator.
Note
The use of TEFLON tape at the pressure fittings strengthens the seal.
2. At this point, the display should be indicating “rAnGE”. This is an indication to
choose the correct model of the 718 Calibrator.
For 718 30G, push the
key. For 718 100G, push the key. The display will
flash for a short time:
------ rAnGE
then display:
CAL 0.00 PSI
3. Vent the system to ambient air to ensure 0.00 PSI.
Push any key on the 718 Calibrator. The display will change to read:
CAL ------ PSI
then change to:
CAL 30.000 PSI
or
CAL 100.00 PSI
depending on which model /range was selected in step 2.
5. Set up the deadweight tester for either 30 PSI or 100 PSI to be injected into the
pressure port of the 718 Calibrator.
Once the pressure has stabilized, push any key on the 718 Calibrator. The display
should read:
CAL ------ PSI
then change to:
76
CAL 15.000 PSI
or
CAL 50.00 PSI
depending on which model /range was previously selected.
6. Set the deadweight tester for either 15 PSI or 50 PSI.
Page 89

Process Calibrators
Calibration
7. Once the pressure has stabilized, push any key on the 718 Calibrator. The display
should read:
CAL ------ PSI
then change to:
CALU
8. Release pressure by venting the system.
9. Push the
key to go to vacuum calibration. Otherwise, push any key to finish
calibration. If calibrating vacuum, the display should show:
CAL -12.000 PSI
10. Make sure the pressure/vacuum switch is in the vacuum position. Forward
(clockwise) is for pressure and backward (counter-clockwise) is for vacuum.
11. Set up the deadweight tester to apply -12.000 PSI.
12. Wait for the pressure standard to stabilize, then push any key.
13. The display should show:
---------------------------
14. The unit will then reset power.
15. The 718 Calibrator is now out of the CAL mode and into the normal mode of
operation. Carefully vent all pressure, push the key to turn the calibrator off, and
disconnect all pressure fittings.
718 Calibration (V2.0 to V3.9)
mA Measure
1. Hold down both and on the 718 Pressure Calibrator. Push and release .
For versions 3.00 and later, has changed to .
Note
2. The display shows CAL xxx, as long as and are pressed. Where xxx is a
number, indicating the number of times the 718Ex has been through the calibration
adjustment. When and are released,
PASS is displayed. The password is
required before you can enter the calibration mode. The password is 817. Enter the
most significant digit first. The password appears below
PASS. Use to increase
the displayed number, to decrease it. When the required digit appears, push
to proceed to the next digit, or the password check. If the password entry was correct,
the 718 will go to the CAL mode. If the password is incorrect,
BAD PASS shows on
the display and then the 718Ex returns to the normal operation mode. In the CAL
mode, the 718 should display:
0.000 mA
in the upper display and
CAL 0 mA
on the lower line of the display.
The upper display shows an uncalibrated reading. This reading is approximately
±10 % of full scale of the applied reading. When is pressed, the calibration value
is calculated relative to this reading. The lower display indicates what function and
point is being calibrated.
3. Connect the test leads from the AUX jacks of the Fluke 5520A to the mA jacks on
the 718 Calibrator (black to black and red to red).
77
Page 90

71X Series
Calibration Manual
Pressure Measure
4. Set the Fluke 5520A to 0.00000 mA and push O.
5. When 0.0 mA is sourced from the 5520A the upper display indicates about
"0.000 mA". When is pushed, the unit establishes the calibration constant for
that point and the lower display changes to "CAL 24 mA". The upper display still
reflects the applied current so it does not change until after step 6 when 24 mA is
applied."
6. Set the Fluke 5520A to 24.0000 mA.
7. The upper display reads approximately 24.000 mA. Push on the 718 Calibrator.
CHEC appears on the lower display.
8. The CHEC mode allows for a quick check of the calibration constants that have just
been stored. Changes to the applied current are reflected in the display. Push to
continue. The lower display changes to:
rAnGE
The 718 Pressure Calibrator has built-in temperature compensation. Instruments being
calibrated should be in a stable temperature environment for several minutes before
calibration. Calibration facilities should be maintained near 23 °C nominal.
Re-calibration (re-characterization) is performed in terms of ‘PSI’ pressure units. Inputs
using other pressure units (ie. kPa and bar) must be mathematically converted.
Note
For versions 3.00 and later, has changed to .
1. Remove two-wire test lead from the 718 Calibrator and carefully attach the pressure
fitting of the deadweight tester to the pressure jack on the 718 Calibrator.
Note
The use of TEFLON tape at the pressure fittings strengthens the seal.
2. The lower display shows rAnGE. This is an indication to choose the correct model of
the 718 Calibrator. Choose the correct range. The appropriate range for the 718 is as
follows:
718 1G (1)
718 30G (30)
718 100G (100)
718 300G (300)
For unit with V2.0 or less
range. Pressing
changes the sensor range to 100 PSI, pressing changes it back to
, the upper display shows 30, which is the default pressure
30 PSI. For a≥ version 3.0 push to uprange, hold to down range. Match the displayed
range to the measurement range of the 718.
3. After selecting the proper range, push on the 718Ex Calibrator.
4. Vent the system to ambient air to ensure 0.00 PSI.
78
5. The lower display indicates C 0 PSI and the upper display indicates the current
reading. When the unit is vented (step 5) the upper display will read 0.00 ±
approximately 10 % of full scale. When
is pressed, the lower display indicates
the next pressure to apply. Apply the requested pressure that shows on the lower
display and when the upper reading is stable, push
. Repeat this until CHEC
appears on the display.
Page 91

Process Calibrators
Calibration
6. The CHEC mode allows for a quick check of the calibration constants that have just
been stored. Changes to the applied pressure reflect on the display. Push
continue. The unit will then reset power.
7. The 718 Calibrator is now out of the CAL mode and into the normal mode of
operation. Carefully vent all pressure, push to turn the calibrator off, and
disconnect all pressure fittings.
718 Calibration (V4.0 and Later)
mA Measure
1. Hold down both
and on the 718 Pressure Calibrator. Push and release .
to
The display shows CAL xxx, as long as
number, that tells you the number of times the 718 has been through the calibration
adjustment. When
2. A password is required to enter calibration mode. The password is 817. Enter the
most significant digit first. The password appears below PASS. Use to increase
the shown number, to decrease it. When the required digit is shown, push to
go to the next digit, or the password check. If the password entry was correct, the 718
will go to the CAL mode. If the password is incorrect, BAD PASS shows on the
display and the 718 returns to the normal operation mode.
In the CAL mode the upper display shows an uncalibrated reading. This reading is
approximately ± 10 % of full scale of the applied reading. When is pressed, the
calibration value is calculated relative to this reading.
The lower display shows what function and point is being calibrated.
In mA Measurement calibration mode, the 718 should show:
mA on the upper display
and
CAL 0 mA on the lower display.
3. Connect the test leads from the AUX jacks of the Fluke 5520A to the mA jacks on
the 718 Calibrator (black to black and red to red).
4. Set the Fluke 5520A to 0.00000 mA.
and are released, PASS is shown.
and are pushed. Where xxx is a
When 0.0 mA is sourced from the 5520A the upper display shows approximately
0.000 mA. When is pushed, the unit establishes the calibration constant for that
point and the lower display changes to CAL 12 mA. The upper display still shows
the applied current so it does not change until after 12 mA is applied.
5. Set the Fluke 5520A to 12.0000 mA. The upper display reads approximately
12.000 mA.
6. Push on the 718.
When 12.000 mA is sourced from the 5520A, the upper display shows approximately
24.000 mA. When is pushed, the unit establishes the calibration constant for
that point and the lower display changes to CAL 24 mA. The upper display still
shows the applied current so it does not change until after 24 mA is applied.
7. Set the Fluke 5520A to 24.0000 mA.
The upper display shows approximately 24.000 mA.
8. Push on the 718.
79
CHEC appears on the lower display
.
Page 92

71X Series
Calibration Manual
Pressure Measure
The CHEC mode allows for a quick check of the calibration constants that have just
been stored. Changes to the applied current are shown in the display.
9. Push to continue. The lower display changes to:
rAnGE
The Calibrator has built-in temperature compensation. Instruments being calibrated
should be in a stable temperature environment for several minutes before calibration.
Calibration facilities should be maintained near 23 °C nominal. Re-calibration
(recharacterization) is performed in terms of PSI pressure units. Inputs using other
pressure units (kPa and bar, for example) must be mathematically converted.
1. Disconnect the test lead from the 718 Calibrator mA jacks and carefully attach the
pressure fitting of the deadweight tester to the Calibrator’s pressure jack.
Note
The use of TEFLON tape at the pressure fittings strengthens the seal.
The lower display shows rAnGE.
The upper display should show the full-scale range for the 718, for example:
• For the 718 1G, upper display should show 1.
• For the 718 100G, upper display should show 100.
2. After you check the proper range, push to continue.
3. Vent the system to ambient air to ensure 0.00 PSI or 0.000 PSI.
The lower display shows 0 PSI and the upper display shows the current reading.
When the unit is vented, the upper display will show 0.00 ± approximately10 % of
full scale.
4. When you push , the lower display shows the next pressure to apply.
5. Apply the requested pressure that shows on the lower display and when the upper
reading is stable, push .
6. Repeat this until lower display shows negative pressure.
7. Turn the pressure/vacuum switch to the vacuum position.
8. Apply requested negative pressure and push .
CHEC shows on the lower display.
The CHEC mode allows for a quick check of the calibration constants that have just
been stored. Changes to the applied pressure are shown on the display.
9. Push to continue. The 718 will restart in normal mode.
The 718 is now out of the Calibration mode and in the normal mode of operation.
80
10. Carefully vent all pressure, push to turn the 718 off. Disconnect all pressure
fittings.
Page 93

Process Calibrators
Calibration
718Ex Calibration
mA Measure
1. Hold down both and on the 718Ex Pressure Calibrator. Push and release .
2. The display shows CAL xxx, as long as and are pressed. Where xxx is a
number, indicating the number of times the 718Ex has been through the calibration
adjustment. When and are released,
PASS is displayed. The password is
required before you can enter the calibration mode. The password is 817. Enter the
most significant digit first. The password appears below
PASS. Use to increase
the displayed number, to decrease it. When the required digit appears, push
to proceed to the next digit, or the password check. If the password entry was correct,
the 718Ex will go to the CAL mode. If the password is incorrect,
BAD PASS shows
on the display and then the 718Ex returns to the normal operation mode. In the CAL
mode, the 718Ex should display:
0.000 mA
in the upper display and
CAL 0 mA
on the lower line of the display.
The upper display shows an uncalibrated reading. This reading is approximately
±10 % of full scale of the applied reading. When is pressed, the calibration value
is calculated relative to this reading. The lower display indicates what function and
point is being calibrated.
3. Connect the test leads from the AUX jacks of the Fluke 5520A to the mA jacks on
the 718Ex Calibrator (black to black and red to red).
4. Set the Fluke 5520A to 0.00000 mA and push O.
5. When 0.0 mA is sourced from the 5520A the upper display indicates about
"0.000 mA". When is pushed, the unit establishes the calibration constant for
that point and the lower display changes to "CAL 24 mA". The upper display still
reflects the applied current so it does not change until after step 6 when 24 mA is
applied."
6. Set the Fluke 5520A to 24.0000 mA.
7. The upper display reads approximately 24.000 mA. Push on the 718Ex
Calibrator. CHEC appears on the lower display.
8. The CHEC mode allows for a quick check of the calibration constants that have just
been stored. Changes to the applied current are reflected in the display. Push to
continue. The lower display changes to:
rAnGE
81
Page 94

71X Series
Calibration Manual
Pressure Measure
The 718Ex Pressure Calibrator has built-in temperature compensation. Instruments being
calibrated should be in a stable temperature environment for several minutes before
calibration. Calibration facilities should be maintained near 23 °C nominal.
Re-calibration (re-characterization) is performed in terms of ‘PSI’ pressure units. Inputs
using other pressure units (ie. kPa and bar) must be mathematically converted.
1. Remove two-wire test lead from the 718Ex Calibrator and carefully attach the
pressure fitting of the deadweight tester to the pressure jack on the 718Ex Calibrator.
Note
The use of TEFLON tape at the pressure fittings strengthens the seal. For
versions 2.0 and higher, the upper display should show the appropriate
pressure sensor range. The range is set through the production process and
cannot be changed.
2. For version 2.0 and higher, skip to step 4. For version 1.9 or lower, the lower display
shows rAnGE. This is an indication to choose the correct model of the 718Ex
Calibrator. The appropriate range for the 718Ex 30G is 30 and 100 for the 718Ex
100G. Choose the correct range.
3. The upper display shows 30, which is the default pressure range. Pressing
changes the sensor range to 100 PSI, pressing changes it back to 30 PSI.
4. When proper range is shown, push
5. Vent the system to ambient air to ensure 0.00 PSI.
6. The lower display indicates C 0 PSI and the upper display indicates the current
reading. When the unit is vented (step 5) the upper display will read 0.00 ±
approximately 10 % of full scale. When
the next pressure to apply. Apply the requested pressure that shows on the lower
display and when the upper reading is stable, push
appears on the display.
7. The CHEC mode allows for a quick check of the calibration constants that have just
been stored. Changes to the applied pressure reflect on the display. Push
continue. The unit will then reset power.
8. The 718Ex Calibrator is now out of the CAL mode and into the normal mode of
operation. Carefully vent all pressure, push to turn the calibrator off, and
disconnect all pressure fittings.
on the 718Ex Calibrator.
is pressed, the lower display indicates
. Repeat this until CHEC
to
82
Page 95

Process Calibrators
Calibration
719 Calibration (V1.0)
mA Measure
1. Hold down both and on the 719 Pressure Calibrator. Push and release .
2. The display shows CAL xxx, as long as and are pressed. Where xxx is a
number, indicating the number of times the 719 has been through the calibration
adjustment. When and are released, PASS is displayed.
3. A password is required to enter calibration mode. The password is 917. Enter the
most significant digit first. The password appears below PASS. Use to increase
the displayed number, to decrease it. When the required digit appears, push to
proceed to the next digit, or the password check. If the password entry was correct,
the 719 will go to the CAL mode. If the password is incorrect, BAD PASS shows on
the display and the 719 returns to the normal operation mode.
4. In the CAL mode the upper display shows an uncalibrated reading. This reading is
approximately ±10 % of full scale of the applied reading. When is pressed, the
calibration value is calculated relative to this reading.
5. The lower display indicates what function and point is being calibrated.
6. In mA Measurement calibration mode, the 719 should display:
mA on the upper display and
CAL 0 mA on the lower display.
7. Connect the test leads from the AUX jacks of the Fluke 5520A to the mA jacks on
the 719 Calibrator (black to black and red to red).
8. Set the Fluke 5520A to 0.00000 mA.
9. When 0.0 mA is sourced from the 5520A the upper display indicates approximately
0.000 mA. When is pressed, the unit establishes the calibration constant for that
point and the lower display changes to CAL 12 mA. The upper display still reflects
the applied current so it does not change until after 12 mA is applied.
10. Set the Fluke 5520A to 12.0000 mA. The upper display reads approximately 12.000
mA.
11.
Push on the 719 Calibrator.
12. When 12.000 m
A is sourced from the 5520A, the upper display indicates
approximately 24.000 mA. When is pressed, the unit establishes the calibration
constant for that point and the lower display changes to CAL 24 mA. The upper
display still reflects the applied current so it does not change until after 24 mA is
applied.
13. Set the Fluke 5520A to 24.0000 mA.
The upper display reads approximately 24.000 mA.
14. Push on the 719 Calibrator.
CHEC appears on the lower display.
15. The CHEC mode allows for a quick check of the calibration constants that have just
been stored. Changes to the applied current are reflected in the display.
16. Push to continue. The upper and lower display changes to - - - - -. The Source,
mA, Ref appear on the LCD, and the unit will proceed enters the mA output
calibration section.
83
Page 96

71X Series
Calibration Manual
mA Output Calibration
1. Connect a test lead across the Fluke 719 mA jacks, connecting red to black.
2. Push to start the mA source calibration.
3. The unit will start its auto-calibration process for the mA output using an internal
mA measurement circuit calibrated at previous stage. It will generate 17 different
output values, measure each of them, and save the measured values as calibration
points.
• The upper display indicates measured output current in mA for the point which
is being calibrated.
• The lower display indicates expected output current in mA for the point which
is being calibrated.
• During this process the unit checks if the measured values fit in ±15 % range of
expected values. If all 17 values are within range, the upper display indicates
DONE.
• If any of this values were out of the range, the upper display indicates ErrOr ,
and the lower display shows the amount of errors.
• The mA OUTPUT self-calibration takes approximately 30 seconds.
4. Push to continue. The lower display changes to:
rAnGE
Pressure Measure
The Calibrator has built-in temperature compensation. Instruments being calibrated
should be in a stable temperature environment for several minutes before calibration.
Calibration facilities should be maintained near 23 °C nominal. Re-calibration (recharacterization) is performed in terms of PSI pressure units. Inputs using other pressure
units (ie. kPa and bar) must be mathematically converted.
1. Disconnect the test lead from the 719 Calibrator mA jacks and carefully attach the
pressure fitting of the deadweight tester to the Calibrator’s pressure jack.
The use of TEFLON tape at the pressure fittings strengthens the seal.
The lower display shows rAnGE.
The upper display should show appropriate range for the 719 as follows:
• For the 719 30G, upper display should show 30.
• For the 719 100G, upper display should show 100.
2. After checking the proper range, push to continue.
3. Vent the system to ambient air to ensure 0.00 PSI or 0.000 PSI.
Note
84
The lower display indicates 0 PSI and the upper display indicates the current
reading. When the unit is vented, the upper display will read 0.00 ± approximately
10 % of full scale. When is pressed, the lower display indicates the next
pressure to apply.
4. Apply the requested pressure that shows on the lower display and when the upper
reading is stable, push .
5.
Repeat this until lower display
indicates negative pressure.
6. Turn the pressure/vacuum switch to the vacuum position.
Page 97

Process Calibrators
Calibration
7. Apply requested negative pressure, push .
CHEC appears on the lower display.
The CHEC mode allows for a quick check of the calibration constants that have
just been stored. Changes to the applied pressure are shown on the display.
8. Push to continue. The Calibrator will restart in normal mode.
The 719 Calibrator is now out of the Calibration mode and into the normal mode of
operation. Carefully vent all pressure, push to turn the calibrator off, and disconnect all
pressure fittings.
85
Page 98

71X Series
r
Calibration Manual
Replacement Parts and Accessories
Table 71 lists the replaceable parts and accessories for the 71X Calibrators. See Figure 7
for an exploded view of the 718 Calibrator. Fluke repair is recommended for the 718Ex
and no 718Ex replacement parts are listed in Table 71.
Note
Not all parts listed in Table 71 are shown in Figure 7.
Table 71. Replaceable Parts and Accessories
Ref.
Des.
A1 Assembly 690906
BT1, BT2 9V battery, ANSI/NEDA 1604A or IEC 6LR61 614487 71X 1
WF1 Fuse, 125 mA, 250V fast 686527 71X 1
WF2 Fuse, 125 mA, 250V fast 686527 715 1
H2,3,4 Case screw 832246 71X 3
H5,6 Battery door fasteners 948609 71X 2
H7,8 Bracket screw 641131 718 2
MP1 LCD Bezel 620242
MP2 LCD 686490
MP6 1G Pump 2571725 718 1
MP6 30G, 100G, 300G Pump Assembly 2558508 718 1
MP6 718-719 Vernier assembly 33774652 718-719 1
MP6 719 pump body 3345794 719 1
MP6 719 pump Motor w/Gearhead 3345802 719 1
MP7 719 Selector knob 3330284 719 1
MP7,8 Selector knob 664193 718 2
MP9 Vernier adjust knob 664190 718 1
MP10 Pump handle knob 664185 718 1
MP11,12,13 O-ring, for pressure input 146688 717,718 1
Description
PN o
Model No.
691147
620275
646866
2545064
663997
1638728
2545073
2545099
2545105
2545110
2545122
2545131
2545047
664158
664169
2545058
3315371
3322226
4058824
4058836
686482
3345775
2725782
2550335
Used On Qty.
718 30G
718 100G
712
714
714
717 1G
717 30G
717 100G
717 300G
717 500G
717 1000G
717 1500G
717 3000G
717 5000G
718 1G
718 30G
718 100G
718 300G,
719 30G,
719 100G
717 15G
717 10000G
712,714,715
717,718, 719
717-8 V3.0 or
later
712, 714,
715, V2.0 or
later
1
1
1
86
Page 99

Process Calibrators
r
Replacement Parts and Accessories
Table 71. Replaceable Parts and Accessories (cont.)
Ref.
Des.
MP14 Spacer for pressure input 687449 717,718 1
MP20 Shield, LCD, Top Case 687092 71X 1
MP21 LCD Zebra Strip 643376 71X 2
MP22 O-ring for input/output receptacle 831933 712,715 1
MP85 Case top
with LEMO
MP86 Case bottom
W/Pump Cleanout
-
-
-
-
MP89, 90 Non-skid foot 824466 71X 2
MP92 Battery door 609930
S1 Keypad 687084
3315673 719
TM1 712 Instruction Sheet
TM2
(not shown)
718 1G Top Case Decal
718 30G Top Case Decal
718 100G Top Case Decal
718 300G Top Case Decal
714 Instruction Sheet
715 Instruction Sheet
717 30G/100G Instruction Sheet
718 Product Overview Manual
718Ex Control Drawing (CCD)
718 30G/100G Users Manual (on CD)
718Ex 30G/100G Users Manual (on CD)
719 Users Manual (on CD)
Description
PN o
Model No.
620192
620234
620200
690997
1640322
690997
691147
3255195
2402610
2097409
2097411
3315493
620168
664174
3242728
2397526
3315686
2546993
2547000
2547017
2547021
664177
687076
687100
2113087
687068
2113087
2558474
650280
560306
650314
690013
1549632
6800013
1549626
2097427
3316449
Used On Qty.
712
714
715
717 30G
717 100G
718 30G
718 100G
718Ex 30
712 V2.0 or
later
718EX 30G
718EX 100G
719
71X
718
718EX
715/717 V2.0
or later
719
71X
718
712
714
715
718
717,718 V1.4
or less
717,718 V2.0
to V2.9
717,718 V3.0
or later
712
714
715
717
718
718Ex
718
718Ex
719
1
1
1
1
1
1
1
1
1
1
87
Page 100

71X Series
A
Calibration Manual
Table 71. Replaceable Parts and Accessories (cont.)
Ref.
Des.
Description
PN or
Model No.
Used On Qty.
- Holster, yellow 664182 718 1
- Fluke-7XX Test Lead Set 3397308 712 2
CCESSORIES
AC72 Alligator Clips
Red
Black
1670641
1670652
715
718
1
CG81Y Holster, Yellow 2074033 71X 1
TL20 Industrial Test Lead Set 1639457 715
Option
717
TL75 Test lead set 855742 715
1
717
Not Shown 718 Pump Rebuild Kit 2553919 718 Option
Not Shown 719 Pump Rebuild Kit 3345816 719 Option
TM3 71X Series Calibration Manual 686540 71X Option
Parts are for all 71X Calibrators unless specified.
W For safety, use exact replacement only.
MP85
MP1
MP2
MP11,12,13
MP7
MP8
MP86
MP9
MP10
H2,3,4
MP5
S1
MP14
H7,8
MP3,4
MP6
BT1
BT2
MP92
H5,6
MP89,90
Holster
TMI
Figure 7. Replacement Parts (718 shown)
Alligator Clips
TL75
Test Lead Set
AC72
wh004f.eps
88
 Loading...