

Page 1
n
U
u
Ech
o
q
1
a
n
&
2
e
5
n
Ultrasonic Li
Sp
uid Level Tra
n®
smitter
80, LU8
L
, LU83
LU84 S
ries Ma
ual
Flowli
e, Inc. | 10500 H
mbolt Street, Los
Alamitos, CA 907
0 p 562.598.301
f 562.431.8507
w flowline.com MN301550 Rev C
2
Page 2

Introduction / Table of Contents Step One
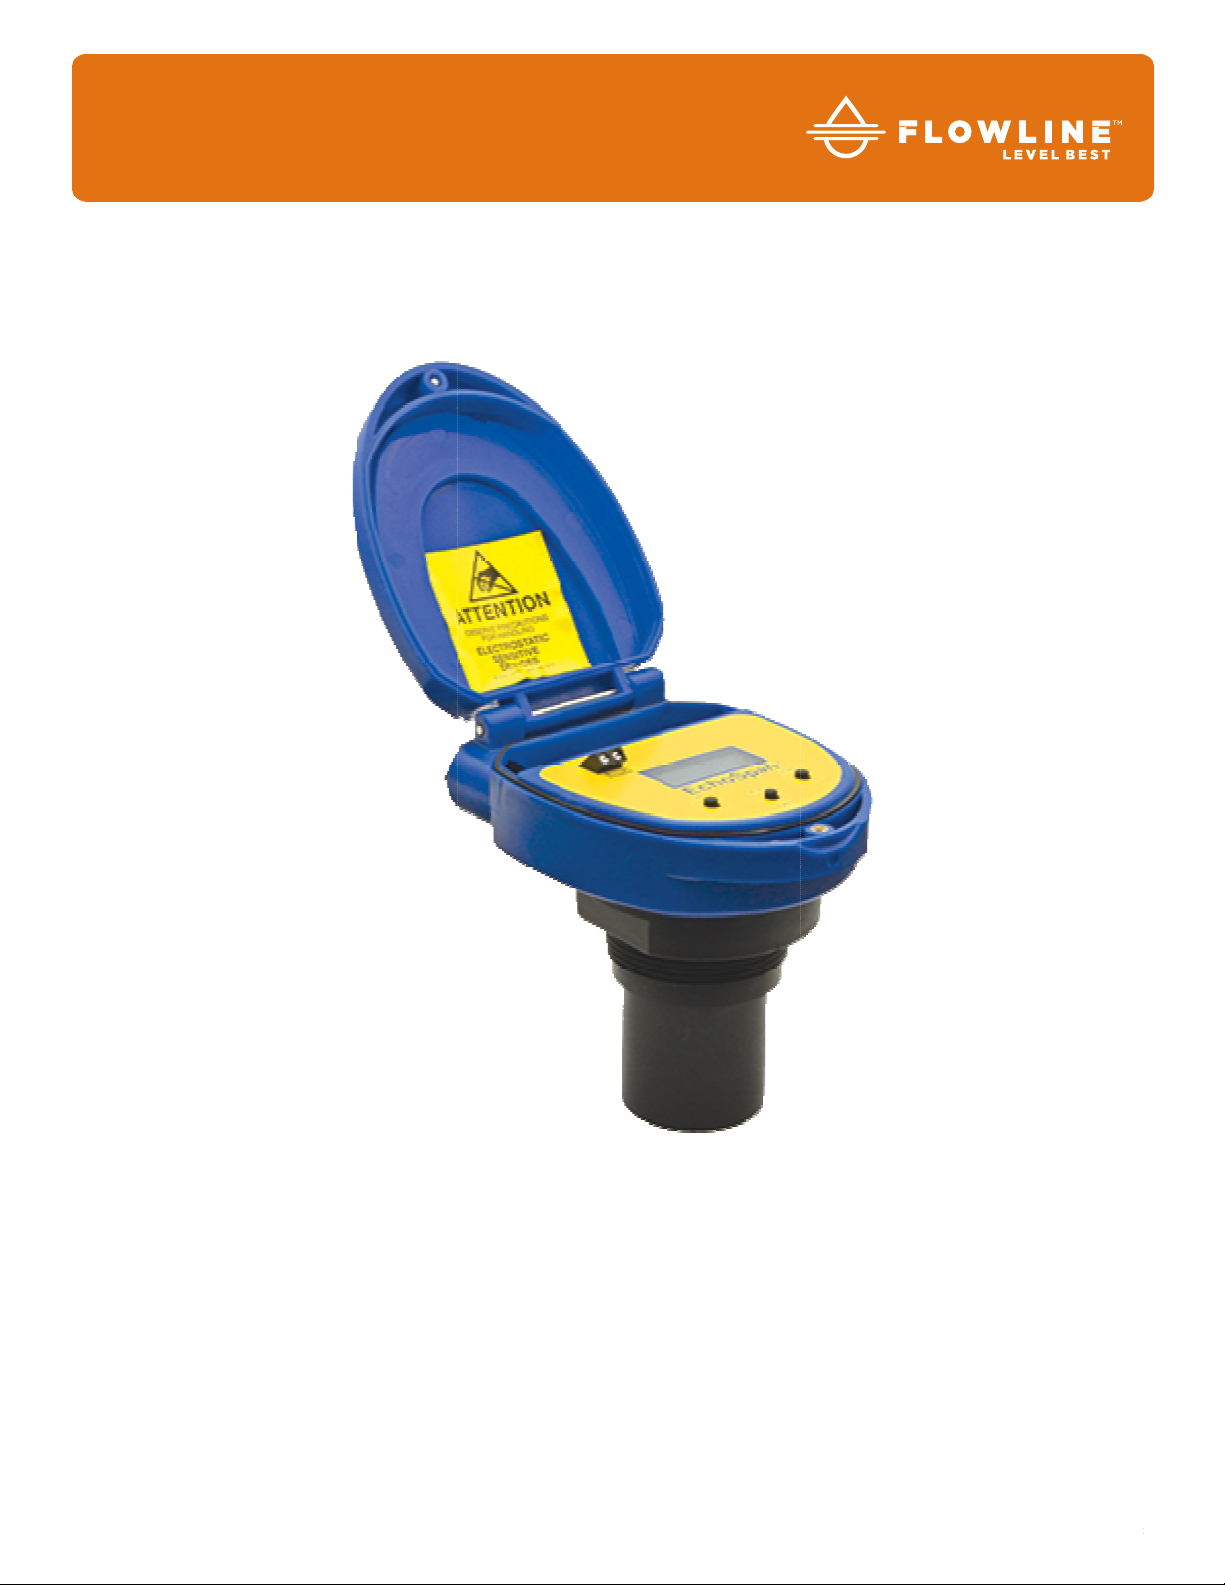
The EchoSpan
®
is a general-purpose ultrasonic level transmitter that provides a loop powered 4-20 mA output.
The 4-20 mA output can be used to provide the proportional level of liquid in any tank or vessel. The signal can
be connected to any device that accepts a loop powered 4-20 mA signal, such as a PLC, SCADA, DCS,
display, controller, etc.
NEW FEATURES
Simple configuration with push button configuration
Adjustable Loop Fail-Safe, Hold Last, Empty, Full, 21 mA, 22 mA
Easy to reverse mA output, 4-20 mA to 20-4 mA
Increased output filtering
TABLE OF CONTENTS
Specifications: ……………. ............................................................................................... 3
Dimensions: ………. ......................................................................................................... 3
Safety Precautions: .......................................................................................................... 4
Components: ........................................................................................................ 5
Features Guide: ................................................................................................... 5
Getting Started: ................................................................................................................ 6
Getting Around the TOP-LEVEL MENU: ............................................................. 6
Descriptions: ........................................................................................................ 7
Configuration: ……………………………………………………………………………………9
Hot to Enter the TOP-LEVEL MENU: .................................................................. 9
How to Configure UNITS: .................................................................................... 9
How to Configure the Operational Range Using Height & Fill-H: ....................... 10
How to Configure the Operational Range Using Target Calibration: ................. 11
How to Select Fail-Safe (SAFE) Current Output/ LOST: .................................... 12
Wiring: …………………….. ............................................................................................. 13
Analog Output: ................................................................................................... 13
Common Wiring to Displays, Controllers & PLCs: ............................................. 14
Installation: ………….. .................................................................................................... 16
Mounting Guide: ................................................................................................. 16
Installation in Existing Fitting: ............................................................................. 16
Metal Tanks: ...................................................................................................... 16
Fitting Selection: ................................................................................................ 17
Appendix: ……………. .................................................................................................... 20
How to Configure the DISPLAY: ........................................................................ 20
How to Reverse the Current Output (Rev mA): ................................................. 20
SETUP: ............................................................................................................... 21
Diagnostic (DIAG) Parameters: ......................................................................... 21
Reset: ……….. .................................................................................................... 22
Troubleshooting: ................................................................................................ 23
Warranty: ....................................................................................................................... 24
| 2 MN301550 Rev C2
Page 3

Specifications / Dimensions Step Two
Range
LU80: 4" to 9.8'
(10 cm to 3 m)
LU81: 8" to 18.0'
(20 cm to 5.5 m)
Accuracy: ± 0.2% of range
Resolution: LU80: 0.019” (0.5mm)
LU81: 0.039” (1mm)
LU83: 0.039” (1mm)
LU84: 0.078” (2 mm)
Dead band: LU80: 4” (10cm)
LU81/83/84: 8” (20 cm)
Beam width: LU80: 2” (5cm) dia.
LU81/83/84: 3" (7.6 cm)dia.
Configuration: Push button
Memory: Non-volatile
Display type: LCD, 6-digit
Display units: Inch, feet, cm, meters or
percent
Supply voltage: 14-28 VDC
Loop resist.: 500 Ohms @ 24 VDC
Signal output: 4-20 mA, two-wire
Signal invert: 4-20 mA / 20-4 mA
Signal fail-safe: 4mA, 20 mA, 21 mA, 22 mA,
hold last
Process temp.: F: -4° to 140°
C: -20° to 60°
Temp. comp.: Automatic
Ambient temp.: F: -4° to 140°
C: -20° to 60°
Pressure: MWP = 30 PSI
Enclosure rating: NEMA 4X (IP65)
Encl. material: PC
Encl. hardware: Brass and stainless
Enclosure vent: Water tight membrane
Conduit entrance: Dual, 1/2” NPT*
Trans. material: PVDF, Viton
Process mount: LU80: 1” NPT/1” G
LU81/83/84: 2” NPT/2” G
Mount. gasket: Viton
®
Classification: General purpose
Compliance: CE, RoHS
* If using the Flowline LM90-1001 (liquid tight fitting)
on the ½” conduit, the cable minimum is 0.170”
(4.3mm) and the maximum is 0.450” (11.4mm).
LU83: 8" to 26.2'
(20 cm to 8 m)
LU84: 8" to 32.8'
(20 cm to 10 m)
Side View
LU80 Series
Side View
LU81, LU83 & LU84 Series
Top View
All Models
MN301550 Rev C2 3 |
Page 4

Safety Precautions Step Three
About this Manual: PLEASE READ THE ENTIRE MANUAL PRIOR TO INSTALLING OR USING THIS
PRODUCT. This manual includes information on the EchoSpan
®
series Ultrasonic Level Transmitter from
FLOWLINE. Please refer to the part number located on the switch label to verify the exact model
configuration, which you have purchased.
User’s Responsibility for Safety: Flowline manufactures a broad range of level sensing technologies.
While each of these sensors is designed to operate in a wide variety of applications, it is the user’s
responsibility to select a sensor model that is appropriate for the application, install it properly, perform
tests of the installed system, and maintain all components. The failure to do so could result in property
damage or serious injury.
Proper Installation and Handling: Only professional staff should install and/or repair this product. Install
the sensor with the included Viton gasket and never over tighten the sensor within the fitting. Always check
for leaks prior to system start-up.
Wiring and Electrical: A supply voltage of 12 to 28 VDC is used to power the EchoSpan®. Electrical wiring
of the transmitter should be performed in accordance with all applicable national, state, and local codes.
Material Compatibility: The enclosure is made of Polycarbonate (PC). The transducer is made of
Polyvinylidene Fluoride (PVDF). Make sure that the model, which you have selected, is chemically
compatible with the application media.
Enclosure: While the sensor housing is liquid-resistant the EchoSpan® is not designed to be operational
when immersed. It should be mounted in such a way that the enclosure and transducer do not come into
contact with the application media under normal operational conditions.
The enclosure has a flip cover with dual 1/2” NPT female conduit ports and an internal terminal strip for
wiring. To open the enclosure, you will need a small flat-headed screwdriver. Loosen the locking screw
located at the top front of the enclosure. Rotate the hinged cover up for 135° access to the faceplate and
terminal strips. Before closing the enclosure, make sure that the enclosure gasket is properly seated, and
that any conduit fittings, cable connectors or plugs are installed correctly and sealed.
Note: If using the Flowline LM90-1001 (liquid tight fitting) on the ½” conduit, the cable minimum is 0.170”
(4.3mm) and the maximum is 0.450” (11.4mm).
Handling Static-Sensitive Circuits/Devices: When handling the transmitter, the technician should
follow these guidelines to reduce any possible electrostatic charge build-up on the technician’s body
and the electronic part.
1. Always touch a known good ground source before handling the part. This should be repeated while
handling the part and more frequently after sitting down from a standing position, sliding across the
seat or walking a distance.
2. Avoid touching electrical terminals of the part unless making connections.
3. DO NOT open the unit cover until it is time to calibrate.
Warning: Always use the Viton gasket when installing the EchoSpan®, and make sure that all electrical
wiring of the switch is in accordance with applicable codes.
| 4 MN301550 Rev C2
Page 5
Safety Precautions Step Three
Make a Fail-Safe System: Design a fail-safe system that accommodates the possibility of switch and/or power
failure. FLOWLINE recommends the use of redundant backup systems and alarms in addition to the primary
system.
Flammable, Explosive or Hazardous Applications: EchoSpan
®
should not be used within classified
hazardous environments.
COMPONENTS
EchoSpan® is offered in three different models. Depending on the model purchased, you may or may not have
®
been shipped all the components shown below. You do however, need an EchoSpan
configure, install and operate EchoSpan
®
.
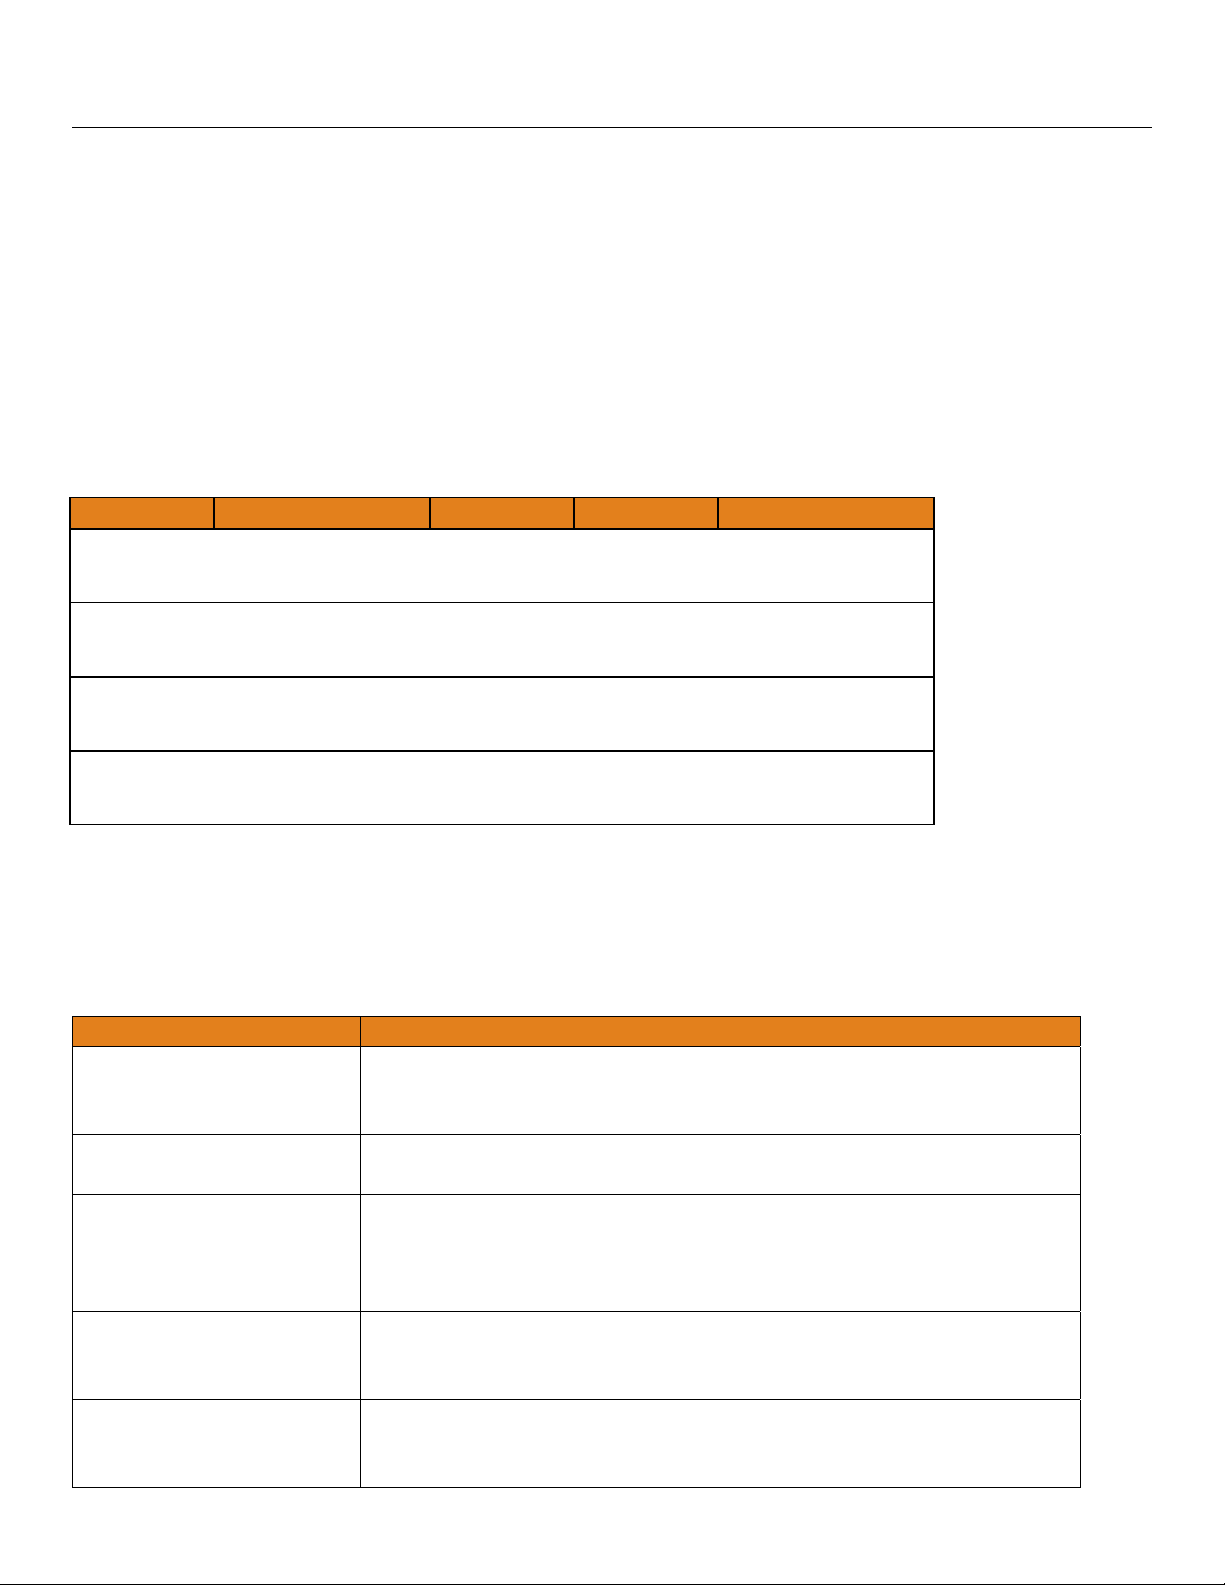
P/N Max. Range Dead Band Thread Enclosure
LU80-5101
LU80-5161
9.8’ (3m) 4” (10cm)
1” NPT
1” G
Type 4X
and Viton® gasket to
LU81-5101
LU81-5161
LU83-5101
LU83-5161
18.0’ (5.5m) 8” (20cm)
26.2’ (8m) 8” (20cm)
2” NPT
2” G
2” NPT
2” G
Type 4X
Type 4X
LU84-5101
LU85-5161
32.8’ (10m) 8” (20cm)
2” NPT
2” G
Type 4X
Viton Gasket
o Part #220128 – for LU80 series only
o Part #220129 – for LU81, LU83 and LU84 series
QUICK START GUIDE
FEATURE GUIDE
FEATURE ACCESS BY
Easy to use TOP-LEVEL
MENU.
Press and hold SELECT key (approximately 5 seconds) until MENU is
displayed. The items in the TOP-LEVEL MENU will rotate through
display, press SELECT to change an item.
Many UNITS of
measurement.
No cumbersome measure
required. Set point
distances are relative to
the tank bottom.
In the TOP-LEVEL MENU, press SELECT when UNITS is displayed,
then select INCHES, CM (centimeter), FEET, METERS or PERCNT.
In TOP-LEVEL MENU, select TANK and set the HEIGHT of the tank
from the transducer face to the bottom of the tank. Set the Fill Height
(FILL-H) to the maximum fill height of the liquid from the bottom of the
tank. All of the set points are from the bottom of the tank up.
Optional target calibration. Use this feature if the tank liquid level is at an empty or full volume. This
feature will accept the current liquid level as either empty (TG CAL
EMPTY) of full (TG CAL FULL).
Fail-Safety Use the SAFE function to preset the output to either Empty (4 mA), Full
(20 mA, 21 mA or 22 mA) or Hold Last Value in case the transmitter
loses it’s signal (LOST).
MN301550 Rev C2 5 |
Page 6

Getting Started Step Four
®
EchoSpan
®
can be configured before installation. The transmitter features non-volatile memory, so the set
points configured before installation will not be lost when the switch is powered down. To start, all you need is
the following information:
Basic Tank Information:
o HEIGHT – Distance from the transducer
face to the bottom of the tank.
o FILL-H – Maximum fill height of the liquid
from the bottom of the tank.
Set Points (optional):
o If the sensor is to be used to provide
feedback to the control of pumps, valves
or alarms, you will need the measured
distance from the bottom of the tank to
each of the device’s set point(s).
Power:
o Provide input power to the EchoSpan
®
Note: The HEIGHT and Fill-Height (FILL-H) settings also determine the 4 to 20 mA current span. The HEIGHT
setting determines the 4mA position and the FILL-H setting determines the 20 mA position.
Getting Around the TOP-LEVEL MENU: EchoSpan
is
configured by the use of three push buttons (UP, DOWN and
SELECT) and a LCD display.
As a lockout feature, the buttons are inactive until the SELECT
button is held down for 5 seconds, and then the display will
begin to scroll through the top level of the configuration menu.
TOP-LEVEL MENU
The TOP-LEVEL MENU will continue to scroll
through the items listed to the right until the
SELECT button is pressed.
To return to the Normal / Operational mode of
EchoSpan
®
, press SELECT while RUN appears
in the display.
| 6 MN301550 Rev C2
Page 7

Getting Started Step Four
TOP-LEVEL MENU DESCRIPTIONS
UNITS – Allows end user to select the units for configuration and operation. Additional function allows the
display to show liquid level or air gap.
o Select between INCHES, CM (Centimeters),
Air Mode
Liquid Mode
FEET, METERS or PERCNT (Percent).
o Select between AIR or LIQUID for the display.
AIR configures display to show the air gap
in the tank.
LIQUID (factory default) configures display
to show the level of liquid in the tank.
This function does not influence the
current output, just the display on the
sensor.
o Press EXIT to return to the TOP-LEVEL MENU.
Note: Flowline recommends that when selecting PERCNT, configure the HEIGHT and FILL-H settings before
selecting PERCNT in order to span the EchoSpan
®
for your application requirements. If UNITS is set to
PERCENT, then TANK will not appear. To view TANK, set UNITS to any of the following: INCHES, CM
(Centimeters), FEET or METERS.
Note: Flowline recommends that when selecting PERCNT, keep the Display mode in LIQUID and to never
use the Display mode in AIR.
TANK – Allows the end user to configure the operational range for the switch as well as the 4-20 mA
output signal. Additional function allows the output current to be reversed.
o HEIGHT – Distance from the transducer face to the
bottom of the tank.
o FILL-H – Maximum fill height of the liquid from the
bottom of the tank.
o Note: The 4 and 20 mA points are set by setting these
two points.
Fill-H sets the 20 mA set point and Height sets
the 4 mA set point. This is the factory default.
Use the REV MA setting to reverse the 4 and
20 mA set points.
o REV MA – Allows the current output to be reversed.
In NORM mode (factory default), 4mA is at bottom and 20mA is at top of the tank.
In REV mode, 4mA is at top and 20mA is at bottom of the tank.
o Press EXIT to return to the TOP-LEVEL MENU.
MN301550 Rev C2 7 |
Page 8

Getting Started Step Four
SAFE – In the event the sensor does not receive an echo, the Fail-Safe Current Output or LOST setting
can be set to output a current of 4mA, 21mA or Hold (last known value).
o 22mA – Overfill fail-safe setting.
o 21mA – Overfill fail-safe setting.
o 20mA – Full fail-safe setting.
o 4mA – Empty fail-safe setting.
o HOLD – Keeps the current output at the last reading
when fail-safe condition occurs.
Note: During fail-safe, the display will read LOST.
TG CAL – Target Calibration (allows for the sensor to accept as either EMPTY or FULL the liquid level at
that moment. Liquid level must be at either the required EMPTY or FULL levels of liquid.
VALUES – Provides setup information, a diagnostic to be used in conjunction with a Flowline
®
Representative and the ability to reset the EchoSpan
o SETUP – Will display the setting for all functions of EchoSpan
.
®
.
o DIAG – This is a production test feature used by the factory to confirm operation. This mode
should only be used when supervised by a Flowline representative.
o RESET – Will reset the EchoSpan
®
back to its original factory setting.
HELP – Provides information for contacting Flowline on-line.
RUN – Returns the unit to normal measurement and control mode.
| 8 MN301550 Rev C2
Page 9

Configuration Step Five
This section will take you through the key steps in the setup and configuration of EchoSpan
1) Select the units for configuration.
a. Determine the measurement units that will be used to configure the sensor.
2) Measure the distance from the bottom of the tank (empty level) to the bottom of the sensor.
a. Be sure to include the added height of installation fittings.
3) Measure the distance from the bottom of the tank (empty level) to the full level of liquid.
a. Take into account the dead band of the sensor.
4) Determine the fail-safe output in the event of a LOST signal condition.
a. Example: will the output over-ride a pump on or pump off status during a LOST signal condition.
HOW TO ENTER THE TOP-LEVEL MENU
1. Press and hold SELECT (approximately 5 seconds)
until MENU is displayed.
2. The TOP-LEVEL MENU items will rotate through
display.
3. Use SELECT to choose a MENU item.
HOW TO EXIT THE TOP-LEVEL MENU
In TOP-LEVEL MENU, press SELECT when RUN appears.
®
:
HOW TO CONFIGURE UNITS
1. In the TOP-LEVEL MENU mode, select UNITS.
2. Press SELECT to choose between INCHES, CM
(centimeter), FEET, METERS or PERCNT (percent).
3. Select EXIT to return to the TOP-LEVEL MENU.
Note: Reading the level of liquid in Percent
Flowline recommends that when selecting PERCNT,
configure the HEIGHT and FILL_H settings before
®
selecting PERCNT in order to span the EchoSpan
for your application requirements.
When in PERCNT, the operational span will be
based upon the last TANK settings, 100% will occur
at the FILL-H level and 0 percent at the bottom of the
tank.
When PERCNT is selected, the TANK settings (HEIGHT and FILL_H) will be disabled. They will
remain disabled until a different unit of measurement is selected under UNITS.
Flowline recommends that when selecting PERCNT, keep the Display mode in LIQUID and to never
use the Display mode in AIR.
Note: EchoSpan
®
will adjust the display when measurement units are changed under UNITS. Example: If you
are in inches and the display reads 60.0, the display will change to 5.00 when feet is selected as the unit of
measurement.
MN301550 Rev C2 9 |
Page 10

Configuration Step Five
HOW TO CONFIGURE THE OPERATIONAL RANGE OF ECHOSPAN® USING SENSOR HEIGHT AND FILL-HEIGHT
Before starting, take two measurements. 1) Measure the
distance from the bottom of the sensor (transducer face) to the
bottom of the tank. This will be the HEIGHT setting. 2) Measure
the distance from the bottom of the tank to the Maximum Level of
Liquid (Full). This will be the FILL-H setting.
1. In TOP-LEVEL MENU mode, select TANK.
2. Select HEIGHT.
3. Using the UP and DOWN buttons, set the HEIGHT of the
tank (transducer face to the bottom of the tank).
4. To enter the value, press and hold SELECT for 2 seconds
and release. SAVED will display.
5. When FILL-H appears, press SELECT.
6. Using the UP and DOWN buttons, set the Fill Height
(FILL-H) of the tank (max. level of liquid to the bottom of
the tank).
7. To enter the value, press and hold SELECT for 2 seconds
and release. SAVED will display.
8. Select EXIT to return to TOP-LEVEL MENU.
Note: The HEIGHT and Fill-Height (FILL-H) settings also determine the 4 to 20 mA current span. The HEIGHT
setting determines the 4mA position and the FILL-H setting determines the 20 mA position. To reverse the
current output, use the REV MA function.
Note: To speed up the scrolling of the values on the display, hold down the SELECT button while holding
down the UP or DOWN buttons.
| 10 MN301550 Rev C2
Page 11

Configuration Step Five
HOW TO CONFIGURE THE OPERATIONAL RANGE OF ECHOSPAN® USING TARGET CALIBRATION (TGCAL)
TG Cal is an alternative configuration method for setting the 4-20 mA
current span within EchoSpan
®
. Use this method only if you are able
to completely empty and/or fill the tank. TGCal involves two settings,
Empty and Full.
TG Cal (EMPTY) requires the tank be empty when performing this
function.
o When preformed, the function will take a sample reading and
will use the distance measured as the empty setting.
Likewise, TG Cal (FULL) requires the tank be full when
performing this function.
o When preformed, the function will take a sample reading and
will use the distance measured as the full setting.
Note: If this function is preformed while the tank is not at empty or
full, the scaling of the current output will be off.
1. In TOP-LEVEL MENU mode, select TGCAL.
2. Select EMPTY if the tank is empty or select FULL is the tank is
full. SAVED will display.
3. Change the level to the other state (full or empty).
4. Select EMPTY if the tank is empty or select FULL is the tank is
full. SAVED will display.
5. Select EXIT to return to TOP-LEVEL MENU.
Note: The Empty and Full settings determine the 4 to 20 mA current
span. With REV MA set to NORM, empty sets 4mA and Full sets
20mA. With REV MA set to INV, empty sets 20mA and Full sets 4mA.
MN301550 Rev C2 11 |
Page 12

Configuration Step Five
HOW TO SELECT FAIL-SAFE CURRENT OUTPUT / LOST
In the event the sensor does not receive an echo, the Fail-Safe Current Output or LOST setting can be set to
output a current of 4mA, 20mA, 21mA, 22mA or Hold (last known value). During fail-safe, the display will read
LOST.
1. In TOP-LEVEL MENU mode, select SAFE.
2. Select 4mA, 20mA, 21mA, 22mA or HOLD.
3. Select EXIT to return to TOP-LEVEL MENU.
| 12 MN301550 Rev C2
Page 13

Wiring Step Six
ANALOG OUTPUT (4-20 MA)
The analog output of the EchoSpan® is a loop powered 4-20 mA control circuit. The typical way to use this
feature is to connect a positive supply to the (+) input and to sense the current flow out of the (-) output with a
sampling resistor as shown in the following diagram.
The cabling should be a shielded twisted pair to minimize EMI interference. Typically 20 to 24 gauge wire is
used in this application.
GENERAL NOTES FOR ELECTRICAL CONNECTIONS, USAGE AND SAFETY
Where personal safety or significant property damage can occur due to a spill, the installation must
have a redundant backup safety system installed.
Wiring should always be completed by a licensed electrician.
When using a liquid tight fitting (cord grip), make sure the cable meets the fittings specification.
o Example: The LM90-1001 nylon liquid tight fitting has a cable minimum of 0.170” (4.3mm) and
cable maximum of 0.450” (11.4mm)
Protect the sensor from excessive electrical spikes by isolating the power, whenever possible.
Supply voltage should never exceed 28 VDC.
The sensor materials must be chemically compatible with the liquids to be measured.
Design a fail-safe system for possible sensor and/or power failure.
Never use the sensor in environments classified as hazardous.
VOLTAGE OUTPUT
EchoSpan® can be used as a 0 to 5 or 0 to 10 VDC output device. A resistor will need to be added to the circuit
to enable a voltage output (refer to the wiring diagram below).
0-5 VDC output
o Add a 250 Ohm resistor
o Actual output will be 0.8 to 5 VDC
0-10 VDC output
o Add a 500 Ohm resistor
o Actual output will be 2 to 10 VDC
MN301550 Rev C2 13 |
Page 14

Wiring Step Six
COMMON WIRING TO DISPLAY, CONTROLLERS & PLC’S
Below is a quick review of wiring the EchoSpan® to common display, controllers and PLC’s.
DataView™ LI55 Series
Level Controller
DataLoop™ LI23 Series
Level Indicator Without Backlight
Commander™ LI90 Series
Multi-Tank Level Controller
DataLoop™ LI23 Series
Level Indicator with Backlight
| 14 MN301550 Rev C2
Page 15

Wiring Step Six
COMMON WIRING TO DISPLAY, CONTROLLERS & PLC’S (continued)
DataPoint™ LC52 Series
Level Controller
JWA mode (Factory Setting)
Generic Loop
Powered Display
DataPoint™ LC52 Series
Level Controller
JWB mode
Generic PLC
MN301550 Rev C2 15 |
Page 16

Installation Step Seven
EchoSpan
®
should always be mounted perpendicular to the liquid surface and installed using the provided
Viton mounting gasket. Make sure that the fitting and transmitter threads are not damaged or worn. Always
hand-tighten the transmitter within the fitting. Perform an installed leak test under normal process conditions
prior to system start up. Note: The preferred mounting fitting for the LU80 series is the LM52-1400 (2” thread x
1” thread) reducer bushing.
MOUNTING GUIDE
1. Do not mount sensor at an angle.
2. Liquid should never enter the dead band.
3. Side Wall:
a. Mount at least 3” from the side wall.
b. LU80 Series - mount at least 2” from the side wall
4. Do not mount where obstacles will intrude on sensor’s
Do not install at
angle relative to the
liquid.
beam width.
a. LU80 Series - mount at least 2” from the side wall.
b. LU81, LU83 & LU84 Series - mount at least 3” from
the side wall.
Do not install within
3” of tank sidewall.
5. Do not mount sensor in a vacuum
6. Avoid mounting sensor in the center of a dome top tank.
7. In cone bottom tank, position the sensor over the deepest
part of the tank.
INSTALLATION IN EXISTING FITTINGS
Do not install with
objects in the
beam.
If the existing fitting is larger than the threads of the
EchoSpan
®
, select a reducer bushing such as the LM52-1400
(2” thread x 1” thread) or LM52-2400 (3” thread x 2” thread).
Do not install in
applications with
vacuum.
LM52-1400
METAL TANKS (LU80 SERIES)
LM52-2400
Do not install in the
center of a dome
top tank.
Flowline ultrasonic transmitters have been optimized for use in non-metallic fittings.
1. For best performance, avoid the use of metallic fittings.
a. Use a plastic 2” x 1” reducer bushing, such as the LM52-1400 or a plastic 1” flange, such as the
LM52-1850 for metallic tanks.
2. While installations directly into a 1” metal fitting are not recommended, acceptable results may be
obtained if the 1” fitting is a half coupling in form and the outer diameter of the coupling is tightly
wrapped in vinyl tape to dampen vibrations.
| 16 MN301550 Rev C2
Page 17

Installation Step Seven
FITTING SELECTION
Check the part number to determine the required fitting mount size and thread type. EchoSpan® is commonly
installed in tank adapters, flanges, brackets or standpipes. Note: Always include the gasket when installing the
EchoSpan
1. Tank Adapter: Select a tank adapter fitting, such as the LM52-1890 for the LU80 series or the LM52-
®
.
2890 for the LU81, LU83 & LU84 series.
a. For best results, select a 2” tank adapter and add a reducer bushing such as the LM52-1400,
thread x thread, reducer bushing.
b. Avoid tank adapter (thread x thread) styles and/or pipe stops forward of the installed transducer.
c. Always mount the tank adapter so the majority of fitting is outside the tank.
i. Note: Never mount the tank adapter upside down or where the bulk of the material is
inside the tank.
2” Tank Adapter
Socket x Thread
(LM52-2890)
w/ 2”x1” Reducer Bushing
(LM52-2890 w/LM52-1800)
Tank Adapter
Do not use thread x thread
2. Riser: Installations with tall, narrow risers can impede the acoustic signal.
a. Core Out Concrete: Applications where a tank with a concrete ceiling that has been cored out
can also be considered as a riser type application. In these applications follow a 2:1 ratio (Core
Height to Inner Diameter) for the diameter of the core.
b. LU81, LU83 & LU84 Series: 2” (5 cm) diameter risers should be no taller than 4” (10 cm).
Larger diameter risers should be no taller than 12” (30.5 cm).
Riser Specifications
Inner
Diameter
2” (5cm)
4” (10cm)
6” (15cm)
Maximum
Height
4” (10cm)
8” (20cm)
12” (30cm)
Note: Do not exceed the dimensions listed above.
Tank Adapter
Thread x Thread
Note: If attempting to raise the
sensor above the top of the tank
to allow for a higher fill capacity,
avoid the use of tall and narrow
risers. The example to the left
exceeds the dimensions listed in
the Riser Specifications chart.
Use a larger tank adapter which
takes into account the Riser
Specifications.
MN301550 Rev C2 17 |
Page 18

Installation Step Seven
3. Flange (LU80 series): If installing on a flange, select a flange with a thread that is above the plane of
the flange, such as the LM52-1850.
a. Avoid the use of blind flanges with tapped threads or flanges where the threads are even with
the plane of the flange, such as the Banjo 1" Poly ANSI Flange (series AF100).
b. Use a flange with a 2” thread and add a 2” to 1” reducer bushing to complete the installation.
c. The LU81, LU83 & LU84 series works well with Flange installations
2” Flange w/
thread out of plane
(LM52-1850)
2” Flange w/
thread in plane
2” Flange w/
Reducer Bushing
(LM52-1800)
Do not use thread in plane
4. Side Mount Bracket: For installations in open tanks and sumps, use the LM50 series side mount
bracket.
a. For the LU80 series, order the LM50-1001-1, which includes a 2”x 1” Reducer Bushing.
b. For the LU81, LU83 & LU84, series, order the LM50-1001 side mount bracket.
LM52-1001 Shown
LM52-1001-1 Shown
Note: The Side Mount Bracket (LM50 series) is not designed for use with stand pipes or as a method
to secure stand pipes. There are too few threads to properly hold the sensor and the stand pipe.
| 18 MN301550 Rev C2
Page 19

Installation Step Seven
5. Stand Pipe: A standpipe maybe used to dampen turbulence or when foam is present in the application.
a) Pipe can be made of any material.
b) Select a minimum 3” ID pipe for the stand pipe.
i) A 2” pipe (minimum pipe size) is usable with the LU80
series.
ii) Pipes larger than 3” can also be used.
c) Use a coupling and reducer bushing to attach the
EchoSpan
i) With the LU80 series, be sure to use a plastic reducing
bushing such as LM52-1400 2” Thread x 1” Thread
fitting or the LM52-1410 2” Slip x 1” Thread fitting.
ii) For the LU81, LU83 & LU84 series, use a reducer
bushing such as LM52-2400 (3” Thread x 2” Thread)
fitting or the LM52-2410 (3” Slip x 2” Thread) fitting.
d) The pipe length should run the measurement span and the
bottom of the pipe should remain submerged at all times to
prevent foam from entering the pipe.
e) Cut a 45°notch at the bottom of the pipe. Drill a
1/4”pressure equalization hole in the dead band.
®
to the pipe.
f) The pumps should not drive liquid past the open end of the
stand pipe which causes the liquid in the pipe to oscillate.
Note: Never allow the bottom of the stand pipe to become
exposed to air. This will break the liquid seal which will
prevent echoes from returning back to the sensor.
Ultrasonic
Sensor
(LU27 Shown)
2” x 1” (TxT)
Reducer Bushing
2” Coupling
(S x T)
Vent Hole (1/4”)
2” PVC Pipe
Ultrasonic sensor attached to a
LM52-1400 (2”x1” reducer
bushing) to a SxT 2” Coupling.
Avoid the use of a tee within the
stand pipe. A tee can create false
signals which will interfere with the
sensor’s performance.
MN301550 Rev C2 19 |
Page 20

Appendix Step Eight
AIR GAP VS. LIQUID LEVEL (HOW TO SELECT THE DISPLAY SETTING)
The display can be made to display either the height of liquid in the tank (LIQUID mode) or the amount of air in
the tank (AIR mode). This function does not influence the current output, just the display on the sensor.
1. In TOP-LEVEL MENU mode, select UNITS.
2. Select DISPLAY.
3. Select LIQUID or AIR. SAVED will display.
4. Select EXIT to return to TOP-LEVEL MENU.
Liquid Mode Air Mode
HOW TO REVERSE THE CURRENT OUTPUT
The factory setting for EchoSpan® has 4mA set to the bottom of the tank and 20mA at the top. If the application
requires this output to be reversed (20mA at bottom and 4mA at top), then use the REV MA setting to reverse
the current output.
With REV MA set to NORM (factory default), 4mA will be at the bottom and 20 mA at the top of the tank.
With REV MA set to REV, 20mA will be at the bottom and 4mA at the top of the tank.
1. In TOP-LEVEL MENU mode, select
TANK.
2. Select REV MA.
3. Select NORM or REV. SAVED will
display.
4. Select EXIT to return to TOP-LEVEL
MENU.
| 20 MN301550 Rev C2
Page 21

Appendix Step Eight
SETUP
Will display the configuration settings for EchoSpan®.
1. In TOP-LEVEL MENU mode, select
VALUES.
2. Select SETUP.
3. Setup will list the following
information:
a. UNITS,
b. DISPLY,
c. REV MA,
d. SAFE,
e. HEIGHT,
f. FILL-H
4. Select EXIT to return to TOP-LEVEL
MENU.
DIAGNOSTIC (DIAG) PARAMETERS
This mode runs diagnostic tests that confirm operation of EchoSpan®. This is a production test feature used by
the factory to confirm operation.
1. In TOP-LEVEL MENU, select VALUES.
2. Select DIAG.
3. DIAG will list the following settings:
a. RANGE
b. TEMP
c. ECHO
d. POWER
e. MOUNT
f. VER
4. Select EXIT to return to TOP-LEVEL
MENU.
Note: This mode should only be used when
supervised by a Flowline representative.
MN301550 Rev C2 21 |
Page 22

Appendix Step Eight
RESET
EchoSpan® enables the end user to reset the entire configuration back to the original factory settings.
1. In TOP-LEVEL MENU mode, select
VALUES.
2. Select RESET.
3. Select YES.
a. To cancel the reset, Select NO.
4. Select EXIT to return to TOP-LEVEL
MENU.
FACTORY SETTINGS
EchoSpan® Sensor Height Fill-Height
LU80 Series 118.1” (300 cm) 114.1” (290 cm)
LU81 Series 216.5” (550 cm) 208.5” (530 cm)
LU83 Series 314.9” (800 cm) 307.1” (780 cm)
LU84 Series 393.7” (1000 cm) 381.9” (970 cm)
USER SETTINGS
Fill out the chart below and keep as a record of your configuration.
Tank
Height = Fill-H =
Norm Reverse
Units
Inches Feet cm Meter Percent
Air Liquid
Safe
22mA 21 mA 20mA Hold Last 4mA
| 22 MN301550 Rev C2
Page 23

Appendix Step Nine
TROUBLESHOOTING
PROBLEM SOLUTION
TANK does not appear on
the main menu:
Display shows FULL: Level of liquid is above the FILL-H setting: Check the FILL-H setting,
Display shows EMPTY: Level of liquid is beyond the HEIGHT setting: Check the HEIGHT
Display shows WARMUP: Typically occurs when power is being applied to transmitter. Indicates a
Display shows LOST: Sensor is in a Fail-Safe state. The return sound pulses are not reaching
Display is opposite of the
measured value:
Transmitter indicates a
current of 0 mA:
Transmitter jumps to a
current reading between
19 and 20 mA:
Transmitter indicates a
current over 23 mA:
Units function is set for PERCNT on EchoSpan®: When Units is set for
PERCNT, the TANK function is disabled. To re-enable TANK, change
units to INCHES, CM, FEET or METERS.
making sure the FILL-H setting is high enough so the level of liquid is
below the FILL-H setting. The Fill-H setting is the distance from the
bottom of the tank to the Full level of liquid.
setting, making sure the HEIGHT setting is low enough so the level of
liquid is above the HEIGHT setting.
weak power supply, bad wire connections or the sensor is out of the
operational range.
the transducer. First, cycle power off and on, waiting 5 seconds
between the off and on states. If problem persists, check the installation
fitting against the Installation instructions in the manual.
Check the DISPLAY setting. AIR mode indicates the distance from the
liquid to the sensor. LIQUID mode indicates the height of liquid in the
tank. Change the DISPLAY mode from AIR to LIQUID or vice versa to
correct.
Check the wiring for an open circuit. An open circuit is the most
common issue with a 0 mA signal.
Check the installation of the transmitter. Bad installation fittings will
cause false signals near the top of the tank, which typically translates to
a signal between 19 and 20 mA. Also look for interference just below
the transmitter. If the transmitter is installed in a metal fitting, switch to a
plastic fitting.
Immediately check the wiring for a short circuit. The EchoSpan® is
current limited to 22 mA. Anything above 23 mA indicates a short
circuit.
MN301550 Rev C2 23 |
Page 24

Warranty, Returns and Limitations Step Ten
WARRANTY
Flowline warrants to the original purchaser of its products that such products will be free from defects in
material and workmanship under normal use and service in accordance with instructions furnished by Flowline
for a period of two years from the date of manufacture of such products. Flowline's obligation under this
warranty is solely and exclusively limited to the repair or replacement, at Flowline's option, of the products or
components, which Flowline's examination determines to its satisfaction to be defective in material or
workmanship within the warranty period. Flowline must be notified pursuant to the instructions below of any
claim under this warranty within thirty (30) days of any claimed lack of conformity of the product. Any product
repaired under this warranty will be warranted only for the remainder of the original warranty period. Any
product provided as a replacement under this warranty will be warranted for the full two years from the date of
manufacture.
RETURNS
Products cannot be returned to Flowline without Flowline's prior authorization. To return a product that is
thought to be defective, go to www.flowline.com, and submit a customer return (MRA) request form and follow
the instructions therein. All warranty and non-warranty product returns to Flowline must be shipped prepaid
and insured. Flowline will not be responsible for any products lost or damaged in shipment.
LIMITATIONS
This warranty does not apply to products which: 1) are beyond the warranty period or are products for which
the original purchaser does not follow the warranty procedures outlined above; 2) have been subjected to
electrical, mechanical or chemical damage due to improper, accidental or negligent use; 3) have been modified
or altered; 4) anyone other than service personnel authorized by Flowline have attempted to repair; 5) have
been involved in accidents or natural disasters; or 6) are damaged during return shipment to Flowline. Flowline
reserves the right to unilaterally waive this warranty and dispose of any product returned to Flowline where: 1)
there is evidence of a potentially hazardous material present with the product; or 2) the product has remained
unclaimed at Flowline for more than 30 days after Flowline has dutifully requested disposition. This warranty
contains the sole express warranty made by Flowline in connection with its products. ALL IMPLIED
WARRANTIES, INCLUDING WITHOUT LIMITATION, THE WARRANTIES OF MERCHANTABILITY AND
FITNESS FOR A PARTICULAR PURPOSE, ARE EXPRESSLY DISCLAIMED. The remedies of repair or
replacement as stated above are the exclusive remedies for the breach of this warranty. IN NO EVENT SHALL
FLOWLINE BE LIABLE FOR ANY INCIDENTAL OR CONSEQUENTIAL DAMAGES OF ANY KIND
INCLUDING PERSONAL OR REAL PROPERTY OR FOR INJURY TO ANY PERSON. THIS WARRANTY
CONSTITUTES THE FINAL, COMPLETE AND EXCLUSIVE STATEMENT OF WARRANTY TERMS AND NO
PERSON IS AUTHORIZED TO MAKE ANY OTHER WARRANTIES OR REPRESENTATIONS ON BEHALF
OF FLOWLINE. This warranty will be interpreted pursuant to the laws of the State of California. If any portion
of this warranty is held to be invalid or unenforceable for any reason, such finding will not invalidate any other
provision of this warranty.
For complete product documentation, video training, and technical support, go to www.flowline.com.
For phone support, call 562-598-3015 from 8am to 5pm PST, Mon - Fri.
(Please make sure you have the Part and Serial number available.)
| 24 MN301550 Rev C2
 Loading...