

Page 1
Quick Networking Guide
DNR210_SERIES_QNG_EN_R1
4K Network Video Surveillance Recorder
DNR210 Series
Before You Start:
• Make sure you
have a router
and high-speed
Internet access
(not included).
• Connect your NVR
to your router
using an Ethernet
cable (see the
Quick Connection
Guide for details).
• Upgrade your NVR
firmware and client
software or mobile
app to the latest
versions.
• Please note that a minimum
upload speed of 3 Mbps is
required for remote video
streaming. Up to 3 devices
may connect to the system
at the same time.
DNR210 SERIES
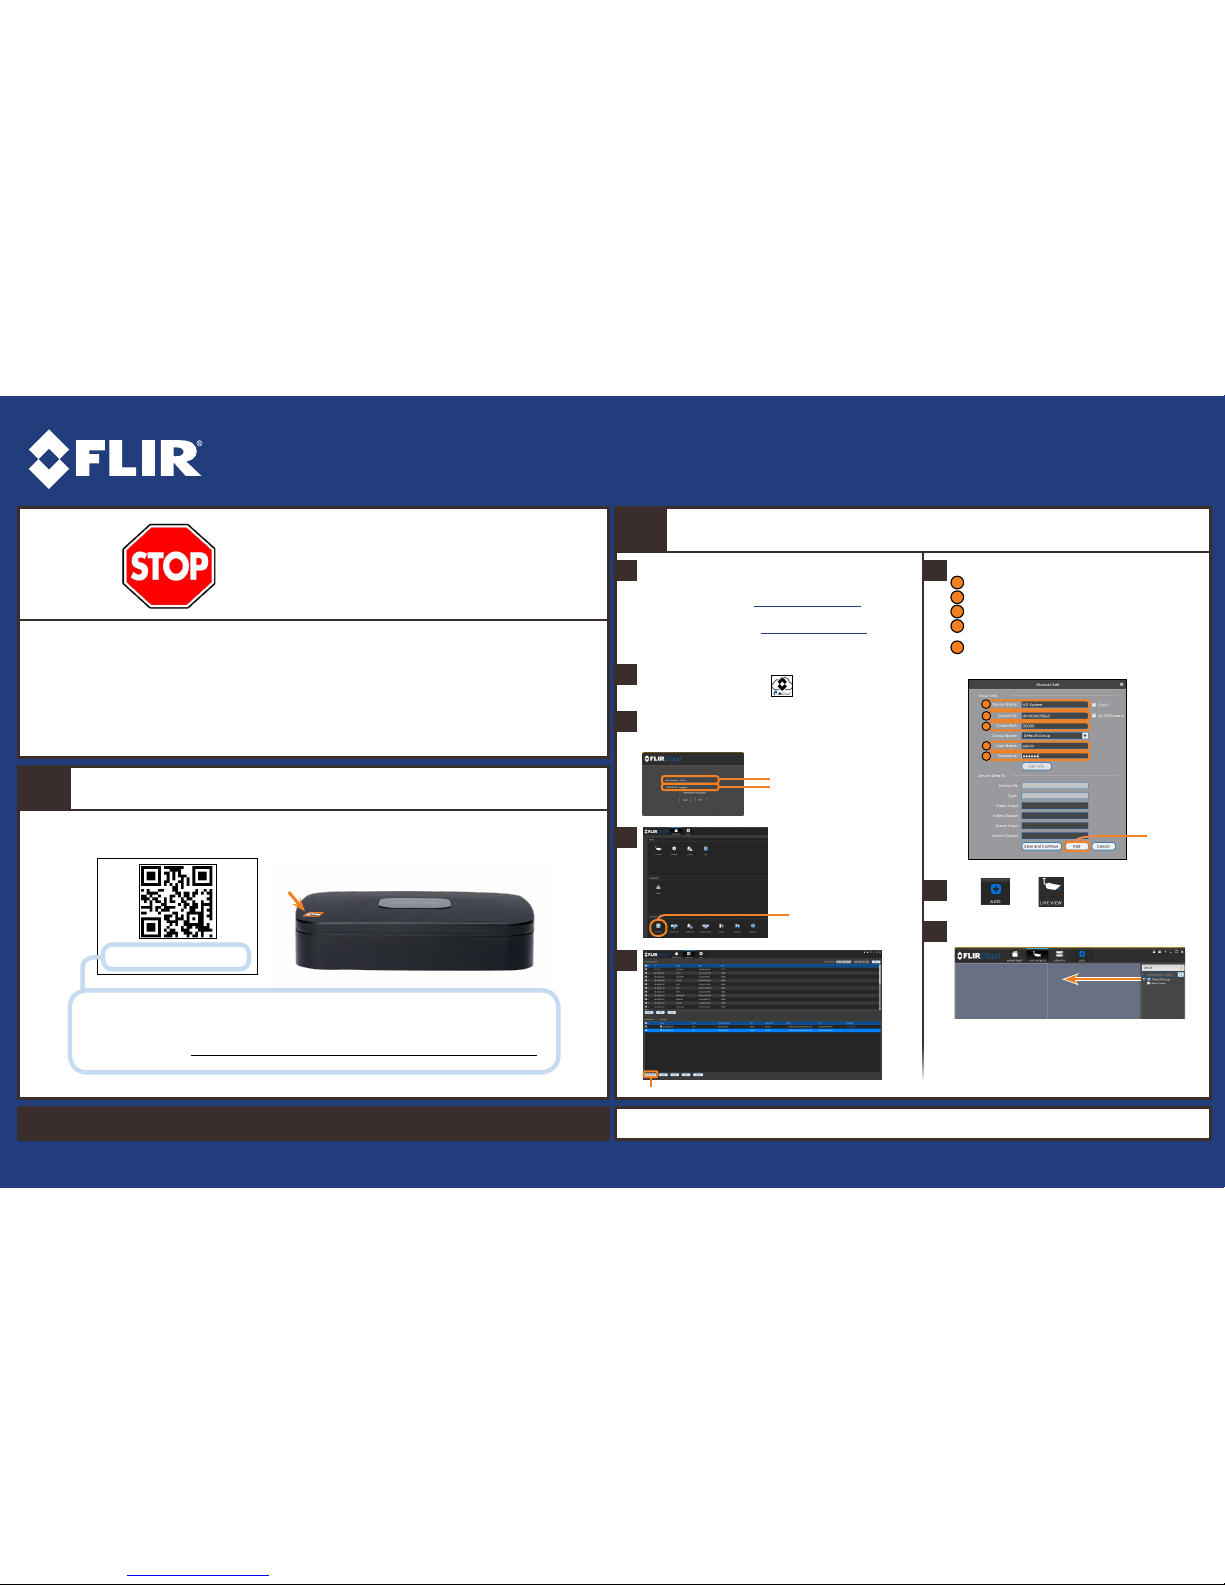
Find Your Device ID
Record your information below:
DEVICE ID:
2
The Device ID is printed on a label on the top panel of the NVR.
Device ID: xxxxxxxxxxx
1
Congratulations! You can now connect over the Internet to view and playback video on your computer.
PC / Mac Setup
a
• PC Users: Download and install the FLIR Cloud Client
Software for PC from flir.com/security/pro.
Download and install the client software:
• Mac Users: Download and install the FLIR Cloud Client
Software for Mac from flir.com/security/pro. Double-
click to extract the software, then drag the software to
Applications.
b
c
Once installation is finished, double-click the
FLIR Cloud Client™ icon (
) on the desktop or
Applications list.
2
Log into the Client Software using the user name
(default: admin) and password (default: admin) and
then click Login.
f
User Name: admin
Password: admin
d
Click Devices
1
2
3
4
5
Enter the following information:
Device Name: Choose a name for your system.
Device ID: Manually enter the Device ID printed on the label.
Client Port: Enter the Client Port (default: 35000).
User Name: Enter the NVR’s User Name
(default: admin).
Password: Enter your new, secure password recorded on the
Quick Connection Guide.
1
2
3
4
5
Click Add.
EXAMPLE
g
Click then .
h
Click and drag Default Group to the display
window to open your cameras in live view.
NOTE: PC/Mac setup is not required to connect on a
smartphone or tablet. See reverse for smartphone/tablet
setup.
Click Manual Add
e
Page 2
Quick Networking Guide
DNR210_SERIES_QNG_EN_R1
4K Network Video Surveillance Recorder
DNR210 Series
Information in this document is subject to change
without notice. As our products are subject to
continuous improvement, FLIR Systems, Inc. and
our subsidiaries reserve the right to modify product
design, specifications and prices, without notice and
without incurring any obligation. E&OE © 2017 FLIR
Systems, Inc. All rights reserved.
Quick Reference
Default access information:
• Default user name: admin
• Default password: 000000
Default system ports:
• HTTP Port: 80
• Client Port: 35000
If you have forgotten your password,
contact FLIR technical support.
See the label on top of your NVR for
your Device ID
If you are having trouble
connecting, try the following:
• Restart the NVR by disconnecting the
power adapter, then reconnecting it.
• Ensure the NVR is connected to the
router using an Ethernet cable and
then restart the NVR.
• Double check the Username,
Password, and Client Port.
• Ensure your NVR has the latest
firmware.
• Ensure your mobile app is up-to-date.
Troubleshooting
Need Help?
Visit us online for up-to-date software
and complete instruction manuals
Click on the Downloads tab
4
Visit flir.com/security/pro
Search for the model number
of your product
Click on your product in the
search results
3
2
1
a
Tap Sign up and enter your email address and
password to create a new account.
b
c
d
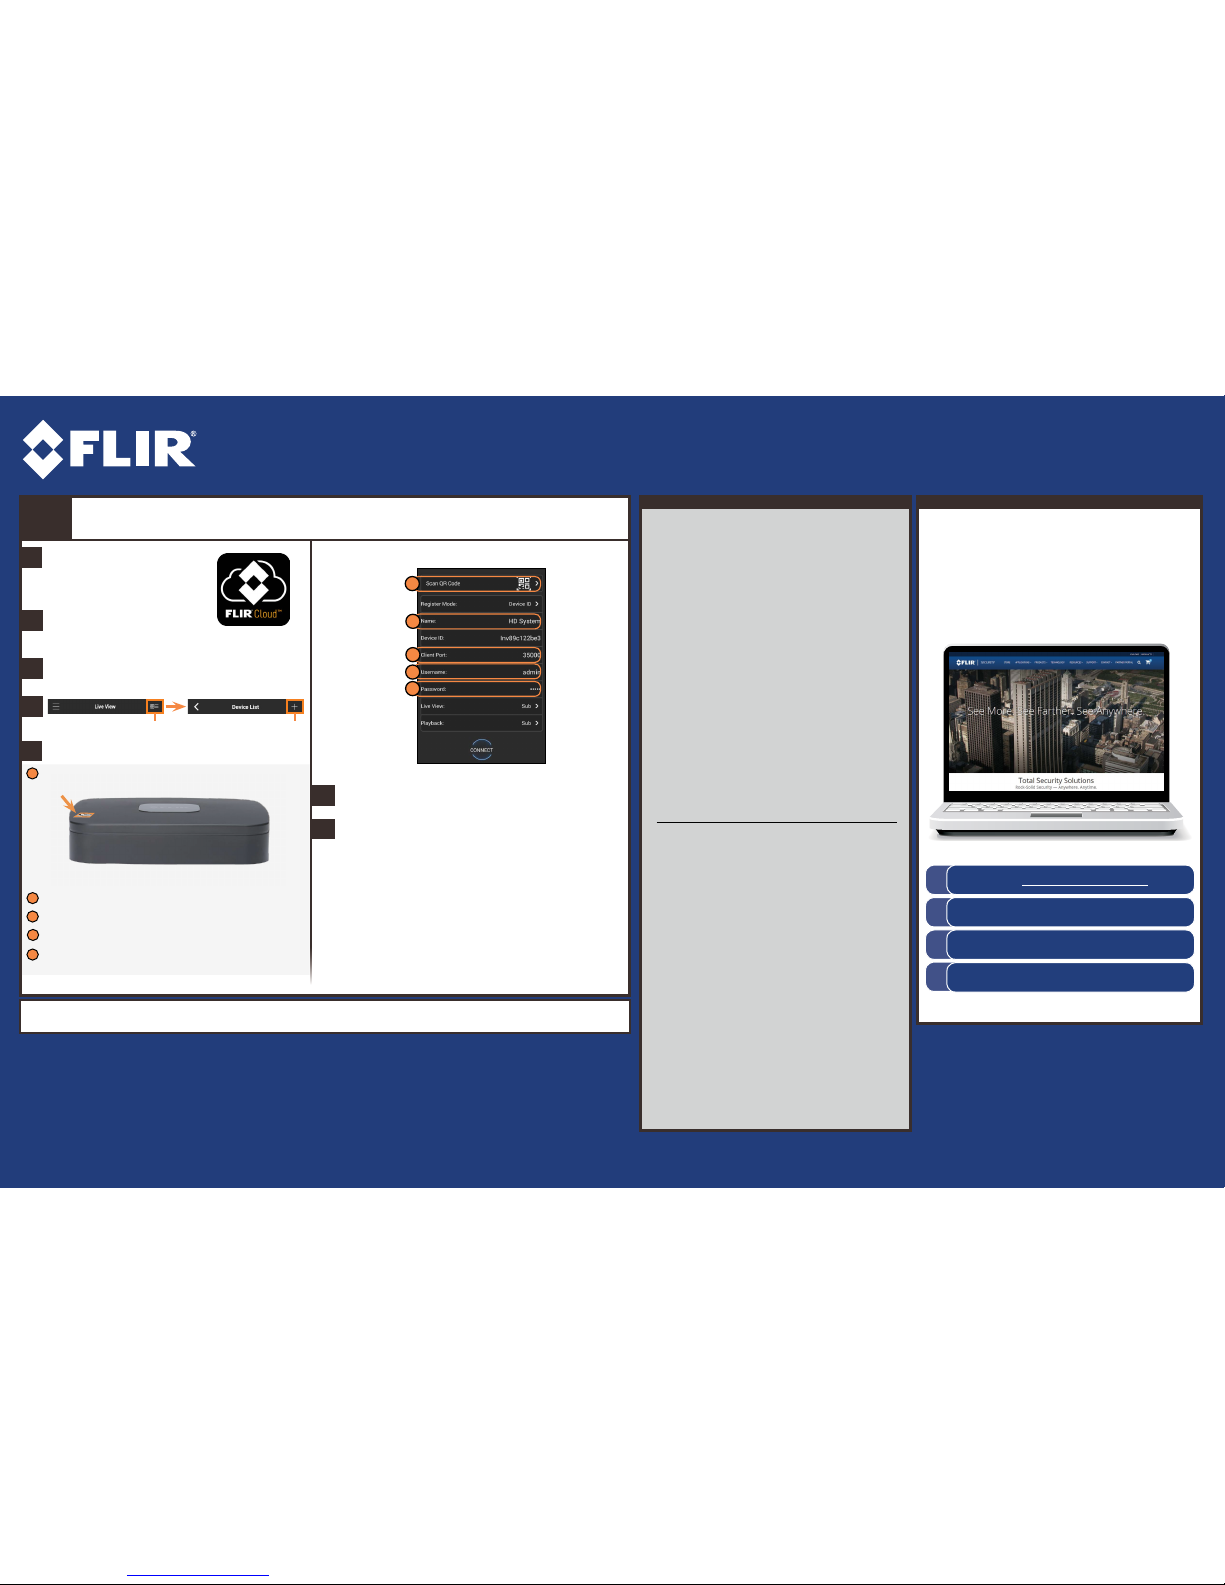
Smartphone / Tablet Setup
Install the free FLIR Cloud™
app from the App Store or
Google Play Store.
Tap the FLIR Cloud™ icon
to open the app.
e
f
Tap Connect.
g
Congratulations! You can now view video from your cameras on your smartphone or tablet.
3
The app opens in Live View and streams video from
all connected cameras.
Tap Then tap +
Configure the following:
1
2
3
4
Tap Scan QR Code and line up the QR code on the top of the NVR using
the camera on your smartphone or tablet.
1
3
4
5
2
EXAMPLE
5
OR under Device ID, manually enter the Device ID printed on the label.
Name: Choose a name for your system of your choice.
Client Port: Enter the Client Port (default: 35000).
Username: Enter the NVR’s User Name (default: admin).
Password: Enter your new, secure password recorded on the Quick
Connection Guide.
 Loading...