

Page 1
QUICK START GUIDE
Camera Specifications
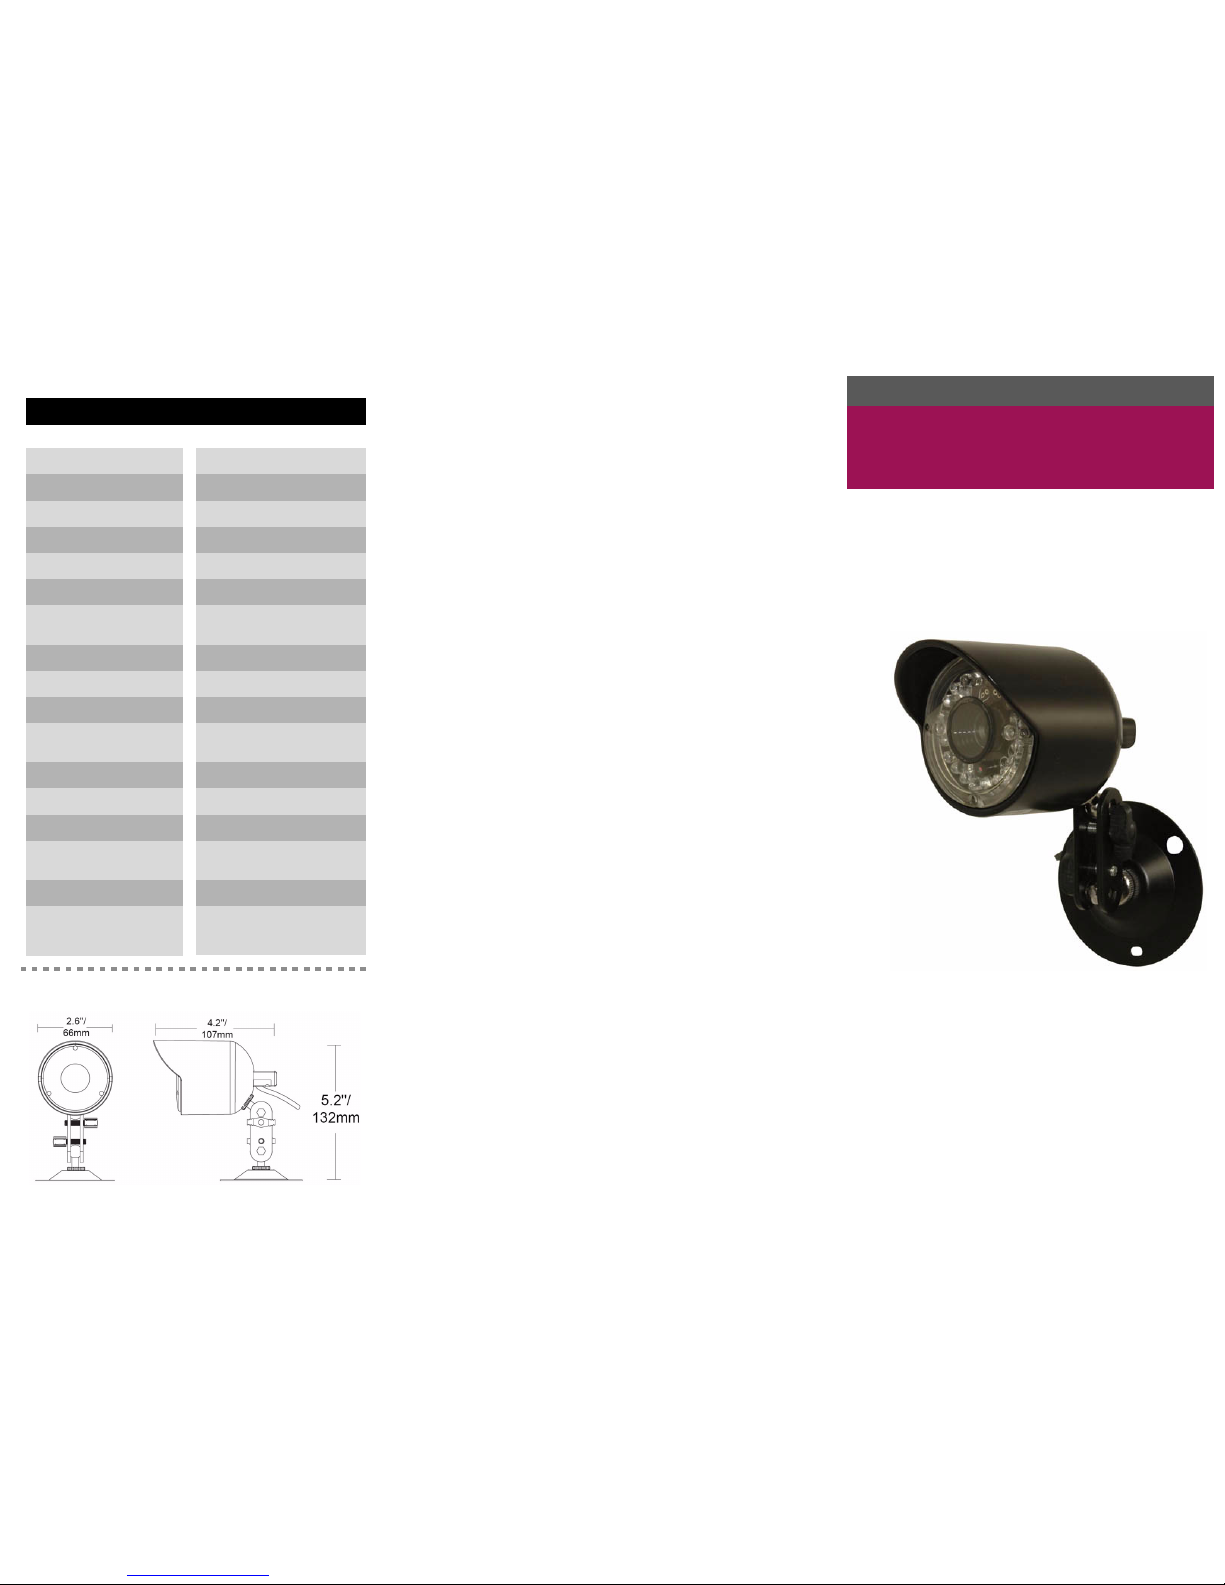
INDOOR / OUTDOOR
COLOR CAMERA
with Night Vision
Dimensions
Image Sensor 1/4” Color
Lens / Lens Mount
Video Format / Pixels
Horizontal Resolution
Minimum Illumination
Termination
IR / Night Vision Range
FOV (diagonal)
S/N Ratio
Sync. & Scan. Systems
Video Output
Power Consumption
NTSC: 640(H) x 480 (V)
420 TVL
0 LUX (IR LEDs on)
Video: BNC Female
Power: Barrel Female
18 IR LED/40 ft. / 12 m
64 Degrees
> 48dB
Internal; 2:1 Interlace
Comp. 1.0 Vpp @ 75ohm
170 mA or 2W max
Operating Temp.
Dimensions
WxLxH
(with stand)
14°F ~ 122°F
(-10°C ~ 50°C)
2.6" x 4.2"" x 5.2"
66 mm x 107 mm x 132 mm
3.6 mm F1.8/ Fixed
Iris & Shutter Speed AES; 1/30 ~ 1/625,000 sec.
Power Requirement 12V DC ±10%
Weight (with stand) 0.6 lbs. / 0.26 kg
MODEL: DBB13TL SERIES
English Version 1.0
Page 2
Contents Installing the camera
Indoor / Outdoor Color
Camera with Night Vision*
To install the camera:
1. Mount the camera stand to the desired mounting
surface.
2. Attach the camera to the stand at either of the two
connection points.
3. Connect the BNC end of the cable to a DVR or
monitor.
4. Connect the included 12V DC Power Adaptor to the
camera(s).
ATTENTION - Test the camera prior to selecting a permanent
mounting location by temporarily connecting the cameras and
cables to a TV, DVR, or Observation System.
Figure 1.0 Use the stand for ceiling, table, or wall mounting.
Wall Mount
Ceiling Mount
Table Mount
ATTENTION: This camera includes an Auto Mechanical IR Cut
Filter. When the camera changes between Day/Night Lighting, an
audible clicking noise may be heard coming from the camera.
This clicking is normal, and indicates that the camera filter is
working.
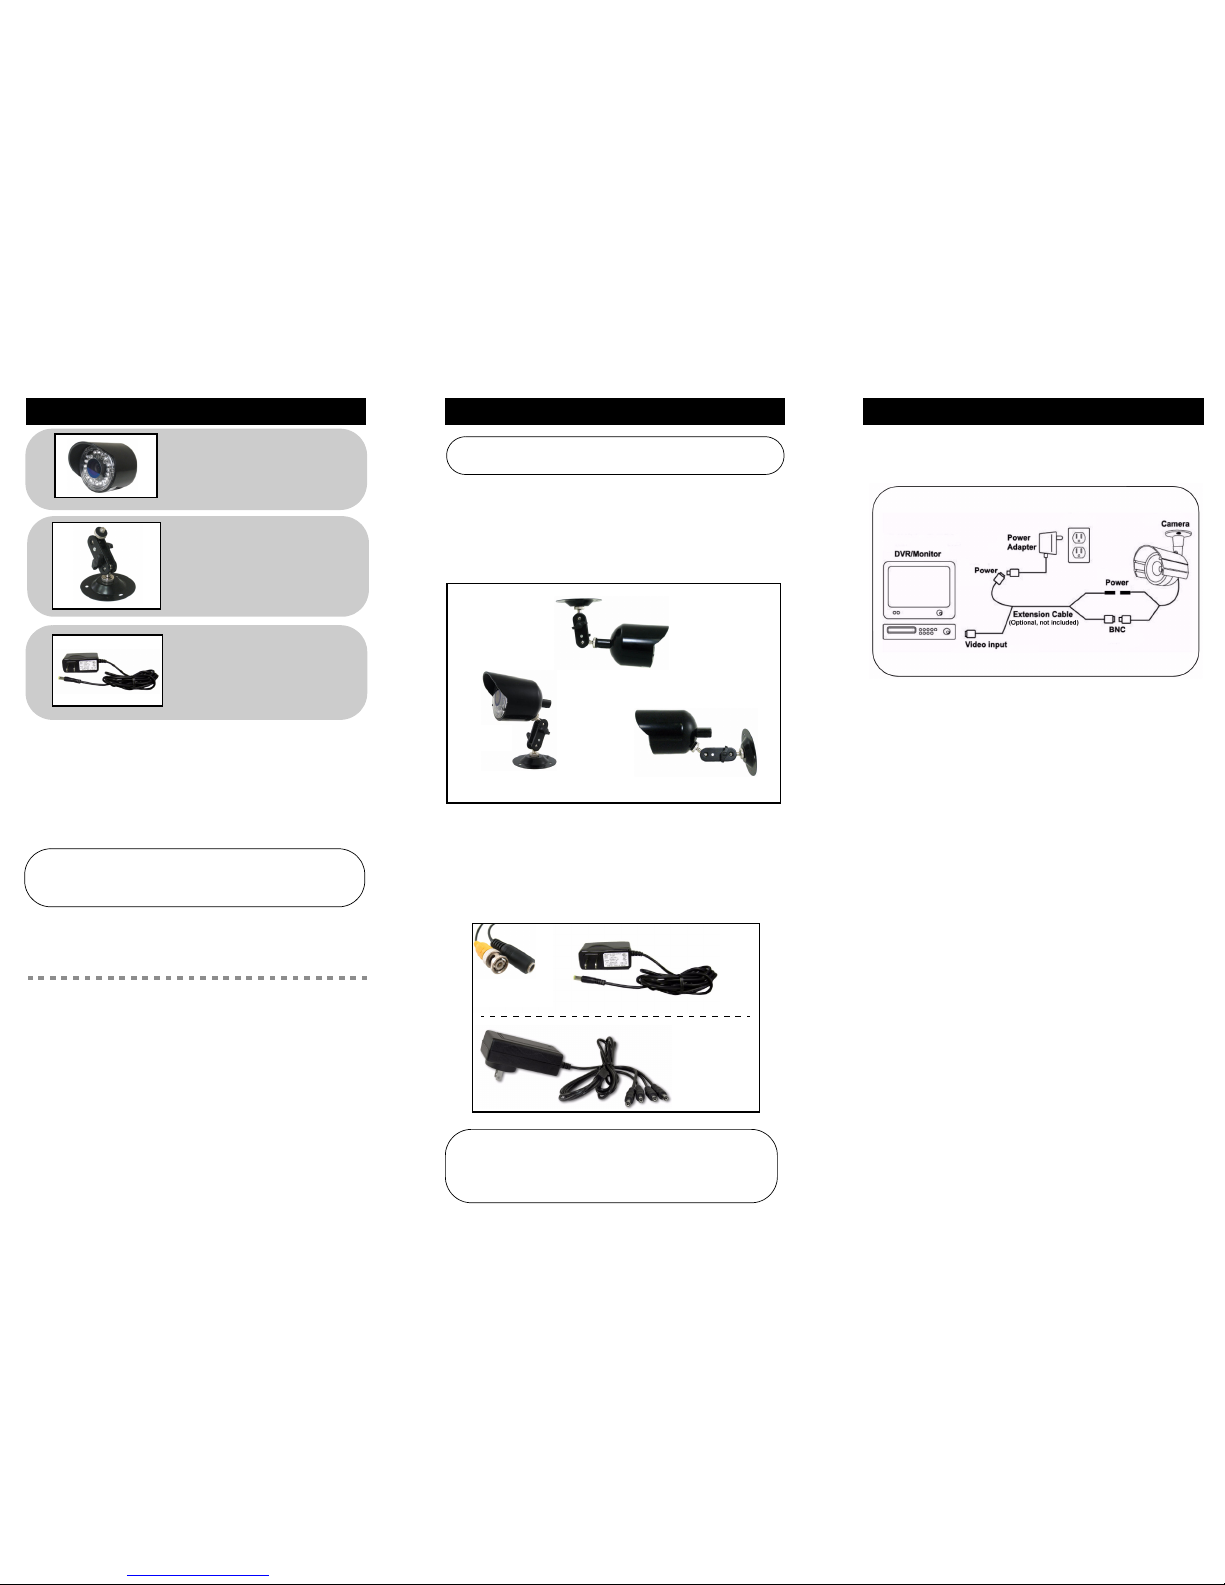
Figure 2.0 Connect an AC power adapter
AC Power Adapter
4-in-1 Power Adapter
(optional)
Features
• Auto Mechanical IR Cut Filter ensures accurate color
reproduction in all lighting conditions
• Special IR LED's do not glow red in the dark for covert
night vision operation
• Enhanced Night Vision Capability - up to 40 ft. / 12 m†
• Weatherproof Indoor/Outdoor camera (IP66)‡
• Ceiling or wall mountable
† IR illumination range of 40 ft. (12 m) under ideal conditions. Actual range and clarity may
vary depending on scene/object reflection and camera application.
‡ Not intended for submersion in water. Installation in a sheltered location
recommended.
Mounting Stand*
Connecting the camera
Setup Diagram:
AC Power Adapter**
* Model DBB13TL-PK4 is a 4-pack that includes four of the listed items.
** A "4-in-1" Power Adapter that provides power to four cameras may be
substituted for four individual power adapters, depe nding on product
configuration.
WARNING - A REGULATED UL/CSA APPROVED 12V DC power supply
is REQUIRED for use with this camera. Use of a non-regulated, nonconforming power supply can damage this product an d will void the
warranty.
 Loading...