

Page 1
Getting started
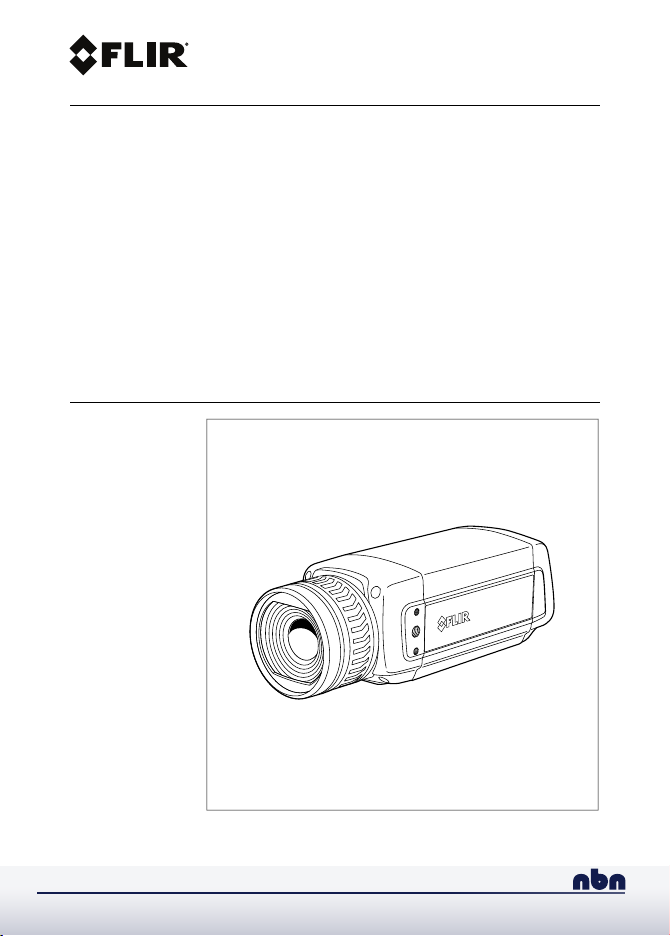
FLIR A6xx series
nbn Austria GmbH
Page 2

Page 3

Page 4

Important note
Before operating the device, youmust read, understand, and follow all instructions, warnings, cautions,and legal
disclaimers.
Důležitá poznámka
Před použitím zařízení si přečtěte veškeré pokyny,upozornění, varování a vyvázání se ze záruky, ujistěte se, že jim
rozumíte, a řiďte se jimi.
Vigtig meddelelse
Før du betjener enheden, skal du dulæse, forstå og følge alle anvisninger, advarsler,sikkerhedsforanstaltninger og
ansvarsfraskrivelser.
Wichtiger Hinweis
Bevor Sie das Gerät in Betrieb nehmen, lesen, verstehen und befolgen Sie unbedingt alleAnweisungen, Warnungen,
Vorsichtshinweise und Haftungsausschlüsse
Σημαντική σημείωση
Πριν από τη λειτουργία της συσκευής, πρέπει να διαβάσετε, να κατανοήσετε και να ακολουθήσετε όλες τις
οδηγίες, προειδοποιήσεις, προφυλάξεις και νομικές αποποιήσεις.
Nota importante
Antes de usar el dispositivo, debe leer, comprender y seguir toda la información sobre instrucciones, advertencias,
precauciones y renuncias de responsabilidad.
Tärkeä huomautus
Ennen laitteen käyttämistä on luettava ja ymmärrettävä kaikki ohjeet, vakavat varoitukset, varoitukset ja lakitiedotteet
sekä noudatettava niitä.
Remarque importante
Avant d'utiliser l'appareil, vous devez lire, comprendre et suivre l'ensemble des instructions, avertissements, mises
en garde et clauses légales de non-responsabilité.
Fontos megjegyzés
Az eszköz használata előtt figyelmesen olvassa el és tartsa be az összes utasítást, figyelmeztetést, óvintézkedést és
jogi nyilatkozatot.
Nota importante
Prima di utilizzare il dispositivo, è importanteleggere, capire e seguire tutte le istruzioni, avvertenze, precauzioni ed
esclusioni di responsabilità legali.
重要な注意
デバイスをご使用になる前に、あらゆる指示、警告、注意事項、および免責条項をお読み頂き、その内容を理解し
て従ってください。
중요한 참고 사항
장치를 작동하기 전에 반드시 다음의 사용 설명서와 경고, 주의사항, 법적 책임제한을 읽고 이해하며 따라야 합니다.
Viktig
Før du bruker enheten, må du lese, forstå og følge instruksjoner, advarsler og informasjon om ansvarsfraskrivelse.
Belangrijke opmerking
Zorg ervoor dat u, voordat u het apparaat gaatgebruiken, alle instructies, waarschuwingen en juridische informatie
hebt doorgelezen en begrepen, en dat u deze opvolgt en in acht neemt.
Ważna uwaga
Przed rozpoczęciem korzystania z urządzenia należy koniecznie zapoznać się z wszystkimi instrukcjami,
ostrzeżeniami, przestrogami i uwagami prawnymi. Należy zawsze postępować zgodnie z zaleceniami tam zawartymi.
Nota importante
Antes de utilizar o dispositivo, deverá proceder à leitura e compreensão de todos os avisos, precauções, instruções
e isenções de responsabilidade legal e assegurar-se do seu cumprimento.
Важное примечание
До того, как пользоваться устройством, вам необходимо прочитать и понять все предупреждения,
предостережения и юридические ограничения ответственности и следовать им.
Viktig information
Innan du använder enheten måste du läsa, förstå och följa alla anvisningar, varningar, försiktighetsåtgärder och
ansvarsfriskrivningar.
Önemli not
Cihazı çalıştırmadan önce tüm talimatları, uyarıları, ikazları ve yasal açıklamaları okumalı, anlamalı ve bunlara
uymalısınız.
重要注意事项
在操作设备之前,您必须阅读、理解并遵循所有说明、警告、注意事项和法律免责声明。
重要注意事項
操作裝置之前,您務必閱讀、了解並遵循所有說明、警告、注意事項與法律免責聲明。
Page 5

Getting started
FLIR A6xx series
#T810153; r. AA/34081/34081; mul
Page 6

Page 7

Table of contents
1 List of contents . . . . . .. . .. . . . . . . .. . .. . . . . . . .. . .. . . . . . . . . . .. . .. . . . . . . .. . .. . . . . . . . 1
2 Illustrations .. . . .. . .. . . . . . . .. . .. . . . . . . .. . .. . . . . . . .. . .. . . . . . . .. . .. . . . .. . .. . .. . . . . 2
3 EN-US English ... . .. . . . .. . .. . .. . . . .. . .. . .. . . . .. . .. . .. . . . .. . .. . .. . . . .. . .. . . . . . . . 4
#T810153; r. AA/34081/34081; mul vii
Page 8

Page 9

1 List of contents
• Infrared camera with lens
• Ethernet cable
• FLIR ResearchIR Max
• Hard transport case or cardboard box
• Mains cable
• Power cable, pig-tailed
• Power supply
• Printed documentation
• ThermoVision System Tools & Utilities CD-ROM
• USB cable
1
Note FLIR Systems reserves the right to discontinue models, parts or accessories, and other items, or to change specifications at any time without prior notice.
1
2
1. The inclusion of this item is dependent on model.
2. The inclusion of this item is dependent on model. FLIR IR Monitor on the CD-ROM only supports FLIR
A310 cameras.
#T810153; r. AA/34081/34081; mul 1
Page 10

2 Illustrations
Note Explanations of the illustrations are provided in each language section.
Figure 2.1 Connectors
Figure 2.2 Typical system overview, FLIR A6xx series
#T810153; r. AA/34081/34081; mul 2
Page 11

2 Illustrations
Figure 2.3 Typical system overview, FLIR A6xx sc series
#T810153; r. AA/34081/34081; mul 3
Page 12

3 EN-US English
3.1 Thank you!
Thank you for choosing a product from FLIR Systems. We hope that the product
will meet your expectations and that you will consider us again for your future
needs.
3.2 Read the manual before use
Go to the following website to read or download the
manual:
http://support.flir.com/resources/6kb4
3.3 Register your product now
Be the first to receive advance notice on new product updates, software upgrades, and special offers.
Go to the following website to register your product:
http://www.flir.com/thg/register
3.4 Download FLIR Tools
FLIR Tools lets you quickly create professional inspection reports that clearly
show decision makers what you’ve found with your IR camera.
Import, analyze, and fine-tune images easily. Then incorporate them into concise
documents to share findings and justify repairs.
Go to the following website to download FLIR Tools:
http://support.flir.com/tools
#T810153; r. AA/34081/34081; mul 4
Page 13

3 EN-US English
3.5 Quick start guide, FLIR A6xx series
Follow this procedure:
1. Connect the power and Ethernet cables to the camera.
2. Connect the power cable to a power supply.
3. Connect the camera to the network, using the Ethernet cable.
4. Use FLIR IP Config to identify the unit in the network and set the IP address
if necessary. Download FLIR IP Config from http://tinyurl.com/o5wudd7.
5. Use FLIR Tools to set up and control the camera. For more information, see
section 3.4 Download FLIR Tools, page 4.
3.6 Quick start guide, FLIR A6xx sc series
Follow this procedure:
1. Go to http://support.flir.com/rir4 and download FLIR ResearchIR Max.
2. Install FLIR ResearchIR Max.
3. Start FLIR ResearchIR Max.
When asked for the license key, enter the license key that is printed on the
FLIR ResearchIR Max download card. The card is included with your
camera.
4. Connect the camera to the computer using the provided Ethernet cable.
5. Start the camera. This displays a start-up dialog box in FLIR ResearchIR
Max. If the start-up dialog box is not displayed, go to View > Startup Dialog.
6. In the start-up dialog box, click the camera you want to connect to.
For more information about the installation and connection processes, see the
FLIR ResearchIR Max manual.
3.7 Connectors
See Figure 2.1 Connectors, page 2.
1. Network cable with an RJ45 connector for Ethernet connectivity and Power
over Ethernet (PoE) (dependent on the camera model).
Note Only CAT-6 Ethernet cables should be used with this camera.
2. Power cable for 12–24 V DC power in.
Note The power connector on the camera is polarity protected.
3. USB cable with a USB mini-B connector for control and image transfer.
4. Digital I/O ports, opto-isolated (six-pole screw terminal).
#T810153; r. AA/34081/34081; mul 5
Page 14

3 EN-US English
A. Hardware reset button (for a factory default reset).
Use a straightened paper clip or a similar tool to press the reset button
through the small hole on the back of the camera for 5 seconds, then release
the button.
B. Power indicator.
3.8 Typical system overview, FLIR A6xx series
See Figure 2.2 Typical system overview, FLIR A6xx series, page 2.
1. Computer.
2. CAT-6 Ethernet cable with RJ45 connectors.
3. Industrial Ethernet switches with fiber-optic ports.
4. Fiber-optic cable.
5. FLIR A6xx cameras.
6. Industrial process to be monitored, e.g., items on a conveyor belt.
3.9 Typical system overview, FLIR A6xx sc series
See Figure 2.3 Typical system overview, FLIR A6xx sc series, page 3.
1. PC running FLIR ResearchIR Max (a download card with a printed license
key is included with the camera).
2. Gigabit Ethernet connection to a PC.
3. Alternative USB connection to a PC (lower frame rate).
4. Allowed range: 10–30 V DC, 24 W absolute max.
5. Digital I/O connector (screw terminals).
3.10 Training
Let the Infrared Training Center help you maximize your investment in thermal
imaging:
www.infraredtraining.com info_us@infraredtraining.com
www.irtraining.eu info@irtraining.eu
www.irtraining.com itc@flir.se
#T810153; r. AA/34081/34081; mul 6
Page 15

3 EN-US English
3.11 Customer support
Do not hesitate to contact our Customer Support Center at http://support.flir.com
if you experience problems or have any questions about your product.
#T810153; r. AA/34081/34081; mul 7
Page 16

A note on the technical production of this publication
This publication was produced using XML — the eXtensible Markup Language.
For more information about XML, please visit http://www.w3.org/XML/
A note on the typeface used in this publication
This publication was typeset using Linotype Helvetica™ World. Helvetica™ was
designed by Max Miedinger (1910–1980)
LOEF (List Of Effective Files)
T501209.xml; mul; AA; 34081; 2016-03-07
T505924.xml; en-US; 34071; 2016-03-07
T505919.xml; en-US; 33517; 2016-02-18
T505918.xml; en-US; AA; 34079; 2016-03-07
#T810153; r. AA/34081/34081; mul 8
Page 17

Page 18

Website
last page
http://www.flir.com
Customer support
http://support.flir.com
Copyright
© 2016, FLIR Systems, Inc. All rights reserved worldwide.
Disclaimer
Specifications subject to change without further notice. Models and accessories
subject to regional market considerations. License procedures may apply.
Products described herein may be subject to US Export Regulations. Please
refer to exportquestions@flir.com with any questions.
Publ. No.: T810153
Release: AA
Commit: 34081
Head: 34081
Language: mul
Modified: 2016-03-07
Formatted: 2016-03-07
Aufgrund laufender Weiterentwicklungen sind Änderungen der Spezikationen vorbehalten. Alle Angaben vorbehaltlich Satz- und Druckfehler.
nbn Austria GmbH
nbn @ nbn. at | www. nbn. atTel. +43 316 40 28 05 | Fax +43 316 40 25 06 Riesstraße 146, 8010 Graz
 Loading...