

Page 1
Fitbit Tracker Product Manual
Getting Started(#start)
Setting up Your Fitbit Tracker(#start-
setup)
Using Your Fitbit
Tracker(#tracker)
Using the Desktop
Client(#client)
Using the Website(#site)
Support(#support-help)
Statements(#statements)
Getting Started
Installing the Software
1. Navigate to www.fitbit.com/start(http://www.fitbit.com/start) and download the latest
software for your OS.
2. Run the installation file and follow onscreen instructions.
3. After installation, you will be taken to the account setup screen.
Setting up Your Fitbit Tracker
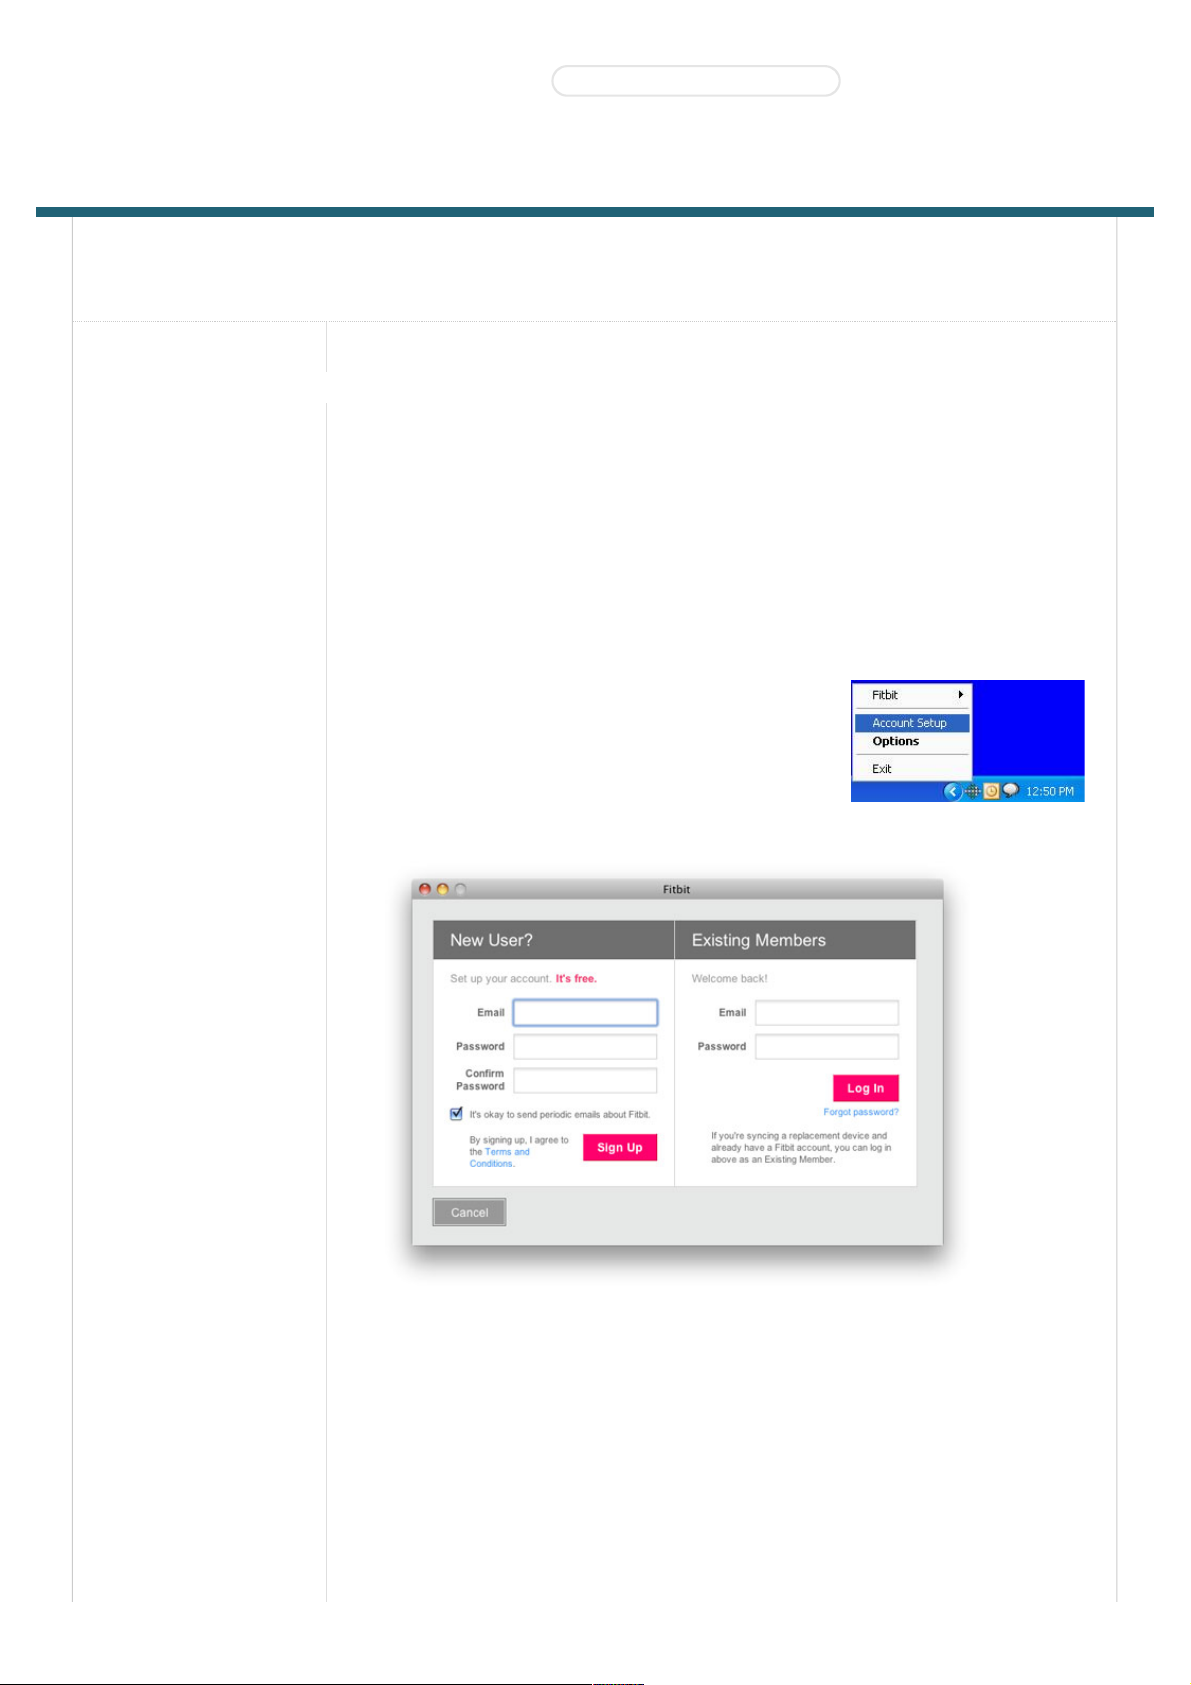
1. If you just installed the software, you will be taken to the
account setup screen. Otherwise, right-click on the Fitbit
Service Manager icon in the system tray application and
choose Account Setup (Windows) or double click on the Fitbit
application in the Applications folder (Mac).
2. On the first screen, create a new account or log in to your existing account.
3. The next screen will let you enter your personal information on your account. This information will
help the Tracker's accuracy when calculating the distance traveled and calories burned.
Installing the Software(#start-install)
Products(http://www.fitbit.com/p ro duct) STORE(HTTP://WWW.FITBIT.COM/STORE) Buzz(h ttp://www.fi tbit.co m/buz z)
Social(#)
Log in (https://w ww .fitbit.com/login)•Get Started (https://w ww .fitbit.com/setup)
Page 2
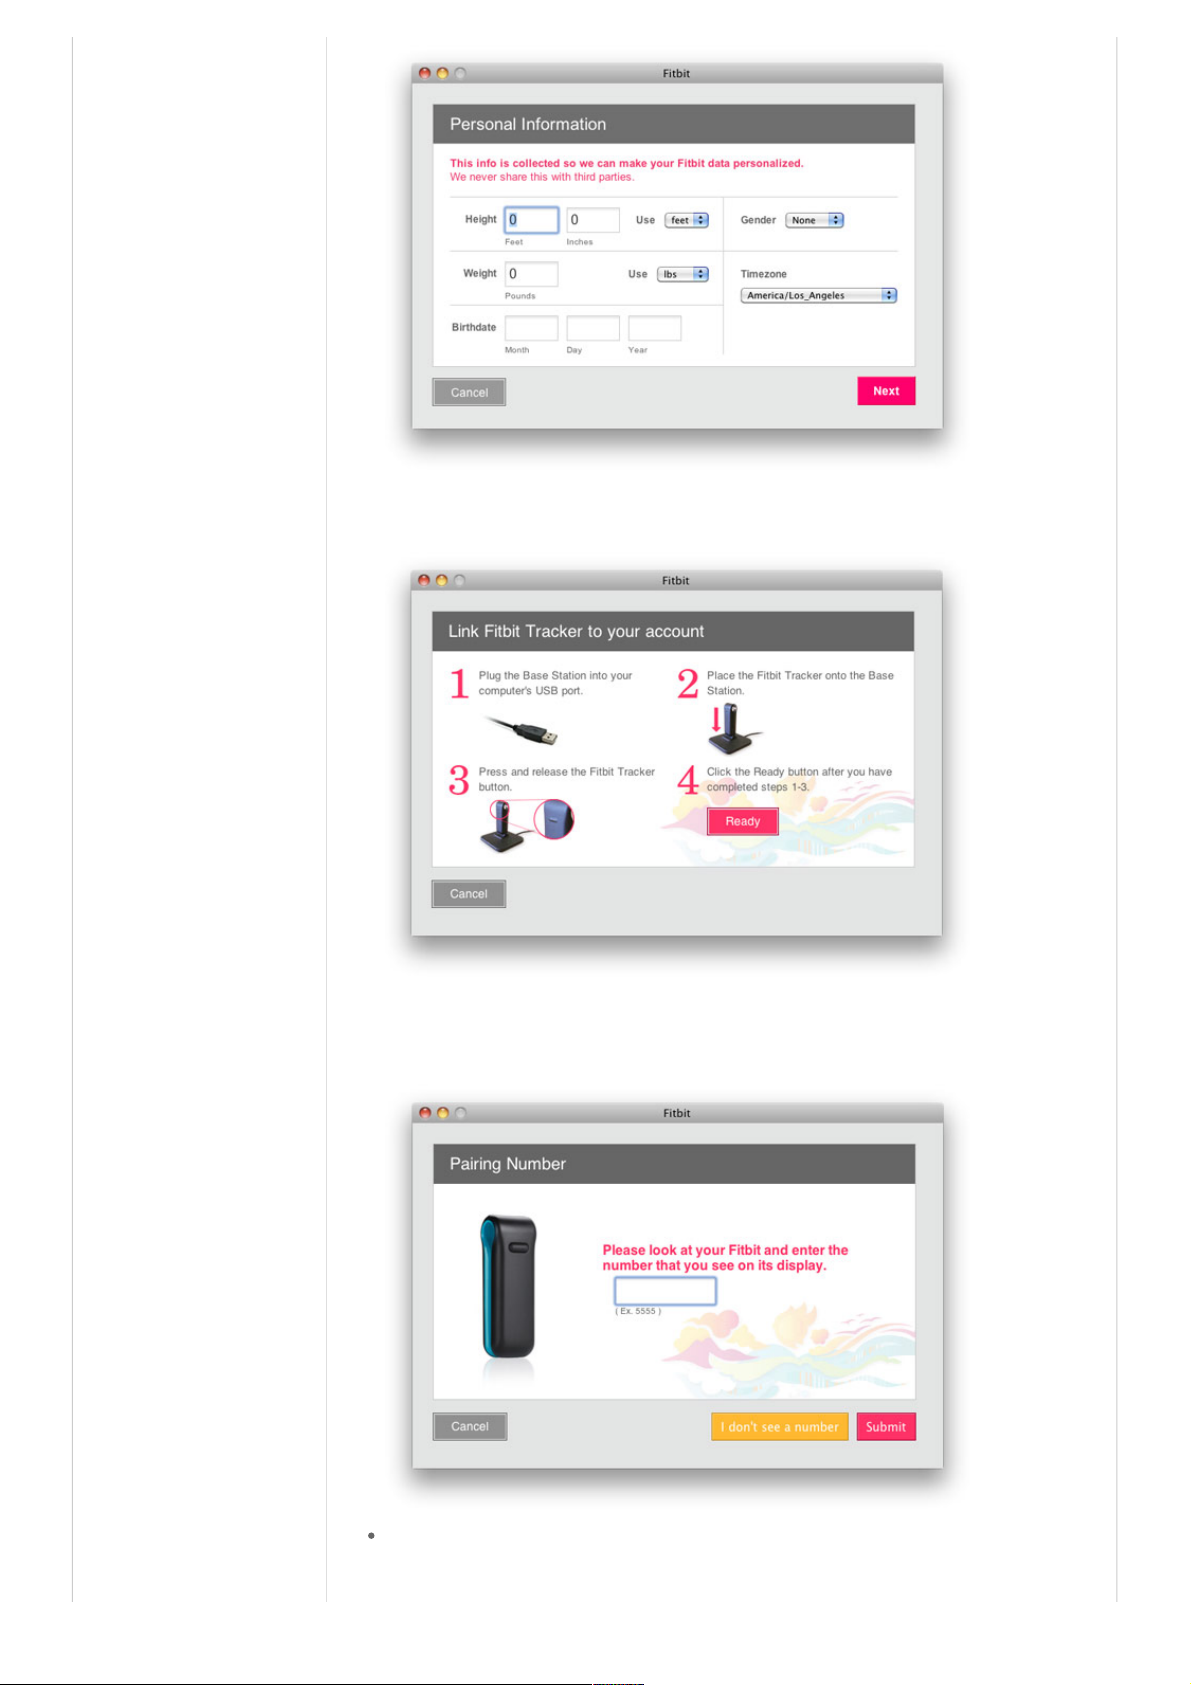
4. The next screen informs you that it is time to plug in the base station, place your Tracker on the
base station, and press the button on the Tracker.
5. Finally, the Tracker will show a number for you to type in. This makes sure that the Tracker you are
looking at is the Tracker that the software is communicating with. After entering this number, setup
is complete.
Multiple Trackers can be used in the same household. To set up another Tracker, merely proceed
from Account Setup. You do not have to redownload the Fitbit software.
Page 3
Multiple Trackers can be used with the same base station, or many base stations.
Using Your Fitbit Tracker
Charging
To charge, place the Tracker on any powered base station. For charging purposes only, the base
station can be plugged into any USB power source including (but not limited to):
A computer, whether the software is installed or not
A Wall A/C to USB adapter, commonly found with smartphones
A DC to USB adapter (vehicle power port)
It takes about one to two hours to go from empty to a full charge. You can charge more frequently
for shorter time periods for your battery to never hit empty.
A full battery will last a minimum of 3 days, but will typically last 5-7 days.
While on the charger, pushing the Tracker's button will display the battery indicator.
A battery indicator is also displayed on the website dashboard near your picture.
When the battery gets low, the Tracker will enter a power saving mode. You will see an empty
battery icon when you push the button. After several presses to the button, the display will stop
turning on to save the battery. Please charge your Tracker as soon as possible. The Tracker will
continue to collect data until it enters full shutdown mode.
To turn off your Tracker (other than draining the battery completely), place it on an unplugged base
station and press the reset button (found at the bottom of the base station).
To turn on your Tracker, place it on a plugged in base station.
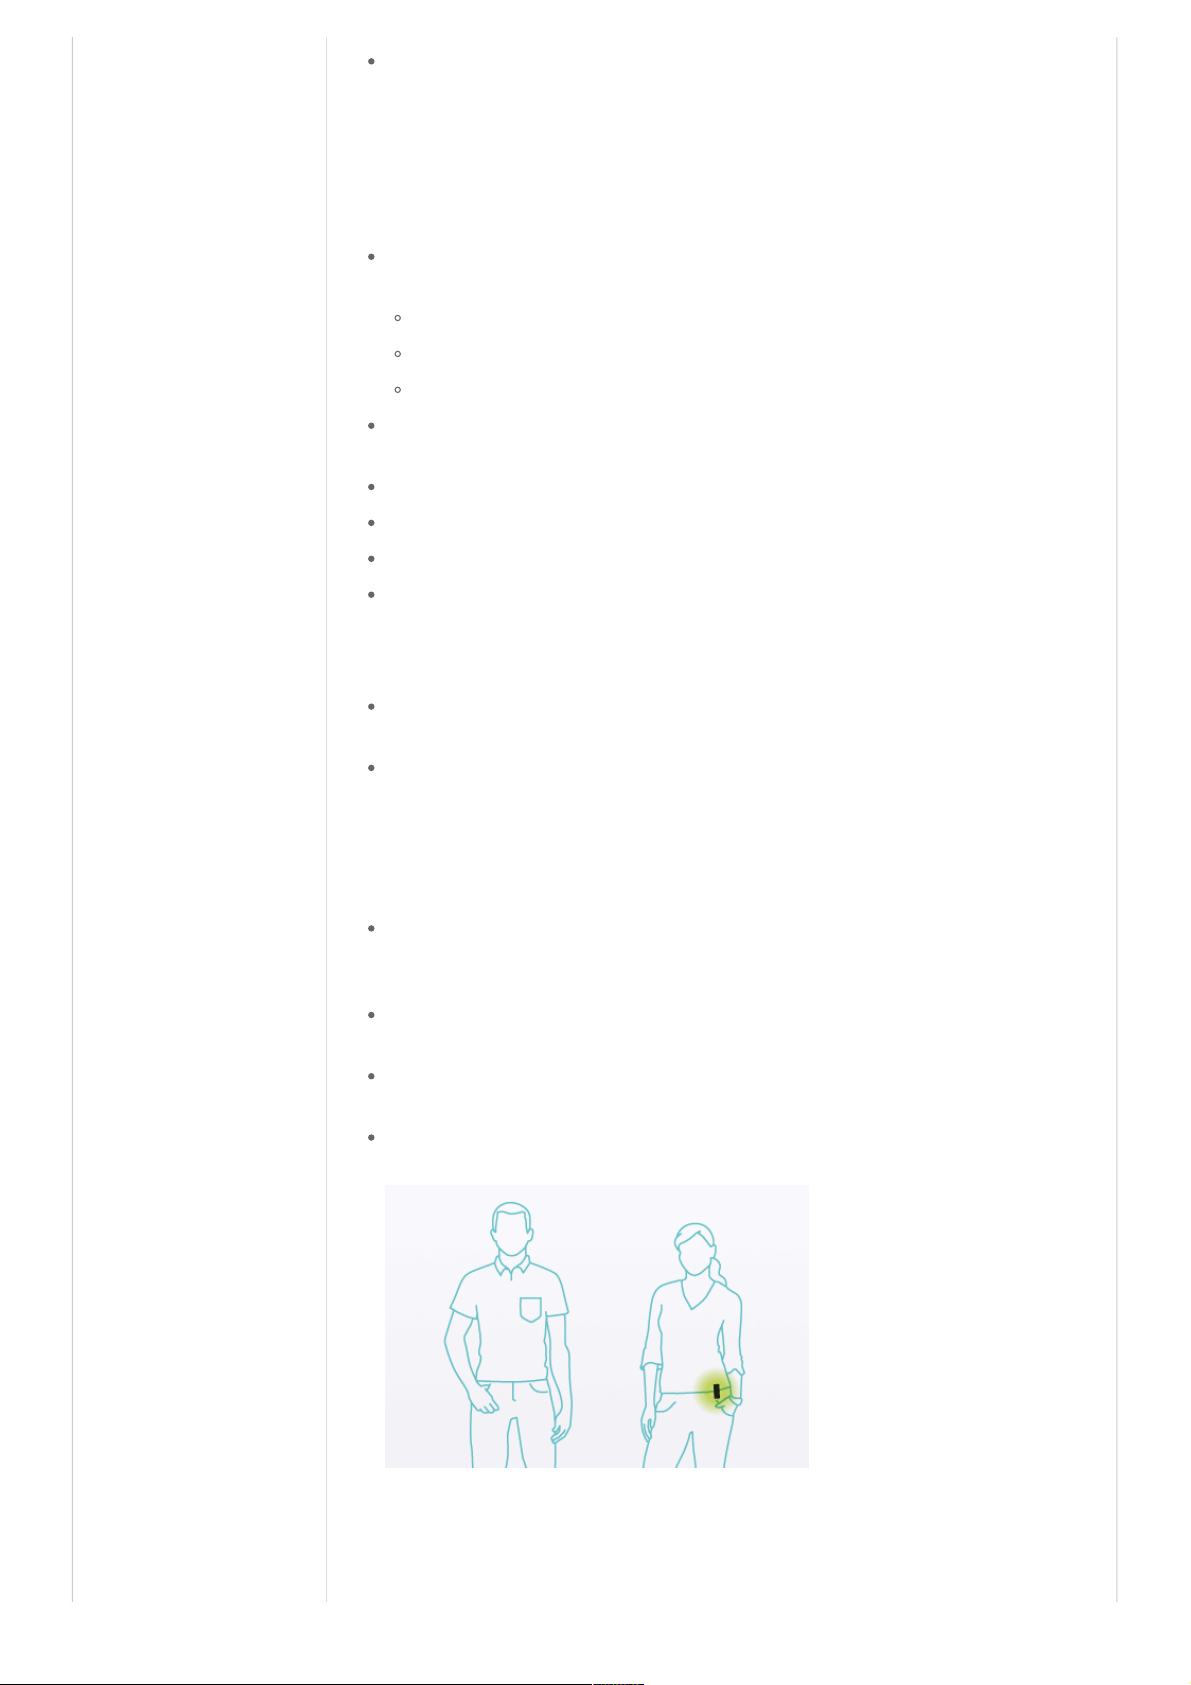
Wearing the Tracker
The Tracker is best worn on your torso. This can include your waist or chest. You can also clip it to
undergarments. You might have to try different locations to see what works the best for you in
terms of accuracy.
The Tracker can be worn in the pocket for more convenience, but the steps and calorie counts will
be slightly less accurate.
Use the provided belt clip for thick belts and other thick clothing to prevent overextending your
Tracker.
The Tracker is water resistant, but not waterproof. Do not wear your Tracker during activities when
it might get wet.
The Display
Page 4
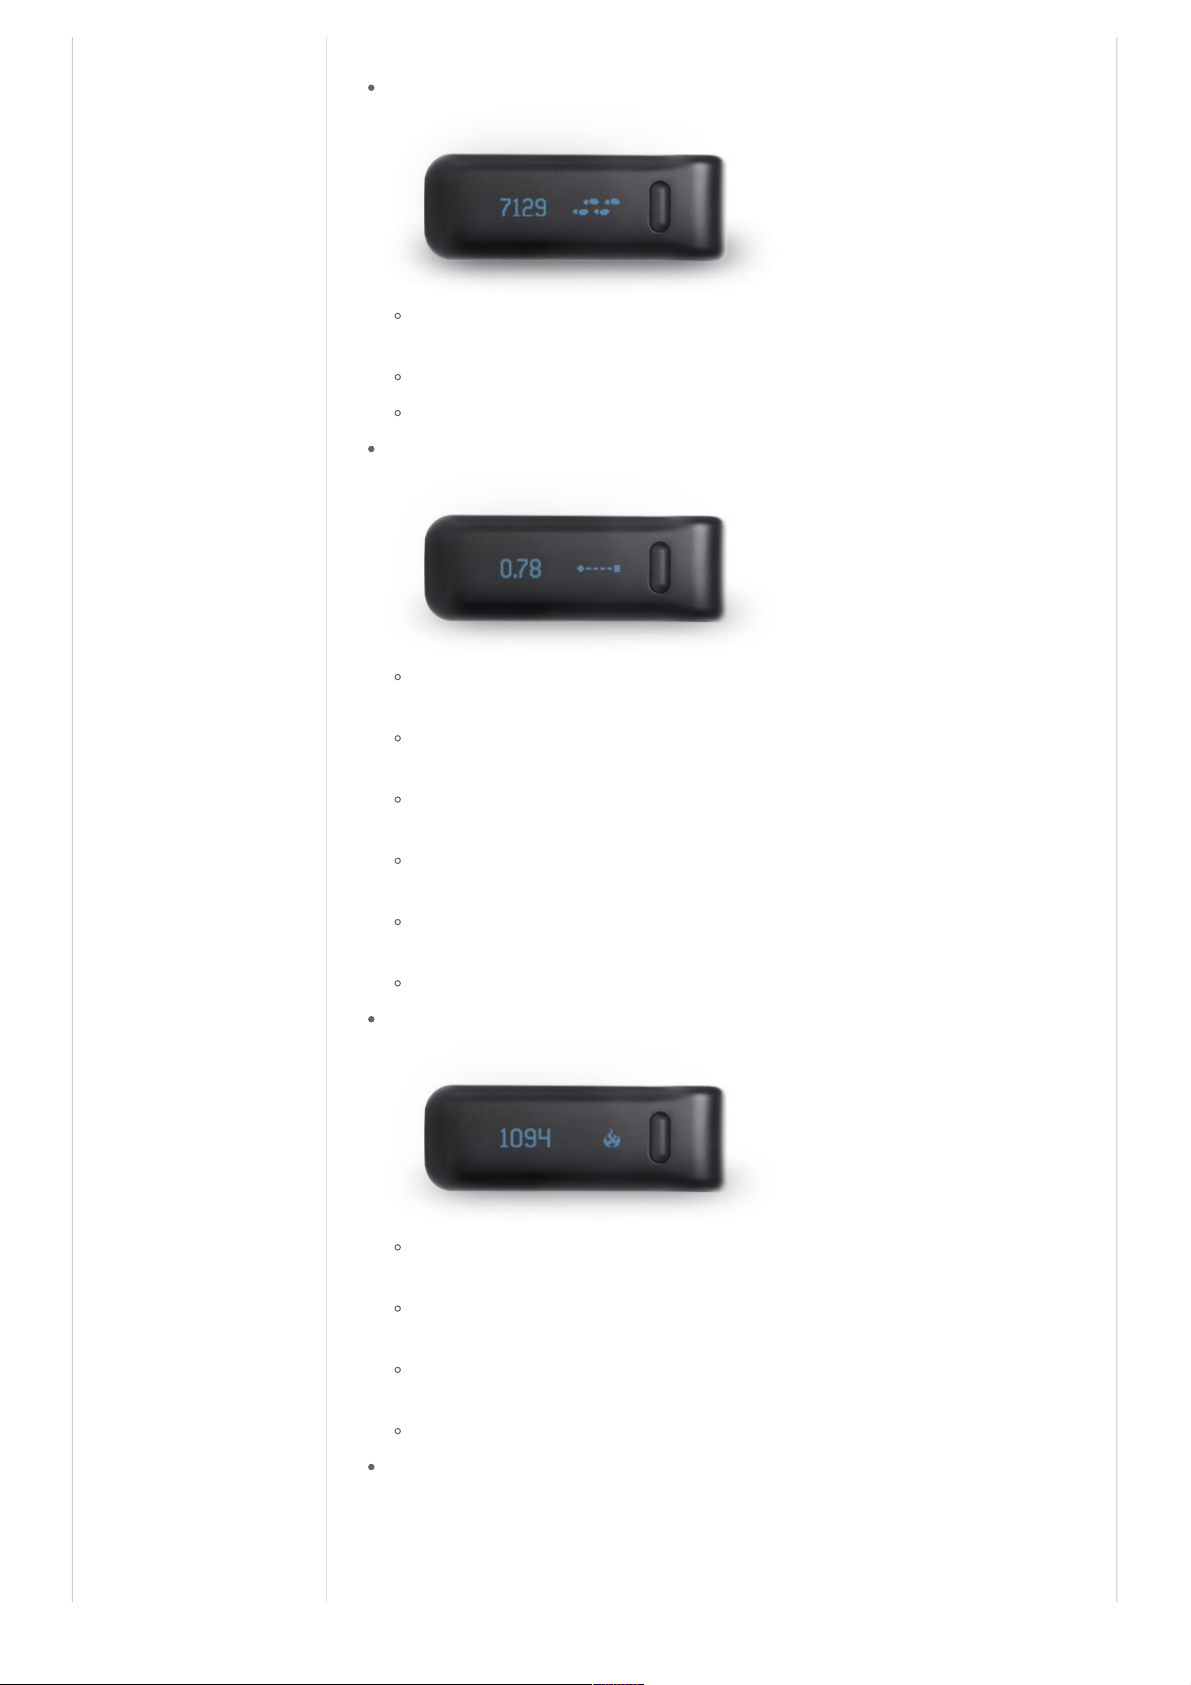
Pushing the Tracker's button will cycle the display to show you:
Steps
The steps displayed are the total since midnight, or since you started a recording (see
Recordings).
Walking and running steps are displayed as one combined total.
The steps recorded by your Tracker should be roughly 95-97% accurate.
Distance
Distance is calculated based on your walking steps times your walking stride length plus your
running steps times your running stride length.
Running steps are determined based on the frequency and intensity of your steps, so some fast
paced walks might be counted as running steps. This will only affect the distance calculation.
The default stride length is based on your gender and height and should be fairly accurate.
Generally speaking, it's better to use the defaults than to incorrectly calculate your stride length.
For better accuracy on distance calculations, calculate and enter your stride length in your
profile settings (see Calculating Stride).
The displayed distance can be toggled between miles and kilometers by changing your height in
your profile from feet and inches to centimeters.
The distance display can be disabled on Fitbit Ultra Trackers from the setup screen.
Calories
The Tracker records calories burned based on your activities throughout the day and your Basal
Metabolic Rate (see BMR).
When you manually log an activity on Fitbit.com, the calorie burn associated with it will be
added to your Tracker when you next sync.
The total displayed is how many calories you have burned since midnight, or since you started a
recording (see Recordings).
The calories display can be disabled on Fitbit Ultra from the setup screen.
Flower
Page 5
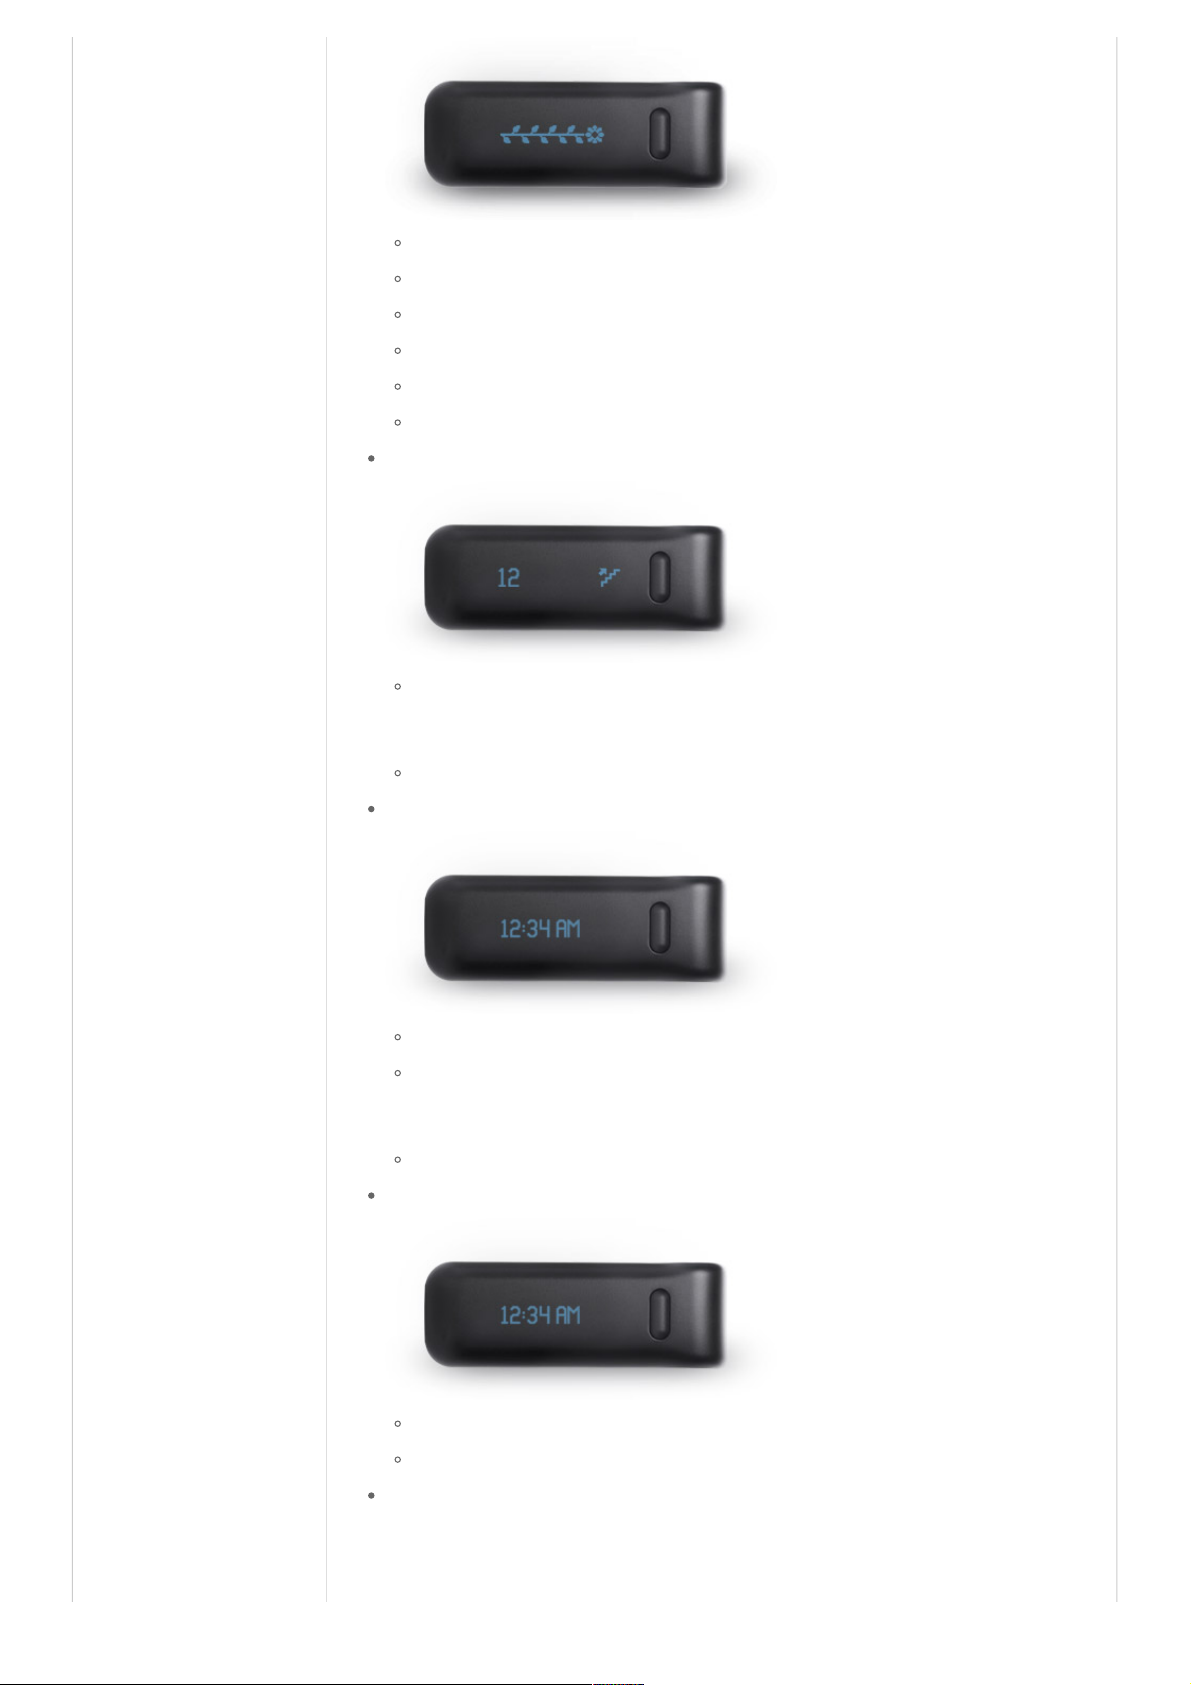
The flower grows and shrinks based on your activity level throughout the day.
It is a graphical representation of your activity over the past 3 hours.
Keep moving to grow your flower and keep it grown.
There are 11 leaves on a fully grown flower.
It will adapt as you become fit, so you will find it harder and harder to fully grow your flower.
The flower display can be disabled on Fitbit Ultra from the setup screen.
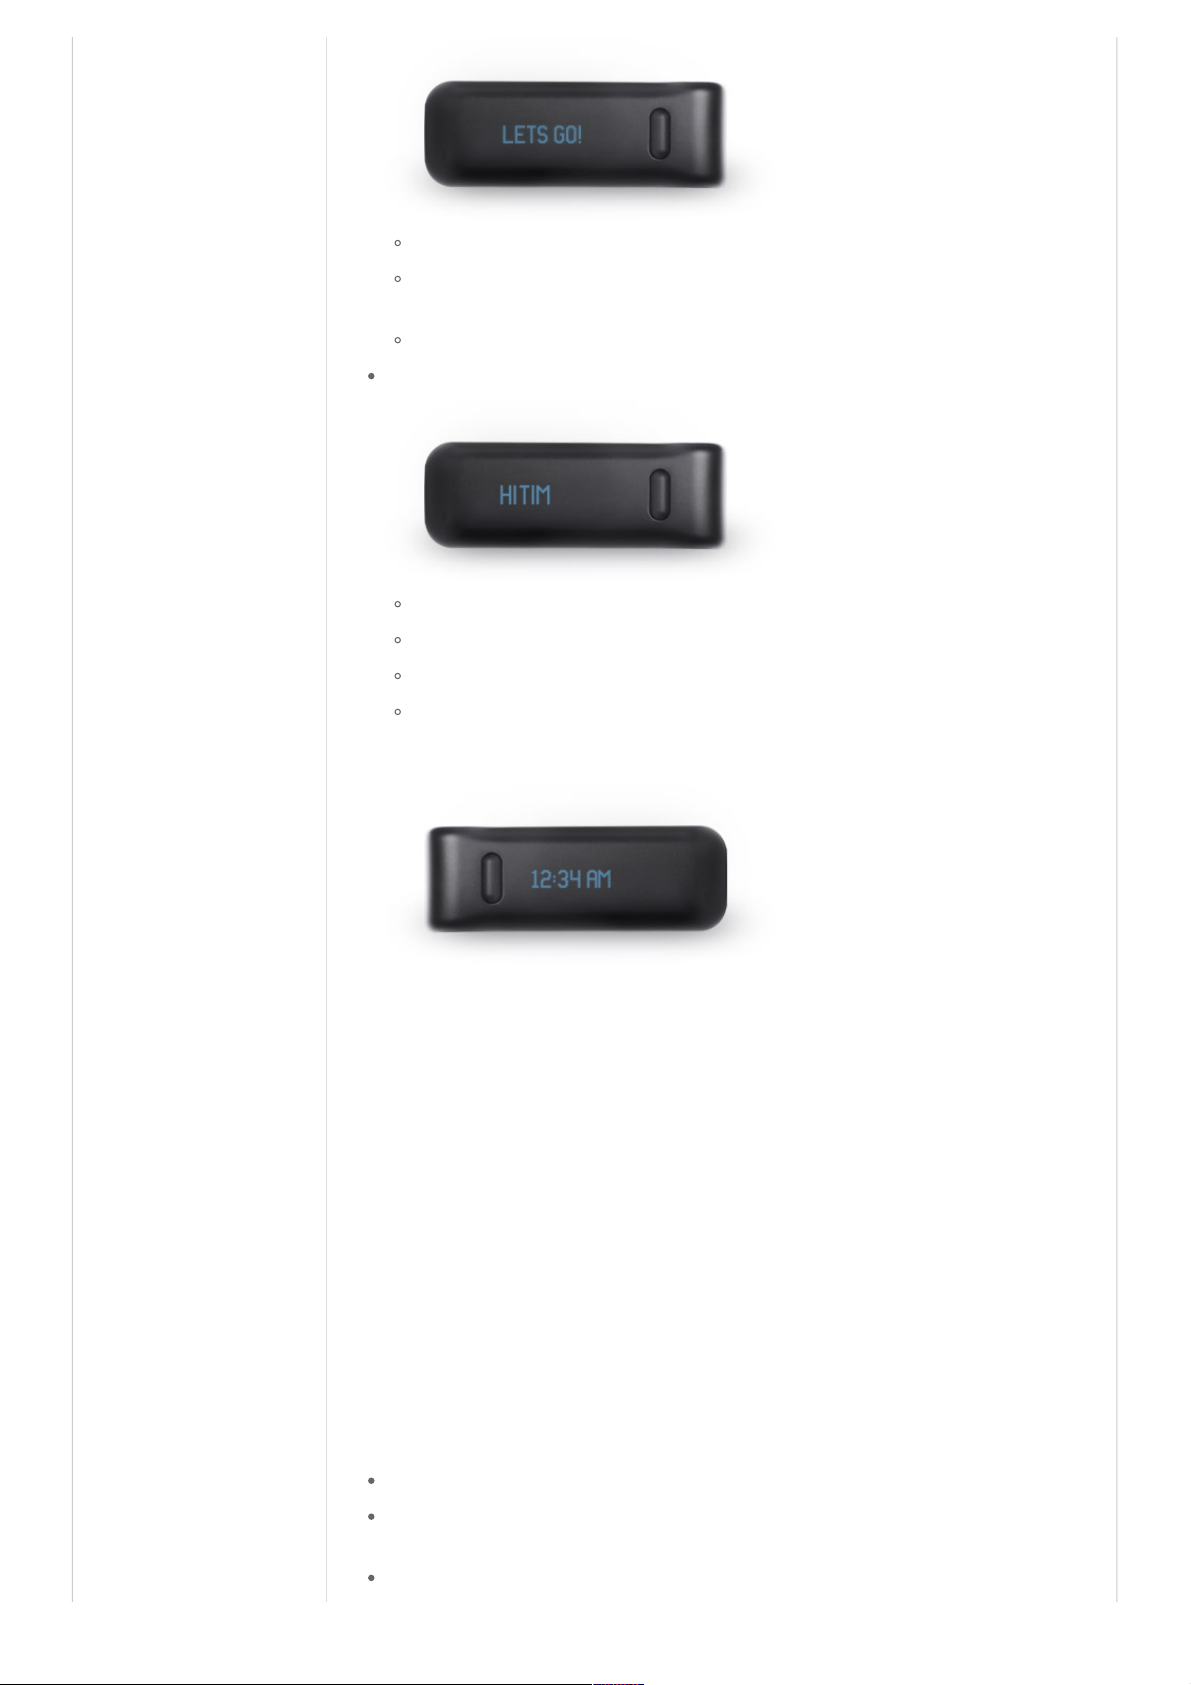
Floors (Fitbit Ultra only)
The floors displayed is a representation of the height you've climbed from walking up stairs and
hills. Escalators will count if you are actually walking up (doing the work), but stair exercise
machines will not (no actual elevation gain).
The floors display can be disabled from the Fitbit Ultra setup screen.
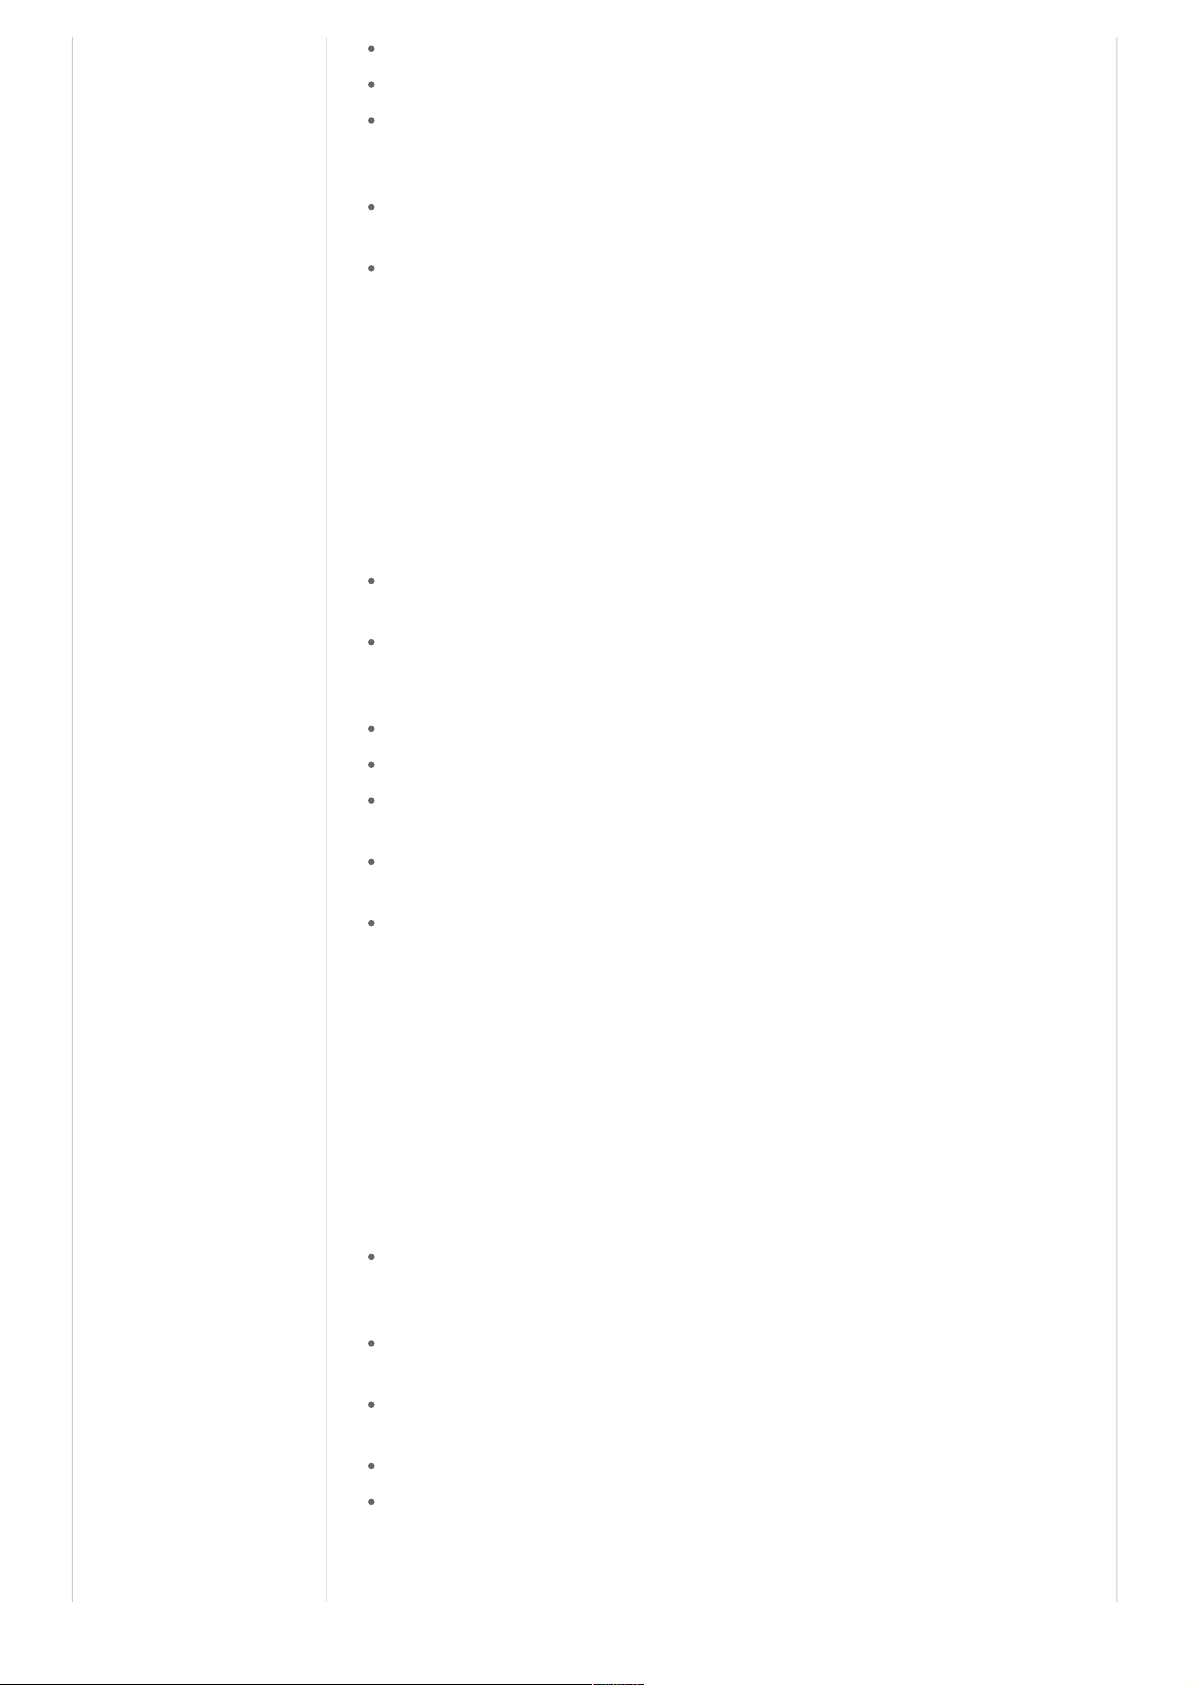
Clock/Time (Fitbit Ultra only)
The current time can be viewed on the Fitbit Ultra's display.
The time can be displayed in 12 hour format (e.g., 5:00 PM) or 24 hour format (e.g., 17:00).
You can adjust this setting on the Edit Profile page, which affects the displayed time on the
Fitbit Ultra, graphs, and input fields across the site.
The clock display can be disabled from the Fitbit Ultra setup screen.
Stopwatch (Fitbit Ultra only)
When in recording mode, a stopwatch is available as a display.
The time shown is the elapsed time since the start of the recording.
Chatter (Fitbit Ultra only)
Page 6
Each time you pick up your Fitbit Ultra, words of encouragement are displayed.
Three words or phrases are stored on the Fitbit Ultra and are updated randomly each time you
sync.
The Chatter display can be disabled from the Fitbit Ultra setup screen.
Greeting (Fitbit Ultra only)
A greeting can be displayed each time you pick up your Fitbit Ultra.
The greeting is displayed after the chatter message if that feature is enabled.
Greetings can be 8 characters long containing numbers, letters, and many special characters.
The Greeting can be set, updated, or disabled on the Fitbit Ultra setup screen.
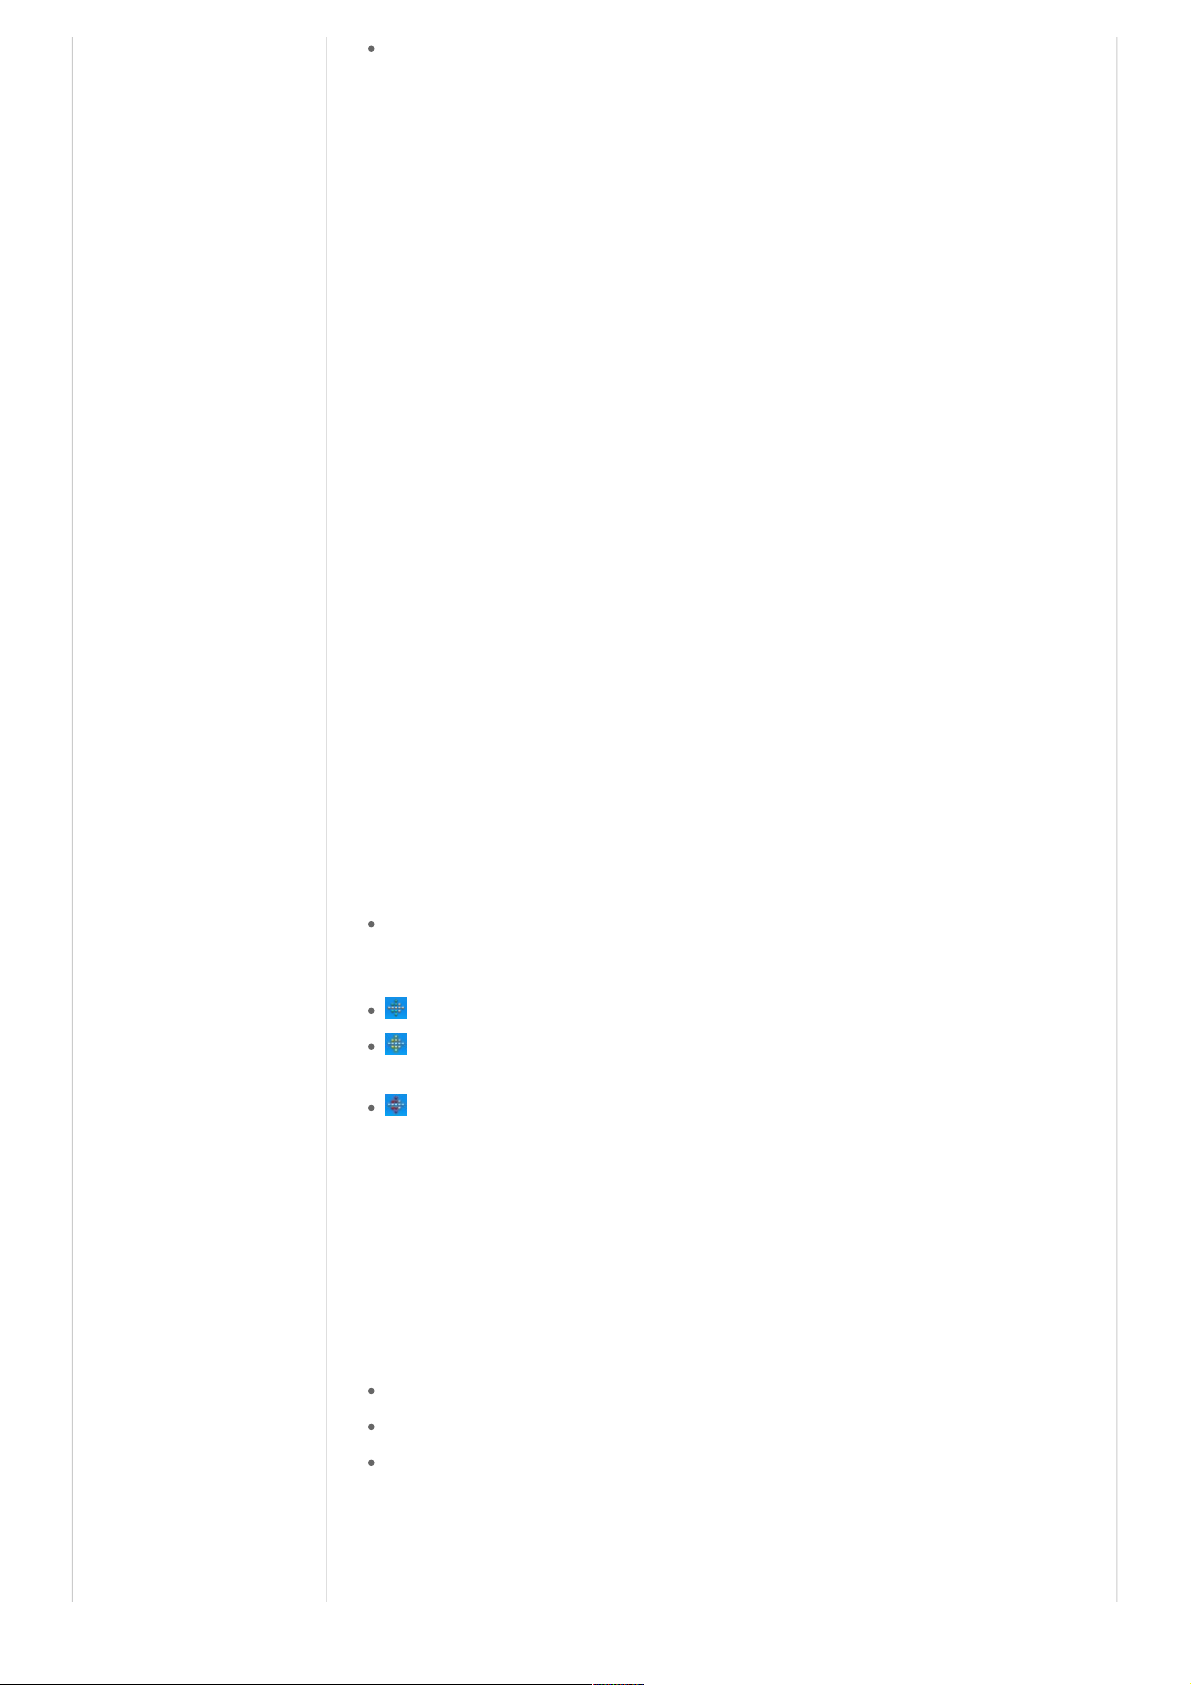
Lefty Mode
Fitbit Ultra Trackers can be displayed in Lefty mode which is enabled on the Fitbit Ultra setup screen.
Lefty mode is where the display gets flipped upside down so that to read it, the button is on the left
(pushed with the left hand).
Beginner Mode
Beginner mode displays the words before displaying the value with the icon (e.g.,Steps is displayed
before "7482" and the steps icon). After the display has cycled through each screen 5 times, beginner
mode will end and you will be in normal operating mode. In normal mode, the value and icon is
displayed immediately for faster viewing. Any time your Tracker is reset, it will enter beginner mode.
This will happen if you manually reset your Tracker (see Resetting Tracker), upgrade the firmware (see
Upgrading Firmware) or the battery goes completely dead and the Tracker is powered back on when
you place it on the base station. To exit beginner mode, simply press the button 20 times (which will
cycle between steps, distance, calories, and the flower five times each).
Recordings
A recording is similar to the trip mode on the odometer in your car.
To start a recording, hold the button down for 2+ seconds until you see the word Start. With Fitbit
Ultra, you will instead see a stopwatch start.
When in recording mode, the display icons will blink indicating that you are in recording mode.
Page 7
The displayed stats will be the total since you started the recording.
To exit recording mode, hold the button down for 2+ seconds until you see the word Stop.
The next time your Tracker syncs, the recording will display on your activities page along with
additional stats such as pace, duration of the recording, a graph of your speed, and more (see
Activity/Recordings).
Recordings do not affect your data (how it is tracked or analyzed). It merely brings greater visibility
to that time frame.
During recording mode, Fitbit Ultra Trackers will display a stopwatch showing the elapsed time
since the beginning of the recording.
An example of a recording would be to track your morning run. If you put your Tracker in activity
mode at the beginning of your run, you can check the display to see your stats since the start of the
activity. The icons will be flashing, confirming that you are in recording mode. At the end of the run,
hold the button down for 2+ seconds again until you see Stop and the numbers displayed will again
be the total since midnight.
Tracking Sleep
To track your sleep, place the Tracker completely into the slot on the provided wristband and wrap
the wristband around your non-dominant wrist (i.e. if you are right handed, use your left wrist).
Once you are in bed and ready to sleep (not reading a book or watching TV, but actually trying to
fall asleep), press and hold the button for 2+ seconds. You should see Start indicating that you are
in sleep/recording mode. With Fitbit Ultra, you will instead see a stopwatch start.
If you check the display, the icons will blink indicating that you are in sleep/recording mode.
When you wake up, press and hold the button for 2+ seconds to Stop sleep mode.
Sleep mode also displays your steps, miles, and calories since you entered sleep mode. Once you exit
sleep mode, you will resume seeing your daily total.
After your Fitbit syncs, the sleep will appear on your dashboard and sleep page on the website. It
will appear on the day that you woke up (recording last night's sleep shows up on today's page).
If you forgot to Start and Stop your Tracker, you can enter the times manually on the Track My
Sleep page.
Note: The steps to track your sleep are the same as making a recording. Once your Tracker syncs, the
site will determine if you were trying to record an activity or a sleep and will analyze the recording
accordingly. Provided you are not starting and stopping the Tracker for an activity like reading a book,
watching TV, or another sedentary activity, the Fitbit website will categorize your activity or sleep
correctly.
Syncing Your Data
The Tracker will upload your data every 15 minutes provided you are within range of any plugged in
base station (about 15 feet for direct line of sight), the computer is on and not in sleep or hibernate
mode, the software is installed and running, and you have an active internet connection.
While out of range, the Tracker will look for a base station every minute until it syncs your data,
after which it will wait 15 minutes before searching again.
You can see when the last successful sync occurred by viewing your main page at www.fitbit.com.
Near your profile picture, you will see Synced with a time and date of your last sync.
If you want to force the Tracker to upload its data, place the Tracker on the base station.
While we recommend you sync your data regularly, the Tracker has the ability to store 7 days' worth
of detailed, minute by minute data. It will store summary data (calories, distance, and steps) for the
trailing 30 days. If you wait longer than 7 days before syncing, you will not see your minute by
minute graphs (except on the most recent 7 days).
Page 8
Your Tracker is able to sync from multiple computers, as long as each computer has the Fitbit
software installed and a working base station is plugged in.
Upgrading the Firmware
Windows
1. Right-click on the diamond Fitbit icon in the system tray at the bottom right corner of your screen
(you may have to click the < to see hidden icons).
2. Select Fitbit -> About…
3. On the bottom left corner of the About screen, click on Upgrade Firmware.
4. Follow the onscreen instructions, taking care not to remove the Tracker from the base station until
the process completes.
Mac
1. Open a Finder window.
2. Navigate to Applications > Utilities.
3. Double-click on the Terminal application to open it. A terminal window appears.
4. Now enter: FB_OPEN_MODE="userFirmwareUpdate"
/Applications/Fitbit.app/Contents/MacOS/Fitbit
5. The Fitbit application will launch and upgrade your firmware.
6. Do not close the terminal window until after you have quit the Fitbit application.
Using the Desktop Client
The Fitbit Service Manager - System Tray Application (Windows Only)
The tray application provides a visual indication that your base station is plugged in and the Fitbit
Data Uploader service is running. It also launches the Account Setup screen used to link a Tracker
to a new or current account and to upgrade the firmware.
The Fitbit Data Uploader service is running and the base station is plugged in.
The Fitbit Data Uploader service is not running. The easiest way to restart the service is to
reboot your computer.
The base station is unplugged. Check the wiring and try unplugging and replugging the base
station's USB cord.
Note: Launching the Fitbit application by going to Start -> All Programs -> Fitbit -> Fitbit starts
the system tray application. All functions of the installed software are accessed through the system tray
icon.
The Fitbit Data Uploader - Service
This service syncs all your data with the website.
By default, the service will start when you log in to your computer.
Firewall settings (usually those found in a business environment) may prevent the software from
communicating with the website, in which case no sync can take place.
Page 9
Upgrading the Desktop Client
Windows
Right-click on the tray icon and choose Fitbit > Check for update
Mac
Please go to http://www.fitbit.com/start(http://www.fitbit.com/start) to check whether
there is a new version.
Using the Website
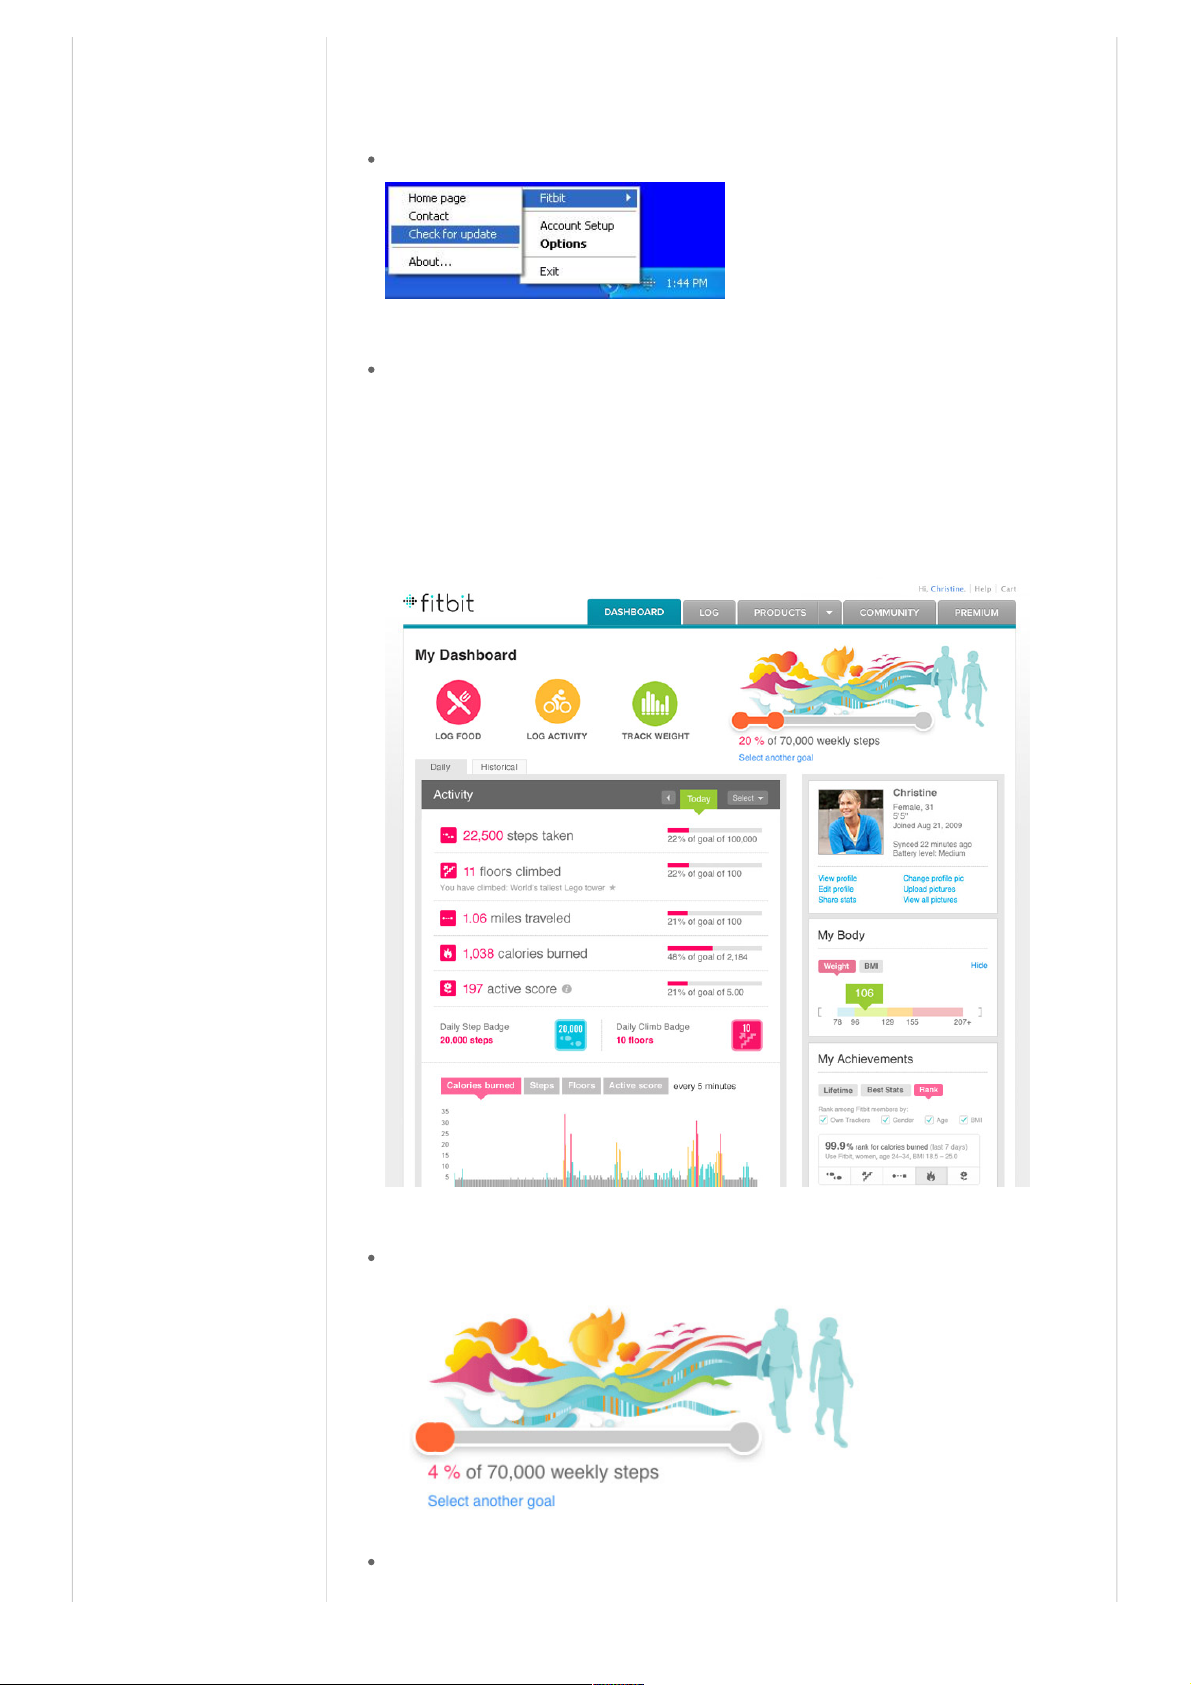
Home - The Dashboard
Header Section
Your weekly goals can be customized by clicking on the Select another goal link.
Before you can view a weight goal as your weekly goal to display, you must first navigate to the
Track My Weight page and set an initial goal.
Page 10

Activity Section
Click on the progress bars on the right to adjust your daily goals (available for Today date only).
Your activity section shows your number of steps taken, distance traveled, calories burned, active
score, daily badges earned, and whether you have any recordings. Fitbit Ultra users will also see
how many floors they've climbed here.
The floors climbed data does not show your elevation. Rather, it shows the elevation you've climbed
throughout the day in terms of floors without adding in your starting elevation or negating downhill
movement.
Each floor represents about 10 feet of elevation gain. You can expect office buildings to have larger
heights per floor and some residential buildings to have smaller heights.
You do not have to be walking up stairs for your Fitbit Ultra to calculate floors climbed. It will also
count walking up hills.
Regardless of the height of floors in the building you're in, you will receive credit for one floor for
every 10 feet you climb.
Floors climbed is based on an altimeter to gauge your elevation, rather than GPS. It will generally be
more accurate than a GPS device.
Page 11

If your distance traveled appears off, you can adjust your stride length in the Edit profile page (see
Calculating Stride).
For a description of your Active Score, just hover your mouse over the asterisk (*) on your
dashboard. You will see a tool tip with our definition of Active Score.
The active score captures how active you were compared to if you were completely sedentary all
day. Your score will be 0 if you were sedentary, and typically a 3-digit number if you were active.
You may prefer the active score over calories burned, because the active score just captures your
level of activity and is not dependent on your height and weight, as calories burned is.
To describe the active score in terms of your MET (metabolic equivalent), the active score is a
rough translation of the sum of your METs for each minute minus one for each minute elapsed
in the day.
The first thing you need to know when trying to understand the calories burned figure is some
definitions:
Basal Metabolic Rate (BMR): Calories burned while at rest to sustain regular body functions, such
as breathing. This number is independent of exercise done throughout the day, and is dependent on
age, height, weight, gender, and other factors.
Estimated Energy Requirements (EER): Calories you are estimated to burn based on your BMR
plus calories from a typical non-exercise day, such as getting ready for work, working at a desk job
for 8 hours, stopping by the store on the way home but not exercising. EER is based on a formula
published by the FDA and used by other government agencies to estimate the calories required by
an individual based on their age, height, weight, and gender. Your EER is greater than your BMR
since your BMR only takes into account the calories burned by your body just for it to exist and does
not take into account even minimal motion or activity.
Calorie Estimation: A setting in your profile that determines whether BMR or EER is used for days
that you forget to wear your Tracker, you haven't synced yet, or you do not have a Tracker linked to
your account.
If you have a Tracker and have synced recently, the calories will match the Tracker's number. This
includes your BMR, activity calories, and calories from manually logged activities. Manually logged
activities replace the Tracker's calorie estimate for that time frame, so there's no need to worry
about double counting the calories.
If you do not have a Tracker, the calorie calculation is the same as if you have not synced.
If you have NOT synced recently, you could see two different values depending on whether or not
you've enabled calorie estimation.
Calorie estimation enabled:
EER is displayed if you do not have any manually logged activities or not enough logged
activities to overcome the EER estimate.
If BMR + calories from manually logged activities is greater than 80% of your EER, that
calculated number is displayed.
If EER is used, an asterisk (*) will be displayed next to your calorie burn number. Putting your
mouse over the * will display a definition of calorie estimation.
Calorie estimation disabled:
BMR is displayed + calories from manually logged activities.
Calories Section
Page 12

If you have a Premium account, your Trainer's Fitness Plan will be displayed here.
Your calories section shows how many calories you've eaten based on your food log.
Your calories eaten goal can be edited by clicking on the progress bar to the right of the value, or by
setting a Food Goal. Resetting this number will also reset your Food Goal. If you have set up a Food
Goal, your calories eaten goal will adjust dynamically throughout the day based on your activities.
(See Food Goal.)
Sleep Section
This section shows information about your longest sleep of the day.
If you recorded multiple sleeps, click on View all your sleeps on this day to be taken to your
Track My Sleep page where naps are included.
Journal Section
This section includes any journal information you've logged including mood, allergies, and journal
entries.
Your Profile Section
Page 13

If you own a Tracker, your profile section of the dashboard will display the last time the Tracker had
a successful sync, such as Synced Dec 25 at 6:12am.
Below the last time synced, you will see the status of your battery level. This is displayed as High,
Medium, or Low and represents the status of your battery at the time of the last sync.
To change your picture, use the Change profile pic link in the list of links just below your picture.
If you want to use a picture you've already uploaded, click View all pictures, select the picture,
click the gear icon on the top right of the pop-up, and select Set as profile pic.
Editing Your Profile
To edit your profile, click on the Edit profile link on the Dashboard near your picture.
Most of the options are self-explanatory with the following exceptions:
Stride Length (walking) and Running Stride Length are calculated by default based on
your other profile information (but displayed as 0).
If your distance traveled is not close with the default values, you can calculate your stride length
by walking a known distance (like a track) and counting your steps. Most tracks are .25 mile if
you walk on the inside ring.
You can also walk a straight line using a GPS to calculate the distance traveled and your Tracker
to calculate the steps taken over that distance.
To calculate using a treadmill:
Just stand on the treadmill and hold down the button on the Tracker until it says Start.
The Tracker will start counting your steps from 0.
Now start the treadmill going at a normal walking speed (taking normal sized steps, not big
workout steps). The longer you go, the more accurate your stride length will be.
When you've gone far enough (a quarter of a mile should be okay, but the longer the better),
stop the treadmill and check the steps on the Tracker. Make note of the distance traveled on
the treadmill. You can also Stop the recording and the number of steps will be listed as a
recording on your activity page.
Now do the math. There are 5280 feet in a mile and 12 inches in a foot (63360 inches per
mile). So the formula you need for your stride length in inches is:
63360 x Miles / Steps = Stride in inches
To calculate your stride length using a track, do the same as above but press Start when on
the start line and know the distance you are walking/running (or use End_Steps -
Start_Steps).
If you know the distance in feet, then:
12 x Feet / Steps = Stride in inches
Repeat the above for running stride length. Just go your average running speed.
You can disable calorie estimation under the Preferences section (for more information about
calorie estimation, see Activity Section).
Sleep setting is defaulted to normal, which is recommended (for more information, see Sleep
Sensitivity).
Your Public Profile
To see your public profile, click on the View profile link under your picture on the dashboard or
Page 14

your email address at the top of the page.
At the top, you have the option to view your page as it is seen by one of your friends or to a member
of the public.
Use the Public Page link at the top right to direct people straight to your page.
Use the Privacy tab to adjust what information is displayed to your friends and the public.
Your public profile can be viewed by anyone that clicks on your picture/name in the forums or
anyone that you give the link to (the anyone privacy level).
Page 15

Friends
To start inviting friends, click on the appropriate link on your Dashboard to start inviting them via
Facebook or via Email.
The Facebook process will allow you to select Facebook friends that already have a Fitbit account
linked to their Facebook account, then friends that do not have a Fitbit account. If you are already
friends on Fitbit, your Facebook friends will not show up in the list.
For address book importing, click on the email tab and choose to import your friends. You can select
from America Online, Outlook, Yahoo!, Gmail, and other address books. You will then be able to
select which friends from your address book that you want to send the invite to.
Alternatively, you can choose to manually enter email addresses.
Page 16

Whichever method you use to enter friends, customize a message for them to send them a message.
Once you have some friends accept your invitation, you will see a leaderboard on the dashboard
with your friends ranked by number of steps. Click the link to see the entire leaderboard to view
how your friends compare by steps, distance, active score, or very active minutes over the past 7 or
30 days.
Badges
You can earn several different kinds of badges through your daily activity.
Only Tracker data is counted towards the award of badges. Manually logged activities do not get you
closer to earning your next badge.
There are several different badge types that you can earn, including:
Daily step badges, such as 5,000 steps, 10,000 steps, and more.
Daily climb badges, such as 5 floors, 10 floors, and more for Fitbit Ultra users.
Lifetime distance badges, such as 50 miles, 250 miles, and more.
Lifetime climb badges, such as a helicopter badge at 600 floors and more for Fitbit Ultra users.
Log Tab
Track My Food
To find a food, enter the name in the search box (and brand name to narrow down the list, if you
have one).
Page 17

If you don't see a matching result, there is a link to Add New Food in the suggested results list.
Click that to add a food.
At this time, foods you add will only be viewable by you and will appear in your private foods
list.
In the pop-up, click on the Add Nutritional Information button if you want to add
nutritional content. If you only want to track calories, enter them and click Add Food.
The newly created food will appear in the search results the next time you need to log it.
The nutritional date for foods logged in our database come from the USDA database or are provided
by individual restaurants and brands.
If you log a food for the wrong time, you can drag and drop the food between time slots.
Click on the star next to a logged food to mark it as a favorite.
Click on a logged food's name to see all of the nutritional information for that food.
Hover over a logged food to see the options for adjusting food size and deleting the item.
On the right side of your food log screen, you will find any foods you marked as a favorite, your
meals, most logged foods, and recent logged foods. These lists make logging foods quicker.
To create a meal:
On the Favorites section, click the Meals tab.
Click the Create a meal link.
Enter a meal name and click Save.
The Meal Content page will open, allowing you to change the name and add foods to the meal.
To log the meal, click the name of the meal from your favorites-meals tab. After you select a time
(Breakfast, Lunch, etc.) any foods in that meal will be added to your food log.
A Food Goal can be set up to help you stay on track for a weight loss goal.
The Food Goal is set up based on how many calories you want to eat per day less than you burn
(eat 500 calories less per day than you burn to lose 1 pound of fat per week).
The initial estimate on what you can eat for your plan intensity is based on being sedentary.
As you exercise, the calorie amount that you can eat to be in the zone (roughly near the target
calorie amount for the day) will increase dynamically based on the calories you burn through
Page 18

activities.
A proper diet and exercise are recommended for any weight loss plan. The Food Goal is based
on the calorie in and out numbers only and does not take into account any of your specific
factors such as health. We recommend you consult a doctor before making any drastic changes
to your diet.
Track My Activities
Use the activity logging to log any activities you do without your Tracker as well as those that the
Tracker does not adequately track, such as weight lifting, cycling, yoga, and other exercise activities
where your body is relatively stationary.
When you log an activity, the calories from that activity will overwrite whatever the Tracker
measured for that time frame. There's no need to worry about double counting when you manually
log an activity whether you were wearing the Tracker or not.
You can create a custom activity by entering the activity name in the search and click Create
Custom Activity.
With a custom activity, you can manually enter the calories burned as displayed from a third
party device.
When you log it subsequent times, you can have the site automatically calculate your calorie
burn. This will log the same calories per hour as the last time you logged the activity.
As with food logging, you can mark your favorite activities for easier logging in the future or use the
most logged and recent logged lists.
The Hide this day's calories link is used to hide a day's calories that you don't want included in
your graphs and statistics (such as days you forgot to wear the Tracker, don't want EER or BMR
displayed for that day and don't want to manually log your activities for the day). The calories on
historical graphs will show 0 for that day and your weekly average and other stats will ignore that
day.
Logging any driving activity will erase any steps and floors climbed for that time period and adjust
the calories for that time frame. While not normally necessary, certain vehicles and roads can
generate false steps, calorie burn, and floors climbed.
Track My Weight
Use the weight tracking page to log your weight, set your weight goal, and view graphs of your
progress.
Page 19

Logging your weight every day is not necessary. Your weight can fluctuate throughout the day based
on many factors. For best results, weigh yourself at the same time every day.
If you do log your weight every day, don't get overly worried on the ups and downs you see. Look at
the overall trend in your graphs.
Smaller, shorter term goals can help you lose weight compared to looking at a larger, overall goal.
If you have a Withings scale, Fitbit can download your weight data from the Withings site. Just click
the Withings user? link to link your accounts.
Track My Sleep
To track sleep, use the Tracker's activity tracking function (see Tracking Sleep).
If you forget to start and stop your Tracker, you can enter Start and Stop times on this page.
Log the sleep on the day that you woke up (so Today if you went to bed last night and woke up
this morning).
If you went to bed before midnight, use the default previous day option (as opposed to going
to bed at 12:00 AM or 1:00 AM, you would enter same day for when you went to bed).
The 12 hr and 24 hr options are for how you want to enter the time (the 12 hour option is to
enter a time as 10:00 PM compared to the 24 hour version of 22:00, also known as military
time).
In addition to seeing your latest sleep data (as shown on the Dashboard), you can use this page to
see multiple sleep data sets. This can be particularly useful if you take naps throughout the day.
This page also gives the additional options to edit and delete sleeps.
Page 20

To edit your sleep:
Put your mouse over the sleep graph that you wish to edit and click the edit icon that appears
on the top right corner of the graph (next to the X that deletes the sleep).
The edit options will appear below, so scroll down if necessary.
You can adjust the times, the sensitivity setting (applies to this sleep only) or switch the sleep to
an activity record (in case you meant to use the activity tracker for a purpose other than sleep,
but the site classified the recording as sleep).
Sleep Sensitivity
Normal: Counts significant movements such as turning over in bed as being awake.
Sensitive: Counts every minor movement as being awake.
The default sleep sensitivity setting is normal. This can be changed in your profile settings (see Edit
Profile).
You can edit individual sleeps to see the difference in these settings.
Normal is recommended if you are wearing the Fitbit as designed. If you wear the Fitbit clipped to
your waist or undergarments as it is recommended for day time use, even turning over may not
count as being awake. In this case, the sensitive setting may help (though this is not the
recommended method of wearing and tracking sleep).
However you choose to wear the Tracker at night and with which sleep sensitivity setting, you
should collect helpful data as long as you are consistent.
My Daily Journal
On the journal page, you can track your mood/energy and allergies.
Keep notes about your day and make them visible on your public profile page for friends or
everyone to read (though the default privacy is for the entry to be visible to only myself).
Journal entries are visible at the bottom of your Dashboard.
Track My Heart Rate
You can manually track your heart rate on the Heart tab.
Enter Resting, Normal, and Exertive heart rates to track them over time.
The Tracker does not measure your heart rate. Enter heart rates as measured manually or with a
third party device.
Individual measurements can be deleted from the Daily Measurements area by putting your
mouse over the logged value and clicking the X that appears to the left.
Premium members can add up to 6 more heart rate trackers by clicking on the Add new heart
Page 21

rate tracker link. Select a name and a color for the graphs and click the Add button.
Track My Blood Pressure
You can track your blood pressure using measurements from a third party device.
Multiple measurements can be entered throughout the day.
The average of all your measurements for the day will be displayed on the graph.
Individual measurements can be deleted from the Daily Measurements area by putting your
mouse over the logged value and clicking the X that appears to the left.
Track My Glucose
By default, you can enter Morning, Afternoon, and Evening glucose measurements (as
measured by a third party device).
Each of the default tracker names (such as morning, noon, or evening) can be deleted. If you
accidentally delete a tracker (such as Evening), you can create a new tracker with the same name
(Evening) and your data will reappear.
Individual measurements can be deleted from the Daily Measurements area by putting your
mouse over the logged value and clicking the X that appears to the left.
Premium members can add up to 6 more glucose trackers by clicking on the Add new glucose
tracker link. Select a name and a color for the graphs and click the Add button.
Track My <custom>
Custom trackers can be used to track anything you want to track (e.g. cigarettes, push-ups, beers,
smoked, exercised, etc.).
Each custom tracker can be set up to accept a number or a Yes/No value.
To set up a new custom tracker:
Click on the Tracker tab.
Click on the Add custom tracker link to the right of Glucose.
Enter the pop-up information including name (push-ups), unit (rep), unit plural (reps), and
whether you want to enter a number or Yes/No each day.
Every account can have one custom tracker set up at a time. You can delete your tracker and create
a new one at any time.
Premium members can have unlimited custom trackers.
Community Tab
The community tab contains the forums and groups which are useful for staying in contact with
other Fitbit members.
Your public name as displayed on the forum is your:
Nickname as entered in your profile
First name, Last initial if no nickname is entered.
Email address (everything before the @) if no name or nickname is entered.
Each group has its own leaderboard so you can compete against group members.
Premium Tab
Page 22

Benchmark
Benchmarking is an interactive tool that lets you compare yourself to other users in the Fitbit
database.
With 2,688 possible combinations of data to look at, you have all the data you need to compare
yourself against the rest of our users.
Use the Save Settings to save your default settings so they will be displayed the next time you visit
the page.
Food, Activity, and Sleep Reports
Your reports display the last completed week, displaying your logged items, total, averages and
other relevant data to paint a complete picture of your week.
Use the date navigator to select any date. The report associated with the week that date falls in will
display.
Your report starts on Sunday or Monday, depending on what your week starts on day is set as in
your profile settings.
TIP: You can use the (>) arrow or select today's date to see a partial report. The stats may be slightly
off since the report is not yet complete, but it is a great way to see how your stats look so far this
week.
Trainer
The Fitbit Digital Trainer is a tool used to help you become more active.
The Trainer tab is used to set up your Fitness Plan. Once set up, the Fitness Plan can be found on
the Dashboard.
If your Fitness Plan is set to increase your activity, the activity calories goal will increase slightly
each week over a 12 week period.
If you miss or exceed your goal by a significant amount during any given week, you will have the
option to lower or increase your Trainer's goal on the first day of the following week. So if your
Fitness Plan becomes too easy or you suffer an injury, you can set a new, relevant goal and continue
making use of the Trainer for the remainder of the 12 weeks.
Activity Calories: The Trainer uses activity calories which are the calories you burn from your
movements and do not include your BMR.
Once your 12 week Fitness Plan is complete, you can immediately start a new one. The completed
Fitness Plan will be available for review on the Trainer tab. With no completed Fitness Plans and
your first Fitness Plan running, there is nothing to be displayed on the Trainer tab so it links to the
Dashboard where the Fitness Plan is.
Export
Page 23

You have the option to export data using any custom date range. Data options to include in the
exported file are:
Body: Includes weight, BMI, fat, blood pressure (average for the day), heart rate (average for
each tracker, such as Resting), and glucose readings for each date.
Foods: Contains total calories, fat, fiber, carbs, sodium, protein, and water for each date.
*CAUTION: There will be an individual tab for each date containing food information, so you
may want to download a week or a month of data at a time as opposed to doing a couple of years
all at once.
Activities: Contains your calories burned, steps, distance, minutes sedentary, lightly active,
fairly active, very active, activity calories, and active score for each date.
Sleep: Contains minutes asleep, minutes awake, number of awakenings, and time in bed for
each date.
Use the XLS file format if you want to view the data in Microsoft Excel. Otherwise, use the CSV
(comma-separated values) file format.
Support
Troubleshooting
My data is not syncing to the website.
If your data has never synced, make sure you followed all the instructions in the Getting
Started section (install software and set up Tracker).
If you still can't sync, try pointing the computer to the drivers manually:
Unplug and replug the base station into your computer. The Add New Hardware Wizard
dialog should open.
Please select Advanced and point the wizard to the following location:
Windows XP, Vista 32 bit, Windows 7 32 bit: c:\program files\fitbit\base station
Vista 64 bit, Windows 7 64 bit: c:\program files (x86) \fitbit\base station
Make sure the base station is plugged in and try unplugging and replugging the base station.
Follow the instructions in the The Fitbit Data Uploader - Service(#client-service) section
to verify the service is running.
Follow the instructions in the Upgrading the Desktop Client(#upgrade) section to make
sure your software is up to date.
Most corporate firewalls will block the data transfer with our servers. Try setting up your base
station on a personal computer with internet access.
If all else fails, restarting your computer can solve many problems.
If your problems persist, please contact support(
http://help.fitbit.com/customer/portal/emails/new ) .
My Tracker seems to be frozen.
Place the Tracker on the base station. If the Tracker is functioning correctly, the battery
indicator should display.
Most Tracker-related problems can be solved by restarting the Tracker. To do this:
1. Place your Tracker on the base station (with it plugged in and the computer on).
2. Using a pen tip or a paper clip, push the button on the bottom of the base station.
3. The Tracker should restart and display the firmware version (ex. FITBIT 2.27).
My numbers reset to 0 during the day.
Verify that you are not in sleep/recording mode (display is flashing). When in
sleep/recording mode, your numbers displayed will be your steps, distance, and calories
since you entered sleep mode. Upon exiting sleep mode, you will resume seeing your daily
totals.
Page 24

Make sure your time zone settings are correct (from the dashboard, click on the Edit profile
link near your picture).
The Tracker keeps falling out of the provided wristband when I sleep.
If you were clipping your Tracker to the pocket, try inserting the Tracker all the way inside the
pocket.
If you still have problems with the Tracker falling out, insert the Tracker all the way into the
pocket and turn it sideways.
The display on my Tracker is no longer visible.
If your Tracker has been charging but the display won't light up, please update your firmware to
the latest version.
For Windows:
Right click on the Fitbit icon on the system tray on the lower right of the screen
(diamond-shaped icon)
Hover over Fitbit, then select About
An About Box will pop up. Click on the Upgrade Firmware link text in the lower left
of the box. DO NOT click on OK
Follow the instructions that appear. Do not move the Tracker until the entire process is
complete.
Do not press the button on the Tracker or close the update dialog until the entire process
completes.
For Mac:
Download the latest Mac client(http://domain.com/start?platform=mac)
Install latest client version
Close the Fitbit Tracker setup page
Update the firmware
Open a Finder window.
Navigate to Applications > Utilities.
Double-click on the Terminal application to open it. A terminal window appears.
Now enter: FB_OPEN_MODE="userFirmwareUpdate"
/Applications/Fitbit.app/Contents/MacOS/Fitbit
The Fitbit application will launch and upgrade your firmware
Do not close the terminal window until after you have quit the Fitbit application.
After the update, reset the Tracker. Place it on the base station then press the button
on the bottom of the base station using a toothpick, pen tip, or paper clip.
Support
Fitbit staff and other users are available on our forums:
http://www.fitbit.com/forums(http://www.fitbit.com/forums) . You can ask questions, get
help, learn about the newest features to be added to the Fitbit site, and suggest foods and brands you
would like us to add to our ever growing food database. You should also check out our FAQ, which is
regularly updated at http://www.fitbit.com/faq( http://help.fitbit.com ) .
We can be reached directly via email. Please contact support(
http://help.fitbit.com/customer/portal/emails/new ) . We try to answer all emails as quickly as
possible, typically within 24 hours (hopefully much less). The only exception is Sunday and major
holidays when we have reduced staffing.
Page 25

Statements
Federal Communications Commission (FCC) Statement
Model No: F001 FCC ID: XRAF001
Model No: F002 FCC ID: XRAF002
15.21
You are cautioned that changes or modifications not expressly approved by the part responsible for
compliance could void the user's authority to operate the equipment.
15.105(b)
This equipment has been tested and found to comply with the limits for a Class B digital device,
pursuant to part 15 of the FCC rules. These limits are designed to provide reasonable protection against
harmful interference in a residential installation. This equipment generates, uses and can radiate radio
frequency energy and, if not installed and used in accordance with the instructions, may cause harmful
interference to radio communications. However, there is no guarantee that interference will not occur
in a particular installation. If this equipment does cause harmful interference to radio or television
reception, which can be determined by turning the equipment off and on, the user is encouraged to try
to correct the interference by one or more of the following measures:
Reorient or relocate the receiving antenna.
Increase the separation between the equipment and receiver.
Connect the equipment into an outlet on a circuit different from that to which the receiver is
connected.
Consult the dealer or an experienced radio/TV technician for help.
This device complies with Part 15 of the FCC Rules. Operation is subject to the following two conditions:
1. this device may not cause harmful interference and
2. this device must accept any interference received, including interference that may cause undesired
operation of the device.
FCC RF Radiation Exposure Statement:
This equipment complies with FCC radiation exposure limits set forth for an uncontrolled environment.
End users must follow the specific operating instructions for satisfying RF exposure compliance. This
transmitter must not be co-located or operating in conjunction with any other antenna or transmitter.
Industry Canada (IC) Statement
Model No: F001 IC ID: 8542A-F001
Model No: F002 IC ID: 8542A-F002
15.21
You are cautioned that changes or modifications not expressly approved by the part responsible for
compliance could void the user's authority to operate the equipment.
15.105(b)
This equipment has been tested and found to comply with the limits for a Class B digital device,
pursuant to part 15 of the IC rules. These limits are designed to provide reasonable protection against
harmful interference in a residential installation. This equipment generates, uses and can radiate radio
frequency energy and, if not installed and used in accordance with the instructions, may cause harmful
interference to radio communications. However, there is no guarantee that interference will not occur
in a particular installation. If this equipment does cause harmful interference to radio or television
reception, which can be determined by turning the equipment off and on, the user is encouraged to try
to correct the interference by one or more of the following measures:
Page 26

Reorient or relocate the receiving antenna.
Increase the separation between the equipment and receiver.
Connect the equipment into an outlet on a circuit different from that to which the receiver is
connected.
Consult the dealer or an experienced radio/TV technician for help.
Operation is subject to the following two conditions:
1. this device may not cause interference and
2. this device must accept any interference, including interference that may cause undesired
operation of the device.
IC RF Radiation Exposure Statement:
This equipment complies with IC radiation exposure limits set forth for an uncontrolled environment.
End users must follow the specific operating instructions for satisfying RF exposure compliance. This
transmitter must not be co-located or operating in conjunction with any other antenna or transmitter.
Products
Shop Devices ▶
Services
Mobile Apps
(http://ww w.fitbit.com/iphone)
Premium Reports
(http://ww w.fitbit.com/premium/about)
App Gallery and
Partners
(http://ww w.fitbit.com/apps)
Developer APIs
(http://dev.fitbit.com/)
Help
Fitbit Online Help (
http://help.fitbit .com )
Returns and Warranty
(http://ww w.fitbit.com/returns)
Setup and Downloads
(http://ww w.fitbit.com/setup)
Suppor ted Syncing
Devices
(http://ww w.fitbit.com/devices)
About Fitbit(http://www.fitbit.com/company)
Blog(http://blog.f itbit.c om/)
Jobs(http://www.fitbit .com/jobs )
Fitbit is dedicated to helping people
lead healthier, more active lives.
©2014 Fitbit Inc. All rights reserved.
Privacy Policy(http://w ww.fitbit.com/ privacy)
Terms of U se(ht tp:/ /www. fitbit. com/t erms)
Recall/Safety
Info(http ://domain.com//www .fitbit .com/forces upport/info)
United States (change(http: //domain .com/countrie s)
Flex™
Wirel ess Act ivity + S leep Wrist band
(http://ww w.fitbit.com/flex)
Zip™
Wirel ess Act ivity Tra cker
(http://ww w.fitbit.com/zip)
One™
Wirel ess Act ivity + S leep Track er
(http://ww w.fitbit.com/one)
Force™
Wirel ess Act ivity + S leep Wrist band
(http://ww w.fitbit.com/force)
Aria™
Wi-F i S mart Sca le
(http://ww w.fitbit.com/aria)
Tory Burch for Fitbit
Accessories
(http://ww w.fitbit.com/toryburch)
Explore
Wher e to buy (http:/ /www .fit bit.com/where-to-buy)
Affiliates (http://www.f itbit .com/aff ilia te)
Corpor ate We lln es s (htt p://w ww .fitbit.com/fitbit-wellness)
Foods by Restaurant (http://ww w.fit bit.com/foods/restaurants)
Foods by Brand (http://w ww.fitbit.com/foods/brands)
Calor ies in F oods (http://ww w.fitbit.com/foods/categories)
Search Foods (http://w ww .fi tbit.com/foods/search)
Device Help
Flex Tracker Help( http://help.fi tbit.com/#product_flex)
Zip Tr acker Help( ht tp://help.fitbit.com/#product_zip)
One Tracker Help( http://help.fitbit.com/#product_one)
Ultra Tracker Help( http://help.fitbit.com/#product_ultra)
Force Tracker Help( http://help.fitbit.com/#product_force)
Aria Scale Help( http://help.fitbit.com/#product_aria)
Page 27

 Loading...