

w
w
w
.
f
i
s
h
e
r
-
p
r
i
c
e
.
c
o
m
Please keep this instruction sheet for future reference, as it contains important information.
Adult assembly is required.
Requires three “AA” batteries for operation (included).
Tool required for assembly: Short-shaft Phillips screwdriver (not included).
73397
Instructions
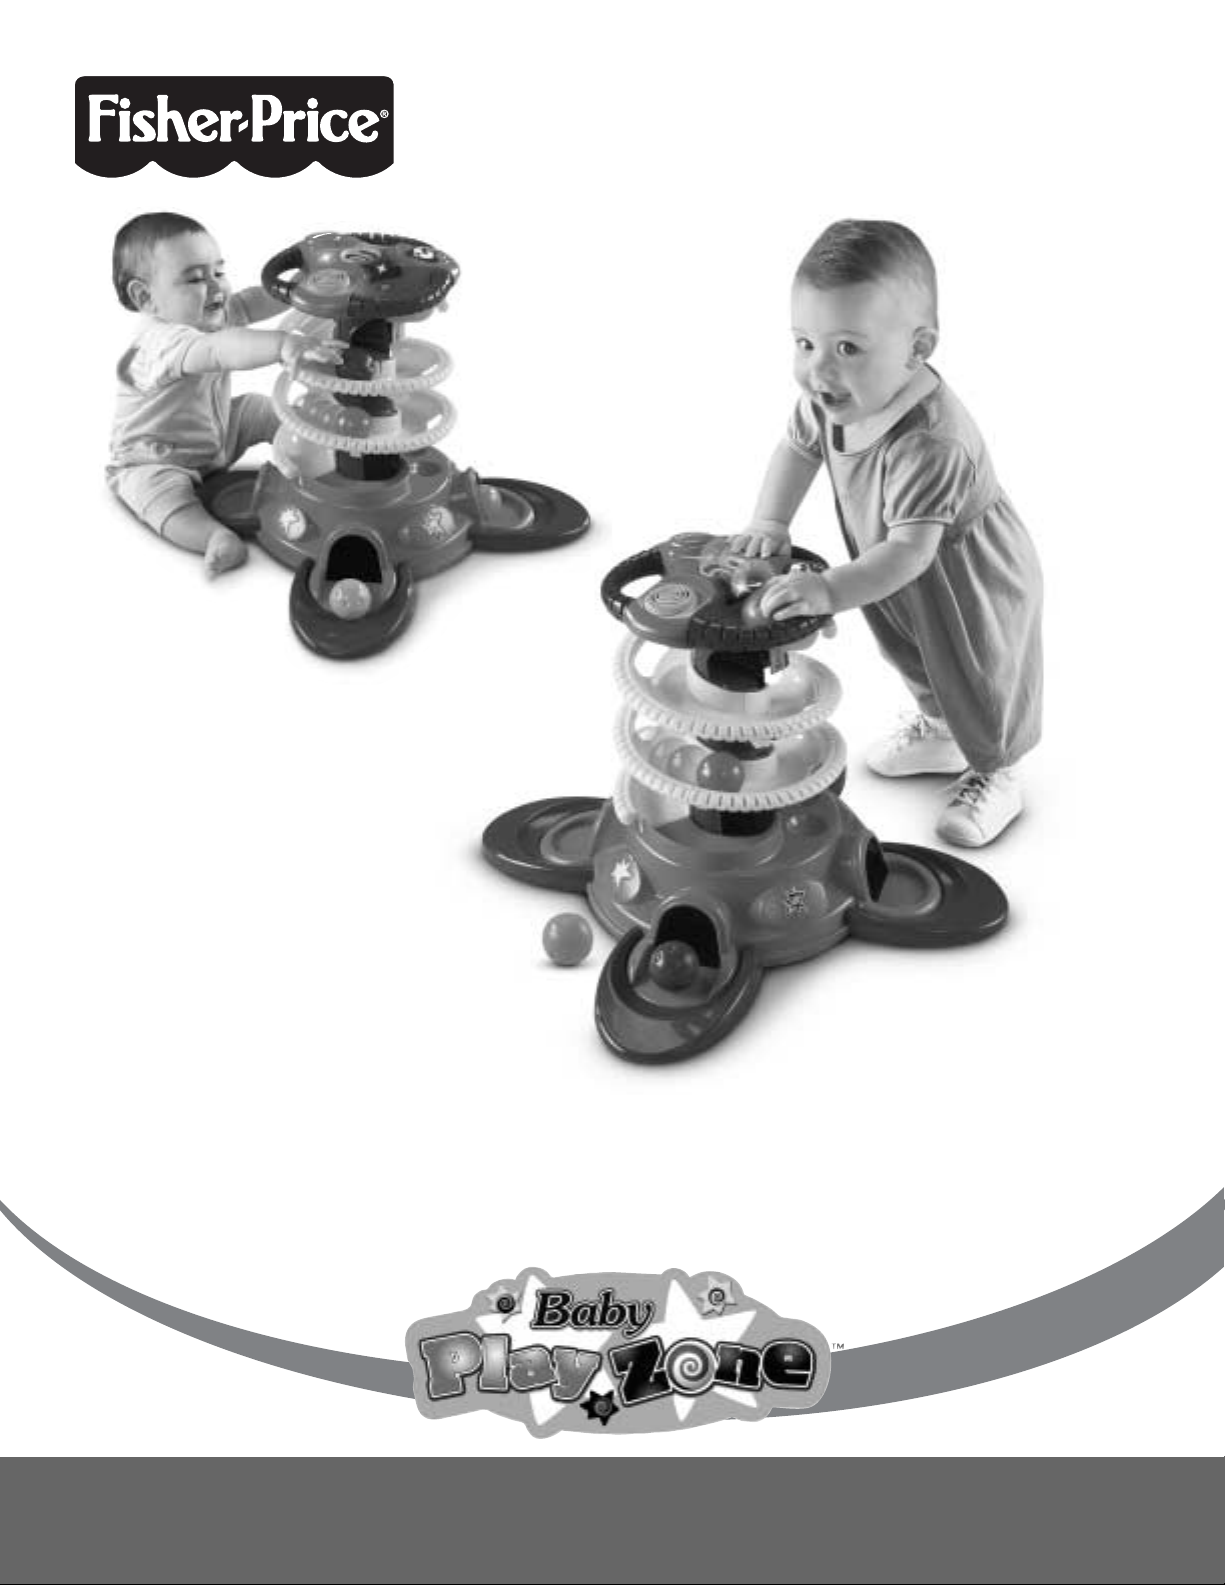
Stand-Up Ball Blast
TM
Electronic Top
Base
Base
Dimple
Bottom Track
Bottom Track
4 Balls
4 Feet
Track 3
Center Tube
(2 Pieces)
2
1
Ta b
Foot
Peg
Hole
Hole
#6 x 3/8"- 9
#6 x 3/4"- 8
Screws Shown
Actual Size
Track 2
Track 1
2
Not Shown: label sheet.
This product contains small parts in its
unassembled state. Adult assembly is required.
CAUTION
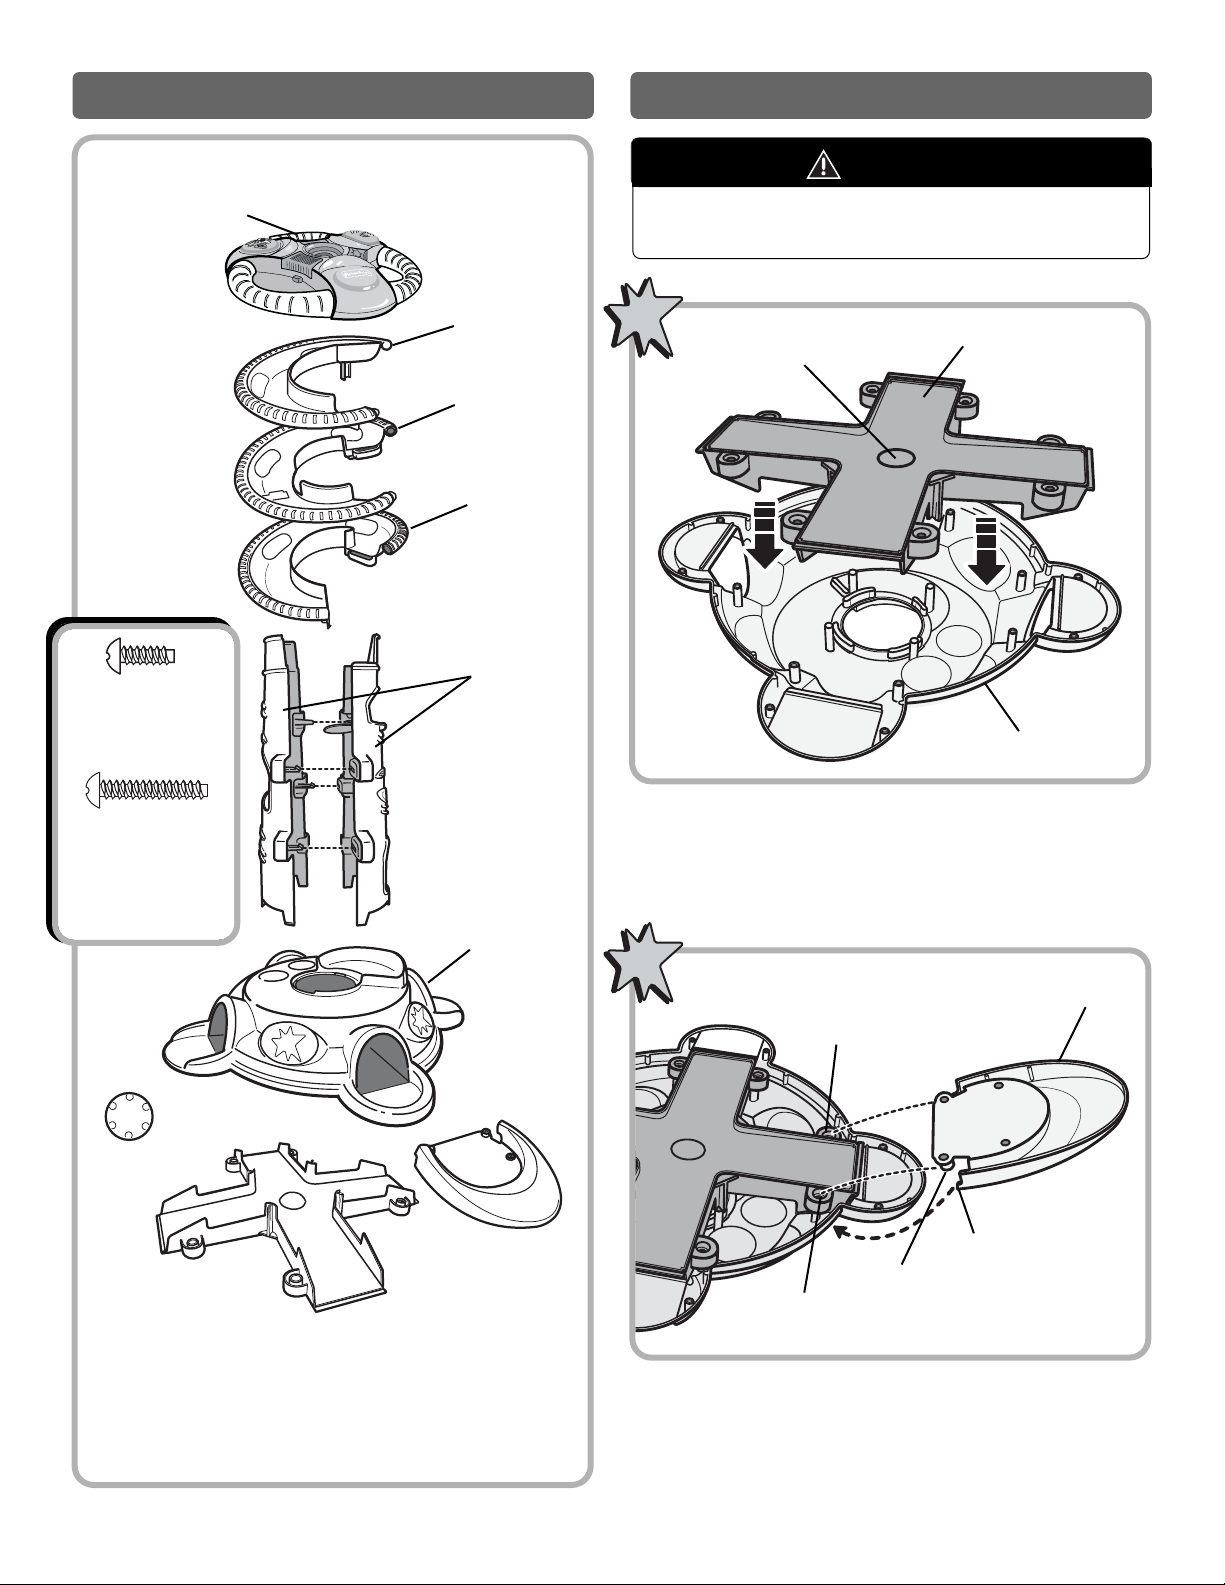
• Place the base upside down on a flat surface.
• Identify the side of the bottom track with the dimple.
• Place the bottom track onto the pegs on the base with the
dimpled side facing you.
• Insert the tabs on on each edge of a foot under the edge of
the base so that you can fit the pegs on the foot into the
holes on the bottom track.
Parts Assembly

Center Tube
Piece
• Insert and “snap” the tabs on one of the center tube pieces
into the slots in the other center tube piece.
6
4
3
Bottom Track
Front Holes
Do Not
Insert the
1" Screws
Here
Center Tube
Piece
3
PUSH
• Insert two #6 x
3
/8" screws through the remaining two holes
in the foot and into the base, as shown.
•Tighten the screws with a Phillips screwdriver.
Do not over-tighten.
• Repeat steps 2 through 5 to attach the other three feet.
•Turn the base over.
• Insert two #6 x
3
/4" screws through the front holes in the foot
and into the base, as shown.
•Tighten the screws with a Phillips screwdriver.
Do not over-tighten.
• Push down in the center of the foot to “snap” it into place.
• Be sure the tabs are under the edge of the base and the
pegs fit snuggly in the holes on the bottom track.
5
#6 x 3/8" - Screw
Shown Actual Size
#6 x 3/4" - Screw
Shown Actual Size

4
• Position track 2 with the grooved side up. Fit track 2 onto the
center tube.
• Rotate track 2 counter-clockwise until it meets track 1. Insert
and “snap” the tab on the end of track 2 into the slot in
track 1. Be sure the peg on the end of track 2 fits into the
hole in track 1.
• Repeat this process to assemble track 3 to track 2.
Hint: When the tracks are properly fitted on the center tube, a tab on
the center tube should be visible above each track.
9
Track 2
Track 1
Center Tube
•Align the smallest tab on the center tube with the smallest
slot in the base. Push down on the track support to “snap”
the center tube into place.
Base
• Locate track 1. Position track 1 with the grooved side up.
•Fit track 1 onto the center tube. Rotate it counter-clockwise
until it reaches the base.
• Insert and “snap” the tab on the end of track 1 into the slot
in the base.
8
Center Tube
Track 1
Ta b
7
Base Slot
Ta b
Peg
Hole
Center Tube
Small Tab
Base Small Slot
PUSH
PUSH
• Insert a #6 x 3/8" screw through the hole in track 3 and into
the tube. Tighten the screw with a Phillips screwdriver.
Do not over-tighten
10
Track 3
Center Tube
#6 x 3/8" - Screw
Shown Actual Size

• Match the ribbed tab on the center tube with the grooved
slot in the electronic top.
• Push down on the electronic top to “snap” it into place. Pull
up on the electronic top to be sure it is secure.
11
Electronic
To p
Center Tube
•Wash your hands before applying the labels.
• Make sure the areas where the labels will be applied are
clean and dry. Wipe this product with a clean, soft, dry cloth
to remove any dust or oils.
• For best results, do not attempt to apply a label more
than once.
• Apply the labels as shown in the illustration above.
Proper label application will help to keep the labels
looking their best!
Volume
Switch
5
Rib
Groove
Decoration

Volume Switch
•Locate the volume switch on underside of the electronic top.
• Slide the switch to the desired position: Off , On with low
volume or On with higher volume .
• For flashing lights and lively music, baby can place the ball in
any one of the three openings on the top of the toy and
push it through.
•Place the ball in the center spinner. Press the play button to
see the ball twirl.
For best performance, we recommend replacing the
batteries that came with this toy with three, new alkaline “AA” (LR6) batteries.
Electronic Top
Battery
Compartment
SHOWN ACTUAL SIZE
• Locate the battery compartment on the underside of the
electronic top.
• Loosen the screw in the battery compartment door with a
short shaft Phillips screwdriver and remove the door.
• Remove the exhausted batteries from the battery compartment. Properly discard the exhausted batteries.
• Insert three, “AA” (LR6) alkaline batteries.
Hint: We recommend using alkaline batteries for longer life.
• Replace the battery compartment door and tighten the
screw with a Phillips screwdriver. Do not over-tighten.
• When sounds or lights from this toy become faint or stop, it’s
time for an adult to change the batteries!
1.5V x 3
“AA” (LR6)
Play Button
Ball
Center Spinner
BOTTOM VIEW
6
Lights and Sounds Fun! Battery Replacement

Wipe this toy with a clean cloth dampened with a mild soap
and water solution. Do not immerse this toy.
7
Battery Safety Information
Batteries may leak fluids that can cause a chemical burn
injury or ruin your toy. To avoid battery leakage:
• Do not mix old and new batteries or batteries of different
types: alkaline, standard (carbon-zinc) or rechargeable
(nickel-cadmium).
• Insert batteries as indicated inside the
battery compartment.
• Remove batteries during long periods of non-use. Always
remove exhausted batteries from the toy. Dispose of
batteries safely. Do not dispose of batteries in a fire. The
batteries may explode or leak.
• Never short-circuit the battery terminals.
• Use only batteries of the same or equivalent type,
as recommended.
• Do not charge non-rechargeable batteries.
• Remove rechargeable batteries from the toy
before charging.
• If removable, rechargeable batteries are used, they are only
to be charged under adult supervision.
Care

This equipment has been tested and found to comply with the
limits for a Class B digital device, pursuant to Part 15 of the FCC
Rules. These limits are designed to provide reasonable protection against harmful interference in a residential installation.
This equipment generates, uses and can radiate radio frequency energy and, if not installed and used in accordance
with the instructions, may cause harmful interference to radio
communications. However, there is no guarantee that interference will not occur in a particular installation. If this equipment
does cause harmful interference to radio or television reception, which can be determined by turning the equipment off
and on, the user is encouraged to try to correct the interference by one or more of the following measures:
• Reorient or relocate the receiving antenna.
• Increase the separation between the equipment
and receiver.
• Consult the dealer or an experienced radio/TV technician
for help.
Note: Changes or modifications not expressly approved by
the manufacturer responsible for compliance could void the
user's authority to operate the equipment.
Fisher-Price, Inc., a subsidiary of Mattel, Inc., East Aurora, NY 14052 U.S.A. Printed in Mexico
©2003 Mattel, Inc. All Right Reserved. ® and ™ designate U.S. trademarks of Mattel, Inc. 73397d-0920
FCC Note (United States Only) Consumer Information
Questions? We'd like to hear from you!
Call Fisher-Price®Consumer Relations, toll-free at
1-800-432-5437, 8 AM - 6 PM EST Monday through Friday.
Hearing-impaired consumers using TTY/TDD equipment, please
call 1-800-382-7470. Or, write to: Fisher-Price
®
Consumer
Relations, 636 Girard Avenue, East Aurora, New York 14052.
For countries outside the United States:
CANADA: Questions? 1-800-567-7724. Mattel Canada Inc., 6155 Freemont Blvd.,
Mississauga, Ontario L5R 3W2.
GREAT BRITAIN: Mattel UK Ltd, V
anwall Business Park, Maidenhead SL6 4UB. Helpline:
01628 500302.
AUSTRALIA: Mattel Australia Pty. Ltd., 658 Church Street, Locked Bag #870, Richmond,
Victoria 3121 Australia. Consumer Advisory Service 1300 135 312.
NEW ZEALAND: 16-18 William Pickering Drive, Albany 1331, Auckland.
ASIA: Mattel East Asia Ltd, Room 1106, South Tower, World Finance Centre, Harbour City,
Tsimshatsui, HK, China.
 Loading...