

Fisher-Price 73180 User Manual
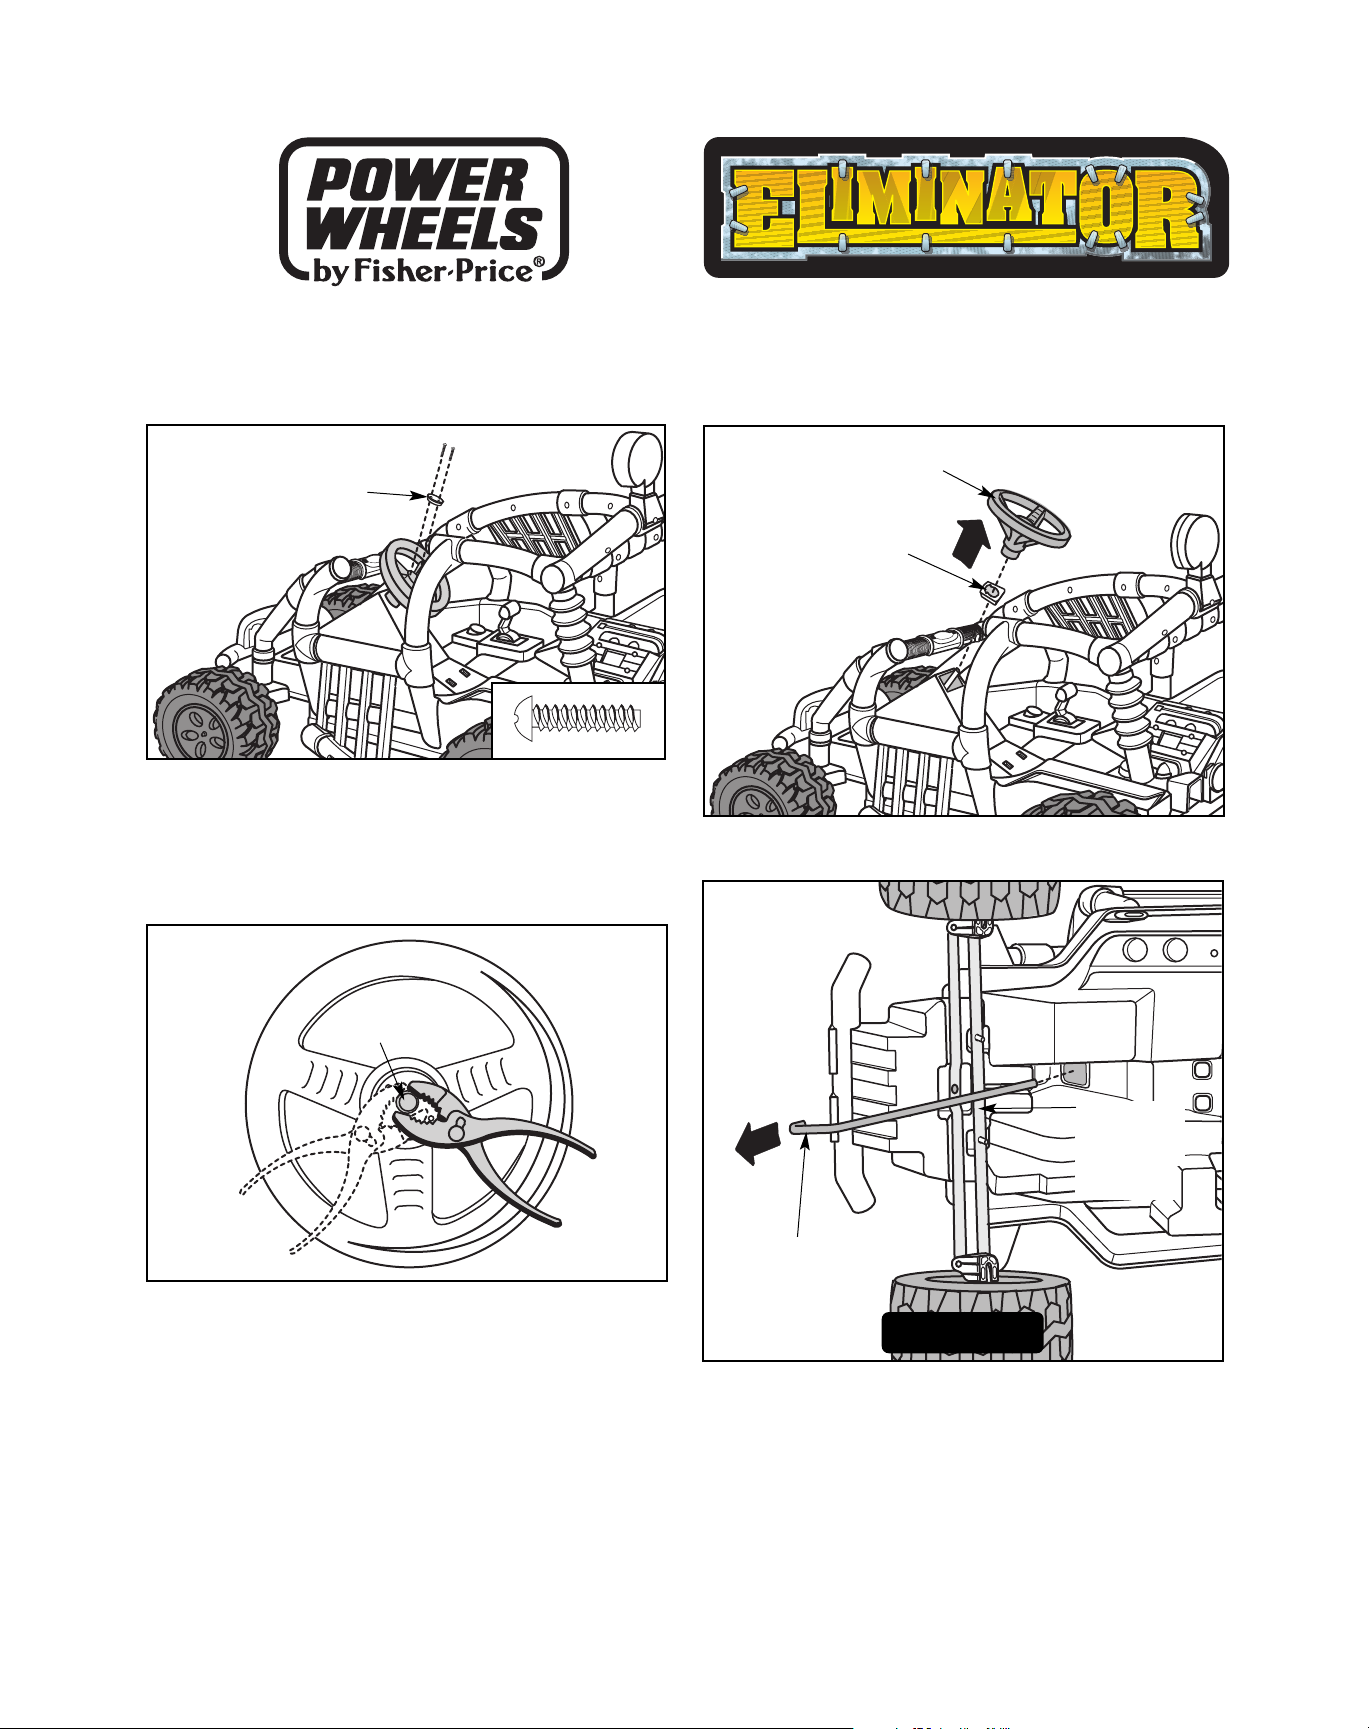
• Remove the steering wheel and steering wheel collar
from the old steering column.
Steering
Wheel
Steering
Wheel
Collar
3
• Turn the vehicle on it’s side.
• Remove the old steering column from the steering
linkage assembly and the vehicle body.
• Throw away the old steering column.
Old Steering
Column
4
Steering
Linkage
Assembly
Bottom View
• Remove the label on the steering wheel cap.
• Loosen and remove the two #8 x 3/4” screws in the steering wheel cap with a Phillips screwdriver.
• Remove the steering wheel cap.
• Set the screws and the steering wheel cap aside for
step 7.
Steering
Wheel Cap
1
Steering Column Replacement Kit
Model Number: 73180
Tools needed for replacement: Phillips Screwdriver and Pliers (not included).
2
Note: When removing the cap nut from the old steering
column, you will crush it. We have included a new cap nut
in this kit for re-assembly.
To remove the cap nut from the old steering column:
• Squeeze the cap nut on the steering column with pliers.
• Now, at a different angle, squeeze the cap nut again
with the pliers.
• Remove the crushed cap nut from the old steering
column and throw it away.
Nut Cap
Printed in the U.S.A. 73180pr-0920
Fisher-Price and Power Wheels by Fisher-Price are U.S. trademarks of Mattel, Inc.
Fisher-Price, Inc., a subsidiary of Mattel, Inc., East Aurora, New York 14052 U.S.A.
©2001 Mattel, Inc. All Rights Reserved.
If you have further questions about your Power Wheels® vehicle or the replacement of the steering column,
please call our toll-free service lines at 1-800-348-0751 from 8 AM to 6 PM (EST) Monday through Friday.
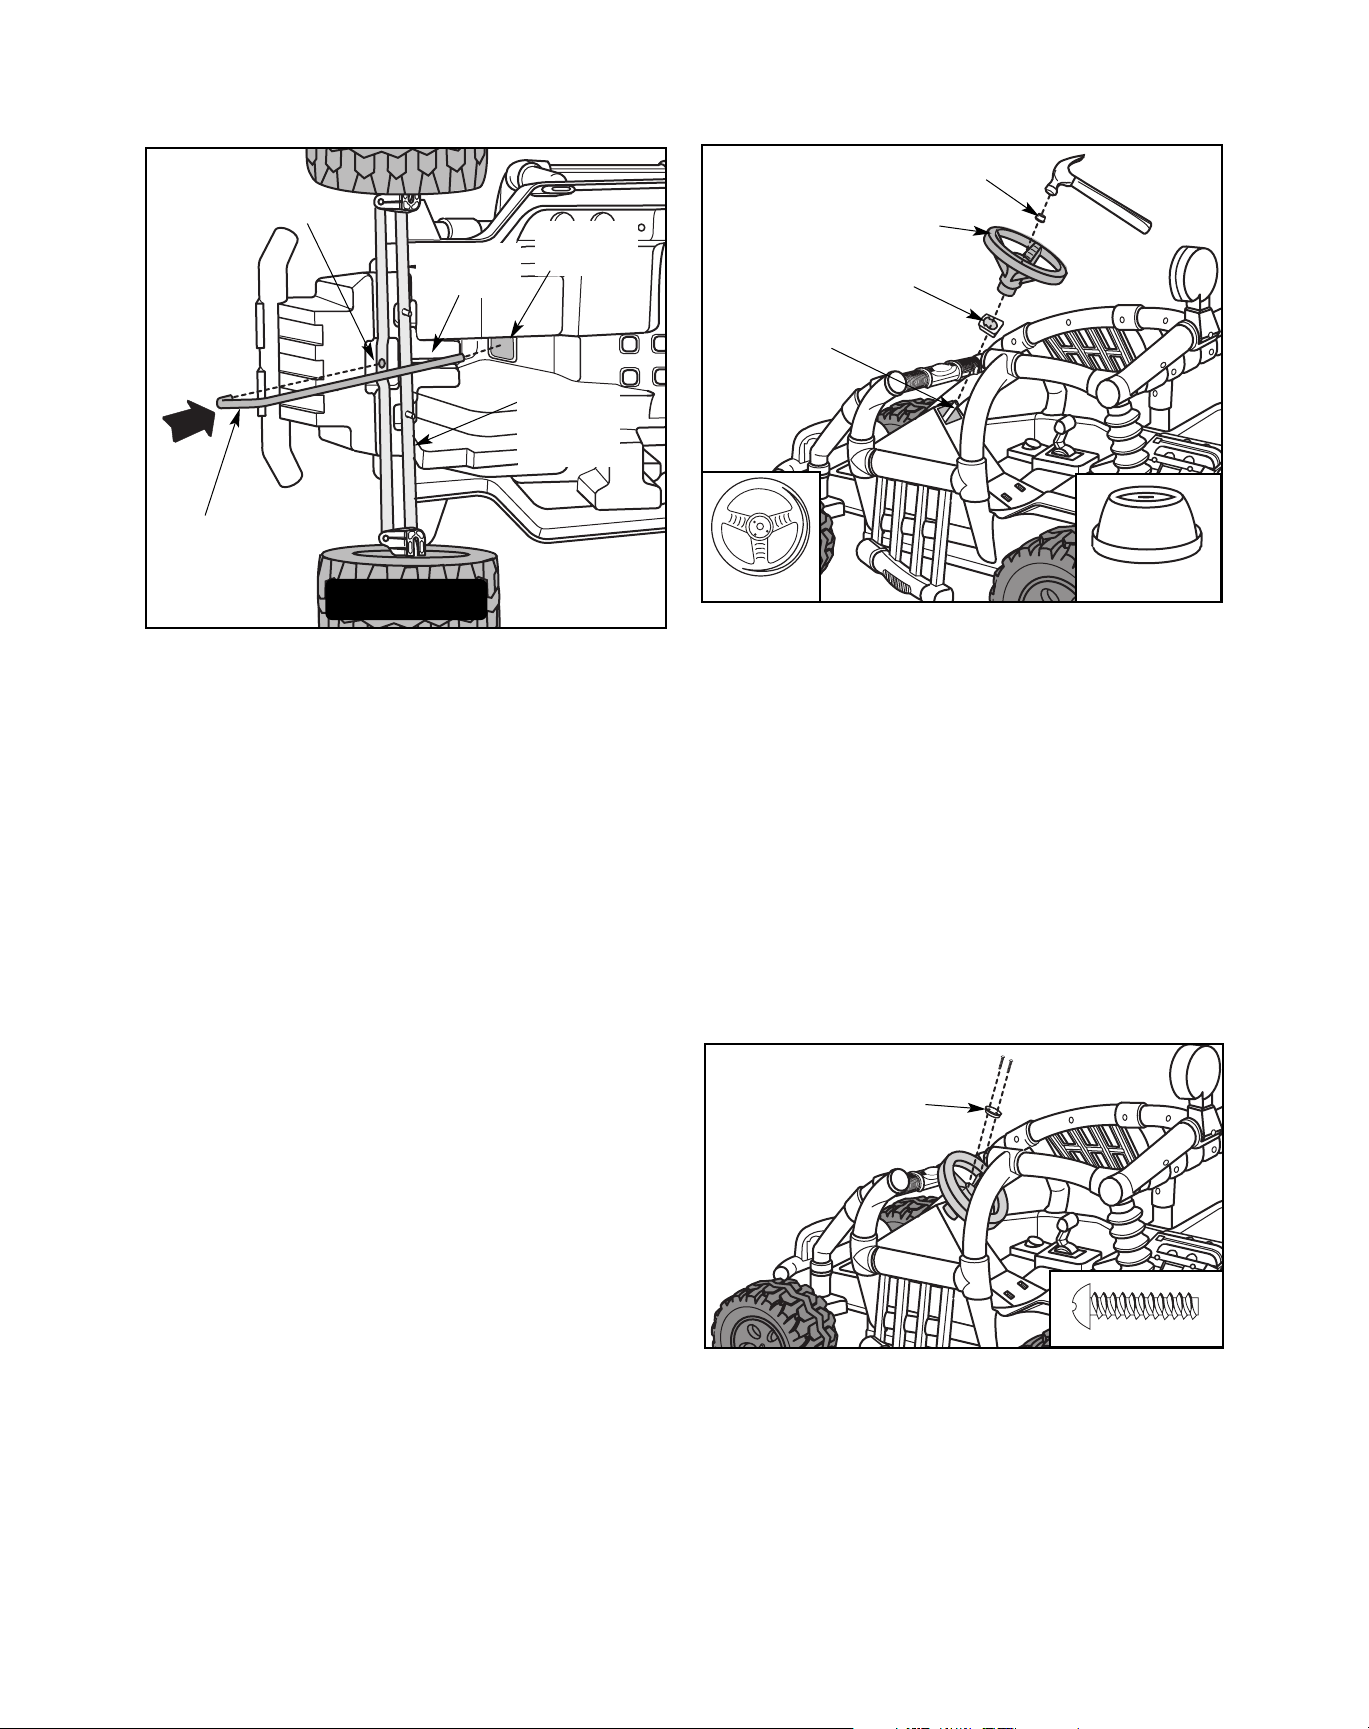
• Insert the straight end of the new steering column up
through the square opening in the vehicle body.
• Fit the curved end of the steering column into the hole
in the steering linkage assembly. The steering column
will fit snugly into the slot in the brushguard tab.
New
Steering
Column
Hole
Square
Opening
5
Steering
Linkage
Assembly
Bottom View
• While holding the steering column in place, position the
vehicle body upright.
• Push up on the end of the steering column to center it
in the vehicle body opening.
• Fit the steering wheel collar over the end of the
steering column and press the collar into the opening
in the vehicle body.
• Position the steering wheel upright so that the spokes
form a “Y”.
• Fit the steering wheel onto the steering column. Make
sure the base of the steering wheel fits into the steering
wheel collar.
• Fit a .354 cap nut on the end of the steering column.
• Support the end of the steering column near the
steering linkage assembly and tap the cap nut with
a hammer to secure it. Pull on the steering wheel to
make sure the cap nut is secure.
Steering
Wheel
Steering
Wheel
Collar
6
• Fit the steering wheel cap into the center of the
steering wheel.
• Insert two #8 x 3/4" screws into the steering wheel cap.
• Tighten the screws with a Phillips screwdriver. Do not
over-tighten.
• Place the new label on the steering wheel cap.
Replacement is now complete.
Steering
Wheel Cap
7
.354 Cap Nut
Steering
Column
“UP”
.354 Cap Nut
Brushguard
Ta b
 Loading...