

Fisher-Price 71970 User Manual

Baby's Gym
Toddler's First Piano
71970
Instructions
w
w
w
.
f
i
s
h
e
r
-
p
r
i
c
e
.
c
o
m
Sparkling Symphony™Gym

2
• Please keep this instruction sheet for future
reference, as it contains important information
• Adult assembly is required.
• Requires three “C” batteries for operation
(included).
•Tool required for battery installation: Phillips
screwdriver (not included).
To prevent entanglement injury,
NEVER place gym or suspend
links in crib or playpen.
NEVER add strings, ties or other
products to the gym.
WARNING
PRINTED IN MEXICO 71970e-0920
3
For best performance, we recommend
replacing the batteries that came with
this toy with three, new alkaline “AA”
(LR6) batteries.
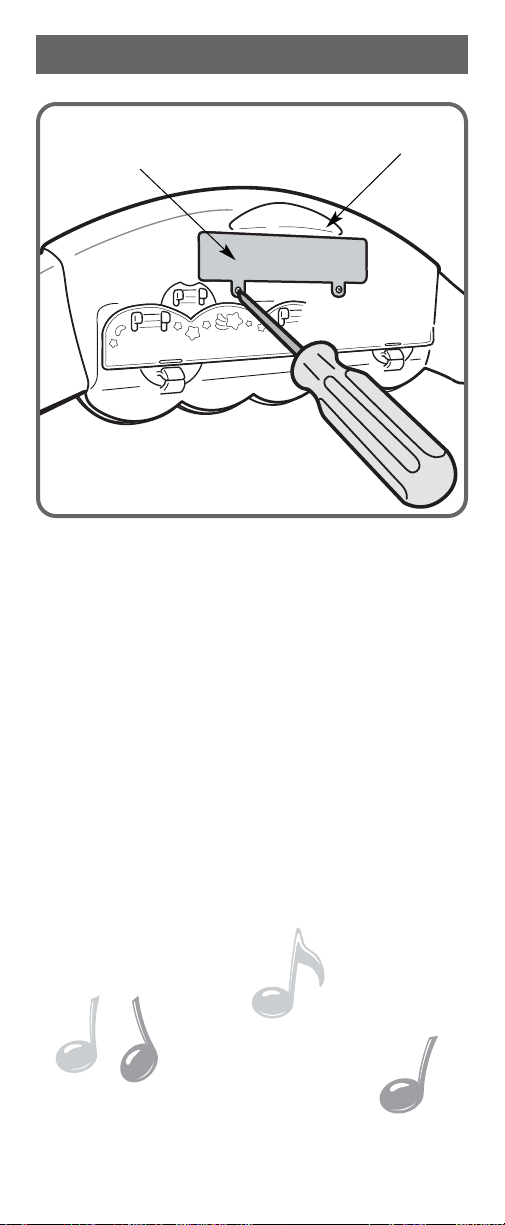
• Locate the battery compartment on the arch.
•Loosen the screws in the battery compartment door
with a Phillips screwdriver and remove the door.
• Insert three, new “C” (LR14) alkaline batteries.
Hint: We recommend using alkaline batteries for
longer battery life.
• Replace the battery compartment door and
tighten the screws with a Phillips screwdriver.
Do not over-tighten.
• When sounds or lights from this toy become
faint or stop, it's time for an adult to change
the batteries!
Battery Compartment Door
Arch
Battery Replacement
4
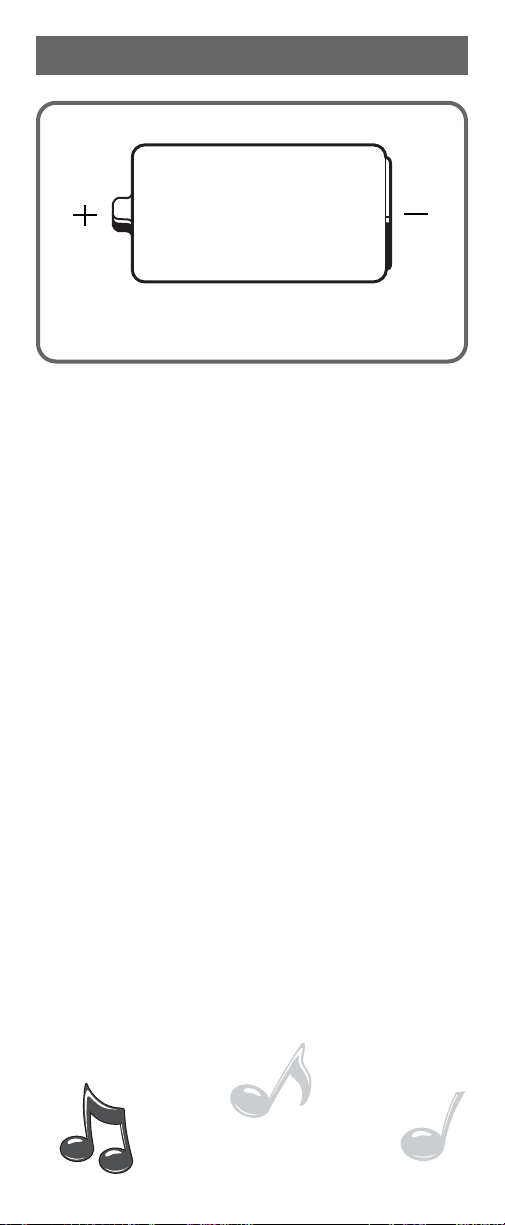
Battery Safety Information
1.5V x 3
“C” (LR14)
SHOWN ACTUAL SIZE
Batteries may leak fluids that can cause a
chemical burn injury or ruin your toy. To avoid
battery leakage:
• Do not mix old and new batteries or batteries of
different types: alkaline, standard (carbon-zinc)
or rechargeable (nickel-cadmium).
• Insert batteries as indicated inside the battery
compartment.
• Remove batteries during long periods of nonuse. Always remove exhausted batteries from
the toy. Dispose of batteries safely. Do not
dispose of batteries in a fire. The batteries may
explode or leak.
• Never short-circuit the battery terminals.
• Use only batteries of the same or equivalent
type, as recommended.
• Do not charge non-rechargeable batteries.
• Remove rechargeable batteries from the toy
before charging.
• If removable, rechargeable batteries are used,
they are only to be charged under
adult supervision.
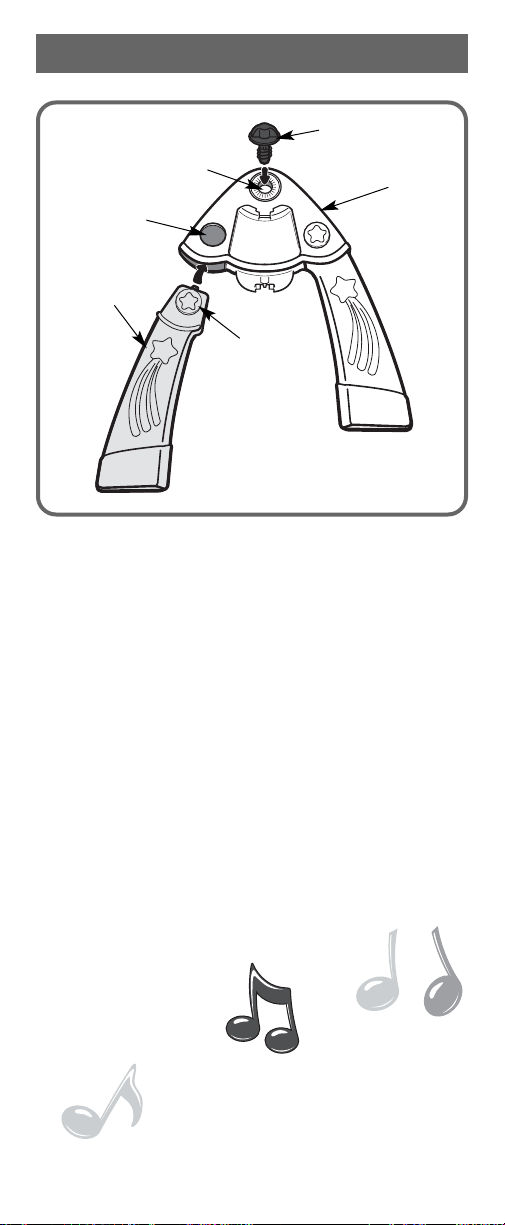
One-time Assembly
• Position one of the joints front side up.
• Position a threaded knob with the peg side down.
• Insert and snap the threaded knob into the upper
hole in the joint.
• Insert a right and left leg (marked R or L on each
leg) into the slots on the joint. Make sure the
buttons on the legs fit into the circular openings
in the joints.
• Repeat this procedure to attach the other threaded
knob and two legs to the remaining joint.
Button
Leg
Hole
Opening
Threaded Knob
Joint
5
1
1
Baby Gym
 Loading...