

Page 1

Installation instructions
https://producthelp.fisherpaykel.com/nz/Dry/Dryers/Condensing/DE8060P2/User_Guide_DE8060P2/02_Installation_instructions
Updated: Fri, 01 Mar 2019 03:41:55 GMT
Powered by
Please read and follow the ‘Safety and warnings’ and ‘installation instructions’ sections carefully before using
your dryer!
Accessories
Please check you received the following accessories with your Fisher & Paykel dryer. You will find them inside the drum:
• 1 x Drying rack
• 1 x Drain hose
• 1 x Installation instructions and user guide
Unpacking
To ensure the best performance from your new dryer please follow the instructions below.
Removing the packaging
1. Remove the outer packaging (including the polystyrene packer and plastic wrapping). All packaging must be
removed prior to use.
2. Tilt the machine backwards and ‘walk’ it off the base one foot at a time. Not doing so may cause damage to
your floor and dryer.
3. Remove all packaging and accessories from inside the drum.
1
Page 2
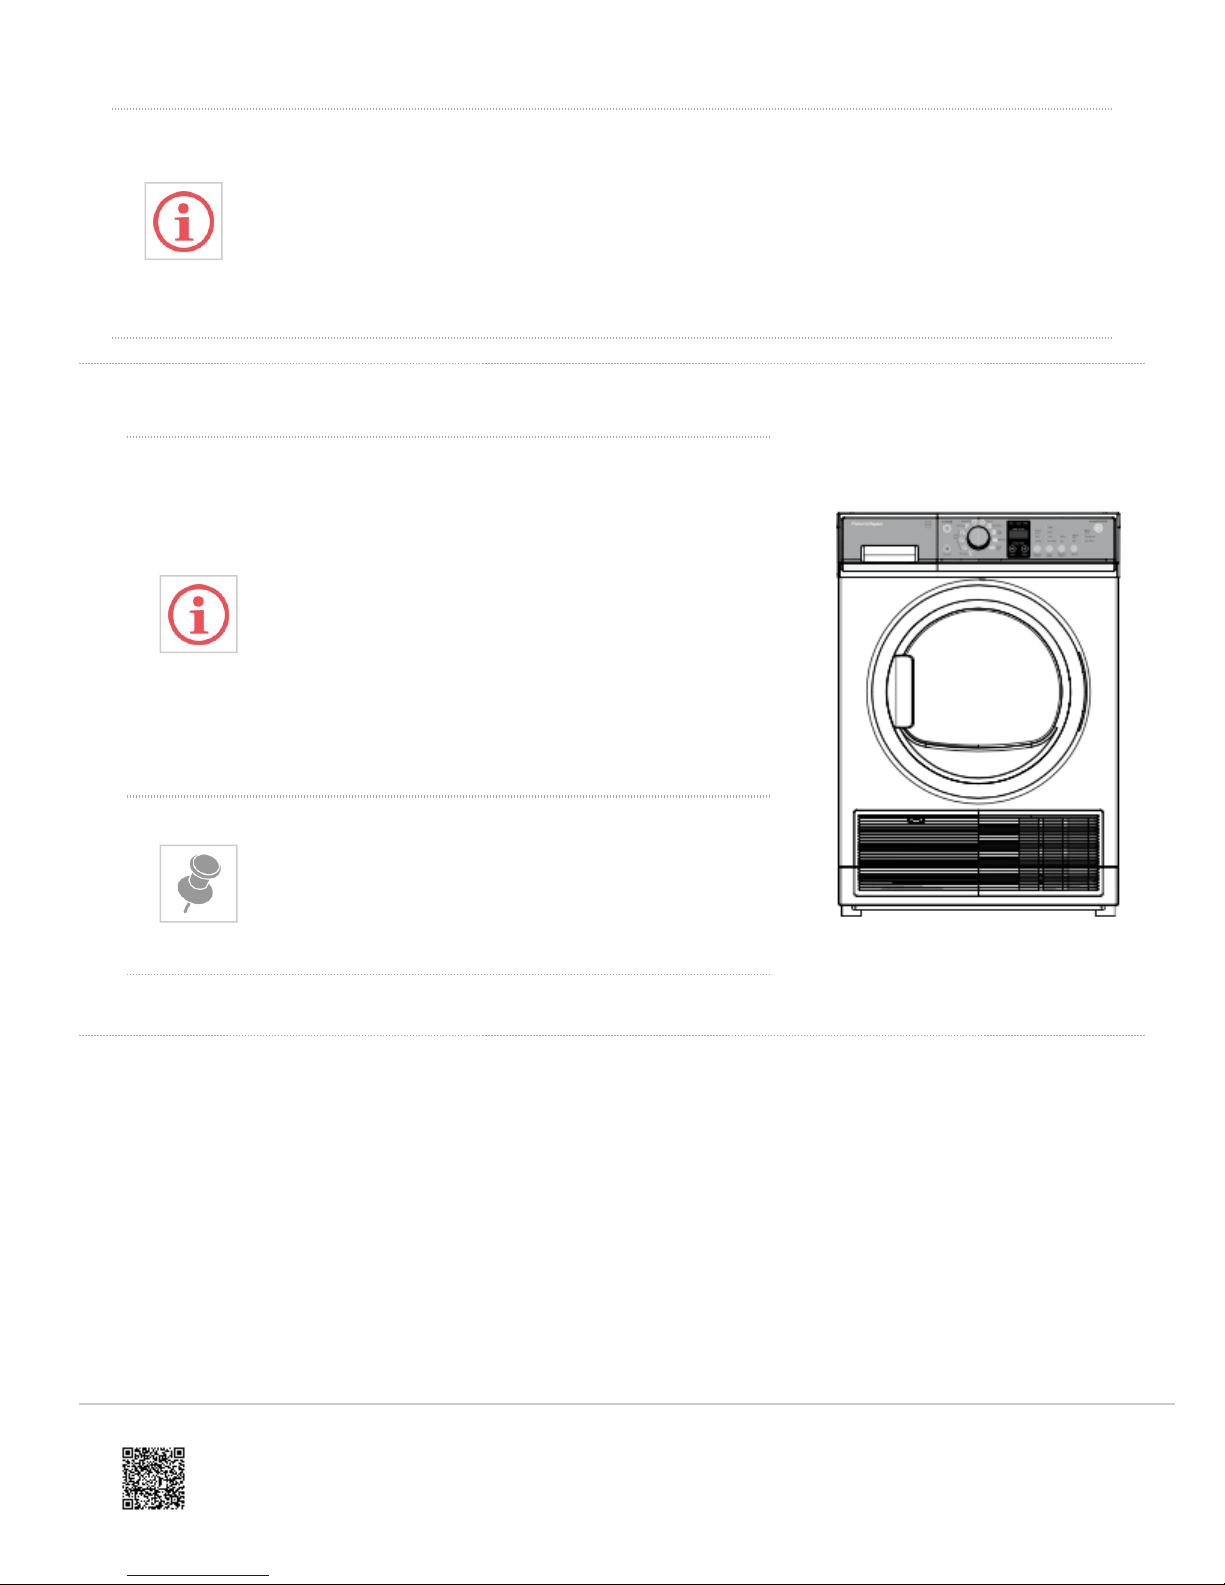
Location
https://producthelp.fisherpaykel.com/nz/Dry/Dryers/Condensing/DE8060P2/User_Guide_DE8060P2/02_Installation_instructions
Updated: Fri, 01 Mar 2019 03:41:55 GMT
Powered by
• Ensure packaging materials are kept out of reach of children.
• Please help protect the environment and dispose of the packaging from around the
dryer in an environmentally friendly manner.
• The dryer must be installed in a well-ventilated,
dust- free environment.
• The dryer must not be installed on any textured
floor coverings (eg carpet, rugs) to ensure that
openings at the base of the machine are not
obstructed.
• Do not install the dryer behind a lockable door,
sliding door, or behind a door where the hinge is on
the opposite side to that of the dryer in such a way
that the full opening of the door is inhibited. Ensure
the dryer door can always be opened fully.
This dryer CANNOT BE INVERTED AND
MOUNTED ON THE WALL.
Free standing
Installation options
Your dryer can be installed one of two ways, either freestanding, or stacked on top of a Fisher & Paykel front loading
washer (specific models only).
1. Free standing
The dryer stands on the floor and can easily be moved into position.
2. Stacking
Your dryer has been designed to be able to be stacked on top of a Fisher & Paykel WashSmartTM or
QuickSmartTM front loading washer (WH8560P, WH8060P and WH8560J models only). A stacking kit MUST
2
Page 3
BE USED between the products and fitted correctly to the washing machine.
https://producthelp.fisherpaykel.com/nz/Dry/Dryers/Condensing/DE8060P2/User_Guide_DE8060P2/02_Installation_instructions
Updated: Fri, 01 Mar 2019 03:41:55 GMT
Powered by
Stacking Kit White: Part No. 427976.
3. Move the machine into the desired position. Do not lift the dryer by the top panel.
4. Have a minimum clearance on all sides of at least 20 mm.
5. Install the machine on a stable and level floor.
• Do not install your dryer in such a way that the dryer door cannot be opened fully.
• Do not install the dryer outside, in a damp place, where there is a risk of freezing, where it may be rained on, in
direct sunlight or close to a source of heat.
• Do not place your machine on top of its power cable.
Leveling the machine
It is IMPORTANT to level the machine to ensure the machine runs efficiently with minimal noise. The dryer should be
leveled in as close to its final position as possible so it stands balanced evenly on all four feet. Ensure the dryer does not
rock in any direction.
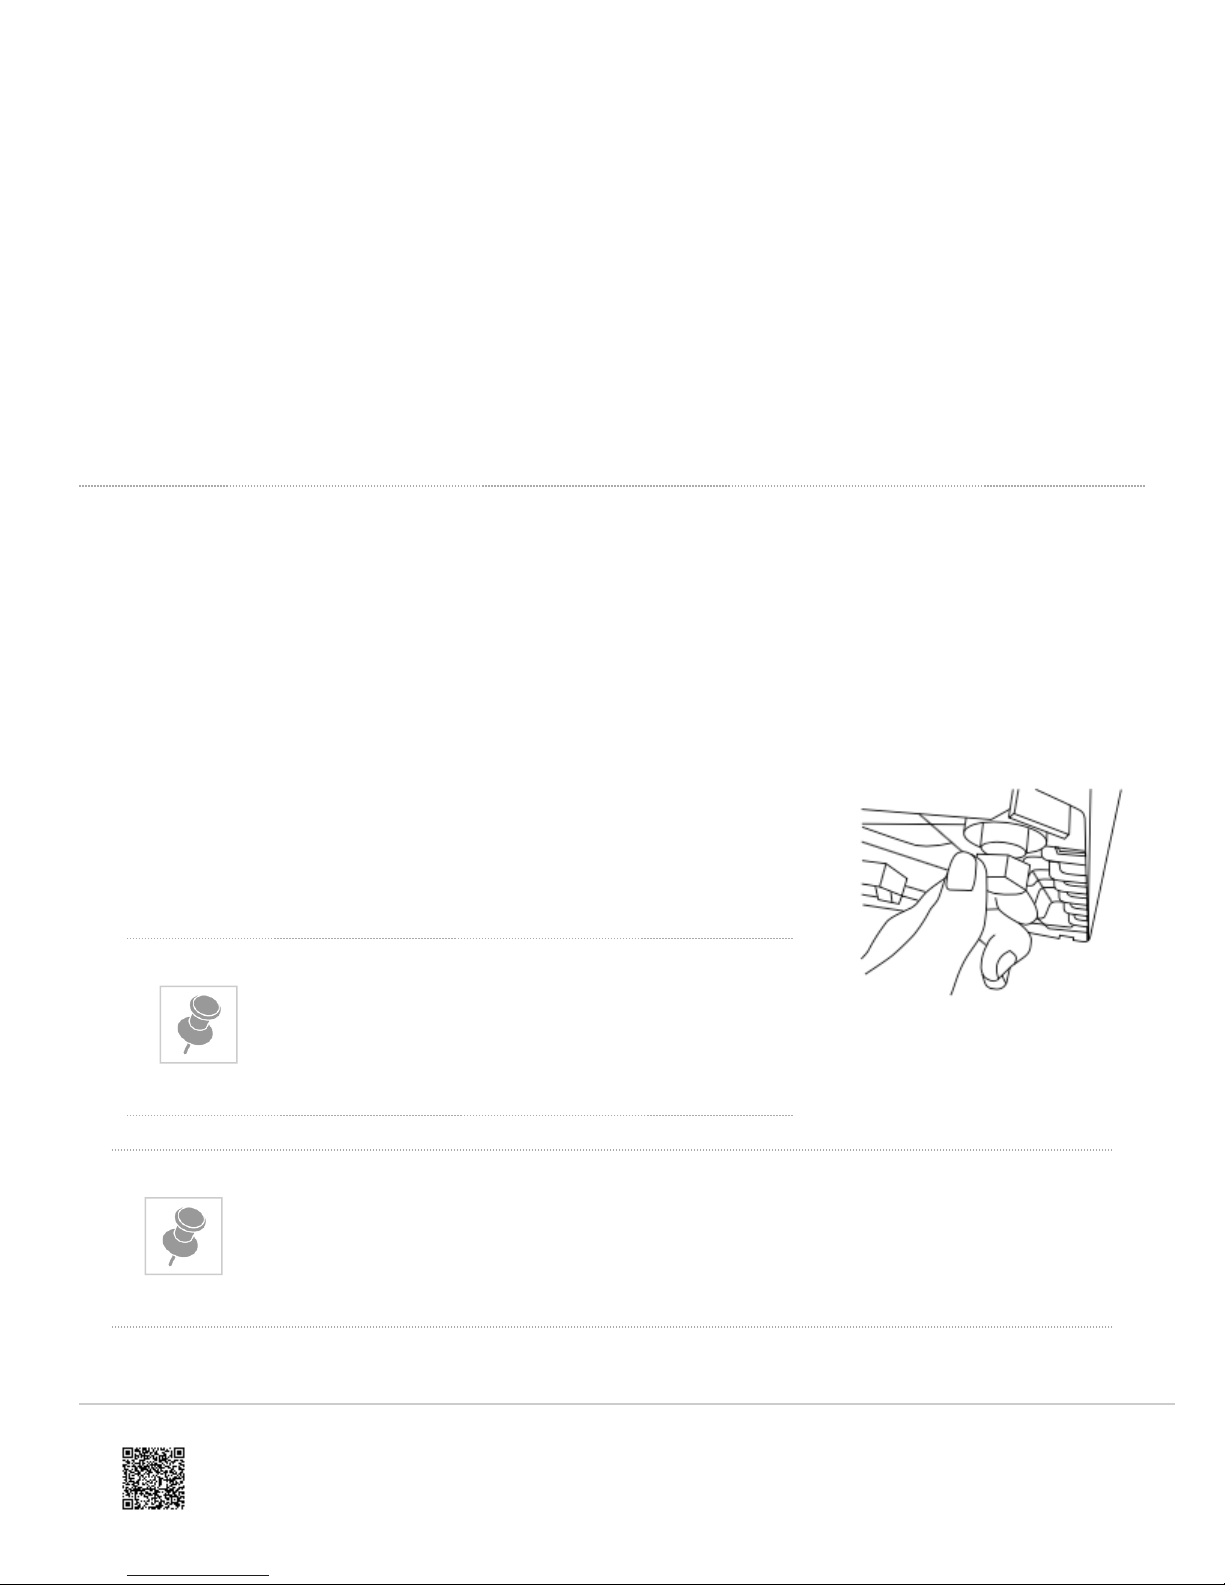
The dryer comes with four adjustable feet, wind all four feet up or down until the
dryer is correctly level. A spirit level can assist with this process. The machine is
considered level when the bubble sits in the centre (ie within the two lines or the
circle), when the spirit level is placed flat on top of your dryer, in the directions
from:
1. left to right,
2. back to front and
3. corner to corner
Never unscrew the feet completely from their
housings.
After leveling, the corners of the dryer cabinet should be clear of the floor and the machine
must not rock in any direction.
Leveling the feet
3
Page 4
Draining
https://producthelp.fisherpaykel.com/nz/Dry/Dryers/Condensing/DE8060P2/User_Guide_DE8060P2/02_Installation_instructions
Updated: Fri, 01 Mar 2019 03:41:55 GMT
Powered by
The dryer is equipped with a condenser unit which accumulates water during the drying cycle. This water is collected in
the removable water tank located at the top left of the dryer. The accumulated water must be emptied after each drying
cycle. However you can also set up your dryer to drain automatically using the drain hose provided.
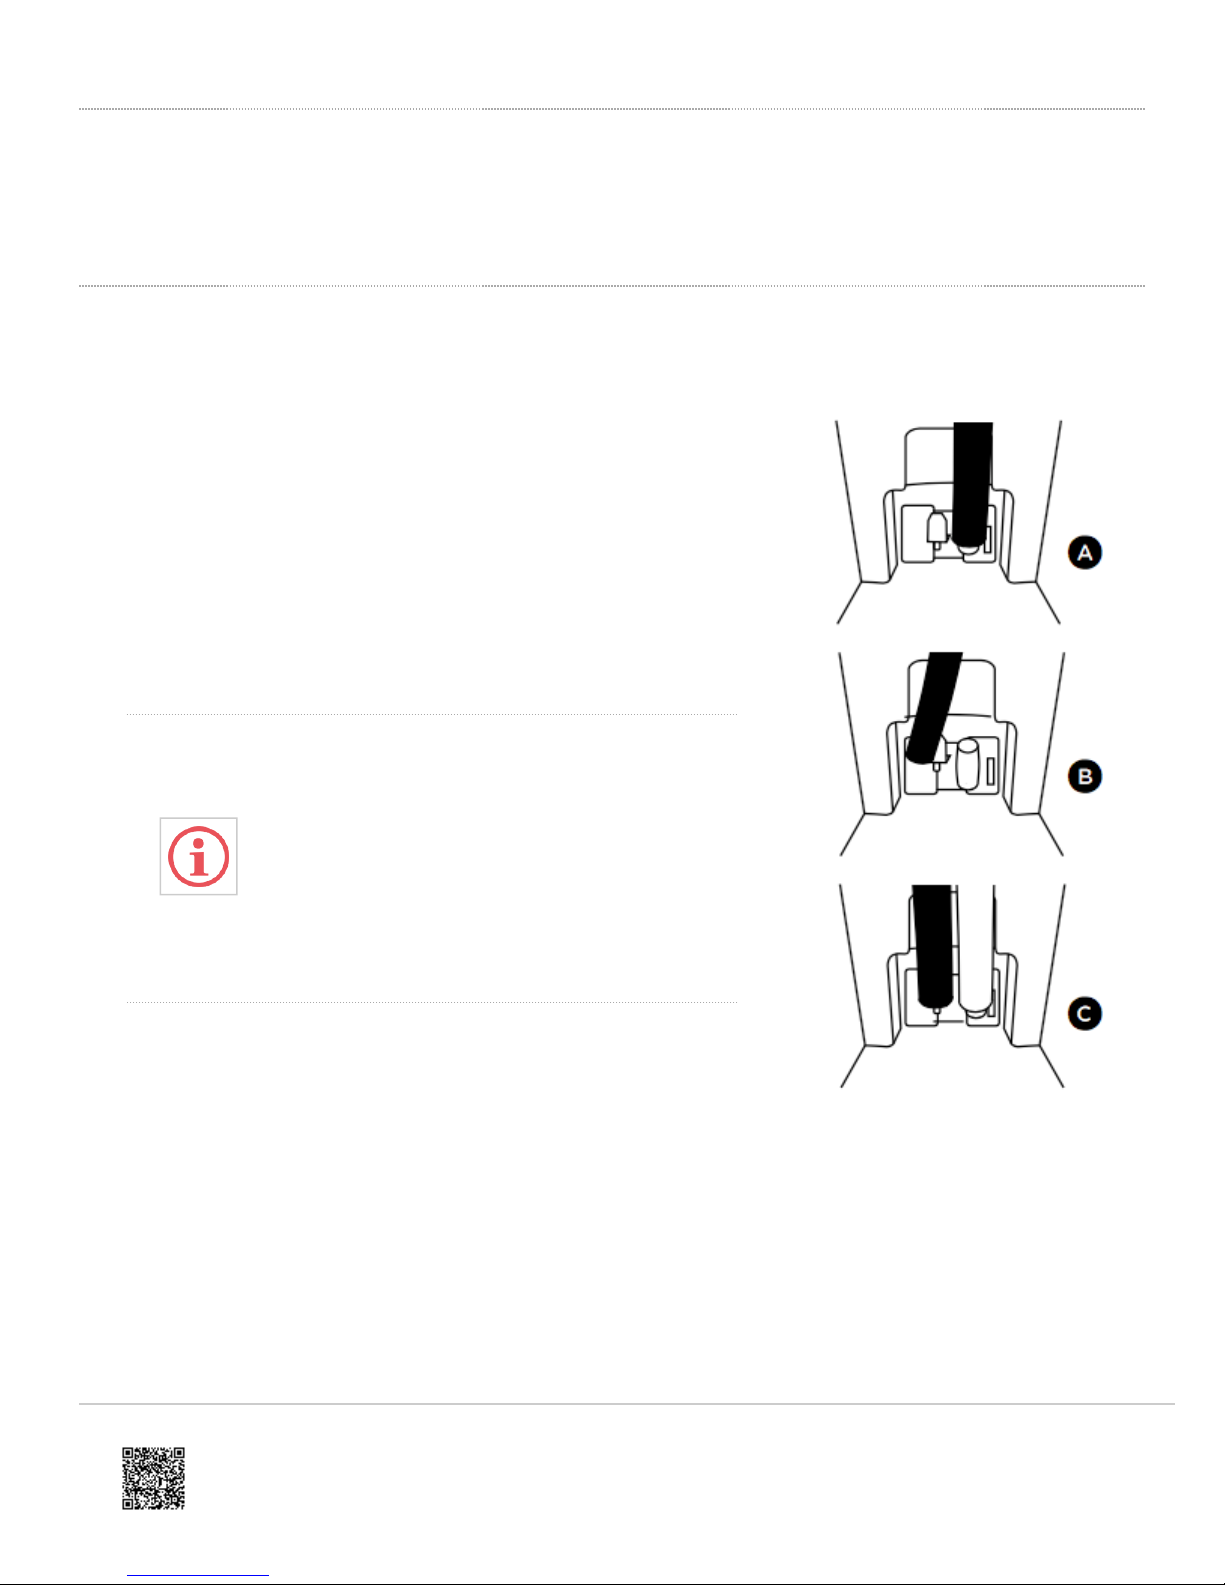
Connecting the drain hose:
1. Remove the black drain hose from the connection at the back of
the dryer (A) and place it on the other connection to the left (B).
Uncoil the white drain hose and connect it to the back of the dryer
where the black drain hose was previously connected (C).
2. Place the other end of the white drain hose into a tub or standpipe.
The connection between the dryer and the white drain hose (C)
must be secured to avoid a potential flood.
If you connect the white drain hose onto your
dryer and you do not secure the other end in a
drain, your dryer will drain water onto your
floor. Ensure the drain hose is securely fixed in
place to an appropriate drain and is leak-free
at the connection to the machine.
• Regularly check that your standpipe or tub is free from lint and other obstructions, which may affect drainage and
cause flooding.
• The drain hose should be checked from time to time and replaced if any damage, eg wear, cuts, bulges, kinks,
leaks, etc are found. Do not bend the drain hose sharply, as this may cause it to split.
• The extended length of the provided drain hose is 1.3 m.
• In multistory apartments or any upper floor, the machine should be installed on a floor equipped with a drain.
• Draining must comply with local by-laws.
4
Page 5

Electrical connection
https://producthelp.fisherpaykel.com/nz/Dry/Dryers/Condensing/DE8060P2/User_Guide_DE8060P2/02_Installation_instructions
Updated: Fri, 01 Mar 2019 03:41:55 GMT
Powered by
1. This appliance must be connected to a 220 V – 240 V, 50 Hz, sinusoidal, 10 A electrical supply.
2. Uncoil the power cord, remove and discard the plastic pin cover and plug into a power socket.
3. Connect the appliance to an earthed outlet protected by a fuse of suitable capacity.
◦ Check the power cord for damage and make sure it is not squashed or twisted when installing the dryer.
◦ Always remove the power cord from the power socket by the plug, not by the cord.
If you are using an extension cord or a portable electrical outlet device (eg multi- socket
outlet box), ensure that it is positioned so that it does not come into contact with water or
moisture. FAILURE TO DO SO MAY RESULT IN DEATH OR ELECTRICAL SHOCK.
• Do not touch or operate the machine with wet hands or with bare-feet.
• A damaged power cord must be replaced by a Fisher & Paykel trained and supported
service technician,
its service agent or similarly qualified persons in order to avoid a hazard. The
appliance must not be operated until it is repaired, as there is risk of electric shock.
• Do not operate this machine if it has been damaged during transport. Contact your
Fisher & Paykel dealer or Fisher & Paykel trained and supported service technician.
Completing the installation
Installation test cycle
Ensure the installation test cycle is completed before you dry any items in your dryer. This
is to check that your dryer is installed correctly and that it is functioning properly prior to
use.
1. Turn your dryer on by pressing the
button.
2. Select the ‘Time Dry’ 30 cycle. Ensure the drum is empty and the door is closed (you will hear it click shut).
3. Touch the
5
Page 6

button. The drum will start rotating.
https://producthelp.fisherpaykel.com/nz/Dry/Dryers/Condensing/DE8060P2/User_Guide_DE8060P2/02_Installation_instructions
Updated: Fri, 01 Mar 2019 03:41:55 GMT
Powered by
◦ Observe the machine for any problems.
◦ The dryer will beep and display any faults on the screen if there are any problems. Refer to pages 25 and
26.
4. At the completion of the cycle open the door and check that there is warmth inside the dryer. This indicates the
dryer is operating normally.
If there are any problems, you must address these before proceeding with normal use. The
dryer will automatically turn off at the end of the cycle if there are no problems.
Before you start, it is a good idea to go through the following checklist:
1. Has the packaging been removed?
2. Is the machine correctly levelled, and the cabinet corners clear of the floor and walls?
3. Are the water tank, condenser and lint filter correctly in place?
4. Has the power cord been connected to an appropriate power supply and the power turned on?
5. Have you performed the installation test cycle?
6. If external draining is preferred, is the white drain hose attached to the correct outlet and hooked into a
standpipe or tub?
Machine specifications - DE8060P
Capacity (kg)* 8
Dimensions (mm)
Width 600
Depth 645
Height** 850
Length of drain hose 1300
Electrical
Volts 220 – 240
6
Page 7

HZ 50
https://producthelp.fisherpaykel.com/nz/Dry/Dryers/Condensing/DE8060P2/User_Guide_DE8060P2/02_Installation_instructions
Updated: Fri, 01 Mar 2019 03:41:55 GMT
Powered by
Amps (maximum) 10
Heating Power (W) 1800
*Capacity refers to the maximum dry weight of items the machine can dry at any one time.
Some cycles have a lower maximum capacity (see the ‘Drying cycles’ section).
** The exact height of your dryer is dependent on how far the feet are extended from the
base of the machine.
7
 Loading...