

INSTRUCTION MANUAL
VPC-S5
Digital Camera
Important note
This manual explains how to safely operate the VPC-S5.
Please read these instructions carefully before using the digital camera. Make
sure to read and understand the section “USING YOUR DIGITAL CAMERA
SAFELY AND CORRECTLY” on pages 5 to 16. Keep this manual in a safe place
for later reference.

Warning
TO PREVENT THE RISK OF FIRE OR ELECTRIC SHOCK, DO NOT
EXPOSE THIS APPLIANCE TO RAIN OR MOISTURE
FOR AMERICAN USERS
i This equipment has been tested and found to comply with the limits for a
Class B digital device, pursuant to Part 15 of the FCC Rules. These limits
are designed to provide reasonable protection against harmful interference
in a residential installation. This equipment generates, uses and can
radiate radio frequency energy and, if not installed and used in accordance
with the instructions, may cause harmful interference to radio
communications.
However, there is no guarantee that interference will not occur in a
particular installation. If this equipment does cause harmful interference to
radio or television reception, which can be determined by turning the
equipment off and on, the user is encouraged to try to correct the
interference by one or more of the following measures:
h Reorient or relocate the receiving antenna.
h Increase the separation between the equipment and receiver.
h Connect the equipment into an outlet on a circuit different from that to
which the receiver is connected.
h Consult the dealer or an experienced radio/TV technician for help.
i Changes or modifications not expressly approved by the party responsible
for compliance could void the user’s authority to operate the equipment.
Declaration of Conformity
Model number: VPC-S5
Trade Name: SANYO
Responsible party: SANYO FISHER COMPANY
Address: 21605 Plummer Street, Chatsworth, California 91311
Telephone No.: (818) 998-7322
This device complies with Part 15 of the FCC Rules. Operation is subject
to the following two conditions:
(1) this device may not cause harmful interference, and
(2) this device must accept any interference received, including
interference that may cause undesired operation.
i English

FOR CANADIAN USERS
i This Class B digital apparatus complies with Canadian ICES-003.
English ii

OUTLINE OF OPERATION
To help you get started enjoying using your digital camera right away, given
below is an outline of the fundamental operation, from setup to shooting to
playback.
SETUP
1 Install the batteries (see page 21).
<When using a card>
h Your camera has a 16MB internal memory
that lets you store images even when no SD
Memory Card is installed. In addition, images
stored in the camera’s internal memory can
be copied to a card, and vice versa (see
page 71).
2 Install the SD Memory Card
3 Format the SD Memory Card (see page 90).
NOTE
i Be sure to format the SD Memory Card with this
digital camera before using it. A card that is not
formatted using the digital camera may interfere
with the operation of your camera.
SHOOTING
1 Capture an image.
h Shoot a still image (see pages 29 and 30).
h Shoot a sequential shots series (see pages
29 and 32).
h Shoot a video clip*
PLAYBACK (see page 56)
NOTE
i It is not possible to connect this camera to
a TV to view the images.
*1
(see page 22).
2
(see pages 30 and 33).
1 English

* 1: About the SD Memory Card
This digital camera can use either an SD Memory Card or a Multi Media
Card for data storage. This manual is written with the premise that SD
Memory Cards are used. In this manual, SD Memory Card and Multi Media
Card are both referred to as “card”.
* 2: About video clips
This digital camera does not have audio record or playback functions.
Therefore, your recorded video clips will not have sound. Moreover, even if
you play back video clips that do have recorded sound with this camera, no
sound will be generated.
Symbols used in this manual
HINT Points that may prove useful when using the digital camera.
NOTE Points giving some extended instructions or special points to
CAUTION Points that require special attention.
(see page xx) Refer to the page indicated for detailed information.
You may find the answers to questions or problems concerning camera
operation in the sections “COMMONLY ASKED QUESTIONS” (see page
112) and “TROUBLESHOOTING” (see page 121).
pay attention to.
English 2

CONTENTS
OUTLINE OF OPERATION ................................................................... 1
USING YOUR DIGITAL CAMERA SAFELY AND CORRECTLY .......... 5
CHECKING THE INCLUDED ACCESSORIES .................................... 17
CAUTIONS CONCERNING THE CARD .............................................. 18
PREPARATION
PARTS NAMES ................................................................................... 19
INSTALL THE BATTERIES AND CARD .............................................. 21
TURNING THE POWER ON/OFF ....................................................... 23
SHOOTING
BEFORE TAKING PICTURES (for best results) .................................. 25
CAPTURING IMAGES ......................................................................... 29
OTHER SHOOTING FUNCTIONS ...................................................... 34
CHANGING THE SHOOTING SETTINGS .......................................... 40
PLAYBACK
VIEWING IMAGES .............................................................................. 56
DISPLAYING THE PLAYBACK SETTING SCREEN ........................... 61
CHANGING IMAGE SIZE (RESIZE) .................................................... 63
ROTATING AN IMAGE ........................................................................ 65
SLIDESHOW PLAYBACK ................................................................... 66
OTHER PLAYBACK FUNCTIONS ....................................................... 67
3 English

CAMERA SETTINGS
CHANGING THE CAMERA SETTINGS ...............................................81
LCD MONITOR SETTING ....................................................................83
DATE AND TIME SETTING .................................................................85
HELP DISPLAY ....................................................................................88
LANGUAGE ..........................................................................................89
INITIALIZING THE CARD MEMORY AND INTERNAL MEMORY .......90
POWER SAVE SETTING .....................................................................92
FILE NO. RESET FUNCTION ..............................................................94
RESETTING THE CAMERA SETTINGS ..............................................96
CHECKING THE REMAINING CARD MEMORY AND
INTERNAL MEMORY ......................................................................97
CHECKING THE REMAINING BATTERY CHARGE ...........................98
OTHER FUNCTIONS AND CONNECTIONS
CONNECTING TO A COMPUTER .....................................................100
DIRECT-PRINT ..................................................................................103
APPENDICES
COMMONLY ASKED QUESTIONS ...................................................112
TROUBLESHOOTING ........................................................................121
SPECIFICATIONS ..............................................................................128
HINTS FOR TAKING PICTURES .......................................................135
English 4
USING YOUR DIGITAL CAMERA SAFELY AND CORRECTLY
CONCERNING THE DIGITAL CAMERA
WARNING
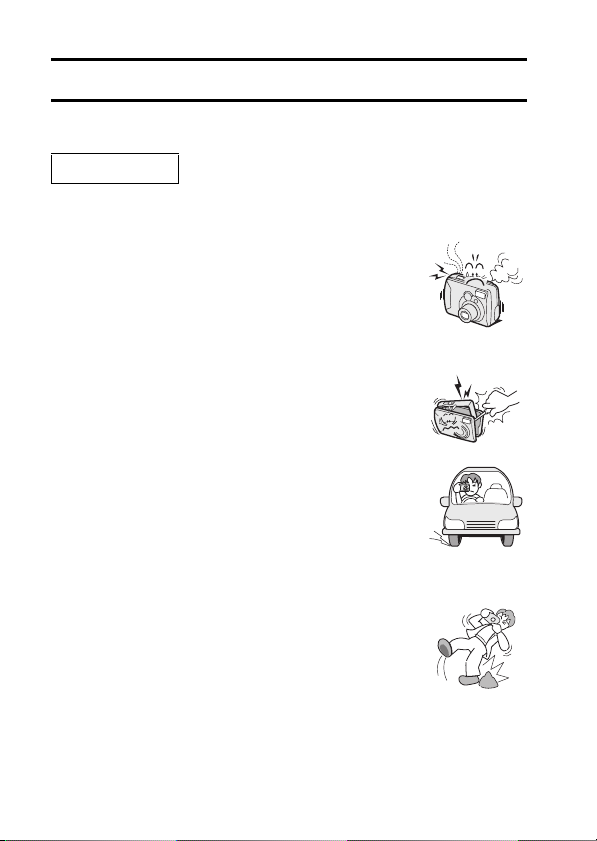
k If the digital camera makes a strange noise, emits a strange odor, or if
smoke comes out from it, immediately turn off the power and remove
the batteries.
i If the digital camera is used under these conditions, it
may cause a fire or electric shock. Immediately turn off
the digital camera, remove the batteries, and wait to
make sure no more smoke comes from the digital
camera. Then take it to the dealer for service. Do not try
to repair or open the digital camera yourself.
k Do not modify or open the cabinet
i High voltage circuits are inside, and there is a high risk
of fire or electric shock if they are touched. Any internal
check, setting, or repair should be performed by the
dealer.
k Do not use while driving
i Do not capture images, play back images, or watch the
LCD monitor while driving a vehicle. Doing so may
cause an accident.
i Be careful where you put down the digital camera inside
an automobile. During sudden stops or turns it may fall
behind the brake pedal and prevent braking.
k Be aware of your surroundings when using the
digital camera
i Pay close attention to your surroundings when using the
digital camera. Failure to do so may lead to an accident
or injury.
i When using the digital camera while walking, be very
careful of your surroundings and especially the traffic to
avoid accidents.
i Do not use the digital camera inside an airplane or
elsewhere where its use may be restricted.
5 English

k Do not get the digital camera wet
i This digital camera is not water-resistant. Do not allow it
to get wet, as doing so may cause a fire or electric
shock.
i Do not use the digital camera in a bathroom.
i If the digital camera gets wet, immediately turn it off and
remove the batteries. Then take it to a dealer for repair.
Using the digital camera after it has been become wet
may cause a fire, electric shock, or other accident.
k Do not use during a storm
i To avoid the risk of being struck by lightning, do not
use the digital camera during a thunderstorm. In
particular, if used in an open field, you have an
increased chance of being struck by lightning. Quickly
seek refuge in a place that will protect you from
lightning.
k Do not place on an unstable surface
i The digital camera may fall, resulting in damage to the
digital camera or injury.
i If the digital camera has fallen and its body is
damaged, turn it off, remove the batteries, and take it
to the dealer for repair. Using the digital camera after
its body has been damaged may cause a fire or
electric shock.
k Do not look through the digital camera into the
sun
i Do not look through the digital camera at the sun or
any other strong source of light. Doing so may
seriously injure your eyes.
k Do not use the flash close to a person’s face
i To prevent possible eye injury, do not use the flash
near a person’s face (especially young children or
babies). If the flash is used close to a person’s opened
eyes, there is a risk that it may damage that person’s
eyesight.
English 6

USING YOUR DIGITAL CAMERA SAFELY AND CORRECTLY
(CONCERNING THE DIGITAL CAMERA)
WARNING
k Do not use where there is risk of explosion
i Do not use the digital camera in a location where
there is explosive gas, or any other flammable
material in the air. Doing so may cause a fire or an
explosion.
k Keep the digital camera out of the reach of children
i The following may happen if children play with the
digital camera:
h They may wrap the strap around their neck and
suffocate.
h They may swallow the batteries or other small
parts. In such a case, consult a physician
immediately.
h They may damage their eyesight if the flash goes
off too close to their eyes.
h They may get hurt by the digital camera.
CAUTION
k Cautions when carrying the digital camera
i Do not walk around holding the digital camera by the
handstrap. It may hit other objects and get damaged.
When walking around, hold the digital camera in your
hand or place it in a pocket.
i Be careful not to drop the digital camera or subject it
to strong shocks.
i Make sure direct sunlight does not hit the digital
camera lens, as that may damage the internal parts.
When not using the digital camera, be sure to always
turn it off and retract the lens.
k If the digital camera is not going to be used for a
long period of time
i For safety’s sake, remove the batteries from the
camera. This will prevent any possible excess heat or
leakage of battery fluid that may result in injuries or
damage to nearby objects. (Note that when the
batteries is removed for a long period, the time and
date settings will be cleared.)
7 English

k Cautions during use and storage
i This digital camera is a precision instrument. When using or storing the
digital camera, make sure to avoid the following locations.
h Places in direct sunlight
h Places where humidity and temperature are high
h Places that may get wet
h Places close to an air conditioner or heater
h Inside a car
h Places where there is dust and dirt
h Places where there is a fire burning
h Places where volatile products are stored
h Places subject to vibration
Operating environment
i Temperature 0 to 40°C (operation)
i Humidity 30 to 90% (operation, no condensation)
–20 to 60°C (storage)
10 to 90% (storage, no condensation)
English 8

USING YOUR DIGITAL CAMERA SAFELY AND CORRECTLY
WARNING
Cautions concerning the alkaline batteries
i Follow all the warnings indicated below to prevent the batteries from
leaking, overheating, exploding, catching fire, or becoming damaged.
h Do not install with the polarities ((+) and (–)) inverted.
h Do not recharge the batteries.
h Do not heat the batteries or throw them in a fire.
h Do not allow metal objects to touch the terminals. Do not carry loose
with necklaces, hairpins, etc.
h Do not transform, take apart, or modify the batteries.
h Do not solder the batteries.
h Do not allow the batteries to come into contact with fresh or salt water,
or allow the terminals to become wet.
h Do not attempt to remove or puncture the outer casing.
h Immediately discontinue use if there is leaking, swelling, temperature
rising, discoloration, or any other abnormal condition.
h Keep out of the reach of children.
In the event that a battery is swallowed, seek medical attention right
away.
h Do not drop, hit, or submit the batteries to strong shocks.
9 English
General precautions concerning the batteries
i Use only alkaline batteries or other specified batteries in this
camera. Manganese batteries cannot be used, as they have a
short battery life and may overheat, causing damage to the digital
camera.
i Never use an alkaline battery together with a Ni-Cd battery, or batteries
of different types or different brands at the same time.
i Do not use a new battery together with an old battery, or combine
consumed batteries.
i Make sure not to invert the polarity ((+) and (–)) when installing the
batteries.
i Use of batteries of different types, new and old batteries, or consumed
batteries together may generate heat or cause the batteries to leak,
resulting in fire, injury or burns, or damage to the digital camera and
any other nearby object.
i When purchasing batteries, be sure to purchase only the specified
batteries. Use of batteries without protective casings or other inferior
products may cause a fire, injury, or burns.
Batterij niet
NL
weggooien, maar
inleveren als KCA.
English 10

USING YOUR DIGITAL CAMERA SAFELY AND CORRECTLY
WARNING
i The batteries may be warm immediately after the
digital camera is used. If removing the batteries, turn
off the digital camera and allow the batteries to cool
down before removing them.
i If a battery is leaking and the electrolyte gets on your
skin or clothing, immediately rinse with clean water. If
the electrolyte gets into your eyes, you risk losing
your eyesight. Do not rub your eyes, but immediately
rinse your eyes with clean, running water, and seek
medical attention right away.
i Do not drop or hit the batteries, or submit them to
strong shocks.
i If the digital camera is not going to be used for a long period of time,
remove the batteries and store them in a cool place. (When the batteries
are removed for a long period, the time and date settings will be cleared.)
i When disposing of the batteries, be sure to follow all applicable
regulations.
i Except for the lithium battery (CR-V3), if used in temperatures below 10°C,
the service life of the batteries will be shorter than normal.
i If using rechargeable batteries, use after fully recharging with the exclusive
battery charger. Always read the instruction manuals that may come with
the batteries you purchase before use.
11 English

Concerning the accessories
CAUTION
k Cautions concerning the use of the AC adapter
i Use only the separately sold AC adapter (model VAR-G4AEX for Europe,
U.K. and others, and model VAR-G4AU for North America and others) with
your digital camera. Do not use an AC adapter other than the one indicted
here, designed for specific use with your digital camera.
i If an AC adapter other than the specified one is used, it may damage the
digital camera and cause a fire or electric shock.
i Normally when using an AC adapter, remove the batteries. Otherwise the
batteries may cause excess heat, leakage, injury or damage to nearby
objects.
i For complete information on how to use the AC adapter, refer to the
instructions accompanying it.
k Cautions concerning the card
i Immediately after use, the card will be very hot. Before removing the card,
turn off the digital camera and wait for the temperature to cool down.
i Keep out of the reach of children. Young children may put the media in
their mouth and choke or cause some other unexpected injury or accident.
English 12

USING YOUR DIGITAL CAMERA SAFELY AND CORRECTLY
FOR CORRECT USE OF YOUR CAMERA
k Cautions before capturing important images
i Before capturing important images, make sure that the digital camera
is operating properly and in condition to capture the image properly.
i Sanyo Electric shall not be held responsible for any losses that result
from images that could not be recorded, are erased, destroyed, or
damaged in any way due to a problem with the digital camera, any of
its accessories, or its software.
k Caution concerning copyrights
i The images you capture with your digital camera are for your own
private use; any other use may violate the rights of copyrights owners.
i Please note that photography may be restricted at stage
performances, shows or exhibitions, even in presentations whose
purpose is entertaining or amusing individuals.
i Also note that images that are intended to be copyrighted cannot be
used outside those limits defined by the regulations of the relevant
copyright laws.
k Cautions when cleaning the digital camera
Cleaning procedure
1 Turn off the digital camera and remove the batteries.
2 Remove the dirt with a soft cloth.
3 If the digital camera is extremely dirty, wipe with a soft cloth
moistened with a mild detergent diluted with water and wrung dry.
Caution
i Do not use benzene or thinner products to clean the digital camera. Doing
so may cause deformation, discoloration, or paint peeling. When using a
chemically treated cloth, carefully read its instructions and warnings.
i Do not spray insecticides or volatile sprays on the digital camera. Do not let
rubber or vinyl objects contact the digital camera for a long period. They
may cause deformation, discoloration, or paint peeling.
13 English

k Caution concerning the batteries and terminals
i Periodically clean the battery terminals ((+) and (–)) as well as the
terminals in the camera’s battery compartment cover with a dry cloth.
Do not touch the terminals of either the batteries or the battery
compartment with your bare hands. Doing so will allow contaminants from
your hands to adhere to the terminals and oxidize, increasing the contact
resistance. If the contact resistance increases, the usable life of the
batteries will diminish.
k Caution when cleaning the lens
i If the lens gets dirty, use a commercially available air blower or a cleaning
cloth for photographic equipment to clean it.
k When not using the digital camera for a long period
i Remove the batteries. However, when the batteries are removed for a long
time, the digital camera functions may begin to not work properly.
Periodically reinstall the batteries and check the digital camera functions.
i If the batteries are left in the digital camera, a small amount of power is still
used even if the digital camera is turned off. If the batteries are left in the
digital camera for a long period, they may become completely discharged
and cannot be used.
k Cautions concerning condensation
i Using the digital camera with condensation inside it may damage the
digital camera.
If condensation seems likely to form
i Place the digital camera in a plastic bag and seal it, and then wait until the
digital camera has reached the ambient temperature.
Be careful of condensation under the following conditions
i When moving the digital camera suddenly from a cold place to a warm
place.
i When the ambient temperature changes drastically, such as when a heater
is turned on to quickly heat the room.
i When the digital camera is placed in the path of cool air from an air
conditioner.
i When the digital camera is placed in a location of high humidity.
English 14
USING YOUR DIGITAL CAMERA SAFELY AND CORRECTLY
FOR CORRECT USE OF YOUR CAMERA (Continued)
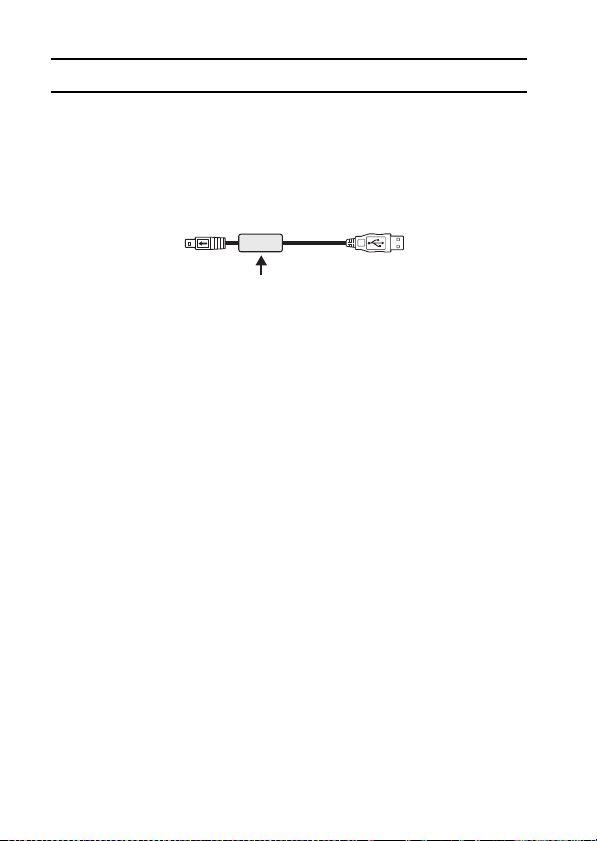
k Caution concerning undesired interference
i The digital camera may create undesired interference if used close to a
television or radio. To avoid this type of interference, make sure the cores
on the supplied video cable and USB interface cable are not removed.
Dedicated USB interface cable (supplied)
k Cautions concerning data storage
i It is recommended that any important data be copied onto a separate
media (such as a hard disk, MO disk, or CD-R disk).
i Stored data may be lost (or corrupted) in cases such as those listed below.
Sanyo Electric will not be held responsible for any damage or lost profits
arising from the loss of data.
h If the card is used incorrectly.
h If the card is not inserted correctly into the digital camera.
h If the card is subjected to electrical or mechanical shocks or other
force s.
h If the camera is turned off or a card is inserted/removed while the
internal memory or card is being accessed.
h If the card has reached the end of its usable life.
Core
15 English

CAUTION
k Cautions when handling the cards
i The cards are precision devices. Do not bend, drop, or subject them to
strong forces or shocks.
i Avoid using or storing the cards in places with extremely high or low
temperatures, subject to direct sunlight, in a completely closed vehicle,
near air conditioners or heaters, or in humid or dusty locations.
i Avoid using or storing the cards in locations where strong static electrical
charges or electrical noise can be easily generated.
i Do not allow the edges of the cards to become contaminated with foreign
materials. Gently wipe away any contamination with a soft, dry cloth.
i Do not carry the cards in trouser pockets, as the cards may become
damaged when you sit down or make other movements that may apply
force s.
i Before using a new card or a card that was used in other equipment, be
sure to format it using the digital camera (see “INITIALIZING THE CARD
MEMORY AND INTERNAL MEMORY” on page 90).
i When buying commercially available products, carefully read the
instructions and warnings that come with the card.
English 16

CHECKING THE INCLUDED ACCESSORIES
i Handstrap i Software: 1 CD-ROM
i AA alkaline batteries: 2
(batteries specially made to
be used as included
accessories)
i Quick Guide: 1
i Dedicated USB interface
cable: 1
Using the included accessories
ATTACHING THE HANDSTRAP
17 English

CAUTIONS CONCERNING THE CARD
Media cards that can be used with this digital camera
The types of card that can be inserted into and used with this digital camera
are:
i SD Memory Card
i Multi Media Card
What “card” means in this manual
i In this manual, SD Memory Cards and Multi Media Cards that can be used
in this digital camera are referred to as “card”.
i The cards in the illustrations in this manual are SD Memory Cards, but all
installation, removal, and formatting procedures are the same for both SD
Memory Cards and Multi Media Cards.
English 18
PREPARATION
1234
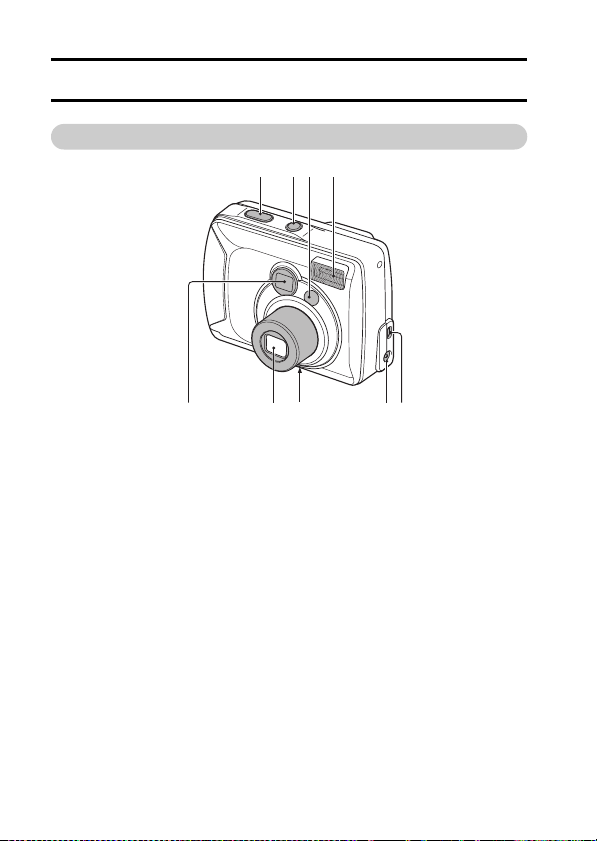
PARTS NAME S
Front
1 Shutter release button
2 Power button
3 Mirror
h When taking a picture of
yourself, use it to check the
angle.
4 Flash
56789
5 OUTPUT terminal
6 DC IN (external DC power)
h For connecting a separately
sold AC adapter (model VARG4AEX for Europe, U.K. and
others, and model VAR-G4AU
for North America and others)
7 Tripod stand hole
8 Lens
9 Viewfinder
19 English
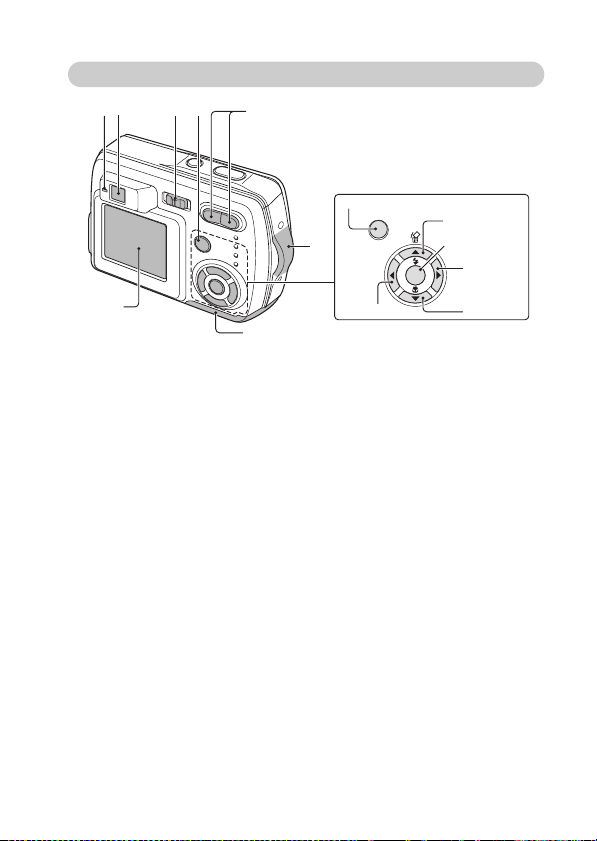
Rear
12 3 8
7
1 Accessing indicator: The red
LED
Lit:
h Indicates that shooting is
enabled; during shooting
without using the LCD monitor
(see page 83); or during USB
connection (see pages 100
and 103).
Flashing (1-second intervals):
When the camera is starting up
or when the flash is recharging
(shooting not possible); while
the manual focus is being set
(see page 52); when exposure
correction is active (see page
55) or the digital zoom is being
used (see page 36) (shooting is
possible); During self-timer
countdown (see page 37); when
the batteries are consumed; or
while an image is being saved.
4
8
MENU
5
A
9
0
9
SET
A
6
Slow flashing (2-second
intervals):
h When the power save mode is
active (see page 24); or when
the memory is full (shooting
not possible).
Rapid flashing (2 flashes per
second):
h When an unformatted card
(see page 90) or a locked card
is installed (shooting not
possible); or during self-timer
countdown (see page 37)
2 Viewfinder
3 Main switch
4 Zoom switch
5 Handstrap holder
6 Battery compartment cover
7 LCD monitor
8 MENU button
9 [n] and [m] arrow buttons
0 SET button
A [l] and [o] arrow buttons
English 20
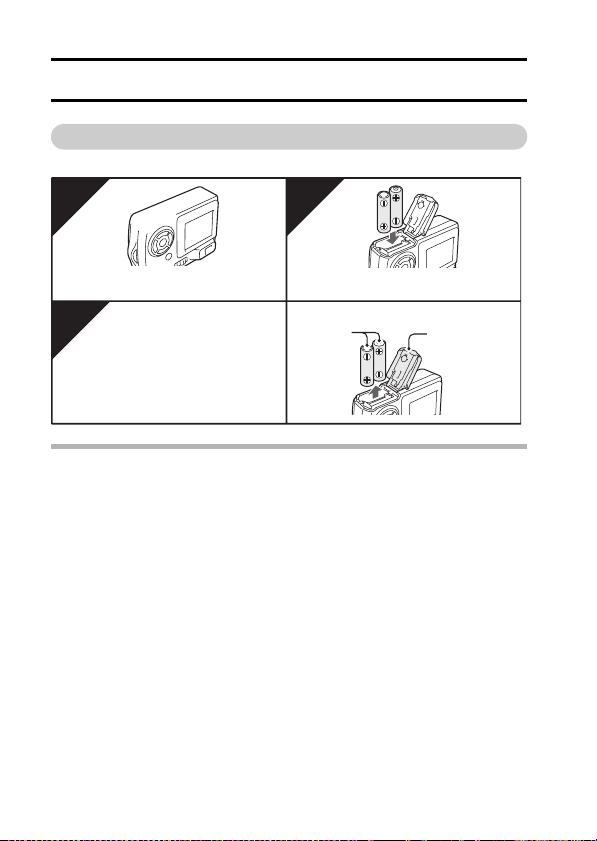
INSTALL THE BATTERIES AND CARD
Install the batteries
Make sure that the batteries’ polarities ((+) and (–)) are correct.
1 2
3
CAUTION
Manganese batteries cannot be used
i Not only do manganese batteries have a short battery life, but there is the
danger of their overheating and causing damage to the digital camera.
Other batteries
i If you wish to use batteries other than the alkaline
batteries (LR6), we recommend the following.
h AA-size nickel metal hydride (NiMH) batteries
(SANYO HR-3UF) × 2
h AA-size Ni-Cd batteries (SANYO N-3UV) × 2
h Lithium battery (CR-V3) × 1
When installing the batteries, make sure that they are
oriented correctly.
Do not open the battery compartment cover when the camera is turned
on.
i If the battery compartment cover is opened while the power is on,
important data may be lost. Sanyo Electric shall not be held responsible for
any losses that result from failure to comply with this warning.
21 English
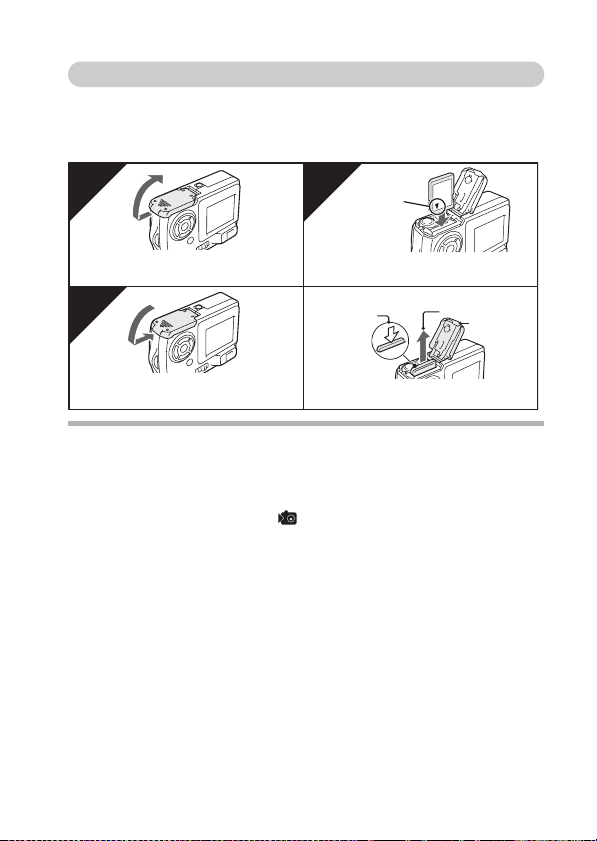
Insert the card
The card can be used after it has been formatted with the camera (see page 90).
When inserting the card, make sure that it is correctly oriented.
Take special care to orient the card correctly when inserting it. Attempting to
insert the card incorrectly may result in damage.
1 2
Open battery compartment cover on
the camera bottom.
3
Close the battery compartment cover.
HINT
Shooting without a card
i When a card is installed in your camera, you can photograph images and
play them back from the card. When no card is installed, you can still shoot
pictures and play them back from the camera’s 16 MB internal memory.
Also, the internal memory icon appears on the LCD monitor when the
camera is turned on and there is no card installed.
About the internal backup battery
i This camera’s internal battery serves to maintain the date and time
settings, as well as the shooting settings. The backup battery will be fully
charged when the batteries are kept in the camera continuously for about 2
days. In the fully charged state, the backup battery will maintain the
camera settings for about 7 days.
When not using the camera for a long time, remove the batteries
i A small amount of power is still used even if the digital camera is turned off,
and it is therefore recommended that the batteries be removed from the
camera if it is not going to be used for a long time. Note that when the
batteries are removed for a long period, the time and date settings may be
cleared. Before using your camera again, be sure to confirm that the
camera settings are correct.
[o] mark
Insert all the way until it clicks.
i To remove the card...
2 Push
down
Do not attempt to forcefully remove the
card.
3 Pull out
1 Open
English 22
TURNING THE POWER ON/OFF
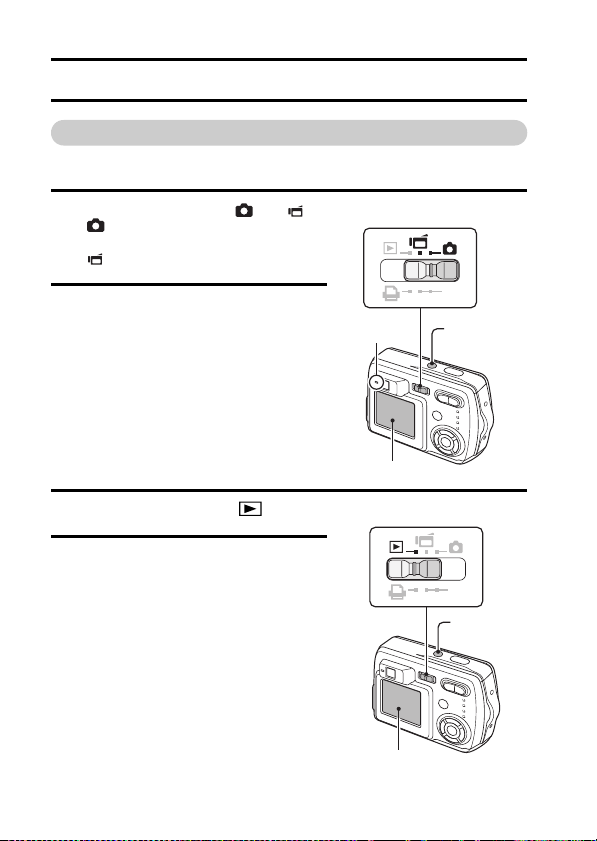
Turning the power on
When capturing images
1 Set the main switch to [ ] or [ ].
[ ]: To shoot still images or
sequential shots
[ ]: To shoot video clips
2 Press the power button.
h The power turns on, an image
appears on the LCD monitor, and
the accessing indicator next to the
viewfinder lights.
When playing back images
1 Set the main switch to [ ].
2 Press the power button.
h The power turns on, and an image
appears on the LCD monitor.
Main switch
Accessing
indicator
LCD monitor
Main switch
LCD monitor
PC
Powe r
button
PC
Powe r
button
23 English

Turning the power off
1 Press the power button.
h The power turns off.
h The LCD monitor and accessing
indicator turn off.
h If the lens is extended, it
automatically retracts.
Turning the power on when the power save function is active
In order to save the battery power, the power save function will automatically
turn off the power after one minute of no use during shooting, or five minutes
of no use during playback (factory-preset setting).
i When the power save function is active, the power is restored after any of
the following operations:
h Press the power button.
h Press the shutter release button.
h Press the MENU button.
h Press the SET button.
i After the power save function has been active for 15 minutes, the power
will turn off completely.
i When the separately sold AC adapter (model VAR-G4AEX for Europe,
U.K. and others, and model VAR-G4AU for North America and others) is
connected, the power save function will become active about 10 minutes
after the camera is turned on (factory-preset setting).
i The user can specify the time elapsed before the power save function is
activated (see page 92).
i When the camera is connected to a computer or printer using the
dedicated USB interface cable, the power save function is disabled, and
the camera turns off after about 12 hours.
English 24
SHOOTING
BEFORE TAKING PICTURES (for best results)
Recording the date and time
When the correct date and time are set in your camera, the date and time are
recorded with the image each time you snap a picture (see page 85).
To facilitate organizing your photographed data, it is recommended that you
complete your camera’s date and time settings before shooting pictures.
A clock alert icon appearing on the LCD monitor indicates that the date
and time settings have not been completed.
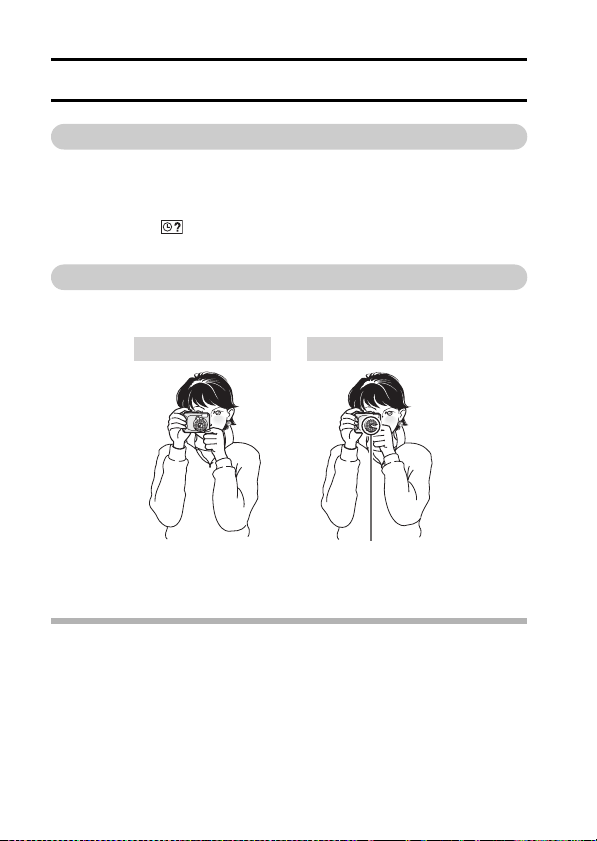
Holding the camera
Hold the camera securely with both hands, keeping your elbows close to your
body and making sure the camera is stable.
Correct hold Incorrect hold
A finger is blocking the lens.
Make sure that the lens or flash is not blocked by your fingers or the
handstrap.
HINT
i Images captured in the still image shooting mode or sequential shots
shooting mode can be rotated when they are played back (see page 65).
Note that video clips cannot be rotated while they are being played back.
i When the optical zoom is used or when the autofocus is operating, the
image may appear to waver, but this is not a malfunction.
25 English

Using the Autofocus
The autofocus will work in almost all situations; however, there are certain
conditions that may cause the autofocus function to not work properly. If the
autofocus function is not working properly, set the focus range to capture
images (see page 52).
k Conditions that may cause incorrect focus
The following examples are some of the situations where the autofocus
function may not work.
i Subjects with low contrast, very bright
subjects at the center of the image, or
dark subjects or locations
Use the focus-lock function (see page 30)
to lock the focus on an object with contrast
at the same distance as the desired
subject.
i Subjects without vertical lines
Use the focus-lock function to lock the
focus on the subject while holding the
digital camera vertically.
English 26

BEFORE TAKING PICTURES (for best results)
The following examples are some of the situations where the autofocus
function may work, but not as desired.
i When both near and far objects are
present
Use the focus-lock function to lock the
focus on an object at the same distance as
the desired subject, then reposition the
27 English

While the image data is being recorded...
i The accessing indicator flashes while an image is being recorded and it is
not possible to take another picture at this time. When the accessing
indicator stops flashing, the camera is again enabled for shooting.
View the image just captured (preview display)
i Immediately after capturing an image,
you can press the SET button to preview
the image. Press the [l] or [m] arrow
button to view the previous image or the
next image. For video clips, press the
SET button to begin playback, and press
the [n] arrow button to pause playback.
Also, when playback is paused, you can
press the [l] or [m] arrow button for fast
forward play or fast reverse play.
After video clip playback has ended, you
can go to the start of the previously recorded video clip by pressing the [l]
or [m] arrow button.
If you do not want to keep the image, you can press the [n] button at this
time to delete the currently displayed image from the camera’s memory. To
return to the shooting mode, press the [o] arrow button.
PREVIEW
ONE ERASE
EXIT
English 28
CAPTURING IMAGES
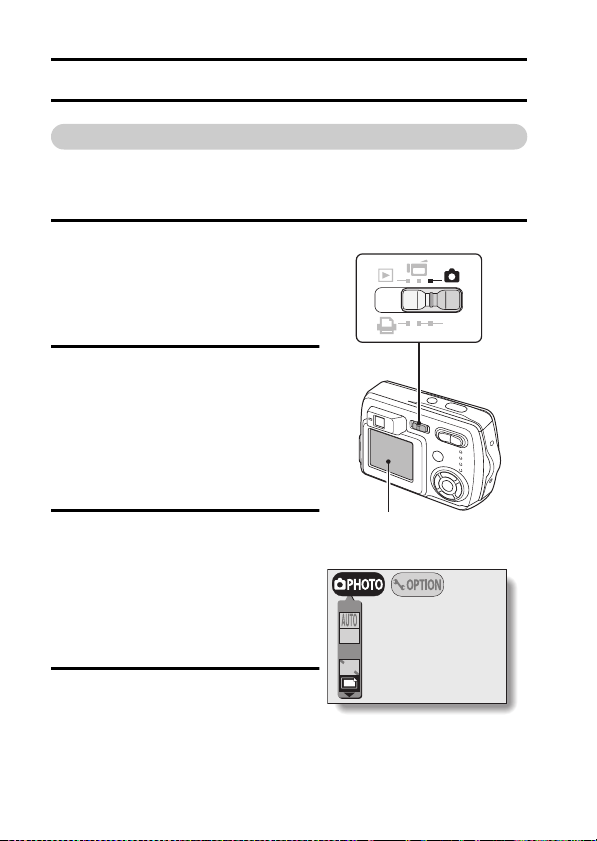
Setting the shooting mode
Set the camera to the still image or sequential
shots shooting mode
1 Set the main switch to [ ], and
turn on the camera (see page 23).
h An image appears on the LCD
monitor. If no image appears,
please see page 83 and follow the
steps to enable the LCD monitor.
2 Press the MENU button.
h The Still Image Shooting Setting
Screen appears.
3 Press the [n] or [o] arrow button
to select the operation mode
menu.
: To capture still images (still
image shooting mode).
: To capture sequential shots
(sequential shots shooting
mode).
PC
4 Press the [l] or [m] arrow button
to select the desired icon, and
press the SET button.
h If you press the MENU button, the
still image shooting setting screen
is canceled.
29 English

Set the camera to the video clip shooting mode
1 Set the main switch to [ ], and turn on the camera.
h An image appears on the LCD monitor. If no image appears, please
see page 83 and follow the steps to enable the LCD monitor.
Capturing still images
1 Set the camera to the still image
shooting mode (see page 29).
2 Slowly press and hold the shutter
release button halfway.
h The target mark or the focus
icon (focus-lock) appears in
the LCD monitor.
h If the Shooting Setting Screen
(see page 40), was displayed, it is
exited.
3 Press the shutter release button
all the way.
h The image is captured.
Shutter release button
LCD monitor
(Press halfway)
Focus icon
Target mark
(Press fully)
English 30

CAPTURING IMAGES
NOTE
About the focus icon and target mark
i The target mark outlines the area that the camera is using to focus. If the
area outlined by the target mark is not the subject you want to focus on,
then refocus your subject, for example by changing the shooting angle.
i The target mark does not appear in the following situations.
When the subject is not in focus
When using the self-timer to take a picture (see page 37)
When the focus is set to focus range or (see page 52)
When the Scene Select or function is enabled (see page 45)
i When the camera focuses on a wide area of the central part of the screen,
a large target mark appears.
If the motion alert icon appears...
i During still image shooting, if the shutter
speed is slow and the possibility that the
image may be blurred due to camera
movement becomes high, the motion
alert icon may appear on the LCD
monitor. In this case, use a tripod to
stabilize the camera when shooting, or
set the flash operation mode to
automatic (see page 34).
i When shooting with the scene selection
function set to the fireworks mode,
the motion alert icon always appears,
but this is normal.
Motion alert icon
31 English
Capturing sequential shots
1 Set the camera to the sequential shots shooting mode (see page 29).
2 Press the shutter release button to capture the sequential shots.
h Images are captured as long as the shutter release button is pressed.
h During shooting, appears in the LCD monitor.
3 Finish capturing images.
h Release the shutter release button to end recording.
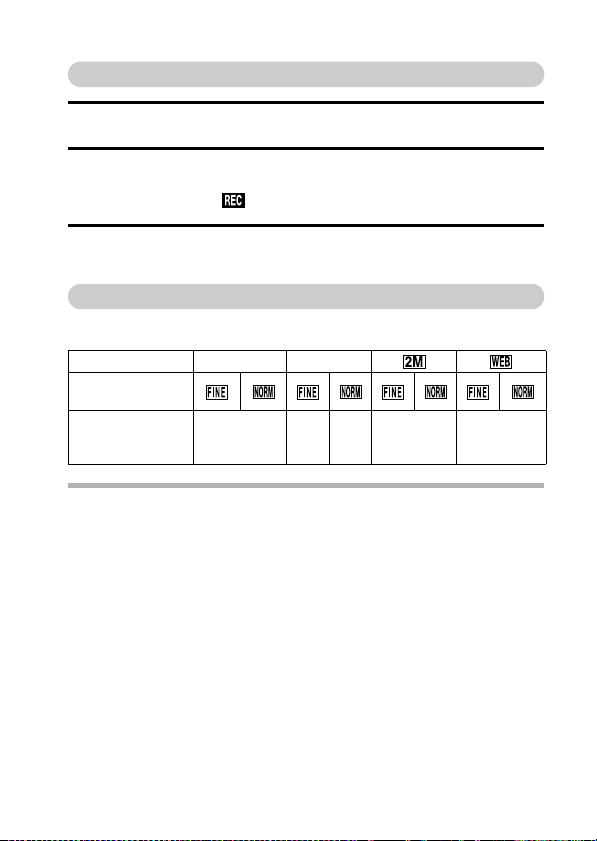
About the maximum number of sequential shots
The maximum number of sequential shots varies depending on the resolution
and compression settings.
Resolution setting
Compression
setting
Maximum number
of sequential
shots
NOTE
About the focus during sequential shots shooting
i In sequential shots shooting, the autofocus function is activated when the
shutter release button is pressed halfway and remains fixed at the same
focus until the sequential shots are finished.
ml
Not available 3 4 4 4
English 32

CAPTURING IMAGES
Video Clips (no audio)
Your camera can shoot Video clips.
* Video clips can only be shot without sound.
1 Set the camera to the video clip
shooting mode (see page 30).
2 Press the shutter release button to
record the video clip.
h It is not necessary to keep the
shutter release button pressed
while shooting.
h During recording appears on
the LCD monitor.
h When the remaining recording time
available for the currently recording
clip becomes little, a countdown of
the remaining recording time
appears on the display.
3 End the recording.
h Press the shutter release button to stop recording.
NOTE
i The data for a video clip is very large. Therefore, be aware that if the video
clip is uploaded to a computer to be played back, the computer may not be
able to play back the video fast enough, making it appear jerky. (The video
will always be displayed properly on the LCD monitor.)
i The possible shooting time for each video clip will differ depending on the
card. Also depending on the card, shooting may end even before the
possible shooting time indicated on page 132.
REC (recording) indicator
Recording time
Remaining
recording time (sec)
(min:sec)
33 English

OTHER SHOOTING FUNCTIONS
Using the flash
The flash is used not only for taking pictures where there is insufficient light,
but also when the subject is in shade or in backlight conditions. Your camera
has four modes of operation (automatic flash mode, forced flash mode, flash
off mode, and red-eye reduction mode). The flash is available only when
shooting still images.
1 Set the camera to the still image
shooting mode (see page 29).
h The current flash mode is shown
on the LCD monitor.
No icon: The digital camera will
detect the subject
brightness and use the
flash only when required.
In a backlight situation, if
only the center of the
image is very dark, the
flash will operate to
compensate (auto flash).
: The flash will operate with every image captured regardless of
the conditions. Use this setting under backlight conditions,
when the subject is in shade, under fluorescent lighting
conditions, etc. (forced flash).
: The flash will not operate even in dark situations. Use this
setting when capturing an image in a location where flash
photography is prohibited, or when shooting a night landscape
scene (flash off).
: The digital camera will detect the subject brightness and use
the flash only when required. At this time the flash will operate
in a manner that reduces the red reflection (“red-eye”) in the
subject’s eyes.
Flash mode
English 34

OTHER SHOOTING FUNCTIONS
2 Press the flash button [] ([n]) to select the flash mode.
h Each time the flash button is pressed, the flash mode icon changes.
Flash button Flash
3 Press the shutter release button.
h The image is captured in the desired flash mode.
<Shooting without using the LCD monitor>
1 Press the flash button.
h The LCD monitor turns on briefly to show the currently set flash
mode.
2 Press the flash button within 5 seconds to set the desired flash mode.
NOTE
In the automatic flash mode...
i In the automatic flash mode using the LCD monitor, when the shutter
release button is depressed halfway, a icon appearing in the upper
right area of the LCD monitor indicates that the flash will operate.
35 English

Using the zoom
There are two zoom functions: optical zoom and digital zoom.
1 Point the camera lens at the subject.
2 Press [T] or [W] on the zoom
switch to compose the desired
image.
[T]: Zoom in on the subject.
[W]: Zoom out.
h When the zoom switch is
pressed, the zoom bar appears
on the LCD monitor.
h When the optical zoom factor is
at maximum, zooming stops
temporarily. When [T] on the
zoom switch is pressed again,
the mode changes to the digital
zoom mode and zooming
continues (if digital zooming is
enabled).
When both optical
and digital zoom
are enabled
3 Press the shutter release button.
When optical zoom
only is enabled
NOTE
i When shooting without the LCD monitor, the digital zoom is not available.
i At the WIDE end, the zoom is resetting; this is not a malfunction.
Zoom switch
[W]
[T]
LCD monitor
Zoom bar
Poin ter
Optical zoom
Digital zoom (yellow)
English 36
OTHER SHOOTING FUNCTIONS
SELF-TIMER
The self-timer can be used to take photos in the still image shooting mode
and sequential shots shooting mode.
1 Set the camera to the still image or sequential shots shooting mode,
press the MENU button and select the self-timer menu.
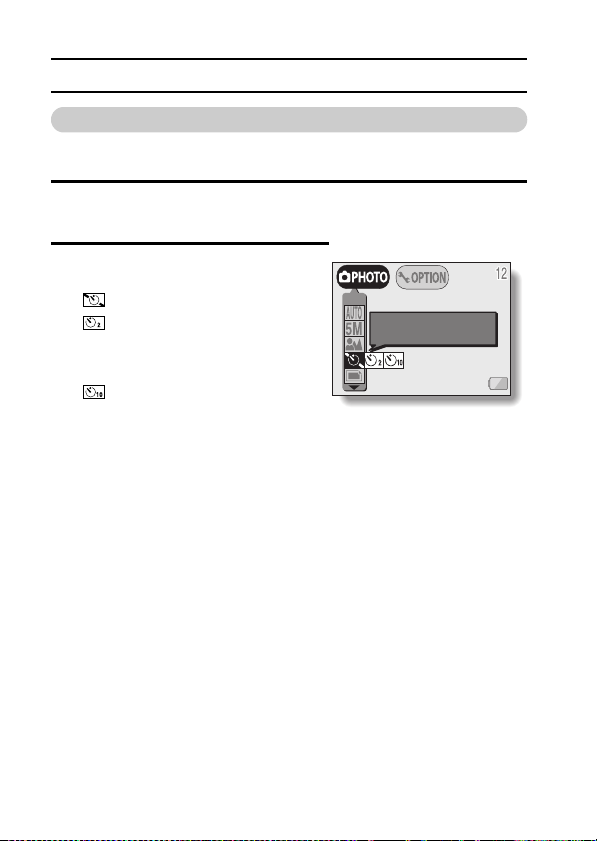
2 Press the [n] or [o] button to select
the self-timer menu.
: Turns off the self-timer function.
: Turns on the self-timer function.
The image is captured about 2
seconds after the shutter release
button is pressed.
: Turns on the self-timer function.
The image is captured about 10
seconds after the shutter release
button is pressed.
SELF-TIMER
OFF
37 English
3 Select desired icon, and press the SET button.
h This completes the self-timer setting.
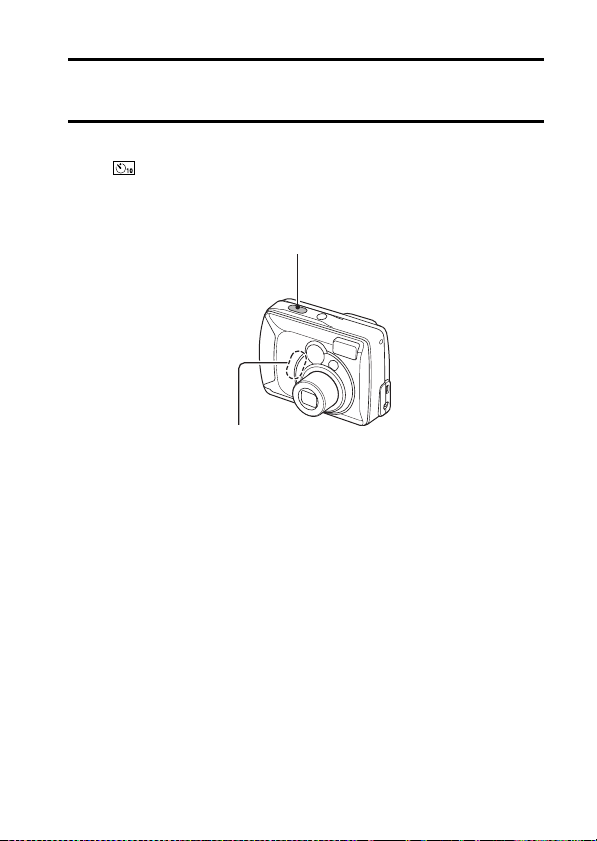
4 Press the shutter release button.
When is selected...
When the shutter release button is pressed, the self-timer indicator flashes for
about 7 seconds, then flashes rapidly for about 2 seconds, and then is lit for 1
second to indicate the timing at which the shutter will be released.
Shutter release button
Self-timer indicator light
English 38

OTHER SHOOTING FUNCTIONS
NOTE
i When using the self-timer function, be sure to use a tripod or place the
digital camera on a level, stable surface.
HINT
About the focus
i In self-timer photography, the autofocus is activated just before the shutter
is released to produce a focussed image.
To pause or cancel the self-timer function...
i If the shutter release button is pressed again before the image is captured,
the self-timer countdown temporarily stops. Press the shutter release
button one more time to restart the self-timer.
i To cancel self-timer photography, select the self-timer off icon and
press the SET button.
i The self-timer setting automatically changes to off after the picture is
snapped.
39 English

CHANGING THE SHOOTING SETTINGS
<
You can change the shooting settings by selecting the desired menu from the
Shooting Setting Screen and modifying the settings.
Displaying the Shooting Setting Screen
1 Set the main switch to [ ] or
[ ], and turn on the camera
(see page 23).
[ ]: The camera is set to the
still image/sequential
shooting mode.
[ ]: The camera is set to the
video clip shooting mode.
2 Press the MENU button.
[ ]: The Still Image/
Sequential Shooting
Setting Screen appears
(see page 41).
[ ]: The Video Clip Shooting
Setting Screen appears
(see page 43).
k To cancel the Shooting Setting
Screen
h Press the MENU button.
Still Image/Sequential Shooting Setting Screen>
Main switch
PC
FULL AUTO
USE AUTO SETTINGS
FULL AUTO
USE AUTO SETTINGS
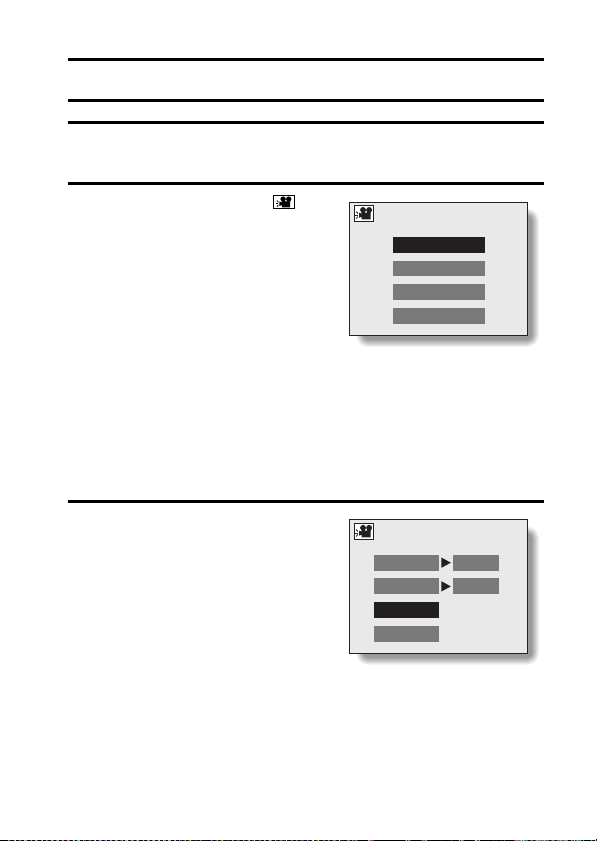
<Video Clip Shooting Setting Screen>
English 40
CHANGING THE SHOOTING SETTINGS
Still Image/Sequential Shots Shooting Setting
Screens
* All the icons never appear at the same time.
FULL AUTO
USE AUTO SETTINGS
41 English

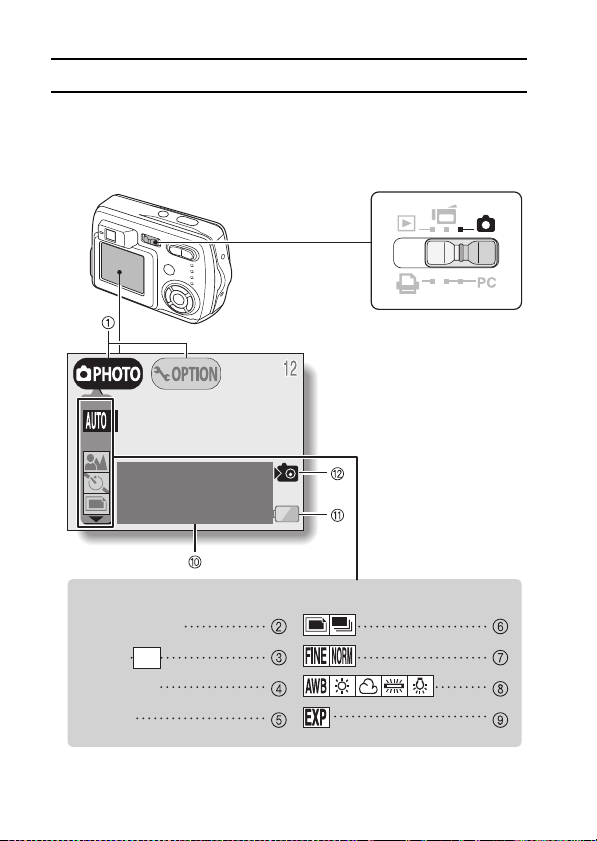
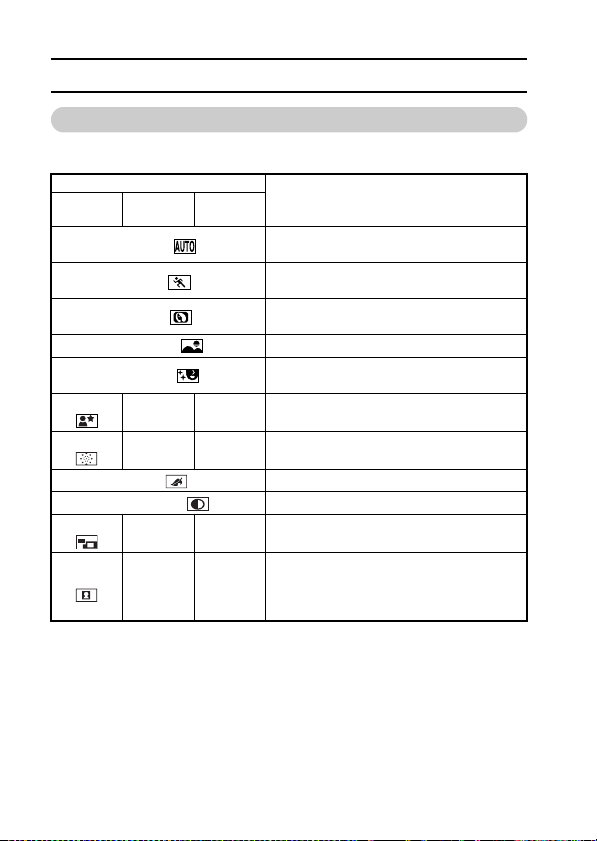
1 Setting/option switch (see
page 81)
Switch between the Shooting
Screen and the Option Screen
Scene Select menu (see page 45)
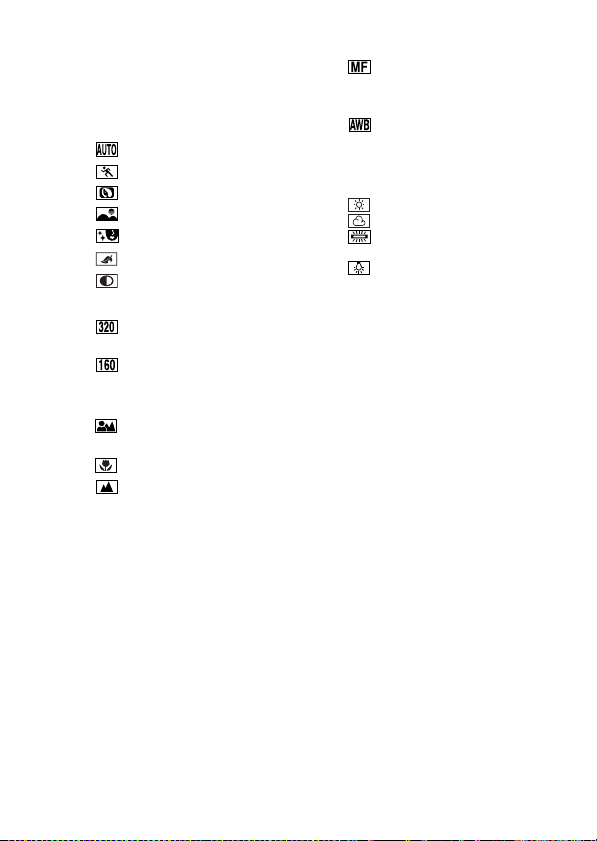
2
Full auto icon
:
Sports icon
:
Portrait icon
:
Landscape icon
:
Cosmetic icon
:
Night view icon
:
Fireworks icon
:
Sepia icon
:
Monochrome icon
:
Composite icon
:
ID photo icon
:
3
Resolution menu (see page 50)
2,592 × 1,944 pixels (5 million
l:
pixels) resolution icon
3,680 × 2,760 pixels (10 million
m:
pixels) resolution icon
1,600 × 1,200 pixels (2 million
:
pixels) resolution icon
640 × 480 pixels (300,000
:
pixels) resolution icon
4 Focus menu (see page 52)
Shooting with the autofocus
:
Super macro icon
:
Distance photography
:
Shooting with manual focus
:
5 Self-timer menu (see page 37)
6 Mode menu (see page 29)
7
Compression menu (see page 51)
8
White Balance menu (see page 54)
9 Exposure correction icon (see
page 55)
Adjust the image brightness.
0 HELP display (see page 88)
A Remaining battery charge
(see page 98)
B Internal memory icon (see
page 22)
i When two mutually exclusive settings are made, the later setting has
priority, and the related settings are changed accordingly.
English 42
CHANGING THE SHOOTING SETTINGS
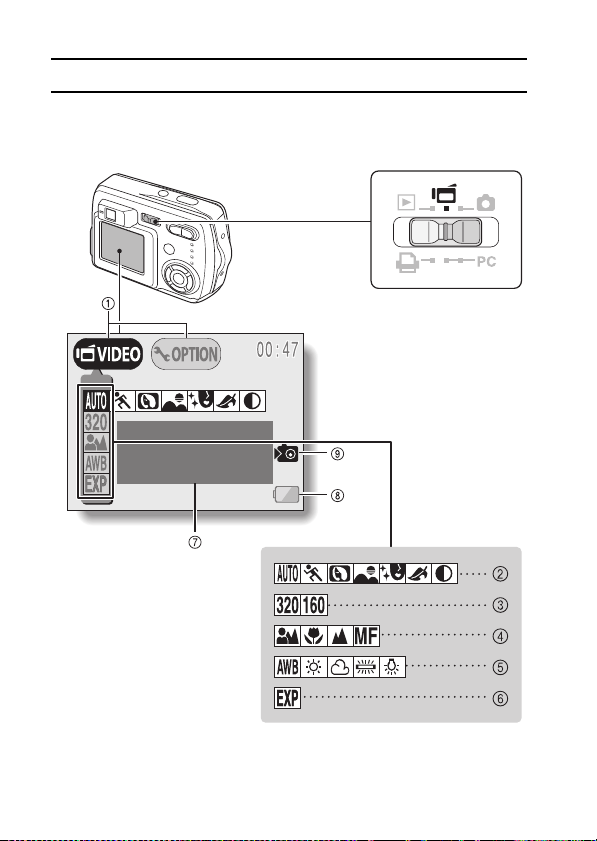
Video Clip Shooting Setting Screen
* All the icons never appear at the same time.
FULL AUTO
USE AUTO SETTINGS
Main switch
43 English
1 Setting/option switch (see
page 81)
Switch between the Shooting
Screen and the Option Screen.
Scene Select menu (see page 45)
2
: Full auto icon
: Sports icon
: Portrait icon
: Landscape icon
: Cosmetic icon
: Sepia icon
: Monochrome icon
3
Resolution menu (see page 50)
: 320 × 240 pixel
resolution icon
: 160 × 120 pixel
resolution icon
4 Focus menu (see page 52)
: Shooting with the auto
focus
: Super macro icon
: Distance photography
i When two mutually exclusive settings are made, the later setting has
priority, and the related settings are changed accordingly.
: Shooting with manual
focus
White Balance menu (see page 54)
5
: The camera determines
the optimum white
balance settings based
on the ambient light and
weather.
: Fair weather setting
: Overcast setting
: Fluorescent lighting
setting
: White (incandescent)
light setting
6 Exposure correction icon (see
page 55)
Adjust the image brightness.
7 HELP display (see page 88)
8 Remaining battery charge
(see page 98)
9 Internal memory icon (see
page 22)
English 44
CHANGING THE SHOOTING SETTINGS
Scene Select function
You can select from various preset settings (aperture, shutter speed, special
effects, etc.) for specific shooting conditions.
Still
image
Night view
Fireworks
Composite
ID photo
Shooting mode
Sequential
shots
Full auto
Sports
Por trait
Landscape
Cosmetic
––
––
Sepia
Monochrome
––
––
Video
clip
The camera makes settings suitable for
the surrounding conditions.
Capture a split-second image of a fastmoving subject.
Enhance the 3D feeling of the subject by
blurring the background.
For beautiful shots of distant scenery.
Enhance skin tones during close-up
shots.
Photograph the subject while keeping
the background night scenery.
For photographing fireworks displays.
Create a sepia-tone photo.
Snap black-and-white photos.
Select a frame to create a composite
photo.
Creates three identical ID photos in two
size (6 total): 45 × 35 mm [1.77" × 1.38"]
and 40 × 30 mm [1.57" × 1.18"], printed
out on postcard-sized paper.
Features
45 English

1 Display the Shooting Setting Screen
(see page 40), and select the scene
select menu.
FULL AUTO
USE AUTO SETTINGS
<Example: Still image
shooting mode>
2 Select the desired icon, and press the SET button.
: Full auto : Sports : Portrait
: Landscape : Cosmetic : Night view
: Fireworks : Sepia : Monochrome
: Composite : ID photo
NOTE
To return to normal shooting
Select from the scene select menu, and press the SET button.
English 46

CHANGING THE SHOOTING SETTINGS
Notes regarding the Scene Select feature
Please note the following points when using the Scene Select feature.
Setting Remarks
Sports
Por trait
Landscape
Cosmetic
Night view
Fireworks
Composite
ID photo
NOTE
When shooting without using the LCD monitor...
i The digital zoom cannot be used.
Manual focus is available for the
focus range setting.
To prevent taking blurred photos, use a
tripod or the like to stabilize the camera.
To prevent taking blurred photos, use a
tripod or the like to stabilize the camera.
The flash cannot be used.
The focus setting is fixed at the distance
photography setting.
The m and l resolution settings are
not available.
Manual focus is available for the
focus range setting.
The m resolution setting is not
available.
Manual focus is available for the
focus range setting.
47 English
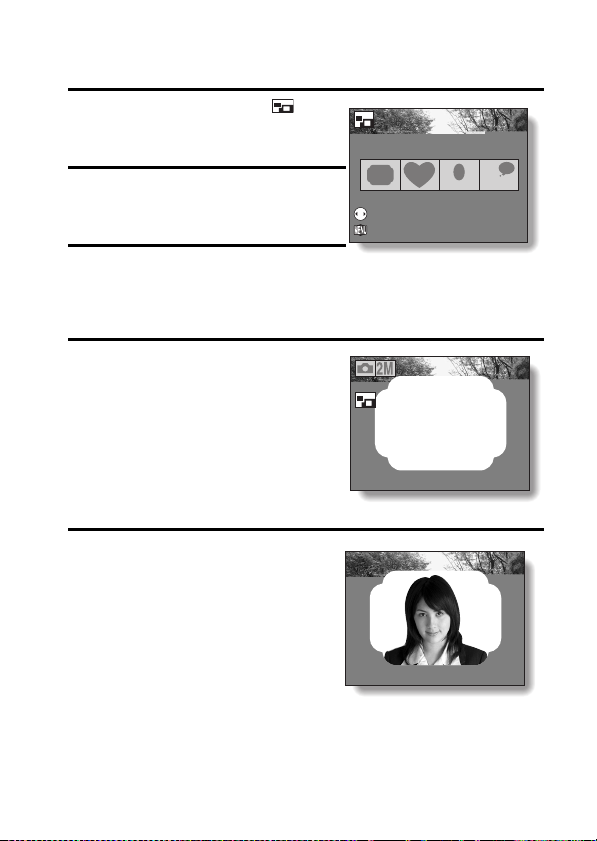
Shooting composite (combined) images
COMPOSITE
SELECT PATTERN
BACK TO MENU
PHOTOGRAPH OUTER
PHOTOGRAPH INNER
1 Select the composite icon from
the Scene Select menu, and press
the SET button.
2 Press the SET button again.
h The frame selection display
appears.
3 Press the [l] or [m] button to select
the desired frame shape, and press
the SET button.
h The select frame shape fills the display.
4 Capture the image for the
background (frame).
h Point the lens at the background
subject, and snap the picture.
5 Next, capture the image that will be
superimposed in the frame.
h Take the photo of the image inside
the frame.
COMPOSITE
COMPOSITE
SELECT PATTERN
SELECT PATTERN
BACK TO MENU
BACK TO MENU
PHOTOGRAPH OUTER
PHOTOGRAPH OUTER
PHOTOGRAPH INNER
PHOTOGRAPH INNER
English 48

CHANGING THE SHOOTING SETTINGS
Snapping ID photos
Lets you take either of two different-sized ID photos (45 × 35 mm [1.77" ×
1.38"] or 40 × 30 mm [1.57" × 1.18"], printed out on postcard-sized paper).
1 Select the ID photo icon from the Scene Select menu, and press
the SET button.
2 Press the MENU button again.
h The ID photo outline appears on
the LCD display.
3 Align the subject with the ID photo
outline, and snap the picture.
h After the preview screen for the
captured image appears, you are
returned to the Shooting Screen.
h Three images are shown in each of
two sizes on the Playback Screen.
<Playback Screen>
49 English

Adjusting the image quality
k Resolution setting
If the resolution is increased, the image quality will improve, but the number of
remaining images that can be taken will decrease. Select the resolution
according to the desired image quality and purpose.
1 Display the Shooting Setting Screen
(see page 40), and select the
resolution menu.
RESOLUTION
2592X1944(5M
2 Select the desired resolution icon,
and press the SET button.
<Still image/sequential shots
shooting modes>
m: 10 million pixels (3,680 × 2,760 pixels)
l: 5 million pixels (2,592 × 1,944 pixels (still image shooting mode
only))
: 2 million pixels (1,600 × 1,200 pixels)
: 300,000 pixels (640 × 480 pixels)
<Video clip shooting mode>
: 320 × 240 pixels
: 160 × 120 pixels
HINT
Concerning shooting at m resolution
i At the m resolution, the digital zoom is not available.
i When shooting at m resolution, the camera processes the captured
image internally to produce a 3,680 × 2,760 pixels image.
<Example: Still image
shooting mode>
)
English 50

CHANGING THE SHOOTING SETTINGS
k Set the compression rate (still images and sequential shots only)
Use the procedure below to set the compression rate. Even if the same
resolution is used, you can change the compression setting to decrease the
image data size so that you can capture more images, or increase the image
data size for no loss in image quality.
1 Display the Shooting Setting Screen (see page 40), and select the
compression menu.
2 Select the desired compression rate
icon, and press the SET button.
: Stores the data with a low
compression (high quality).
: Stores the data with normal
compression (normal quality).
NOTE
About the resolution and compression settings
i The image captured by a digital camera consists of a collection of small
dots. The resolution refers to the number of these dots, and the greater the
number, the higher the image quality. As the resolution increases, the size
of the resulting data also increases, and the number of images that can be
captured decreases. To compensate for this, this digital camera is able to
compress the data. This digital camera uses JPEG compression. If JPEG
compression is used, when the image is played back, an extremely small
portion of it is lost. The higher the compression rate, the more of the
original image is lost.
Therefore, in the still image mode, this digital camera also allows you to
store image data at extremely low compression to ensure that a minimum
of the original image is lost. This is the mode. Since the image data is
large when the mode is used, compared to compression, the
digital camera requires more time both to store the data after the shutter
release button is pressed and to display the image in the playback mode.
COMPRESSION
FINE
51 English

English 52

CHANGING THE SHOOTING SETTINGS
How to use the manual focus
1 Select the manual focus icon from the focus menu, and press
the SET button.
2 Press the SET button.
h The focus distance adjustment bar appears.
3 Use the [l] and [m] arrow buttons to
adjust the focus distance, and press
the SET button.
h The focus distance is fixed, and you
are returned to the Shooting
Screen.
NOTE
About the focal length
i The indicated focal length is that as measured from the lens surface.
i There may be somewhat of a disparity between the focal length numerical
value that is set using the manual focus and the actual distance to the
subject. To confirm the focus, it is best to check that the image is in focus
on the LCD monitor.
About zoom movement when using the manual focus
i If the focus distance is set to 30 cm (11.81 in) or less, the zoom is
automatically set to the wide end.
i When the focus distance is set to 30 cm (11.81 in) or less, the zoom will
function only within the range at which the image is focused.
53 English
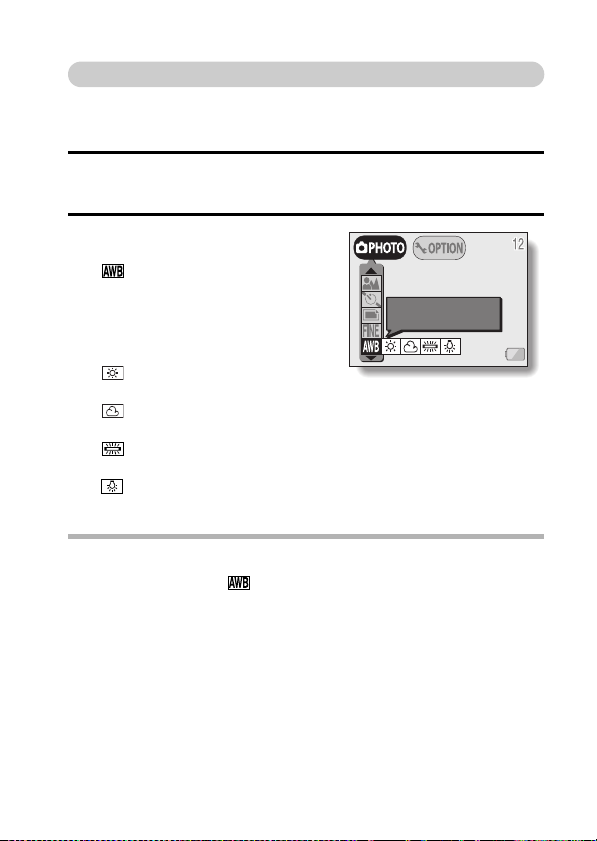
White Balance Setting
This digital camera automatically adjusts the white balance under most
lighting conditions. It is recommended that you adjust the white balance
setting especially if specifying a light source.
1 Display the Shooting Setting Screen (see page 40), and select the
white balance menu.
2 Select the desired white balance
icon, and press the SET button.
: The digital camera will make the
white balance adjustment
automatically based on the
natural and artificial light
conditions. This is the setting
used in the auto mode.
: For shooting outside on a sunny
day.
: For shooting outside on a cloudy
day.
: For shooting inside under
fluorescent lighting.
: For shooting inside under
incandescent lighting.
HINT
To cancel the white balance setting
i Perform step 2, select , and then press the SET button.
WHITE BALANCE
AUTO
English 54

CHANGING THE SHOOTING SETTINGS
Exposure Correction
When capturing images, you can make the image lighter or darker.
1 Cancel the Shooting Setting Screen
(see page 40).
h Press the MENU button to exit the
Shooting Setting Screen.
2 Press [l] or [m] on the arrow button.
h The exposure correction bar
appears.
h At this point, you can press [l] or
[m] on the arrow button to adjust the
exposure.
HINT
i Exposure correction setting is canceled in the following cases:
When the pointer is set to the center position.
After the shooting mode is changed.
When the playback mode is set.
After the power is turned off.
i The exposure setting numerical value is shown at the left end of the
exposure bar. The exposure can be set to a value from –1.8EV to +1.8EV.
i The accessing indicator flashes when the exposure correction is active.
i You can also correct the exposure by selecting the exposure correction
icon on the Shooting Setting Screen.
NOTE
When shooting without using the LCD monitor...
i Exposure correction is disabled.
55 English

VIEWING IMAGES
PLAYBACK
1 Set the main switch to [ ], and
turn on the camera.
h The last recorded image is
displayed on the LCD monitor.
2 Select the image you wish to view.
To display the previous image, press
the [l] arrow button.
To display the next image, press the
[m] arrow button.
Main switch
LCD monitor
Arrow
button
PC
Set button
SET
English 56

VIEWING IMAGES
3 Play back a video clip.
Normal playback
h Press the SET button.
h Pressing [l] during a video clip playback will start reverse playback.
To pause playback
h Press the [n] button to pause playback; press the SET button to
continue playback.
To play back one image at a time (single-frame step)
h While video clip playback is paused, you can press the [m] arrow
button to view the frames in order, or [l] to view them in reverse order.
To accelerate playback
h 2x fast forward playback: During normal speed playback, press [m].
h 20x fast forward playback: During 2x playback, press [m].
* Pressing [l] will start reverse playback.
h For normal playback: during playback, press the SET button.
NOTE
i Sound cannot be played back.
i To play back images from the camera’s internal memory, remove the card
from the camera.
HINT
i If you press the shutter release button while an image is displayed, the
image number will be shown. Press the shutter release button again to turn
off the image number indication.
57 English

HINT
To view video clips on your computer
i You can view video clips taken with this camera on your computer using
QuickTime Ver. 3.0 or later from Apple.
i By using the QuickTime Plug-in included with QuickTime, you can also
play back your video clips on your Internet browser.
i QuickTime 6.5 for Windows and Macintosh is supplied with the included
CD-ROM (SANYO Software Pack).
i Online information about QuickTime can be found at
http://www.apple.com/
English 58

VIEWING IMAGES
Convenient 9-image display playback
1 Set the main switch to [ ],
and turn on the camera.
2 Press [W] ([ ]) on the zoom
switch.
h The 9-image display appears.
3 Select the image to play back.
h Press the [n], [o], [l] or [m]
arrow button to move the
orange frame to the desired
image, and press the SET
button.
Instead of pressing the SET
button, you can press [T] ([ ])
on the zoom switch to show the
image full screen.
Main switch
PC
Zoom switch
[W]
Arrow button
Video clip
Folder number
Still image
100
0001 0002 0003
0004 0005 0006
0007 0008 0009
Orange
frame
Image number
59 English

Magnifying (zooming in) the image
1 Display the image that you want to magnify (see pages 56 and 57).
h For a video clip, pause playback at the place you want to magnify.
2 Press [T] ([]) on the zoom switch.
h Magnification is enabled.
h The image is magnified, and the
central portion of the image is
displayed.
h Use the arrow buttons to view
different parts of the magnified
image.
To magnify:
Press [T] ([ ]) on the zoom
switch.
To return to normal size:
Press [W] ([ ]) on the zoom switch.
h The maximum degree of magnification will depend on the resolution of
the original image.
h The maximum magnification is about 58x at m resolution.
h If the image has been rotated, it will be returned to its original
orientation and then enlarged.
h One scene (still image) of a paused video clip can be enlarged;
however, a video clip cannot be played while enlarged.
HINT
The magnified portion of the image can be saved as a separate image.
i Press the shutter release button. The magnified portion is saved as a new
still image.
ZOOM
MOVE
ZOOM I/O
SHUTTER FOR SAVE
English 60

DISPLAYING THE PLAYBACK SETTING SCREEN
To process your photographed images, select the desired menu from the
Playback Setting Screen.
Displaying the Playback Setting Screen
1 Set the main switch to [ ], and turn on the camera (see page 23).
h The image that was last captured appears on the LCD monitor.
2 Press the MENU button.
h The Playback Setting Screen
appears.
k To cancel the Playback Setting
Screen
h Press the MENU button.
PROTECT
Change image
protect setting
100-0001
242KB
61 English

Playback Setting Screen
* All the icons never appear at the same time.
PROTECT
Change image
protect setting
COPY IMAGE
EXTRACT STILL
SLIDESHOW
100-0001
1004KB
1 Setting/option switch (see
page 81)
h Switch between the Playback
Screen and the Option
Screen.
2 Data protect setting (prevent
accidental erase)
3 Data erase
4 Resize
5 Rotate image
6 Print settings
7 Copy image data
h Displayed only when there is a
card installed.
i Icons 7 through 9 on the Playback Setting Screen are displayed when
you press the [n] or [o] arrow button to scroll down the screen.
8 Extract still image
9 Slideshow settings and
playback
0 HELP display
A Image number
B Data size
C Protect mark
D Resolution
E Compression rate
F Internal memory icon
G Remaining battery charge
English 62

CHANGING IMAGE SIZE (RESIZE)
For a still image that was captured using a higher resolution than , you
can change the size to 640 × 480 pixels or 320 × 240 pixels and save it as a
separate still image.
1 Display the still image whose size you want to change.
2 Display the Playback Setting Screen (see page 61).
3 Select the resize icon , and
press the SET button.
h The Resize Screen appears.
63 English
RESIZE
EXIT
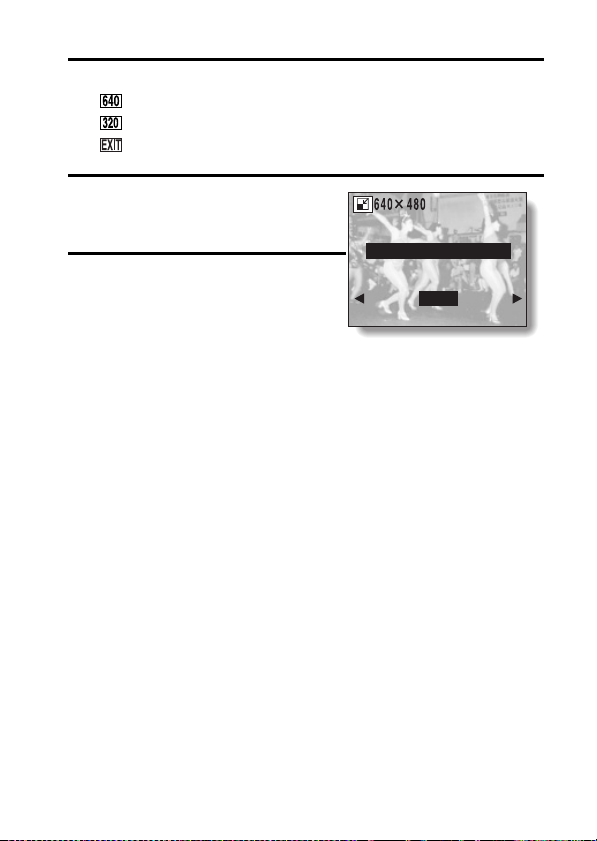
4 Press [n] or [o] on the arrow button to select the new image size.
: The saved image will be 640 × 480 pixels.
: The saved image will be 320 × 240 pixels.
: Return to the Playback Setting Screen.
5 Press the SET button.
h The Confirm Size Change Screen
appears.
RESIZE?
6 Select “YES”, and press the SET
button.
h Resizing begins.
h When resizing is completed, you
are returned to the Playback
Setting Screen.
YES
EXIT
English 64

ROTATING AN IMAGE
Captured images can be rotated to the correct orientation for viewing.
1 Display the still image you want to rotate.
2 Display the Playback Setting Screen (see page 61).
3 Select the rotate image icon , and
press the SET button.
h The Rotate Image Screen appears.
: Rotates image clockwise 90
degrees
: Rotates image counterclockwise
90 degrees
d: Return to the Playback Setting
Screen.
4 Select the rotate right icon or rotate left icon , and press the
SET button.
h Each time the SET button is pressed, the image is rotated another 90
degrees.
ROTATE
RIGHT
LEFT
EXIT
65 English
SLIDESHOW PLAYBACK
1 Display the still image or video clip to play back, and display the
Playback Setting Screen (see page 61).
2 Select the slideshow icon , and
press the SET button.
h The Slideshow Screen appears.
STILL
Only still images are played
IMAGE:
back in the slideshow.
VIDEO
Only video clips are played
CLIP:
back in the slideshow.
MIX: Still images and video clips
are played back in the
slideshow.
EXIT: Return to the Playback
Setting Screen.
<When STILL IMAGE or MIX is selected>
1 Select “TIME” or “EFFECT”, press the SET button.
2 Press [n] or [o] on the arrow button to select the desired setting.
3 Press the SET button.
3 Select “START”, and press the SET
button.
h Slideshow playback is canceled
when the SET button, MENU button
or an arrow button is pressed.
SLIDESHOW
STILL IMAGE
VIDEO CLIP
MIX
EXIT
SLIDESHOW
TIME
EFFECT
START
EXIT
4SEC
OFF
English 66
OTHER PLAYBACK FUNCTIONS
Image protect mode (Prevent accidental erasure)
By using the image protect mode, you can prevent accidental erasure or
overwriting of the important data that you want to keep.
1 Display the data that you want to protect.
2 Display the Playback Setting Screen (see page 61).
3 Select the protect icon .
4 Press the SET button.
h “LOCK?” appears.
h If the protect mode has already
been enabled for the data, then
“UNLOCK?” appears.
PROTECT
LOCK?
YES
EXIT
5 Select “YES”, and press the SET
button.
h The protect mode is set for the
data.
h The protect mark indicates
that the data is locked.
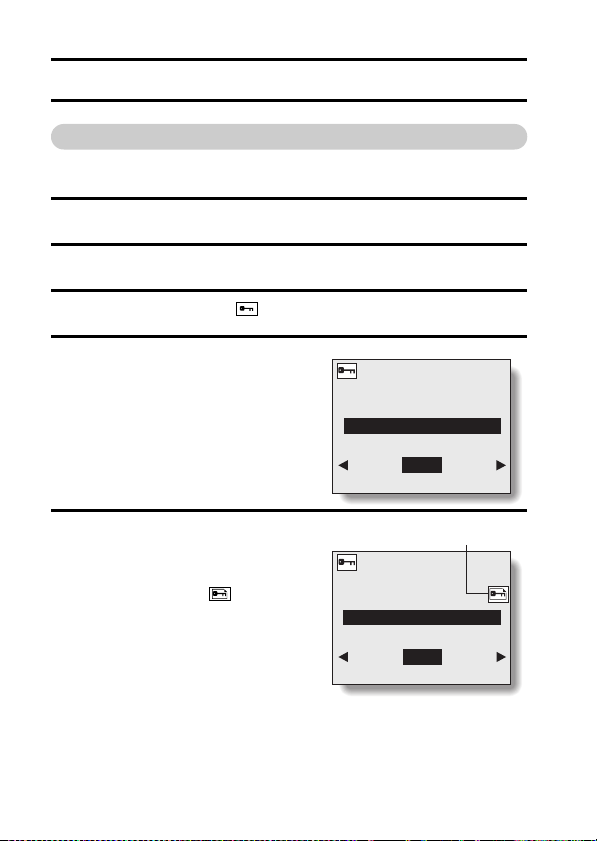
67 English
PROTECT
UNLOCK?
Protect mark
YES
EXIT

CAUTION
i Even if the protect mode is set for certain data files, they will be erased if
the card is reformatted (see page 90).
HINT
To select a different image in steps 4 and 5...
i Press [l] or [m].
To cancel the protect mode for an image...
i Display the desired data and repeat steps 2 to 5. The protect mark will
disappear and the protect mode is canceled.
English 68
OTHER PLAYBACK FUNCTIONS
Erasing Data
Images and video clips can be erased one at a time, or all at once.
1 Display the data that you want to erase.
2 Display the Playback Setting Screen (see page 61).
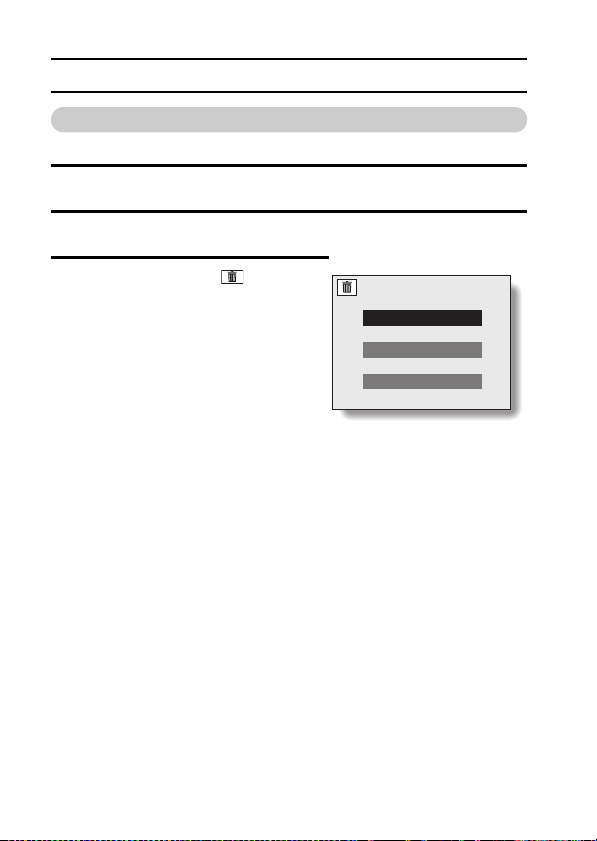
3 Select the erase icon and press
the SET button.
h The Erase Screen appears.
For still images:
ONE ERASE: Erases one still image
ERASE ALL: Erases all the images.
For video clips:
ONE ERASE: Erases the video clip
ERASE ALL: Erases all the images.
h Select “EXIT”, and press the SET button, to return to the Playback
Setting Screen.
at a time.
displayed.
ERASE
ONE ERASE
ERASE ALL
EXIT
69 English

4 Press [n] or [o] on the arrow button
to select the desired type of erase,
and press the SET button.
h The Erase Confirmation Screen
appears.
YES: Erases the selected data.
EXIT: Does not erase the selected
data and returns to the Erase
Screen.
5 Press [n] to select “YES”, and press the SET button.
h “ERASING” is displayed, after which the next image appears. The
data is erased.
h To erase other data, select “EXIT”, press [l] or [m] to display the data
that you want to erase and repeat step 5.
HINT
To select a different data in step 4...
i If “ONE ERASE” is selected, select “EXIT”, and press [l] or [m] on the
arrow button to select different data.
HINT
To quickly erase the currently displayed image
1 Display the image you want to erase.
2 Press the arrow [n] ([ ]) button.
h The Erase Confirmation Screen appears.
3 Select “YES”, and press the SET button.
h The displayed image is erased.
ONE ERASE?
YES
EXIT
English 70

OTHER PLAYBACK FUNCTIONS
Copy image data
You can copy your photographed images from the camera’s internal memory
to a card, and vice versa.
1 Insert a card in the camera (see page 22).
2 Display the Playback Setting Screen (see page 61).
3 Select the copy image icon and
press the SET button.
h The Copy Image Screen appears.
h Press the [n] or [o] arrow button to
select the copy source.
INT MEM m CARD:
Image data is copied from the internal
memory to the card.
INT MEM l CARD:
Image data is copied from the card to
the internal memory.
h If a card is not inserted in the camera, you cannot select the copy
image icon .
COPY IMAGE
CHOOSE COPY DIRECTION
INT MEM
INT MEM
CARD
CARD
EXIT
71 English

4 Press the SET button.
h The screen appears for you to
select whether to copy only the
image currently shown or to copy all
the images from the card or the
internal memory. Press the [n] or
[o] arrow button to make your
selection.
5 Press the SET button.
h The Copy Confirmation Screen appears. To proceed with copying,
select “YES” and press the SET button.
h To copy other data, press [l] or [m] to display the data that you want
to copy and press the SET button.
h If you wish to cancel the copy procedure and return to the Copy Image
Screen, press the MENU button, or select “EXIT” and press the SET
button.
COPY IMAGE
COPY SINGLE
COPY ALL
EXIT
English 72

OTHER PLAYBACK FUNCTIONS
Extracting a Still Image From a Video Clip
You can select one image (scene) from a video clip, copy it, and save it as a
still image (the original data remains unchanged).
1 Play back a video clip, and pause at the point you wish to copy and
save (see pages 56 and 57).
2 Display the Playback Setting Screen (see page 61).
3 Select the extract still icon , and
press the SET button.
h The screen to extract an image
appears.
YES: The image is copied and saved
as a still image (the original
data is left unchanged).
EXIT: The still image extraction
procedure is canceled, and you
are returned to the Playback
Setting Screen.
4 Select “YES”, and press the SET button.
h The image is extracted.
h Select “EXIT”, and press the SET button, or press the MENU button,
to return to the Playback Setting Screen.
HINT
To select a different image (frame) in step 3...
i Press [l] or [m] on the arrow button.
EXTRACT STILL
SAVE THIS IMAGE?
YES
EXIT
73 English

Print Settings (DPOF setting)
In addition to using your printer to print out still images captured with your
camera, as with conventional film, you can have prints made at shops offering
digital print services. Moreover, this camera is DPOF-compatible, so you can
use the camera to specify the number of prints, whether or not the date is
displayed on the print, and also to specify an index print.
Display the Print Settings Screen
1 Display the Playback Setting Screen (see page 61).
2 Select the print settings icon ,
and press the SET button.
h The Print Settings Screen appears.
ALL IMAGES: The specified
EACH IMAGE: The print
INDEX: All the still images are printed as miniature images
ALL CLEAR: Clear all the print settings. This cannot be selected
EXIT: Return to the Still Image Playback Setting Screen.
print settings
apply to all the
still images.
settings are
specified for
each individual
image.
(thumbnail images), several images on one print.
if no print settings have been made for the image.
DPOF
PRINT SETTING
ALL IMAGES
EACH IMAGE
INDEX
ALL CLEAR
EXIT
English 74

OTHER PLAYBACK FUNCTIONS
HINT
i To print with a printer or have the digital print service shop print out a still
image from a video clip, you must first save it (save frame (see page 73))
as a still image.
HINT
About the DPOF format
i DPOF (Digital Print Order Format) is a print order format. You can connect
your camera to a DPOF-compatible printer to produce your prints. You can
also set the print settings for the desired images, and then have the
reserved images printed automatically.
About the finished prints
i Images that have been rotated will be printed in their original orientation.
i The quality of the print output will differ depending on the print service and
printer used.
75 English

Specifying date imprinting and print quantities
You can specify print settings for each individual image (EACH IMAGE), or
apply the print settings to all the images on the card (ALL IMAGES).
1 Display the Print Settings Screen (see page 74).
2 Select EACH IMAGE or ALL
IMAGES.
ALL IMAGES: The set print
EACH IMAGE: The set print
3 Press the SET button.
h The Date/Number Print Screen
appears.
h If EACH IMAGE was selected,
press the [l] or [m] arrow button
display the desired image to print.
h Under “SETTINGS” the settings
that are currently active for the
displayed image are shown. You
can press the [l] or [m] arrow
button to confirm the print settings
for each image.
settings are
applied to all the
still images on the
card.
settings are
applied only to the
image currently
displayed.
PRINT SETTING
ALL IMAGES
EACH IMAGE
INDEX
ALL CLEAR
EXIT
ALL IMAGES
DATE
COPIES
ADD TO PRINT SETTING
NO
EXIT
0
SETTINGS
DATE
COPIES
English 76

OTHER PLAYBACK FUNCTIONS
4 Specify whether the date is
displayed on the print, and the
number of prints.
<Specifying dated prints>
1 Press the [n] or [o] arrow button
to select “DATE”.
2 Press the SET button.
h The Print Date Screen appears.
3 Press the [n] or [o] arrow button
to select the desired option.
YES: Print the date.
NO: Do not print the date.
4 Press the SET button.
h You are returned to the Date/
Number Print Screen.
<Specifying the number of prints>
1 Press the [n] or [o] arrow button
to select “COPIES”.
2 Press the SET button.
h The Print Number Screen
appears.
3 Press the [n] or [o] arrow button
to specify the number of prints.
h Press the [n] or [o] arrow
button until the desired number
of prints is displayed.
4 Press the SET button.
h You are returned to the Date/
Number Print Screen.
ALL IMAGES
DATE NO
ALL IMAGES
COPIES 0
SETTINGS
DATE
COPIES
SETTINGS
DATE
COPIES
77 English
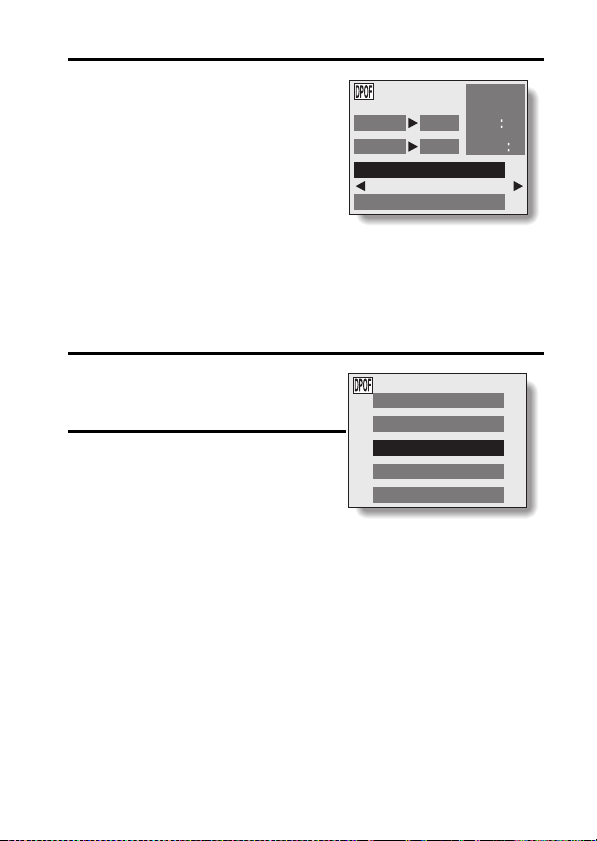
5 Select “ADD TO PRINT SETTING”
and press the SET button.
h The Confirm Print Settings Screen
appears.
If the print settings are correct:
Select “EXIT”, and press the SET
button.
If the print settings were
changed:
Select “MODIFY PRINT SETTING”,
and press the SET button.
ALL IMAGES
DATE YES
COPIES
MODIFY PRINT SETTING
EXIT
1
SETTINGS
DATE
COPIES
YES
1
Index print
Printing out many small images on one sheet is called an “index print.” This is
convenient for use as a list of the images you have captured.
1 Display the Print Settings Screen
(see page 74).
2 Select “INDEX”.
PRINT SETTING
ALL IMAGES
EACH IMAGE
INDEX
ALL CLEAR
EXIT
English 78

OTHER PLAYBACK FUNCTIONS
3 Press the SET button.
h The Index Print Screen appears.
YES: Specify an index print copy.
EXIT: Discontinue the setting
4 Select “YES”, and press the SET button.
h This completes the setting for the index print. You are returned to the
procedure, and return to the
Print Setting Screen.
Print Settings Screen.
INDEX PRINT
SET INDEX PRINT?
YES
EXIT
Changing the print settings
1 Follow steps 1 to 4 on pages 76 and
77.
2 Select “MODIFY PRINT SETTING”,
and press the SET button.
ALL IMAGES
DATE NO
COPIES 1
MODIFY PRINT SETTING
DATE
COPIES
EXIT
SETTINGS
NO
1
79 English
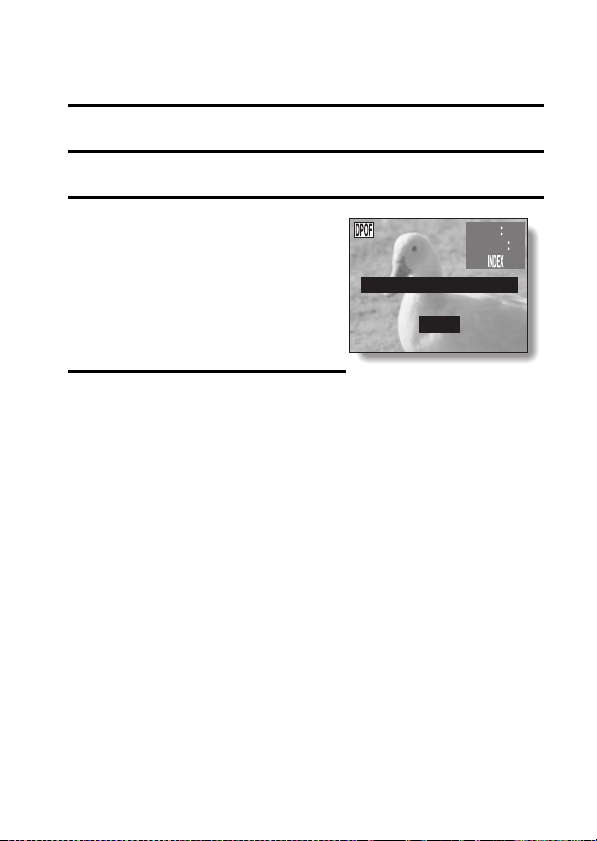
Clearing all the print settings
Delete the print settings for all images.
1 Display the Print Settings Screen (see page 74).
2 Select “ALL CLEAR”.
3 Press the SET button.
h The Confirm All Clear Screen
appears.
YES: Clear the print settings for all
EXIT: Cancel the clear procedure
images.
and return to the Print
Settings Screen.
4 Select “YES”, and press the SET
button.
h All the print settings are cleared
and you are returned to the Print
Settings Screen.
ALL CLEAR
CLEAR ALL SETTINGS?
YES
EXIT
YES
DATE
COPIES 5
English 80

CAMERA SETTINGS
CHANGING THE CAMERA SETTINGS
You can change the camera settings by selecting the desired menu from the
Option Screen and modifying the settings.
To display the Option Screen
1 Set the main switch to the desired
mode.
For a Shooting Option Screen:
Set to [ ] or [ ].
For the Playback Option Screen:
Set to [ ].
2 Press the MENU button.
3 Press the [n] or [o] arrow button
to select the shooting settings/
camera settings switch (see
pages 42, 44 and 62).
4 Press the [m] arrow button to
select the icon.
When the main switch is set to
[] or []:
The corresponding Shooting
Option Screen appears (see page
82).
When the main switch is set to
[ ]:
The Playback Option Screen
appears (see page 82).
k To cancel the Option Screen
i Press the MENU button.
Main switch
MENU button
Arrow button
MONITOR ON/OFF
CLOCK SET
HELP DISP
LCD BRIGHTNESS
LANGUAGE
81 English

Option Screen
* All the icons never appear at the same time.
1 Shooting settings/camera
settings switch
2 Monitor ON/OFF setting
3 Date and time setting
4 Help display settings
5 Monitor brightness
6 Screen display language
i Icons 7 through 0 in the Shooting Option Screen, and icons 8 through
0 in the Playback Option Screen are displayed when you press the [n] or
[o] arrow button to scroll down the screen.
7 Card reformat (format)
8 Power save
9 File No. Reset
0 Reset settings
A Playback setting/camera
settings switch
B Internal memory icon
English 82

LCD MONITOR SETTING
Set the LCD monitor to on or off
You can save battery power by turning off the LCD monitor when shooting.
1 Display the Shooting Option Screen (see page 81).
2 Select the monitor ON/OFF icon
, and press the SET button.
h The Monitor Screen appears.
ON: The LCD monitor is on.
OFF: The LCD monitor turns off.
3 Select the desired setting, and
press the SET button.
h If “OFF” was selected, the LCD
monitor turns off.
h To turn the LCD monitor back on,
press the MENU button to
illuminate the LCD monitor, and
perform steps 1 and 2 above to
select the ON icon.
83 English
MONITOR ON/OFF

LCD MONITOR BRIGHTNESS
1 Display the Option Screen (see page 81).
2 Select the monitor brightness icon , and press the SET button.
h The Monitor Brightness Screen appears.
3 Press the [l] or [m] arrow button.
h Pressing [l] makes the screen
darker, and pressing [m] makes it
lighter.
4 Press the SET button.
h You are returned to the Option
Screen.
NOTE
i The LCD monitor brightness cannot be adjusted when the LCD monitor is
set to OFF.
LCD BRIGHTNESS
ADJUST
English 84

DATE AND TIME SETTING
The digital camera will record the date and time an image is taken so that you
can display them during playback. Therefore, before capturing images, make
sure the correct date and time are set.
Example: To set the clock to 7:30 p.m. on December 23, 2005
1 Display the Option Screen (see page 81).
2 Select the clock set icon , and
press the SET button.
h The Clock Set Screen appears.
h The current date and time settings
appear.
h Follow the procedures below to
enable or disable the date display
during playback, to set the display
format for the date, and to set the
date and time.
h To return to the Option Screen,
press the MENU button, or select
“EXIT” and press the SET button.
85 English
CLOCK SET
DATE
TIME
DISP
EXIT
2005/ 01/ 01
00:00
YMD
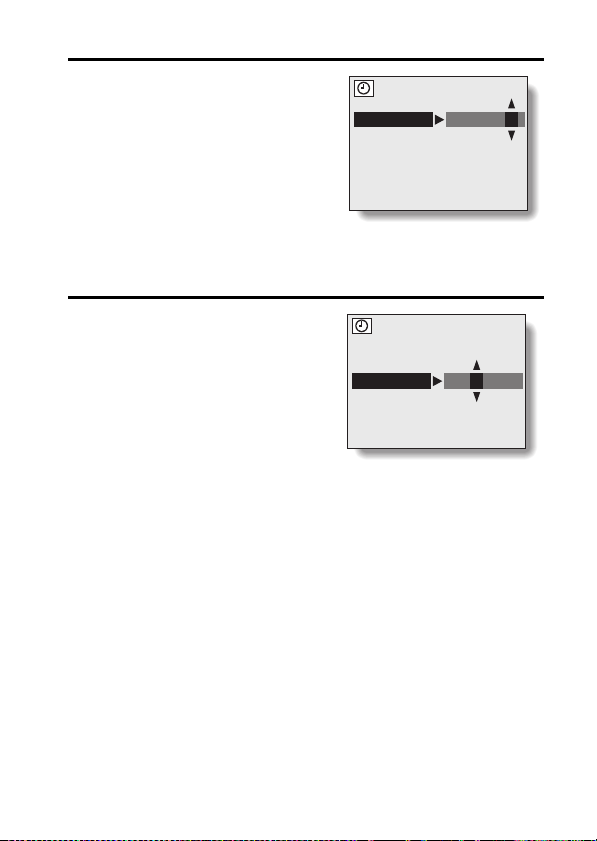
3 Set the date.
1 Press the arrow button to select
“DATE”.
2 Press the SET button.
h The Set Date Screen appears.
3 Press the arrow button to set the
date to “2005/12/23”.
h Year setting → [m] → Month
setting → [m] → Day setting.
h Press [n] to increase the
number.
h Press [o] to decrease the number.
4 Press the SET button.
CLOCK SET
DATE
2005/12/23
4 Set the clock.
1 Press the arrow button to select
“TIME”.
2 Press the SET button.
h The Set Time Screen appears.
3 Press the arrow button to set the
time to “19:30”.
h Hour setting → [m] → Minute
setting.
h A 24-hour clock is used for the
time display.
4 Press the SET button.
CLOCK SET
TIME
19:30
English 86

DATE AND TIME SETTING
5 Set the order in which the date is
displayed during playback.
1 Press the arrow button to select
“DISP”.
2 Press the SET button.
h The Set Date Format Screen
appears.
3 Press [n] or [o].
h When [n] is pressed, the
displayed date order changes as
follows:
year/month/day month/day/year day/month/year
Press [o] to change in the reverse order.
h If “DISP OFF” is selected, the date the image was captured is not
shown during playback.
4 Press the SET button.
6 Select “EXIT”, and press the SET button.
h The date and time setting is completed, and you are returned to the
Option screen.
NOTE
i Under normal conditions, while the battery is being replaced, an internal
battery will maintain the date and time settings. However, there is a small
chance the settings may be lost. (The backup will last for about 7 days.) It
is recommended to check that the date and time settings are still correct
after replacing the batteries and before shooting or recording of any type
(follow steps 1 and 2). Also, when the backup memory has failed and the
camera’s clock is not set, the clock alert icon appears.
To correct the date and time settings
i After steps 1 and 2, press [o] on the arrow button to select the line of the
setting that you want to change, and press [m] to select that setting. Then
press [n] or [o] to set the new setting.
CLOCK SET
DISP
DISP OFF (no display)
YMD
87 English

HELP DISPLAY
You can set whether or not the help display for the Shooting and Playback
Setting Screens is shown.
1 Display the Option Screen (see
page 81).
2 Select the help display icon ,
and press the SET button.
h The Set Help Display Screen
appears.
ON: The help display is shown.
OFF: The help display is not shown.
3 Select the desired setting, and
press the SET button.
h You are returned to the Option
Screen.
HELP DISP
ON
OFF
English 88
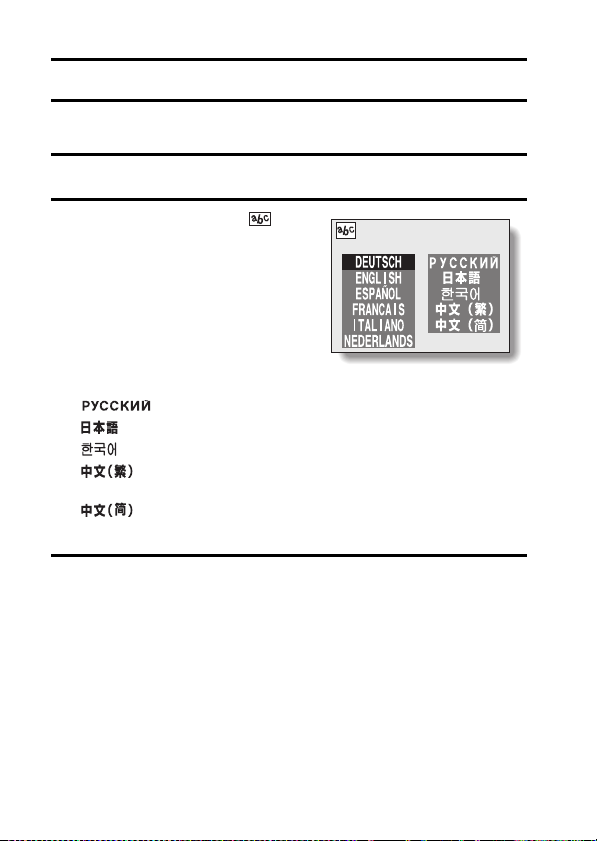
LANGUAGE
You can set the LCD monitor of your digital camera to display the messages
in any of several languages.
1 Display the Option Screen (see page 81).
2 Select the language icon , and
press the SET button.
h The Language Screen appears.
DEUTSCH: Select for German.
ENGLISH: Select for English.
ESPAÑOL: Select for Spanish.
FRANCAIS: Select for French.
ITALIANO: Select for Italian.
NEDERLANDS: Select for Dutch.
: Select for Russian.
: Select for Japanese.
: Select for Korean.
: Select for Chinese
(traditional).
: Select for Chinese
(simplified).
3 Select the desired language, and press the SET button.
h You are returned to the Option Screen.
LANGUAGE
89 English

INITIALIZING THE CARD MEMORY AND INTERNAL MEMORY
A card must be formatted with this camera:
i After purchasing, when used for the first time, or
i If it was formatted using a personal computer or another digital camera.
The card cannot be reformatted if the lock switch is set to the “LOCK”
position. Proceed with the reformat procedure after setting the lock switch to
the unlocked position (see page 67).
1 To reformat a card, install it in the camera. To reformat the camera’s
internal memory, remove the card from the camera.
2 Display the Option Screen (see page 81).
3 Select the format icon , and
press the SET button.
h The Format Screen appears.
h In normal use, a full format is not
necessary. However, in case a card
error occurs even after normal
formatting, executing a full format
may resolve the problem.
FORMAT:
A normal formatting is executed.
FULL FORMAT:
The entire card is scanned and
reformatted. It is not possible to
select this when there is no card
installed, or when the remaining
battery charge is low.
FORMAT
FORMAT THE CARD
FORMAT
FULL FORMAT
EXIT
<With card installed>
FORMAT
FORMAT INTERNAL
MEMORY
FORMAT
EXIT
<No card installed>
English 90

INITIALIZING THE CARD MEMORY AND INTERNAL MEMORY
4 Select the desired format option, and press the SET button.
5 Select “YES”.
6 Press the SET button.
h Formatting begins.
h During formatting, “FORMATTING” and “DO NOT POWER OFF” are
shown on the LCD monitor.
CAUTION
Caution during reformatting
i Please do not turn off the camera or insert/remove the card while the card
is being formatted.
Reformatting erases the data
i When the card or internal memory is initialized, all the recorded data is
erased. Protected data (see page 67) is also erased, so before
reformatting a card, any data you want to keep should be copied to your
personal computer’s hard disk or other storage medium.
Can data be restored after a card is formatted?
i It may be possible to restore data from a reformatted card by using
application software designed to restore data. However, even such
application software cannot restore data after a full format has been
executed. It is recommended that a full format be executed before you
dispose of a card or transfer it to someone else.
HINT
To cancel reformatting
i In step 5, select “NO”, and press the SET button.
91 English

POWER SAVE SETTING
Your camera has a “power save” function whereby the power automatically
turns off after a specified period of inactivity. The power save function works
to conserve the battery power when the camera is not being used, or to
prevent the batteries from dying if the camera has accidentally been left on.
You can specify the elapsed time (standby time) before the power save
function is activated.
1 Display the Option Screen (see page 81).
2 Select the power save icon ,
and press the SET button.
h The Power Save Screen appears.
BATT/CAM: Set the standby time for
BATT/PB: Set the standby time for
EXT.PWR/
CAM.PB:
EXIT: Return to the Option
the shooting modes
when the batteries are
used.
the playback mode when
the batteries are used.
Set the standby time for
the shooting and
playback modes when
the AC adapter is
connected.
Screen.
POWER SAVE
BATT/CAM
BATT/PB
EXT.PWR/CAM.PB
EXIT
English 92
min
min
min

POWER SAVE SETTING
3 Press [n] or [o] on the arrow button to select the desired option.
4 Press the SET button.
h The Set Standby Time Screen
appears.
5 Press [n] or [o] on the arrow button
to set the standby time.
[n]: Increases the standby time.
[o]: Decreases the standby time.
POWER SAVE
BATT/CAM
6 Press the SET button.
h The standby time is set, and you are returned to the Power Save
Screen.
min
93 English
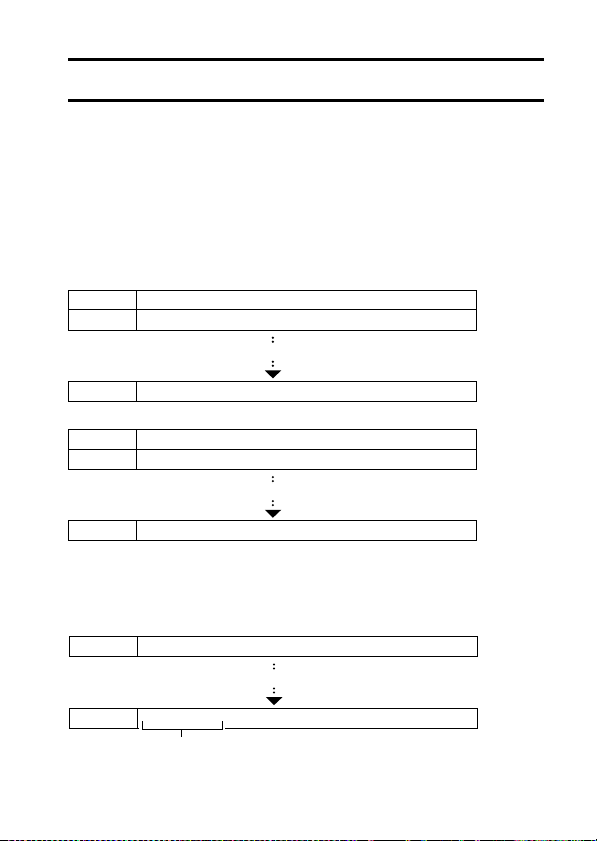
FILE NO. RESET FUNCTION
If a reformatted card is used, the file name (image number) of the captured
image automatically begins from 0001. If the card is subsequently
reformatted, or if a different reformatted card is used, the file names again
begin from 0001. This is because the file number reset function is set to ON,
and consequently it results in more than one card containing images with the
same numbers. By setting the file number reset function to OFF, even if the
card is reformatted or the card is replaced with another card, the consecutive
numbering of file names continues from the last number recorded by the
camera.
<File number reset function ON>
File name (image number)
Card A 0001, 0002 ..... 0012, 0013
Replace card
Card B 0001, 0002 ..... 0012, 0013
<File number reset function OFF>
Card A 0001, 0002 ..... 0012, 0013
Card B 0014, 0015 ..........0025, 0026
i If Card B already has image data in it when it replaces Card A, file names
are assigned as follows.
h When the highest image number on Card B (before replacing) is lower
Card A 0001, 0002...... 0012, 0013
File name (image number)
Replace card
than the highest image number on Card A: the file name of the next
recorded image continues from last file name recorded on Card A.
Replace card
Card B 0001, 0002, 0014, 0015, 0025, 0026
Previously recorded images
English 94
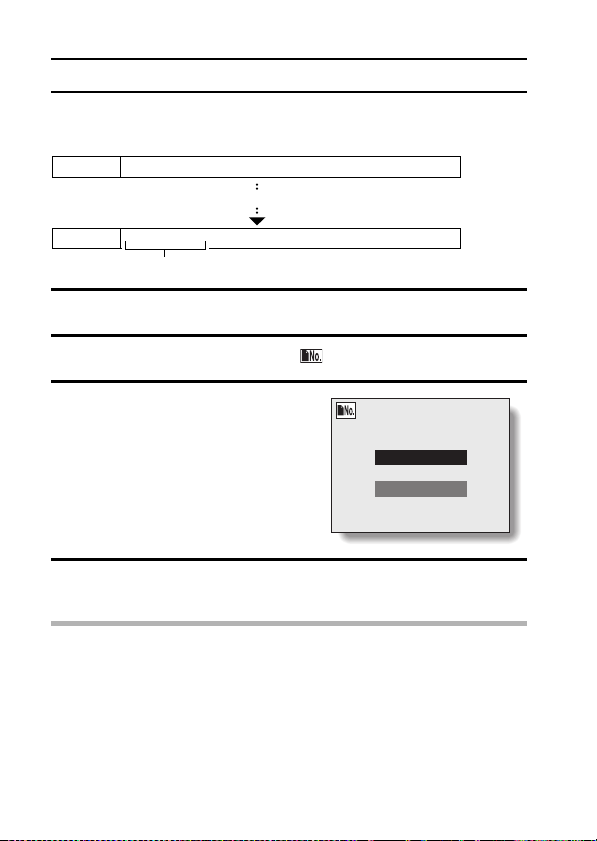
FILE NO. RESET FUNCTION
i When the highest image number on Card B (before replacing) is higher
than the highest image number on Card A: the file name of the next
recorded image continues from last file name recorded on Card B.
Card A 0001, 0002...... 0012, 0013
Replace card
Card B 0020, 0021, 0022, 0023, 0024, 0025, 0026
Previously recorded images
1 Display the Option Screen (see page 81).
2 Select the file number reset icon .
3 Press the SET button.
h The File Number Reset Screen
appears.
ON: The file number reset function
is on.
OFF: The file number reset function
is off.
4 Select “OFF”, and press the SET button.
h The file number reset function is deactivated.
NOTE
i Until the file number reset function is turned ON, consecutive file names
are assigned. It is recommended that the file number reset function be
returned to ON at the end of each photography session.
FILE NO. RESET
ON
OFF
95 English

RESETTING THE CAMERA SETTINGS
The settings that were changed on all the setting screens can be reset to the
factory-preset settings.
1 Display the Option Screen (see page 81).
2 Select the reset settings icon ,
and press the SET button.
h The Reset Settings Screen
appears.
YES: Reset to the factory-preset
settings.
NO: Do not change the settings,
and return to the Option
Screen.
3 Select “YES”, and press the SET button.
h The camera settings are reset to the factory-preset settings.
HINT
i Note that the following settings do not change with this procedure:
Date and time setting
Language setting
RESET SETTINGS
RESET?
YES
NO
English 96
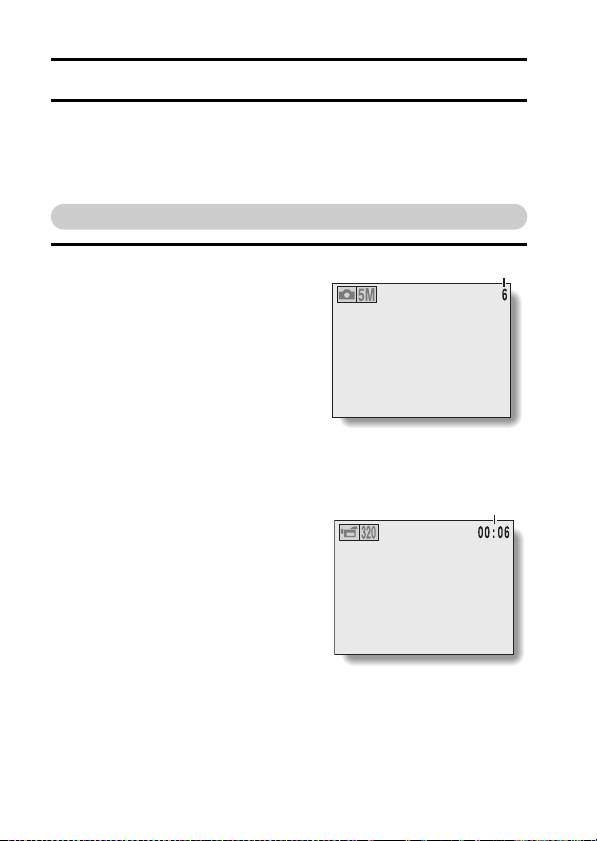
CHECKING THE REMAINING CARD MEMORY AND INTERNAL MEMORY
You can check how many images can be captured and how much recording
time is available on the card or in the camera’s internal memory. For a table
showing the maximum number of images and recording time for specific
cards, please see “Possible No. of Images/Possible Shooting Time” on
page 132.
Checking the remaining number of images and video recording time
1 Set the camera to the desired
shooting mode (see pages 29 and
30).
h The remaining number of images
appears in the upper right of the
LCD monitor (for the still image and
sequential shots shooting modes).
h The remaining video recording time
appears in the upper right of the
LCD monitor (for the video clip
shooting mode).
h The remaining number of images
and video recording time will differ
depending on the resolution and
compression settings.
h When the remaining number of
images or the remaining video
recording time is “0”, it may be
possible to capture a few more
images by changing the shooting
mode, setting a lower resolution
setting (see page 50), or selecting a
different compression setting (see
page 51).
97 English
Remaining number of images
<Still image/sequential
shots mode>
Remaining time (min:sec)*
* Depending on the card
capacity, hr:min:sec
<Video clip shooting mode>
 Loading...