

Firetide HotPort 6101, HotPort 6102 Quick Installation Manual
HotPort Node
AC Power
Brick
Antennas
Quick Install;
Warranty
HotPort Series 6100 Quick Installation Guide
This hardware installation guide describes how to install the HotPort node safely. The HotPort is intended to be installed by trained
professionals. Be sure to read and understand all installation and
safety instructions before proceeding with the installation.
Model Use No. of Radios
6101 Indoor, Worldwide, 2.4, 4.9, 5 GHz 1
6102 Indoor, Worldwide, 2.4, 4.9, 5 GHz 2
This guide covers both dual-radio and single radio models. The
only difference between dual-radio models and single-radio models is the second radio. If you are installing single-radio models,
you may ignore references in this manual to dual antennas.
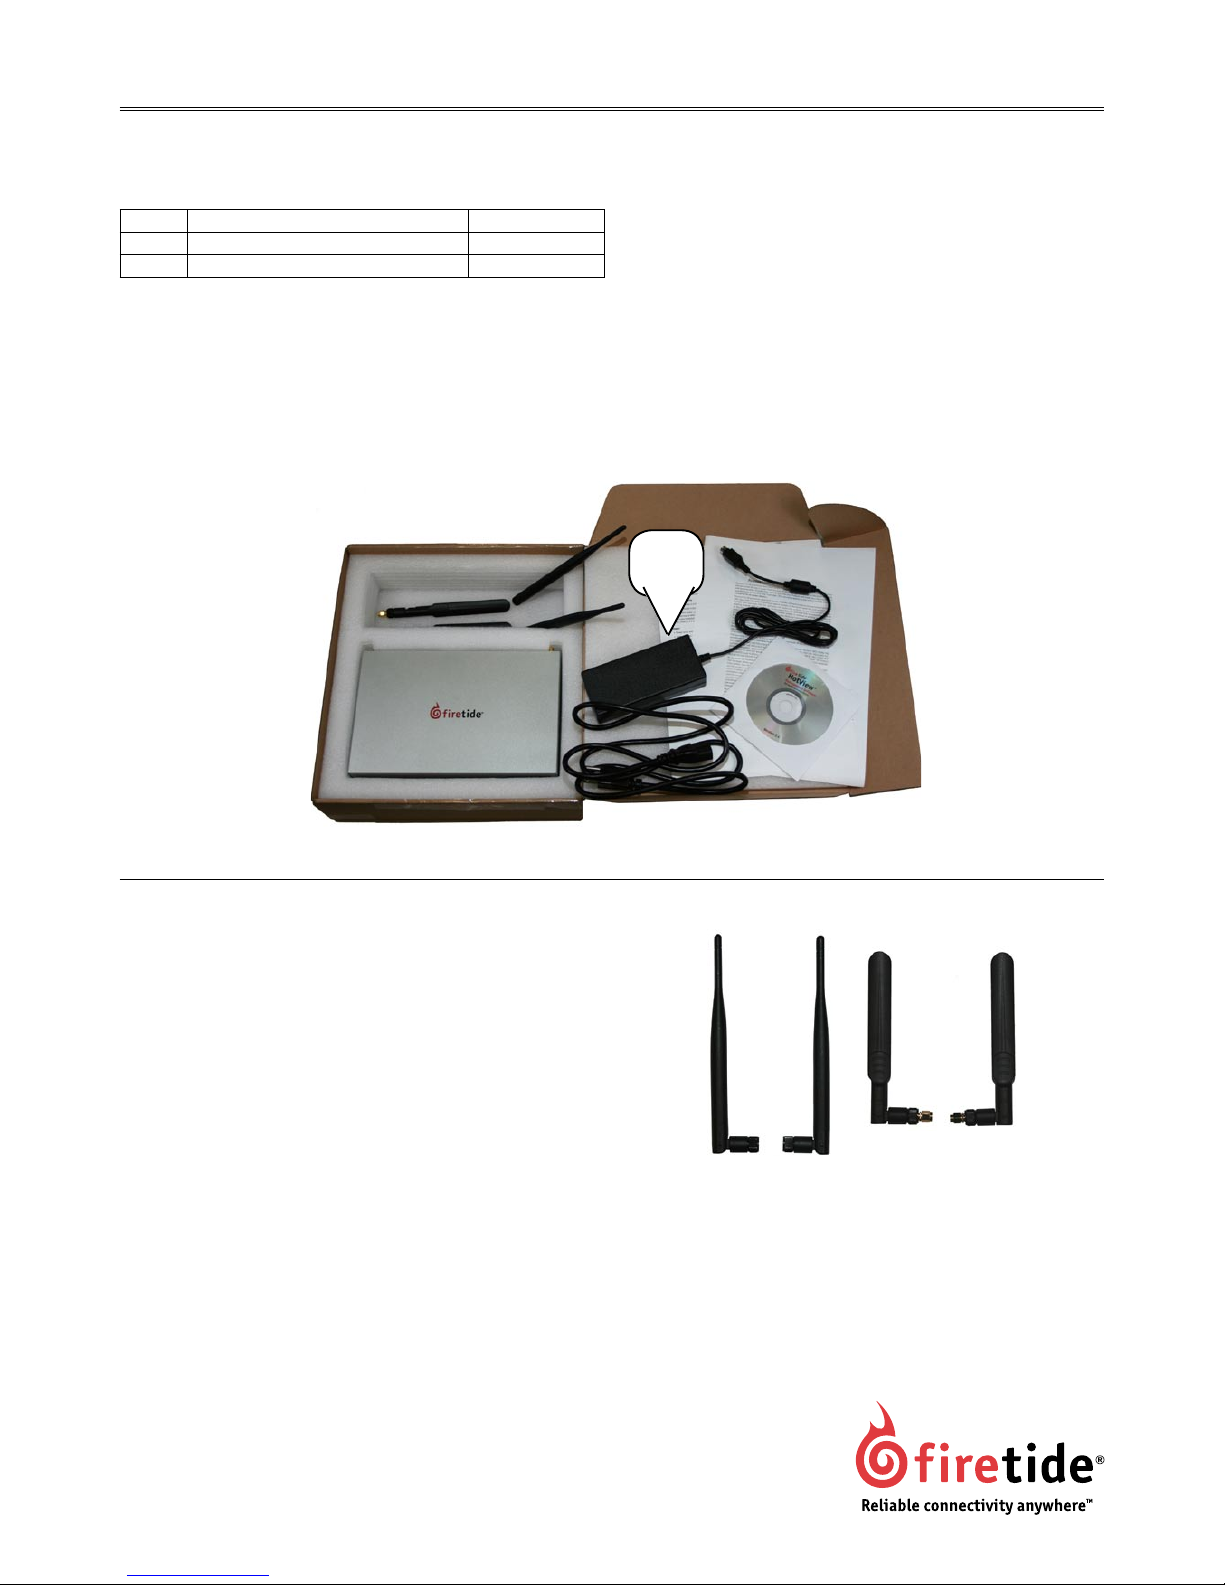
Package Contents
The HotPort node package contains the items listed at right. If
you are missing any of these items, contact your Firetide reseller.
Series 6100 Indoor Mesh Node in plenum-rated enclosure.
Two detachable 2.4 GHz omni-directional antennas.
Two detachable 5 GHz omni-directional antennas.
(Note: single-radio models will have only one of each antenna.)
External power module with NEMA5-15 (US) to IEC-320 cord.
(Other IEC cords are available separately.)
Series 6100 Quick Install Guide (this document).
Warranty and registration card.
Compact Disk (CD) with
HotView software.
HotView Pro User Guide.
HotPort Series 6000 Hardware Installation Guide
Warranty/Registration Card.
EULA.
•
•
•
•
•
•
•
•
•
•
•
•
2.4 GHz and 5 GHz Indoor and Staging Antennas
The Firetide-supplied antennas are rated for use in dry, indoor
environments. If the antenna is exposed to weather, moisture,
or high humidity, it may fail. Use an approved outdoor-rated antenna instead.
Planning Your Installation
HotPort Series 6000 nodes are easy to install. They are mechanically compatible with existing HotPort nodes. Series 6000 nodes
form their own mesh, and can connect to Series 3000 meshes via
MeshBridge. Refer to the HotView Pro User Guide for details.
Staging Considerations
You should set up and test your nodes on a bench or table before
installing them. This will allow you to pre-configure the nodes so
that they are all on the same RF channel, etc.
Set up your HotPort node in a lab with all other HotPort units using two of the provided antennas, as shown in the figure.
Make the necessary connections and power the units.
Install the HotView software on a workstation and connect
the workstation to a HotPort node. (See the HotView User
Guide for information about installing and using HotView.)
You will use HotView to configure the nodes and create a mesh
network. Configure and test the settings you plan to use.
Begin by checking to see that all nodes are visible in HotView.
If not, troubleshoot this problem according to the directions
in the HotView User Guide.
Set the Country Code for your country of operation.
Re-verify that all nodes are visible.
Verify that all dual-radio nodes (Series 6102) have both radios correctly meshed.
1.
2.
3.
1.
2.
3.
4.

Installing the Node
Indoor node installation is straightforward. Place the unit on a
table or shelf, or use the optional bracket to attach it to a wall,
ceiling, or cubicle partition. Apply power. The power LED should
illuminate immediately; after about 60 to 90 seconds, the status
LED should switch to steady green.
Note the location of the reset button in the lower right corner of
the rear panel. A paperclip can be used to reset the unit after it
has fully booted and the status light has come on.
Antenna Placement
The dual-radio capability of the Series 6102 nodes must be considered when selecting operating frequencies and arranging antennas. Each transmitter is powerful enough to drown out the other
unless steps are taken to provide adequate isolation.
The easiest solution is to operate one radio in the 2.4 GHz band
and the other radio in the 5 GHz band. This provides sufficient
isolation to avoid overload problems.
If this is not possible, you must select and place the antennas to
achieve the necessary isolation. You can do this with any of several techniques.
Omnidirectional antennas transmit in a plane perpendicular
to the shaft of the antenna. If one antenna is higher or lower than the other one, sufficient isolation can be provided.
In some cases, simply pointing one antenna “up” and one
“down” may be sufficient.
If the two omnidirectional antennas must be placed in the
same plane, mount them at least 1.6 meters (5ft.) apart.
1.
2.
AC Power Brick
Optional Mounting Bracket
Auxiliary Bracket
Main Mounting Bracket
HotPort Mesh Node
HotPort Series 6100 Mesh Node - Front View
HotPort Series 6100 Mesh Node - Rear View
HotPort Series 6100 Quick Install Guide Revision 1.03 041907 700-0078-005
The contents of this Installation Guide are subject to change without notice.
Please refer to the Firetide web site, www.firetide.com, for current versions.
 Loading...