

Page 1
FPX 32 DVS Artisan Face
Compatibility
• DVS Insert • 31 DVI Insert
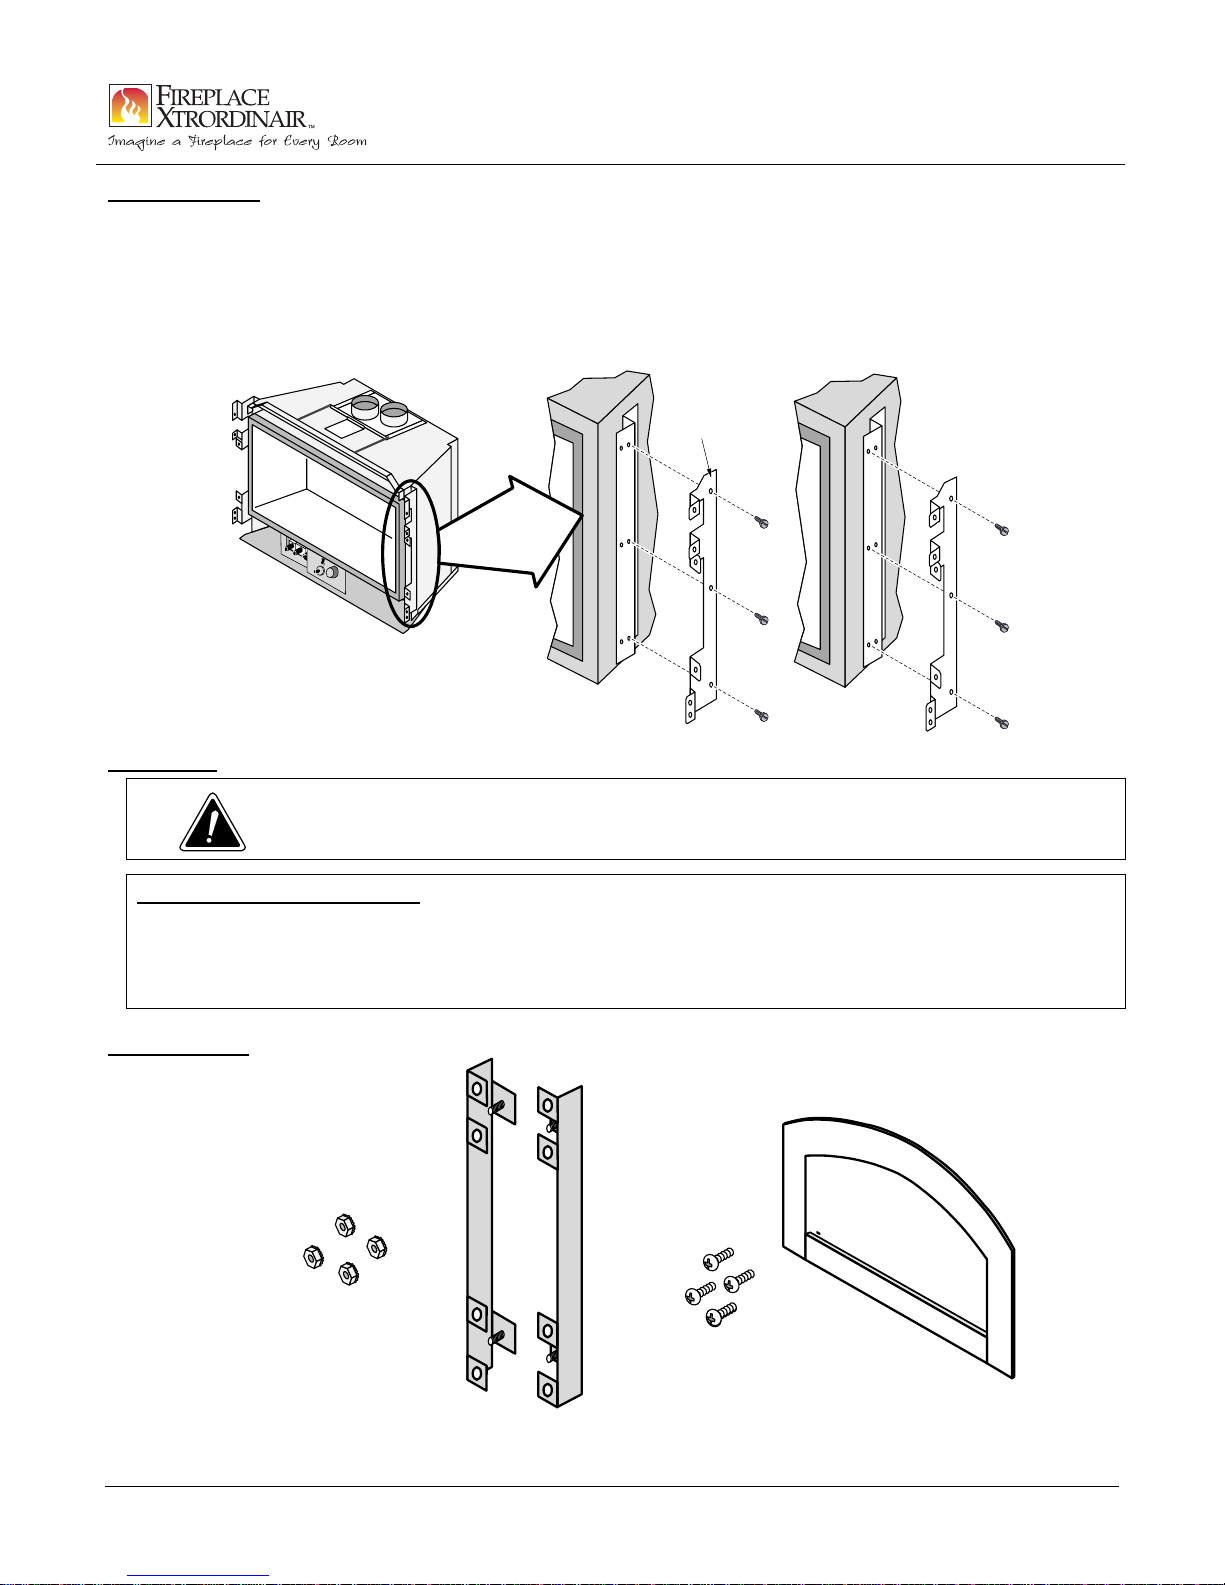
NOTE: On newer units (2008 or later), leave the glass on and move the face connector to the
Charcoal: 98500507 Patina Bronze: 95300398
forward position (see illustration below). For older units, remove the glass.
Remove the face connector bracket
from the heater (on both sides).
Face Connector
Bracket
Re-attach the face connector to the
heater using the forward mounting holes.
Warnings
Warning:
Make sure the heater has fully cooled prior to conducting service.
Hand-Rubbed Patina Finishes
The optional patina finish is hand applied by a skilled artisan to permanently alter the metal colors and
texture of the face. Each face is individually hand-polished and fired in an oven which imparts unique color
subtleties with no two finishes alike. The patina finish on your face is a “living” color and will age and antique
over time. Enjoy the timeless, rich luster of your beautiful new face.
Packing List
10-24 Nuts
Page 1 of 3 17601079 - 9/14/11 © Travis Industries, Inc.
1/4-20
Screws
Page 2
FPX 32 DVS Artisan Face
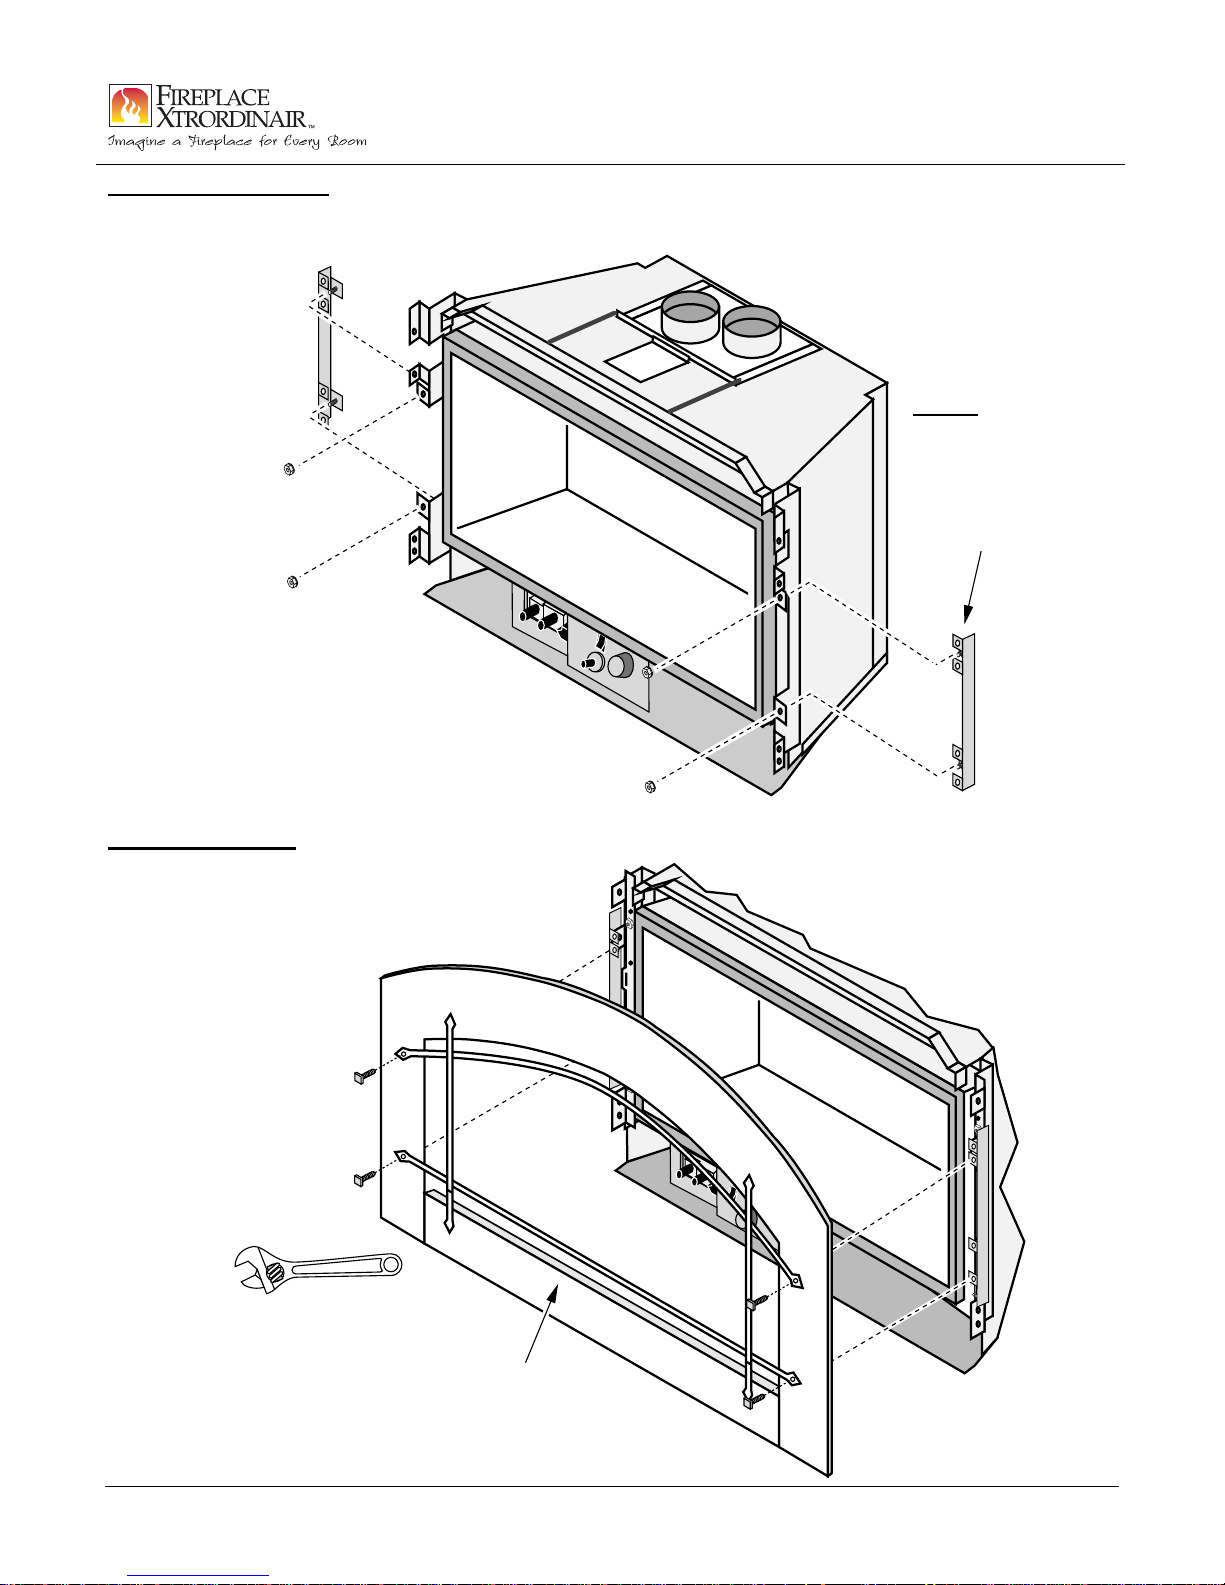
Bracket Installation
Install the face mounting brackets to
Charcoal: 98500507 Patina Bronze: 95300398
NOTE: The brackets
install with this pair of
closely spaced
flanges at the top.
the heater with the included nuts.
Face Installation
Attach the face using the four
bolts included with the face.
Adjustable
Wrench
Make sure the door does
not open while installing.
Page 2 of 3 17601079 - 9/14/11 © Travis Industries, Inc.
Page 3

FPX 32 DVS Artisan Face
Opening the Control Door
Warning:
The face becomes very hot during operation. Use the included handle open the control and
Use the pull tool
on either side to
disengage the
hinges.
take care to not touch any of the hot surfaces.
Note how the hooks on the tool insert
into the triangle-shaped holes.
Charcoal: 98500507 Patina Bronze: 95300398
Control Door
Pull Tool
(included
with face)
When removing the
pull tool, make sure
it does not damage
the hearth.
Adjusting the Control Door
The control is adjusted at the factory. See the directions below if further adjustment is necessary.
Back of Face (with face removed)Bullet Catch
Back of Bullet
Catch
These two nuts hold the
bullet catch assembly.
If the top of the control
door is not aligned,
these nuts can be
loosened to re-align the
bullet catch assembly.
This bullet-shaped device holds the control door
upright. To tighten or loosen the catch, simple
rotate it (it is threaded inside the assembly).
Access
Panel
Adjust this nut to tighten
or loosen the friction of
the hinge.
Page 3 of 3 17601079 - 9/14/11 © Travis Industries, Inc.
 Loading...