

Page 1

2013 USER GUIDE
Page 2
The driver’s primary responsibility is the safe operation of the
vehicle. Driving while distracted can result in loss of vehicle
control, resulting in a collision and personal injury. Chrysler
Group LLC strongly recommends that the driver use extreme
caution when using any device or feature that may take their
attention off the road. Use of any electrical devices such as cell
phones, computers, portable radios, vehicle navigation or other
devices by the driver while the vehicle is moving is dangerous
and could lead to a serious collision. Texting while driving is also
dangerous and should never be done while the vehicle is moving.
If you nd yourself unable to devote your full attention to
vehicle operation, pull off the road to a safe location and stop
your vehicle. Some States or Provinces prohibit the use of
cellular telephones or texting while driving. It is always
the driver’s responsibility to comply with all local laws.
IMPORTANT: This User Guide is intended to familiarize you
with the important features of your vehicle. The DVD enclosed
contains your Owner’s Manual, Navigation/Uconnect
®
Manuals,
Warranty Booklets, Tire Warranty and 24-Hour Towing
Assistance (new vehicles purchased in the U.S.) or Roadside
Assistance (new vehicles purchased in Canada) in electronic
format. We hope you nd it useful. Replacement DVD kits
may be purchased by visiting www.techauthority.com.
FIAT is a registered trademark of Fiat Group Marketing &
Corporate Communication S.p.A., used under license by
Chrysler Group LLC.
If you are the rst registered retail owner of your vehicle,
you may obtain a complimentary printed copy of the
Owner’s Manual, Navigation/Uconnect
®
Manuals or
Warranty Booklet by calling 1-888-242-6342 (U.S.) or
1-800-387-1143 (Canada) or by contacting your dealer.
Driving and Alcohol: Drunken driving is one of the most frequent causes of
collisions. Your driving ability can be seriously impaired with blood alcohol levels
far below the legal minimum. If you are drinking, don’t drive. Ride with a
designated non-drinking driver, call a cab, a friend, or use public transportation.
Driving after drinking can lead to a collision. Your perceptions are less sharp,
your reexes are slower, and your judgment is impaired when you have been
drinking. Never drink and then drive.
Page 3

TABLE OF CONTENTS
INTRODUCTION/WELCOME
WELCOME FROM FIAT ..............2
IMPORTANT VEHICLE INFORMATION .....4
CONTROLS AT A GLANCE
DRIVER COCKPIT .................6
INSTRUMENT CLUSTER .............8
GETTING STARTED
ELECTRIC VEHICLE FEATURES .........10
ELECTRIC SYSTEM OPERATION ........13
CHARGINGTHE HIGHVOLTAGE BATTERY . . 16
STARTING YOUR 500e ..............18
KEYFOB ......................19
THEFT ALARM ..................19
POWER DOOR LOCKS .............20
SEATBELT .....................20
SUPPLEMENTAL RESTRAINT SYSTEM (SRS)
-AIRBAGS.....................21
CHILD RESTRAINTS ...............22
FRONTSEATS...................24
REAR SEATS ....................26
TILT STEERING ..................26
HEATEDSEATS ..................27
OPERATING YOUR VEHICLE
EXTENDING YOUR DRIVING RANGE PER
CHARGE ......................28
TURN SIGNAL/LIGHTS/HIGH BEAM LEVER . . 29
WIPER/WASHER LEVER .............31
SPEED CONTROL ................32
POWERWINDOWS ...............33
AUTOMATIC TEMPERATURE CONTROLS
(ATC) .......................33
REAR PARK A SSIST ................34
POWER SUNROOF ...............34
WIND BUFFETING ...............35
ELECTRONICS
YOURVEHICLE'S SOUND SYSTEM .......36
AM/FM RADIO WITH CD PLAYER AND
SiriusXM SATELLITE RADIO ...........38
BLUE&ME™ HANDS-FREE OPERATION ....40
iPod®/USB/MP3 CONTROL ...........44
ELECTRONICVEHICLE INFORMATION
CENTER (EVIC) ..................45
PROGRAMMABLE FEATURES ..........45
TRIP BUTTON ..................46
POWER OUTLET .................47
UTILITY
TRAILER TOWING ................48
RECREATIONAL TOWING (BEHIND
MOTORHOME, ETC.) ..............48
WHAT TO DO IN EMERGENCIES
24-HOUR ROADSIDE ASSISTANCE .......49
INSTRUMENT CLUSTER WARNING LIGHTS . 49
TIREFIT KIT ....................52
JUMP-STARTING PROCEDURE — 12VOLT
BATTERY ......................58
MANUAL PARK RELEASE ............60
TOWING A DISABLED VEHICLE ........61
ENHANCED ACCIDENT RESPONSE
SYSTEM ......................62
FREEING A STUCK VEHICLE ...........62
EVENT DATA RECORDER (EDR) ........63
MAINTAINING YOUR VEHICLE
OPENING THE HOOD .............64
UNDERHOOD COMPARTMENT ........65
FLUIDS AND CAPACITIES ............66
MAINTENANCE SCHEDULE ..........67
FUSES .......................69
TIRE PRESSURES .................71
TIRE ROTATION RECOMMENDATIONS . . . 72
WHEEL AND WHEEL TRIM CARE .......72
EXTERIOR BULBS ................73
CUSTOMER ASSISTANCE
FIAT CUSTOMER CENTER ............74
ASSISTANCE FOR THE HEARING IMPAIRED . 74
PUBLICATIONS ORDERING ..........74
REPORTING SAFETY DEFECTS IN
THEUNITEDSTATES...............75
MOPAR ACCESSORIES
AUTHENTIC ACCESSORIES BY MOPAR® . . 76
INDEX
.....................77
FAQ(HowTo?)
FREQUENTLY ASKED QUESTIONS .......78
1
Page 4

INTRODUCTION/WELCOME
WELCOME FROM FIAT
Congratulations on selecting your new FIAT 500e. Be assured that your 500e represents an
elegant marriage of technology and Italian styling that is as good for the environment as is
fun to drive!
Your new 500e has characteristics to enhance the driver's control under some driving conditions.These are to assist the driver and are never a substitute for attentive driving.They
can never take the driver's place.Always drive carefully.
Your new vehicle has many features for the comfort and convenience of you and your passengers. Some of these should not be used when driving because they take your eyes from
the road or your attention from driving. Never text while driving or take your eyes more
than momentarily off the road.
This guide illustrates and describes the operation of features and equipment that are either
standard or optional on this vehicle. This guide may also include a description of features and
equipment that are no longer available or were not ordered on this vehicle . Please disregard
any features and equipment described in this guide that are not available on t his vehicle.
Chrysler Group LLC reserves the right to make changes in design and specifications and/or
make additions to or improvements to its products without imposing any obligation upon
itself to install them on products previously manufactured.
This User Guide has been prepared to help you quickly become acquainted with the important features of your vehicle. It contains most things you will need to operate and maintain
the vehicle, including emergency information.
The DVD includes a computer application containing detailed owner's information which
can be viewed on a personal computer or MAC computer.The multimedia DVD also includes videos which can be played on any standard DVD player.Additional DVD operational
information is located on t he back of the DVD sleeve.
For complete owner information, refer to your Owner's Manual on the DVD in the
owner’s kit provided at the time of new vehicle purchase. For your convenience, the infor-
mation contained on the DVD may also be printed and saved for future reference.
We are committed to protecting our environment and natural resources. By converting
from paper to electronic delivery for the majority of the user information for your vehicle,
together we greatly reduce the demand for tree-based products and lessen the stress on
our environment.
2
Page 5

INTRODUCTION/WELCOME
USE OF AFTERMARKET PRODUCTS (ELECTRONICS)
The use of aftermarket devices including cell phones, MP3 players, GPS systems, or chargers
may affect t he performance of on-board wireless features. If you are experiencing difficulties with any of your wireless features, try disconnecting your aftermarket devices to see if
the situation improves. If your symptoms persist, please see an authorized studio.
CHRYSLER, DODGE, JEEP, RAM TRUCK, SRT,ATF+4, MOPAR and Uconnect are registered
trademarks of Chrysler Group LLC.
COPYRIGHT ©2012 CHRYSLER GROUP LLC
3
Page 6

INTRODUCTION/WELCOME
IMPORTANT VEHICLE INFORMATION
• Your 500e operates entirely on electricity stored in the high voltage battery. Unlike a con-
ventional vehicle or Hybrid there is no internal combustion engine. Batter y Electric Vehicles have unique operating characteristics that you should become familiar with to ensure you are getting the optimal performance from your vehicle.
High Voltage Battery
• Your vehicle is equipped with a Lithium-ion high voltage battery that is used to power
the electric powertrain systems and the 12 Volt vehicle electrical system.
• The high voltage battery is located under the vehicle.The high voltage battery is mainte-
nance free and designed to last for the life of the vehicle.
Lithium-ion batteries provide the following
benefits:
• Lithium-ion batteries are much lighter
than other types of rechargeable batteries
of the same size.
• Lithium-ion batteries hold their charge;
they only lose approximately 3% of their
charge per month.
• Lithium-ion batteries have no memory,
which means that you do not have to
completely discharge them before recharging, as with some other batteries.
• Lithium-ion batteries can be recharged
and discharged thousands of times.
High Voltage Battery Service Disconnect
• The high voltage battery service discon-
nect is located under the rear passenger
seat lower cushion. If your vehicle requires service see your authorized studio.
Disposal of the High Voltage Battery
• Your vehicle’s high voltage ba ttery is designed to last the life of your vehicle. See your
authorized studio for information on the disposal of the battery if it should require
replacement.
4
Page 7

INTRODUCTION/WELCOME
General Information
The vehicle is also equipped with a Battery Management System that is designed to:
• Ensure safe operation
• Maximize driving range
• Maximize the life expectancy of the high voltage battery
NOTE:
The high voltage battery contains contactors that will open and close during vehicle shut
down, start up or when plugging the vehicle in for charging.The contactors will produce a
clicking noise that can be heard from within the vehicle. The clicking noise observed is the
sound of these contactors as they open and close and is normal operation for your 500e.
WARNING!
Never try to remove the high voltage service disconnect. The high voltage service disconnect is used when your vehicle requires service by a trained technician at an authorized
studio. Failure to follow this warning can cause severe burns or electrical shock that may
result in serious injury or death.
5
Page 8

CONTROLS AT A GLANCE
DRIVER COCKPIT
6
Page 9

L. Drivers PowerWindow Switch pg. 33
M. Automatic Temperature Controls pg. 33
N. Speed Control Switches pg. 32
O. BLUE&ME™ Hands-Free Communication
Switches pg. 40
CONTROLS AT A GLANCE
P. Hood Release Lever
Q. Power Mirror Switches
E. ESC Off pg. 31
pg. 29
A. Turn Signal Lever (behind steering wheel)
F. Instrument Panel Charge Indicator pg. 16
G. Hazard Button
H. Radio pg. 38
I. Rear Defroster
J. Passenger Power Window Switch pg. 33
K. Single-Speed Transmission Buttons
(EVIC) Display pg. 45
wheel) pg. 31
B. Instrument Cluster
C. ElectronicVehicle Information Center
D. Wiper/Washer Lever (behind steering
7
Page 10

CONTROLS AT A GLANCE
INSTRUMENT CLUSTER
Warning Lights
- Electric Vehicle System Warning Light
- Regenerative Brake System Warning Light
- 12 Volt Battery Charging System Light
- Anti-Lock Brake (ABS) Light
- Air Bag Warning Light
- Seat Belt Reminder Light
- Power Steering System Warning Light
- Service Propulsion System Warning Light
BRAKE
(See page 49 for more information.)
8
- Brake Warning Light
- Tire Pressure Monitoring System (TPMS) Light
Page 11

Indicators
CONTROLS AT A GLANCE
- Turn Signal Indicators
- High Beam Indicator
- Front Fog Light Indicator
- Park/Headlight ON Indicator
- Electronic Speed Control SET Indicator
- Door Ajar Indicator
- Electronic Stability Control (ESC) OFF Indicator
- Electronic Stability Control (ESC) Activation/Malfunction Indicator
9
Page 12

GETTING STARTED
ELECTRIC VEHICLE FEATURES
Auto Park
• The Auto Park features automatically places the transmission into PARK if there is any
indication that the driver may leave the vehicle while the transmission is in D (DRIVE), N
(NEUTRAL) or R (REVERSE).
• Auto Park is enabled under the following conditions:
• Key On (12 Volt ON and High Voltage OFF) or READY mode (12 Volt ON and High
Voltage ON).
• Vehicle speed is below 2 mph (3 km/h).
NOTE:
Auto Park is disabled above 2 mph (3 km/h) and transmission range will be maintained.
• The instrument cluster will display an Auto shift to park message and chime once when
Auto Park action occurs.
Mode of operation with key ON
• Auto Park will be engaged when the transmission is in DRIVE, NEUTRAL or REVERSE
and the following conditions are detected:
• Seat Belt is unlatched
• Brake pedal is released
• Driver's door is ajar
Mode of operation with key OFF
• Auto Park will be engaged when the transmission is in DRIVE, NEUTRAL or REVERSE
and the vehicle speed is less than 2 mph (3 km/h).
Audible Pedestrian Warning System
• Your vehicle is equipped with an Audible Pedestrian Warning System.The Audible Pedes-
trian Warning System uses distinct sounds to alert pedestrians that your vehicle is approaching.
• The audible warning system uses an in-car sound synthesizer with a speaker located in
the underhood compartment. The warning system is automatically activated when selecting DRIVE or REVERSE.
• In DRIVE range, the system will remain active until the vehicle reaches a speed of ap-
proximately 22 mph (35.5 km/h). At approximately 22 mph (35.5 km/h) the warning system is deactivated and will automatically be active when the vehicle returns to approximately 20 mph (32 km/h).
Smartphone Features
• With the “FIAT Access” smartphone app, you can monitor the state of charge of the high
voltage battery or initiate charging from your phone.You can also turn on your car’s climate control system remotely.The smartphone app provides the following features:
• Monitor battery charge level
• Display available driving distance
10
Page 13

GETTING STARTED
• Check charging status
• Remotely activate vehicle climate control system
• Unlock and lock doors
• Assist with locating your vehicle
• Locate charging stations
• Send a point-of-interest to your vehicle
• Schedule a charge
• View energy consumed
• Notifications for charging and preconditioning events
How do I get the “FIAT Access” smartphone App?
• Visit the 500e registration website:
https://www.uconnectaccess.fiatusa.com/bevsubscribe/basicSubscription.jsp
• Once in the registration website, you will
need to enter your vehicle’s VIN and Connectivity ID.The connectivity ID is found
in the vehicle's instrument cluster.To locate the connectivity ID follow the steps
below:
1. Press the menu button on the instrument
cluster.
11
Page 14

GETTING STARTED
2. Choose “Settings” and scroll down to the
“Connectivity ID”.
3. Select “Connectivity ID”.
• After obtaining the connectivity ID and
VIN number return to the vehicle registration website and perform the
following:
1. After entering the VIN (Vehicle Identification Number), Connectivity ID and your
email address, click “submit”.
2. You will now be asked to fill in your contact information and a user name and
password.
3. Once finished with registration you will
be directed to your 500e owner’s site.
4. From the owner’s site you will be able to
download the 500e mobile application
and learn how to use your connected features.
5. Use your owner’s site username and password for logging into the mobile application.
NOTE:
Your smartphone must have a valid data connection to use the 500e mobile application.
Need help with registration?
• Please call the 500e Call Center Toll Free number below:
(855) 261-5364
12
Page 15

GETTING STARTED
ELECTRIC SYSTEM OPERATION
Level 1 Charging (120V — Requires NEMA 5–15 Outlet)
• Level 1 charging is done by using a conventional 120 Volt AC (Alternating Current)
grounded receptacle along wit h the NEMA 5–15 Electric Vehicle Supply Equipment
(EVSE) that comes standard with your vehicle. Refer to “Vehicle Charging Cord” for further information.
Level 2 Charging (240V — Requires A 40 Amp Circuit Breaker Or Greater)
• Level 2 charging is accomplished by using
240V permanently mounted EVSEs and is
the preferred method for charging your
vehicle.
• A Level 2 charging station can be installed
at your residence.
• The Level 2 unit and installation service is
available for purchase at your authorized
studio.
Charge Times
Type of Charge Approximate Time
Level 1 (120V/15A)
Level 2 (240V/30A)
The following factors determine how long a battery recharge will take:
• The battery’s current state of charge (percent depleted)
• What recharging device is being used (Level 1 or Level 2)
• Ambient temperatures
Approximately 23 hours to fully recharge
* 3 hours will restore 10 miles of range *
Approximately 4 hours to fully recharge
* 30 minutes will restore 10 miles of range *
13
Page 16

GETTING STARTED
NOTE:
• Charging times are estimates based on a completely discharged high voltage battery pack.
• Charging times will vary based on the age, condition state of charge and temperature of
the high voltage battery pack.
EVSE Operation And Status Information
Indicator Description
1 — AC Indicator LED
2 — Fault Indicator LED
3 — Charge Level Indicator LED's
Green indicates READY
RED Indicates a fault
Green indicates READY
RED indicates a fault
All ON indicates system ready and not
charging
LED's turning on and off in sequence indicates vehicle charging
• When the EVSE is first plugged in it will go through an initialization and self test. For the
first three seconds after plugging in your EVSE all the LED's will remain off.
• After approximately three seconds the EVSE performs an internal self test and Ground
Continuity Test.This process takes approximately six seconds.
• During the internal self test the unit turns on one Charge Level Indicator LED every 1.5
seconds until all the Charge Level Indicator LED's are illuminated.
14
Page 17

GETTING STARTED
AC LED
•••ooo
••••oo3.0 sec
• • •••o4.5 sec
• • ••••6.0 sec
• If the self test is successful the AC LED, the Fault Indicator LED and the four Charge
Level LED's will turn solid green.
• The EVSE LED's will be used to indicate the vehicle's connection status if no faults are
found during the self test.
AC LED
••••••
• After the EVSE is connected to the vehicle's charge inlet the EVSE will continue to illumi-
nate all LED's green.
• Once the vehicle begins charging the EVSE Charge level LED's will illuminate in order
from left to right, then shut off.This pattern will repeat as long as the EVSE remains connected to AC power and the battery is charging.
• The LED's are illuminated and turn off at the rate of one change per second.
AC LED
•••ooo
••••oo2.0 sec
• • •••o3.0 sec
• • ••••4.0 sec
Fault Indicator
LED
Fault Indicator
LED
Fault Indicator
LED
Charge Level Indicator LED's Time
1.5 sec
Charge Level Indicator LED's
Charge Level Indicator LED's Time
1.0 sec
NOTE:
Refer to the Level 1 User Manual for any additional information on its use or operation.
CAUTION!
Do not bend or damage the Level 1 EVSE terminals as this could cause the EVSE to become inoperative and/or illuminate the fault LED.
15
Page 18

GETTING STARTED
CHARGING THE HIGH VOLTAGE BATTERY
• Put the vehicle in PARK.
• Turn the ignition to the OFF position.
• Remove the Level 1 EVSE from its storage bin by lifting the rear cargo cover.
• Uncoil the entire length of the EVSE
(charge cord).
• Plug the EVSE into a standard 120V AC
outlet that is properly grounded. It is recommended that the EVSE is connected to
an AC outlet on a circuit which is not
electrically loaded by other devices. Extension cords may not be used.
NOTE:
All of the EVSE LED’s illuminate green.
• Open the charge receptacle door.
NOTE:
The charge receptacle door is locked whenever the vehicle is locked. Unlock the doors
to unlock the charge receptacle door for
charging.
• Plug the EVSE into the charge receptacle.
Push the EVSE in firmly until it is completely engaged (of not completely engaged the vehicle may not charge).
16
Page 19

GETTING STARTED
NOTE:
• The vehicle will initiate the charging cycle automatically when all the conditions are
satisfied.
• The vehicle charge indicator will show the pattern for charging.
• When charging is complete, or the vehicle
needs to be unplugged, remove the EVSE
by pushing the button on the connector
and pull firmly to remove it from the vehicle’s charge receptacle.
• Close the charge receptacle door.
NOTE:
• In the event of an error in the charging
process the AC power to the vehicle
will stop and a red indicator will illuminate on the EVSE.
• Keep t he door for the charge recep-
tacle closed when not in use.
Instrument Panel Visual Indicator
• In addition to the instrument cluster the
vehicle is also equipped with a visual
charge indicator. The indicator is made up of five lights that are mounted to the center of
the instrument panel.
• The charge indicator represents the cur-
rent state of charge for the high voltage
battery.The charge indicator lights quickly
identify the battery state of charge while
the vehicle is being charged. Each light
represents an incremental 20% level of
charge. Solid and blinking lights indicate
charge status similar to a mobile device.
NOTE:
In the event of an error in the charging process the outer two lights will blink.
17
Page 20

GETTING STARTED
Number Of Indicator Lights Illuminated Percent Of Battery Charge
1 Light 0 – 20%
2 Lights 21 – 40%
3 Lights 41 – 60%
4 Lights 61 – 80%
5 Lights 81 – 100%
STARTING YOUR 500e
• Before starting your vehicle, adjust your seat, adjust both inside and outside mirrors, and
fasten your seat belts.
WARNING!
• Never leave children alone in a vehicle, or with access to an unlocked vehicle.
• Allowing children to be in a vehicle unattended is dangerous for a number of rea-
sons.A child or others could be seriously or fatally injured. Children should be
warned not to touch the parking brake, brake pedal or the shift lever.
• Do not leave the key fob in or near the vehicle (or in a location accessible to chil-
dren), and do not leave the ignition in the ACC or ON/RUN position. A child could
operate power windows, other controls, or move the vehicle.
NOTE:
You must press the brake pedal before selecting a transmission gear.
• The transmission must be in the PARK or
NEUTRAL position before you can start
the vehicle.Apply the brakes before placing the transmission into any position.
• Turn the key to the START position while
your vehicle is in PARK.When the ignition
key is turned to the START position, the
“READY” indicator in the EVIC will illuminate to indicate the 500e's Electric Drive
System has started. When the “READY”
indicator is illuminated your 500e is ready
to be driven.
• If the “READY” indicator fails to illuminate
after you have followed the normal starting procedure contact your authorized
studio.
18
Page 21
GETTING STARTED
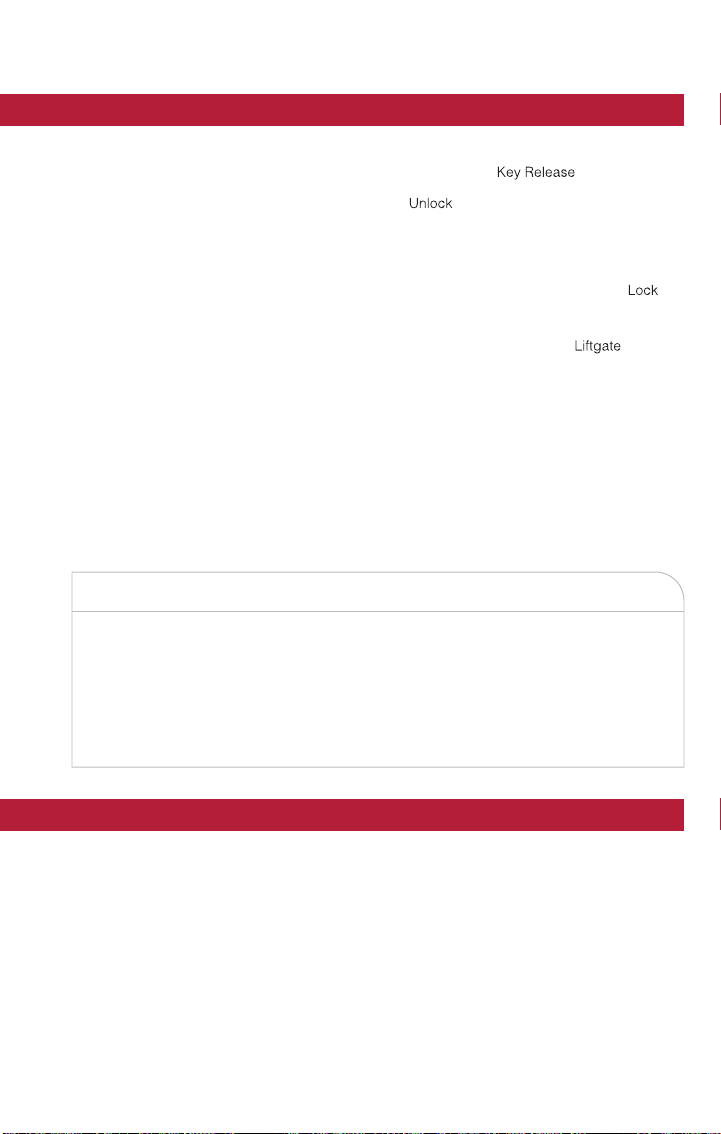
KEY FOB
Locking and Unlocking the Doors and Liftgate
• Press the LOCK button once to lock all
the doors and the liftgate.
• Press the UNLOCK button once to un-
lock the driver’s door only and twice
within five seconds to unlock all the doors
and liftgate.
• All doors can be programmed to unlock on the first press of the UNLOCK button. Refer
to Programmable Features in this guide.
Opening the Liftgate
• Press the LIFTGATE button for approximately two seconds to unlock the liftgate.
• To open the liftgate, press the liftgate release handle located on the underside of the
license plate bar and pull the liftgate open with one fluid motion.
WARNING!
Never leave children alone in a vehicle, or with access to an unlocked vehicle. Allowing
children to be in a vehicle unattended is dangerous for a number of reasons. A child or
others could be severely injured or killed. Children should be warned not to touch the
parking brake, brake pedal, or the shift lever. Do not leave the Key Fob in the vehicle, or in
a location accessible to children.A child could operate power windows, other controls, or
move the vehicle.
THEFT ALARM
To Arm:
• Press the Key Fob LOCK button.
To Disarm:
• Press the Key Fob UNLOCK button or turn the ignition to the ON/RUN position.
19
Page 22

GETTING STARTED
POWER DOOR LOCKS
• The vehicles power door locks are activated by moving the inside door handles.
NOTE:
The vehicle’s door must be closed to initiate this feature.
• Push or pull the door handle to lock or unlock the doors and liftgate when the doors are
closed.
SEAT BELT
• Be sure everyone in your vehicle is in a seat and using a seat belt properly.
• Position the lap belt across your thighs, below your abdomen.To remove slack in the lap
portion, pull up a bit on the shoulder belt.To loosen the lap belt if it is too tight, tilt the
latch plate and pull on the lap belt. A snug belt reduces the risk of sliding under the belt
in a collision.
• Position the shoulder belt on your chest so that it is comfortable and not resting on your
neck.The retractor will withdraw any slack in the belt.
• A shoulder belt placed behind you will not protect you from injury during a collision.You
are more likely to hit your head in a collision if you do not wear your shoulder belt.The
lap and shoulder belt are meant to be used together.
• A belt that is too loose will not protect you properly. In a sudden stop you could move
too far forward, increasing the possibility of injury.Wear your seat belt snugly.
• A frayed or torn belt could rip apart in a collision and leave you with no protection. In-
spect the belt system periodically, checking for cuts, frays, or loose parts. Damaged parts
must be replaced immediately. Do not disassemble or modify the system. Seat belt assemblies must be replaced after a collision if they have been damaged (bent retractor,
torn webbing, etc.).
• The seat belts for both front seating positions are equipped with pretensioning devices
that are designed to remove slack from the seat belt in the event of a collision.
• A deployed pretensioner or a deployed air bag must be replaced immediately.
WARNING!
In a collision, you and your passengers can suffer much greater injuries if you are not buckled up properly.You can strike the interior of your vehicle or other passengers, or you can
be thrown out of the vehicle.Always be sure you and others in your vehicle are buckled
up properly.
20
Page 23

GETTING STARTED
SUPPLEMENTAL RESTRAINT SYSTEM (SRS) - AIR BAGS
• This vehicle has Advanced Front Air Bags for both the driver and right front passenger as
a supplement to the seat belt restraint system.The Advanced Front Air Bags will not deploy in every type of collision.
• Advanced Front Air Bags are designed to provide additional protection by supplementing
the seat belts in certain frontal collisions depending on several factors, including the severity and type of collision.Advanced Front Air Bags are not expected to reduce the risk
of injury in rear,side, or rollover collisions.
• This vehicle is equipped with Supplemental Side Air Bag Inflatable Curtains to protect the
driver, front and rear passengers sitting next to a window.
• This vehicle is equipped with Supplemental Seat-Mounted Side Air Bags to provide en-
hanced protection to help protect an occupant during a side impact.
• This vehicle is equipped with Supplemental Driver Side Knee Air Bag to provide en-
hanced protection and work together with the Driver Advanced Front Air Bag during a
frontal impact.
• If the Air Bag Warning Light
driving, have the vehicle serviced by an authorized service center immediately.
• Refer to the Owner's Manual on the DVD for further details regarding the Supplemental
Restraint System (SRS).
is not on during starting, stays on, or turns on while
WARNING!
• Relying on the air bags alone could lead to more severe injuries in a collision.The air
bags work with your seat belt to restrain you properly. In some collisions, the air bags
won't deploy at all. Always wear your seat belts even though you have air bags.
• Being too close to the steering wheel or instrument panel during Advanced Front Air
Bag deployment could cause serious injury, including death. Air bags need room to
inflate. Sit back, comfortably extending your arms to reach the steering wheel or
instrument panel.
• Supplemental Side Air Bag Inflatable Curtains and Supplemental Sea t-Mounted Side
Air Bags need room to inflate. Do not lean ag ainst the door or window. Sit upright in
the center of the seat.
• Being too close to the Supplemental Side Air Bag Inflatable Curtain and/or Seat-
Mounted Side Air Bag during deployment could cause you to be severely injured or
killed.
• Do not drive your vehicle after the air bags have deployed. If you are involved in
another collision, the air bags will not be in place to protect you.
• After any collision, the vehicle should be taken to an authorized studio immediately.
21
Page 24

GETTING STARTED
CHILD RESTRAINTS
• Children 12 years and under should ride properly buckled up in a rear seat, if available.
According to crash statistics, children are safer when properly restrained in the rear seats
rather than in the front.
• Every state in the United States and all Canadian provinces require that small children
ride in proper restraint systems.This is the law, and you can be prosecuted for ignoring it.
Installing The LATCH Compatible Child Restraint System
• Your vehicle's second row passenger seats are equipped with the child restraint anchor-
age system called LATCH, which stands for Lower Anchors and Tether for CHildren.
LATCH child restraint anchorage systems are installed in both rear seating positions.
• NEVER install compatible child seats so that two seats share a common lower anchorage.
• Loosen the child seat adjusters on the
lower straps and tether straps so that you
can attach the hook or connector to the
anchors.
• Attach the lower hooks or connectors
over the top of the anchorage bars, pushing aside the seat cover material.The rear
seat lower anchorages are round bars,
located at the rear of the seat cushion
where it meets the seatback.The rear
seat lower anchors can be readily identified by the symbol
seatback directly above the anchorages and are just visible when you lean into the rear
seat to install the child restraint.
• The tether strap should be routed under the center of the head restraint and attached
to the tether anchor on the rear of the seatback.
• Tighten all three straps as you push the
child restraint rearward and downward
into the seat.
located on the
22
Page 25

GETTING STARTED
Installing the Child Restraint Using the Vehicle Seat Belts
• To install a child restraint, first pull enough of the seat belt webbing from the retractor to
route it through t he belt path of the child restraint, and then slide the latch plate into the
buckle.
• Next, extract all the seat belt webbing out of the retractor and then allow the belt to
retract into the retractor. Finally, pull on any excess webbing to tighten the lap portion
around the child restraint.Any seat belt system will loosen with time, so check the belt
occasionally, and pull it tight if necessary.
• Once you have completed securing the child restraint with the seat belt, secure the top
tether strap.The tether strap should be routed under the center of the head restraint.
WARNING!
• In a collision, an unrestrained child, even a tiny baby, can become a projectile inside
the vehicle.The force required to hold even an infant on your lap could become so
great that you could not hold the child, no matter how strong you are.The child and
others could be severely injured or killed. Any child riding in your vehicle should be
in a proper restraint for the child's size.
• Improper installation of a child restraint to the LATCH anchorages can lead to failure
of an infant or child restraint.The child could be severely injured or killed. Follow the
manufacturer’s directions exactly when installing an infant or child restraint.
• An incorrectly anchored tether strap could lead to increased head motion and pos-
sible injury to the child. Use only the anchor positions directly behind the child seat
to secure a child restraint top tether strap.
• Rearward-facing child seats must never be used in the front seat of a vehicle with a
front passenger air bag.An air bag deployment could cause severe injury or death to
infants in this position.
• This vehicle does not have a center seating position. Do not use the center lower
LATCH anchorages to install a child seat in the center of the back seat.
23
Page 26

GETTING STARTED
FRONT SEATS
Manual Seat Adjustment
Forward/Rearward
• Lift up on the adjusting handle, located at
the front of the seat near the floor, and
release at the desired position.Then, using
body pressure, move forward and backward on the seat to be sure that the seat
adjusters have latched.
Recliner
• To recline the seatback, lift up the recline
lever, located on the inboard side of the
seat, lean back until the desired position
has been reached, and release the lever.
24
Page 27

Seat Height
• The driver’s seat height can be raised or
lowered by using a lever, located on the
outboard side of the seat. Pump the lever
upward to raise the seat height, or pump
theleverdownwardtolowertheseat
height.
EZ Entry Seats
• Pull forward on the lever, located on the
side of the seatback, to dump the seatback forward and slide the seat forward.
This allows for easier access to the rear
seat.
• The driver seat has a memory feature.
After using the EZ Entry function, the
seat back and adjuster will re-lock into the
original position at which the seat was
previously adjusted to.
GETTING STARTED
WARNING!
• Adjusting a seat while the vehicle is moving is dangerous.The sudden movement of
the seat could cause you to lose control.The seat belt might not be properly adjusted, and you could be severely injured or killed. Only adjust a seat while the vehicle is parked.
• Actuating the recliner handle will allow the seatback to swing (dump) forward on
manual recliner seats. Do not stand or lean in front of the seat while actuating the
handle.The seatback may swing forward and hit you, causing injury.This dump feature
allows access to t he storage bin behind the seat.To avoid injury, place your hand on
the seatback and actuate the handle, then position the seatback in the desired position.
• Do not ride with the seatback reclined so that the seat belt is no longer resting
against your chest. In a collision, you could slide under the seat belt and be severely
injured or killed. Use the recliner only when the vehicle is parked.
25
Page 28

GETTING STARTED
REAR SEATS
Folding Rear Seatback
• To fold each rear seatback, push down on
the button located on the upper outboard side of the seat and fold the seatback flat.
NOTE:
Be sure that the front seats are fully upright
and positioned forward.This will allow the
rear seatback to fold down easily.
TILT STEERING
• The tilt lever is located on the steering
column, below the turn signal lever.
• Push down on the lever to unlock the
steering column.
• With one hand firmly on the steering
wheel, move the steering column up or
down as desired.
• Pull upward on the lever to lock the col-
umn firmly in place.
WARNING!
Do not adjust the steering column while driving. Adjusting the steering column while driving or driving with the steering column unlocked could cause the driver to lose control of
the vehicle. Be sure the steering column is locked before driving your vehicle. Failure to
follow this warning may result in severe injury or death.
26
Page 29

GETTING STARTED
HEATED SEATS
Front Heated Seats
• The controls for the front heated seats
are located on the center instrument
panel area.
• Press the switch once to turn on the
heated seat. Press the switch a second
time to turn off the heated seat.
WARNING!
• Persons who are unable to feel pain to the skin because of advanced age, chronic
illness, diabetes, spinal cord injury,medication, alcohol use, exhaustion or other physical conditions must exercise care when using the seat heater.It may cause burns
even a t low temperatures, especially if used for long periods of time.
• Do not place anything on the seat that insulates against heat, such as a blanket or
cushion.This may cause the seat heater to overheat. Sitting in a seat that has been
overheated could cause serious burns due to the increased surface temperature of
the seat.
27
Page 30

OPERATINGYOURVEHICLE
EXTENDING YOUR DRIVING RANGE PER CHARGE
• A little knowledge will go a long way to extend your driving range on the 500e. First and
foremost understand that the drive system and cabin temperature management features
use the most energy from the high voltage battery. Reducing energy draw from these
features are the easiest and most effective way to extend driving range.
• Just like a conventional vehicle, 500e likes to keeps things smooth and steady for most
efficient operation.When driving, avoid aggressive driving styles and high speeds for extended times.When practical, choose surface streets over the highway,work to maintain
a steady speed to extend range.
• The 500e uses high voltage components to heat and cool the cabin, so a little awareness
can go a long way to extend range.When using automatic climate control, consider setting temperatures a few degrees higher or lower during hot and cold days. If your 500e
has been soaking in hot or cold temperatures for an extended period, it is recommended
that the car be preconditioned via the mobile application while still plugged into a charging source.This will allow 500e to use external power to establish a comfortable cabin
temperature before the drive, and allow the battery to maintain the temperature using
significantly less energy.
Additional tips:
• keep tires properly inflated
• avoid carrying nonessential cargo
• be mindful of adding external accessories that may increase aerodynamic drag
• perform all scheduled maintenance at recommended intervals
Driving Status Gauge
1—Power
2 — ECO
3 — Charge
28
Page 31

OPERATINGYOURVEHICLE
• To help the driver extend the driving range of the high voltage battery your vehicle is
equipped with a Driving Status Gauge.The gauge is located on the right side of the instrument cluster.The gauge contains three driving ranges:
Power
• The gauge will move into the Power range when under acceleration.
ECO
• The gauge will move into the ECO range when you are maximizing the driving range of
the high voltage battery.
Charge
• The gauge will move into the Charge range when ba ttery regeneration is active (either
coasting or braking).
TURN SIGNAL/LIGHTS/HIGH BEAM LEVER
Turn Signal/Lane Change Assist
• Tap the lever up or down once and the turn signal (right or left) will flash briefly to indi-
cate a lane change and automatically turn off.
Headlights/Parking Lights
• The ignition switch must be in the ON/RUN position for the headlights to operate.
• Rotate the end of the lever to the first detent for parking lights and headlight operation.
High Beams
• Push the lever forward to activate the high beams.
• A high beam symbol will illuminate in the cluster to indicate the high beams are on.
29
Page 32

OPERATINGYOURVEHICLE
NOTE:
For safe driving, turn off the high beams when oncoming traffic is present to prevent headlight glare and as a courtesy to other motoris ts.
Flash To Pass
• Pull the lever toward you to ac tivate the high beams.The high beams will remain on until
the lever is released.
Headlight Delay (Follow Me Home)
• Within two minutes of the ignition switch being turned to the OFF/LOCK position or the
ignition key being removed from the ignition, pull the turn signal lever toward the steering wheel.
• Each movement of the lever toward the steering wheel will increase the illumination pe-
riod by 30 seconds, up to a maximum of 210 seconds.
• To deactivate, pull the multifunction lever toward the steering wheel and hold it for more
than two seconds.
NOTE:
Activation of Follow Me Home is only enabled once per key cycle and steps must be repeated each time you want to activate it.
Fog Lights
• Push the fog light button, located on the
climate controls, once to turn on the fog
lights.
• Push the button a second time to turn
the fog lights off.
30
Page 33

OPERATINGYOURVEHICLE
WIPER/WASHER LEVER
Front Wipers
Intermittent, Low and High Operation
• Move the lever downward to the first detent for intermittent wiper operation, the sec-
ond detent for low wiper operation and to the third detent for high wiper operation.
Mist
• Move the lever upward and release when a single wipe is desired.
NOTE:
The mist feature does not activate the washer pump; therefore, no washer fluid will be
sprayed on the windshield. The wash function must be activated in order to spray the windshield with washer fluid.
Washer Operation
• Pull the lever toward you and hold for as long as spray is desired.
Rear Wiper
Rear Wiper Operation
• Rotate the end of the lever to activate the rear wiper.
Rear Washer Operation
• Push the lever forward and hold for as long as spray is desired.
31
Page 34

OPERATINGYOURVEHICLE
SPEED CONTROL
• The speed control switches are located
on the steering wheel.
Cruise ON/OFF
• Push the ON/OFF button to activate the
Speed Control.
• CRUISE READY will appear on the instru-
ment cluster to indicate the Speed Control is on.
• Push the ON/OFF button a second time
to turn the system off.
Set
• With the Speed Control on, push and
release the SET – button to set a desired
speed.
NOTE:
The set speed will be displayed on the cluster for approximately 2–3 seconds.
Accel/Decel
• Once a speed is set, pushing t he RES + button once or the SET – button once will in-
crease or decrease the set speed approximately 1 mph (2 km/h).
• Push and hold the RES + button to accelerate in 5 mph (8 km/h) increments or push and
hold the SET – button to decelerate in 5 mph (8 km/h) increments; release the button to
save the new set speed.
Resume
• To resume a previously selected set speed in memory, push the RES + button and
release.
Cancel
• Push the CANCEL button, or apply the brakes to cancel the set speed and maintain the
set speed memory.
• Push the ON/OFF button to turn the system off and erase the set speed memory.
32
Page 35

OPERATINGYOURVEHICLE
WARNING!
• Leaving the Electronic Speed Control system on when not in use is dangerous.You
could accidentally set the system or cause it to go faster than you want.You could
lose control and have a collision. Always leave the Electronic Speed Control system
off when you are not using it.
• Electronic Speed Control can be dangerous where the system cannot maintain a
constant speed.Your vehicle could go too fast for the conditions, and you could lose
control.A collision could be the result. Do not use Electronic Speed Control in heavy
traffic or on roads that are winding, icy,snow-covered or slippery.
POWER WINDOWS
• The controls for the power windows are located on either side of the transmission push
buttons.
• Power windows can be operated with the ignition in the ON/RUN position.
• Both windows have an Auto Down feature. Push the switch down past the detent and
release to fully lower the window.
• Pull the switch upward to close the window.
AUTOMATIC TEMPERATURE CONTROLS (ATC)
Automatic Operation
• Push the AUTO button.
• Select t he desired temperature by pushing the temperature control buttons.
• The system will maintain the set temperature automatically.
33
Page 36

OPERATINGYOURVEHICLE
Air Recirculation
• Use recirculation for maximum A/C operation.
• For window defogging, turn the air recirculation button off.
Heated Mirrors
• The mirrors are heated to melt frost or ice.This feature is activated whenever you turn
on the rear window defroster.
REAR PARK ASSIST
• If an object is detected behind the rear bumper while the vehicle is in REVERSE, a chime
will sound.The chime rate will change depending on the distance of the object, getting
faster as the object gets closer to the bumper.The chime will become continuous when
the distance between the vehicle and the obstacle is less than 12 inches (30 cm).
POWER SUNROOF
• The power sunroof roof switch is located in the overhead console.
To Open
• Press and hold the power sunroof switch rearward for approximately two seconds and
the sunroof will stop at the vented position. Press the switch a second time and hold for
approximately one second and release, the sunroof will open fully, then stop automatically.
This is called “Express Open”. During Express Open operation, any movement of the
sunroof switch will stop the sunroof.
To Close
• With the sunroof in the full open position, pull the power sunroof button and hold it for
approximately one second, the sunroof will return to the vented position. Pull the switch
a second time and hold for approximately two seconds to completely close the sunroof.
Pinch Protection Feature
• This feature will detect an obstruction in the opening of the sunroof during Express
Close operation. If an obstruction in the path of the sunroof is detected, the sunroof will
automatically retract. Remove the obstruction if this occurs. Next, press the switch forward and release to Express Close.
NOTE:
If three consecutive sunroof close attempts result in Pinch Protect reversals, the fourth
close attempt will be a Manual Close movement with Pinch Protect disabled.
Sun Shade
• For vehicles equipped with either a power sunroof or a fixed glass roof, there is a sun
shade that can be open or closed.To open the sun shade press the tab and move the
shade to a full open position.
34
Page 37

OPERATINGYOURVEHICLE
WARNING!
• Do not let children play with the sunroof, or leave children unattended in the ve-
hicle. Occupants, particularly unattended children, can become entrapped by the
power sunroof while operating the power sunroof switch. Such entrapment may
result in serious injury or death.
• In a collision, there is a greater risk of being thrown from a vehicle with an open
sunroof.You could also be seriously injured or killed. Always fasten your seat belt
properly and make sure all passengers are properly secured.
• Do not allow small children to operate the sunroof. Never allow your fingers, other
body parts, or any object to project through the sunroof opening. Injury may result.
WIND BUFFETING
• Wind buffeting can be described as a helicopter-type percussion sound. If buffeting oc-
curs with the windows down, or top down (convertible models), adjust one or both windows up or down slightly.
35
Page 38

ELECTRONICS
YOUR VEHICLE'S SOUND SYSTEM
36
Page 39

ELECTRONICS
37
Page 40

ELECTRONICS
AM/FM RADIO WITH CD PLAYER AND SiriusXM SATELLITE RADIO
Seek Up/Down Buttons
• Press the right or left arrows to seek through radio stations in AM or FM bands. Seek
through tracks in CD.
• Hold either button to bypass stations without stopping.
Tune Up/Down Buttons
• Press the up or down arrows to manually search through radio stations in AM or FM
bands. Fast Forward or Fast Rewind through a CD track.
Audio Settings
• Press the AUDIO button, then press the up and down arrows to select BASS,TREBLE,
BALANCE and FADE.To adjust a setting, use the right and left arrows.
TUNER
• Press the Tuner button to select between AM, FM, SAT (SiriusXM Satellite Radio) modes.
Info
• Press the Info button to view Song, Artist,Album, Genre, Playlist, Folder information (if
available) in CD, Media Player and SiriusXM Satellite Radio (if so equipped).Also use the
Info button to toggle RDS information in FM.
38
Page 41

ELECTRONICS
MENU
• Press the MENU button and one of the following options will appear on the Radio dis-
play. Use the up and down arrows to scroll through the options; use the left and right
arrows to change a selection setting.
• Speech Volume • SiriusXM Telephone Number
• Aux Audio Offset • System Reset
• Radio Off • Speed Volume
• Sat ID • On Volume Limit
Clock Setting
• The time is set using the Electronic Vehicle Information Center (EVIC) Display.
• With the Date and Time shown in the EVIC display, press the SET ESC button to enter
the menu mode.
• Press the plus or minus buttons until "Set Time" is displayed and press the SET ESC but-
ton again.
• Press the SET ESC button;“hours” will flash on the display.
• Press the plus or minus buttons to adjust the hours.
• When setting the hour is complete, briefly press the SET ESC button and “minutes” will
flash in the display. Press the plus or minus buttons to adjust the minutes.
• When setting the time is complete, press and hold the SET ESC button.
NOTE:
The charging schedule is based on this date and time.
Station Presets
• To store a tuned station, find the station to store by either pressing the right and left
arrow (Seek) buttons or by pressing up or down arrow (Manual Tune) buttons.
• Once the station is found, press and hold one of the PRESET buttons, until you hear a
confirmation beep (Preset Saved will be shown in the radio display). A total of 15 FM, 10
AM and 15 SiriusXM Satellite Radio stations can be preset by pressing the A-B-C button.
A-B-C Button
• Press the A-B button to choose between the presets stored in the AM mode, A-B-C to
choose between the presets stored in the FM and SAT modes.The mode (AM, FM, SAT),
station preset (A, B, C) and preset button number (P 1-5) will be displayed in the middle
of the radio display.
39
Page 42

ELECTRONICS
BLUE&ME™ HANDS-FREE OPERATION
• FIAT’s Windows Mobile™ based BLUE&ME™ Hands-Free Communication is a personal
telematics system that incorporates communication and entertainment applications that
are specifically designed for use in your car.
• The BLUE&ME™ Hands-Free Communication package installed in your car is equipped
with integral hands-free functionality, message reader, and media player. BLUE&ME™ is
designed to support the future installation of additional services.
• The BLUE&ME™ Hands-Free Communication package features integrated voice recogni-
tion, steering wheel controls and a multifunction electronic display that allows you to use
your Bluetooth® enabled wireless technology enabled mobile phone without having to
take your eyes off the road.You can even keep your phone in a pocket or a bag.You are
not required to train the voice recognition system to recognize your voice.The system is
“speaker independent” and performs equally well for different users.
WARNING!
Driving while distracted can result in loss of vehicle control, accident and injury. It is
strongly recommended that you use extreme caution when using any device or feature
that may take your focus off the road or your hands off the steering wheel.Your primary
responsibility is the safe operation of your vehicle.
Steering Wheel Buttons
Front Steering Wheel Buttons
• The operations of the front BLUE&ME™
Steering Wheel buttons, located on the
front left of the steering wheel, are as
follows:
40
Page 43

(more than 1 second)
–
ELECTRONICS
–
Repeat the last utterance
in a voice interaction
–
–
–
Button Short press function (less than 1 second) Long press function
Dial the number displayed on the display that was accessed haptically from the
phonebook or the recent calls list
Accept an incoming phone call
Switch between two ongoing phone conversations (call waiting)
Dial the name/number on the display that was selected/entered by voice recognition
Cancel a voice announcement
Interrupt message reading
Exit BLUE&ME™ Main Menu
Exit the sub-menu and return to the previous menu option
Exit current menu option without storing settings
Turn the microphone on/off during a phone conversation
Mute the ring tone of an incoming call
Media player Pause on/off
Activate voice recognition
Interrupt voice announcement to provide a new voice command
End an active call and switch to a call waiting (on hold)
Confirm manually selected menu option
Switch phone conversation from the hands-free phone to your mobile phone and
vice versa
Select displayed message
Scroll BLUE&ME™ menu items
Scroll through media player tracks
Scroll inbox messages
PHONE/MENU Launch BLUE&ME™ Main Menu
MUTE/ESC Cancel voice recognition
VOICE RECOGNITION
(VR)
PHONE HANG UP Reject an incoming call and end a phone call in progress
PRESET UP/OK (center
button on left side back of
steering wheel)
SCAN UP/SCAN DOWN
(left side back of steering
wheel
41
Page 44

ELECTRONICS
Steering Wheel Audio Controls
• The right hand control on the rear of the steering wheel is a rocker type switch with a
pushbutton in the center. Press the switch up for Volume +. Press the switch down for
Volume –. The button in the center is t he SRC button used to change audio sources (e.g.
AM, FM, CD,Media Player).
• The left hand control on the rear of the steering wheel is also a rocker type switch with
a pushbutton in the center.Press the top of the switch to Scan Up. Press the bottom of
the switch to Scan Down.The button in the center is the PRESET UP/OK button.
BLUE&ME™ Hands-Free Communication
• To use the hands-free feature, you need a Bluetooth® wireless technology enabled mo-
bile phone.This hands-free feature gives you the possibility of interacting vocally with
your mobile phone while driving, even if your mobile device does not feature this capability.You can also interact with your mobile phone manually and visually using the steering
wheel controls and the instrument panel EVIC display.
• To get started with BLUE&ME™ hands-free feature with voice recognition, you have to
simply pair your Bluetooth® wireless technology enabled mobile phone with the system.
Pair Your Mobile Phone
• Press VR steering wheel button and “Settings” then, at the end of the BLUE&ME™ mes-
sage say “Pairing”.
• The system will show the phone pairing PIN number on the EVIC display.For the next
two steps, consult your mobile phone owner’s manual about Bluetooth® pairing procedures for your phone.
• On your mobile phone, search for devices equipped with Bluetooth® wireless technol-
ogy (the setting on your mobile phone might be called Discover or New Device). In this
list you will find BLUE&ME™ (name identifying the BLUE&ME™ system on your car):
select it.
• When prompted by the mobile phone, enter the PIN number shown on the instrument
panel display using your mobile phone keypad. If pairing is successful, the system will say
“Connecting” and at the end the display will show as confirmation message, the ID of the
paired mobile phone.
• It is essential to wait until you see this confirmation message on the display. Pressing
PHONE/MENU button on the steering wheel or MUTE/ESC button before the message
is displayed may cancel the pairing process. If the pairing process fails, an error message
will be displayed: in this event repeat the pairing procedure.
• At first pairing, BLUE&ME™ will say “Welcome” immediately after connecting. This mes-
sage will no longer be heard when your phone automatically connects to the
BLUE&ME™ system on future ignition cycles.
• BLUE&ME™ will ask if you would like to copy your paired phone phonebook to
BLUE&ME™. It is recommended to copy it.To start copying the phonebook say “Yes”,
otherwise say “No”.
42
Page 45

ELECTRONICS
• For cert ain mobile phones the phonebook is not copied automatically, in this case you
must transfer the phonebook contacts using your mobile phone keypad. If BLUE&ME™
asks you to do this, then perform this procedure following the instructions specific to
your mobile phone and press PHONE/MENU button on the steering wheel when you
have finished.
Making a Phone Call
• Assume that “John Smith” is one of t he contacts stored in your phonebook.
• To call John Smith, proceed as follows:
• Press the VR steering wheel button and pronounce “Call John Smith”.
• If the name is recognized, the system will display the recognized contact’s information on
the display screen.
• If there is just one phone number for John Smith in your phonebook, the system will ask
if you would like to call John Smith.To start the call say “Yes”, otherwise say “No”.
• If John Smith has several phone numbers, the system will ask which phone number you
would like to call (e.g.:“Call John Smith (at) Work or (at) Home?”).Answer with the type
of required phone number (e.g.:“(at) Home”).
• If John Smith has several phone numbers but the “location” (i.e.: the type of phone num-
ber like work, home, etc.) is missing, the system will display the selected contact and a list
of related phone numbers on the instrument cluster display.The hands-free phone system will ask if you would like to call the phone number displayed.To respond with “Yes”,
pronounce “Yes”, otherwise say “No”. If this is the correct contact but the wrong number,
say “Forward” or “Backward” to navigate to the phone number you’d like to call.To call
the displayed phone number, pronounce “Call”.You can also scroll through the phone
number list manually by pressing the buttons on the back of the steering wheel until you
find the required number.Then, press PRESET UP/OK button on the rear of the steering
wheel to start the call.
• To end the phone call, press the PHONE HANG UP button on t he steering wheel.
Media Player
• With the BLUE&ME™ media player you can play, via the car sound system, the digital
audio files stored on a USB device by simply connecting it to the USB por t located in the
glove box of the car.
• The MEDIA PLAYER menu enables the following:
– Display tracks stored on your USB stick/iPod®.
– Play audio files stored on your USB stick/iPod®.
How To Connect The USB Stick/iPod® To BLUE&ME™
• To connect your USB stick/iPod® to BLUE&ME™, proceed as follows:
• Copy tracks on your USB stick/iPod® (BLUE&ME™ recognizes .wma, .mp3 and .wav, .aac
formats for audio files and .wpl and .m3u for playlists).
• USB devices without USB wire: just connect the USB stick/iPod® (directly or by an ex-
tension lead) to the USB port on the car.
43
Page 46

ELECTRONICS
• USB stick/iPod® with USB wire: use the wire to connect the USB stick/iPod® to the USB
port on the car.
• Turn the ignition key to ON. BLUE&ME™ will star t automatically to play your digital
tracks selecting them from the library built at the moment the USB stick/iPod® is connected.
• If AUTOPLAY is set to “ON”, BLUE&ME™ will star t playback automatically.
• Refer to the iPod®/USB/MP3 CONTROL section in this manual and the BLUE&ME™
User's Manual on the DVD for more details.
WARNING!
Driving while distracted can result in loss of vehicle control, accident and injury. It is
strongly recommended that you use extreme caution when using any device or feature
that may take your focus off the road or your hands off the steering wheel.Your primary
responsibility is the safe operation of your vehicle.
iPod®/USB/MP3 CONTROL
• The USB port located within the glove
box, allows you to plug an iPod® or USB
device into the vehicle's sound system.
• To hear audio from devices connected to
this port press the MEDIA button on the
radio faceplate.
• When connected to this feature:
• The iPod® or USB device audio can be
played on the vehicle’s sound system.
• The iPod® can be controlled using the
radio buttons to Play, Browse, and List
the iPod® or external devices contents. Refer to the BLUE&ME™ Manual on the DVD
for details.
• The iPod® battery charges when plugged into the USB port (if supported by the spe-
cific audio device).
• Compatible iPod® devices may also be controllable using voice commands. Refer to the
BLUE&ME™ Manual on the DVD for details.
NOTE:
The USB port supports certain Mini, Classic, Nano,Touch,and iPhone® devices.The USB
port also supports playing music from compatible external USB Mass Storage Class
memory devices. For supported audio file formats, refer to the USB Port section on the
Owner's Manual on the DVD. Some iPod® software versions may not fully suppor t the
USB port features. Please visit Apple’s website for iPod® software updates.
44
Page 47

ELECTRONICS
WARNING!
Do not plug in or remove the iPod® or external device while driving. Failure to follow this
warning could result in a collision.
ELECTRONIC VEHICLE INFORMATION CENTER (EVIC)
• The EVIC features a driver interactive display that is located in the instrument cluster.
Pressing the controls on the right side of the Instrument Cluster allows the driver to
select vehicle information and Personal Settings. For additional information, refer to Programmable Features in this guide.
• Press the MENU ESC button to enter the menu mode.
• Press the + or – buttons to scroll through the menu settings.
• Once the menu setting is shown in the EVIC display press the MENU ESC button to ac-
cess the setting and use the plus or minus buttons to change the current setting. Press
the MENU ESC button a second time to save the setting and return to menu screen.
PROGRAMMABLE FEATURES
Electronic Vehicle Information Center (EVIC)
• The EVIC can be used to program the following Personal Settings. Press and release the
MENU ESC button until menu is displayed, then press the + or – buttons to scroll
through the settings.
• Once the menu setting is shown in the EVIC display press the MENU ESC button to ac-
cess the setting and use the + or – buttons to change the current setting.The menu includes the following functions:
• Charging Schedule • Daytime Running Lights
• Set Date • Button Volume
• Set Time • Hill Start Assist
• Standard Units • Stored Warning
• Languages •Tutorial
• Audio Display • Connectivity ID
• Battery % Display • Restore Factory Settings
• Auto Door Lock • Exit Menu
• Remote Unlock
Selecting An Option Of The Main Menu Without Submenu:
• Briefly press the MENU ESC button to select the main menu option to set.
• Press the + or – button (by single presses) to select the new setting.
• Briefly press the MENU ESC button to store the new setting and go back to the main
menu option previously selected.
45
Page 48

ELECTRONICS
Selecting An Option Of The Main Menu With Submenu:
• Briefly press the MENU ESC button to display the first submenu option.
• Press the + or – button (by single presses) to scroll through all the submenu options.
• Briefly press the MENU ESC button to select the displayed submenu option and to open
the relevant setup menu.
• Press the + or – button (by single presses) to select the new setting for this submenu
option.
• Briefly press the MENU ESC button to store the new setting and go back to the previ-
ously selected submenu option.
• Press and hold the MENU ESC button to return to the main menu (short hold) or the
main screen (longer hold).
TRIP BUTTON
• The Trip button is located on the end of
the wiper lever to the right of the steering column.The trip button can be used
to display and reset the following functions:
• Instant Consumption (Kilowatts)
• Trip A
• Trip B
• Tire Pressure
• Short press (less than 1 second) to display
different functions.
• Long press (more than 1 second) to reset
and start a new trip.
New Trip
• A new trip can be reset or restarted by:
• “Manual” resetting by the user, by press-
ing the Trip button;
• “Automatically” resetting, when the “Trip distance” reaches 999.9 miles or when the
“Travel time” reaches 99.59 (99 hours and 59 minutes);
Start Of Trip Procedure
• With the ignition key on, press and hold the TRIP button for over one second to reset
Trip A or Trip B.
Exit Trip
• The Trip function is over when all the values have been displayed or holding the MENU
ESC button for longer than one second.
46
Page 49

ELECTRONICS
• Briefly press the MENU ESC button to go back to the menu screen or press and hold
the MENU ESC (approximately one second) to go back to the main screen without storing settings.
POWER OUTLET
• There is a standard 12 Volt (13 Amp)
power outlet, located in the floor console,
for added convenience.This power outlet
can power mobile phones, electronics and
other low power devices.
NOTE:
• Do not exceed the maximum power of
160 Watts (13 Amps) at 12 Volts. If the
160 Watt (13 Amp) power rating is exceeded, the fuse protecting the system
will need to be replaced.
• Power outlets are designed for accessory
plugs only. Do not insert any other object
in the power outlet as this will damage
the outlet and blow the fuse. Improper
use of the power outlet can cause damage not covered by your new vehicle
warranty.
47
Page 50

UTILITY
TRAILER TOWING
• Trailer towing with this vehicle is not recommended.
RECREATIONAL TOWING (BEHIND MOTORHOME, ETC.)
Towing This Vehicle Behind Another Vehicle
Towing Condition
Flat Tow NONE NOTALLOWED
Dolly Tow
On Trailer ALL OK
NOTE:
This vehicle must be towed on a flatbed or vehicle trailer with the front wheels OFF the
ground.
Wheels OFF the Ground Single-Speed Transmission
Front OK
Rear NOTALLOWED
48
Page 51

WHAT TO DO IN EMERGENCIES
24-HOUR ROADSIDE ASSISTANCE
• If your FIAT 500e requires jump star t assistance, tire service, lockout service or towing
due to a defect covered under the Basic Limited Warranty, dial toll-free 1-888-242-6342.
See your Warranty booklet for further details.
• Provide your name, vehicle identification number and license plate number.
• Provide your location, including telephone number, from which you are calling.
• Briefly describe the nature of the problem and answer a few simple questions.
• You will be given the name of the service provider and an estimated time of arrival. If you
feel you are in an “unsafe situation”, please let us know.With your consent, we will contact local police or safety authorities.
INSTRUMENT CLUSTER WARNING LIGHTS
- Service Propulsion System Warning Light
• The Service Propulsion System Warning Light will illuminate if there is a malfunction de-
tected with the Propulsion System. If the light comes on or remains on while driving see
your authorized studio.
- Electric Vehicle System Warning Light
• This indicator will illuminate when there is a malfunction in the Electric Vehicle System. If
the EV malfunction light comes on while driving or charging see your authorized studio
as soon as possible.
- Regenerative Brake System Warning Light
• If the light turns on and remains on while driving, it suggests that t here is a potential
problem with the Regenerative Brake System (RBS) and the need for system service. See
your authorized studio as soon as possible.
- Power Steering System Warning
• If the “POWER STEERING SYSTEM OVER TEMP” message and icon are displayed in the
EVIC display, it indicates that extreme steering maneuvers have occurred, which caused
an over temperature condition in the power steering system.You will lose power steering
assistance momentarily until the over temperature condition no longer exists. Once driving conditions are safe, pull over and let the vehicle idle. After approximately five minutes,
the system will cool and return to normal operation.
- Electronic Stability Control (ESC) OFF Indicator Light
• This light indicates the Electronic Stability Control system (ESC) has been turned off by
the driver.
49
Page 52

WHAT TO DO IN EMERGENCIES
- Electronic Stability Control (ESC) Activation / Malfunction Indicator
Light
• The “ESC Activation/Malfunc tion Indicator Light” in the instrument cluster will come on
for four seconds when the ignition switch is turned to the ON/RUN position. If the “ESC
Activation/Malfunction Indicator Light” comes on continuously with the engine running, a
malfunction has been detected in the ESC system. If this light remains on, see your authorized studio as soon as possible to have the problem diagnosed and corrected.
NOTE:
• The “ESC Off Indicator Light” and the “ESC Activation/Malfunction Indicator Light” come
on momentarily each time the ignition switch is turned to ON/RUN.
• Each time the ignition is turned to ON/RUN, the ESC system will be ON even if it was
turned off previously.
- Tire Pressure Monitoring System (TPMS) Light
• Each tire, should be checked monthly,when cold and inflated to the inflation pressure
recommended by the vehicle manufacturer on the vehicle placard or tire inflation pressure label. (If your vehicle has tires of a different size than the size indicated on the vehicle placard or tire inflation pressure label, you should determine the proper tire inflation pressure for those tires.)
• As an added safety feature, your vehicle has been equipped with a Tire Pressure Monitor-
ing System (TPMS) that illuminates a low tire pressure telltale when one or more of your
tires is significantly under-inflated.Accordingly, when the low tire pressure telltale illuminates, you should stop and check your tires as soon as possible, and inflate them to the
proper pressure. Driving on a significantly under-inflated tire causes the tire to overheat
and can lead to tire failure. Under-inflation also reduces fuel efficiency and tire tread life,
and may affect the vehicle’s handling and stopping ability.
• IF THE LIGHT STARTS FLASHING INDICATING A LOW TIRE PRESSURE, ADJUST
THE AIR PRESSURE IN THE LOW TIRE TO THE AIR PRESSURE SHOWN ON THE
VEHICLE PLACARD OR TIRE INFLATION PRESSURE LABEL LOCATED ON THE
DRIVER'S DOOR. NOTE: AFTER INFLATION, THE VEHICLE MAY NEED TO BE
DRIVEN FOR 20 MINUTES BEFORE THE FLASHING LIGHT WILL TURN OFF.
• Please note that the TPMS is not a substitute for proper tire maintenance, and it is the
driver’s responsibility to maint ain correct tire pressure, even if under-inflation has not
reached the level to trigger illumination of the TPMS low tire pressure telltale.
• Your vehicle has also been equipped with a TPMS malfunction indicator to indicate when
the system is not operating properly.The TPMS malfunction indicator is combined with
the low tire pressure telltale.When the system detects a malfunction, the telltale will flash
for approximately one minute and then remain continuously illuminated.This sequence
will continue each time the vehicle is restarted as long as the malfunction exists.
• When the malfunction indicator is illuminated, the system may not be able to detect or
signal low tire pressure as intended.TPMS malfunctions may occur for a variety of reasons, including the installation of replacement or alternate tires or wheels on the vehicle
that prevent the TPMS from functioning properly.Always check the TPMS malfunction
50
Page 53

WHAT TO DO IN EMERGENCIES
telltale after replacing one or more tires or wheels on your vehicle, to ensure that the
replacement or alternate tires and wheels allow the TPMS to continue to function
properly.
NOTE:
Tire pressures change by approximately 1 psi (7 kPa) per 12° F (7° C) of air temperature
change. Keep this in mind when checking tire pressure inside a garage, especially in the Winter. Example: If g arage temperature is 68°F (20°C) and the outside temperature is 32°F
(0°C), then the cold tire inflation pressure should be increased by 3 psi (21 kPa), which
equals 1 psi (7 kPa) for every 12°F (7°C) for this outside temperature condition.
CAUTION!
The TPMS has been optimized for the original equipment tires and wheels.TPMS pressures and warning have been established for the tire size equipped on your vehicle. Undesirable system operation or sensor damage may result when using replacement equipment that is not of the same size, type, and/or style. Aftermarket wheels can cause sensor
damage. Do not use tire sealant from a can, or balance beads if your vehicle is equipped
with a TPMS, as damage to the sensors may result.
BRAKE
• The Brake Warning light illuminates when there is either a system malfunction or the
parking brake is applied. If the light is on and the parking brake is not applied, it indicates a
possible brake hydraulic malfunction, brake booster problem or an Anti-Lock Brake System problem.
• Please have your vehicle serviced immediately.
- Brake Warning Light
WARNING!
Driving a vehicle with the red brake light on is dangerous. Part of the brake system may
have failed. It will take longer to stop the vehicle.You could have a collision. Have the vehicle checked immediately.
- 12 Volt Charging System Light
• This light shows the status of the 12 Volt electrical charging system. If the charging system
light remains on, it means that the vehicle is experiencing a problem with the charging
system.
• We recommend you do not continue driving if the charging system light is on. Have the
vehicle serviced immediately.
- Anti-Lock Brake (ABS) Light
• This light monitors the Anti-Lock Brake System (ABS).
51
Page 54

WHAT TO DO IN EMERGENCIES
• If the light is not on during starting, stays on, or turns on while driving, we recommend
you drive to the nearest service center and have the vehicle serviced immediately.
- Air Bag Warning Light
• If the light is not on during starting, stays on, or turns on while driving, have the vehicle
serviced by an authorized service center immediately.
TIREFIT KIT
• Your vehicle may be equipped with a TIREFIT kit.The TIREFIT kit is located under the
front driver’s seat.
• Small punctures up to 1/4 in (6 mm) in the tire tread can be sealed with TIREFIT. Foreign
objects (e.g., screws or nails) should not be removed from the tire.TIREFIT can be used
in outside temperatures down to approximately -4°F (-20°C).
• This kit will provide a temporary tire seal, allowing you to drive your vehicle up to 100
miles (160 km) with a maximum speed of 55 mph (88 km/h).
TIREFIT Storage
• The TIREFIT kit is located in the rear cargo area.
TIREFIT Kit Components and Operation
1. Sealant Bottle
2. Deflation Button
3. Pressure Gauge
4. Power Button
5. Mode Select Knob
6. Sealant Hose (Clear)
7. Air Pump Hose (Black)
8. Power Plug
Using The Mode Select Knob and Hoses
• Your TIREFIT kit is equipped with the fol-
lowing symbols to indicate the air or sealant mode.
Selecting Air Mode
• Turn the Mode Select Knob (5) to this position for air pump operation only. Use the
Black Air Pump Hose (7) when selecting this mode.
52
Page 55

WHAT TO DO IN EMERGENCIES
Selecting Sealant Mode
• Turn the Mode Select Knob (5) to this position to inject the TIREFIT Sealant and to in-
flate the tire. Use the Sealant Hose (clear hose) (6) when selecting this mode.
Using The Power Button
• Push and release the Power Button (4) once to turn On the TIREFIT kit. Push and release
the Power Button (4) again to turn Off the TIREFIT kit.
Using The Deflation Button
• Press the Deflation Button (2) to reduce the air pressure in the tire if it becomes
over-inflated.
TIREFIT Usage Precautions
• Replace the TIREFIT Sealant Bottle (1) and Sealant Hose (6) prior to the expiration date
(printed on the bottle label) to assure optimum operation of the system. Refer to “Sealing a Tire with TIREFIT” section (F) “Sealant Bottle and Hose Replacement”.
• The Sealant Bottle (1) and Sealant Hose (6) are a one tire application use.After each use,
always replace these components immediately at an authorized studio.
• When the TIREFIT sealant is in a liquid form, clean water, and a damp cloth will remove
the material from the vehicle or tire and wheel components. Once the sealant dries, it
can easily be peeled off and properly discarded.
• For optimum performance, make sure the valve stem on the wheel is free of debris be-
fore connecting the TIREFIT kit.
• You can use the TIREFIT air pump to inflate bicycle tires.The kit also comes with two
needles, located in the Accessory Storage Compartment (on the bottom of the air
pump) for inflating sport balls, rafts, or similar inflatable items. However, use only the Air
Pump Hose (7) and make sure the Mode Select Knob (5) is in the Air Mode when inflating such items to avoid injecting sealant into them.The TIREFIT Sealant is only intended to
seal punctures less than 1/4 in (6 mm) diameter in the tread of your vehicle.
• Do not lift or carry the TIREFIT kit by the hoses.
Sealing A Tire With TIREFIT
(A) Whenever You Stop To Use TIREFIT:
1. Pull over to a safe location and turn on the vehicle’s Hazard Warning flashers.
2. Verify that the valve stem (on the wheel with the deflated tire) is in a position that is
near to the ground.This will allow the TIREFIT Hoses (6) and (7) to reach the valve stem
and keep the TIREFIT kit flat on the ground.This will provide the best positioning of the
kit when injecting the sealant into the deflated tire and running the air pump. Move the
vehicle as necessary to place the valve stem in this position before proceeding.
3. Place the transmission in PARK (auto transmission) or in Gear (manual transmission) and
cycle the ignition to the OFF position.
4. Set the parking brake.
53
Page 56

WHAT TO DO IN EMERGENCIES
(B) Setting Up To Use TIREFIT:
1. Turn the Mode Select Knob (5) to the Sealant Mode position.
2. Uncoil the Sealant Hose (6) and then remove the cap from the fitting at the end of the
hose.
3. Place the TIREFIT kit flat on the ground next to the deflated tire.
4. Remove the cap from the valve stem and then screw the fitting at the end of the Sealant
Hose (6) onto the valve stem.
5. Uncoil the Power Plug (8) and insert the plug into the vehicle’s 12 Volt power outlet.
6. Do not remove foreign objects (e.g., screws or nails) from the tire.
(C) Injecting TIREFIT Sealant Into The Deflated Tire:
• Always start the engine before turning ON the TIREFIT kit.
• After pressing the Power Button (4), the sealant (white fluid) will flow from the Sealant
Bottle (1) through the Sealant Hose (6) and into the tire.
NOTE:
Sealant may leak out through the puncture in the tire.
• If the sealant (white fluid) does not flow within0–10seconds through the Sealant
Hose (6):
1. Press the Power Button (4) to turn Off the TIREFIT kit. Disconnect the Sealant Hose (6)
from the valve stem. Make sure the valve stem is free of debris. Reconnect the Sealant
Hose (6) to the valve stem. Check that the Mode Select Knob (5) is in the Sealant Mode
position and not Air Mode. Press the Power Button (4) to turn On the TIREFIT kit.
2. Connect t he Power Plug (8) to a different 12 Volt power outlet in your vehicle or another vehicle, if available. Make sure the engine is running before turning ON the TIREFIT
kit.
3. The Sealant Bottle (1) may be empty due to previous use. Call for assistance.
NOTE:
If the Mode Select Knob (5) is on Air Mode and the pump is operating, air will dispense
from the Air Pump Hose (7) only,not the Sealant Hose (6).
• If the sealant (white fluid) does flow through the Sealant Hose (6):
1. Continue to operate the pump until sealant is no longer flowing through hose (typically
takes 30 - 70 seconds).As the sealant flows through the Sealant Hose (6), the Pressure
Gauge (3) can read as high as 70 psi (5 kPa).The Pressure Gauge (3) will decrease
quickly from approximately 70 psi (5 kPa) to the actual tire pressure when the Sealant
Bottle (1) is empty.
2. The pump will start to inject air into the tire immediately after the Sealant Bottle (1) is
empty. Continue to operate the pump and inflate the tire to the pressure indicated on
the tire pressure label on the driver-side latch pillar (recommended pressure). Check the
tire pressure by looking at the Pressure Gauge (3).
54
Page 57

WHAT TO DO IN EMERGENCIES
• If the tire does not inflate to at least 26 psi (1.8 kPa) pressure within 15 minutes:
• The tire is too badly damaged. Do not attempt to drive the vehicle further. Call for
assistance.
NOTE:
If the tire becomes over-inflated, press the Deflation Button to reduce the tire pressure to
the recommended inflation pressure before continuing.
• If the tire does not inflate to at least 26 psi (1.8 kPa) pressure within 15 minutes:
1. Press the Power Button (4) to turn off the TIREFIT kit.
2. Remove the Speed Limit sticker from the top of the Sealant Bottle (1) and place the
sticker on the instrument panel.
3. Immediately disconnect the Sealant Hose (6) from the valve stem, reinstall the cap on
the fitting at the end of the hose, and place the TIREFIT kit in the vehicle storage location. Quickly proceed to (D) “DriveVehicle”.
(D) Drive Vehicle:
• Immediately after injecting sealant and inflating the tire, drive the vehicle 5 miles (8 km)
or 10 minutes to ensure distribution of the TIREFIT Sealant within the tire. Do not exceed 55 mph (88 km/h).
(E) After Driving:
• Pull over to a safe location. Refer to “Whenever You Stop to Use TIREFIT” before
continuing.
1. Turn the Mode Select Knob (5) to the Air Mode position.
2. Uncoil the Air Pump Hose (7) (black in color) and screw the fitting at the end of hose
(7) onto the valve stem.
3. Uncoil the power plug and insert the plug into the vehicles 12 Volt power outlet.
4. Check the pressure in the tire by reading the Pressure Gauge (3).
• If tire pressure is less than 19 psi (1.3 kPa), the tire is too badly damaged. Do not at-
tempt to drive the vehicle further. Call for assistance.
If the tire pressure is 19 psi (1.3 kPa) or higher:
1. Press the Power Button (4) to turn on TIREFIT and inflate the tire to the pressure indi-
cated on the tire and loading information label on the driver-side door opening.
2. Disconnect t he TIREFIT kit from the valve stem, reinstall the cap on the valve stem and
unplug from 12 Volt outlet.
3. Place the TIREFIT kit in its proper storage area in the vehicle.
4. Have the tire inspected and repaired or replaced at the earliest opportunity at an autho-
rized studio or tire service center.
5. Replace the Sealant Bottle (1) and Sealant Hose (6) assembly at your authorized studio
as soon as possible. Refer to “(F ) Sealant Bottle and Hose Replacement.”
55
Page 58

WHAT TO DO IN EMERGENCIES
NOTE:
• If the tire becomes over-inflated, press the Deflation Button to reduce the tire pressure
to the recommended inflation pressure before continuing.
• When having the tire serviced, advise the authorized studio or service center that the
tire has been sealed using the TIREFIT service kit.
(F) Sealant Bottle And Hose Replacement:
1. Uncoil the Sealant Hose (6) (clear in color).
2. Locate the round Sealant Bottle release button in the recessed area under the sealant
bottle.
3. Press the Sealant Bottle release button. The Sealant Bottle (1) will pop up. Remove the
bottle and dispose of it accordingly.
4. Clean any remaining sealant from the TIREFIT housing.
5. Position the new Sealant Bottle (1) in the housing so that the Sealant Hose (6) aligns
with the hose slot in the front of t he housing. Press the bottle into the housing. An audible click will be heard indicating the bottle is locked into place.
6. Verify that the cap is installed on the fitting at the end of the Sealant Hose (6) and re-
turn the hose to its storage area (located on the bottom of the air pump).
7. Return the TIREFIT kit to its storage location in the vehicle.
CAUTION!
• The metal end fitting from Power Plug (8) may get hot after use, so it should be
handled carefully.
• Failure to reinstall the cap on the fitting at the end of the Sealant Hose (6) can result
in sealant contacting your skin, clothing, and the vehicle’s interior. It can also result in
sealant contacting internal TIREFIT kit components which may cause permanent
damage to the kit.
56
Page 59

WHAT TO DO IN EMERGENCIES
WARNING!
• Do not attempt to seal a tire on the side of the vehicle closest to traffic. Pull far
enough off the road to avoid the danger of being hit when using the TIREFIT kit.
• Do not use TIREFIT or drive the vehicle under the following circumstances:
• If t he puncture in the tire tread is approximately 1/4 in. (6 mm) or larger.
• If t he tire has any sidewall damage.
• If t he tire has any damage from driving with extremely low tire pressure.
• If t he tire has any damage from driving on a flat tire.
• If t he wheel has any damage.
• If you are unsure of the condition of the tire or the wheel.
• Keep TIREFIT away from open flames or heat source.
• A loose TIREFIT kit thrown forward in a collision or hard stop could endanger the
occupants of the vehicle. Always stow the TIREFIT kit in the place provided. Failure to
follow these warnings can result in injuries that are serious or fatal to you, your passengers, and others around you.
• Take care not to allow the contents of TIREFIT to come in contact with hair,eyes, or
clothing.TIREFIT is harmful if inhaled, swallowed, or absorbed through the skin. It
causes skin, eye, and respiratory irritation. Flush immediately with plenty of water if
there is any contact with eyes or skin. Change clothing as soon as possible, if there is
any contact with clothing.
• TIREFIT Sealant solution contains latex. In case of an allergic reaction or rash, consult
a physician immediately. Keep TIREFIT out of reach of children. If swallowed, rinse
mouth immediately with plenty of water and drink plenty of water. Do not induce
vomiting! Consult a physician immediately.
• TIREFIT is not a permanent flat tire repair. Have the tire inspected and repaired or
replaced after using TIREFIT. Do not exceed 55 mph (88 km/h) until the tire is repaired or replaced. Failure to follow this warning can result in injuries that are serious
or fatal to you, your passengers, and others around you.
57
Page 60

WHAT TO DO IN EMERGENCIES
JUMP-STARTING PROCEDURE — 12 VOLT BATTERY
• If your vehicle has a discharged 12 Volt battery,it can be jump-started using a set of
jumper cables and a battery in another vehicle or by using a portable battery booster
pack. Jump-starting can be dangerous if done improperly so please follow the procedures
in this section carefully.
NOTE:
When using a portable battery booster pack, follow the manufacturer’s operating instructions and precautions.
Preparations For Jump-Start
• The battery in your vehicle is located in the underhood compartment under the beauty
cover.
1. Set the parking brake, place the transmission into PARK and turn the ignition to OFF/
LOCK.
2. Turn off the heater, radio, and all unnecessary electrical accessories.
3. If using another vehicle to jump-start the battery, park the vehicle within the jumper
cables reach, set the parking brake and make sure the ignition is OFF.
Jump-Starting Procedure
1. Connect t he positive (+) end of the jumper cable to the positive (+) post of the dis-
charged vehicle.
2. Connect t he opposite end of the positive (+) jumper cable to the positive (+) post of
the booster battery.
3. Connect t he negative end (-) of the jumper cable to the negative (-) post of the booster
battery.
4. Connect t he opposite end of the negative (-) jumper cable to a good ground (exposed
metal part of the discharged vehicle) away from the battery and the high voltage cables.
5. Start the engine in the vehicle that has the booster battery, let the engine idle a few min-
utes, and then start the the vehicle with the discharged battery.
• Once the vehicle has started, remove the jumper cables in the reverse sequence:
1. Disconnect t he negative (-) jumper cable from the ground (-) of the vehicle with the
discharged battery.
2. Disconnect t he negative end (-) of the jumper cable from the negative (-) post of the
booster battery.
3. Disconnect t he opposite end of the positive (+) jumper cable from the positive (+) post
of the booster battery.
4. Disconnect t he positive (+) end of the jumper cable from the positive (+) post of the
discharged vehicle.
58
Page 61

WHAT TO DO IN EMERGENCIES
• If frequent jump-starting is required to start your vehicle, you should have the battery
and charging system inspected at your authorized studio.
CAUTION!
• Accessories that can be plugged into the vehicle power outlets draw power from
the vehicle’s battery,even when not in use (i.e., cellular phones, etc.). Eventually, if
plugged in long enough, the vehicle’s battery will discharge sufficiently to degrade
battery life and/or prevent the engine from s tarting.
• Do not use a portable battery booster pack or any other booster source with a
system voltage greater than 12 Volts or damage to the battery, starter motor,alternator or electrical system may occur.
• Failure to follow these procedures could result in damage to the charging system of
the booster vehicle or the discharged vehicle.
WARNING!
• Do not attempt jump-starting if the battery is frozen. It could rupture or explode
and cause personal injury.
• Take care to avoid the radiator cooling fan whenever the hood is raised. It can start
anytime the ignition switch is on.You can be injured by moving fan blades.
• Remove any metal jewelry such as watch bands or bracelets that might make an in-
advertent electrical contact.You could be seriously injured.
• Batteries contain sulfuric acid that can burn your skin or eyes and generate hydrogen
gas which is flammable and explosive. Keep open flames or sparks away from the
battery.
• Do not allow vehicles to touch each other as this could establish a ground connec-
tion and personal injury could result.
• Failure to follow this procedure could result in personal injury or property damage
due to battery explosion.
•
Do not connect the cable to the negative post (-)
of the discharged battery.The resulting electrical spark could cause the battery to
explode and could result in personal injury.
59
Page 62

WHAT TO DO IN EMERGENCIES
MANUAL PARK RELEASE
WARNING!
Always secure your vehicle by fully applying the parking brake, before activating the
Manual Park Release.Activating the Manual Park Release will allow your vehicle to roll
away if it is not secured by the parking brake or other means. Activating the Manual Park
Release on an unsecured vehicle could lead to serious injury or death for those in or
around the vehicle.
• In order to move the vehicle in cases where the transmission will not shift out of PARK
(such as a dead battery), a Manual Park Release is available. If a dead 12 volt battery is the
cause of the condition refer to “Jump Start Procedure — 12 Volt Battery” before performing the Manual Park Release.
• To perform the Manual Park Release follow these steps:
1. To prevent the vehicle from rolling unintentionally,firmly apply the parking brake.
2. If possible, raise the front driver's side of the vehicle to provide access to the transmis-
sion.
3. Working from underneath the vehicle, remove the black rubber plug from the front of
the Park module (a black canister mounted on the front of the transmission).
4. Using a T25 driver bit, rotate the Manual Park Release shaft (located just behind the rub-
ber plug) clockwise, at least 20 turns, to release the Park mechanism.The vehicle is now
out of PARK and can be moved.
5. Reinstall the rubber plug.
6. Release the parking brake only when a
driver is in the vehicle, or the vehicle is
secured by other means.The Manual Park
Release will be reset automatically once
the vehicle is restarted.
60
Page 63

WHAT TO DO IN EMERGENCIES
OK
NOT ALLOWED
NOT ALLOWED
ALL
Rear
Front OK
CAUTION!
Towing Condition Wheels OFF The Ground Single-Speed Transmission
TOWING A DISABLED VEHICLE
• This section describes procedures for towing a disabled vehicle using a commercial wrecker service .
Flat Tow NONE
Flatbed
Wheel Lift
tion.
• This vehicle must be towed on a flatbed truck or vehicle trailer with the front wheels OFF the ground.
• If you must use the accessories (wipers, defrosters, etc.) while being towed, the ignition must be in the ON/RUN position, not the ACC posi-
shifting the transmission out of PARK for towing.
• If the ignition key is unavailable, or the battery is discharged, see “Manual Park Release” in “What To Do In Emergencies” for instructions on
DO NOT use sling-type equipment when towing.When securing the vehicle to a flatbed truck, do not attach to front or rear suspension
components. Damage to your vehicle may result from improper towing.
61
Page 64

WHAT TO DO IN EMERGENCIES
ENHANCED ACCIDENT RESPONSE SYSTEM
• In the event of an impact causing air bag deployment, if the communication network and
power remains intact, depending on the nature of the event, the ORC will determine
whether to have t he Enhanced Accident Response System perform the following functions:
• Disable the high voltage battery.
• Place the transmission into PARK.
• Flash hazard lights as long as the 12 Volt battery has power or until the ignition key is
turned off.
• Turn on the interior lights, which remain on as long as the 12 Volt battery has power or
until the ignition key is removed.
• Unlock the doors automatically.
• In order to move your vehicle to the side of the road the transmission must be in NEU-
TRAL and the 12 Volt system must be functional. To place the transmission into NEUTRAL you must turn the ignition OFF and then back to the RUN position (cycle the ignition) then press the NEUTRAL button.
NOTE:
The high voltage battery will remain disabled after an Enhanced Accident Response Event
and must be reset by your authorized studio.
FREEING A STUCK VEHICLE
• If your vehicle becomes stuck in mud, sand or snow, it can often be moved using a rock-
ing motion.Turn the steering wheel right and left to clear the area around the front
wheels.Then shift back and forth between DRIVE and REVERSE while gently pressing the
accelerator. Use the least amount of accelerator pedal pressure that will maintain the
rocking motion, without spinning the wheels.
NOTE:
Press the “ESC Off” switch, to place the Electronic Stability Control (ESC) system in “Partial
Off” mode, before rocking the vehicle. Refer to “Electronic Brake Control” in “Starting And
Operating” for fur ther information. Once the vehicle has been freed, press the “ESC Off”
switch again to restore “ESC On” mode.
CAUTION!
• When “rocking” a stuck vehicle by shifting between DRIVE and REVERSE, do not
spin the wheels faster than 15 mph (24 km/h), or drivetrain damage may result.
• Spinning the wheels too fast may lead to transmission overheating and failure. It can
also damage the tires. Do not spin the wheels above 30 mph (48 km/h) while in gear.
62
Page 65

WHAT TO DO IN EMERGENCIES
WARNING!
Fast spinning tires can be dangerous. Forces generated by excessive wheel speeds may
cause damage, or even failure, of the axle and tires.A tire could explode and injure
someone. Do not spin your vehicle's wheels faster than 30 mph (48 km/h) or for longer
than 30 seconds continuously without stopping when you are stuck and do not let anyone near a spinning wheel, no matter what the speed.
EVENT DATA RECORDER (EDR)
• This vehicle is equipped with an Event Data Recorder (EDR).The main purpose of an
EDR is to record, in certain crash or near crash-like situations, such as an air bag deployment or hitting a road obstacle, data that will assist in understanding how a vehicle’s systems performed.The EDR is designed to record data related to vehicle dynamics and
safety systems for a short period of time, typically 30 seconds or less.The EDR in this
vehicle is designed to record such data as:
• How various systems in your vehicle were operating.
• Whether or not the driver and passenger safety belts were buckled/fastened.
• How far (if at all) the driver was depressing the accelerator and/or brake pedal.
• How fast the vehicle was traveling.
• These data can help provide a better understanding of the circumstances in which
crashes and injuries occur.
NOTE:
EDR data are recorded by your vehicle only if a non-trivial crash situation occurs; no data
are recorded by the EDR under normal driving conditions and no personal data (e.g. name,
gender, age, and crash location) are recorded. However, other parties, such as law enforcement, could combine the EDR data with the type of personally identifying data routinely
acquired during a crash investigation.
• To read data recorded by an EDR, special equipment is required, and access to the vehicle
or the EDR is needed. In addition to the vehicle manufacturer, other parties such as law
enforcement, that have the special equipment, can read the information if they have access to the vehicle or the EDR.
63
Page 66

MAINTAINING YOUR VEHICLE
OPENING THE HOOD
• Pull the release lever located below the
instrument panel and in front of the driver’s door.
• Raise the hood and locate the safety latch
in the middle of the hood opening.
• Move the safety latch while lifting the
hood at the same time.
• Insert the support rod into the slot on
the hood.
• To close the hood, remove the support
rod and place it in the retaining clip, then
lower the hood slowly.
WARNING!
Be sure the hood is fully latched before driving your vehicle. If the hood is not fully
latched, it could open when the vehicle is in motion and block your vision. Failure to follow
this warning could result in serious injury or death.
64
Page 67

MAINTAINING YOUR VEHICLE
UNDERHOOD COMPARTMENT
65
Page 68

MAINTAINING YOUR VEHICLE
FLUIDS AND CAPACITIES
Systems
Brake Master Cylinder
MOPAR® DOT 3, SAE J1703 should be used. If DOT
3, SAE J1703 brake fluid is not available, then DOT 4
is acceptable. Use only recommended brake fluids or
equivalent.
Refrigerant
MOPAR® R134a
Compressor Lubricant
MOPAR® POE Oil or Equivalent meeting the requirements of Chrysler Material Standard MS-12727
Single-Speed Transmission
Castrol BOT 533 0.8 Quarts 750 ml
Power Electronics Cooling System
MOPAR®Antifreeze/Engine Coolant 10 Year/
150,000 Mile Formula or equivalent
Battery Thermal Management Cooling System
MOPAR®Antifreeze/Engine Coolant 10 Year/
150,000 Mile Formula or equivalent
CAUTION!
• Mixing of coolant (antifreeze) other than specified Organic Additive Technology
(OAT) coolant (antifreeze), may result in cooling system damage and may decrease
corrosion protection. Organic Additive Technology (OAT) coolant is different and
should not be mixed with Hybrid Organic Additive Technology (HOAT) coolant (antifreeze). If a non-OAT coolant (antifreeze) is introduced into the cooling system in
an emergency,it should be replaced with the specified coolant (antifreeze) as soon
as possible.
• Do not use water alone or alcohol-based coolant (antifreeze) products. Do not use
additional rust inhibitors or antirust products, as they may not be compatible with
the radiator coolant and may plug the radiator.
• This vehicle has not been designed for use with propylene glycol-based coolant (anti-
freeze). Use of propylene glycol-based coolant (antifreeze) is not recommended.
U.S. Metric
3.6 Quarts 3.5 Liters
7.0 Quarts 6.7 Liters
66
Page 69

MAINTAINING YOUR VEHICLE
MAINTENANCE SCHEDULE
Once A Month Or Before A Trip:
• Check windshield washer fluid level
• Check the tire inflation pressures and look for unusual wear or damage
• Check the fluid levels of the coolant reservoirs and brake master cylinder
• Check function of all interior and exterior lights
Required Maintenance Intervals.
Refer to the maintenance schedules on the following page for the required maintenance
intervals.
At Every Service Interval:
• Rotate the tires. Rotate at the first sign of irregular wear.
The front and rear tires are different sizes and cannot be used in place of each other, refer
to “Tire Rotation Recommendations” for further information.
•
Inspect brake pads, shoes, rotors, drums, and hoses.
•
Inspect battery cooling system protection and hoses.
•
Check and adjust hand brake.
67
Page 70

MAINTAINING YOUR VEHICLE
Maintenance Chart
Refer to the Maintenance Schedules on the following pages for the required maintenance
intervals.
Mileage or time passed
(whichever comes first)
Or Years: 2 3 4 5 6 7 8 9 10 11 12 13 14 15
20,000
30,000
40,000
50,000
60,000
70,000
80,000
90,000
100,000
110,000
120,000
130,000
140,000
150,000
Or Kilometers:
Additional Inspections
Inspect the CV joints. X X X X X
Inspect front suspension, tie
rod ends and boot seals,
and replace if necessary.
Inspect the brake linings,
parking brake func tion.
Additional Maintenance
Replace cabin air filter. X X X X X X X
Clean and lube sun roof
tracks.
Flush and replace the
Power Elec tronics and Battery Thermal Loop Systems
at 10 years or 150,000
miles (240,000 km) whichever comes first.
32,000
48,000
64,000
80,000
96,000
112,000
128,000
144,000
160,000
176,000
192,000
208,000
XXXXXXX
XXXXXXX
XXXXXXX
XX
WARNING!
• You can be badly injured working on or around an electric motor vehicle. Do only
service work for which you have the knowledge and the right equipment. If you have
any doubt about your ability to perform a service job, take your vehicle to a competent mechanic.
• Failure to properly inspect and maintain your vehicle could result in a component
malfunction and effect vehicle handling and performance.This could cause an accident.
224,000
240,000
68
Page 71

MAINTAINING YOUR VEHICLE
FUSES
Interior Fuses
• The interior fuse panel is part of the Body Control Module (BCM) and is located on the
driver's side under the instrument panel.
Cavity Vehicle Fuse
Number
1 F12 7.5 Amp Brown Right Low Beam
2 F32 5 Amp Tan
3 F53 5 Amp Tan Instrument Panel Node
4 F38 20 Amp Yellow Central Door Locking
5 F36 10 Amp Red
6 F43 20 Amp Yellow Bi-Directional Washer
7 F48 20 Amp Yellow Passenger Power Window
8 F13 7.5 Amp Brown Left Low Beam
9 F50 7.5 Amp Brown Airbag
10 F51 5 Amp Tan
11 F37 5 Amp Tan
12 F49 5 Amp Tan
13 F31 5 Amp Tan
14 F47 20 Amp Yellow Driver PowerWindow
Mini Fuse Description
Front and Rear Ceiling Lights
Trunk and Door Courtesy Lights
Diagnostic Socket, Car Radio,
Climate Control System,Tire
Pressure Monitor,TCU and CTM
Car Radio Switch, Climate Con-
trol System, Stop Light, Exterior
Mirrors and Sunroof Switch
Stop Light Switch, Instrument
Panel Node
Exterior Mirror, GPS, Electric
Mirror, Parking Sensor, Sunroof
Switch
Ignition, Climate Control, RDU
and EVCU
69
Page 72

MAINTAINING YOUR VEHICLE
Power Distribution Center #1
• The Power Distribution Center #1 is located on the right side of the underhood com-
partment.To access the fuses, remove locking screw and slide cover off.
• The ID number of the electrical component corresponding to each fuse can be found on
thebackofthecover.
Cavity Maxi Fuse Mini Fuse Description
F01 60 Amp Blue Body Control Module (BCM)
F02 20 Amp Yellow HiFi Amplifier
F03 20 Amp Yellow Ignition Switch
F04 40 Amp Orange Brake System Module Pump
F05 70 Amp Tan Electric Power Steering (EPS)
F06 60 Amp Blue Radiator Fan
F07 40 Amp Orange Regen Brake Module
F08 40 Amp Orange HVAC
F09 5 Amp Tan
F10 10 Amp Red Horn
F11 10 Amp Red
F14 5 Amp Tan High beam (Shutter)
F15 15Amp Blue Cigar Lighter
F16 10 Amp Red
F18 5 Amp Tan
F19 10 Amp Red HVAC
F20 15Amp Blue Heated Seats – If Equipped
F23 20 Amp Yellow Anti-Lock BrakeValves
F24 7.5 Amp Brown
F30 15Amp Blue Fog Lamps
F81 30 Amp Green Electronic Shifter (ESM)
F82 30 Amp Green Sunroof
F84 25 Amp Clear Regen Brake Module
F85
F87 5 Amp Tan Electronic Shifter (ESM)
F90 5 Amp Tan Heated Mirrors
30 Amp Green Rear Window Heater
Air Electric Heater
Charge Indicator
Electronic Vehicle Control Unit
(EVCU)
Humidity Sensor
VPAM
AC Compressor
Electronic Vehicle Control Unit
(EVCU)
EPS
YAW Sensor
70
Page 73

MAINTAINING YOUR VEHICLE
Power Distribution Center (PDC) #2
• The Power Distribution Center #2 is located next to the battery in the underhood com-
partment.To access the fuses, pull the release tabs and remove the cover.
Cavity Maxi Fuse Mini Fuse Description
FTP3 25Amp Clear Batt Coolant Pump
FPT5 20Amp Yellow Inverter Coolant Pump
FTP9 10Amp Red Battery Pack Control Module
FTP13 10 Amp Red EAC (AC Compressor)
FTP16 5 Amp Tan Intelligent Battery Sensor (IBS)
FPT17 10 Amp Red EAC (AC Compressor)
FPT20 10 Amp Red Electronic Vehicle Control Unit
TIRE PRESSURES
• Check the inflation pressure of each tire, including the spare tire, at least monthly and
inflate to the recommended pressure for your vehicle.
• The tire pressures recommended for your vehicle are found on the “Tire and Loading
Information” label located on the driver’s side door opening.
NOTE:
Refer to the Owner's Manual on the DVD
for more information regarding tire warnings
and instructions.
(BPCM)
Power Inverter Module (PIM)
On Board Charging Module
(OBCM)
Radiator Fan
(EVCU)
71
Page 74

MAINTAINING YOUR VEHICLE
WARNING!
• Overloading of your tires is dangerous. Overloading can cause tire failure, affect ve-
hicle handling, and increase your stopping distance. Use tires of the recommended
load capacity for your vehicle. Never overload them.
• Improperly inflated tires are dangerous and can cause collisions. Under-inflation is the
leading cause of tire failure and may result in severe cracking, component separation,
or “blow out”. Over-inflation reduces a tire’s ability to cushion shock. Objects on the
road and chuck holes can cause damage that results in tire failure. Unequal tire pressures can cause steering problems.You could lose control of your vehicle. Overinflated or under-inflated tires can affect vehicle handling and can fail suddenly,resulting in loss of vehicle control.
TIRE ROTATION RECOMMENDATIONS
NOTE:
The front and rear tires are different sizes and cannot be used in place of each other. Rotate
the tires “side-to-side” as shown in the diagram.
• The tires on the front and rear of your
vehicle operate at different loads and perform different steering, driving, and braking functions. For these reasons, they wear
at unequal rates.
• These effects can be reduced by timely
rotation of tires.The benefits of rotation
are especially worthwhile with aggressive
tread designs such as those on all season
type tires. Rotation will increase tread life, help to maintain mud, snow and wet traction
levels, and contribute to a smooth, quiet ride.
• Refer to the “Maintenance Schedule” for the proper maintenance inter vals. The reasons
for any rapid or unusual wear should be corrected prior to rotation being performed.
WHEEL AND WHEEL TRIM CARE
• All wheels and wheel trim, especially aluminum and chrome plated wheels, should be
cleaned regularly with a mild soap and water to prevent corrosion.
• To remove heavy soil and/or excessive brake dust, use a wheel cleaner or equivalent or
select a non-abrasive, non-acidic cleaner.
72
Page 75

MAINTAINING YOUR VEHICLE
CAUTION!
Do not use scouring pads, steel wool, a bristle brush, or metal polishes. Do not use oven
cleaner. These products may damage the wheel's protective finish. Avoid automatic car
washes that use acidic solutions or harsh brushes that may damage the wheel's protective
finish.
EXTERIOR BULBS
LIGHT BULBS – Exterior Bulb Number
High Beam Headlight HI R2
Low Beam Headlight HI R2
Front Park/Daytime W21/5W
Front Turn Signals WY21W
Side Turn Signals W5W
Brake Lights P21W/5W
Backup Lights W16W
Interior Cargo Light C5W
Fog Lights H11
Center High Mount Stop Light (CHMSL) W5W
73
Page 76

CUSTOMER ASSISTANCE
FIAT CUSTOMER CENTER
P.O. Box 21–8004
Auburn Hills, MI 48321–8004
Phone: 1-888-242-6342
ASSISTANCE FOR THE HEARING IMPAIRED
• To assist customers who have hearing difficulties, the manufacturer has installed special
TDD (Telecommunication Devices for t he Deaf) equipment at its customer center.Any
hearing or speech impaired customer, who has access to a TDD or a conventional teletypewriter ( TTY) in the United States, can communicate with the manufacturer by dialing
1–800–380–CHRY. Canadian residents with hearing difficulties that require assistance can
use the special needs relay service offered by Bell Canada. For TTY teletypewriter users,
dial 711 and forVoice callers, dial 1–800–855–0511 to connect with a Bell Relay Service
operator.
WARNING!
Engine exhaust, some of its constituents, and certain vehicle components contain, or emit,
chemicals known to the State of California to cause cancer and birth defects, or other
reproductive harm. In addition, certain fluids contained in vehicles and certain products of
component wear contain, or emit, chemicals known to the State of California to cause
cancer and birth defects, or other reproductive harm.
PUBLICATIONS ORDERING
• If you are the first registered retail owner of your vehicle, you may obtain one free
printed copy of the Owner's Manual,Warranty Booklet or Radio Manuals on your DVD
by calling 1–888–242–6342 (U.S.) or 1–800–387–1143 (Canada) or by contacting your
dealer.
• Replacement English User Guide kits or DVDs may be purchased by visiting www.techau-
thority.com or by calling 1–800–890–4038 (U.S.) or 1–800–387–1143 (Canada).Visa,
Master Card,American Express and Discover orders are accepted. If you prefer mailing
your order, please call the above numbers for an order form.
NOTE:
A street address is required when ordering manuals (no P.O. Boxes).
74
Page 77

CUSTOMER ASSISTANCE
REPORTING SAFETY DEFECTS IN THE UNITED STATES
• If you believe that your vehicle has a defect that could cause a collision or cause injury or
death, you should immediately inform the National HighwayTraffic Safety Administration
(NHTSA) in addition to notifying the manufacturer.
• If NHTSA receives similar complaints, it may open an investigation, and if it finds that a
safety defect exists in a group of vehicles, it may order a recall and remedy campaign.
However, NHTSA cannot become involved in individual problems between you, your
authorized studio and the manufacturer.
• To contact NHTSA, you may either call the Auto Safety Hotline toll free at 1–888–327–
4236 (TTY: 1–800–424–9153), or go to http://www.safercar.gov; or write to:Administrator, NHTSA, 1200 New Jersey Avenue, SE., West Building, Washington, D.C. 20590.You can
also obtain other information about motor vehicle safety from http://www.safercar.gov.
In Canada
• If you believe that your vehicle has a safety defect, you should contact the Customer Ser-
vice Department immediately. Canadian customers who wish to report a safety defect to
the Canadian government should contact Transport Canada, Motor Vehicle Defect Investigations and Recalls at 1-800-333-0510 or go to http://www.tc.gc.ca/eng/roadsafety/
safedrivers-childsafety-index-53.htm
• French Canadian customers who wish to report a safety defect to the Canadian govern-
ment should contact Transport Canada, Motor Vehicle Defect Investigations and Recalls at
1-800-333-0510 or go to http://www.tc.gc.ca/securiteroutiere/
75
Page 78

MOPAR ACCESSORIES
AUTHENTIC ACCESSORIES BY MOPAR®
• The following highlights just some of the many Authentic FIAT Accessories by Mopar®
featuring a fit, finish, and functionality specifically for your 500e.
• In choosing Authentic Accessories you gain far more than expressive style, premium pro-
tection, or extreme entertainment, you also benefit from enhancing your vehicle with
accessories that have been thoroughly tested and factory-approved.
• For the full line of Authentic FIAT Accessories by Mopar®, visit your local FIAT studio or
online at mopar.com
EXTERIOR:
• Chrome Hood Spear • Front End Cover • 16 inch Silver Painted
• Chrome Mirror Cover • Body Side Molding • Level 1 Portable Charger
• Vehicle Cover • Wheel Pocket Inserts • Level 2 Charging Station
• Side Window Air Deflec-
tors
INTERIOR:
• Door Sill Guards • Key Covers • Slush Mats
• Roadside Safety Kit • Premium Carpet Floor
ELECTRONICS:
• GPS Tracking System(s) • Wi-Fi • Interior/Ambient Lighting
• Rear Park Distance Sen-
sors
• 16 inch Black Painted
Wheels
Mats
• Sound System Upgrades
Wheels
• Cargo Organizer
CARRIERS:
• Roof Rack • Bike Carrier • Canoe Carrier
• Snowboard/Ski Carrier • Luggage Carrier • Hitch-mount Bike Carrier
76
Page 79

INDEX
Arming Theft System (Security Alarm) ....19
Automatic Temperature Control (ATC) . . .33
Belts,Seat..................20
Bulb Replacement ..............73
Charging ...................16
Clock Setting.................39
Cruise Control (Speed Control) .......32
Customer Assistance.............74
Defects, Reporting ..............75
Disarming,Theft System ...........19
Driver Cockpit ................6
Electronic Speed Control (Cruise
Control).................32
Electronic Vehicle Information Center
(EVIC)..................45
Emergency,In Case of
Brake Warning Light ...........51
Towing..................61
Enhanced Accident Response Feature ....62
EventDataRecorder............63
Extending Driving Range ...........28
Exterior Lights ................73
Flash-To-Pass .................30
Freeing A Stuck Vehicle............62
FrontHeatedSeats.............27
Fuse .....................69
Fuses .....................69
HeatedMirrors ...............34
HeatedSeats.................27
Hood Release ................64
Instrument Cluster Warning Lights......49
Lane Change Assist .............29
Level 1 Charging ...............13
Level 2 Charging ...............13
Lights
Turn Signal ................29
Maintenance Schedule ............67
Mirrors
Heated .................34
MOPAR®Accessories ............76
Placard,Tire and Loading Information ....71
Programmable Electronic Features......45
RecreationalTowing .............48
ReplacementBulbs..............73
Reporting Safety Defects ..........75
Rotation,Tires................72
Schedule, Maintenance ............67
SeatBelts ..................20
Seats
Heated .................27
Setting the Clock...............39
Signals,Turn .................29
Speed Control (Cruise Control) .......32
StoreRadioPresets.............39
Stuck, Freeing ................62
TheftSystemArming ............19
Theft System Disarming ...........19
TIREFIT ...................52
Tires
Air Pressure ...............71
PressureWarning Light .........50
Rotation.................72
Towing
Disabled Vehicle .............61
Recreational ...............48
Towing Vehicle Behind a Motorhome ....48
Turn Signals .................29
W
asher
Rear...................31
Wheel and Wheel Trim Care ........72
Wind Buffeting................35
Wiper,Rear.................31
77
Page 80

FAQ (How To?)
FREQUENTLY ASKED QUESTIONS
GETTING STARTED
• How do I charge my vehicle? 16
• How do I install my LATCH Equipped Child Seat? 22
• How do I fold down my rear seat? 26
ELECTRONICS
• What Sound System do I have? 38
• How do I set the clock on my radio? 39
• How do I set the presets on my radio? 39
• How do I connect my portable media player/iPod/MP3? 44
• How do I pair my cell phone via Bluetooth® with the BLUE&ME™ Hands-Free
Communication System? 42
WHAT TO DO IN EMERGENCIES
• What do I do if my TPMS warning light is blinking?. 50
• How do I Jump-Start my vehicle? 58
MAINTAINING YOUR VEHICLE
• Where is my underhood fuse block located? 69
• Where is my interior fuse block located? 69
• What should my tire pressure be set at? 71
78
Page 81

NOTES
79
Page 82

NOTES
80
Page 83

Driving and Alcohol: Drunken driving is one of the most frequent causes of
collisions. Your driving ability can be seriously impaired with blood alcohol levels
far below the legal minimum. If you are drinking, don’t drive. Ride with a
designated non-drinking driver, call a cab, a friend, or use public transportation.
Driving after drinking can lead to a collision. Your perceptions are less sharp,
your reexes are slower, and your judgment is impaired when you have been
drinking. Never drink and then drive.
This guide has been prepared to help you get quickly acquainted with
your new FIAT and to provide a convenient reference source for common
questions. However, it is not a substitute for your Owner’s Manual.
For complete operational instructions, maintenance procedures and
important safety messages, please consult your Owner’s Manual,
Navigation/Uconnect
®
Manuals and other Warning Labels in your vehicle.
Not all features shown in this guide may apply to your vehicle. For
additional information on accessories to help personalize your vehicle,
visit www.mopar.com or your local FIAT studio.
WARNING
Page 84

Download a free Vehicle
Information App
store, Keyword (My FIAT), or scanning the Microsoft Tag.
To put Microsoft Tags to work for you, use your mobile
phone’s browser or App store to download a Microsoft Tag
reader, like the free one at www.gettag.mobi. Then follow
the directions to scan the code.
by visiting your application
13BEV24-926-AA
Second Edition
User Guide
Download a FREE electronic copy
of the Owner’s Manual or Warranty Booklet by visiting
the Owner’s tab at:
www.atusa.com (U.S.)
 Loading...