

Fhiaba FI36BFILO, FP24BILS, FI36BDILO, FI30BDWLGO, FI30BILO User Manual
...
USER MANUAL
EN
MODE D’EMPLOI
FR


Page
10
12
Index
2
1
Important directions for safety and the environment
1.1
For your safety
1.2
Caring for the environment
1.3
Cleaning, sanitization and maintenance of the ice and/or water
dispenser (if present)
4
2
Installation
2.1
Installation
2.2
Connection to the electrical power supply
2.3
Connection to the water system
6
3
Before starting
3.1
Know your appliance
3.2
Main features
3.3
Main components
3.4
Electronic Control
3.5
Main control panel
3.6
Fresco control panel
4
Appliance switching on and off
4.1
Switching on and off
4.2
How to adjust the temperature for different requirements
4.3
Ice Maker activation
4.4
Information and malfunction messages on the display
5
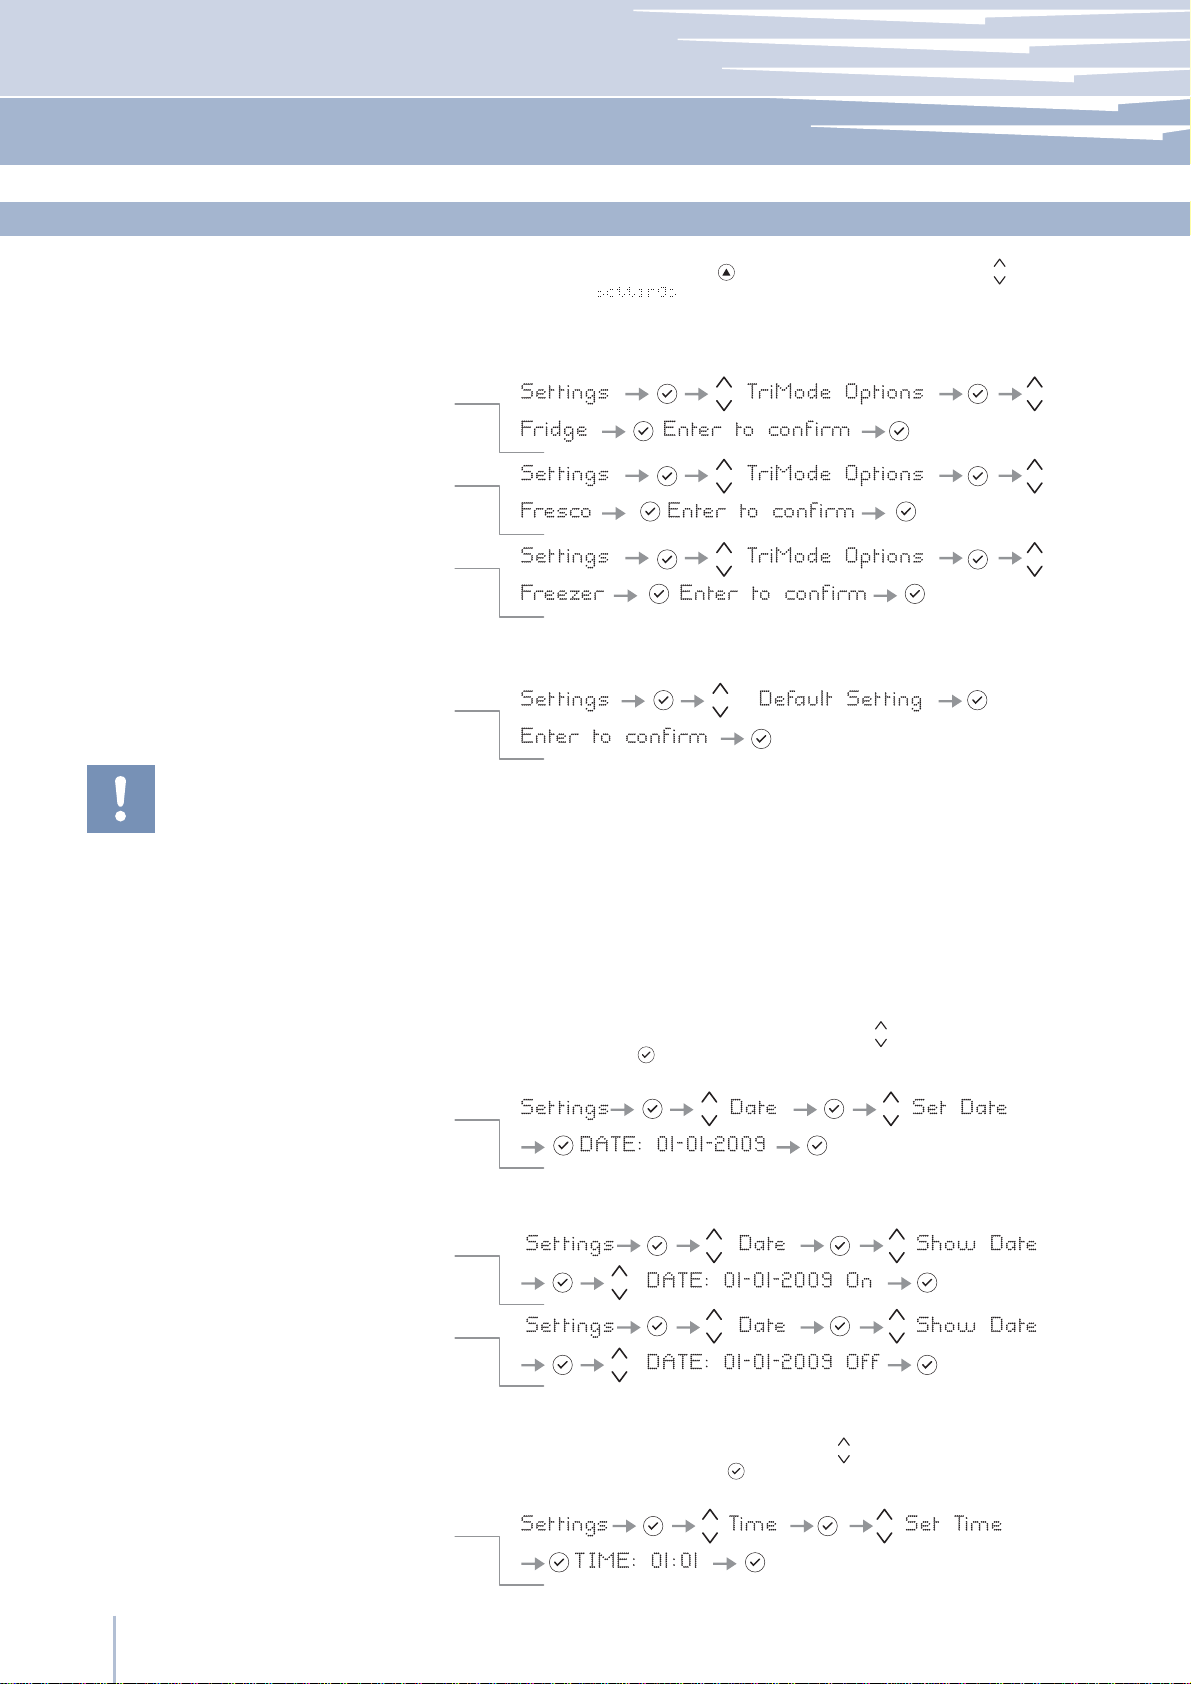
Settings and Special Functions
5.1
Customization and language settings
5.2
Special functions activated through the Menu
5.3
Basic settings of the Menu
EnglishFrançais
17
19
21
22
26
27
28
6
Internal Layout
6.1
Internal Layout (positioning, adjustment, removal)
7
Activation and use of the Ice Maker
7.1
Activation and use of the Ice Maker
7.2
Water Filter
8
Lighting
8.1
Lighting
9
Food Preservation
9.1
General directions
9.2
How to maintain good food quality
9.3
Recommendations for preserving fresh food
9.4
Recommendations for preserving frozen food
10
Recommended times for food preservation
11
Care and Cleaning
11.1
Care and Cleaning
11.2
Condenser cleaning
11.3
Internal cleaning
12
Troubleshooting Guide
12.1
Troubleshooting Guide
12.2
Malfunction messages appearing on the display
30
31
13
Before calling for service
13.1
Before calling for service
14
Menu Map
14.1
Functions
14.2
Setting
www.fhiaba.com ∙ www.thevettagroup.com
1
Important directions for safety and the environment
1
1.1
For your safety
PRUDENZA:
NON FISSARE LA LAMPADA IN FUNZIONE.
PUÒ ESSERE DANNOSO PER GLI OCCHI.
CAUTION:
DO NOT STARE AT OPERATING LAMP.
MAY BE HARMFUL TO THE EYES.
Product tested in accordante with EN62471
Notes
Recommendations for correct
use of the appliance
Risk Group 2
B09001301
If this appliance is replacing an existing appliance which must be
removed or disposed of, make sure that it does not become a dangerous trap for children by cutting its power supply cable and rendering it impossible to close the door. Use the same caution at the
end of the lifespan of the new appliance.
This appliance is designed to refrigerate beverages and foods and
is intended for domestic use.
The appliance must be installed by following the instructions in the
Installation Guide, particular care should be taken not to obstruct the
vent openings of the appliance and of the built-in units.
The appliance features a concentrated lighting system with LED
lamps. Do not stare into these lamps when they are on to avoid possible eyesight damage.
This warning is also contained on the label attached to the inside of
the refrigerator door.
When the freezer is functioning do not touch the inner surfaces in
stainless steel with wet or damp hands, since skin may stick to the
very cold surfaces.
Do not use any type of electrical equipment inside of the food
conservation compartments.
When positioning the shelves, do not place fingers in the shelf
slide guides.
Important
Directions for avoiding
appliance damage
Warning
Indications for avoiding injury
to people
Do not position containers of flammable liquids near the appliance.
Completely switch off the appliance and unplug the power supply
cable during cleaning operations. If the plug is not easily reached, it
is a good idea to turn off the breaker or remove the fuse that controls
the socket that the appliance is connected to.
The packaging parts can be dangerous for children: do not allow
children to play with the plastic bags, plastic film or Styrofoam.
Any repairs must be performed by a qualified Fhiaba Service
technician.
This appliance is not intended for use by persons (including children)
with reduced physical, sensory or lack of experience and knowledge
unless they have been given supervision or instruction concerning use of
the appliance by a person responsible for their safety. Children should
be supervised to ensure that they do not play with the appliance.
Do not damage the appliance refrigerant circuit pipes.
Do not store explosive substances such as aerosol cans with a flam-
mable propellant in this appliance.
www.fhiaba.com ∙ www.thevettagroup.com
2
Important directions for safety and the environment
1
Caring for the environment
Pay special attention to correct disposal procedure for all the pack-
aging materials.
The appliance must not be disposed of with urban waste. Contact lo-
cal waste disposal centers for on how to dispose of recyclable waste.
Prior to disposal, cut the power supply cord and make it impossible
to close the door.
During disposal, avoid damage to the refrigeration circuit.
The appliance does not contain hazardous substances for the atmos-
pheric ozone layer, neither in the refrigeration circuit nor in the insulation.
Cleaning, sanitization and maintenance of the ice and/or water dispenser (if present)
Failure to follow the instructions regarding sanitizing can compromise
the hygienic safety of the water dispensed.
When using the appliance for the first time and every time the filter
is changed, it is recommended to let the water flow in the circuit using
the “Manual Cleaning” and discard the ice produced in the first 24
hours.
1.2
1.3
EnglishFrançais
If the water dispenser has not been used for more than 4/5 days, it is
advisable to clean the circuit and run off the first litre of water.
Reposition the removable water dispenser (if present), ensuring your
hands are hygienically clean.
Clean the ice bucket or drawer regularly but using only drinking
water.
The filter must be changed when indicated on the control panel
or when the ice/water dispenser has not been used for more than 30
days.
With each filter replacement, sanitise the ice and/or water distribution system using a food grade disinfectant (with sodium hypochlorite), which does not alter the characteristics of the materials, or use
the “Sanitising Kit” available from the After-Sales Service. Rinse with at
least 2 litres of water before use.
Only original spare parts supplied by the manufacturer should be
used when replacing components in the ice and water dispenser.
Any work on the appliance must be carried out by a qualified technician or the After-sales Service.
www.fhiaba.com ∙ www.thevettagroup.com
3
Installation
1
2.1
2.2
Installation
Make sure that installation is performed correctly, adhering to all directions in the specific installation manual provided with the appliance.
Connection to the electrical power supply
The appliance operates at 115 V AC, 60 Hz and is equipped with
a power supply cord with a 3-prong grounded plug, which must be
connected to a corresponding 3-prong (15 Amp) grounding-type
wall receptacle.
Do not use extension cords and/or multiple adapters for the power supply connection.
www.fhiaba.com ∙ www.thevettagroup.com
4

Installation
2
The appliance should be supplied only
with drinkable water.
Make sure that installation is performed
correctly, according to all of the directions in the specific installation manual
provided with the appliance.
Connection to the water system
The models provided with Ice Maker require a connection to the
domestic water supply system. This can be executed through the
1/4” water line (copper or polyethylene)to the house water supply.
The system pressure must be between from 8 psi to 75 psi (between
0.5 bar and 5 bar).
Different pressures can cause malfunctions or leaks in the water system.
The appliance should be supplied only with drinkable water.
2.3
EnglishFrançais
Do not attempt to use a locally sourced
garden hose threaded adapter or braided supply line. It will strip the threads on
the appliance water connection solenoid.
www.fhiaba.com ∙ www.thevettagroup.com
5
Before starting
3
3.1
Know your appliance
Congratulations for having purchased your new Fhiaba:
from now on you can use our innovative conservation system, which will allow you to keep all of your food in the
best way possible.
This manual will answer most of your questions about the
product’s features. Should you require further information,
please check our website
www.fhiaba.com
or write us an e-mail at
fhiaba@adcoservice.com
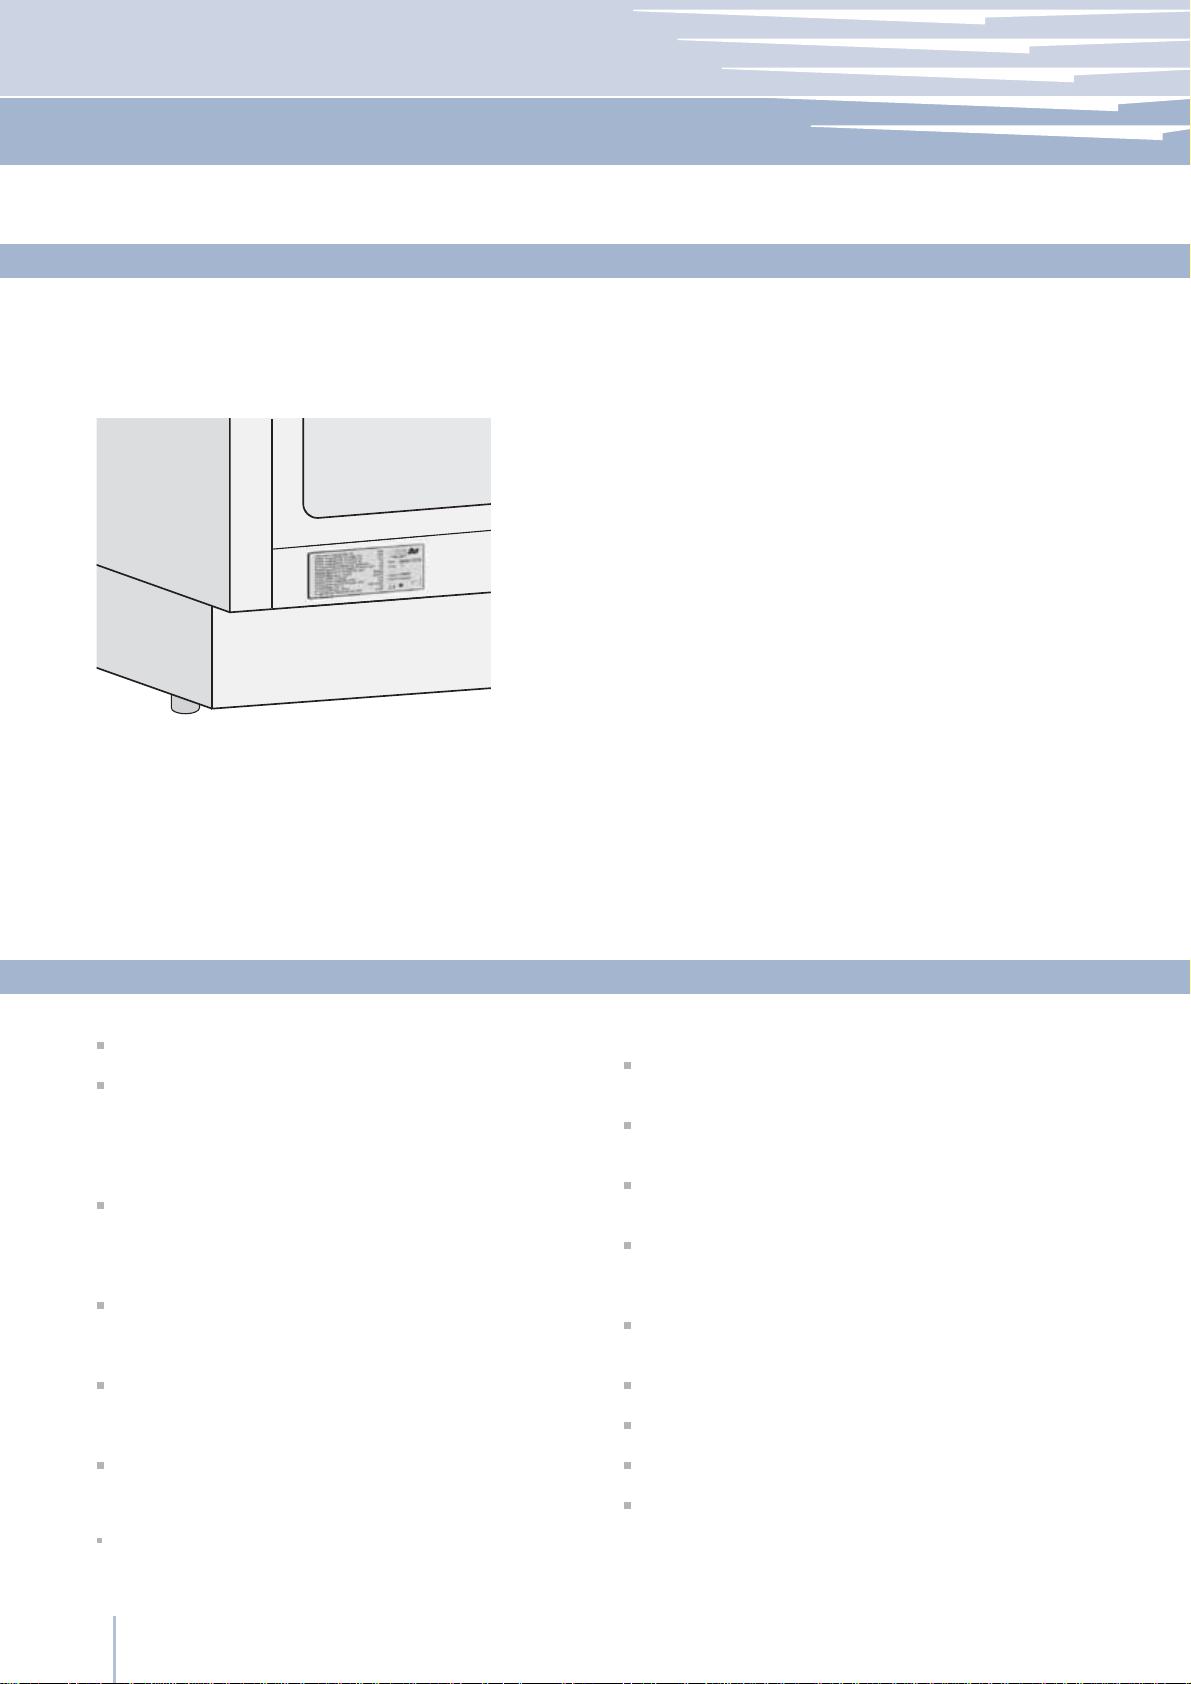
Before calling, write down the model type and serial
number which are available on the warranty certificate
and on the rating plate located on the bottom left-hand
corner of the appliance, behind the bottom drawer and
any messages which may have appeared on the display.
1-855-4-FHIABA (1-855-434-4222)
3.2
separation of internal compartments ensures maximum
freshness and offers excellent conservation of foods in the
three compartments: refrigerator, Crisper-Fresco and freezer
crease the flexibility of the appliance by making the freezer
compartment operate as a refrigerator or as a Crisper-Fresco compartment
and controlled humidity, providing excellent conservation in
superior preservation conditions for fresh foods
humidity levels set by the user and provides real-time compartment temperature readings.
ment of appliance functions and the visualization of functioning messages
Power save features to reduce consumption during vaca-
tion periods
Main features
Exclusive design by Giugiaro
The Fhiaba TriMode refrigeration system and the efficient
It is also possible, should there be a need, to further in-
The Crisper-Fresco compartment has a low temperature
Electronic control guarantees constant temperature and
An interactive menu (Menu) allows customized manage-
Ample drawer space with Soft self-closing systems in the Crisp-
er-Fresco area
Ice Maker for automatic ice production of variable cube
size
Easily replaceable water filter located inside the refrigera-
tor
Patented adjustable shelf system, with shelves that can be
positioned at any level inside of the refrigerator without having to be removed
Stainless steel surface both inside and outside, with fine
aluminum trim
Patented hinge system that permits automatic door closing
External drawers with to self-closing system
Localized lighting with LEDs
Anti-tipping system by means of wall mounting brackets
www.fhiaba.com ∙ www.thevettagroup.com
6

Before starting
3
Main components
Single drawer Fridge
19
Fridge
Fresco
Crisper
TriMode
2
3
4
5
6
8
10
11
12
13
14
15
16
1 Stainless steel structure with
aluminum trim
2 Control panel with Menu
3 Water Filter
4 Patented shelf positioning
system
5 Control panel,
area
6
Crisper-Fresco compartment
with controlled humidity
7 “Low Temp” drawer with
controlled humidity
8 Automatic icemaker
9 Double refrigeration system
10 Temperature display
Crisper-Fresco
3.3
EnglishFrançais
Fridge
Low Temp
TriMode
11 Sound signals
1T Models
1
2
3
4
7
8
10
11
12
13
14
15
16
12 Vacation function
13 Spacious door shelves
14 Innovative lighting
15 Automatic door and
drawer closure
16 Frezer compartment that
can be transformed into a
refrigerator or Crisper-Fresco
compartment
(TriMode function)
9
0T Models
www.fhiaba.com ∙ www.thevettagroup.com
7
Before starting
3
3.4
Electronic Control
The innovative electronic control system designed by Fhiaba maintains constant temperature in multiple compartments and
displays it on the control panel. It also allows user interaction making it possible to personalize settings of various functions and
to alert the user with sound and/or visual messages should any malfunction occur in the appliance.
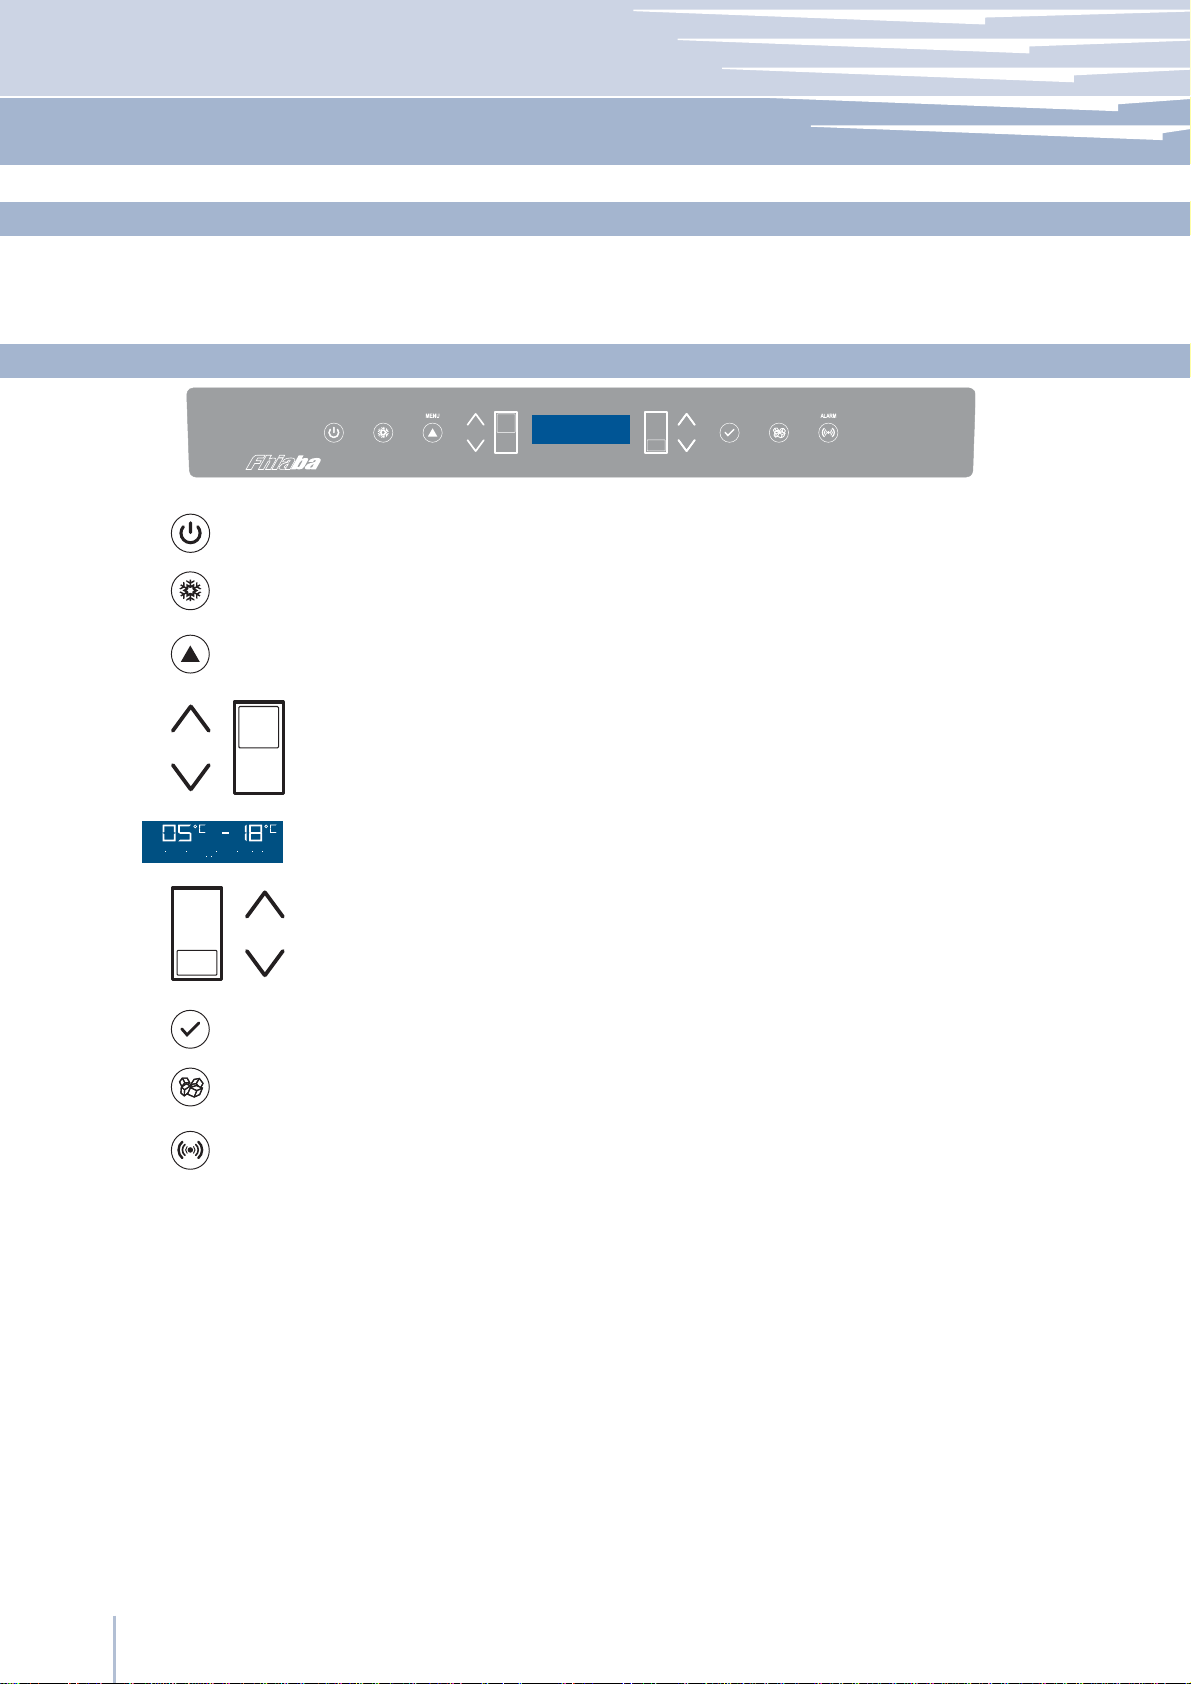
3.5
UNIT
1234 5 67 98
1 Unit
2 Fridge
3 Menu
4
Up/down
Fridge
Main control panel
ICE
FRI
D
G
E
Switches the appliance (all compartments) between ON and STAND BY
(press for three seconds).
Allows switching on and off of only the refrigerator compartment
(press for three seconds).
Allows access to the appliance function menu
Using the Up and Down buttons, it is possible to change the set temperature of the refrigerator and navigate through the interactive menu.
E
NTE
MAKE
R
R
5 Display
Up/Down
6
Freezer
(TriMode)
7 Enter
8 Ice maker
9 Alarm
It shows the temperature of the refrigerator and freezer compartments,
the date and time, Menu functions and visual messages.
By selecting Up/Down the preset temperature can be changed according to the selected function mode (freezer, refrigerator, Crisper-Fresco).
Confirms activation or deactivation of the selections made in the
Menu.
Allows activating or deactivating the automatic ice production.
Blinks to signal user alerts such as door left open, also in combination with
a sound signal which can be deactivated by pressing the button.
www.fhiaba.com ∙ www.thevettagroup.com
8
Before starting
3
11 Display
12 Up/Down
13 Crisper
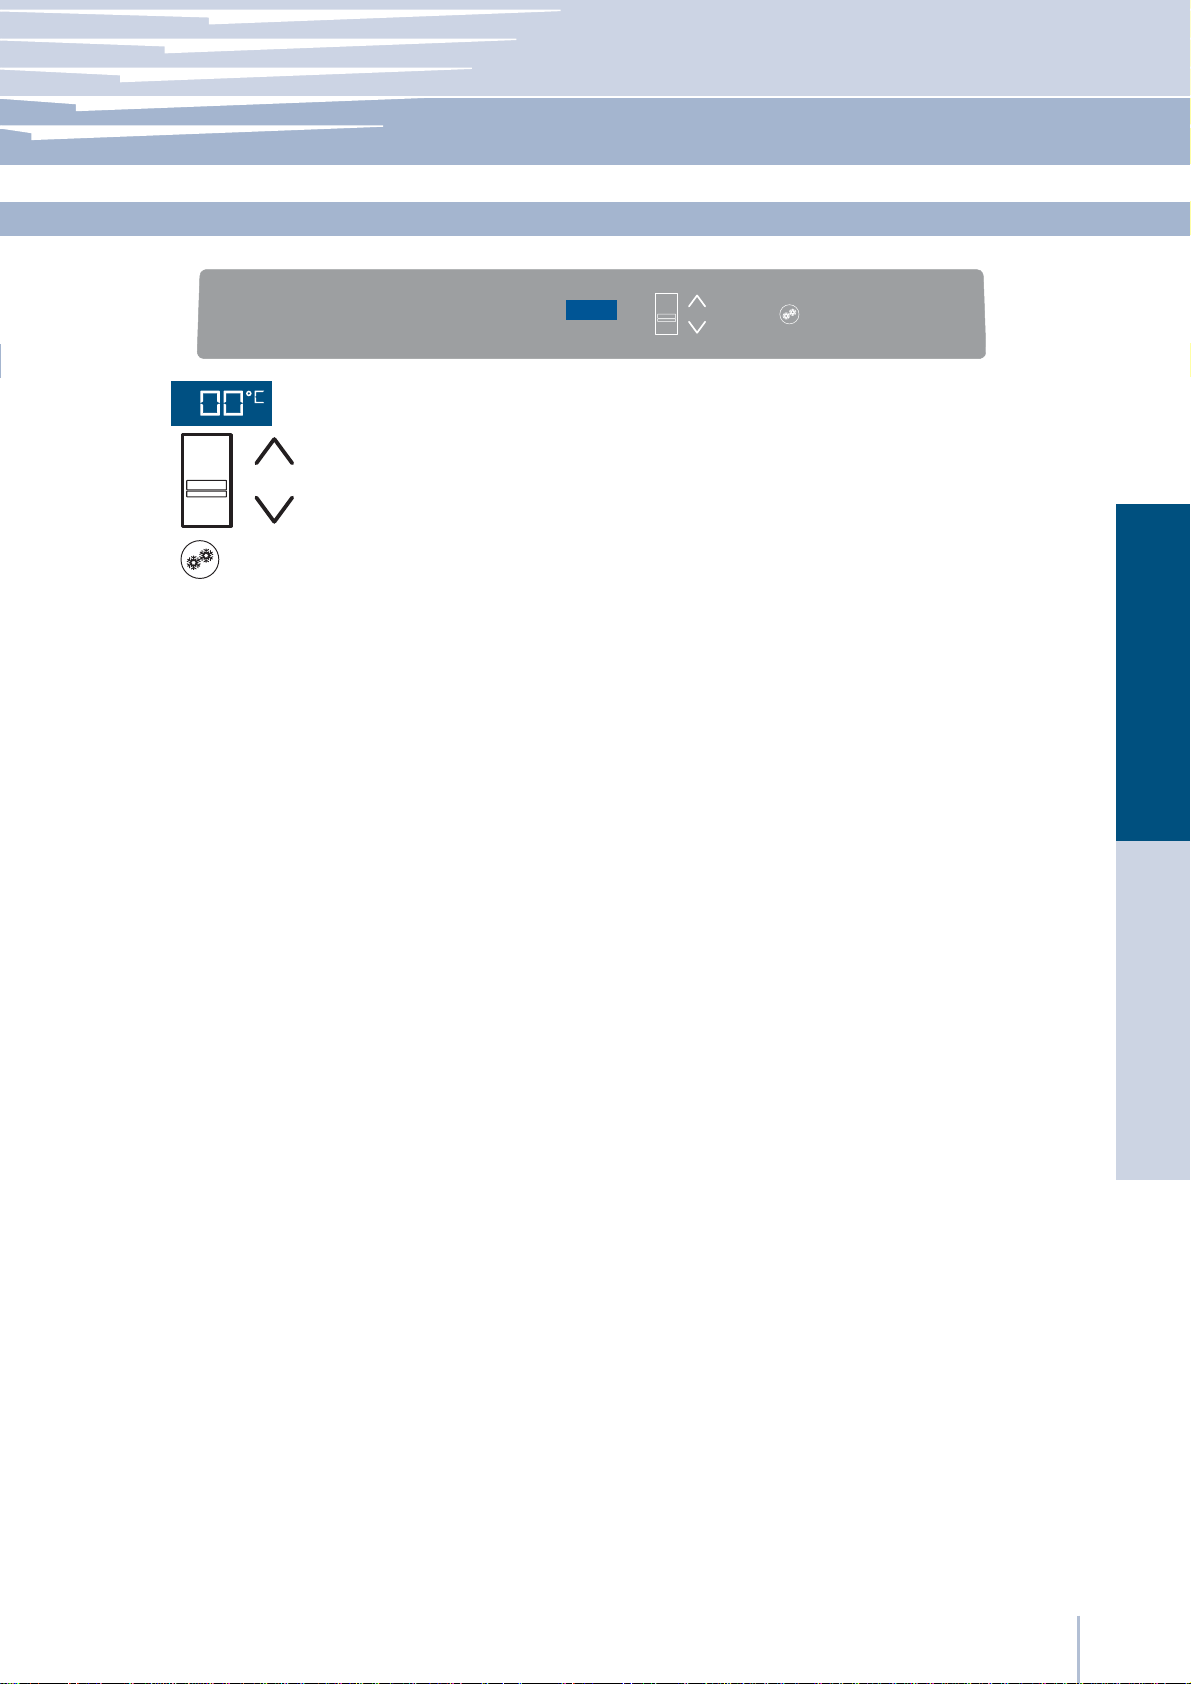
Crisper-Fresco control panel
CR
ISP
E
R
10 11 12
Shows the temperature of the Crisper-Fresco compartment.
Using the Up and Down buttons, it is possible to change the
temperature set for the Crisper-Fresco compartment.
Allows switching on and off of only the Crisper-Fresco compartment
(press
for three seconds).
3.6
EnglishFrançais
www.fhiaba.com ∙ www.thevettagroup.com
9
Appliance switching on and off
4
4.1
Switching on and off
First startup
Switching off the Refrigerator and Crisper-
Fresco compartments
Restarting
Switching off for long periods
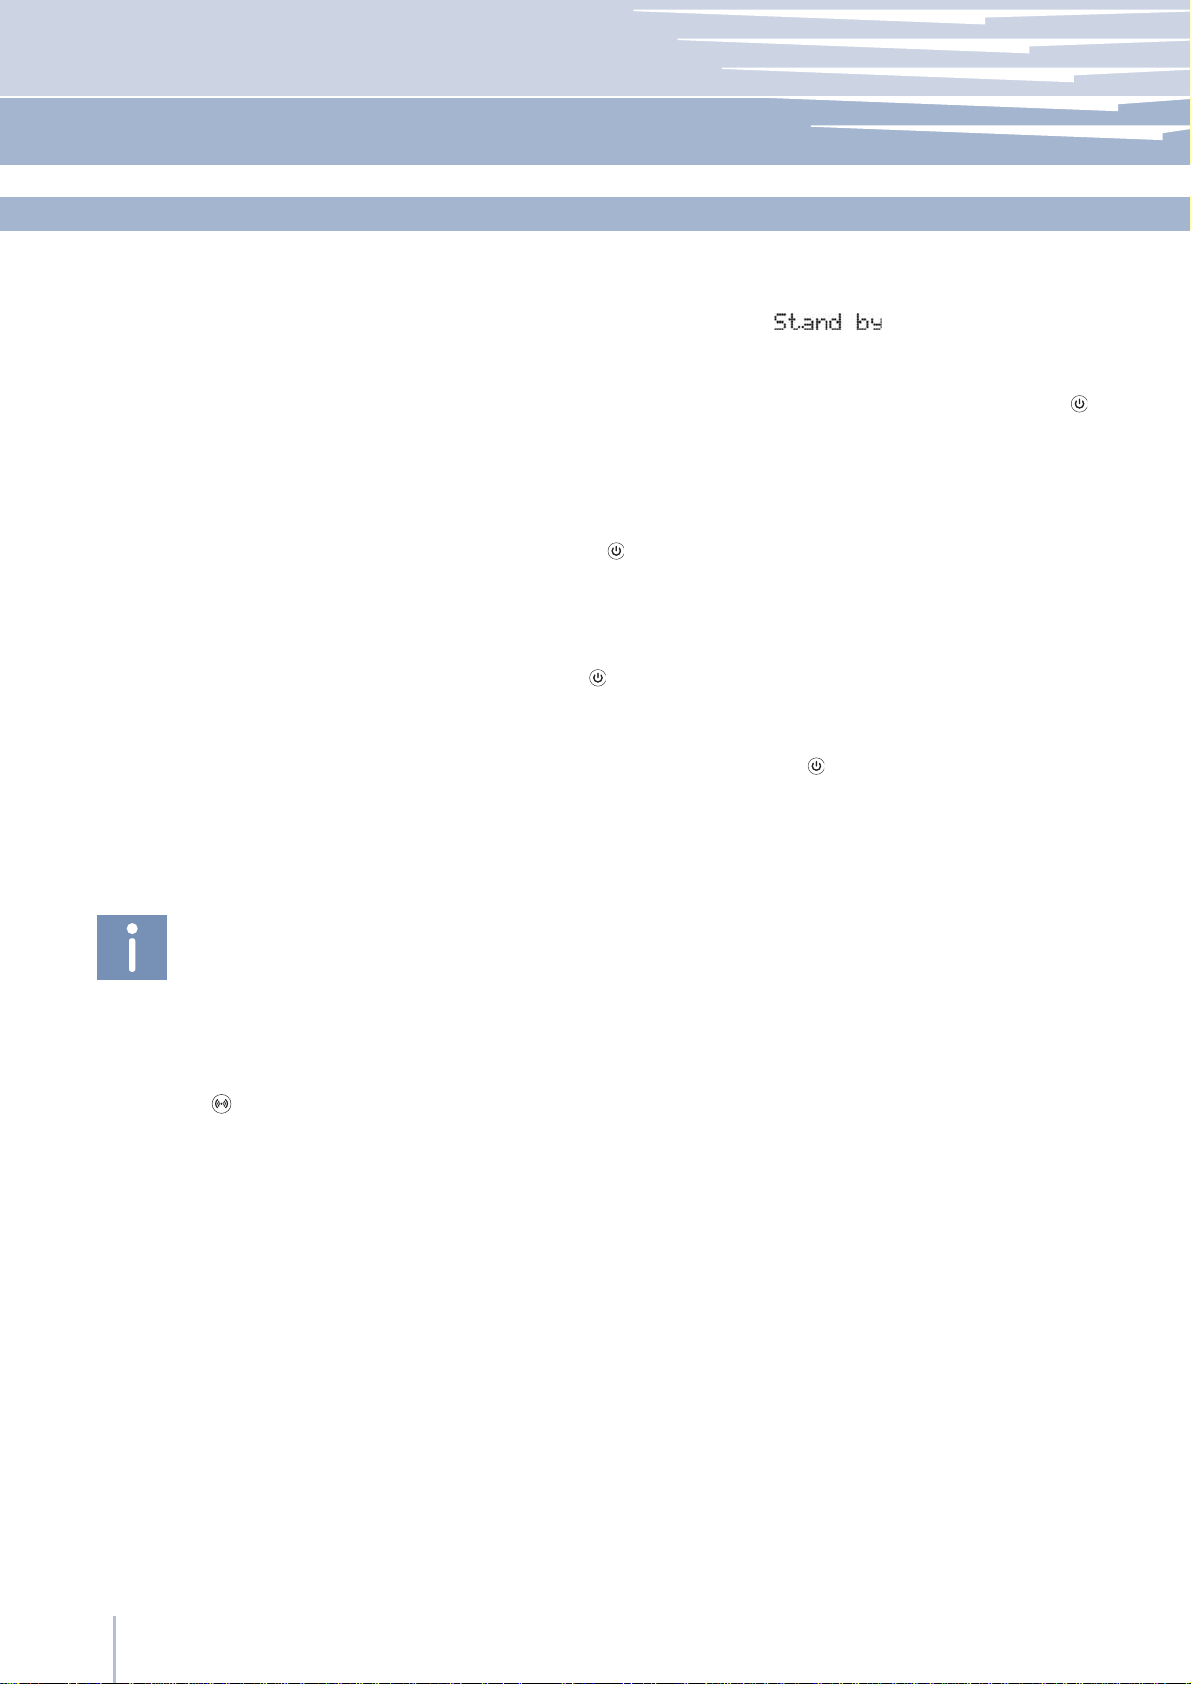
When the appliance is connected to the electrical power supply but has
not yet been switched on, the display shows the message
This is a safety message to warn that the appliance is connected to the
mains, and all the panel buttons are off.
To switch on all the appliance compartments, press the Unit button
three seconds.
When the appliance is first switched on the TriMode compartment is set
to the “freezer” mode. After switching on it remains always on and can
be switched off only by switching off the complete appliance.
Press Unit
Use the same buttons to restart.
The freezer compartment always stays on and cannot be switched off
except by completely switching off the appliance by pressing the Unit
button for three seconds.
During long absence periods it is recommended to switch off the refrigerator by pressing the Unit button
ing the electrical plug or the breaker controlling the socket.
for three seconds.
for three seconds and disconnect-
for
If at the first startup the Standby message does
not appear, but another message appears, it
means that the appliance has already started
the cooling process. If this is the case, deactivate any possible sound signal by pressing the
Alarm button
the set temperature is reached.
During the first startup, it will not be possible to
use the Menu to modify the factory settings until
the preset temperature has been reached.
Each time the appliance is switched on it goes
trough a self-diagnosis procedure lasting three
minutes before completely starting up.
If only the refrigerator compartment or the Crisper-Fresco compartment is switched off, the specific fan will continue to operate to prevent the
formation of unpleasant odors and mold.
, close the door and wait until
Completely empty the refrigerator, clean and dry it and leave the doors
and drawers partially open to prevent unpleasant odors.
Before switching off the appliance for a long period of time, remove all of the items inside and
leave the doors and drawers open to prevent
the formation of unpleasant odors and mold.
www.fhiaba.com ∙ www.thevettagroup.com
10

Appliance switching on and off
4
How to adjust the temperature for different requirements
Refrigeration Compartment
Crisper-Fresco Compartment
Freezer Compartment
(TriMode)
The temperature shown can vary slightly in respect to the set temperature following frequent
openings of the doors or insertion of room temperature foods or large quantities of foods.
4.2
Each model has been carefully tested before leaving the factory and is
adjusted in such a way to ensure high performance and low consumption. Usually, it is not necessary to modify the settings.
Nevertheless, according to special needs, it is possible to modify the set
temperatures as follows:
From +1°C to +7°C (from 33,8°F to 44,6°F), the recommended preset
temperature is +4°C (39,2°F).
To adjust the temperature use the Up/Down buttons
these buttons the newly set temperature will appear in the display. To
modify this temperature, use the buttons until reaching the desired temperature.
From -2°C to +2°C (from 28.4°F to 35.6°F), the recommended preset temperature is 0°C (32°F).
To adjust the temperature use the Up/Down buttons
these buttons the newly set temperature will appear in the display. To
modify this temperature, use the buttons until reaching the desired temperature.
From -13°C to -23°C (from 8,6°F to -9,4°F), the recommended temperature is preset at -18° (0°F).
To adjust the temperature use the Up/Down buttons
these buttons the newly set temperature will appear in the display. To
modify this temperature, use the buttons until reaching the desired temperature.
In case the compartment is used as refrigerator or Crisper-Fresco compartment (TriMode function) the recommended and preset temperatures
will correspond to those indicated for the respective compartments.
. Upon touching
. Upon touching
. Upon touching
EnglishFrançais
6 to 12 hours are necessary to reach the selected temperature.
Do not activate the Ice Maker unless the appliance is connected to the water mains.
Information and malfunction messages on the display
Ice Maker Activation
The Ice Maker button located on the main control panel permits activation of the automatic icemaker. The button is lighted when the icemaker is functioning.
4.3
4.4
An integrated control system provides information through light signals or
text messages visualized on the display.
The information signal is always visualized with a fixed text message, while
a malfunction signal is visualized with blinking text. The sound signal that
accompanies some malfunction signals can be deactivated by pressing
the Alarm button on the main control panel.
The list of malfunction signals is located at the back of this manual.
www.fhiaba.com ∙ www.thevettagroup.com
11
Settings and Special Functions
5
5.1
To prevent an inadvertent change to the settings the keypad is automatically locked after
a certain period of time.
To re-activate the Menu function, press simultaneously the Menu button
button for at least three seconds.
5.2
Customization and language settings
and the Down
FR
U
NIT
ID
GE
Special functions activated through the Menu
It is possible to customize the functions of your Fhiaba to adapt it
to diverse usage needs, resetting the main parameters (Settings) or
activating special functions (Functions).
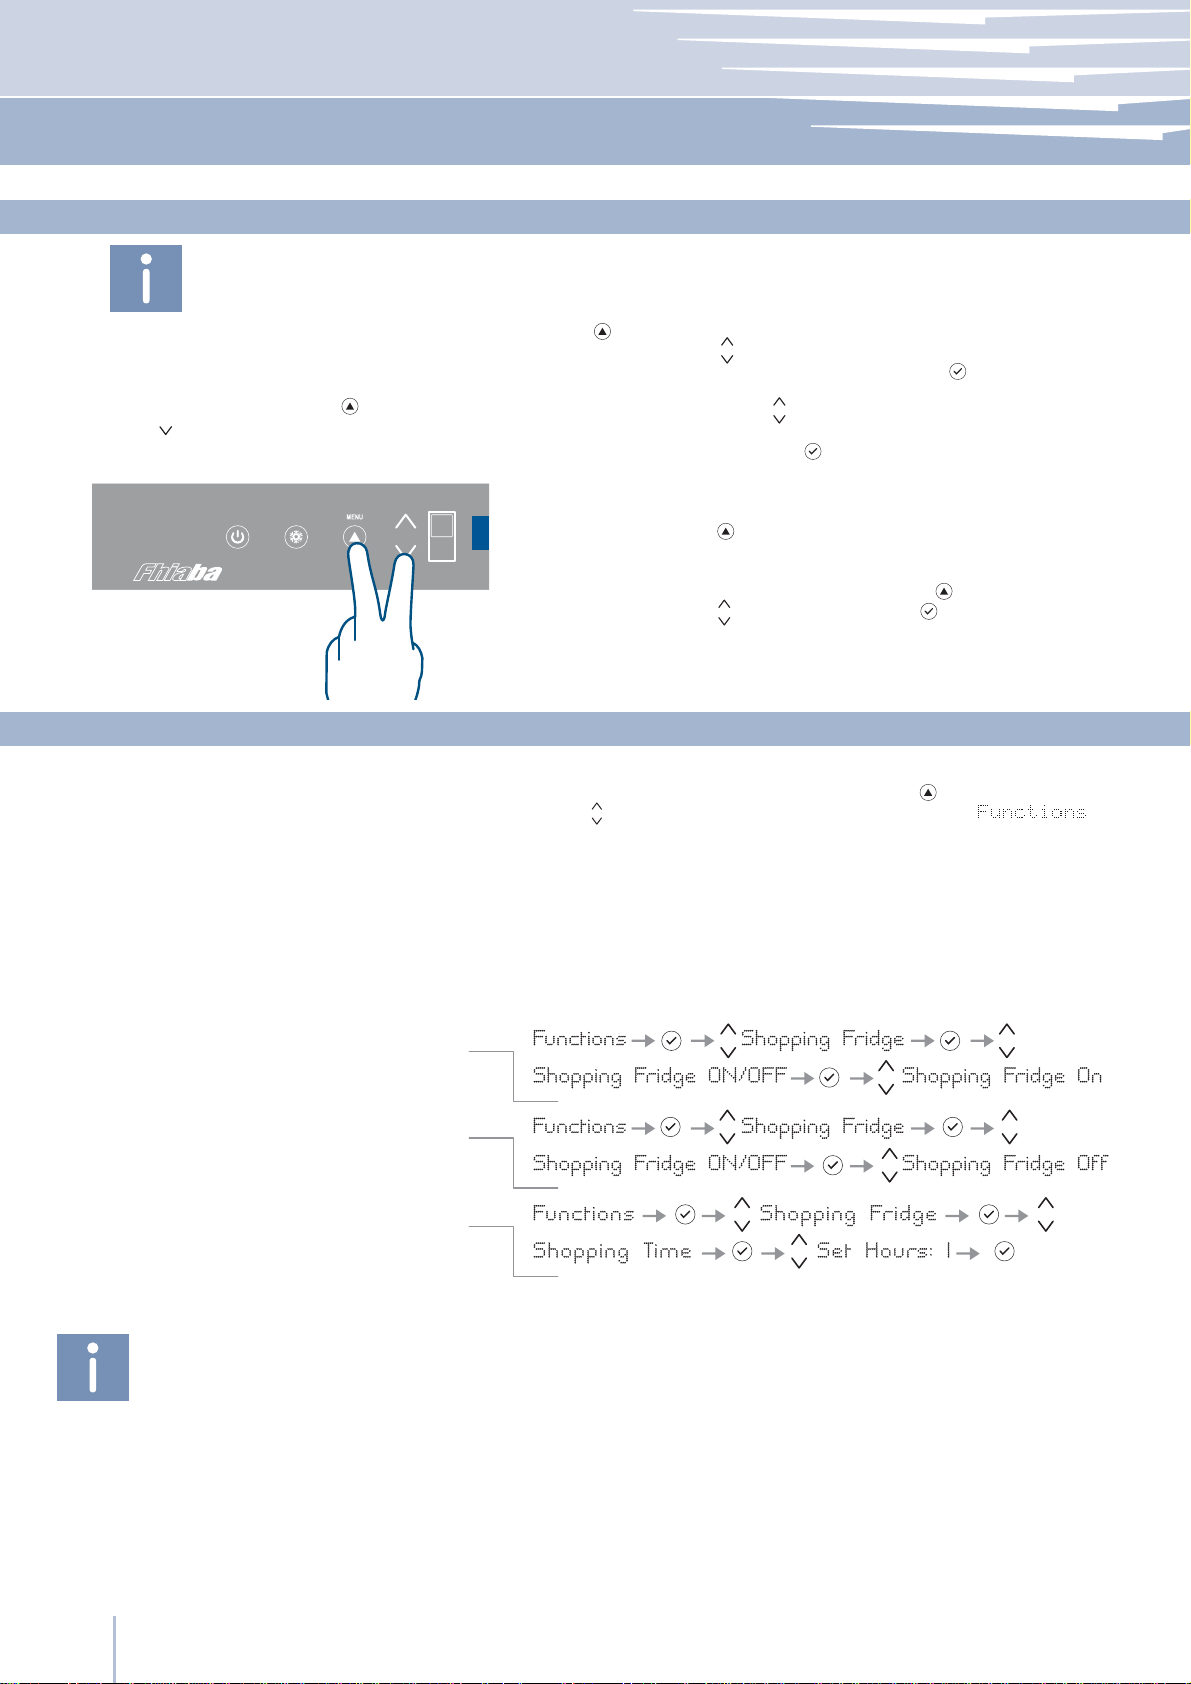
Functions are accessed on the main display by pressing the Menu
button .
The Up/Down buttons permit navigation of the available functions,
which can be selected by pressing the Enter button . The display shows
the current function status.
Using the Up/Down buttons , it is also possible to scroll through the
selected function’s sub-menu if applicable, activating or deactivating by pressing the Enter button
Once the function is confirmed, the display will automatically
step back to the main menu to allow selection of other functions.
At any time it is possible to return to the previous selection through the
FhiabaAccess button
The language of the messages appearing on the display can be
changed by operating as follows:
Enter the Menu by pressing the Menu button select Settings via
the Up/Down buttons and confirm via Enter . Then select the Language function and the desired language.
To use special functions, select the Menu button
button to access the menu, confirming the selection .
.
.
and use the Up/Down
Shopping Fridge
How to activate
How to deactivate
How to program timed activation
Vacation Fridge
The various Shopping Modes help prepare the cooling,
Fridge and TriMode compartments for the introduction
of a heat load which can consist of fresh food or other
items which may have warmed during transport. The
more quickly an item can be cooled or frozen the better it will be preserved.
This mode can also be effective at maintaining compartment temperatures while entertaining when higher than average door and drawer openings are anticipated.
www.fhiaba.com ∙ www.thevettagroup.com
12
The function lowers the refrigerator temperature to +2°C (35.6°F) for
12 hours, permitting more rapid cooling of food that has just been
placed in. Once the 12 hours have expired, the function deactivates
automatically, returning to the previously set temperature. It is possible to program a timed activation of the function. After a prolonged
interruption of electrical current, it is necessary to reactivate the function.
It is possible to program the function with a delay of 1 to 12 hours.
This function (recommended in case of prolonged absences since it allows
considerable energy savings) brings the refrigerator compartment
temperature to +14°C (57.2°F). It is possible to program the duration, or it
can be manually deactivated upon returning after a period of absence.
This function remains active even if during the period of absence there is
a prolonged interruption of electrical power.
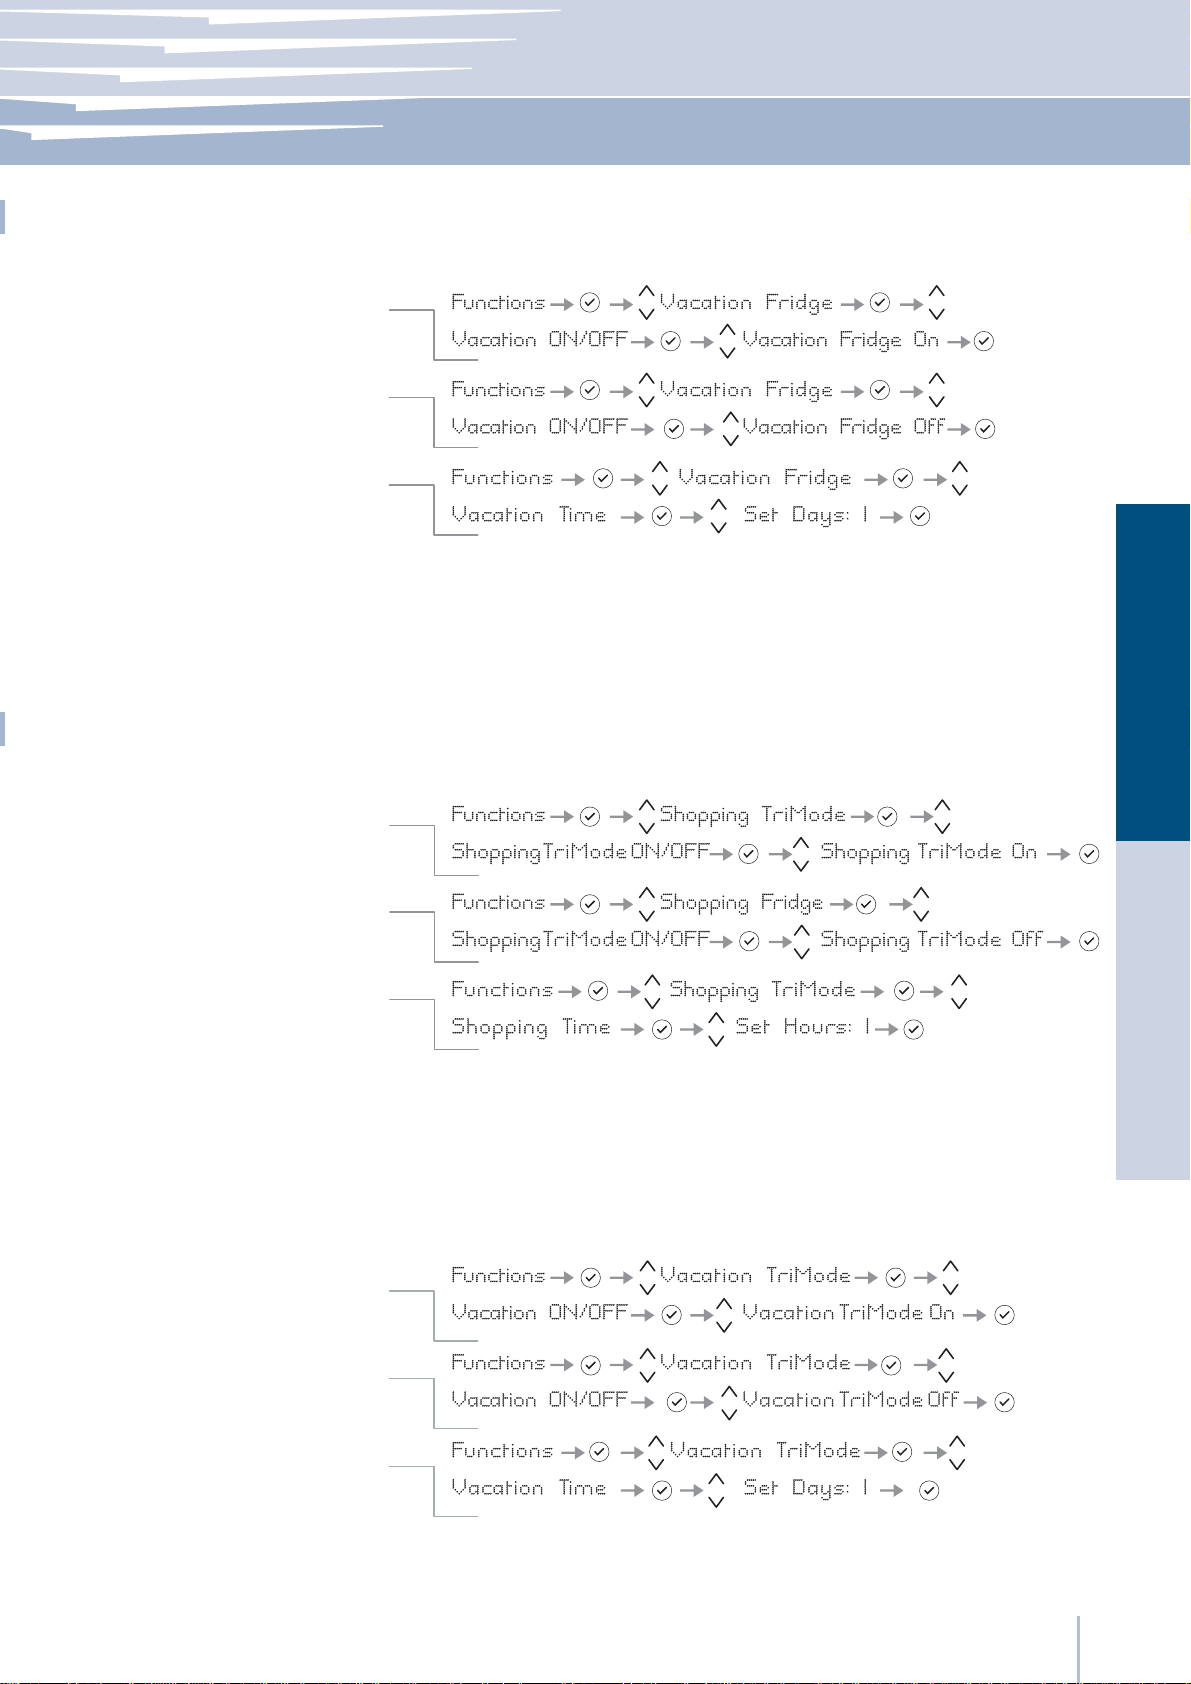
How to activate
How to deactivate upon re-entry
How to program the duration
Settings and Special Functions
It is possible to program a period from 1 to 90 days.
5
Shopping TriMode
How to activate
How to deactivate
How to program timed activation
Vacation TriMode
This function must be activated at least 24 hours before inserting room temperature items into the freezer, or several hours before placing into the freezer previously frozen items which have been subject to a slight temperature rise. This function is automatically deactivated when the programmed time period expires. It
is possible o program timed activation of the function.
If interrupted by a prolonged interruption of the electrical power, it is necessary
to reactivate the function.
It is possible to program the function with a delay of 1 to 12 hours.
This function (recommended in case of prolonged absences since it allows considerable energy savings) brings the TriMode compartment temperature to - 18°C
(46.4°F). It is possible to program the duration, or it can be manually deactivated
upon re-entry after a period of absence.
This function remains active even if during the period of absence there is a prolonged interruption of electrical power.
EnglishFrançais
How to activate
How to deactivate upon re-entry
How to program the duration
It is possible to program a period from 1 to 90 days.
www.fhiaba.com ∙ www.thevettagroup.com
13
Settings and Special Functions
5
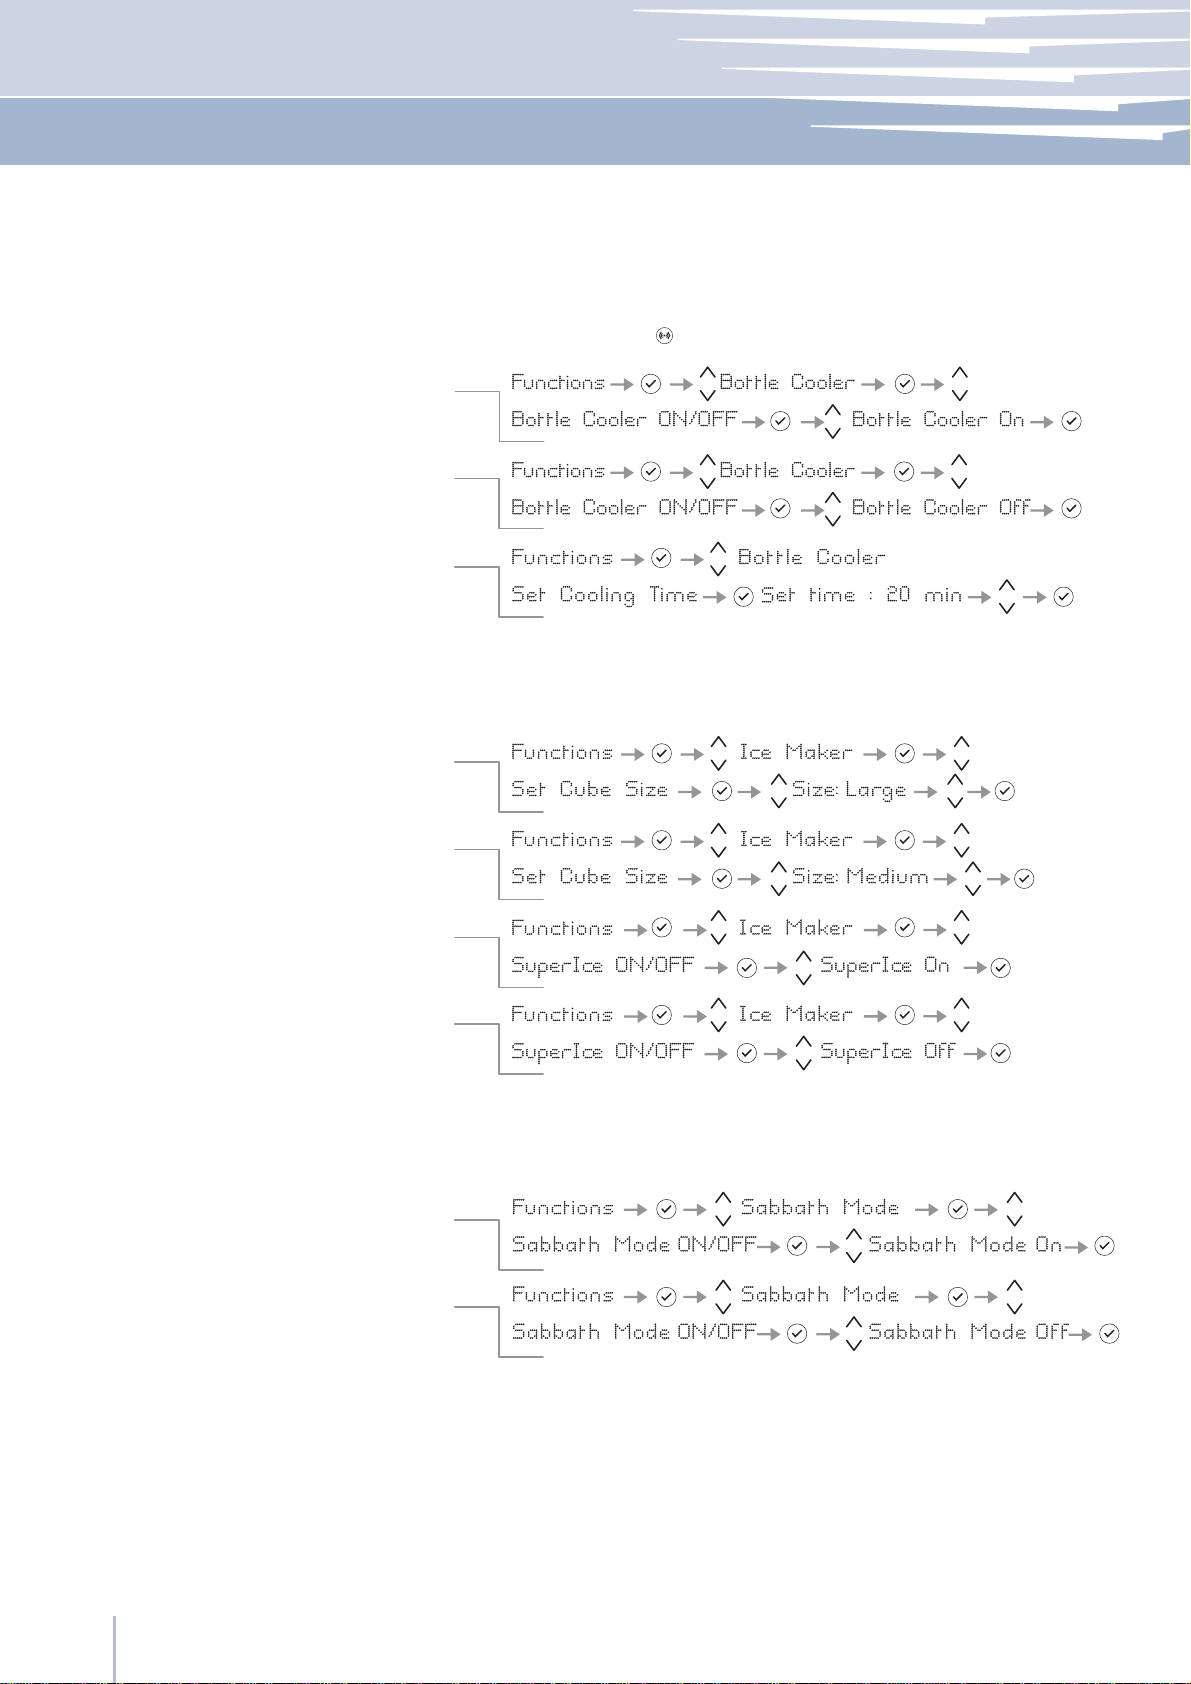
Bottle Cooler
How to activate
How to deactivate
How to program the duration
Ice Maker
How to activate the cube size function
This function can be activated when it is necessary to cool off beverages
quickly, by placing them inside the freezer compartment.
It is possible to select a duration of 1 to 45 minutes. A sound signal will indicated when the optimal temperature has been reached. After removing
the beverages, deactivate the sound signal by pressing
the Alarm button
The IceMaker function permits selecting the size of the ice cubes, by
choosing between Large (base setting) or Medium, and activation of
the SuperIce function, which increases the quantity of produced ice.
The SuperIce function deactivates automatically after 24 hours.
.
How to deactivate
How to activate the SuperIce function
How to deactivate
Sabbath Mode (Optional)
How to activate
How to deactivate
The function makes it possible to comply to certain religious observances
requiring that the operation of the appliance is not affected by the opening or closing of the doors (the thermostatic control, the inner lighting and
the ice maker are deactivated).
www.fhiaba.com ∙ www.thevettagroup.com
14
Settings and Special Functions
5
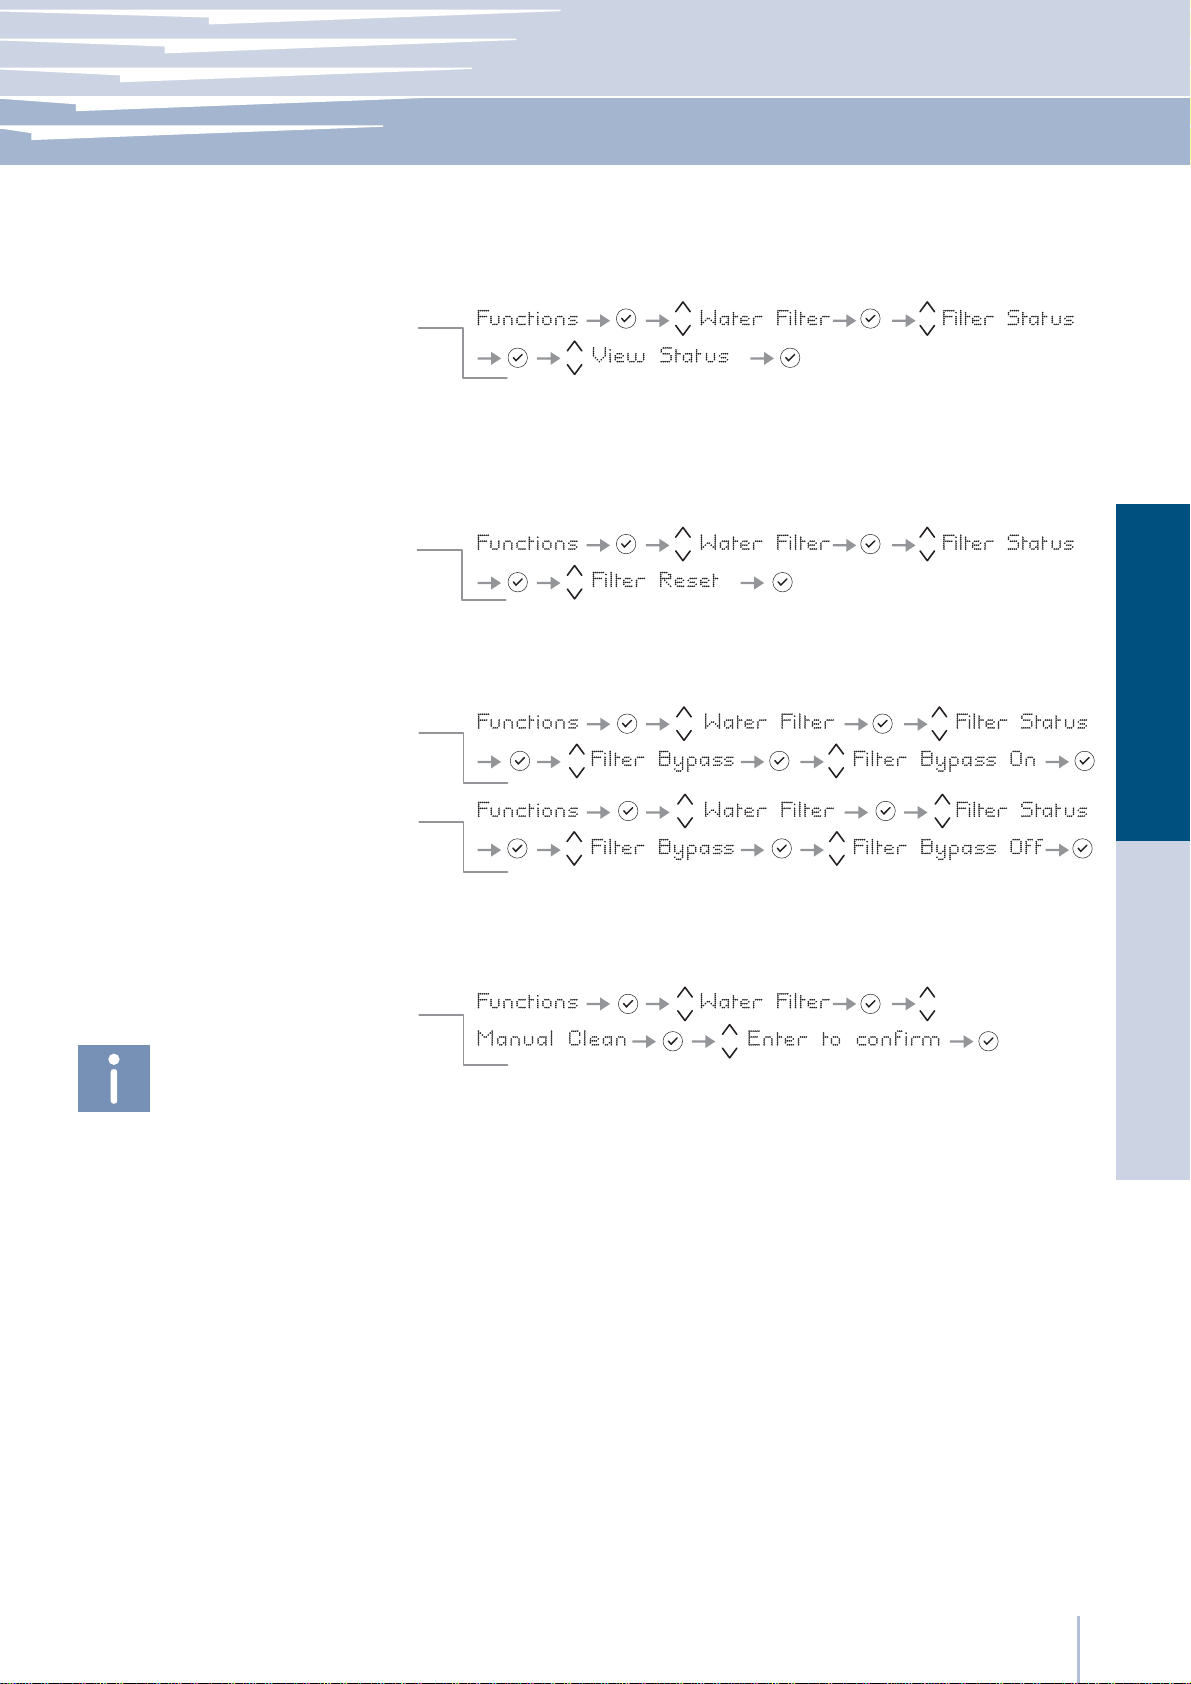
Water Filter
How to check the status of the filter
Reset Filter
How to set the filtered water meter to zero
Bypass Filter
How to activate filter Bypass
The View Status function permits visualizing the time left before the filter needs
to be replaced.
The Reset Filter function sets to zero the time left before the filter needs to be
replaced. It is necessary to set the meter to zero each time the cartridge is replaced.
This function is to be activated when it is not necessary to filter the water,
because excellent quality water is already available from the home water
system.
EnglishFrançais
Manual Clean, Water Filter
How to manually clean the filter
Correctly position the ice tray or another suitable
container under the IceMaker to collect water,
then close the drawer. At the end of the operation,
wash the tray.
If ice production has been disabled or unused for a long period it is recommended to perform a Manual Clean function to flush out water which has
sat in the system during this period. Repeat the operation until the water
is clean.
www.fhiaba.com ∙ www.thevettagroup.com
15
Settings and Special Functions
5
5.3
Basic settings of the Menu
TriMode Options
How to set the Fridge function
How to set the Crisper-Fresco function
How to revert to the Freezer function
Default Setting
How to reset default settings
Select the Menu button
to select .
The freezer compartment can, if required, be converted to refrigeration
or Crisper-Fresco operating mode.
This offers the possibility to reset default factory settings and cancels
any previous changes.
and used the Up/Down button
ATTENTION: If the default settings are restored, the
default mode of the TriMode compartment is freezer
mode. If it was previously being used in refrigerator
or Fresco mode be sure to set it back to your desired
setting.
Date
Set Date
How to set the date
Show Date
How to activate the date
How to deactivate the date
Time
Set Time
The display will show the date in the format dd:mm:yy (day:month:year),
the day will blink. Use the Up/Down buttons
firm with Enter to go on to the next setting; once the year is confirmed
the date will be set.
Using this function it is possible to deactivate/activate the date being
shown on the display.
The display shows the hours and minutes in the format hh:mm and with
hh: blinking. Use the Up/Down buttons to modify the setting and then
confirm by pressing Enter to go on to the next setting.
Once the minutes are confirmed, the time will be set.
to modify the setting, con-
www.fhiaba.com ∙ www.thevettagroup.com
16
How to set the time
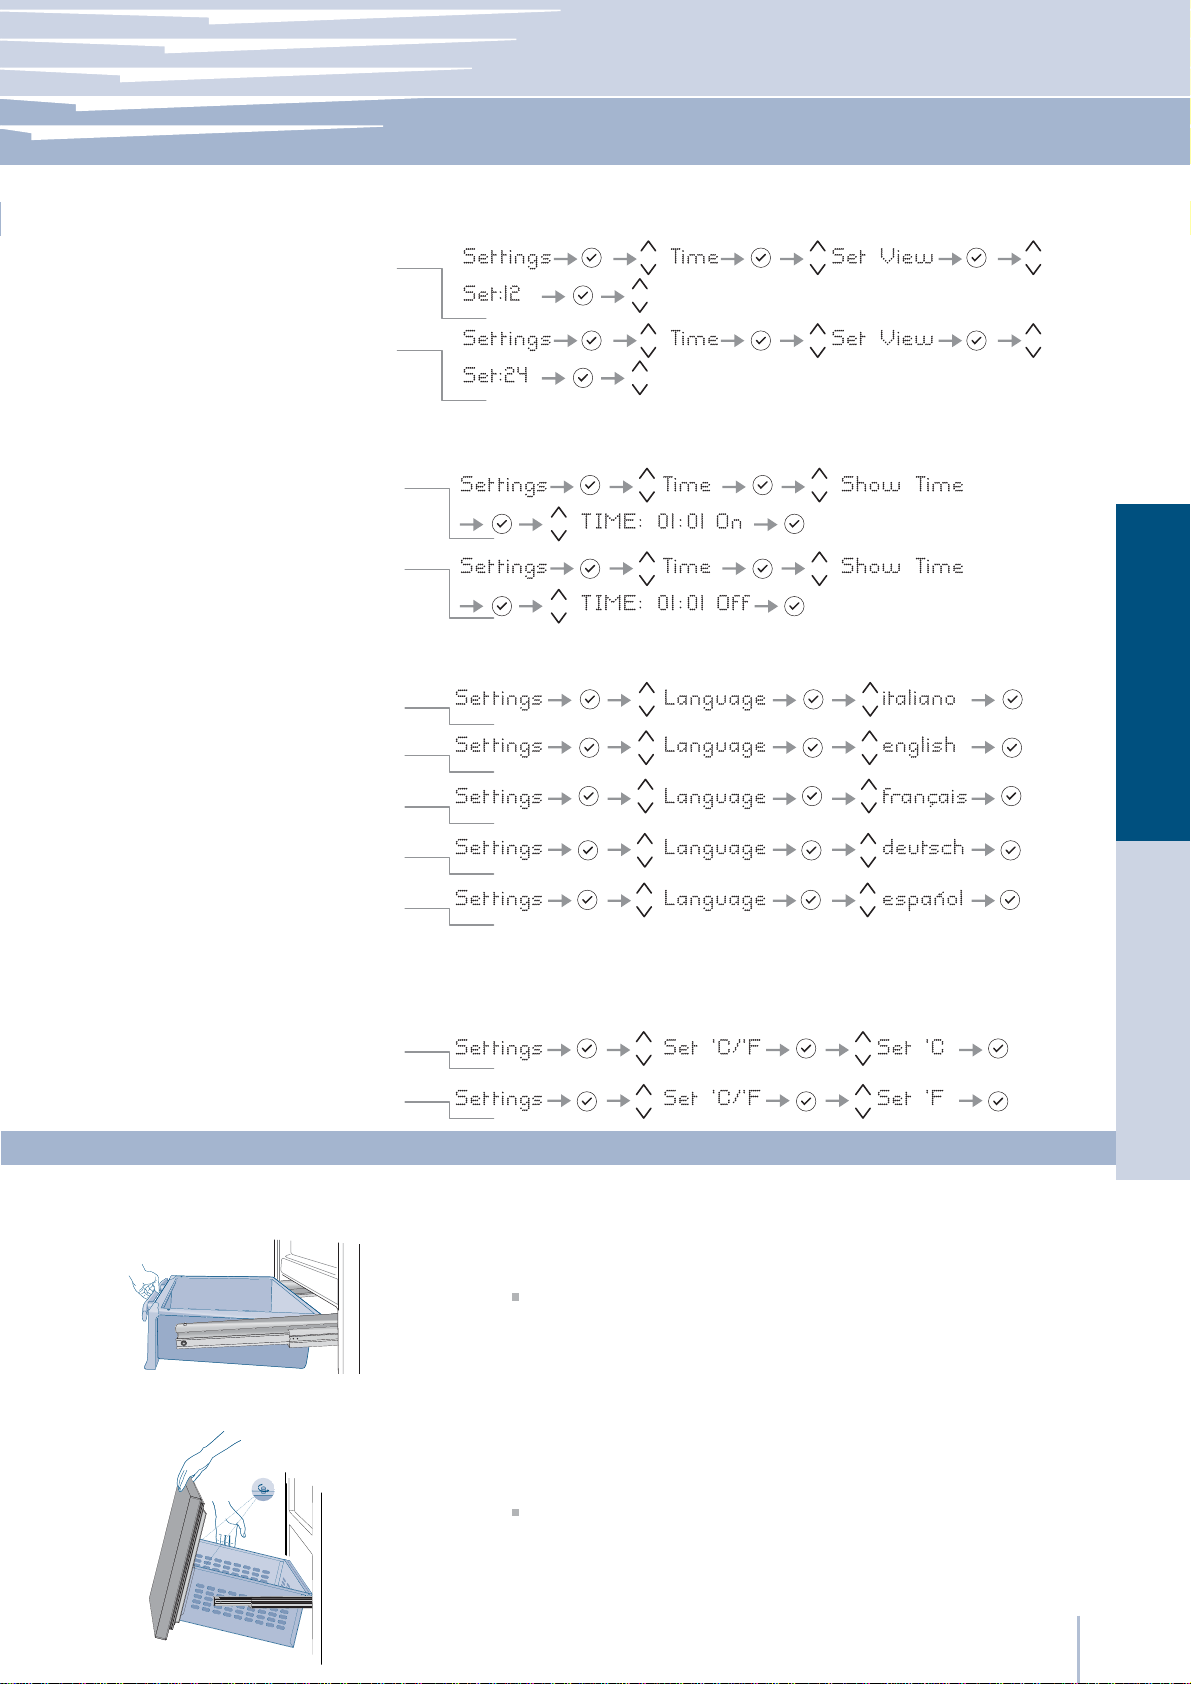
How to set the display to 12 h
How to set the display to 24 h
Internal Layout
This function selects the display at 12 or 24 h.Set 12/24
5-6
Show Time
How to activate the time display
How to deactivate
Language
Italian
English
French
German
Spanish
Set °C/°F
How to set the temperature in Centigrade
Through this function it is possible to activate/deactivate the constant
display of the time.
The function allows selection of the language for the display messages.
EnglishFrançais
This function permits showing the temperature in Centigrade or Fahrenheit degrees. Normally, the appliance is set for display in centigrade degrees.
How to set the temperature in Fahrenheit
Crisper-Fresco Drawer
TriMode Drawer
Internal Layout (positioning, adjustment, removal)
Fixed to the slide guides with two thumbscrews.
to remove the drawer, unscrew the thumbscrews and remove
the drawer.
The upper TriMode can be removed using the same method used
for the Fresco drawer
to remove the inner TriMode drawer unscrew the thumbscrews.
When replacing the drawers, make certain the back of the drawers
engage under the clips on the slide guides.
www.fhiaba.com ∙ www.thevettagroup.com
6.1
17
Internal Layout
6
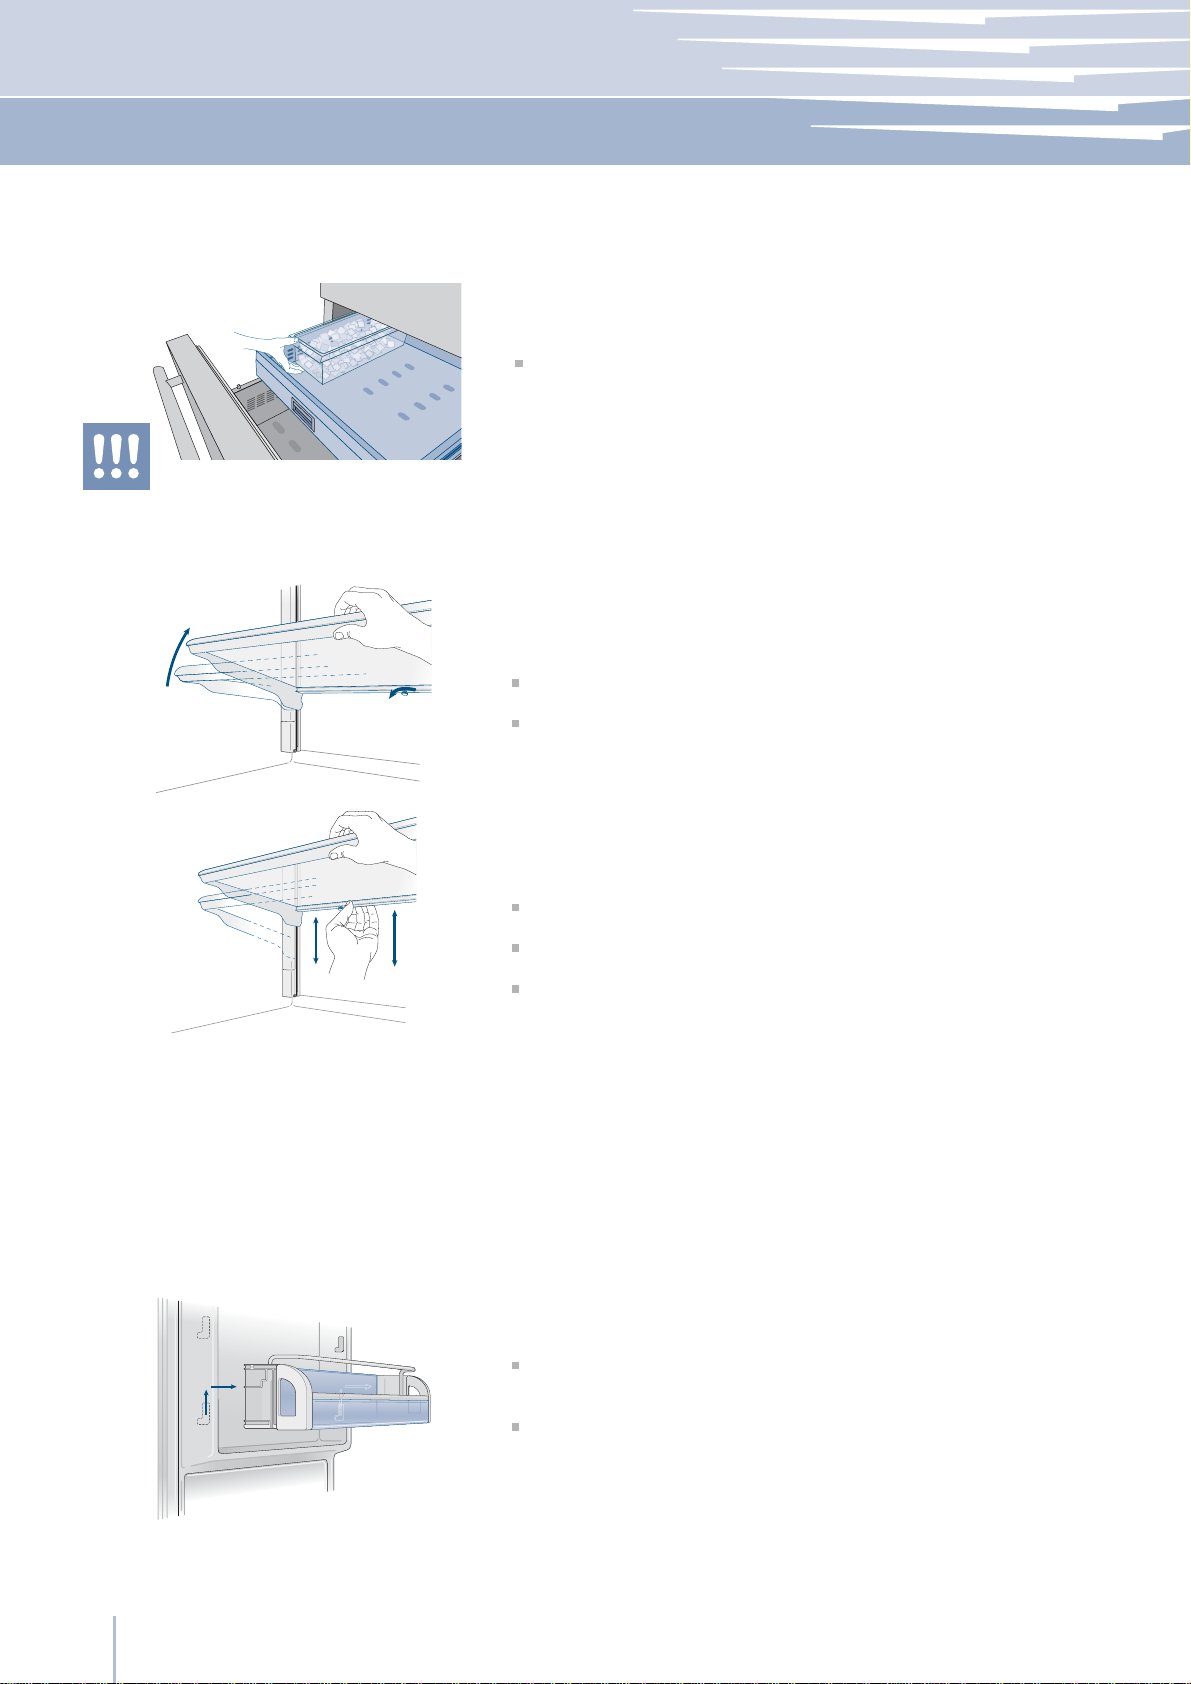
Ice Tray
Do not place hands or fingers near the Icemaker
when functioning
Shelves
Located in the upper drawer of the freezer compartment
after removal, make sure to reposition it correctly - small protrusions
from the bottom of the ice bin should align with holes in the upper
freezer drawer.
It is recommended that the shelves be emptied prior to adjusting the
position. The shelves are sliding and can be easily re-positioned by the
user as follows:
release the locking knob by turning it counter-clockwise
support the back of the shelf and tilt up at the front
lift or lower the shelf to the desired position
re-tighten the locking knob
to remove a shelf it is necessary to slide it up to the top
Door Shelves
2
1
The door shelves can be easily removed for cleaning
Hold the door shelf at the sides and push it upwards to release it from
its seat, then pull it outwards.
Reverse the procedure to reinstall.
www.fhiaba.com ∙ www.thevettagroup.com
18

Activation and use of the Ice Maker
7
If the ice is not used frequently is advisable to
empty the ice bin once every 8-10 days.
It is normal that some ice cubes stick to one
another. If the ice is not frequently used, the
older cubes can become opaque, and will
have a strange flavor and become smaller.
The Icemaker automatically deactivates if the
Vacation function is activated.
When the Icemaker is started for the first time,
it is recommended to dispose of the first full
bin of ice.
If the equipment has been switched off for a
month or more, it is recommended to perform
a water cleaning cycle. (See section 5: Settings and Special Functions).
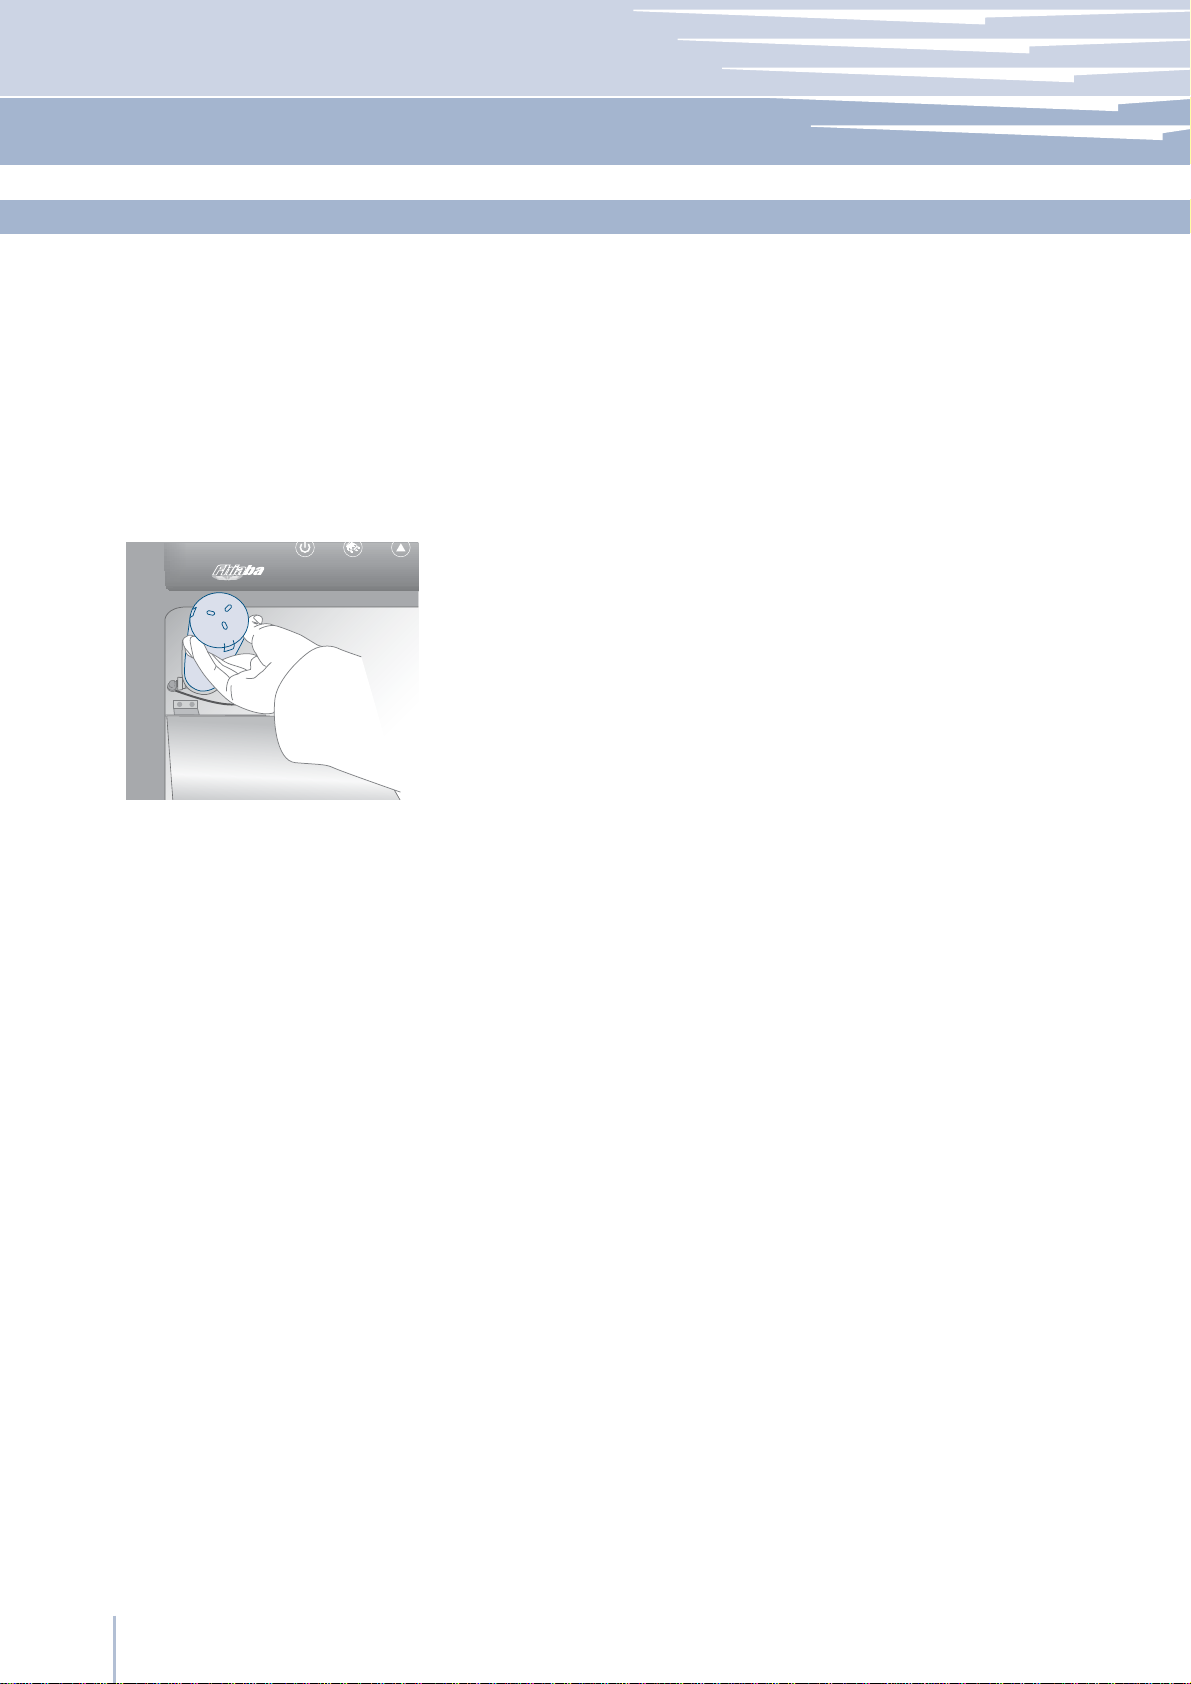
Activation and use of the Ice Maker
To activate the Ice Maker after installation of the appliance, press the
Icemaker button .
Please note that 12 to 24 hours are necessary before ice production
may begin. The production is of 10 cubes per cycle in approximately
10 cycles in 24 hours.
The yield depends on the temperature set in the freezer, the room
temperature and the frequency of door opening.
If the appliance is operating without being connected to the water
system, make sure that the Icemaker is deactivated by pressing the
button .
The Ice Maker produces ice until the ice tray is full and will automatically stop once the maximum level is reached.
With the SuperIce function, it is possible to increase the quantity of ice
produced a 24 hours, while the Set Cube Size function permits selection of the size of the produced ice cubes.
7.1
EnglishFrançais
The ice maker will only produce ice with the
TriMode compartment set to Freezer Mode.
The ice maker will continue to operate even
when the ice bin is not in position.
Do the ice cubes have an unusual odor?
Operating noises
Quite normal noises
At factory default settings Ice Maker can produce approx. 100 ice
cubes within 24 hours.
Ice is a porous material which can absorb odors from the environment.
Ice cubes which have been in the ice cube container for a long time
may absorb odors, stick together and slowly become smaller.
We recommend that old ice cubes not be used.
Other means of preventing odors:
The ice cube container should be cleaned occasionally with warm
water. Make sure that you switch off the ice maker before clearing the
container. Rinse out and wipe dry.
Check the contents of the freezer for spoiled or out-of-date food.
All odorous foods should be wrapped thoroughly or stored in airtight
containers to prevent the build-up of odors.
The water filter may have to be replaced in some models.
In some cases the quality of the water connection in the house
should be checked.
Grumbling: refrigerating unit is running. Fan in the recirculating air
system is running.
Bubbling, humming or gurgling noises: refrigerant is flowing through
the tubes.
Clicking: motor is switching on or off. Solenoid valve on the water
connection is opening/closing.
Rumbling: ice cubes are falling into the ice cube container.
Note: the appliance is powered by two independent compressors.
It is therefore normal to always have one of two compressors in operation.
Do not place any bottles or food for rapid cooling in the ice cube container. The ice maker may
become blocked and be damaged.
www.fhiaba.com ∙ www.thevettagroup.com
19
Activation and use of the Ice Maker
7
7.2
Water Filter
Filter Replacement
The Water Filter makes available high-quality water for the production
of ice cubes. It provides up to 3000 liters of water for a maximum time
of 12 months.
When the filter is nearly expired the message “Replace Filter Cartridge”
will appear on the display.
The filter is located inside the refrigerator compartment, above the top
glass panel. Prior to changing the filter, switch off the Ice Maker by pressing the IceMaker button. Then enter the Fhiaba Access Menu and set
“Manual Clean” function. At the end of the cleaning cycle remove the
water from the ice tray and wipe it dry.
Open the top glass panel and carefully rotate the filter cartridge for a
quarter rotation in a counter clockwise direction until it detaches from its
housing. It is normal for a small quantity of water to come out. Remove
the cap of the new cartridge and insert it into the housing by gently rotating it for a quarter rotation in a clockwise direction until it locks into
place.
www.fhiaba.com ∙ www.thevettagroup.com
20
 Loading...