

Page 1

MediaFACE® 4.01 User’s Manual
1
Page 2

MediaFACE® 4.01 User’s Manual
Fellowes, Inc.
1789 Norwood Avenue
Itasca, IL 6014 3
(630) 893-1600
Neato, Inc.
250 Dodge Avenue
East Haven, CT 06 512
(800) 984-9800
Copyright
2003 Fellowes, Inc. All rights reserved. No part of this publication may be reproduced,
stored in a retrieval system, or transmitted in any form or by any means electronic,
mechanical,
photocopying, recording or otherwise, without the prior written consent of Fellowes 1789
Norwood Avenue, Itasca, IL 60143.
Trademarks
Fellowes/NEATO, the Fellowes logo, the NEATO logo, MediaFACE® 4.01 and the
MediaFACE® 4.01 logo are trademarks of Fellowes, which may be registered in some
jurisdictions. Windows and Windows 98 are registered trademarks and Windows
Me/NT/2000/XP is a trademark of Microsoft Corporation in the U.S. and in other
countries used under license.
*All other trademarks are owned by their respective owners.
Changes
The material in this document is for information only and is subject to change without
notice. While reasonable efforts have been made in the preparation of this document to
assure its accuracy, Fellowes assumes no liability resulting from errors or omissions in
this document or from the use of the information contained herein.
Fellowes reserves the right to make changes in the product design without reservation
and without notification to its users.
2
Page 3

Welcome/Introduction
Thank you for choosing MediaFACE® 4.01 as your labeling design software. With its advanced
capabilities, MediaFACE® 4.01 is more than just a software package, it’s a complete labeling
design system.
Designed with both the expert and novice in mind, MediaFACE® 4.01 is one of the easiest and
most feature-rich programs available for Windows with the following features and capabilities:
Create labels, inserts and sleeves for CD/DVD, Video, MiniCD, MiniDisc and More
Design Wizard Mode – Design and Print a Label in under 30 seconds!
500+ High Resolution Background Images in a variety of categories
Unique Digital Fingerprinting feature which automatically downloads and transfers track
information from MP3 and other music files - no more typing in track names!
Direct import of images from digital camera, scanner, webcam
Custom High-End Graphics Tools
Pre-designed templates for spec ial occas ions
Design templates for Mac for use with popular 3rd party graphics programs
The approach of this manual is to guide you through the fundamentals of using the MediaFACE®
4.01 labeling system to create personalized CD, DVD and additional media labels and inserts.
While the manual uses a CD label as an example, the same design concepts, such as adding
images and text, can be applied to any template used.
3
Page 4

Installation...........................................................................................................................6
System Requirements:.....................................................................................................6
Installing Application......................................................................................................6
Main Setup ..................................................................................................................7
Welcome......................................................................................................................7
License Agreement......................................................................................................8
User Information.........................................................................................................9
Destination Location...................................................................................................9
Setup Type.................................................................................................................10
Options......................................................................................................................11
Select Program Folder...............................................................................................11
Registration ...............................................................................................................12
MediaFACE® 4.01 Installation Complete................................................................12
Image Library Installation.........................................................................................13
Image Library Installation Complete........................................................................13
Uninstalling the Program ..........................................................................................14
Chapter2: Design Wizard..................................................................................................16
Starting the Wizard........................................................................................................16
Select a Project Template..........................................................................................16
The Work Area..........................................................................................................17
Select a Background..................................................................................................18
Add Picture................................................................................................................20
Working with Images................................................................................................21
Select Text Layout ....................................................................................................23
Working with Text....................................................................................................23
Printing......................................................................................................................27
Calibration Wizard....................................................................................................29
Chapter 3: Advanced Mode...............................................................................................34
Launching the Advanced Interface ...............................................................................34
Chapter 4: The Work Area................................................................................................36
Menus............................................................................................................................36
Toolbars.........................................................................................................................39
Customizing Menus and Toolbars.................................................................................41
Palettes ..........................................................................................................................42
Workspace Navigator....................................................................................................44
Window Views..............................................................................................................45
Chapter 5: Creating a Label ..............................................................................................47
Selecting a Project Template.........................................................................................48
New Project Wizard......................................................................................................49
Saving Your Label ........................................................................................................65
Advanced Mode ............................................................................................................ 66
Workspace Navigator....................................................................................................67
Inserting Images............................................................................................................72
Working with Images....................................................................................................77
4
Page 5

Inserting Text ................................................................................................................82
Curved Text...................................................................................................................84
Working with Text........................................................................................................87
Shapes............................................................................................................................89
Alignment......................................................................................................................99
Locking/Unlocking Objects ........................................................................................100
Grid and Guideline Setup............................................................................................101
Special Features...........................................................................................................102
Chapter 6: Tools.............................................................................................................. 114
List Manager ...............................................................................................................114
Play Lists.................................................................................................................114
File Lists..................................................................................................................125
Data Lists.................................................................................................................131
Download....................................................................................................................139
Options........................................................................................................................145
Burners/Players Integration.........................................................................................148
Label Mapping ............................................................................................................149
Export..........................................................................................................................152
Chapter 7: Saving Projects..............................................................................................154
Save Options ...............................................................................................................154
File>Save.................................................................................................................154
File>Save As...........................................................................................................156
Send By Email.............................................................................................................157
Chapter 8: Printing..........................................................................................................158
Printing Your Label.....................................................................................................158
Calibration Wizard..................................................................................................159
Paper Options..........................................................................................................163
Chapter 9: Applying the Label........................................................................................164
Peeling the Label.........................................................................................................164
Using the Fellowes®/NEATO® 2000 CD Label applicator.........................................164
Tips on Handling Fellowes®/NEATO® Paper Stock ..................................................164
Chapter 10: Fellowes/NEATO Media Products..............................................................165
Label Templates:.........................................................................................................165
Project Templates:.......................................................................................................166
Chapter 11 Troubleshooting............................................................................................169
Before calling NEATO Technical Support.................................................................169
Reinstall MediaFACE® 4.01 Software...........................................................169
Check for a Software Upgrade/FAQ...............................................................169
Check for Printer and Video Driver Upgrades................................................169
Check for Software Conflicts..........................................................................169
Optimize Your Hard Disk...............................................................................170
Checklist for Calling Technical Support.....................................................................170
5
Page 6

Installation
This chapter will give you the minimum system requirements needed to run
MediaFACE® 4.01 and will guide you through the installation process.
System Requirements:
Before installing MediaFACE® 4.01, make sure you have the following minimum
system requirements:
PC Compatible 200MHz or faster processor (600MHz recommended)
Windows XP Professional, XP Home, 2000 (SP2 and higher), 98, 98SE,
Millenium
128MB RAM (256MB RAM recommended)
240MB free disk space
CD-ROM Drive
SVGA Display - 16-bit color or higher recommended with a 800x600 screen
resolution
Internet connection for Digital Fingerprinting (optional)
Scanner, digital camera or webcam (optional)
Installing Application
During installation, it is recommended that you close all open applications and turn off
any virus checking software that may be running in the background. After the installation
is complete, virus protection can be turned back on to restore your computer to its normal
operation.
Insert the MediaFACE® 4.01 Design Software and Image Library CD into the drive.
MediaFACE® 4.01 installation uses an “auto-run” installation program for Windows
operating systems that should start shortly after inserting the CD. This may take several
minutes.
If the InstallShield Wizard dialog box does not appear on your screen, click the Start
menu and select the Run command. Type the following line to manually begin
installation of MediaFACE® 4.01:
“D:\setup.exe” (where ‘D’ is the drive letter of your CD drive).
Click OK to continue.
6
Page 7

Main Setup
The first screen you will see is the MediaFACE® 4.01 main setup screen.
Figure 1.1 – The main MediaFACE® 4.01 Setup screen
Step 1: Select a setup language. English is pre-selected as the default. To choose
another language, click once on the name and proceed to the next step.
Step 2:
(a)
Select install options. First, you must choose to install either the Full
or Trial version. The Full version requires a serial number to be
entered and gives you the full capability of the program. The Trial
version is a try-and-buy version of MediaFACE® 4.01 and will expire
after 30 days. The Trial version has all the features of the full version,
with the exception that fingerprinting of audio CDs is limited to 100
successful identifications of songs, and the image library of 500
images in the full version is restricted to 25 images.
(b) Select Image Libraries. If installing the Full version, click once in the
All Libraries checkbox to install all available image libraries.
Step 3: Click the Install button to continue.
Welcome
You should now see the InstallShield Wizard Preparing to Install screen. Please be
patient as this may take several minutes to load. Once it has finished loading, you will
be presented with the MediaFACE® 4.01 Welcome Screen.
7
Page 8

Figure 1.2 – Welcome Screen for MediaFACE® 4.01
Click Next to continue with the installation.
License Agre ement
The next screen you will see will be the License Agreement. Please read the agreement
carefully. To continue with the installation, you must accept the terms of the license
agreement. If you choose No, the installation will stop and setup will close.
Click Yes to proceed with the installation.
8
Figure 1.3 – License Agreement
Page 9

User Informati on
Next, you will see the User Information screen. Please fill in the appropriate information.
If you are installing the Full version, you will be required to enter the serial number
found on the back of the CD sleeve or on the CD booklet. Please be sure to type the
number exactly as it appears.
Figure 1.4 – User Information. Full version requires serial number for activation.
Please Note: If at any time you need to reinstall the program, you will have to enter this
number again so
please keep it stored in a safe place.
Click Next to continue with the installation.
Destination Lo cati on
The next screen is the Choose Destination Location. This is where the program will be
installed on your computer. It is strongly recommended that you choose the default
location, "C:\Program Files\Fellowes\MediaFACE® 4.01\”. You can also change the
name of the program folder, but we recommend leaving it set to the default of
MediaFACE® 4.01.
9
Page 10

Figure 1.5 – Choose Destination Location
Click Next to continue with the installation.
Setup Type
The Setup Type screen allows you to select the type of installation to perform. The
options include installing the entire application or only specific features. It is strongly
recommended that you choose the Full option, which is selected by default.
Click Next to continue with the installation.
10
Figure 1.6 – Setup Type
Page 11

Options
The Options dialog box lets you select which paper sizes to install and which one to use
as the default size. MediaFACE® 4.01 supports both US and A4 paper types. The US
paper size is 8.5x11”. A4 is the European paper standard, which is 210mm x 297mm
(narrower and longer than US paper). If you’re using an A4 template, you must use A4
paper stock. The paper size you select here is used as the default size when you print your
labels.
Figure 1.7 – Options screen for selecting paper sizes.
Select the size you want to use and click Next to continue.
Select Program Folder
The next screen is the Select Program Folder. This allows you to add the MediaFACE®
4.01 folder to your Start menu. The default location in the Start menu is:
Start>Programs>MediaFACE® 4.01.
The MediaFACE 4.01 program folder will contain links for the following:
Image Library folder
MediaFACE 4.01 Calibration Wizard
MediaFACE 4.01 Design Wizard
MediaFACE 4.01 Help
MediaFACE 4.01
11
Page 12

Figure 1.8 – Select Program Folder to add to Start menu.
As the installation begins, you will see the Setup Status screen. Please be patient as it
may take several minutes for the installation to complete.
Registration
Near the end of the installation, a window will pop-up asking that you register the
software. We strongly encourage you to register the software at this time. This will allow
us to keep you informed of any updates to the software, new paper templates, or special
offers.
MediaFACE® 4.01 Installation Complete
The installation of MediaFACE® 4.01 has now been successfully completed. Click
Finish to close the Installshield Wizard dialog box. If you are installing the Full version,
proceed to the next step. The Image Library installation will automatically begin at this
point.
12
Figure 1.9 - Registration
Page 13
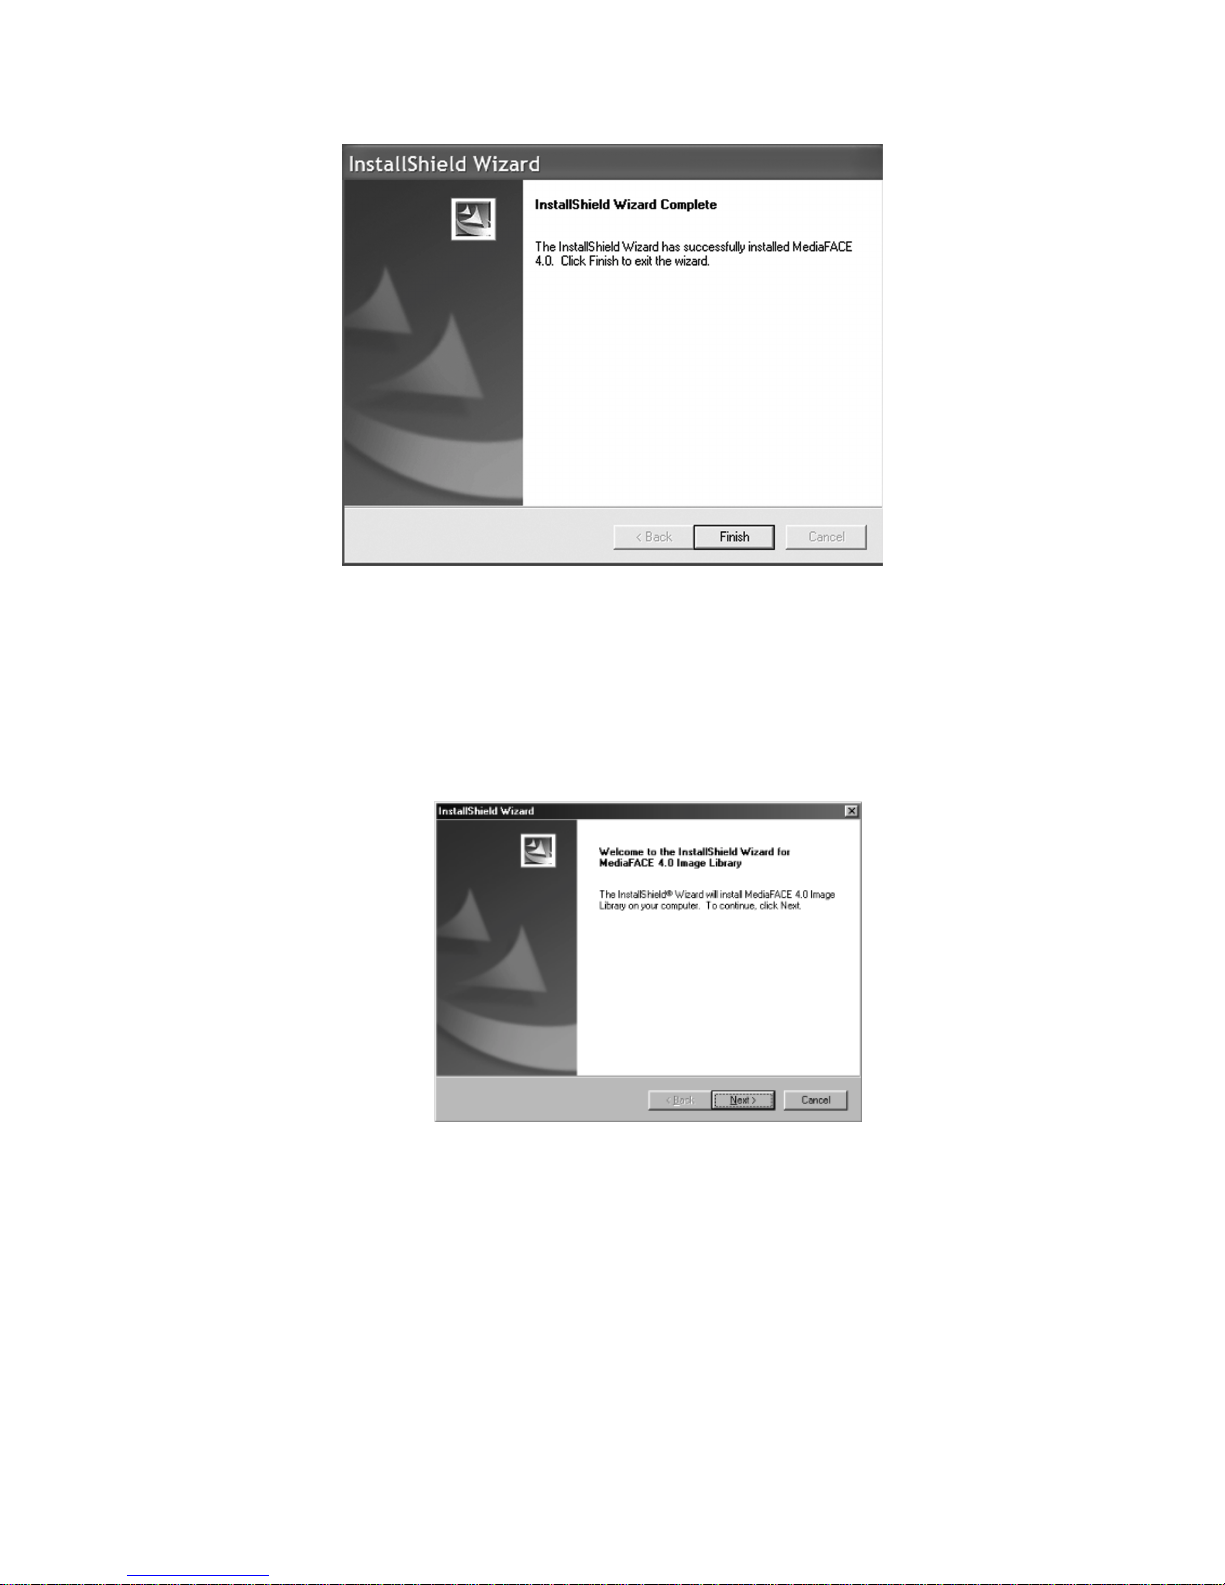
Figure 1.10 – Installation Complete screen
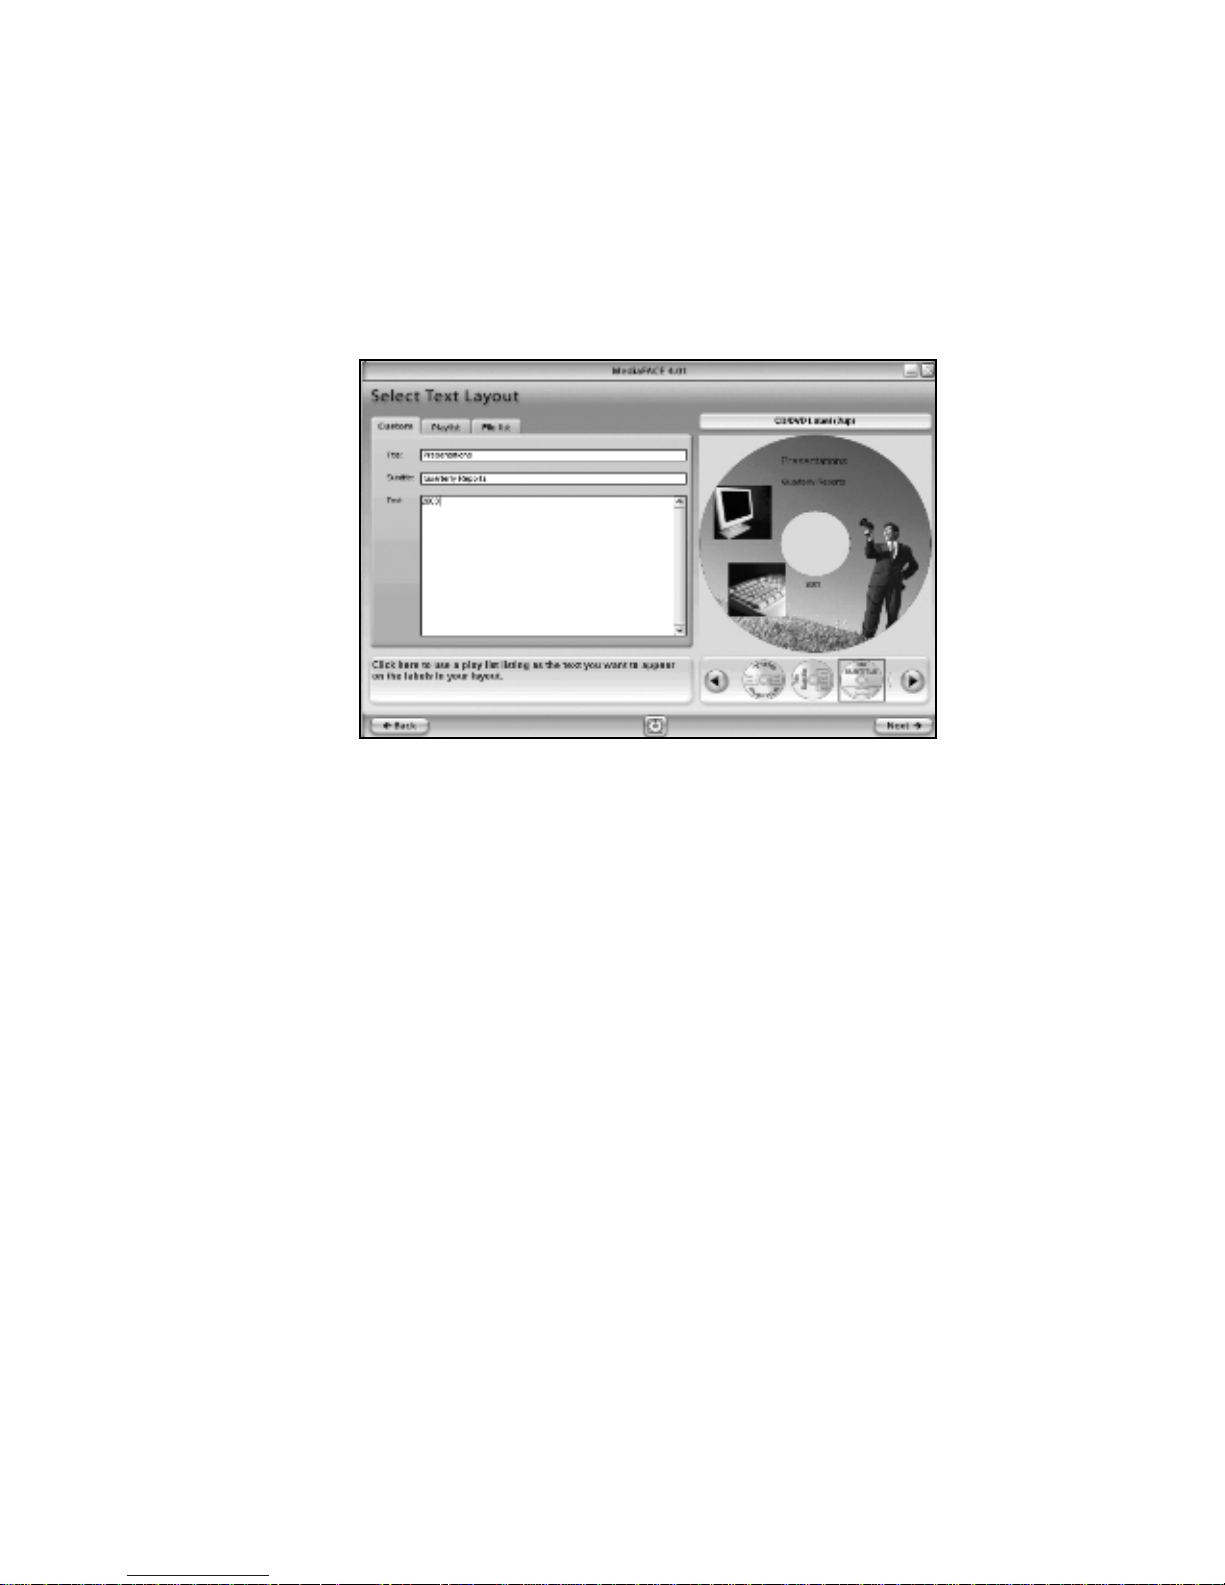
Image Library Installation
If you selected the Full version, you will now be prompted to install the MediaFACE®
4.01 Image Library. Click Next to begin the installation. Please be patient as this may
take several minutes depending upon how many libraries are being installed.
Figure 1.11 – Image Library Installation
Image Library Installation Complete
When the Image Library installation has been successfully completed, a dialog box will
appear. Click Finish to close the dialog box.
13
Page 14

Figure 1.12 – Image Library installation completed
When the dialog box closes, you will notice that a shortcut for the Design Wizard has
been added to your desktop. To create a shortcut for MediaFACE® 4.01 Advanced mode,
do the following:
Right-click and select New>Shortcut
Enter path (default=Program Files>Fellowes>MediaFACE 4>mediaface.exe)
Click Next.
Select a name for the shortcut.
Click Finish.
Uninstalling t he Program
If it becomes necessary to uninstall MediaFACE® 4.01, please do the following:
First, make sure that the MediaFACE® 4.01 program is not running. Then, click
on the Start menu and select Settings>Control Panel. Double-click the
Add/Remove Programs icon.
In the list of installed software, select MediaFACE® 4.01, then click the
Add/Remove button. Please note that any installed Service Packs should NOT be
uninstalled. Uninstalling the Service Packs by themselves could lead to problems
when reinstalling the program.
You will now see the InstallShield Wizard dialog box. Please wait while the
Wizard prepares to run the MediaFACE® 4.01 Setup Maintenance program.
Select the Remove option by clicking on it once. Click the Next button to
continue. You will be prompted with a Confirm Uninstall dialog box. Click OK to
confirm the uninstall.
Next, you will see the Setup Status dialog box as the InstallShield searches for
all currently installed components and begins the uninstall process for the
MediaFACE® 4.01 program files. This may take several seconds.
14
Page 15

An Information dialog box will appear for the Image Library files that are
currently installed. Click OK to uninstall these files. This may take several
seconds.
Finally, you will see the Install Wizard Complete dialog box. At this point,
you will be prompted to restart your computer. Make sure that option is selected
and click Finish. Your computer will automatically restart.
15
Page 16

Chapter2: Design Wizard
Starting the Wizard
There are two ways to start the Design Wizard. The first is to simply double-click the
program icon on the desktop. This shortcut was created during the program installation.
Please be patient as the Wizard may take several seconds to load. Be sure not to doubleclick the icon multiple times while waiting.
The second way to start the Design Wizard is to click the Start menu and select:
Programs>MediaFACE 4.01> MediaFACE 4.01 Design Wizard
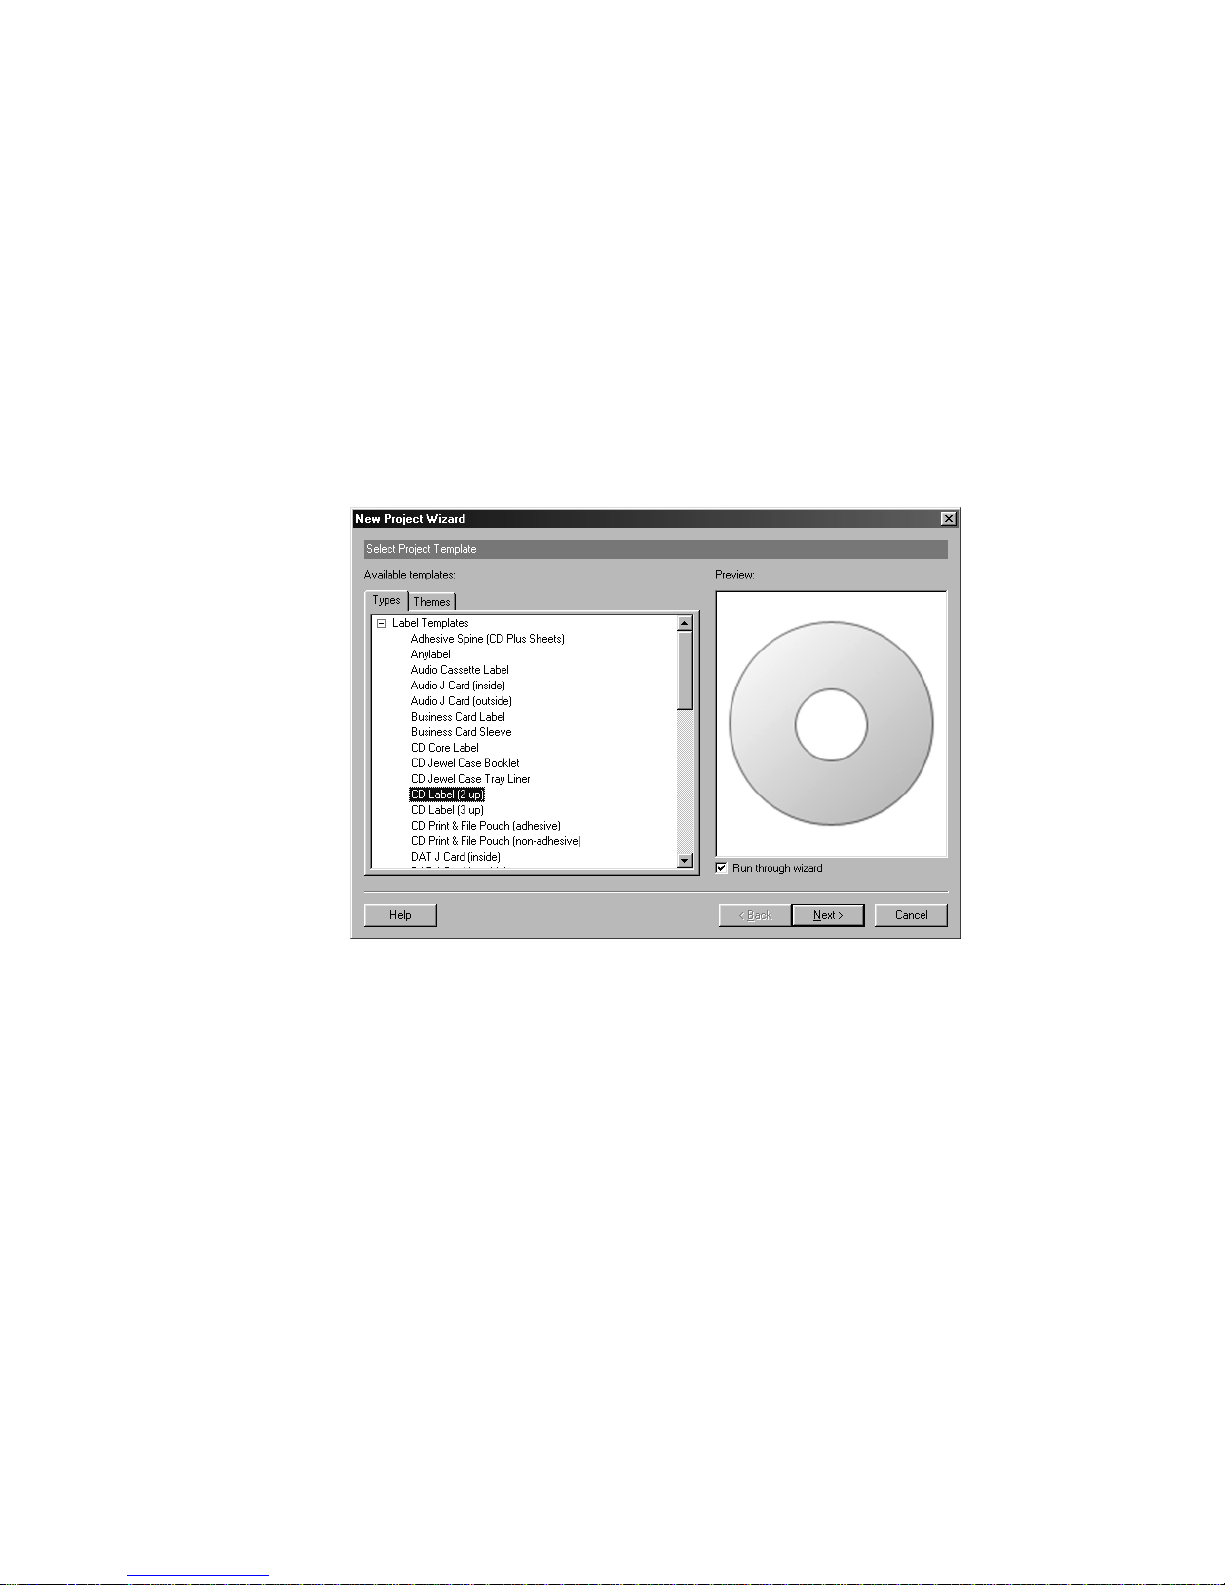
Select a Project Template
Once the Design Wizard opens, you will be asked to select a project template. There are
five main project categories to choose from. These categories are listed below:
CD/DVD Labels
CD/DVD Inserts and Sleeves
Other Inserts and Sleeves (VHS, Audio Cassette, …)
Other Labels (VHS, Audio Cassette, …)
My Projects – Projects created and saved in the wizard
Within each of these project categories, there are several different label templates to
choose from. We will be creating a standard CD label as an example. Please select the
first category by clicking once on the box containing ‘CD/DVD Labels’. Your selection
will be highlighted.
Click ‘Next’ to continue. This will bring us to the background selection screen and the
main work area in the Design Wizard.
Figure 2.1 - Select Project Template screen in Design Wizard
16
Page 17

The Work Area
The work area in the Design Wizard consists of several options that help you edit and
view the labels you create. The main components of the Design Wizard work area are
shown in the diagram below and discussed in detail.
Figure 2.2 – The main work area in the Design Wizard
Option Display Window – this is the large area on the left side of the screen. Custom
label design options, such as adding text and images, are selected or defined here. As
you navigate through each screen, you will notice that there are various option tabs
and a scroll bar for easy access to design options.
Hint Dialog Box – this is a box located directly below the Option Display Window and
it does exactly what its name implies. Its sole purpose is to provide you with hints as
to how to proceed if you get stuck. It also provides definitions of buttons and tabs that
appear on that page. The best part about it is that it’s mouse-sensitive, so all you have
to do is drag your mouse over an object to find out more about that object. Think of it
as your own personal cheat sheet. Test it out by dragging your mouse across items on
this screen – buttons, tabs, folders – and seeing what pops up in the Hints box.
Project Workspace – this is the area to the right of the Option Display Window.
Projects are designed, edited and viewed here.
Advanced Interface Button – this button is present on each page of the Design Wizard.
It allows you to jump from Wizard mode to the MediaFACE® 4.01 Advanced
Interface. The Advanced Interface is a more powerful interface that you can use to
17
Page 18

design labels. Once you choose to go to the advanced interface level, however, you
cannot reopen your project in the Design Wizard.
Navigation Buttons – each screen in the Design Wizard contains a ‘Back’ and ‘Next’
button on the lower left and right side of the screen. These buttons allow you to easily
move back and forth between each step in the label design process.
Select a Background
Now that we’ve selected our project template and have become more familiar with the
work area, we’re ready to begin designing our CD Label. You should be on the Select
Background screen and ‘CD Label (2up)’ should be selected in the Label Drop-Down
box.
On the left side of the screen you will see five folder tabs. These tabs represent five
different options for obtaining an image to use as a background on your label. Clicking
on each tab will display the individual window for that option. A brief description of each
tab option is listed below the diagram:
Figure 2.3 Select Background screen in Design Wizard
By clicking on the buttons directly under the tab name, you can change the window view
to thumbnails, small icons, list or detail view.
The five options for selecting images to use as a background are listed below:
18
Page 19

Image Library - MediaFACE® 4.01 (full version) contains over 500 high-resolution
images to choose from. There are six main categories including Business,
General, Lifestyle, Music, Special Occasion and Spiritual.
File – image files can be selected from directories on a hard drive or CD.
MediaFACE® 4.01 supports the following graphic formats:
.JPG, .BMP, .GIF, .TIF, .PCX, .CMP, .DCX, .ICO, .PCD, .CUR, .FPX, .EPS,
.PNG, .PCT, .PSD, .RAS, .TGA, .WMF and .WPG.
Scanner – images can be imported directly from a scanner. Once the image has
been acquired through your scanning software, it can then be manipulated in
MediaFACE® 4.01.
Camera – images can be downloaded directly from a digital camera.
Webcam - this option allows you to import images directly from a webcam. Action
viewed through a webcam can be paused and captured and imported onto your
label.
Click once on the Image Library tab. In the Option Display Window, you will see a list of
folders and image files. The folders are the main categories of images available in the
MediaFACE® 4.01 libraries. Take a few minutes to browse through each category.
For our CD label example, we will be selecting an image from the Business category.
Double-click the Business folder and scroll down until you find the following image:
When you have found the image, there are two ways to actually transfer the image to
your label. The first way is to just double-click the image and it will automatically appear
on the label. The second way is to highlight the image by clicking on it once, and then
click the large blue button to the left of the Label Drop-Down box. Clicking this button
once will make the image appear on the label. NOTE: You cannot edit an image that is
placed on the label as a background.
19
Page 20

Figure 2.4 Applying a background image to t he la bel
After you have inserted the image as a background for your label, click the Next button to
continue. The next step is to add images to your label.
Add Picture
The next step is to add an image to our label. The Add Picture screen is a carbon copy of
the Select Background screen. You have the same five options for selecting images and
the same categories of image libraries available here as well. One of the main differences
between the two screens is that you can add multiple images here. So, for example, you
could add both your company logo and trademark symbol to your label. You can also edit
images that are inserted in the “Add Picture” screen, which you cannot do in the “Select
Background” screen.
To insert an image f rom the Image Libra ry:
Select the Image Library tab.
Browse the image categories to find an image.
Double-click the thumbnail image to add it to your label.
Repeat these steps to add additional images.
For our CD label example, we will be inserting two graphics from the Business category.
Double-click the Business folder and scroll down until you find the following images:
Please note that when adding more than one image, the thumbnails will overlap when
initially placed on the label. Please refer to the next section, Working with Images, to
move the images on the label.
20
Page 21

Working with Images
Several actions, such as moving, resizing, scaling, rotating and deleting, can be
performed on images once they’ve been added to your label. Details on each action are
discussed below.
To move an image:
Left-click once to select the image. The mouse pointer changes to the
Move/Edit tool as shown here:
Left-click once and hold down the mouse button while dragging the mouse.
Release the mouse button after you’ve moved the image to its new location on
the label.
To resize an image:
Left-click once to select the image. The mouse pointer changes to the
Move/Edit tool and sizing handles will be displayed around the border of the
image.
Next, move your mouse to one of the sizing handles. The mouse pointer
changes to a smaller Move/Edit tool as shown here:
Left-click and hold the mouse button down while dragging the handle in any
direction. Selecting different handles will have different stretching or
shrinking effects on the image. As you resize the image, the point position (X
and Y values) will be displayed as shown here:
To scale an image, hold down the Shift key while dragging the handle.
Scaling an image will retain its original proportions. As you scale the image,
the percentage value of its original size will be displayed as shown here:
To rotate an image:
Double-click on the image. The mouse pointer changes to a small cross-hair.
Hold down the left mouse button while moving the mouse in a circular
motion. As you rotate the image, the angle value will be displayed as shown
here:
21
Page 22

To delete an image:
Left-click once to select the image.
Click on the Delete button (red button with a large ‘X’), or hit the Delete key
on your keyboard.
Multiple selection of image fields is another option offered in the Design Wizard. By
selecting multiple image fields, all of the actions listed in the Working with Images
section can be applied to a group of images at the same time. This is especially useful
when you want to align several images to a specific location on the label.
To edit multiple images:
Left-click on one of the images.
Holding down the Ctrl key, left-click another image. A thin light-blue outline
will appear around both of the images. The two images are now grouped
together and will be treated as one image. Any action that is applied - moving,
resizing, rotating or deleting - will be applied to both images simultaneously.
To ungroup the images, left-click on an open area of the label.
For our CD label example shown below, two images were inserted, moved and resized to
a smaller scale:
Figure 2.5 Add Picture screen in Design Wizard
After you have inserted the images onto your label and moved them to a new position,
click the Next button to continue. The next step is to add text to your label.
22
Page 23

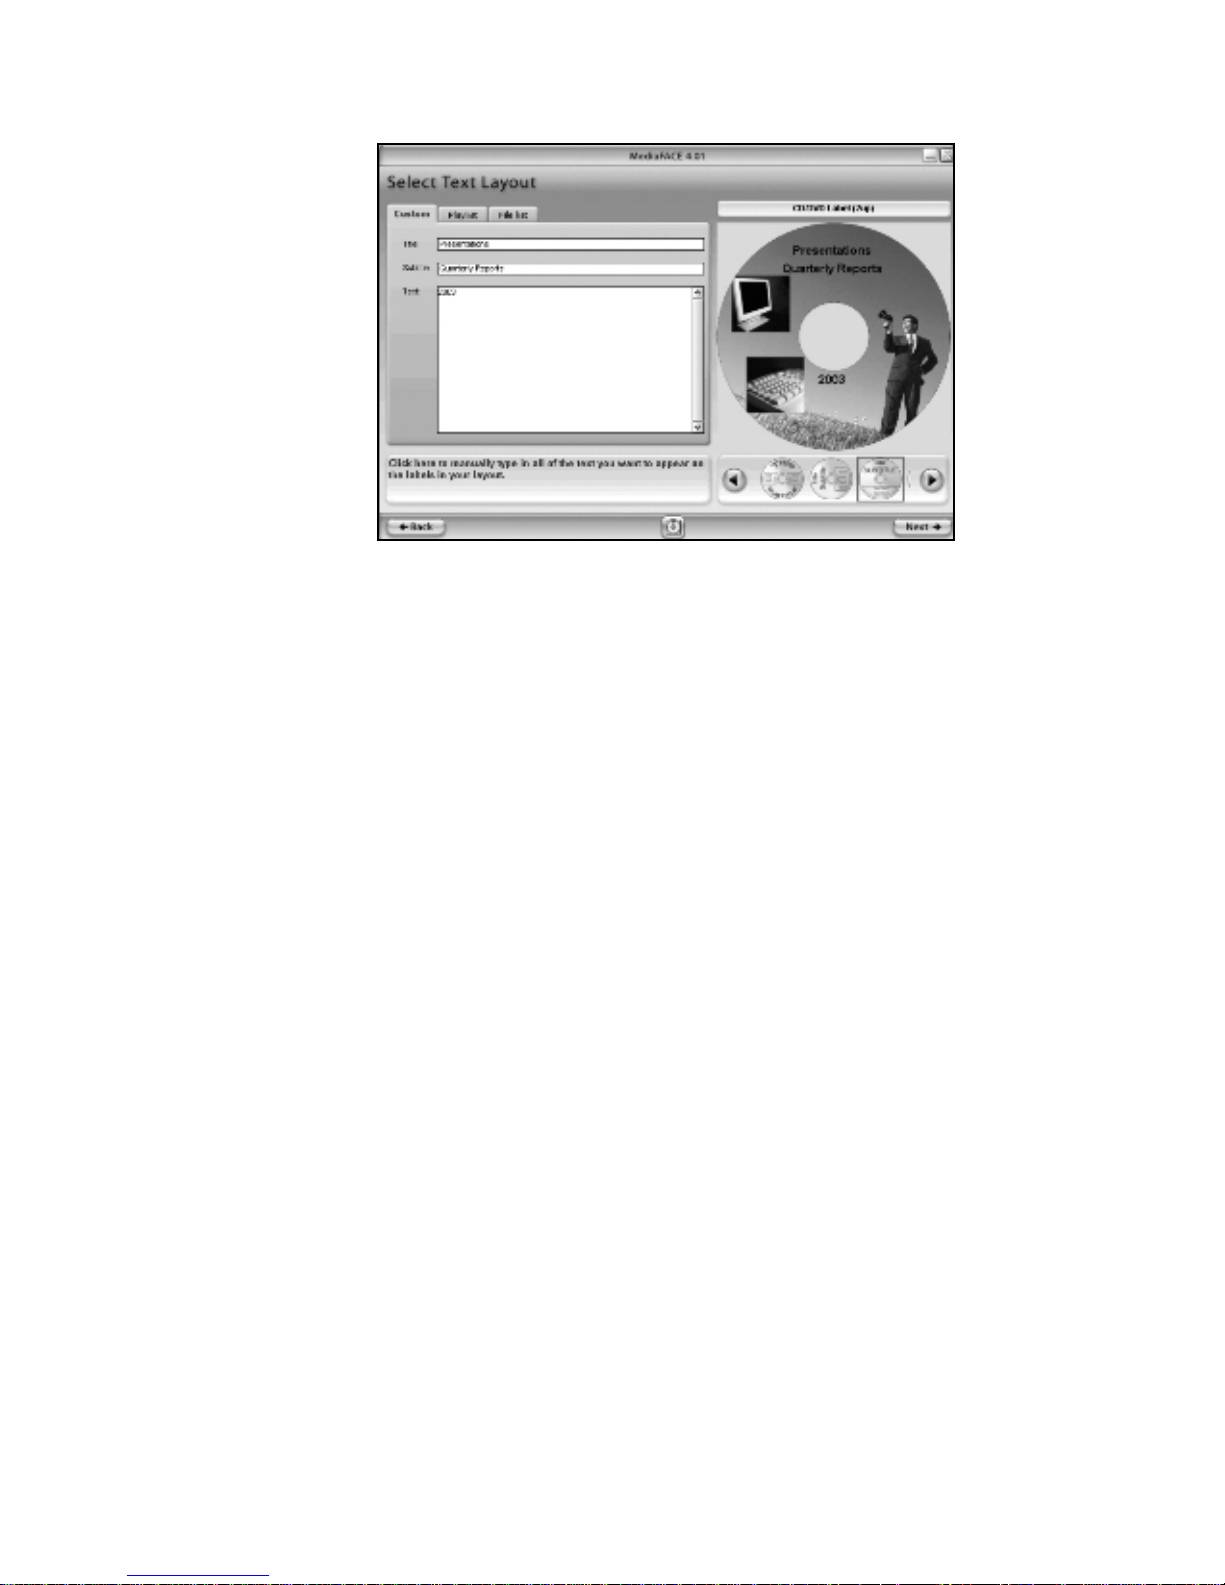
Select Text Layout
The next step is to add Text to our label. The Text Layout screen allows you to add
custom or pre-defined text to your label. It also provides several text editing and text
effect options. On the Text Layout screen, you will see three main tabs:
Custom – this option allows you to enter and edit text on your label. It also
presents a selection of several different text layout formats.
Play List – this option allows you to load track information using the Digital
Finger Printing feature. Artist, album and play list information can be
automatically downloaded and added to your label.
File List – this option allows you to choose a directory to add as a text list to your
label. Browse folders on local or network drives.
Working with Text
The two types of text that can be added to your label are simple and enhanced. Simple
text is displayed exactly as it is typed in without any major visual changes. Enhanced text
is simple text displayed in a variety of layout formats. Available layout options for
enhanced text are discussed further below.
Text layout formats:
Directly below the Project Workspace where your CD label is displayed, there are several
format options to choose from. Scroll through and select each one to see how the text is
displayed differently for each format. You can always change formats as you’re creating
the text for your label. However, when you switch back and forth between formats, your
text will be reset to the simple text format. You will have to reapply any enhancements to
your text, including font, rotation and angle changes. You may also need to resize or
reposition the text fields when changing formats.
For our CD label example, shown below, the fourth text layout option was selected:
Figure 2.6 – Selecting a text layout format
23
Page 24
Next, let’s add some custom text to our CD label.
To add custom text:
Click on the Custom tab.
Highlight the Title box. Type “Presentations” in the box.
Highlight the Subtitle box. Type “Quarterly Reports” in the box.
Highlight the Text box. Type “2003” in the box.
Figure 2.7 – Adding custom text
As you type in the text, you will see it instantly appear on the CD label in the Project
Workspace. The text will be displayed in a default font style and size. After predefined
text options are discussed below, we will look at additional options available to change
the appearance of the text on the label.
In addition to custom text, MediaFACE® 4.01 also allows you to add predefined text,
such as play lists and file lists. Play lists are added using Digital Finger Printing, which
reads the information from music CDs and adds it to your label. NOTE: You must be
connected to the Internet to use the Finger Printing feature. File Lists from
directories can be read from a disk or drive and inserted as text on your label. For both
options, the text is entered as a simple text field and can be edited and manipulated as
such. Steps for adding predefined text are included below:
To enter a Playlist from an audio CD:
Connect to the internet
Insert an audio CD into your drive.
Click on the PlayList tab (top row on right).
Click the Choose Directory button.
Select the drive containing the CD from the list and click OK.
Click the Finger Print button (bottom row on left). Artist, album name and
individual track information (name and duration) is downloaded and displayed
both in the Option Display Window and on your label.
24
Page 25

Song titles and times can be edited in the Display Window. Click once on the
song title or time field, then double-click to edit the text.
To enter a Playlist from a file:
Click on the Playlist tab.
Click the Choose Playlist button (top row on left).
Select the directory containing the playlist.
Select the playlist file and click Open.
The playlist will be displayed both in the Display Window and on your label.
Song titles and times can be edited in the Display Window. Click once on the
song title or time field that you want to change then double-click to edit the
text.
To enter a File List:
Click on the File List tab.
Click the Choose Directory button (top row).
Select the directory to display and click OK.
The contents of the directory (filename and date) will be displayed both in the
Display Window and on your label.
The file list can be edited in the Display Window. Click once on the filename
or date field that you want to change, then double-click to enter the text box.
Next, we will look at additional options available to change the appearance of the text on
the label. As with images, several actions can be performed on text once it’s been added
to your label. These actions include font changes, moving, resizing, scaling, rotating and
deleting. Details on each action are discussed below.
To change font:
Left-click once to select the Title field. (“Presentations”)
Right-click on the text field itself to open the pop-up menu for that field.
Select Font from the pop-up menu. The Font dialog box will open.
Select the desired font, font style and font size. You can also change the font
color.
Repeat these steps for each text field you want to change.
For our CD label example, shown below, we selected Arial>Bold>18>Black for each
text field:
25
Page 26
To move a text field:
Left-click once to select the text field. The mouse pointer changes to the
Move/Edit tool.
Left-click once and hold down the mouse button while dragging the mouse.
Release the mouse button after you’ve moved the text field to its new location
on the label.
To resize a text field:
Left-click once to select the text field. The mouse pointer changes to the
Move/Edit tool and sizing handles will be displayed around the border of the
text field.
Next, move your mouse to one of the sizing handles. The mouse pointer
changes to a smaller Move/Edit tool.
Left-click and hold the mouse button down while dragging the handle in any
direction. Selecting different handles will have different stretching or
shrinking effects on the text field. As you resize the text field, the point
position (X and Y values) will be displayed.
To scale a text field, hold down the Shift key while dragging the handle.
Scaling a text field will retain its original proportions. As you scale the text
field, the percentage value its original size will be displayed.
To rotate a text field:
Double-click on the text field. The mouse pointer changes to a small cross-
hair.
Hold down the left mouse button while moving the mouse in a circular
motion. As you rotate the text field, the angle value will be displayed.
To delete a text field:
Left-click once to select the text field.
Figure 2.8 – Changing font style and size
26
Page 27

Click on the Delete button (red button with a large ‘X’), or hit the Delete key
on your keyboard.
Multiple selection of text fields is another option offered in the Design Wizard. By
selecting multiple fields, all of the actions listed in the Working with Text section can
be applied to a group of text fields at the same time. This is especially useful when
you want to align several text fields to a specific location on the label.
To edit multiple text fields:
Left-click on one of the text fields.
Holding down the Ctrl key, left-click another text field. A thin light-blue
outline will appear around both of the text fields. The two text fields are now
grouped together and will be treated as one text field. Any action that is
applied - moving, resizing, rotating or deleting - will be applied to both text
fields simultaneously.
To ungroup the text fields, left-click on an open area of the label.
For our CD label example, shown below, the text fields inserted earlier were moved and
rotated to different angles:
Figure 2.9 – Rotating and resizing text fields
After you have inserted the images and text and moved them on the label, click the Next
button to continue. The next step is to print your label.
Printing
Now that we’ve designed our CD label, it’s time to print it out. The Select Paper screen
consists of several options that help you select the correct label paper and choose which
27
Page 28

labels on the sheet to print. The main areas of the Select Paper screen are shown in the
diagram below and discussed in detail.
Figure 2.10 – Select Paper screen
Paper Display Window – this area is where you view the different paper options.
Clicking on the scroll arrows, located on the right side of the display window, will
allow you to view all of the available paper options for your specific label type.
Hint Dialog Box – this is a box located directly below the Option Display Window and
it does exactly what its name implies. Its sole purpose is to provide you with hints as
to how to proceed if you get stuck. It also provides definitions of buttons and tabs that
appear on that page. The best part about it is that it’s mouse-sensitive, so all you have
to do is drag your mouse over an object to find out more about that object. Think of it
as your own personal cheat sheet. Test it out by dragging your mouse across items on
this screen – buttons, tabs, folders – and seeing what pops up in the Hints box.
Label Display Window – this area is where you select which labels on the sheet to print.
Left-clicking once on the top or bottom label will toggle that label on or off. The label
you want to print needs to be toggled on in order for it to print in that location. To
print out both labels on one sheet, then both must be toggled on. Any label that is
toggled off, and is not seen in this window, will not print.
Save Design Button – Clicking this button will allow you to save your design in the
wizard. You can retrieve this design at a later time in the wizard to either modify or
print
Transfer – Clicking this button will allow you to transfer your current design to
another label. Example – You can transfer you CD label design over to a Mini CD or
Full Coverage CD label or any other label style.
28
Page 29

New Design – Clicking this button will return you to the beginning of the Design
Wizard
Advanced Mode – Clicking this button will launch the advanced mode of
MediaFACE® 4.01
NOTE: If you are just using the downloada ble Desig n Wizard, y ou will not have
access to the advanced mode The advanced mode of MediaFACE® 4.01 is only
available if the full version of the prog ram is purch ased (see de tails at
www.neato.com)
Next, we will go to the Label Display Window. We want to print two labels on our label
sheet, so both of them need to be toggled on here. Left-click on both labels in the Label
Display Window. Your screen should now look like this:
Figure 2.11 – Selecting both labels to print on the sheet
Click the Print button to continue.
Calibration Wizard
The Calibration Wizard will automatically pop-up after you hit the Print button on the
Select Paper screen. It will only do this the first time you print in MediaFACE® 4.01.
All printers will have slight variations when printing. It is quite possible for two printers
of the same model type to print the same document with small variations in alignment.
Printer Calibration is the process of making sure that the MediaFACE® 4.01 software
understands where the printer should print on the label paper. It allows you to ensure that
your label design matches the layout accurately by allowing the software to accommodate
the printing variance.
29
Page 30

The first screen you will see in the Calibration Wizard will look like this:
Figure 2.12 – First screen in the Calibration Wizard
There are two ways to calibrate your printer in the Design Wizard: MediaFACE Printer
Calibration Sheet and Plain Paper. Both methods are discussed in detail below.
MediaFACE Printer Calibration Sheet
You may have received a Printer Calibration Sheet with your purchase. The
Printer Calibration Sheet will have a ruler grid in the upper left portion of the
page. The lower portion will contain instructions for calibration.
Select the MediaFACE Printer Calibration Sheet option and Click Next.
The next screen will look like this:
Figure 2.13 – Printer Calibration Sheet method
Select your printer from the list.
Insert the Printer Calibration Sheet into the printer.
Click Print.
After the test page prints, do the following:
Locate where the Vertical Line (up and down) crosses the “A” line. Enter
this number as the A value.
Locate where the Horizontal Line (left to right) crosses the “B” line. Enter
this number for the B value.
30
Page 31

Click Done. You have now calibrated your printer.
Click Print to print your label.
For instructions on applying the label to the CD, please refer to Chapter 9.
Plain Paper
The plain paper method for calibration should be used with a blank sheet of paper.
Please do not use a label sheet, as you will need to fold the paper during
calibration.
Select the Plain Paper option and Click Next.
The next screen will look like this:
Figure 2.14 – Plain Paper Calibration method
Select your printer from the list.
Select the paper type: Letter or A4
Click Print.
After the page prints, do the following: (these instructions also appear on the
printed page itself)
Fold the paper so that the two letter A’s meet, being sure to keep the edges
of the paper as even as possible.
Crease the paper thoroughly, then unfold. (see printed page for details on
folding)
Repeat the process, but this time fold the paper so that the letter B’s meet,
being sure to keep the edges of the paper as even as possible.
Crease the paper thoroughly, then unfold. (see printed page for details on
folding)
Locate where the Vertical (up and down) crease crosses the “A” line, and
enter the number into the calibration screen for your “A” value.
Locate where the Horizontal (left and right) crease crosses the “B” line,
and enter the number into the calibration screen for your “B” value.
Click Done. You have now calibrated your printer.
Click Print to print your label.
For instructions on applying the label to the CD, please refer to Chapter 9.
31
Page 32

Saving Your Project
Once you have finished with your project in the Design Wizard, you can now have the
option to save it. You can do so at the “Select Paper” screen by doing the following:
• Click on the “Save Design button
• The “Project Name” window will appear
• Enter a Project name and click on “OK”
• Your project is now saved
Figure 2.15 – Saving your Project in the Design Wizard
32
Page 33

The next time you open the Design Wizard, you can click on the “My Projects” button to
view all of your saved projects in the slider bar at the bottom of the screen. Double
clicking on any of these project thumbnails will open it.
Figure 2.16 – Saving your Project in the Design Wizard
33
Page 34

Chapter 3: Advanced Mode
Launching the Advanced Interface
There are several ways to launch the Advanced Interface of MediaFACE® 4.01. One way
is from within the Design Wizard. If you are using the Design Wizard to create a labeling
project, click the Advanced Interface button at the bottom of the screen. You can do this
at any point while creating your label. Remember, however, that once you open your
project in the Advanced Interface, you cannot reopen it in the Design Wizard.
Another way to launch the Advanced Interface is to access it through the Start menu. If
you kept the default folder location during installation, then click the Start menu and
select:
Programs>MediaFACE 4.01> MediaFACE 4.01
The last way applies only if you created a desktop shortcut after installing MediaFACE®
4.01. Simply double-click the desktop icon to launch the Advanced Interface.
Please be patient as the application may take several minutes to load. When the
application opens, you will be presented with the New Project Wizard screen as seen
below:
The New Project Wizard is one option when creating a new label project in
MediaFACE® 4.01. Like the Design Wizard, it is step-by-step process. The New Project
Wizard is discussed in more detail in
Chapter 5.
To open an existing project, you would exit the New Project Wizard by clicking the
Cancel button. A dialog box will pop-up asking you to confirm closing the Wizard.
34
Figure 3.1 - MediaFACE® 4.01 opening screen
Page 35

Simply click ‘Yes’ and you will be brought to the main work area of the Advanced
Interface. Proceed to Chapter 4 for a detailed look at the main work area.
Another option when creating a new label project is to work directly in the Advanced
Interface. To access the main work area directly, do the following when the opening
screen appears:
Select a label or project template.
Deselect ‘Run through wizard’ checkbox as shown below.
Figure 3.2 – Deselecting New Project Wizard
Click Finish.
The template you selected will be opened directly in the main work area of the Advanced
Interface. Please proceed to Chapter 4 for a detailed look at the main work area of the
Advanced Interface.
35
Page 36

Chapter 4: The Work Area
r
The main work area of the Advanced Interface has several components. These
components include menus, toolbars, palettes and window views. The main components
of the Advanced Interface are shown in the diagram below and discussed in detail.
Menu
Ba
Toolbars
General Properties
Workspace
Navigator
Label
Workspace
Palette
Figure 4.1 – The main work area of the Advanced Interface
Menus
The Advanced Interface contains several menu options that provide easy access to its
features and tools. The main menu bar is pictured below and is followed by a complete
list of items contained within each menu.
File Menu
New – Allows you to create a new project based on a label template, project
template or theme.
Open – Allows you to open an existing project.
Close Project – Closes the current project.
Save – Saves the current project under the existing name.
Save As – Saves the current project under a different filename.
Print – Prints the current label project.
Print Preview – Allows you to preview the current label design before printing.
Calibrate Printer – Calibrates the printer so the design matches the paper layout.
Send by Email – Allows you to share projects or send a copy to Technical
Support as an attachment.
Exit – Exits the MediaFACE® 4.01 application.
36
Page 37

Edit Menu
Undo – Allows you to undo the last action.
Redo – Allows you to return the document to its state before the last undo.
Cut – Removes selected object (text or image) and copies it to the clipboard.
Copy – Copies the selected object (text or image) to the clipboard.
Paste – Pastes the contents of the clipboard to a selected location on your label.
Copy Style – Copies the outline, filling, shadow and text styles.
Paste Style – Pastes a style onto an existing object.
Select All – Selects all objects on the current label.
Delete – Deletes the selected object (text or image) from the label.
View Menu
Palettes – Allows you to select which palettes to view while designing a label.
Toolbars – Allows you to select which toolbars to view while designing a label.
Status Bar – Allows you to turn the view of the status bar on/off.
Workspace – Allows you to display the Workspace palette.
Rulers – Allows you to turn the rulers on/off.
Field Codes – Shows the field codes instead of text.
Background – Allows you to turn the background for a label on/off.
Grid Lines – Allows you to turn the grid lines on/off.
Zoom – Allows you to zoom the label workspace to a specific percentage for
easier viewing.
Last Zoom – Allows you to return to the previous zoom setting.
Snap to Grid – Snaps an object (text or image) to the nearest grid line for
alignment.
Snap to Guidelines – Snaps an object (text or image) to a guideline for alignment.
Grid and Guidelines Setup – Allows you to create and edit grid and guideline
settings.
Insert Menu
Tools – Contains shapes that can be inserted onto your label.
Text - Inserts a line of text at a specified location on your label.
Rectangle – Inserts a rectangle at a specified location on your label.
Ellipse – Inserts a circle or ellipse at a specified location on your label.
Line – Inserts a line at a specified location on your label.
Predefined Text – Inserts predefined text fields (i.e. date, time, etc.).
PlayList – Inserts a MediaFACE® 4.01 custom playlist or imports one from a
supported media player.
File List – Inserts a file list from the selected folder.
Data List – Inserts data from external sources (i.e. Oracle, SQL, Access
databases).
Picture – Inserts a picture onto your label.
From File – Retrieves an image from your own collection.
From Image Library – Retrieves an image from the MediaFACE® 4.01 Image
Library.
From External – Retrieves a picture from a scanner, digital camera or webcam.
Barcode – Allows you to insert a barcode onto your label.
37
Page 38

Object – Allows you to add an object to your label (i.e. document, chart,
drawing, etc.).
Format Menu
Alignment – Aligns multiple objects together.
Group – Groups multiple objects together so they can be easily moved on the
label.
Ungroup – Ungroups objects that were previously grouped together.
Bring to Front – Brings the selected layer to the top.
Send to Back – Sends the select layer to the bottom of the stack.
Move Up – Moves selected layer up one position in the stack.
Move Down – Moves selected layer down one position in the stack.
Effects – Allows you to enhance images by applying various effects to them.
Original – Displays the original image for side-by-side comparisons while
editing image.
Hue-Saturation – Color and the level of clarity reflected from or transmitted through an
object.
Invert – Converts every color in an image to its exact opposite.
Brightness-Contrast – Allows you to change the brightness and contrast.
Gamma – Adjusts the brightness levels of gray in an image.
Mosaic – Applies mosaic effects to image.
Oilify – Makes the image resemble an oil painting.
Posterize – Adjusts the detail in an image.
Solarize – A color re-mapping filter.
Noise – Applies a random pattern across the pixels of an image.
Emboss – Allows you to emboss an image.
Grayscale – Replaces color in an image with shades of gray.
Sharpen – Sharpens the image.
Underlay - Allows you to tile or stretch an underlay image.
Reverse – Reverses the color assignments in the image.
Image – Allows you to manipulate an image on your label in various ways.
Flip Horizontal – Flips the image horizontally.
Flip Vertical – Flips the image vertically.
Fit To Label – Allows you to use an image as a background on your label.
Crop Image - The ability to select only part of an image.
Convert To – Allows you to convert an object to another object of a similar type.
Square – Converts object to a square.
Polygon – Converts an object to a polygon.
Ellipse – Converts an object to an ellipse.
Rectangle – Converts an object to a rectangle.
Circle – Converts an object to a circle.
Object Properties – Displays the property dialog box for a selected object.
Project Menu
Insert – Inserts a new item into your current project.
Item – Creates a new project item.
Label – Creates a new label within a project.
38
Page 39

Version – Allows you to insert a new version
Blank – Creates a new version of the label.
As Copy – Saves a copy of the current label as a new version.
Move – Allows you to move the saved folder location of a project.
Delete – Deletes a selected project.
Share – Allows you to share a selected project.
Print Version – Prints the selected version of a project.
Properties – Displays the project properties.
Save Version as Template – Saves the current version of your project as a
template.
Project Properties – Allows you to view a project’s properties.
Tools Menu
List Manager – Allows you to manage play lists, file lists and data sources.
Download – Allows you to download new templates, images and software
updates.
Burners – A list of installed CD-burning applications that can be launched from
MediaFACE® 4.01.
Players – A list of installed media players that can be launched from
MediaFACE® 4.01.
Options – Displays and allows you to edit various MediaFACE 4 general options.
3D Preview – Allows you to view certain label projects in 3D.
Export – Allows export of label templates to supported image formats for use in
other applications.
Window Menu
Cascade
Tile Horizontally – Tiles open windows horizontally.
Tile Vertically – Tiles open windows vertically.
Arrange Icons – Allows you to organize minimized windows.
Windows – Lists and manipulates selected windows (open, close, cascade, tile,
etc.).
Help Menu
Contents
Tech Support – Allows you to save project as screen capture and email to tech
support.
User Information – Displays user registration information.
Web Registration – Allows you to register your software online.
About MediaFACE® 4.01 – Displays important licensing and contact
information.
Toolbars
The Advanced Interface also contains several toolbars that provide easy access to its
features and tools. Each toolbar is pictured below and is followed by a complete list of
icons contained within each one.
39
Page 40
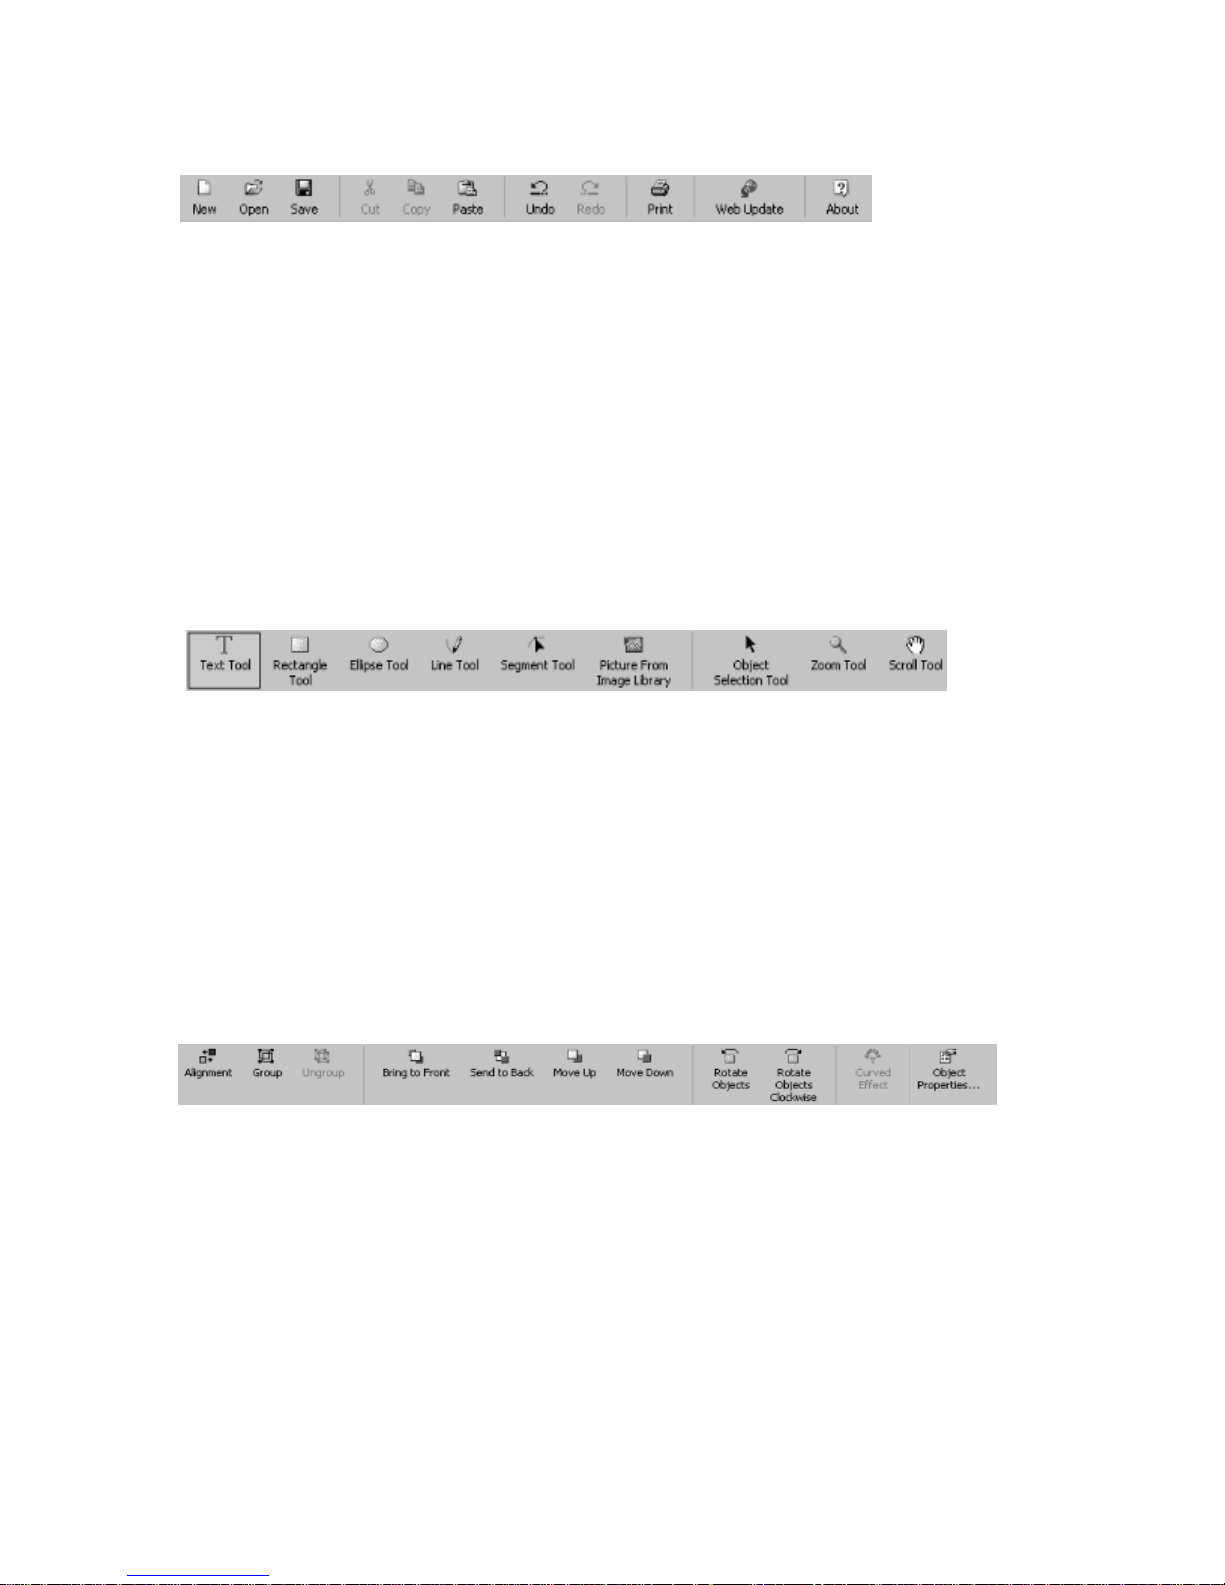
Standard Toolbar
The following icons are on the Standard Toolbar:
New - Allows you to create a new project based on a label template, project template or
theme.
Open - Allows you to open an existing project.
Save - Saves the current project under the existing name.
Cut - Removes selected object (text or image) and copies it to the clipboard.
Copy - Copies the selected object (text or image) to the clipboard.
Paste - Pastes the contents of the clipboard to a selected location on your label.
Undo - Allows you to undo the last action.
Redo - Allows you to return the document to its state before the last undo.
Print - Prints the current label project.
Web Update - Allows you to download new templates, images and software updates.
About - Displays important licensing and contact information.
Object Tools Tool bar
The following icons are on the Object Tools Toolbar:
Text Tool – Inserts a text field onto the label.
Rectangle Tool – Inserts a rectangle onto the label.
Ellipse Tool – Inserts an ellipse onto the label.
Line Tool – Inserts a line, or series of lines, onto the label.
Segment Tool – Selects a specific segment of a line and applies changes.
Picture From Image Library – Inserts an image from the image library.
Object Selection Tool – Selects an object on the label.
Zoom Tool – Allows you to change the magnification of the label.
Scroll Tool – Allows you to scroll the label around in the Label Workspace.
Format Toolbar
The following icons are on the Format Toolbar:
Alignment – Aligns multiple objects together.
Group – Groups multiple objects together so they can be easily moved on the
label.
Ungroup – Ungroups objects that were previously grouped together.
Bring to Front – Brings the selected layer to the top.
Send to Back – Sends the selected layer to the bottom of the stack.
Move Up – Moves selected layer up one position in the stack.
Move Down – Moves selected layer down one position in the stack.
Rotate Objects – Rotates selected objects in a counter-clockwise direction.
Rotate Objects Clockwise – Rotates selected objects in a clockwise direction.
40
Page 41

Curved Effect – Applies the curved effect to text fields.
Object Properties – Displays the property dialog box for a selected object.
Project Toolbar
The following icons are on the Project Toolbar:
New Project Item – Allows you to add a new project item to the project tree.
New Label – Allows you to add a new label to the project tree.
New Blank Version – Allows you to create a new version of the current label
template.
Copy Version - Allows you to create a new version of the current label as either a
copy of the default label version or a copy of the currently selected version.
Move – Allows you to move the saved folder location of a project.
Delete – Deletes a selected project.
Share – Allows you to share a selected project.
Item Properties – Displays the project properties.
Project Properties – Allows you to view a project’s properties.
View Toolbar
The following icons are on the View Toolbar:
Snap to Grid – Snaps an object (text or image) to the nearest grid line for
alignment.
Snap to Guidelines – Snaps an object (text or image) to a guideline for alignment.
Grid and Guidelines Setup – Allows you to create and edit grid and guideline
settings.
Field Codes – Shows the field codes instead of text.
Toggle Version Background – Allows you to turn the background for a label
on/off.
Toggle Grid Lines – Allows you to turn the grid lines on/off.
Toggle Rulers – Allows you to turn the rulers on/off.
Toggle Workspace – Allows you to display the Workspace palette.
Customizing Menus and Toolbars
MediaFACE® 4.01 allows you to customize the appearance of the main window. Rightclicking in the menu bar and toolbar area opens a pop-up menu that allows you quick
access to the toolbar viewing selection. Simply selecting or deselecting a toolbar from the
list will turn the given toolbar on/off. By selecting Customize from the pop-up menu, you
can customize toolbars, menus, options, keyboards and commands. The Customize dialog
box is shown below:
41
Page 42

Figure 4.2 – Customize Menu/Toolbar Dialog box
Custom options for menus include showing recently used commands first, showing the
default menu, resetting all menus back to their default and menu animations. Custom
options for toolbars include creating a new toolbar, viewing text labels for toolbar icons
and showing toolbar screen tips. Keyboard options include assigning custom shortcut
keys.
Palettes
The Advanced Interface contains various palettes that can be accessed through the View
menu. Palettes are used to modify various parameters for drawing objects. By default, the
palettes appear stacked together in groups. The positions of open palettes and moveable
dialog boxes are saved when the user exits from the application. Unlike most dialog
boxes, you can keep palette windows open while working on a document. This allows
you to access the operations used most frequently or to experiment with different effects.
Layers and Imag e Library
The Layers and Image Library palettes are used to view and edit specific layers or
combinations of layers. The Layers tab allows you to turn a specific layer on/off for
viewing or printing purposes. The Image Library tab allows you to insert a picture from
the MediaFACE® 4.01 image library. The palette dialog boxes are shown below:
42
Page 43

Figure 4.3 – Layers Palette
Figure 4.4 – Image Library Palette
Filling, Outline and Shadow
The Filling, Outline and Shadow palettes are used to display the properties for rectangles,
lines and ellipse objects. Properties that can be edited here include colors and styles for
filling, outline, shadow, foreground and background color. The palette dialog boxes are
shown below:
Figure 4.4 – Filling Palette
Figure 4.6 – Shadow Palette
43
Figure 4.5 – Outline Palette
Page 44

Text Style and Text Effects
The Text Style and Text Effects palettes are used to apply effects to text objects.
Enhancements that can be made to selected text include font style and size, foreground
and background color, outline and shadow color and specialized text effects. The palette
dialog boxes are shown below:
Figure 4.7 - Text Style Palette Figure 4.8 - Text Effects Palette
Properties and General
The Properties palette contains specific object information. For all objects this palette
contains information about object location. The General Palette displays properties for
every object and also allows objects to be locked to prevent further changes. The palette
dialog boxes are shown below:
Figure 4.9 – Properties Palette
Workspace Navigator
The Workspace Navigator is a special palette that can be toggled on/off via the View
menu. When toggled on, it is usually located in the left section of the main window.
44
Figure 4.10 – General Palette
Page 45

All MediaFACE® 4.01 projects appear in this window as a project tree. The first level of
the tree represents an open project, which contains sub-folders and/or labels. Each label
contains a set of versions. The Workspace Navigator allows you to manage all of the
labels and versions in your project. It provides access to each label template and version
by offering pop-up menus. These menus allow you to edit the project tree by
adding/removing new items or modifying an item’s properties.
The Workspace Navigator window is shown below:
Figure 4.11 – Workspace Navigator
Window Views
MediaFACE® 4.01 supports several standard window view functions. Cascade, Tile
Horizontally, Tile Vertically and Arrange Icons can all be accessed from the Window
menu. These views can be used to rearrange windows within MediaFACE® 4.01 to allow
all open windows to be visible in your work area.
In addition to accessing the different window views separately, the Window menu also
includes a Windows option, which combines the views available in one dialog box. The
Windows dialog box provides you with a central place to organize your project’s labels.
You can activate and minimize windows as well as save your current project.
Menus, toolbars and palettes also have different viewing options. They can be docked or
floated on the workspace area. Menus and toolbars are docked at the top of the screen by
default. To undock a menu or toolbar, click a gray area within the menu or toolbar and
drag it out onto the workspace. To return it to its default location, simply click the title
bar for its window and drag it back to the top.
45
Page 46

To dock a palette after toggling it on in the View>Toolbar menu, simply click the palette
title bar and drag the window to a new location on the screen. To float a palette, doubleclick the palette title bar to undock the window, then click and drag the palette to a new
location. The Windows dialog box is shown below:
Figure 4.12 – Windows dialog box
46
Page 47
Chapter 5: Creating a Label
We will now design a label using the Advanced Mode of MediaFACE® 4.01. There are
two options available when creating a label in the Advanced Mode. We can either use the
New Project Wizard or work directly in the Advanced Interface. First, we will run
through designing a label using the New Project Wizard. In the Advanced Mode section
later in this chapter, we will run through an example working directly in the Advanced
Interface. The first section, Selecting a Project Template, includes important information
that applies to both design options.
When you first open the MediaFACE® 4.01 application, you will be presented with the
screen shown below:
Figure 5.1 – New Project Wizard opening screen
This is the Select Project Template screen for MediaFACE® 4.01, and also the opening
screen for the New Project Wizard. After selecting a template here, you can choose to run
your project through the New Project Wizard or to work directly in the Advanced
Interface. Template options and a description for each are included in the next section
and apply to both design options.
47
Page 48

Selecting a Project Template
Selecting a project template is the first step in creating a label in MediaFACE® 4.01.
This screen includes the New Project Wizard dialog box, which contains the following
tabs:
Types – this tab displays the template options available in MediaFACE® 4.01. Please
note: the Label Templates tree may be expanded on default. To view all options within
this tab, collapse the tree by left-clicking once on the small box to the left containing the
‘-’ symbol. To expand the tree, left-click once on the small box to the left containing the
‘+’ symbol.
Label Templates - a label template is the starting point for creating a label in
MediaFACE® 4.01. It is essentially a copy of a blank label to which you can add
text and pictures. Label templates can be designed through the New Project
Wizard or directly in the Advanced Interface. (A complete list of
Fellowes/NEATO media products appears at the end of this chapter.
Project Templates - If you expand the Project Templates tree, you will see a list of
all available project options. Each option is a project template, which contains all
of the labels on a specific sheet of paper. For example, the CD Core Labels and
Booklet project template includes a CD Core label and Jewel Case Booklet. (A
complete list of Fellowes/NEATO media products appears at the end of this
chapter.) Highlighting this project template in the list displays a preview of the
project in the Preview window as shown below:
The top portion includes a graphical representation of the project tree structure, as it
would appear in the Workspace Navigator window (discussed later in this chapter) of the
Advanced Interface. All the label types that are included in a particular project are listed
here. The lower portion of the Preview window includes a graphical representation of the
48
Figure 5.2 –Project templates preview
Page 49
label itself. As you scroll through the project tree structure in the top portion of the
Preview window, the corresponding label is displayed. Please note that project templates
can be designed in the Advanced Interface only and cannot be run through the New
Project Wizard. If you highlight a project template, you will notice that the ‘Run through
wizard’ checkbox is grayed out. Project templates are discussed in more detail in the
Advanced Mode section of this chapter.
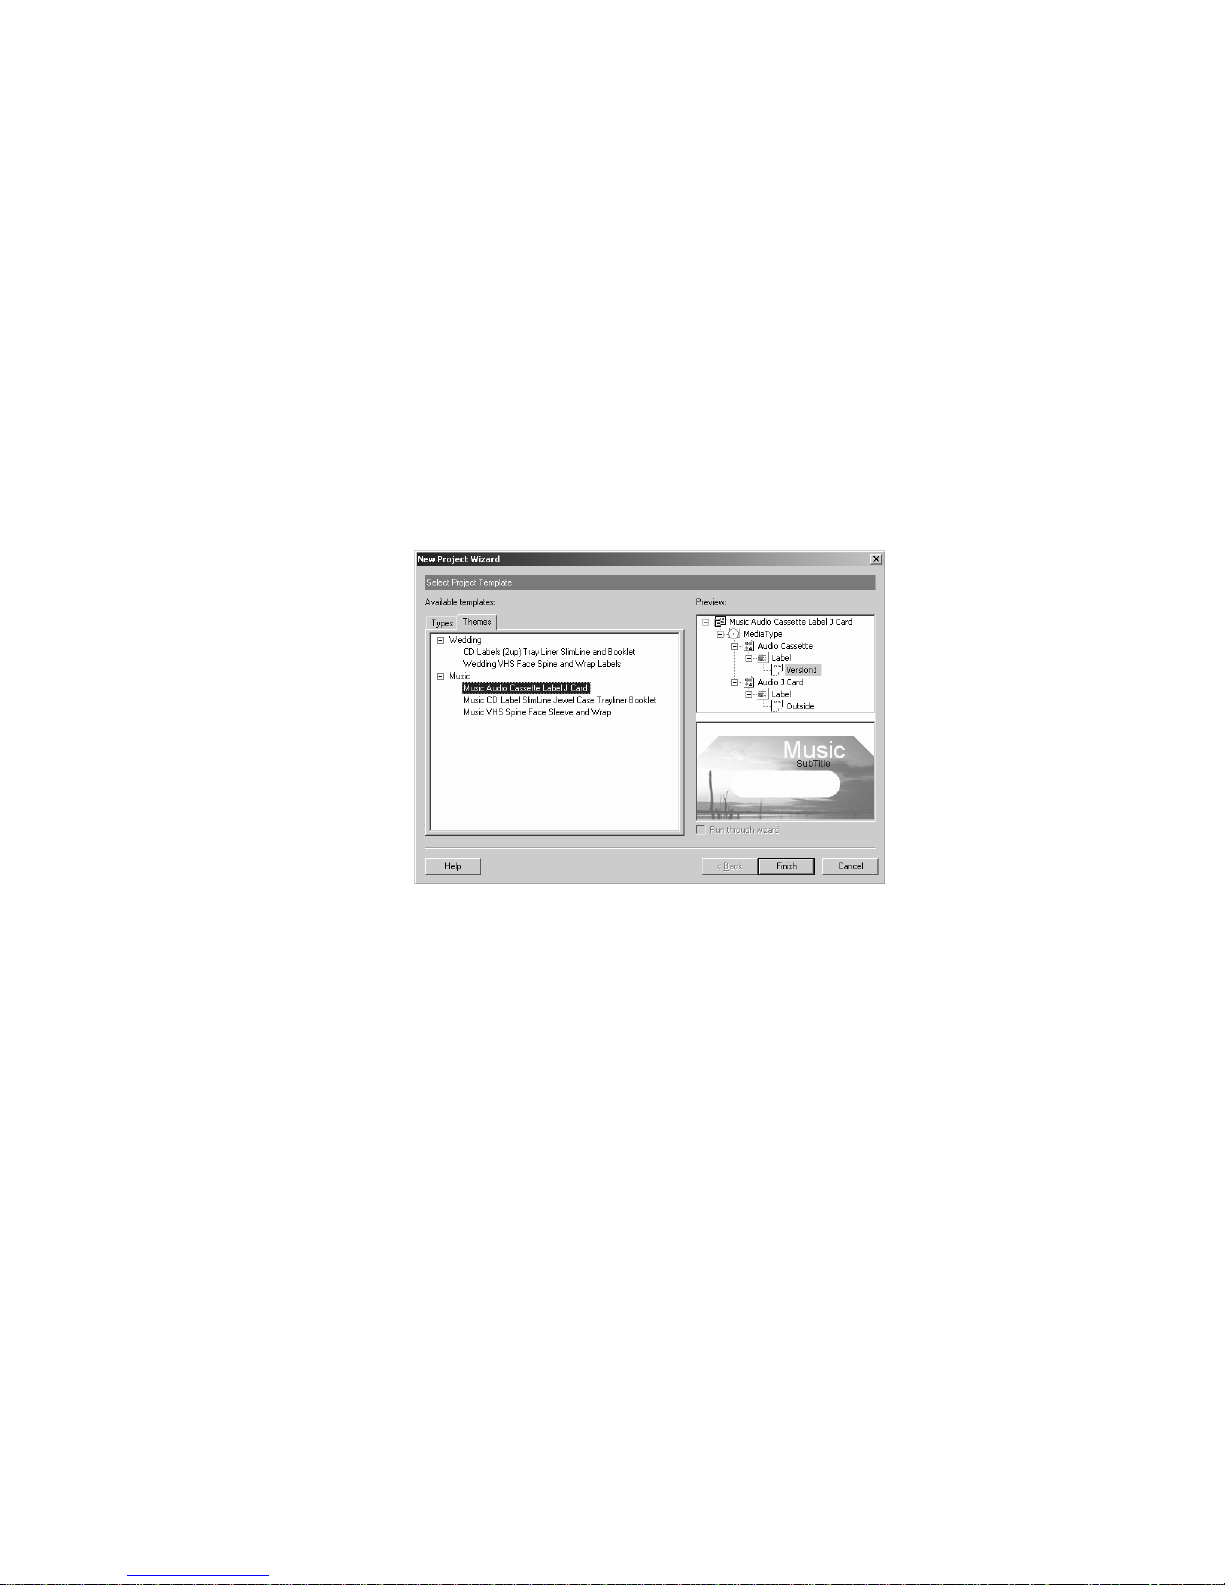
Themes – this tab contains ready-made project themes grouped by keywords. The project
themes include labels with predefined backgrounds and text layouts. Only the text on the
label needs to be modified before printing.
Figure 5.3 – Theme template window
Now that the template options have been discussed, you have the option of designing
your label in the New Project Wizard or directly in the Advanced Interface. If you choose
to work directly in the Advanced Interface, please see the Advanced Mode section in this
chapter.
New Project Wizard
First, we will create a standard CD/DVD label using the New Project Wizard. The
Wizard walks you through the main steps of creating a label, including selecting a
background, adding an image, adding text and printing.
Before we begin, you should still be on the opening screen for the New Project Wizard.
Be sure that the Types tab is selected and the Label Template tree is expanded. From the
list of available label templates, select the ‘CD Label (2 up)’ template. The ‘Run through
wizard’ checkbox should be selected by default. If it’s not, then select it now by clicking
49
Page 50

once in the checkbox. On the right side of the dialog box, you should see a preview of the
label template you selected as shown below:
Figure 5.4 – Selecting a Label Template
Click Next to continue. This will bring us to the background selection screen and the
main work area in the New Project Wizard.
The Work Area
The work area in the New Project Wizard consists of several options that help you edit
and view the labels you create. The main components of the New Project Wizard work
area are shown in the diagram below and discussed in detail:
Option Display Window
Figure 5.5 – The main work area in the New Project Wizard
50
Label
Workspace
Page 51

Option Display Window – this is the large area on the left side of the screen. Custom
label design options, such as adding text and images, are selected or defined here. As
you navigate through each screen, you will notice that there are various option tabs
and a scroll bar for easy access to design options.
Label Workspace – this is the area to the right of the Option Display Window. Projects
are designed, edited and viewed here.
Navigation Buttons – each screen in the New Project Wizard contains a ‘Back’ and
‘Next’ button on the lower left and right side of the screen. These buttons allow you
to easily move back and forth between each step in the label design process.
Selecting a Background
Now that we’ve selected our label template, we’re ready to begin designing our CD label.
You should now be on the Select Background screen.
On the left side of the screen, you will see five folder tabs. These tabs represent five
different options for obtaining an image to use as a background on your label. Clicking
on each tab will display the individual window for that option. A brief description of each
tab option is listed below the diagram:
Figure 5.6 – Select Background screen in New Project Wizard
By clicking on the buttons directly under the tab name, you can change the window view
to thumbnails, small icons, list or detail view. Also included is a folder button, which
allows you to move up by one level when browsing for a file, and a refresh button to
reload the current screen.
51
Page 52

The five options for selecting images to use as a background are listed below:
Library – MediaFACE® 4.01 (full version) contains over 500 high-resolution images
to choose from. There are six main categories including Business, General, Lifestyle,
Music, Special Occasion and Spiritual.
File – image files can be selected from directories on a hard drive, floppy disk or CD.
MediaFACE® 4.01 supports the following graphic formats:
.JPG, .BMP, .GIF, .TIF, .PCX, .CMP, .DCX, .ICO, .PCD, .CUR, .FPX, .EPS, .PNG, .PCT,
.PSD, .RAS, .TGA, .WMF and .WPG.
Scanner – images can be imported directly from a scanner. Once the image has been
acquired through your scanning software, it can then be manipulated in
MediaFACE® 4.01.
Camera – images can be downloaded directly from a digital camera.
Webcam – this option allows you to import images directly from a webcam. Action
viewed through a webcam can be paused and captured and imported onto your label.
Click once on the Library tab. In the Option Display Window, you will see a list of
folders and image files. The folders are the main categories of images available in the
MediaFACE® 4.01 libraries. Take a few minutes to browse through each category.
For our CD/DVD label example, we will be selecting an image from the Business
category. Double-click the Business folder and scroll down until you find the following
image:
When you have found the image, there are two ways to actually transfer the image to
your label. The first way is to just double-click the image and it will automatically appear
on the label. The second way is to highlight the image by clicking on it once, and then
click the ‘Apply as Background’ directly below the Label Workspace. Clicking this
button once will make the image appear on the label. NOTE: You cannot edit an image
that is placed on the label as a background.
52
Page 53
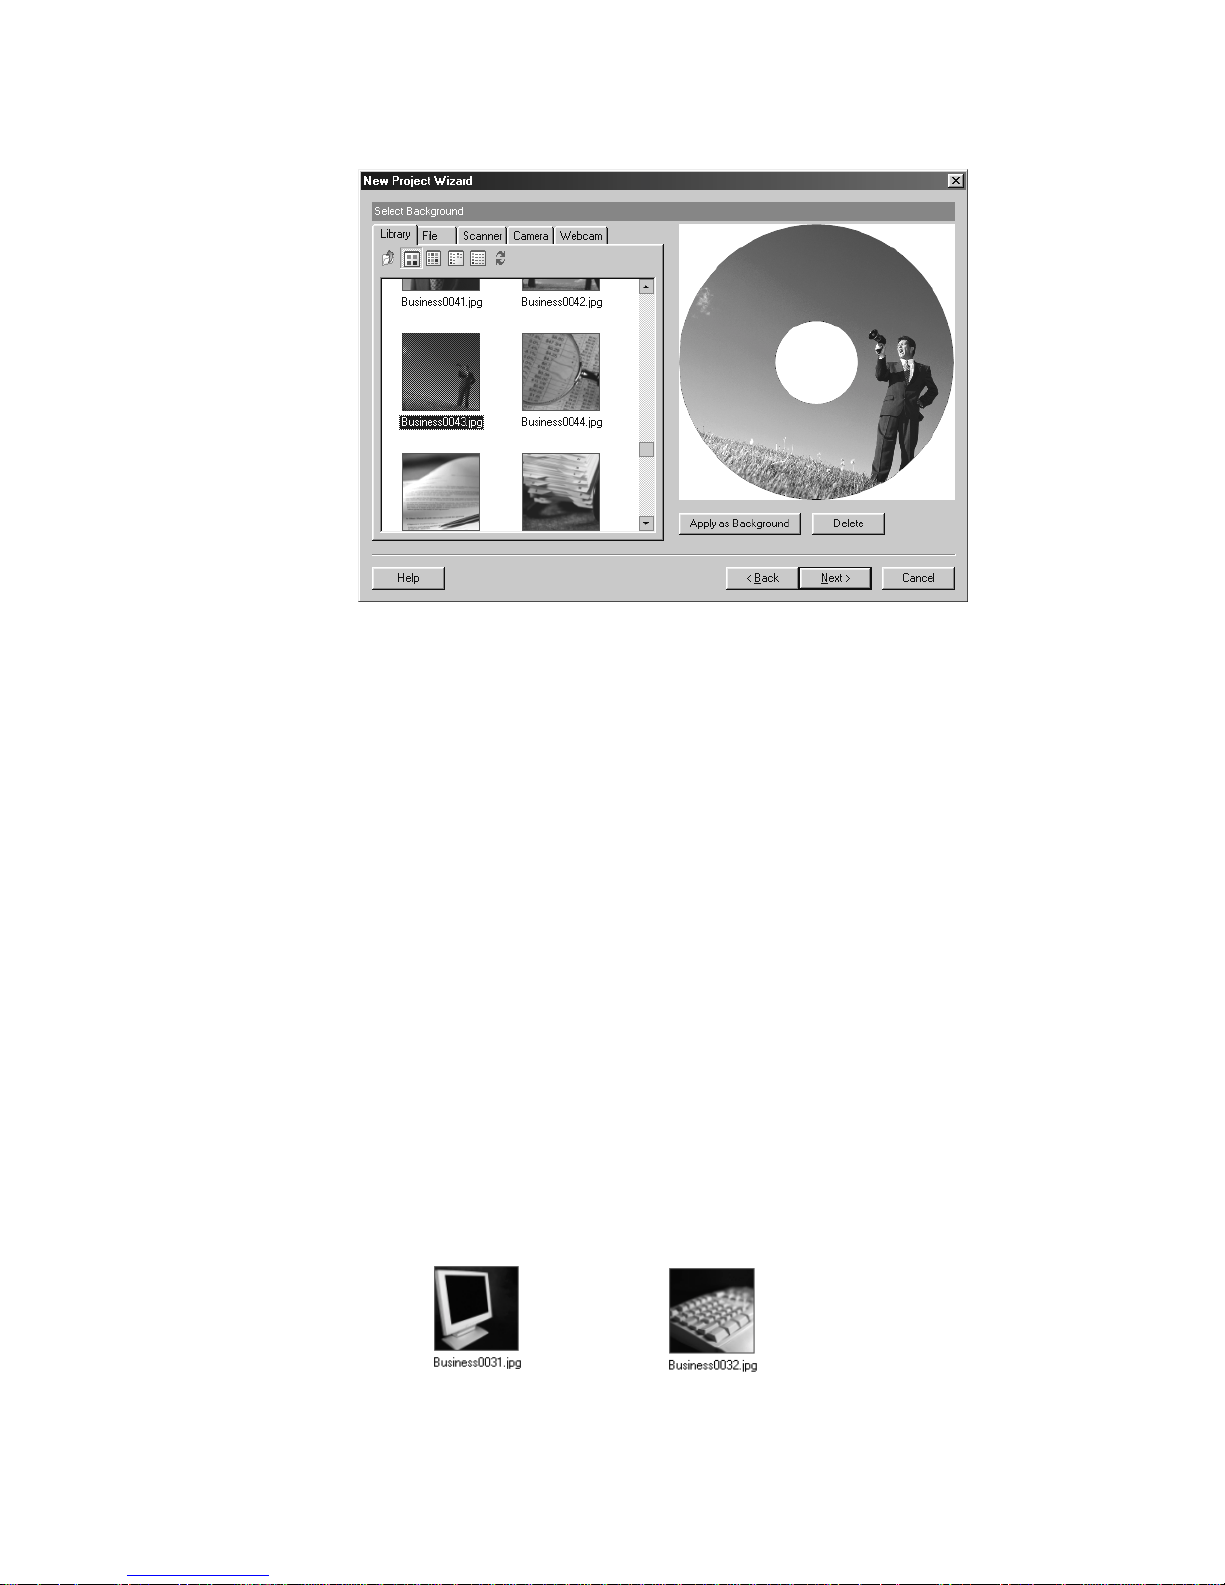
Figure 5.7 – Applying a background image to the label
After you have inserted the image as a background for your label, click the Next button to
continue. The next step is to add images to your label.
Add Picture
The next step is to add an image to our label. The Add Picture screen is very similar to
the Select Background screen. You have the same five options for selecting images and
the same categories of image libraries available here as well. One of the main differences
between the two screens is that you can add multiple images on this screen. So, for
example, you could add both your company logo and trademark symbol to your label.
Also, you can edit any images that are inserted on this screen.
To insert an image f rom the Image Libra ry:
Select the Library tab.
Browse the image categories to find an image.
Double-click the thumbnail image to add it to your label.
Or, select the thumbnail image and click the ‘Insert Image’ button.
Repeat these steps to add additional images.
For our CD/DVD label example, we will be inserting two graphics from the Business
category. Double-click the Business folder and scroll down until you find the following
images:
53
Page 54

Please note that when adding more than one image, the thumbnails will overlap when
initially placed on the label. Please refer to the next section, Working with Images, to
move the images on the label.
Working with Images
Several actions, such as moving, resizing, scaling, rotating and deleting, can be
performed on images once they’ve been added to your label. Details on each action are
discussed below.
To move an image:
Left-click once to select the image. The mouse pointer changes to the
Move/Edit tool.
Left-click once and hold down the mouse button while dragging the mouse.
Release the mouse button after you’ve moved the image to its new location on
the label.
Using the Move/Edit tool
To resize an image:
Left-click once to select the image. The mouse pointer changes to the
Move/Edit tool and sizing handles will be displayed around the border of the
image.
Next, move your mouse to one of the sizing handles. The mouse pointer
changes to a smaller Move/Edit tool.
Left-click and hold the mouse button down while dragging the handle in any
direction. Selecting different handles will have different stretching or
shrinking effects on the image. As you resize the image, the point position (X
and Y values) will be displayed.
54
Page 55

To scale an image, hold down the Shift key while dragging the handle.
Scaling an image will retain its original proportions. As you scale the image,
the percentage value of its original size will be displayed.
Resizing an image Scaling an image
To rotate an image:
Double-click on the image. The mouse pointer changes to a small cross hair.
Hold down the left mouse button while moving the mouse in a circular
motion. As you rotate the image, the angle value will be displayed.
To delete an image:
Left-click once to select the image.
Click on the Delete button or hit the Delete key on your keyboard.
For our CD label example shown below, two images were inserted, moved and resized to
a smaller scale, as shown below:
55
Rotating an image
Page 56

Figure 5.8 – Inserting, moving and resizing images
After you have inserted the images onto your label and moved them to a new position,
click the Next button to continue. The next step is to add text to your label.
Select Text Layout
The next step is to add Text to our label. The Text Layout screen allows you to add
custom or predefined text to your label. It also provides several text editing and text
effect options. On the Text Layout screen, you will see three main tabs:
Custom – this option allows you to enter and edit text on your label. It also presents a
selection of several different text layout formats.
Play list – this option allows you to load track information using the Digital Finger
Printing feature. Artist, album and play list information can be automatically
downloaded and added to your label.
File List – this option allows you to choose a directory to add as a text list to your
label. Browse folders on local or network drives.
Working with Text
Several actions, such as moving, resizing, scaling, rotating and deleting, can be
performed on text fields once they’ve been added to your label. Details on each action are
discussed below.
Text Layout Form ats
Directly below the Option Display Window, there are several format options to choose
from. Scroll through and select each one to see how the text is displayed differently for
each format. You can always change formats as you’re creating the text for your label.
However, when you switch back and forth between formats, your text will be reset to the
simple text format. You will have to reapply any enhancements to your text, including
56
Page 57

font, rotation and angle changes. You may also need to resize or reposition the text fields
when changing formats.
For our CD/DVD label example, shown below, select the fourth text layout option:
Figure 5.9 – Selecting a text layout format
Now, let’s add some custom text to our label.
To add custom text:
Click on the Custom tab.
Highlight the Title box. Type “Presentations” in the box.
Highlight the Subtitle box. Type “Quarterly Reports” in the box.
Highlight the Text box. Type “2003” in the box.
57
Figure 5.10 – Adding custom text
Page 58

As you type in the text, you will see it instantly appear on the CD label in the Label
Workspace. The text will be displayed in a default font style and size. After predefined
text options are discussed below, we will look at additional options available to change
the appearance of the text on the label.
In addition to custom text, MediaFACE® 4.01 also allows you to add predefined text,
such as Play lists and File Lists. Play lists are added using Digital Finger Printing, which
reads the information from music CDs and adds it to your label. (NOTE: You must be
connected to the Internet to use the Finger Printing feature) File Lists from
directories can be read from a disk or drive and inserted as text on your label. For both
options, the text is entered as a simple text field and can be edited and manipulated as
such. Steps for adding predefined text are included below:
To enter a Play Lis t f rom an audio CD:
Connect to the Internet
Insert an audio CD into your drive.
Click on the Play List tab (top row on right).
Click the Choose Directory button.
Select the drive containing the CD from the list and click OK.
Click the Finger Print button (bottom row on left). Artist, album name and
individual track information (name and duration) is downloaded and displayed
both in the Option Display Window and on your label.
Song titles and times can be edited in the Display Window. Click once on the
song title or time field, then double-click to edit the text.
To enter a Play List f rom a file:
Click on the Play List tab.
Click the Choose Play List button (top row on left).
Select the directory containing the play list.
Select the play list file and click Open.
The play list will be displayed both in the Display Window and on your label.
Song titles and times can be edited in the Display Window. Click once on the
song title or time field that you want to change then double-click to edit the
text.
To enter a File List:
Click on the File List tab.
Click the Choose Directory button (top row).
Select the directory to display and click OK.
The contents of the directory (filename and date) will be displayed both in the
Display Window and on your label.
The file list can be edited in the Display Window. Click once on the filename
or date field that you want to change, then double-click to enter the text box.
Next, we will look at additional options available to change the appearance of the text on
the label. As with images, several actions can be performed on text once it’s been added
58
Page 59

to your label. These actions include font changes, moving, resizing, scaling, rotating and
deleting. Details on each action are discussed below.
To change font:
Left-click once to select the Title field. (“Presentations”)
Right-click on the text field itself to open the pop-up menu for that field.
Select Font from the pop-up menu. The Font dialog box will open.
Select the desired font, font style and font size. You can also change the font
color.
Repeat these steps for each text field you want to change.
For our CD label example, shown below, we selected Arial>Bold>18>Black for each
text field:
Figure 5.11 – Changing font style and size
To move a text field:
Left-click once to select the text field. The mouse pointer changes to the
Move/Edit tool.
Left-click once and hold down the mouse button while dragging the mouse.
Release the mouse button after you’ve moved the text field to its new location
on the label.
To resize a text field:
Left-click once to select the text field. The mouse pointer changes to the
Move/Edit tool and sizing handles will be displayed around the border of the
text field.
Next, move your mouse to one of the sizing handles. The mouse pointer
changes to a smaller Move/Edit tool.
Left-click and hold the mouse button down while dragging the handle in any
direction. Selecting different handles will have different stretching or
59
Page 60

shrinking effects on the text field. As you resize the text field, the point
position (X and Y values) will be displayed.
To scale a text field, hold down the Shift key while dragging the handle.
Scaling a text field will retain its original proportions. As you scale the text
field, the percentage value its original size will be displayed.
To rotate a text field:
Double-click on the text field. The mouse pointer changes to a small cross
hair.
Hold down the left mouse button while moving the mouse in a circular
motion. As you rotate the text field, the angle value will be displayed.
To delete a text field:
Left-click once to select the text field.
Click on the Delete button or hit the Delete key on your keyboard.
For our CD label example, shown below, the text fields were moved and rotated to
different angles:
After you have inserted the text fields onto your label and moved them to a new position,
the next step is to print your label.
Printing
Now that we’ve designed our CD label, it’s time to print it out. While still on the Select
Text Layout screen, click the Print button located directly below the Label Workspace.
This will open the Printing plug-in screen. This screen consists of several options that
help you select the correct label paper and
60
Figure 5.12 – Rotating and resizing text fields
Page 61

choose which labels on the sheet to print. The main areas of the Printing plug-in screen
are shown in the diagram below and discussed in detail.
Hint Dialog
Paper
Options
Window
Label
Display
Window
Figure 5.13 – Printing plug-in screen
Paper Options Window – this column is where you view the different paper options.
Each paper type is labeled below its image. Clicking once on a paper type will allow
you to view the placement of the labels in the Label Display Window.
Label Display Window – this area is where you select which labels on the sheet to print.
Left-clicking once on the top or bottom label will toggle that label on or off. The label
you want to print needs to be toggled on in order for it to print in that location. To
print out both labels on one sheet, then both must be toggled on. Any label that is
toggled off, and is not seen in this window, will not print.
Hint Dialog Box – this is a box located in the upper right-hand corner of the dialog box
and it does exactly what its name implies. Its sole purpose is to provide you with hints
as to how to proceed if you get stuck. It also provides definitions of buttons and tabs
that appear on that page. The best part about it is that it’s mouse-sensitive, so all you
have to do is drag your mouse over an object to find out more about that object. Think
of it as your own personal cheat sheet.
Printer Settings – this area is directly below the Hint Dialog Box and it allows you to
view and edit your printer settings. By clicking the Settings button, the individual
properties dialog box for the selected printer is opened. Also located in this area is the
Calibrate button that is used to initialize the Calibration Wizard before printing for
the first time.
Paper Settings – this area is directly below the Printer Settings area and it displays the
paper type that you selected as well as the number of copies you want to print. Also
located in this area is the Print button that you will select to initialize the printing
process.
Box
Printer
Settings
Paper
Settings
61
Page 62

For our CD label example, we will select US CD Labels (2 up), which is the first label
paper option displayed in the Paper Options Window.
Next, we will go to the Label Display Window. We want to print two labels on our label
sheet, so both of them need to be toggled on here. Left-click on both labels in the Label
Display Window. Your screen should now look like this:
Figure 5.14 – Selecting both labels to print on the sheet
Click the Print button to continue.
Calibration Wiza rd
The Calibration Wizard will automatically pop-up after you hit the Print button on the
Select Paper screen. It will only do this the first time you print in MediaFACE® 4.01.
All printers will have slight variations when printing. It is quite possible for two printers
of the same model type to print the same document with small variations in alignment.
Printer Calibration is the process of making sure that the MediaFACE® 4.01 software
understands where the printer should print on the label paper. It allows you to ensure that
your label design matches the layout accurately by allowing the software to accommodate
the printing variance.
62
Page 63

The first screen you will see in the Calibration Wizard will look like this:
Figure 5.15 – First screen in the Calibration Wizard
There are two ways to calibrate your printer in the Design Wizard: MediaFACE Printer
Calibration Sheet and Plain Paper. Both methods are discussed in detail below.
MediaFACE Printer Calibration Sheet
You may have received a Printer Calibration Sheet with your purchase. The
Printer Calibration Sheet will have a ruler grid in the upper left portion of the
page. The lower portion will contain instructions for calibration.
Select the MediaFACE Printer Calibration Sheet option and Click Next. The
next screen will look like the one below:
63
Page 64

Figure 5.16 – Printer Calibration Sheet method
Select your printer from the list.
Insert the Printer Calibration Sheet into the printer.
Click Print.
After the test page prints, do the following:
Locate where the Vertical Line (up and down) crosses the “A” line. Enter this
number as the A value.
Locate where the Horizontal Line (left to right) crosses the “B” line. Enter this
number for the B value.
Click Done. You have now calibrated your printer.
Click Print to print your label.
Click Close to return to the New Project Wizard.
For instructions on applying the label to the CD, please refer to Chapter 9.
Plain Paper
The plain paper method for calibration should be used with a blank sheet of paper.
Please do not use a label sheet, as you will need to fold the paper during calibration.
Select the Plain Paper option and Click Next. The next screen will look like the
one below:
Select your printer from the list.
Select the paper type: Letter or A4
Click Print.
After the page prints, do the following: (these instructions also appear on the
printed page itself)
Fold the paper so that the two letter A’s meet, being sure to keep the edges of the
paper as even as possible.
64
Figure 5.17 – Plain Paper Calibration method
Page 65

Crease the paper thoroughly, then unfold. (see printed page for details on folding)
Repeat the process, but this time fold the paper so that the letter B’s meet, being
sure to keep the edges of the paper as even as possible.
Crease the paper thoroughly, then unfold. (see printed page for details on folding)
Locate where the Vertical (up and down) crease crosses the “A” line, and enter
the number into the calibration screen for your “A” value.
Locate where the Horizontal (left and right) crease crosses the “B” line, and enter
the number into the calibration screen for your “B” value.
Click Done. You have now calibrated your printer.
Click Print to print your label.
Click Close to return to the New Project Wizard.
For instructions on applying the label to the CD, please refer to Chapter 9.
Saving Your Label
In order to save any label created in the New Project Wizard, you must first open it in the
MediaFACE® 4.01 Advanced Interface. However, once you choose to open your project
in the Advanced Interface level, you will not be able to reopen it in the New Project
Wizard.
To access the Advanced Interface, simply click the Finish button. This will close the New
Project Wizard and automatically open your label design in the Advanced Interface. Once
opened, you can choose to save your label or continue editing your design. To save your
label, select File>Save and enter a filename. For more information on saving projects,
please refer to Chapter 7 of this manual. For more information on working in the
Advanced Interface, please refer to the remaining sections in this chapter.
65
Page 66

Advanced Mode
We will now design a label directly in the Advance Interface of MediaFACE® 4.01. As
mentioned in the Selecting a Template section at the beginning of this chapter, choosing a
template is the first step in creating a label in MediaFACE® 4.01. As also mentioned,
when working directly in the Advanced Interface you have the option of selecting either a
label or project template. We will be creating a standard CD/DVD label in the Advanced
Interface. Please refer back to the Selecting a Template section in this chapter to review
template options.
Before we begin, you should be on the opening screen for the New Project Wizard. Be
sure that the Types tab is selected and the Label Template tree is expanded. From the list
of available label templates, select the ‘CD Label (2 up)’ template. On the right side of
the dialog box, you should see a preview of the label template you selected. To work
directly in the Advanced Interface, simply deselect the ‘Run through Wizard’ checkbox
as shown below:
Figure 5.18 – Deselecting the New Project Wizard
After you deselect the wizard checkbox, click the Finish button. This will close the New
Project Wizard and automatically open your label design in the Advanced Interface. On
entering the Advanced Interface, you should see a screen similar to the one below:
Figure 5.19 – Advanced Interface opening screen
66
Page 67

To expand your work area, you should maximize the MediaFACE® 4.01 application
window. Double-click on the blue title bar of the window or click once on the middle
button on the right side of the title bar to maximize this window.
Workspace Navigator
Workspace Navigator is one of the main palettes in the Advanced Interface. When
toggled on, its default location is to the left of the Project Workspace. To change the
location of the Workspace Navigator, please refer to the Window Views section in
Chapter 4.
All MediaFACE® 4.01 projects appear in the Workspace Navigator window as a project
tree. The first level of the tree represents an open project. The second level of the tree
represents labels within that project. The third level of the tree represents separate
versions of those labels.
The Workspace Navigator allows you to manage all of the labels and versions in your
project. It provides access to each through shortcut menus that can be accessed by rightclicking on an item in the project tree. Options in these menus allow you to add or delete
items, view and modify properties and rename or move an item. An example of a pop-up
menu in Workspace Navigator is shown below:
Figure 5.20 – Pop-up menu in Workspace Navigator
Working with Proj ects
Before we continue with our CD/DVD label design, some general project options are
discussed below. A project is a set of labels and versions created as a group. Once the
MediaFACE® 4.01 application has been started, you can choose to close one project and
open a new or existing project.
67
Page 68

To create a new project while in a current project:
Select File>Close Project from the menu.
Select Yes or No to the Save Changes dialog box.
Select File>New from the menu or click on the New icon in the Standard
Toolbar.
The New Project Wizard dialog box will open.
Choose a template.
Choose to work in the New Project Wizard or directly in the Advanced Interface.
To open an existing project:
Open the MediaFACE® 4.01 application
Click Cancel on the New Project Wizard screen.
Click Yes to the confirmation dialog box.
Select File>Open from the menu or click on the Open icon in the Standard
Toolbar.
Select the project to open from the Open Project dialog box.
To close the cur rent project:
Select File>Close Project from the menu.
Select Yes or No to the Save Changes dialog box.
To create a new project item:
Right-click the Project heading.
Select New Item from the pop-up menu.
Enter an item name and description.
Click OK. This will create a new branch in the project tree to which you can
add labels and versions. The new item branch appears directly below any
existing project items listed in Workspace Navigator, as shown below:
Additional way s to create a new project item:
Select Project>Insert>Item from menu.
Or, click on the New Project Item icon in the Project toolbar.
68
Figure 5.21 – Creating a new project
Page 69

Working with La bel s
Additional labels can also be added to a project at any time within the Workspace
Navigator. The same label template options are available that were first presented when
the MediaFACE® 4.01 application was started.
To add a new label to your project:
Right-click the project title.
Select New Label from the pop-up menu.
The Add Label dialog box opens.
Figure 5.22 – The Add Label dialog box
Enter a label name.
Select the label template you want to create from the list.
Select/Deselect the Printable checkbox. This option is selected by default.
Click OK. The new label and its first version is defined and displayed in the
Workspace Navigator project tree, as shown below:
Figure 5.23 – Adding a label to a new project
69
Page 70

Additional ways to create a new label:
Select Project>Insert>Label from the Project menu.
Or, click on the New Label icon in the Project toolbar.
Working with Versions
Creating additional versions can be helpful when you need to create several labels based
on a similar design. MediaFACE® 4.01 allows you to create several versions of an
existing label that can be added to your project in Workspace Navigator. New versions
can be created as a blank copy or as a copy of an existing version. If you choose the
Blank option, a new version of the current label will be created based on label's template.
If you choose the As Copy option, a new version of the current label is created as either a
copy of the default label version or a copy of the currently selected version.
To create a new version as a Blank c opy:
Right-click on the label you are designing.
Select Create New Version from the pop-up menu.
Select the Blank option.
Enter a version name and click OK.
Figure 5.24 – Creating a new version as a blank copy
To create a new version as a Copy:
Right-click on the Label title under the label you are designing.
Select Create New Version from the pop-up menu.
Select the As Copy option. The Insert Version as Copy dialog box opens.
Select the version you want to copy from the list.
Click OK.
70
Page 71

Figure 5.25 – Insert Version as Copy dialog box
Additional way s to create a new version:
Select Project>Insert>Version from the menu.
Select Blank or As Copy.
For Blank, enter a version name and click OK.
For As Copy, select the version you want to copy from the list and click OK.
Or, click on the New Blank Version icon or the Copy Version icon in the
Project toolbar.
When a new version is created, it will appear directly below any existing versions for that
label. Right-clicking on a version provides you with access to a shortcut menu for that
version. The shortcut menu includes the following options:
Create New Version – allows you to create new versions as blank copy or copy of
existing version.
Close – closes selection version. To reopen, double-click on version name.
Rename – allows you to rename selected version.
Delete – deletes selected version.
Share – allows you to share a selected version with another label in your project.
When a version is shared with another label, a new copy of the version is created and
displayed directly below the label. Special link icons are displayed to represent the
link established between the new and original items. Any changes in the original
version will automatically apply to the linked version and vice versa. You can later
choose to break this link in the Version Properties Dialog.
Print Version – allows you to print the selected version.
Save Version as Template – allows you to save selected version as a MediaFACE® 4.01
version template that can be selected when creating new labels in either the Design
Wizard or the New Project Wizard.
Properties – displays the properties dialog box for the selected version. From this
dialog box, you can rename or share the version, set the default version and apply a
background to the label version.
71
Page 72

Inserting Images
Now that we’ve selected our label template and discussed general project options, the
next step is to add images to our label design. You should be on the main screen of the
Advanced Interface. If you’ve made any changes and need to reset your screen back to
the default view, please select File>New and repeat the steps discussed in the Advanced
Mode section of this chapter.
Before continuing with our CD/DVD label design, let’s go over some general
information about inserting images. There are several ways to insert images in
MediaFACE® 4.01. An image can be inserted as a background on your label or as a
picture. There are several source options available that apply to both backgrounds and
pictures. These source options include from a file, from the image library and from an
external source. Each of these is discussed in more detail below.
From a File
Image files can be selected from directories on a hard drive, floppy disk or CD.
MediaFACE® 4.01 supports the following graphic formats: .JPG, .BMP, .GIF, .TIF,
.PCX, .CMP, .DCX, .ICO, .PCD, .CUR, .FPX, .EPS, .PNG, .PCT, .PSD, .RAS, .TGA,
.WMF and .WPG.
To insert an image from a file:
Select Insert>Picture>From File from the menu.
Select image to insert from drive or disk.
Click Open. The Insert Image dialog box will close.
The cursor will change to the Insert Picture Tool.
Move your mouse crosshair over the label.
Left click and hold the mouse button down. Then move the mouse diagonally
and you will notice a box being drawn with the image inside.
To apply as a background, click on the image and select Format>Image>Fit to
Label.
From the Image Library
The full version of MediaFACE® 4.01 contains over 500 high-resolution images to
choose from. There are six main categories including Business, General, Lifestyle,
Music, Special Occasion and Spiritual.
Using the Format Menu:
Select Insert>Picture>From Image Library from the menu.
Find the image you want to insert. Click once to highlight image.
Click the Insert button. The Image Library dialog box will close.
The cursor will change to the Insert Picture Tool.
Move your mouse crosshair over the label.
Left click and hold the mouse button down. Then move the mouse diagonally
and you will notice a box being drawn with the image inside.
To apply as a background, click on the image and select Format>Image>Fit to
Label.
72
Page 73

Using the Object Tools Toolbar:
Click on the Picture from Image Library icon.
Find the image you want to insert and highlight that image.
Click the Insert button. The Image Library dialog box will close.
The cursor will change to the Insert Picture Tool.
Move your mouse crosshair over the label.
Left click and hold the mouse button down. Then move the mouse diagonally
and you will notice a box being drawn with the image inside.
To apply as a background, click on the image and select Format>Image>Fit to
Label.
Using the Image Li brary Palette:
Select View>Palettes>Image Library to open palette.
Find the image you want to insert.
Move your mouse crosshair over the label.
Left click and hold the mouse button down. Then move the mouse diagonally
and you will notice a box being drawn with the image inside.
To apply as a background, click on the image and select Format>Image>Fit to
Label.
To insert a background image from wi thin Workspace Navigator:
Right-click on the current label version you are designing.
Select Properties. The Face and Face Versions dialog box will open.
In the Background section, select Image. Click Browse.
Find the image you want to insert by viewing the preview of each image.
Highlight the image you want to insert. Click Open.
Click the arrow for the dropdown box below the Browse button.
Select Fit. This will fit the image to your label.
Click Apply to view changes.
Click OK to close dialog box and save changes.
From an External Source
MediaFACE® 4.01 allows you to import an image from an external sources including a
scanner, camera, webcam or data source.
To insert a scanned image:
Select Insert>Picture>External from the menu.
Click the Scanner tab.
Click the Acquire image button.
Select the source from available scanning client options.
The application connects to the attached scanner.
Click the Acquire Image button to begin the scan process.
The scanned image will be displayed in the window.
Use the edit buttons to flip vertical/horizontal or to rotate
clockwise/counter-clockwise.
When satisfied with the image, click OK.
73
Page 74

Click OK. The cursor will change to the Insert Picture Tool.
Move your mouse crosshair over the label.
Left click and hold the mouse button down. Then move the mouse diagonally
and you will notice a box being drawn with the image inside.
To apply as a background, click on the image and select Format>Image>Fit to
Label.
To insert an image f rom a camera:
Select Insert>Picture>External from the menu.
Click the Camera tab.
The application automatically connects to the attached digital camera.
Select the image you want to insert and click OK.
The cursor will change to the Insert Picture Tool.
Move your mouse crosshair over the label.
Left click and hold the mouse button down. Then move the mouse diagonally
and you will notice a box being drawn with the image inside.
To apply as a background, click on the image and select Format>Image>Fit to
Label.
To insert an image f rom a webcam:
Select Insert>Picture>External from the menu.
Click the Webcam tab.
The application automatically connects to the attached webcam.
Images are displayed as a video stream.
Click the Live View button to start recording.
Click the Pause button to stop recording. Click the Live View button again to resume
recording.
When satisfied with the image, click OK.
The cursor will change to the Insert Picture Tool.
Move your mouse crosshair over the label.
Left click and hold the mouse button down. Then move the mouse diagonally and you
will notice a box being drawn with the image inside.
If applying as a background, click on the image and select Format>Image>Fit to
Label.
To insert an image f rom a data source:
Select Insert>Picture>External from the menu.
Click the Data Source tab.
Click the Select DataSource button.
If you have an existing data source:
Select the data source from a list of available options.
Click the List Manager button if you need to edit the data source.
Otherwise, select the field you want to use and click OK.
Click OK to close the Get External Picture dialog box.
The cursor will change to the Insert Picture Tool.
Move your mouse crosshair over the label.
74
Page 75

Left click and hold the mouse button down. Then move the mouse
diagonally and you will notice a box being drawn with the image inside.
If you do not have an existing data source:
Click the List Manager button.
Click New to define a new data source
Enter a name for the data source and click New.
Follow the steps for the Data Source Wizard.
Select the field you want to use and click OK to close List Manager.
Select the data source and field and click OK to close the Data Source
dialog box.
Click OK to close the Get External Picture dialog box.
The cursor will change to the Insert Picture Tool.
Move your mouse crosshair over the label.
Left click and hold the mouse button down. Then move the mouse
diagonally and you will notice a box being drawn with the image inside.
If applying as a background, click on the image and select
Format>Image>Fit to Label.
Inserting a Background Image onto our CD/DVD label:
We are now ready to apply the information from the above sections and continue with
our CD/DVD label design. First, we will insert a background image from the image
library onto our CD/DVD label. We will use the shortcut menu in Workspace Navigator.
To do this, follow the steps below:
Right-click on Version1 in the Workspace Navigator.
Select Properties. The Face and Face Versions dialog box will open.
In the Background section, select Image. Click Browse.
Figure 5.26 – Face and Face Versions Properties dialog box
In the MediaFACE® 4.01 folder, double-click the Settings folder.
Double-click the Images folder.
Double-click the Image Library folder.
Double-click the Cliparts folder.
Double-click the Business folder.
75
Page 76

Scroll through to find the following file: Business0043
Click Open.
Click the arrow for the dropdown box below the Browse button.
Options for applying the image to the label include Center, Fit, Fit Maximal or Fit
Minimal.
Select Fit. This will fit the image to your label, as shown below:
Applying image to fit label
To edit the background image you just inserted, right-click on Version1 and select
Properties. In the Face and Face Versions Properties dialog box, you can rename the label
or version, choose a different image or change how it is fit to the label.
Next, to continue with our label design, we will add two additional images to our
CD/DVD label. To do this, follow the steps below:
Image 1
Select Insert>Picture>From Image Library.
Double-click the Business folder.
Scroll down to find the following image:
Click Insert.
The cursor will change to the Insert Picture Tool.
Position your cursor on the left side of the label.
Left click and hold the mouse button down. Then move the mouse diagonally and
you will notice a box being drawn with the image inside.
Image 2
Select Insert>Picture>From Image Library.
Double-click the Business folder.
76
Page 77

Scroll down to find the following image:
Click Insert.
The cursor will change to the Insert Picture Tool.
Position your cursor on the left side of the label.
Left click and hold the mouse button down. Then move the mouse diagonally and you
will notice a box being drawn with the image inside.
After inserting the two images above, your label should look similar to the one shown
below:
Inserting images onto a label
In the next section, we will discuss different options available to edit and work with the
images that have been inserted.
Working with Images
Several actions, such as moving, resizing, scaling, rotating and deleting, can be
performed on images once they’ve been added to your label. We will be moving and
resizing the images on our label. For our CD/DVD label, first we will resize each of our
images to a smaller scale. Then we will move the images to a new position. Complete the
steps listed below to resize and scale each image:
To resize the image:
Left-click once to select the image. The mouse pointer changes to the
Move/Edit tool and sizing handles will be displayed around the border of the
image.
Next, move your mouse to one of the sizing handles. The mouse pointer
changes to a smaller Move/Edit tool.
To scale the text field, hold down the Shift key, left-click and hold the mouse
button down while dragging the handle in any direction. Scaling a text field
77
Page 78

will retain its original proportions. As you scale the text field, the percentage
value of its original size will be displayed.
If you do not want to scale the image, left-click and hold the mouse button
down while dragging the handle in any direction. Selecting different handles
will have different stretching or shrinking effects on the image. As you resize
the image, the point position (X and Y values) will be displayed.
The following diagrams show each image after it’s been resized with scaling and without:
Scaling an image Resizing an image
Now we will move the images to a new position on the label. Complete the steps below
for each image:
To move the image:
Left-click once to select the image. The mouse pointer changes to the
Move/Edit tool.
Left-click once and hold down the mouse button while dragging the mouse.
Release the mouse button after you’ve moved the image to its new location on
the label.
Your label should look similar to the one shown above after the images have been
moved.
78
Page 79

Next, we will rotate the angles of the images. Complete the steps below for each image:
To rotate the image:
Double-click on the image. The mouse pointer changes to a small cross-hair.
Hold down the left mouse button while moving the mouse in a circular
motion. As you rotate the image, the angle value will be displayed.
Your label should now look similar to the one shown below:
Rotating an image
You are also allowed to flip images on your label. Selected objects are flipped either
vertically or horizontally across the center axis of the selection.
To flip image:
Left-click once to select the image.
Select Format>Image>Flip Horizontal
Or, select Format>Image>Flip Vertical.
An example of each effect is shown below:
Original image Flip Horizonta l Flip Vertical
Another way to manipulate an image is to crop that image. When you crop an image, you
are defining a part of that image to cut out and use instead of using the entire image. To
show an example of this, we will insert a third image onto our label and then crop that
image. To do this, complete the steps below.
To crop the imag e:
Insert the following image onto a blank area of your
label: (Please refer back to the Inserting an Image from
79
Page 80
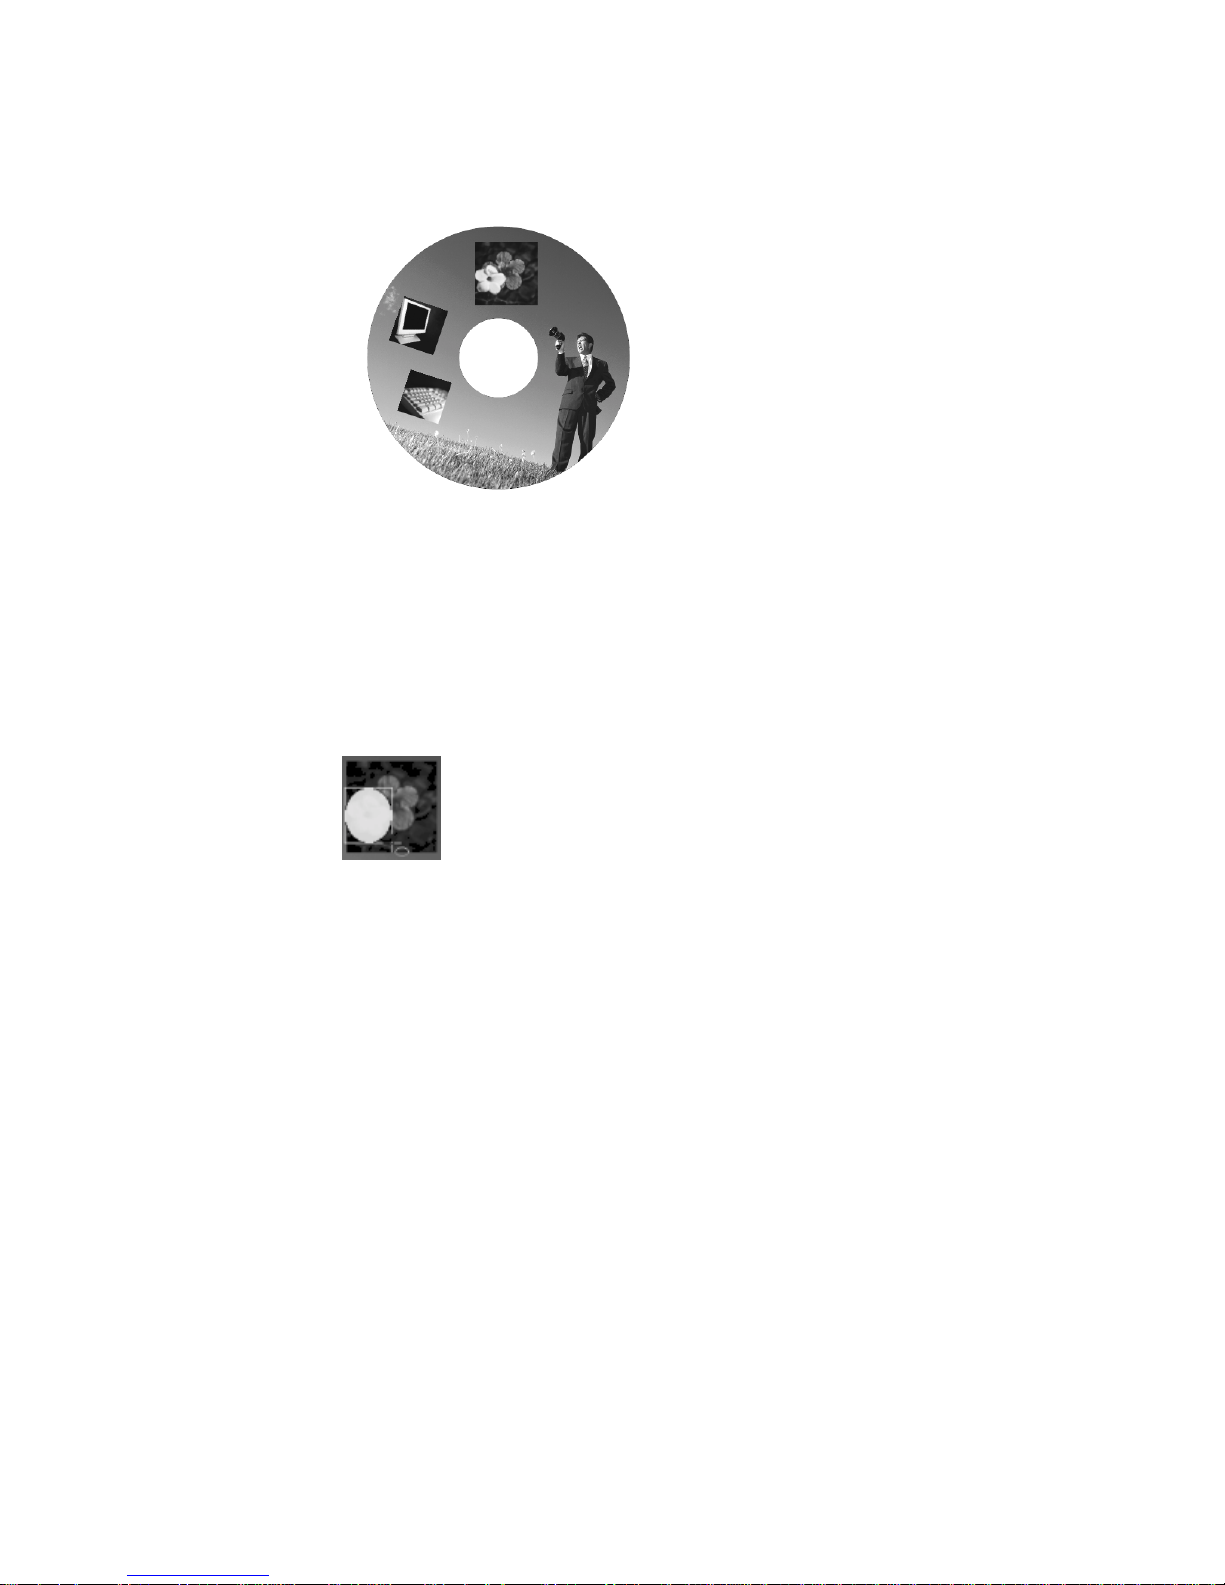
the Image Library section, or our label example for inserting an image.)
After inserting the image, your label should look like this:
Next, select one of the Shape tools (rectangle, ellipse, line). We will use an
ellipse, so select Insert>Tools>Ellipse from the menu. The cursor will change
to the Insert Shape tool.
Left-click and hold the mouse button down. Then drag the mouse to insert the
ellipse shape over the part of the image that you want to crop. For example,
we only want to use the yellow flower, so we’ll position the ellipse shape over
that part of the image, as shown below:
(If you don’t completely cover the part of the image that you want to crop, you can
move or resize the ellipse shape after you’ve inserted it on the label. The same rules
apply as for moving and resizing images, as discussed in the Working with Images
section.)
Next, select both the ellipse shape and the image. Left-click on the ellipse
shape. Holding down the Ctrl key, left-click the image. A thin light-blue
outline will appear around both of the fields.
Select Format>Image>Crop Image.
80
Page 81

The part of the image that you selected with the ellipse shape will remain
while the rest of the image is deleted, as shown below:
Cropping an image
Finally, images can be deleted from your label very easily. We will now delete the
cropped image by completing the steps below:
To delete the image:
Left-click once to select the cropped image.
Right-click and select Delete from the pop-up menu. You can also hit the
Delete key on your keyboard.
81
Deleting an image
Page 82

Now that we have inserted and manipulated images on our label, we’re ready to add text
to our design. As we leave this section,
our CD/DVD label should look like the label shown above.
Inserting Text
The next step is to add text to our label design. MediaFACE® 4.01 allows you to input
text directly onto the label. The text that is entered can be simple or enhanced. Either
style of text is added to the label as a text field and thus can be manipulated as such.
General steps for inserting both text types are listed in separate sections below, followed
by steps for inserting text onto our CD/DVD label.
Simple Text
Simple text is plain text that is input directly onto the label. Standard modifications can
be made to simple text, such as font style, color and size.
To insert simple text:
Select Insert>Tools>Text from the menu.
Left-click and hold the mouse button down. Then drag the mouse diagonally
to insert the text field.
The Text Style/Text Effects Palette will open.
Select the Text Style tab. This tab allows you to enter simple text and change
its appearance.
As you type the text in the text box, it will appear on your label.
Additional ways to insert simple text:
Click the Text Tool in the Objects Tools toolbar.
Left-click and hold the mouse button down. Then drag the mouse diagonally
to insert the text field.
The Text Style/Text Effects Palette will open.
Select the Text Style tab. This tab allows you to enter simple text and change
its appearance.
As you type the text in the text box, it will appear on your label.
82
Page 83
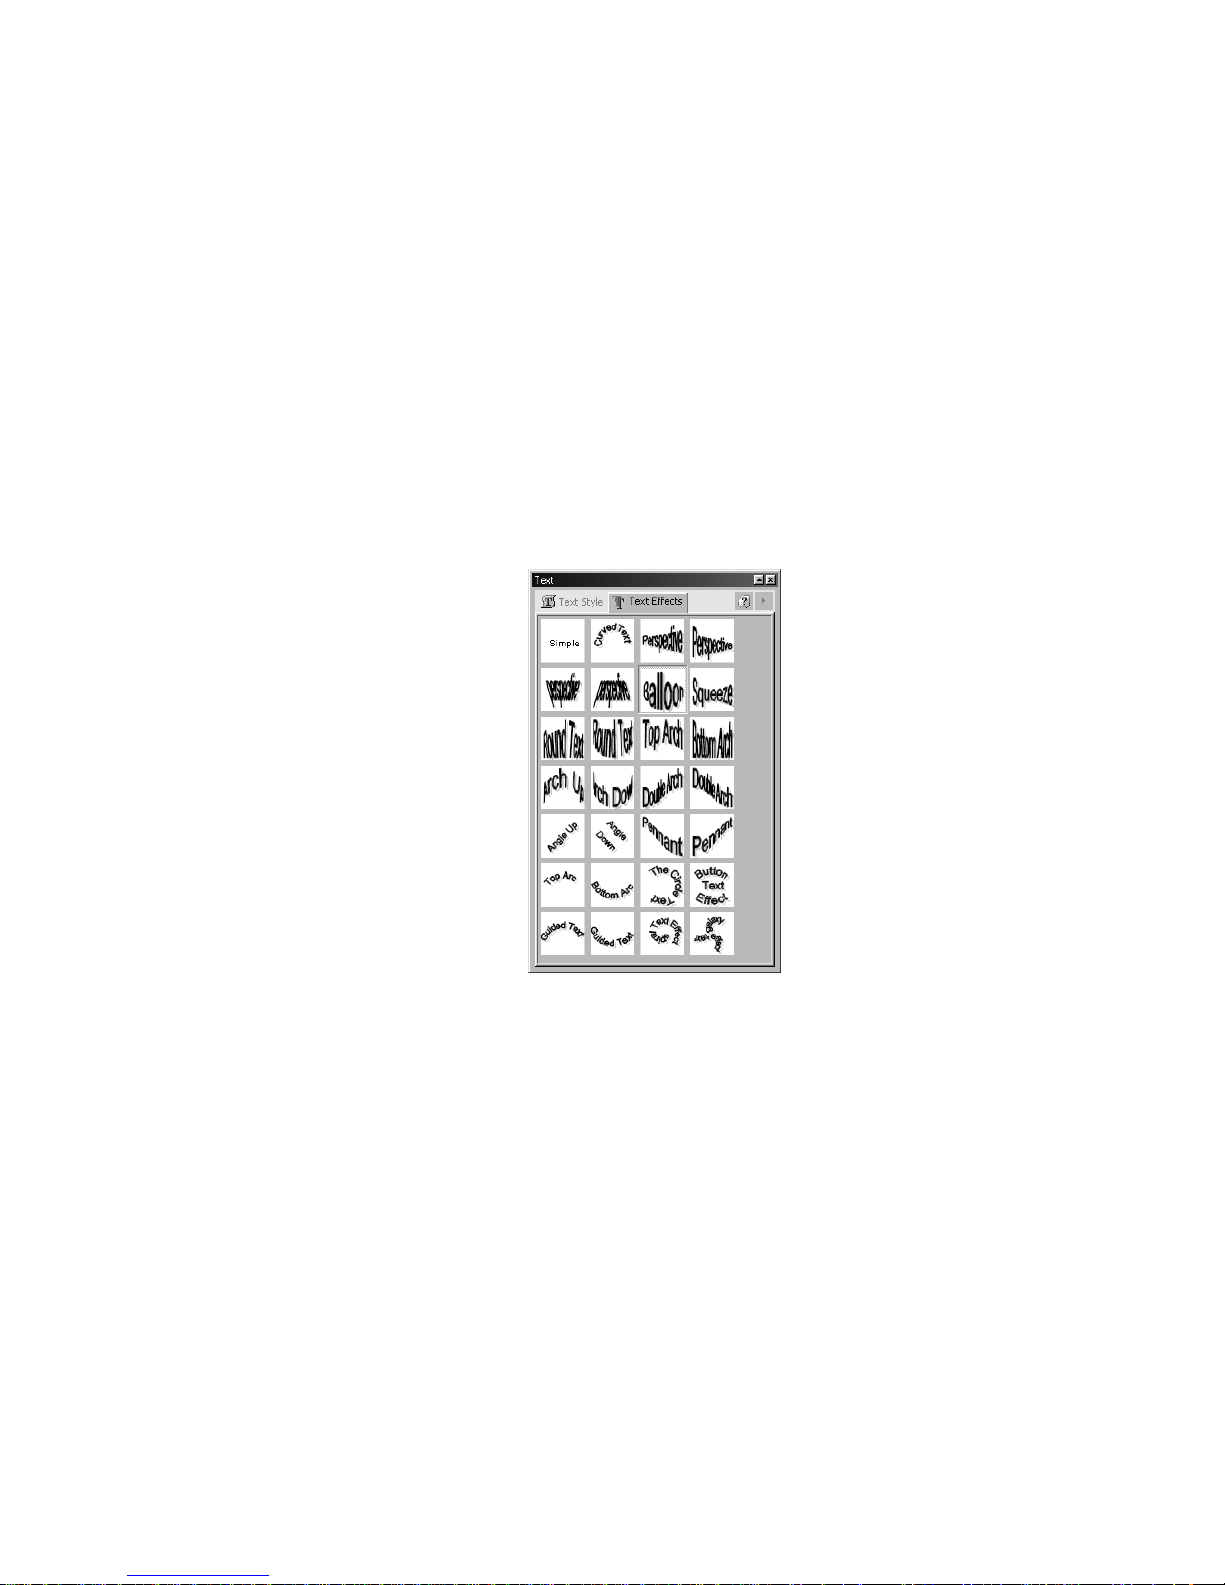
At the bottom of the Text Style palette window, there are dropdown lists that allow you
to change the font type and size. Below these are toggle buttons to apply formatting to the
text – bold, italics, underline, strikethrough, upper case, foreground, background, shadow
and alignment options. To apply any of these changes to text directly in the palette
window, highlight the text first to select it for editing.
Highlighting the text in the palette window and right-clicking once can access additional
format options. A pop-up window that contains the copy/paste commands, paragraph
alignment and spacing, and numbering format options opens.
Text Effects
Text effects are visual effects applied to text, in addition to the standard font
modifications, in order to enhance its appearance. An example of each visual effect as it
appears in the Text Effects Palette is shown below:
Figure 5.27 – Text Effects Palette
To apply text effects:
Select Insert>Tools>Text from the menu.
Left-click and hold the mouse button down. Then drag the mouse diagonally
to insert the text field.
The Text Style/Text Effects Palette will open. Type your text in the Text
window.
Select the Text Effects tab. All available effects are shown here. The
appearance of your text will change as you select different effects.
Additional ways to insert text effec ts:
Click the Text Tool in the Objects Tools toolbar.
Left-click and hold the mouse button down. Then drag the mouse diagonally
to insert the text field.
83
Page 84

The Text Style/Text Effects Palette will open. Type your text in the Text
window.
Select the Text Effects tab. The appearance of your text will change as you
select different effects.
Curved Text
The curved text effect includes its own set of properties that can be edited. The following
section contains specific information for using the curved text effect.
To create curve d text:
Select Insert>Tools>Text from the menu.
Left-click and hold the mouse button down. Then drag the mouse diagonally
to insert the text field.
The Text Style/Text Effects Palette will open. Type your text in the Text
window.
Select the Text Effects tab. Click the Curved Text box. The appearance of
your text will change on the label to curved text format.
To move curved te xt:
Left-click once to select the curved text field. The mouse pointer changes to
the Move/Edit tool and sizing handles will be displayed around the border of
the text field.
Next, move your mouse to one of the sizing handles. The mouse pointer
changes to a smaller Move/Edit tool.
To scale the curved text field, hold down the Shift key, left-click and hold the
mouse button down while dragging the mouse in an up or down direction.
Scaling a curved text field will retain its original proportions and shape. As
you scale the text field, the percentage value of its original size will be
displayed.
To stretch the curved text field, left-click and hold the mouse button down
while dragging one of the end handles in a clockwise or counter-clockwise
direction. As you resize the image, the point position (X and Y values) will be
displayed. Notice that the text field remains curved as it expands in a circular
fashion to fit to the label, as shown below:
84
Page 85

Scaling a curved text field
To move the text around the inside of the label, left-click once to select the
curved text field. The mouse pointer changes to the Move/Edit tool.
Left-click once and hold down the mouse button while dragging the mouse
toward the center of the label. The closer you move the text field to the center
of the label, the tighter its fit around the center becomes. You can adjust this
by moving the mouse up or down until the desired curved shape is reached.
Eventually, a complete circle is formed.
Release the mouse button after you’ve moved the text field to its new location
on the label with the curved shape that you want, as shown below:
To change properties for curved text:
Right-click on the curved text box and select Properties.
Select the Text Effect tab. Click the Curved Text box.
The Effect Parameters section appears below the Text Effects options.
85
Moving curved text field to fit center
Page 86
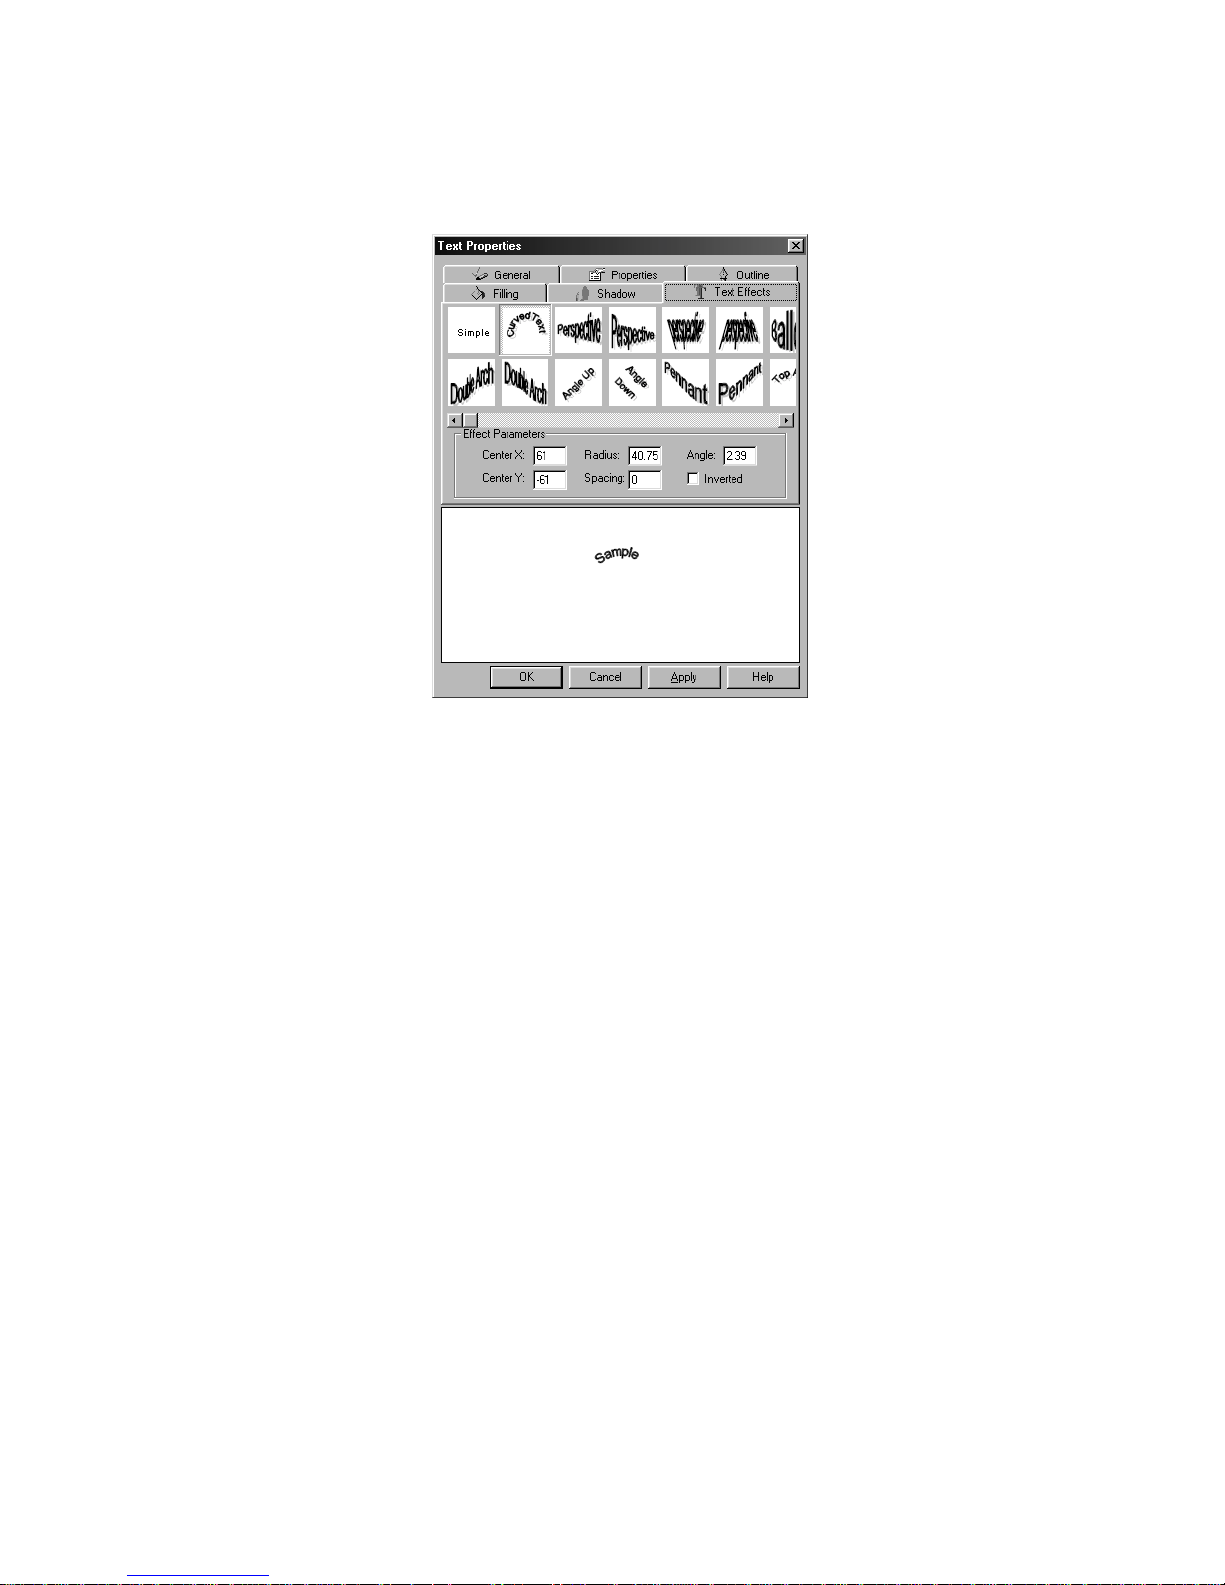
Parameters that can be edited here include horizontal and vertical centering (X
and Y values), radius, spacing, angle rotation and inversion. The Effect
Parameters section is shown below:
Figure 5.28 – Effect Parameters in Text Effects tab
Now, we will insert two text fields onto our CD/DVD label. We will enter the text as
simple text and then apply text effects to both of the fields. To do this, follow the steps
below:
Text Field 1
Select Insert>Tools>Text from the menu.
Left-click and hold the mouse button down. Then drag the mouse diagonally
to insert the text field.
The Text Style/Text Effects Palette will open.
Select the Text Style tab.
Type in the following text: Presentations
Highlight the text in the palette text window.
Select the following font settings: Arial>Bold>18>Black
Click the Text Effects tab.
Select the Bottom Arch effect.
Text Field 2
Select Insert>Tools>Text from the menu.
Left-click and hold the mouse button down. Then drag the mouse diagonally
to insert the text field.
In the Text Style/Text Effects Palette, select the Text Style tab.
Type in the following text: Quarterly Reports
Select the following font settings: Arial>Bold>18>Black
Click the Text Effects tab.
86
Page 87

Select the Top Arch effect.
Close or minimize the Text Style/Text Effects palette.
After inserting the two text fields, your label should look similar to the one shown
below:
Inserting enhanced text
The next section will discuss ways to manipulate the inserted text fields.
Working with Text
Several actions can be performed on text fields once they’ve been added to your label.
These actions include moving, resizing, scaling, rotating and deleting. For our CD/DVD
label, first we will resize each of our text fields. Then we will move the text fields to a
new position. Complete the steps listed below to resize and scale each text field:
To resize the text fi eld:
Left-click once to select the text field. The mouse pointer changes to the
Move/Edit tool and sizing handles will be displayed around the border of the
text field.
Next, move your mouse to one of the sizing handles. The mouse pointer
changes to a smaller Move/Edit tool.
To scale the text field, hold down the Shift key, left-click and hold the mouse
button down while dragging the handle in any direction. Scaling a text field
will retain its original proportions. As you scale the text field, the percentage
value of its original size will be displayed.
If you do not want to scale the text field, left-click and hold the mouse button
down while dragging the handle in any direction. Selecting different handles
will have different stretching or shrinking effects on the text field. As you
resize the text field, the point position (X and Y values) will be displayed.
(Please note: this applies to text effects only, not simple text. When
resizing simple text, the box will get larger but the text itself will not.)
87
Page 88

The following diagrams show each text field after it’s been resized with scaling and
without:
Scaling a text field Resizing a text field
Now we will move the text fields to a new position and try to center them more on the
label. Complete the steps below for each text field:
To move the text fi eld:
Left-click once to select the text field. The mouse pointer changes to the
Move/Edit tool.
Left-click once and hold down the mouse button while dragging the mouse.
Release the mouse button after you’ve moved the text field to its new location
on the label.
Your label should look similar to the one shown below after the text fields have been
moved:
Next, we will rotate the angles of the text fields. Complete the steps below for each text
field:
To rotate the text field:
88
Moving the text fields
Page 89

Double-click on the text field. The mouse pointer changes to a small cross-
hair.
Hold down the left mouse button while moving the mouse in a circular
motion. As you rotate the text field, the angle value will be displayed.
Rotating the text fields
Finally, text fields can be deleted from your label very easily.
To delete a text field:
Left-click once to select the text field you want to delete.
Right-click and select Delete from the pop-up menu. You can also hit the
Delete key on your keyboard.
In the next section, you will be given general instructions for adding shapes to your label.
Shapes
MediaFACE® 4.01 allows you to add several shapes to your label. These shapes include
rectangle, ellipse and line tool. The following section includes steps for creating and
modifying each object.
Rectangle
To insert a rectangle
:
Select Insert>Tools>Rectangle from the menu.
Left-click and hold the mouse button down. Then drag the mouse diagonally
to insert the rectangle.
89
Page 90

Additional way s to i nsert a rectangl e:
Click the Rectangle Tool in the Object Tools toolbar.
Inserting a rectangle
To resize the rect angle:
Left-click once to select the rectangle. The mouse pointer changes to the
Move/Edit tool and sizing handles will be displayed around the border of the
rectangle.
Next, move your mouse to one of the sizing handles. The mouse pointer
changes to a smaller Move/Edit tool.
To scale the rectangle, hold down the Shift key, left-click and hold the mouse
button down while dragging the handle in any direction. Scaling a rectangle
will retain its original proportions. As you scale the rectangle, the percentage
value of its original size will be displayed.
If you do not want to scale the rectangle, left-click and hold the mouse button
down while dragging the handle in any direction. Selecting different handles
will have different stretching or shrinking effects on the rectangle. As you
resize the rectangle, the point position (X and Y values) will be displayed.
The following diagram shows the rectangle after it’s been resized with scaling and
without:
Scaling a rectangle Resizing a rectangle
90
Page 91

To move the rectangle:
Left-click once to select the rectangle. The mouse pointer changes to the
Move/Edit tool.
Left-click once and hold down the mouse button while dragging the mouse.
Release the mouse button after you’ve moved the rectangle to its new location
on the label.
To rotate the rectangle:
Double-click on the rectangle. The mouse pointer changes to a small cross-
hair.
Hold down the left mouse button while moving the mouse in a circular
motion. As you rotate the rectangle, the angle value will be displayed.
Moving the rectangle
Ellipse
To insert an ellipse:
Select Insert>Tools>Ellipse from the menu.
Left-click and hold the mouse button down. Then drag the mouse diagonally
to insert the ellipse.
Additional way s to insert an ellipse:
Click the Ellipse Tool in the Object Tools toolbar.
91
Rotating the rectangle
Page 92

To resize the ellipse:
Left-click once to select the ellipse. The mouse pointer changes to the
Move/Edit tool and sizing handles will be displayed around the border of the
ellipse.
Next, move your mouse to one of the sizing handles. The mouse pointer
changes to a smaller Move/Edit tool.
To scale the ellipse, hold down the Shift key, left-click and hold the mouse
button down while dragging the handle in any direction. Scaling an ellipse
will retain its original proportions. As you scale the ellipse, the percentage
value of its original size will be displayed.
If you do not want to scale the ellipse, left-click and hold the mouse button
down while dragging the handle in any direction. Selecting different handles
will have different stretching or shrinking effects on the ellipse. As you resize
the ellipse, the point position (X and Y values) will be displayed.
The following diagram shows the ellipse after it’s been resized with scaling and
without:
Inserting an ellipse
Scaling an ellipse Resizing an ellipse
92
Page 93
To move the ellipse:
Left-click once to select the ellipse. The mouse pointer changes to the
Move/Edit tool.
Left-click once and hold down the mouse button while dragging the mouse.
Release the mouse button after you’ve moved the ellipse to its new location
on the label.
To rotate the ellipse:
Double-click on the ellipse. The mouse pointer changes to a small cross-hair.
Hold down the left mouse button while moving the mouse in a circular
motion. As you rotate the ellipse, the angle value will be displayed.
Moving the ellipse
93
Rotating the ellipse
Page 94

Lines
To insert a single-s egment line:
Select Insert>Tools>Line Tool from the menu.
Left-click and release the mouse where you want the line to start.
Move the mouse to the end point of the line and left-click.
Press the Enter key on the keyboard to complete the line.
The line will be inserted on the label.
To insert a multi-segment line::::
Select Insert>Tools>Line Tool from the menu.
Left-click and release the mouse where you want the line to start.
Move the mouse to the end of the first segment of the line, left-click and
release.
Do this for as many segments as you want the line to have.
Press the Enter key on the keyboard to complete the line.
The line will be inserted on the label.
Inserting a single-segment line
Additional way s to insert a line:
Click the Line Tool in the Object Tools toolbar.
Multi-segment lines can also be transformed into unique shapes by performing an action
to selected segments. By using the Segment Tool to select specific segments or individual
points, you can create splines and closed polylines.
94
Inserting a multi-segment line
Page 95

Using the Segment Tool:
Create a multi-segment line. See above section for steps involved.
Left-click once to select the line. The segment points will be displayed around
the shape.
Select the Segment Tool from the Object Tools toolbar.
Move the Segment Tool over one of the points. You will see a small curved
line appear to the bottom-right of the Segment Tool.
Left-click and hold as you drag the segment point and change the shape.
Original multi-segment line Using Segment Tool with segment point
Or, move the Segment Tool to the middle of one of the segments. You will
see a small curved line appear to the bottom-right of the Segment Tool.
Left-click and hold as you drag or twist the segment and change the shape.
You can also create unique closed shapes by connecting the first and last segment, or
other segments within the line:
To create a clos ed shape:
Select Insert>Tools>Line Tool from the menu.
Left-click and release the mouse where you want the line to start.
Move the mouse to the end of the first segment of the line, left-click and
release.
95
Using Segment Tool with segments
Page 96

Do this for as many segments as you want the line to have.
To connect with the first segment, hold mouse over segment point until you
see a large black square over the point, as shown below:
Connecting first and last segments
Left-click once on this black square.
The shape will become a closed shape as shown below:
Closed shape
To resize the line:
Left-click once to select the line. The mouse pointer changes to the Move/Edit
tool and sizing handles will be displayed around the border of the line.
Next, move your mouse to one of the sizing handles. The mouse pointer
changes to a smaller Move/Edit tool.
To scale the closed shape, hold down the Shift key, left-click and hold the
mouse button down while dragging the handle in any direction. Scaling a
closed shape will retain its original proportions. As you scale the closed shape,
the percentage value of its original size will be displayed.
If you do not want to scale the line, left-click and hold the mouse button down
while dragging the handle in any direction. Selecting different handles will
have different stretching or shrinking effects on the line. As you resize the
line, the point position (X and Y values) will be displayed.
96
Page 97

The following diagram shows the line after it’s been resized with scaling:
Scaling the line
To move the line:
Left-click once to select the line. The mouse pointer changes to the Move/Edit
tool.
Left-click once and hold down the mouse button while dragging the mouse.
Release the mouse button after you’ve moved the line to its new location on
the label.
Moving the line
To rotate the line:
Double-click on the line. The mouse pointer changes to a small cross-hair.
Hold down the left mouse button while moving the mouse in a circular
motion. As you rotate the line, the angle value will be displayed.
Rotating the line
97
Page 98

Modifying Shape properties
Once a shape has been inserted onto your label, there are several properties that can be
modified via the Properties dialog box. To open the Properties dialog box, right-click on
the shape and select Properties. You will see five tabs – General, Properties, Outline,
Filling, Shadow – which allow you to view and change the position or appearance of the
shape. Properties that can be changed in these tabs include layer position, angle rotation,
corner definition, outline style and color, filling and shadow type. The Line shape only
contains two tabs - General and Outline – which allow you to change layer position,
angle rotation, and outline style and color.
The items under each of the tabs can also be viewed and modified in the corresponding
palettes. To view rectangle properties using a palette, select View>Palettes and select the
appropriate palette from the list.
Convert To Option
The Convert To option can be applied to the Rectangles and Ellipses. The Rectangle can
be converted to a square, polygon or ellipse. The Ellipse can be converted to a rectangle
or a circle.
To convert to a square:
Left-click once to select the Rectangle.
Select Format>Convert to>Square.
The shape changes to a square on the label. Filling, shadow and outline values
will not change.
To convert to a polygon:
Left-click once to select the Rectangle.
Select Format>Convert to>Polygon.
The shape changes to a polygon on the label. Filling, shadow and outline
values will not change.
To convert to an ellipse:
Left-click once to select the Ellipse.
Select Format>Convert to>Ellipse.
The shape changes to an ellipse on the label. Filling, shadow and outline
values will not change.
To convert to a rectangle:
Left-click once to select the Rectangle.
Select Format>Convert to>Square.
The shape changes to a rectangle on the label. Filling, shadow and outline
values will not change.
To convert to a circle:
Left-click once to select the Ellipse.
Select Format>Convert to>Circle.
The shape changes to a circle on the label. Filling, shadow and outline values
will not change.
98
Page 99

Alignment
MediaFACE® 4.01 provides several features that can be used when manipulating and
aligning multiple fields on a label. Each of these features is discussed below.
Multiple selection/Grouping
Multiple selection or grouping of fields is one option offered in the Advanced Interface.
Selecting multiple fields allows you to perform an action or apply changes to a group of
fields at the same time. This is especially useful when you want to align several fields to
a specific location on the label.
To group multiple f i elds:
Left-click on one of the fields.
Holding down the Ctrl key, left-click another field. Repeat to select additional
fields. A thin outline will appear around the selected fields.
Select Format>Group from the menu. The selected fields are now grouped
together and will be treated as one field. Any action that is applied - moving,
resizing, rotating or deleting - will be applied to all of the fields
simultaneously. The selected fields will stay grouped until you ungroup them.
To ungroup the fields, left-click on one of the fields. The thin outline will
appear around both of the fields again. Select Format>Ungroup from the
menu. Important: after ungrouping, you must left-click on an open area of the
label to deselect the fields. Only after the outline around each field disappears
will you be able to select each field separately.
Additional way to group multiple fi elds:
Left-click on one of the fields.
Holding down the Ctrl key, left-click another field. Repeat to select additional
fields. A thin outline will appear around the selected fields.
The two fields are now grouped together and will be treated as one field. Any
action that is applied - moving, resizing, rotating or deleting - will be applied
to all of the fields simultaneously.
To ungroup the fields, left-click on an open area of the label.
Aligning Multiple Objects
Another way to align multiple objects is the Alignment feature. The Alignment dialog
box allows you to select vertical and horizontal options to align objects to the label.
99
Page 100

To align multiple objects:
Left-click on one of the fields.
Holding down the Ctrl key, left-click another field. Repeat to select additional
fields. A thin outline will appear around the selected fields.
Select Format>Alignment. The Alignment dialog box will open:
Figure 5.29 – Alignment dialog box
Select one vertical and/or one horizontal option and click OK to apply
settings.
To ungroup the fields, left-click on an open area of the label.
Locking/Unlocking Objects
Once you have manipulated an object on your label, it is possible to lock that object to
prevent changes to its properties. This option can be set for an individual object or a
group of objects. Locked objects cannot be changed in any way, even if they are part of a
group that is being modified.
To lock/unlock an object:
Right-click on the object. Select Properties.
In the General tab, click once on the lock/unlock button. Click OK.
The selected object will remain locked until it is unlocked.
To unlock an object return to the Properties box and click the lock/unlock
button.
Additional way to lock/unlock obj ects:
100
Figure 5.30 – Locking an object
 Loading...