

FasTest ST Series Seal Replacement User Manual
REPLACEMENT INSTRUCTIONS
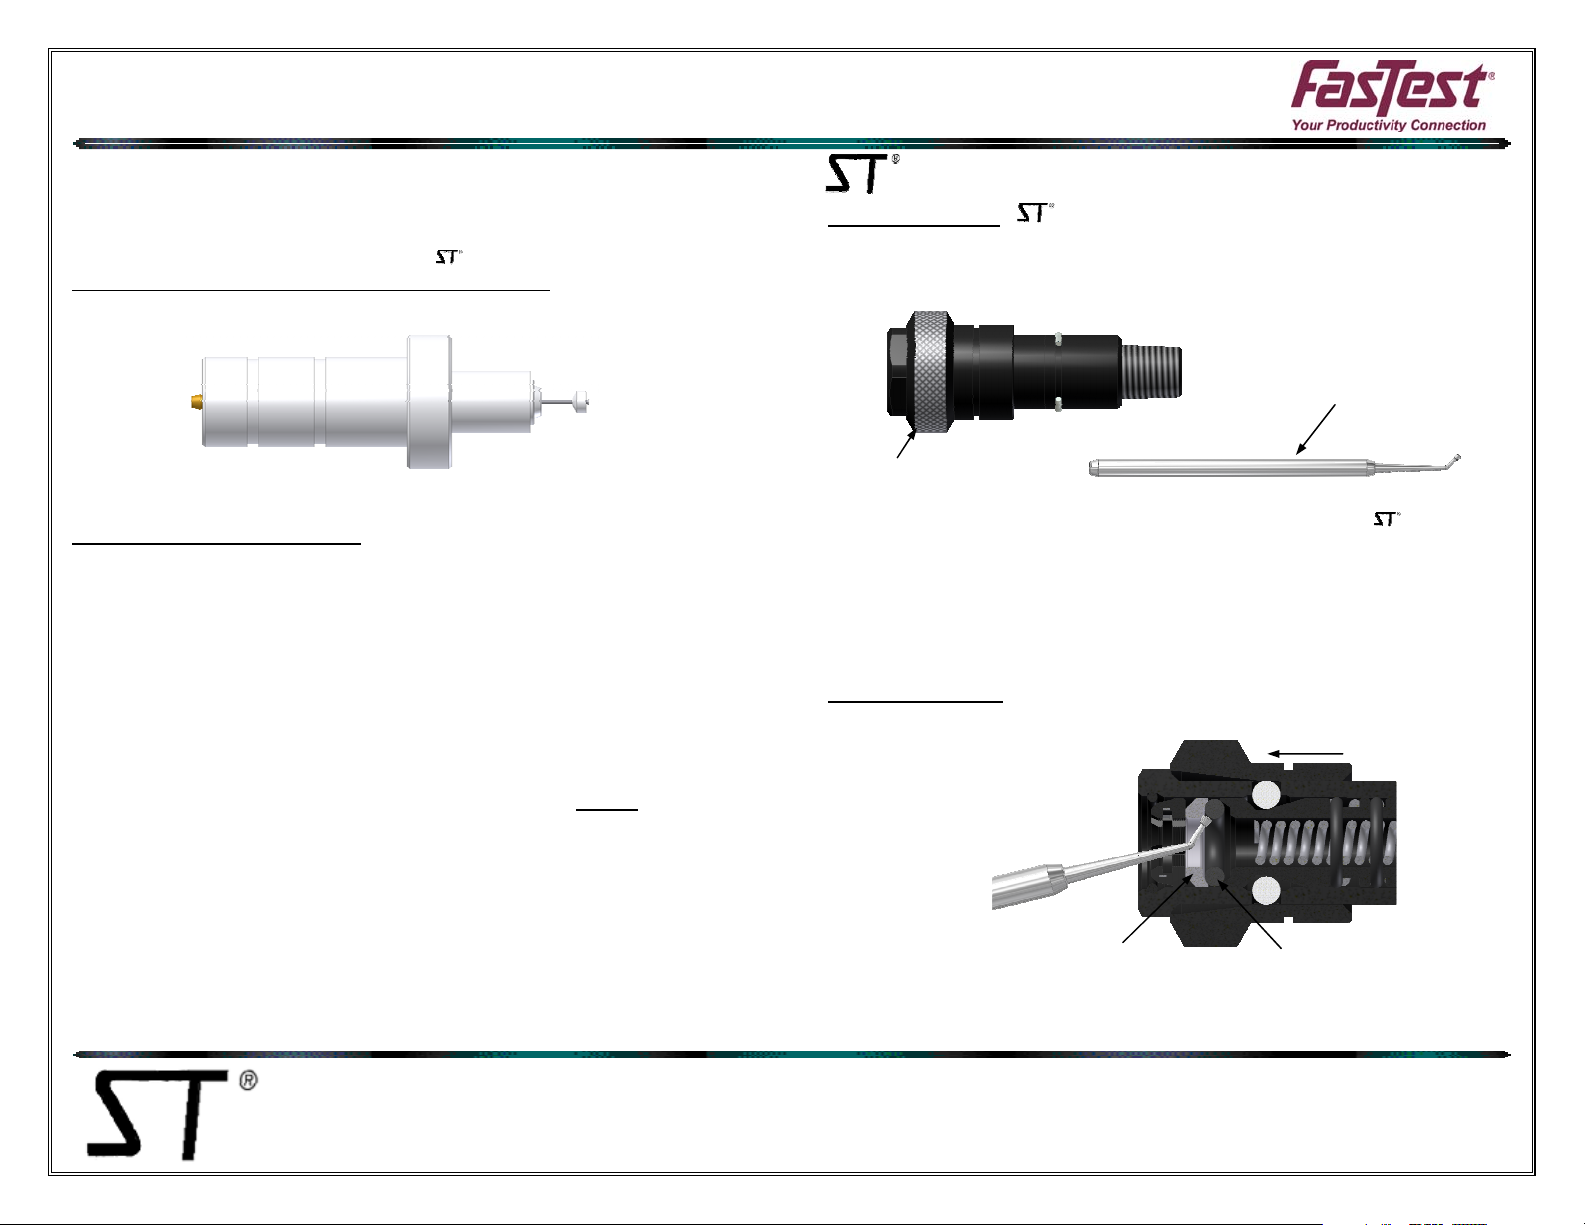
Optional Replacement Tool:
The FasTest STOT Replacement O-Ring Tool Kit provides the user with the
seal extraction pick along with the STT seal replacement tool (shown below).
With the STT tool, the seal replacement procedure is as easy as placing the
seal into the tool, putting the tool into the connector and actuating.
Call FasTest for details and any questions before use.
CONNECTOR MAINTENANCE:
• A daily, weekly and periodic inspection of the connector by competent person is
recommended.
o User must establish a regular interval for maintenance as determined by the user
media and operational environment.
o Periodically inspect connector and seal for wear, damage and proper operation.
• Use only original FasTest spare parts that are designed for the application and are
subject to strict quality control. See warranty.
• Difficulty of operation after continual use indicates need for lubrication or other
maintenance.
• Lubricate on regular intervals under normal operating conditions. Lubrication should
FasTest, Inc. Product Warranty
FasTest, Inc. warrants its products against defects of workmanship and/or material for 12 months from the date of the
sale by FasTest, Inc. This warranty is void if the product is misused, tampered with or used in a manner that is not in
accordance with FasTest, Inc. recommendations and/or instructions. FasTest, Inc. is not liable for consequential or
other damages including, but not limited to, loss, damage, personal injury, or any other expense directly or indirectly
arising from the use of or inability to use its products either separately or in combination with other products. ALL
OTHER WARRANTIES EXPRESSED OR IMPLIED, WHETHER ORAL OR WRITTEN, INCLUDING BUT NOT
LIMITED TO WARRANTIES OR MERCHANTABILITY OR FITNESS FOR A PARTICULAR PURPOSE ARE
EXPRESSLY EXCLUDED.
Remedy under this warranty is limited to replacement of the product or an account credit in the amount of the original
selling price, at the option on FasTest, Inc. All allegedly defective products must be returned prepaid transportation to
FasTest, Inc. along with information describing the products performance, unless disposition in the field is authorized
in writing by FasTest, Inc.
WP026 10/6/2010
be compatible with user application.
Series Seal Replacement
DESCRIPTION: Connector Seal Replacement -STB-
STB replacement seals for FasTest ST Connectors are designed to be installed with FasTest repair tools. Each STB seal replacement kit contains
five seal changes.
SLEEVE
Please thoroughly read the instructions prior to operating the connector. The is designed to
provide a safe, reliable leak-tight seal and connection when properly maintained and operated.
• The connector is designed to mate with a specific application. Verify the application prior to
the introduction of pressure or processing. Use only in a safe environment. Safety chains
and guards are recommended for all applications.
• Connectors are NOT designed for permanent connections and are for temporary
connections only.
DO NOT EXCEED pressure rating as marked on connector or corresponding literature.
Old Seal Removal:
1. Move connector sleeve forward to the disconnect position, opening up the gripping collet
for easy access to internal parts.
2. Insert the round knobbed end of the STR012 repair pick between the front part of the seal,
and washer.
METAL WASHER
STR012 PICK
SLEEVE FORWARD
www.fastestinc.com
Roseville, MN
Toll Free at 1-800-444-2373
Fax 651-645-7390
REPLACEMENT INSTRUCTIONS
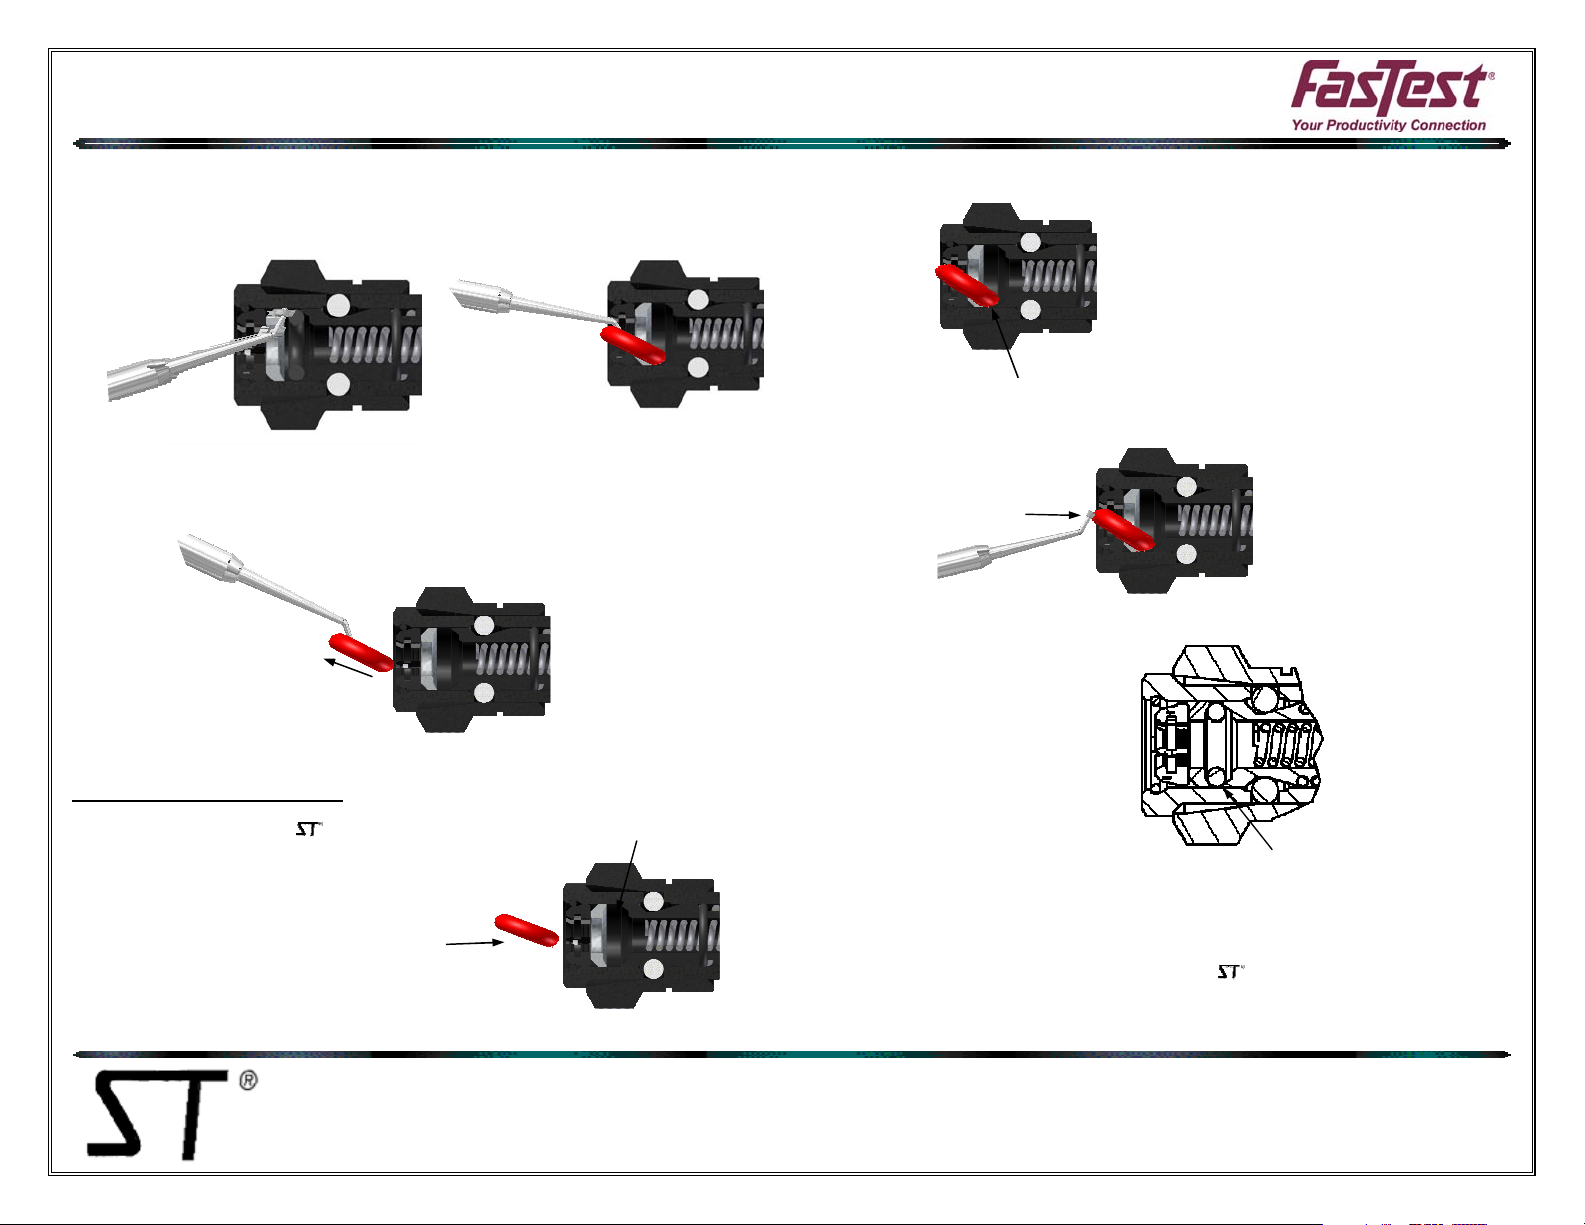
3. Push knobbed end between seal and washer until repair pick touches connector wall. Roll
pick 180° between thumb and fingers to get the curved portion of the pick behind the seal.
By placing your other thumb over the edge of collet opposite the pick, you can work at one
point on the seal. Do not rotate the pick around the I.D. of the connector as this may cause
loosening of the gripping collets.
4. Using the knobbed end as a hook, dislodge the seal and pull it slowly out the connector
throat.
To Install Replacement Seal:
1. Liberally coat the new replacement seal with lubrication. White petroleum is used during
initial assembly of standard connectors.
2. Begin replacement of seal by manually starting the
seal into the groove area. Pinch with fingers and
install into opening.
PINCH AND INSERT
GROOVE AREA
3. The knobbed end of the pick will assist in positioning the seal nose into the groove. This
starting position is important for successful installation of the seal.
4. After nose of seal is in place, slowly press down on the back part (peak) of the seal using
the knobbed end of pick.
SEAL NOSE INTO GROOVE
PUSH PICK AGAINST
O-RING PEAK
5. The seal will slide into the groove area. If the nose of the seal slides out of position, reinstall and repeat steps 1 thru 4.
6. When the new seal is in place, it will fit clearly into the groove area. If a portion of the seal
in inverted or can be seen as not in the groove, use the knobbed end of the pick to assist in
pulling the seal into the groove. If this is unsuccessful, remove the entire seal and start the
installation procedure again.
7. After the replacement seal is in place, actuate the connector sleeve once to make sure
the connector action is correct.
SEAL PROPERLY IN GROOVE
www.fastestinc.com
Roseville, MN
Toll Free at 1-800-444-2373
Fax 651-645-7390
WP026 10/6/2010
 Loading...