

FasTest RQD Series User Manual

RQD
BODY O
-
RING
BALLS
INSTALLED
REBUILD INSTRUCTIONS
REASSEMBLE:
Use all the new seals provided and lubricate lightly with an oil
compatible with your system / process during assembly. Replace
pins, springs, balls and handle with new parts as provided in the
rebuild kit.
1) Replace body o-ring with new urethane o-ring.
Lubricate.
2) Lube all eight holes on body with Vaseline. Install
all eight new balls. Once all the balls are in place,
push the body all the way into the sleeve.
3) Pick up the assembly and push the
sleeve back to expose the snap ring
groove. Insert the new snap ring into its
groove.
Replace the new main seal and the new Teflon ring
4)
on the piston.
MAIN SEAL
INSIDE PISTON
SNAP
RING
MAIN SEAL
TEFLON RING
PISTON
SERIES
PAT PENDING WP115 5/27/2010
BODY
5) Place the piston and new large spring into the main body assembly.
NOTE: ¼” SIZE (KA04xx) REQUIRES HANDLE ORIENTATION. THICK SIDE
OF HANDLE MATCHES TO THICK SIDE OF BODY TAB AS SHOWN. (No
special orientation on 3/8” size.)
Add the new handle and insert the new handle pins.
HANDLE PINS
(2)
6) Lubricate the poppet o-ring and place it on the poppet. Then slide on
poppet back. Place new poppet spring on top of poppet.
POPPET
7) Replace the o-ring on the brass back piston. Use a drop of LocTite 242
on the threads and assemble the two piston halves. Tighten using a
spanner wrench and torque wrench to 15 ft-lbs.
O-RING
O-RING
POPPET
BACK
POPPET
SPRING
LocTite 242
KRxxxx Rebuild Kit Instructions
RQD Valved In-Line Connector
DESCRIPTION: Rebuild Kit for Internally
Valved RQD Connectors.
www.fastestinc.com
Roseville, MN
Ph: 1-800-444-2373
Fax: 651-645-7390
RQD
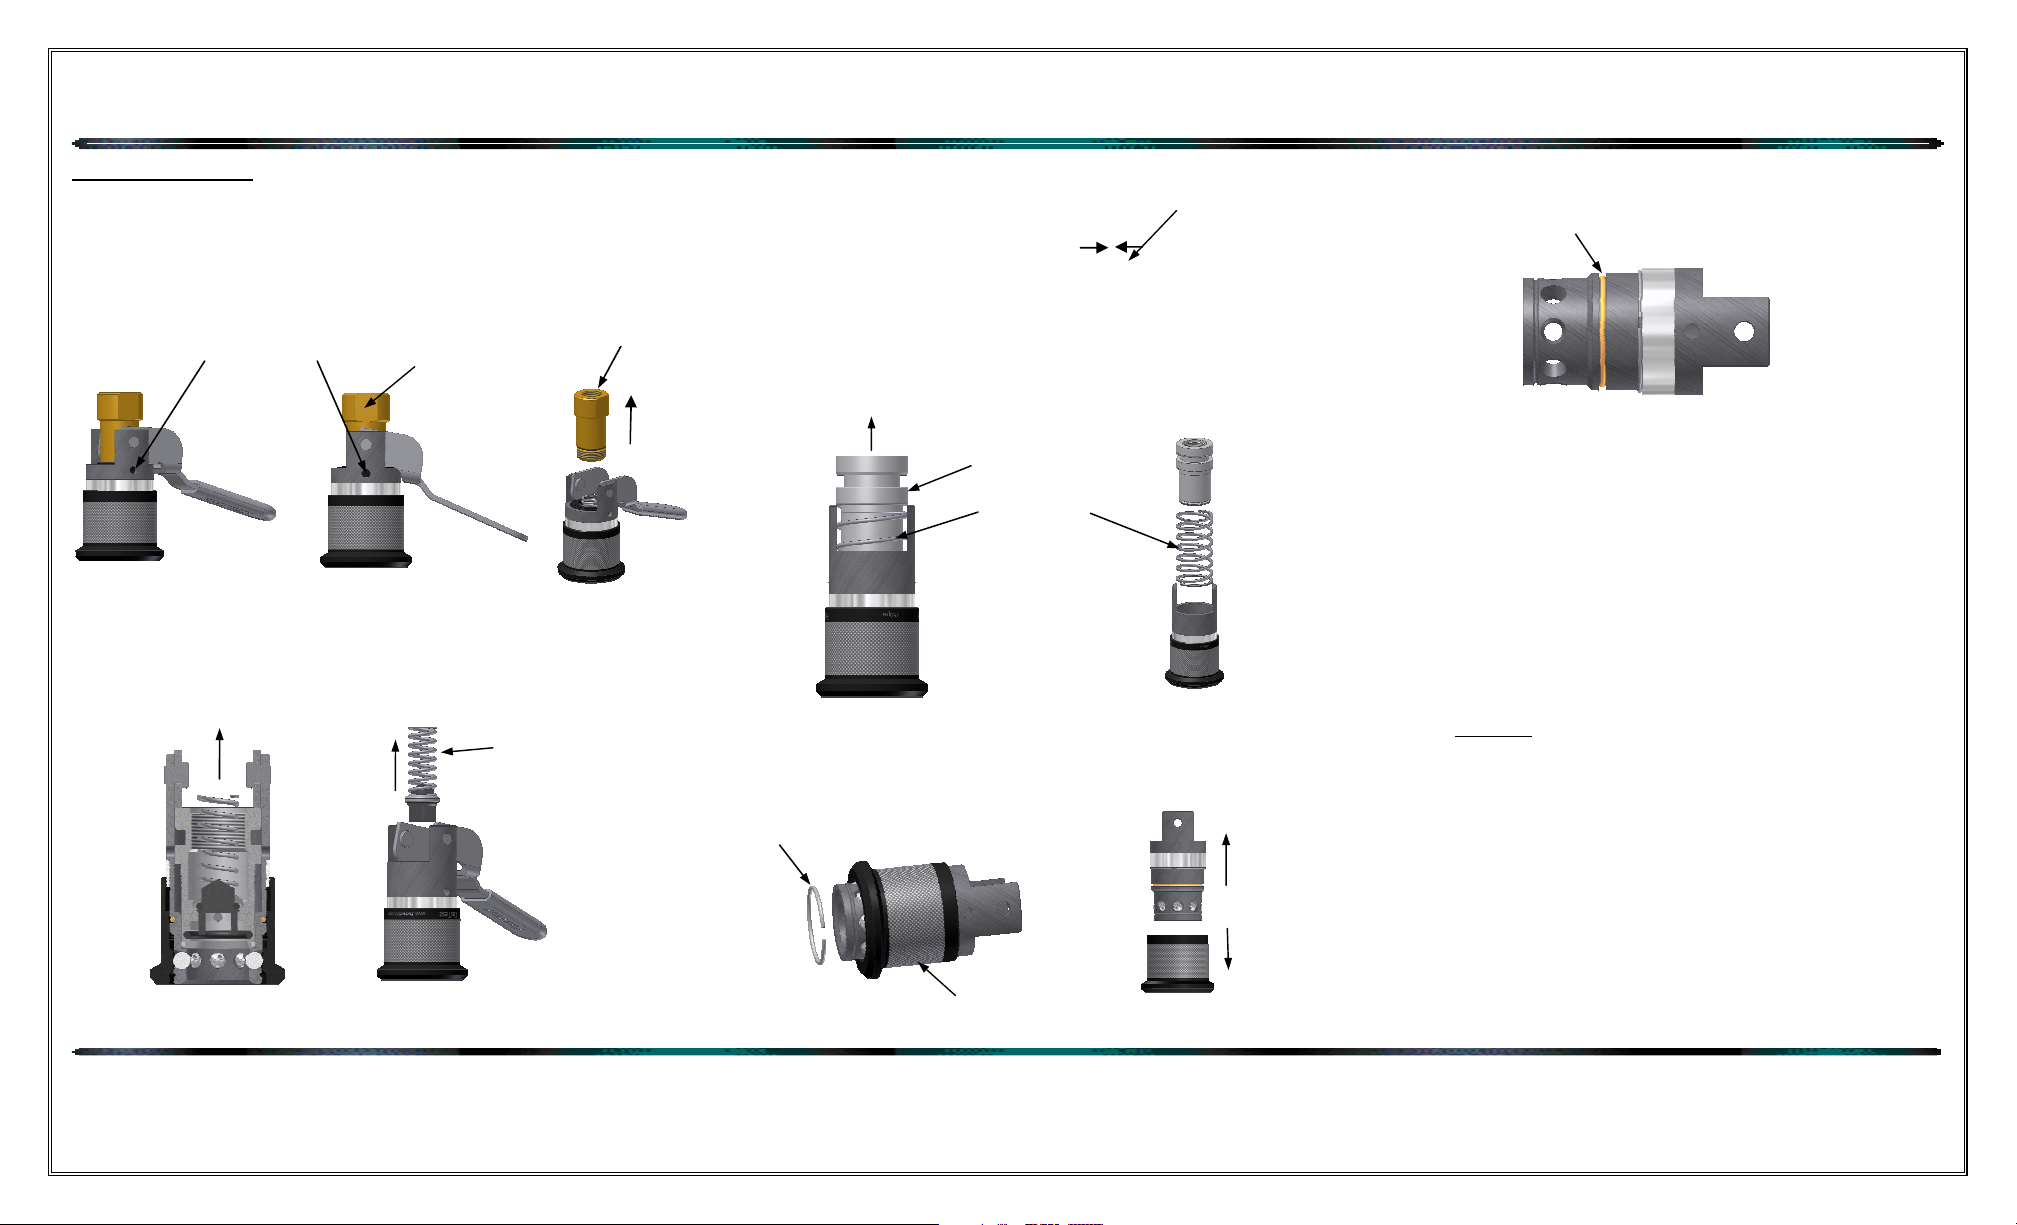
SLEEVE O
-
RING
REBUILD INSTRUCTIONS
DISASSEMBLY:
1) Activate the handle and align the spanner holes of the piston
to the body. Using a spanner wrench to hold the body and
piston then use a wrench on the flats to thread out the
brass back piston. Note that the joint is held by LocTite so
some heat may be applied for ease of removal.
LOCATING HOLE
WRENCH FLATS
2) Once the brass back piston is removed, remove the spring
and poppet assembly.
REMOVE POPPET
SERIES
PAT PENDING WP115 5/27/2010
BACK PISTON
ASSEMBLY
3) Remove the handle pins and handle.
HANDLE PINS
(2)
4) Remove the piston and spring from the main body assembly.
PISTON
LARGE SPRING
5) Slide sleeve back to expose snap ring, remove the snap ring
on the front of the main body assembly and slide off the
sleeve. Note the balls will be free so place in a catch basin.
SMALL SNAP RING
SLEEVE
Remove the sleeve o-ring.
6)
FasTest, Inc. Product Warranty
FasTest, Inc. warrants its products against defects of workmanship and/or
material for 12 months from the date of the sale by FasTest, Inc. This warranty
is void if the product is misused, tampered with or used in a manner that is not
in accordance with FasTest, Inc. recommendations and/or instructions.
FasTest, Inc. is not liable for consequential or other damages including, but not
limited to, loss, damage, personal injury, or any other expense directly or
indirectly arising from the use of or inability to use its products either separately
or in combination with other products. ALL OTHER WARRANTIES
EXPRESSED OR IMPLIED, WHETHER ORAL OR WRITTEN, INCLUDING
BUT NOT LIMITED TO WARRANTIES OR MERCHANTABILITY OR FITNESS
FOR A PARTICULAR PURPOSE ARE EXPRESSLY EXCLUDED.
Remedy under this warranty is limited to replacement of the product or an account credit in the
amount of the original selling price, at the option on FasTest, Inc. All allegedly defective products
must be returned prepaid transportation to FasTest, Inc. along with information describing the
products performance, unless disposition in the field is authorized in writing by FasTest, Inc.
www.fastestinc.com
Roseville, MN
Ph: 1-800-444-2373
Fax: 651-645-7390
 Loading...