

Fantini Cosmi CH150TS, CH151TS Series, CH152TS Series Series Manual
WEEKLY PROGRAMMABLE THERMOSTAT
BACKLIGHTED TOUCH SCREEN
CH150TS

INDEX
Introduction ..............................................................3
Controls and indications ..........................................4
Controls .............................................................4
Indications .........................................................5
User manual ............................................................6
Setting the date and time ..................................6
Summer/Winter selection ..................................7
Operating modes ...............................................7
“Manual” operating mode ..................................7
“Automatic” operating mode ..............................8
“Holiday” operating mode ................................10
“Jolly” operating mode .....................................10
“OFF” function .................................................12
Preset programs ..............................................13
Chronothermostat programming .....................13
Displaying the temperature detected by the
separate probe ................................................15
Statistical data .................................................15
Maintenance ..........................................................16
Keyboard lock ..................................................16
Touch Screen ..................................................16
Replacing the batteries ....................................16
Installation .............................................................18
Fastening the base ..........................................18
Electric connections ........................................19
Fitting the batteries ..........................................20
Fastening the chronothermostat onto the base
.........................................................................20
Confi guring the chronothermostat ................... 21
Technical data ........................................................25
2

Introduction
Chronothermostat CH150TS/151TS/152TS is
suitable to measure the ambient temperature
and to control the heating and air conditioning
system to which it is connected. The operating mode can be chosen between the preset
ones or can be customized according to user’s
needs.
The wide display shows the temperature profi le — i.e.: the relationship between the time table and the temperature to be kept —, as well
as the measured temperature, relative humidity, calculated perceived temperature, time and
day of the week.
The chronothermostat is battery powered. Both
settings and data are stored in a non-volatile
memory capable of retaining them even when
batteries are down.
The chronothermostat is available in the following version:
• CH150TS Chronothermostat with 5 A relay
The following external interfaces are available
for CH150TS chronothermostat:
• Separate temperature probe;
• Telephone activator with GSM modem, for re-
mote management via SMS messages.
The telephone activator enables the following:
• remote communication with the chronothermostat to know the ambient temperature or
the status of the heating or air conditioning
system;
• remote management of the chronothermostat
operating modes.
The chronothermostat comes in three colours:
white, silver (CH151TS series) and anthracite
black (CH152TS series).
Unless otherwise specifi ed, the instruc-
tions contained in this manual apply to every
chronothermostat model.
3
Controls and indications
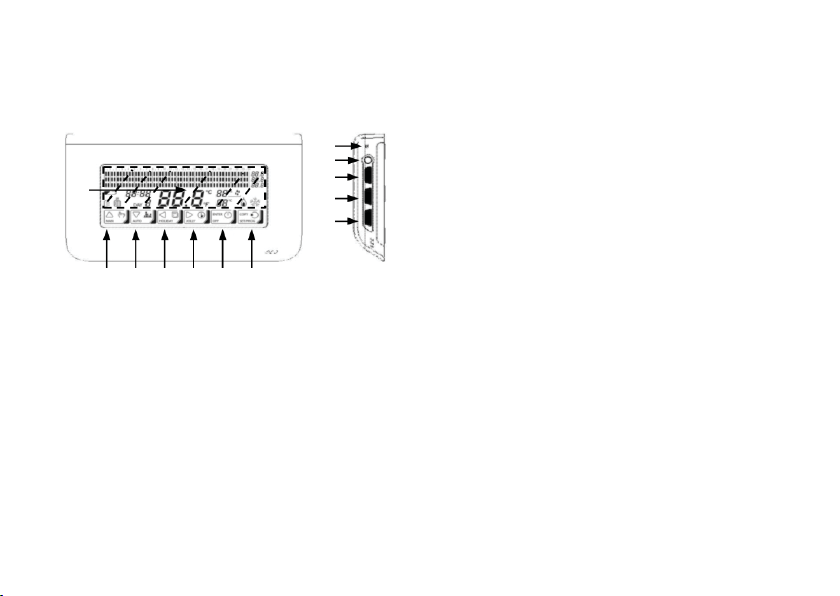
Controls
11
10
12
1 2 3 4 5 6
1. Button used to select the “Manual” operating
mode or increase a value (▲) *
2. Button used to select the “Automatic” operating mode or decrease a value (▼) *
3. Button used to select the “Holiday” operating mode or go back to the previous data item
(◄) *
4. Button used to select the “Jolly” operating
mode or go to the next data item (►) *
5. Button used for the “OFF” or “Enter” functions *
9
8
7
6. Button used for the “Programming” or “Copy”
or “Statistical data displaying” functions *
7. Rotary selector for temperature correction:
T1, Manual temperature, Jolly temperature,
and
Antifreeze temperature *
8. Rotary selector for correcting temperature
T2 or the Jolly operating mode duration *
9. Rotary selector for correcting temperature
T3 or the Jolly operating mode duration
10. Summer/Winter switching key and keyboard lock
11. Chronothermostat reset button
12. Backlighted area
* The function associated with the button or selector depends on the current operating mode.
It is highlighted by the icon placed above.
4
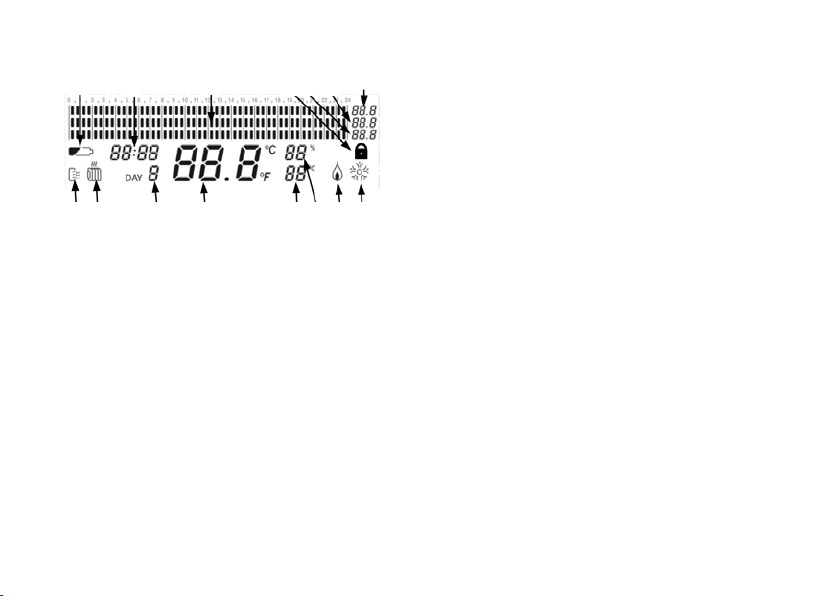
Indications
14
13 12
1
2
11
15 3 4
9810
5
67
1. Time
2. Temperature profi le
3. Temperature value T1 or “Jolly” operating
mode duration (days)
4. Temperature value T2 or “Jolly” operating
mode duration (hours)
5. Temperature value T3
6. System ON in Summer operation
7. System ON in Winter operation
8. Relative humidity percentage
9. Perceived temperature (displayed by the
degree)
10. Ambient/external temperature
11. Current day (1 = Monday … 7 = Sunday;
8 = Holiday)
12. Winter operation
13. Summer operation
14. Battery charge level
15. keyboard lock
Note: Pressing of a key is signalled by a short
acoustic signal.
When ON, backlighting will stay on for about
three seconds after pressing a key
5
User manual
To operate the chronothermostat after it has
been installed, proceed as follows:
1. Set the date and time.
2. Select the Summer/Winter operation.
3. Select the operating mode.
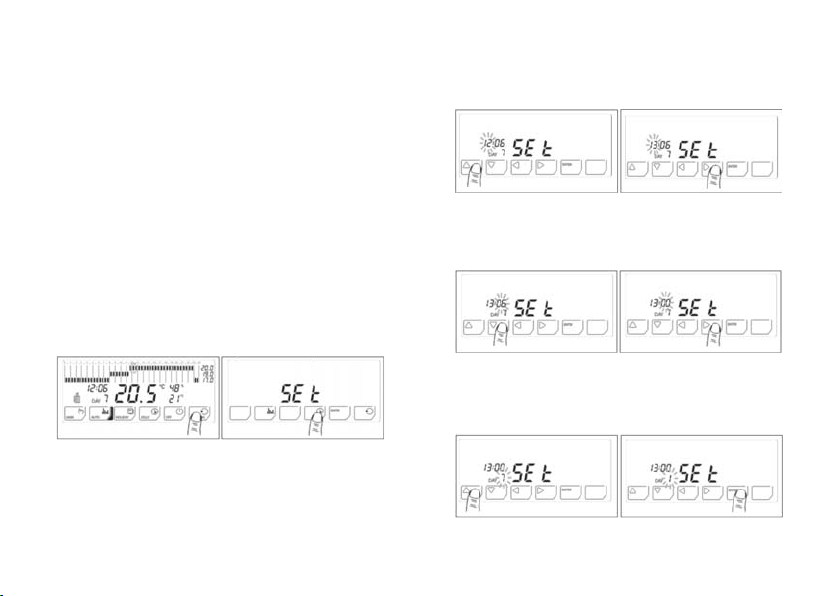
2. Modify the hour setting by means of the ▲
and ▼ buttons, then go to the minute setting
by means of the ► button.
Setting the date and time
To set the current time and date, proceed as
follows:
1. Enter the programming menu main page.
The operating mode currently used will be interrupted temporarily. Choose the time setting
function.
3. Modify the minute setting by means of the
▲ and ▼ buttons, then go to the day setting
by means of the ► button.
4.Modify the day setting by means of the ▲
button, then press ENTER to go back to the
main page of the programming menu.
6
5. Press ENTER again to exit the programming
menu. The chronothermostat operating mode
previously interrupted will be resumed.
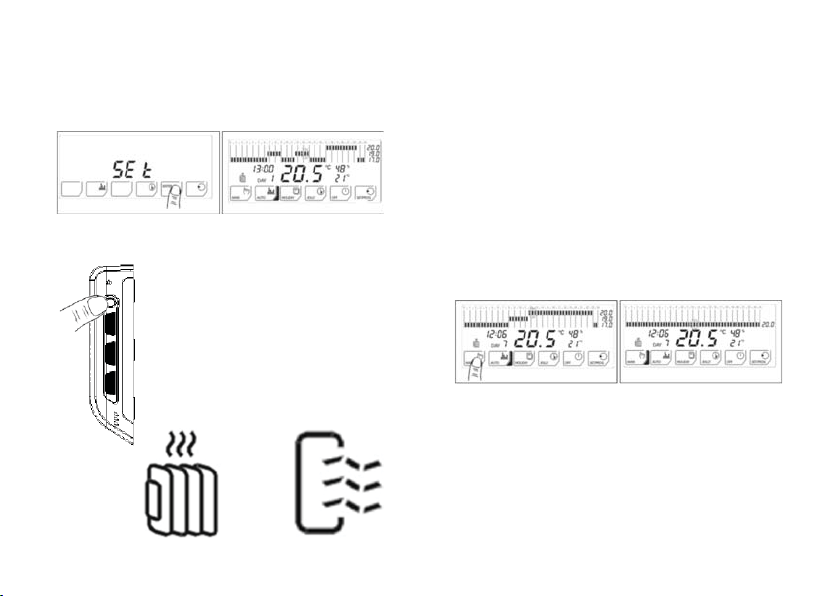
Summer/Winter selection
To shift from the Summer operation (heating system) to the Summer operation (cooling system),
and vice versa, keep the Summer/Winter button depressed for
at least 4 seconds. The selected
operation will be shown on the
display by means of the “Winter”
or “Summer” icons.
Winter Summer
Operating modes
The CH150/151/152 chronothermostat features four different operating modes: Manual,
Automatic, Holiday and Jolly (in addition to the
OFF function).
“Manual” operating mode
With the Manual operating mode, the chronothermostat adjusts the operation of the heating
or cooling system in order to always keep the
same temperature. To select “Manual”, press
MAN.
7
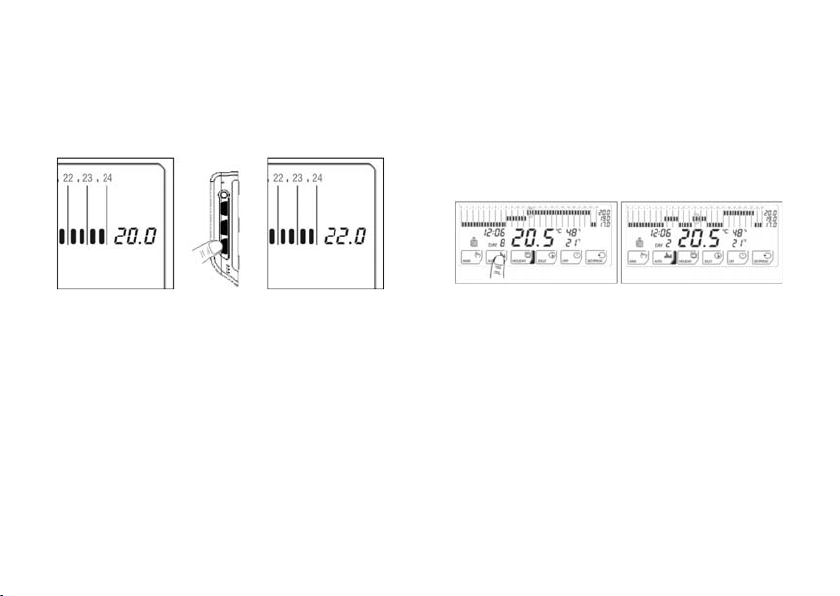
The temperature level can be modifi ed during
operation by means of the lower rotary selector located on the right side of the chronothermostat. The temperature can be changed from
2°C to 40 °C by 0.1°C increments.
“Automatic” operating mode
With the “Automatic” operating mode, the
chronothermostat adjusts the operation of the
heating or cooling system by following the profi les defi ned for the various days of the week.
To select “Automatic”, press AUTO.
The three temperature levels used can be
modifi ed during operation by means of the ro-
tary selectors located on the right side of the
chronothermostat.
8
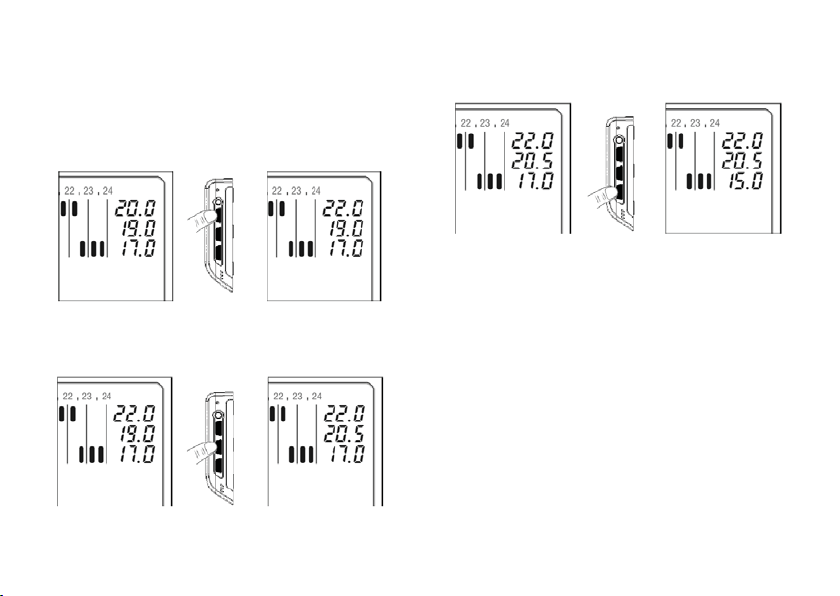
Temperature T3 cannot be lower than temperature T2 or higher than 40 °C.
During Summer operation, temperature
T3 features an upper limit of 30°C. When this
value is exceeded, T3 will take the OFF value,
which will involve switching the system off.
Temperature T2 cannot be higher than temperature T3 or lower than temperature T1.
Temperature T1 cannot be higher than temperature T2 or lower than 2 °C.
If no customization has been made, the automatic operating mode will function with the
stored temperature profi les, i.e. the preset
ones (refer to «Preset programs»). To customize the profi les, refer to «Chronothermostat
programming».
9
 Loading...