

Page 1
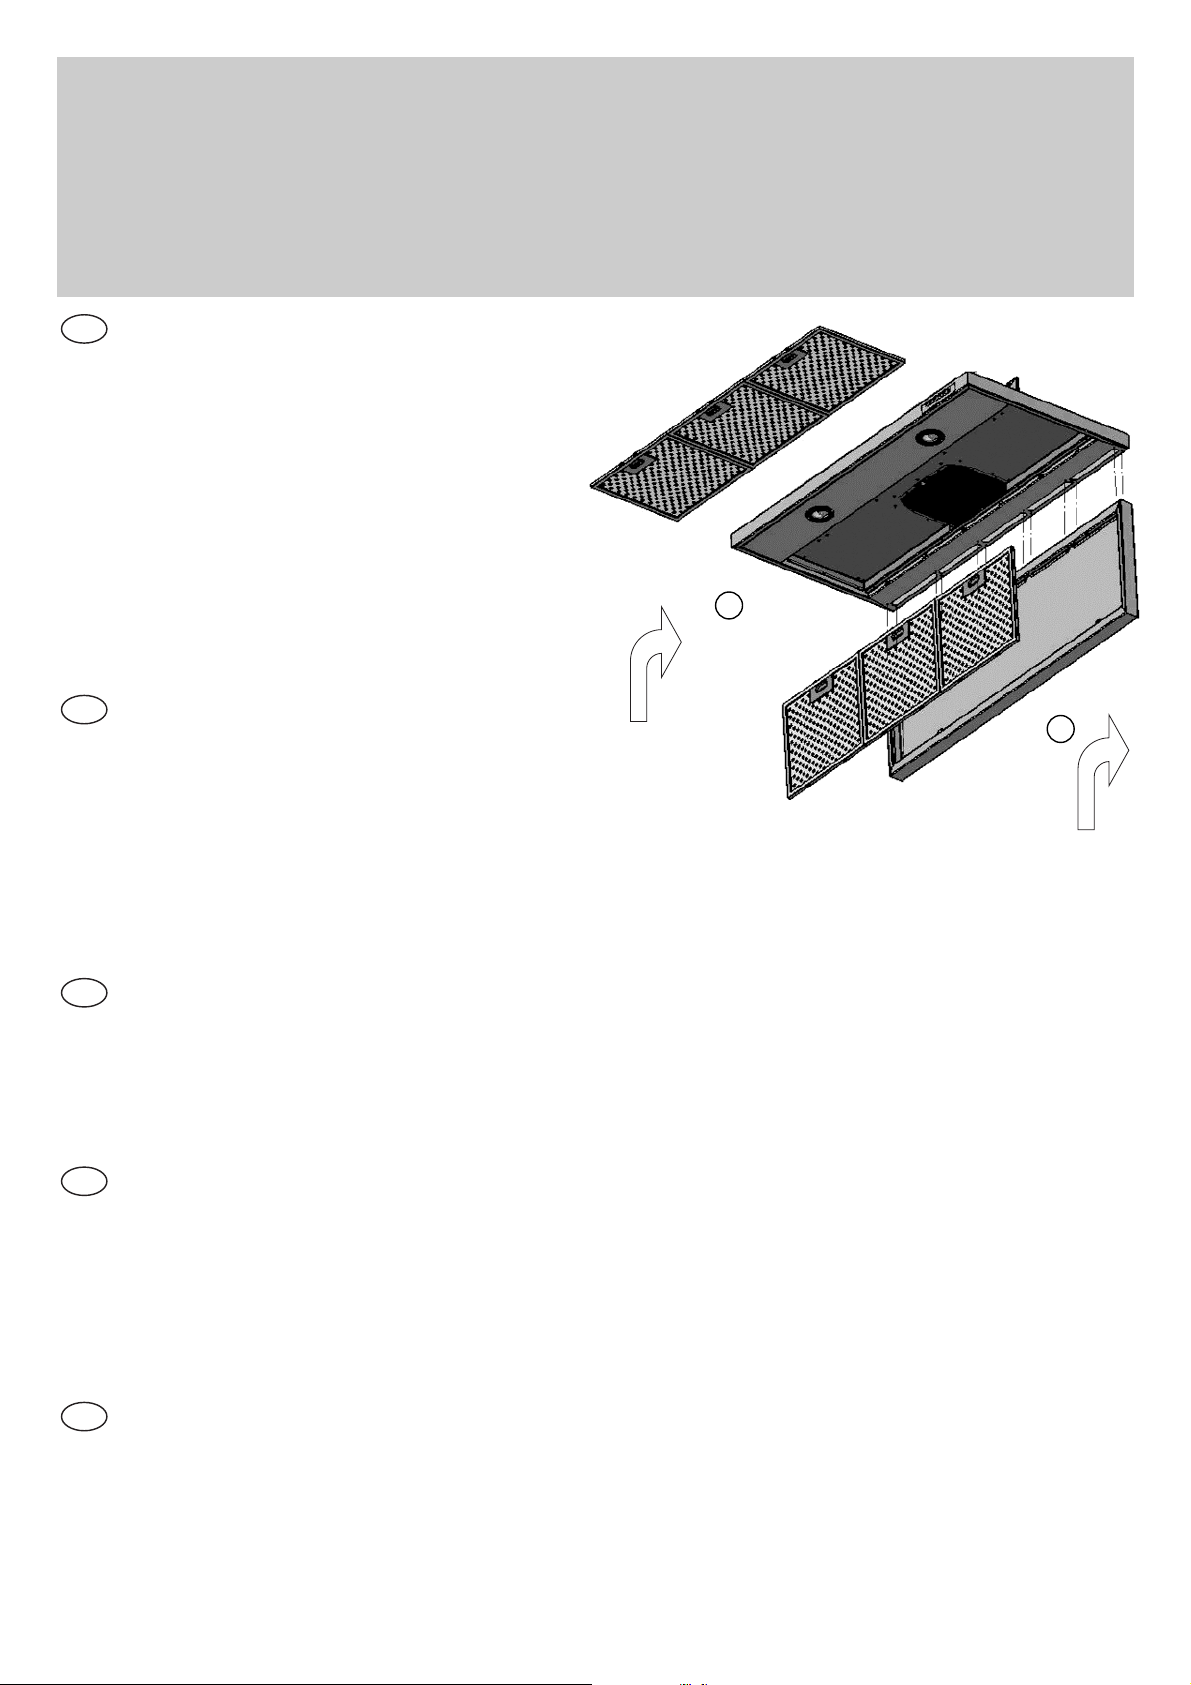
1. Sacar del elemento inferior (pieza 2) los filtros metálicos. Apoye la parte superior de la
campana (pieza 1) sobre una superficie plana y ponga la pieza 2 en la parte inferior del
cono teniendo en cuenta los agujeros y la
salida aspirante.
2. Usando los tornillos autoroscantes (vea kit
de fijación) unir las 2 partes empezando por
los agujeros localizados en la parte trasera
de la pieza 2.
3. Seguir el montaje de la campana siguiendo
las instrucciones contenidas en el libro de
instrucciones.
1. Togliere dall’elemento inferiore (2-schienale)
le griglie metalliche. Adagiare la parte superiore della cappa (1-cono) di schiena su una
superficie piana e posizionare lo schienale
sulla parte inferiore del cono in corrispondenza dei fori e delle asole aspiranti.
2. Usando le viti autofilettanti (vedi kit di fissaggio) fissare le due parti iniziando dai fori posti sul retro dello schienale.
3. Eseguire montaggio della cappa seguendo le istruzioni contenute nel libretto istruzioni.
1. Remove the metal filters from the inferior element (part 2). Lay the back part of the cone (part 1) on a
plane surface and place the part 2 like in the picture.
2. Fasten the two parts using the 10 screws (see the hardware for installation) starting from the holes placed on the back of the part 2.
3. Finally follow the booklet instruction to mount the hood.
1. Die Metallgitter vom unteren Element entfernen (2-Rückwand). Den oberen Teil der Dunstabzugshaube (1-Kegel) mit dem Rücken auf eine flache Oberfläche legen und die Rückwand auf den unteren Teil
des Kegels in Übereinstimmung mit den Öffnungen und Saugschlitzen positionieren.
2. Die zwei Teile mit Hilfe der selbstschneidenden Schrauben (siehe Befestigungssatz) befestigen und
dabei mit den Öffnungen an der Rückseite der Rückwand beginnen.
3. Die Haubenmontage vornehmen, wobei die in der Bedienungsanleitung enthaltenen Anweisungen zu
befolgen sind.
1. лМflЪ¸ Т МЛКМВ„У ˝ОВПВМЪ‡ (2 - Б‡‰Мflfl ТЪВМН‡) ПВЪ‡ООЛ˜ВТНЛВ В¯ВЪНЛ. к‡БПВТЪЛЪ¸ ‚ВıМ˛˛
˜‡ТЪ¸ ‚˚ЪflКНЛ (1 - НУУ·) Б‡‰МВИ ˜‡ТЪ¸˛ М‡ У‚МУИ ФУ‚ВıМУТЪЛ Л ЫТЪ‡МУ‚ЛЪ¸ Б‡‰М˛˛ ТЪВМНЫ
‚ МЛКМВИ ˜‡ТЪЛ НУУ·‡ ‚ ТУУЪ‚ВЪТЪ‚ЛЛ Т ‡ТФУОУКВМЛВП УЪ‚ВТЪЛИ Л ФВЪВО¸.
2. л ФУПУ˘¸˛ ¯ЫЫФУ‚ (ТП. М‡·У ЩЫМЛЪЫ˚) Б‡НВФЛЪ¸ У·В ˜‡ТЪЛ, М‡˜ЛМ‡fl Т УЪ‚ВТЪЛИ,
‡ТФУОУКВММ˚ı ТБ‡‰Л ˜‡ТЪЛ 2.
3. СОfl ЫТЪ‡МУ‚НЛ ‚˚ЪflКНЛ ТОВ‰ЫИЪВ ЛМТЪЫНˆЛЛ ЛБ кЫНУ‚У‰ТЪ‚‡ ФУ ˝НТФОЫ‡Ъ‡ˆЛЛ.
INSTRUCCIONES DE MONTAJE CAMPANA CON ANGULOS
ISTRUZIONI DI MONTAGGIO CAPPA CON SCHIENALE
MOUNTING INSTRUCTION
MONTAGEANLEITUNGEN HAUBE MIT RÜCKWAND
азлнкмдсаь ий млнДзйЗдЦ ЗхньЬда л бДСзЦв лнЦздйв
1
2
E
I
GB
D
RUS
 Loading...