

Faber 630006369, 630006370, 630006459, 630006497, Stilo STIL24SS Specifications
...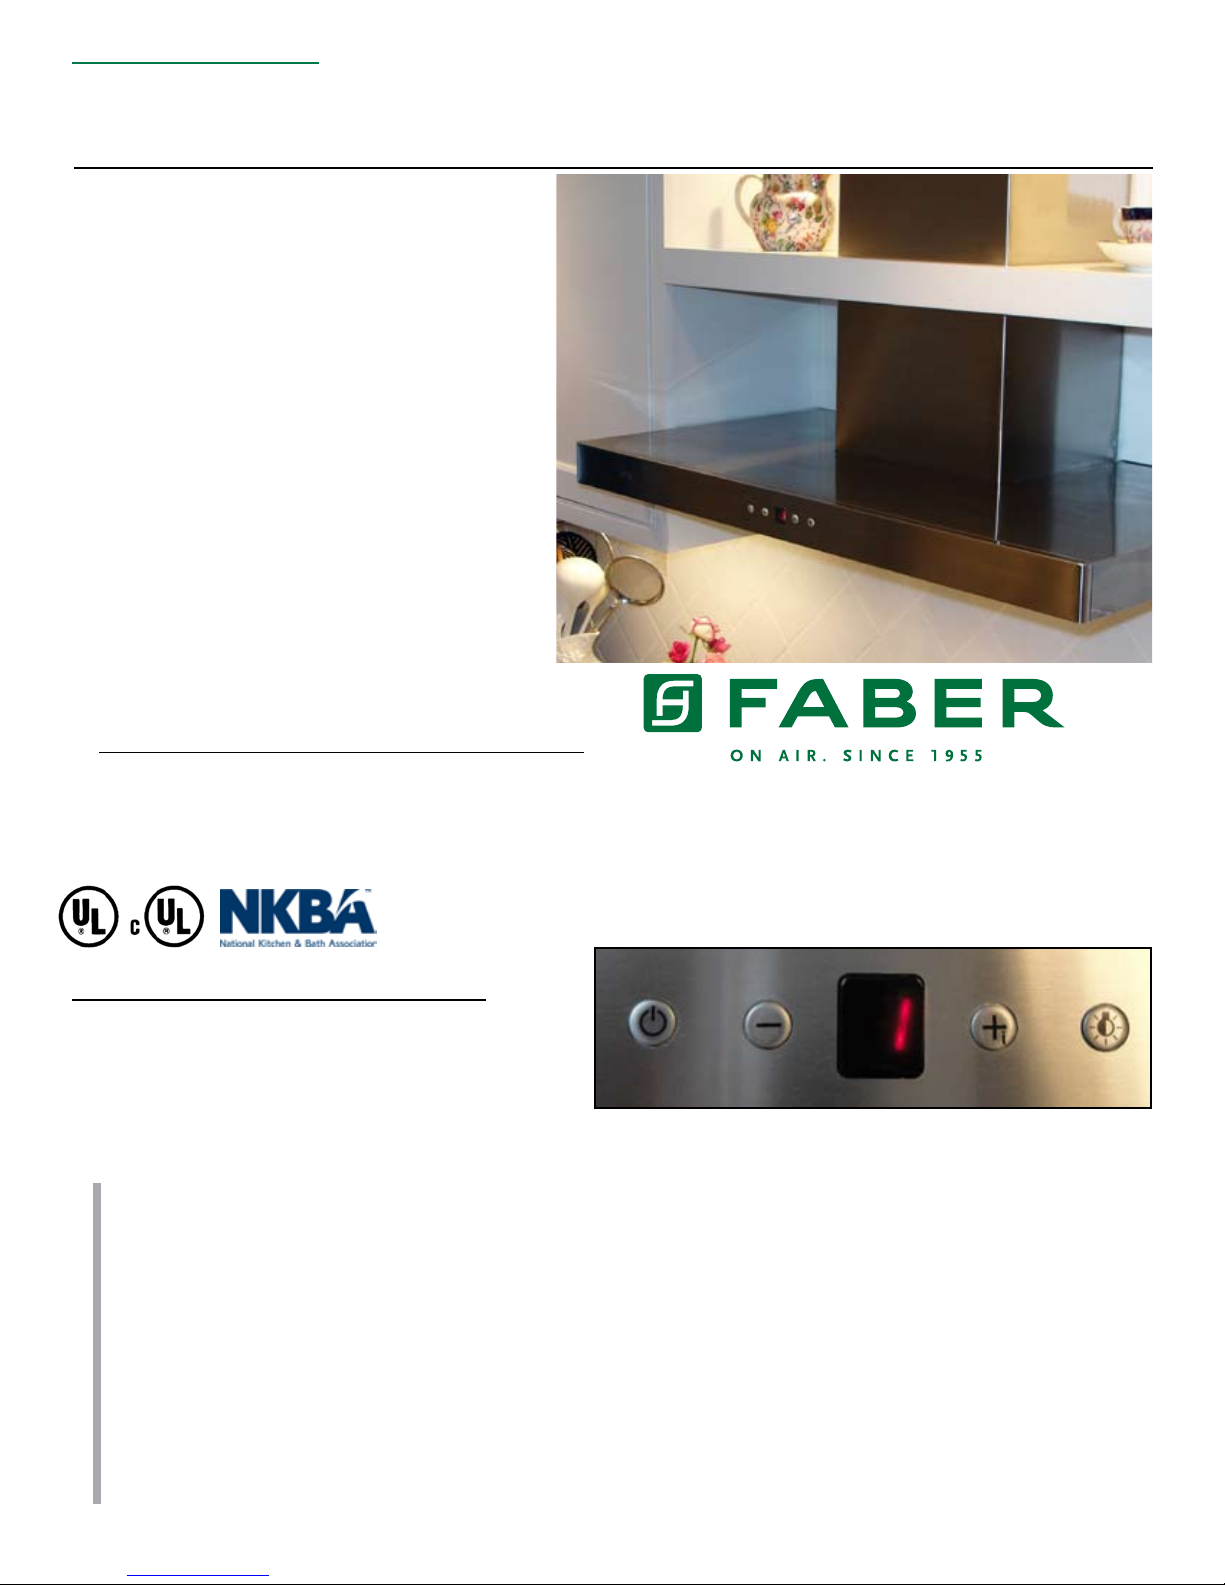
NEW CONTROLS
Stilo
a tranquil sculpture
wall canopy rangehood
°
sleek styling
°
600 cfm PRO motor
°
Silent Kit noise reduction
°
halogen lights with dimmer
°
4 Speed LED display control
°
30 minute auto off timer
°
stainless steel bafe lters
°
modied pro depth
°
convertible to ductless*
Easy Cube mounting system
°
sone range: 3.5 - 6.5
°
Designer Collection
6” round duct
°
Uses 25% less energy than previous model
°
* it is highly recommended that
professional style cooking always be
vented to the outside.
Size/Color/Model #
24 Stainless
30 Stainless
36 Stainless
48 Stainless
a
c
c
e
s
s
High Ceiling Chimney Kit
o
One 40” upper chimney to replace 16 1/8”
upper chimney that came with the hood
r
Stainless
i
e
s
STIL24SS
STIL30SS
STIL36SS
STIL48SS
HIGH1
With simple lines and
minimal styling, the Stilo
exudes modern tranquility.
NOW WITH A NEW LED DISPLAY WITH
ELECTRONIC TOUCH CONTROLS, 2 LEVEL
LIGHTING, 30 MINUTE AUTO SHUT OFF, AND 10
MINUTE INTENSIVE SPEED CONTROL
Ductless Conversion Kit
Includes: • Lower Chimney with holes for ducting
• Ductless Diverter Assembly • Vent Grates
• Charcoal Filter
Stainless
Replacement Charcoal Filter
DUCT1
FILTER2
p.o. box 435 • Wayland, MA 01778 • tel: (508) 358-5353 • fax: (508) 358-5730 • e-mail: info@faberonline.com • www.faberonline.com
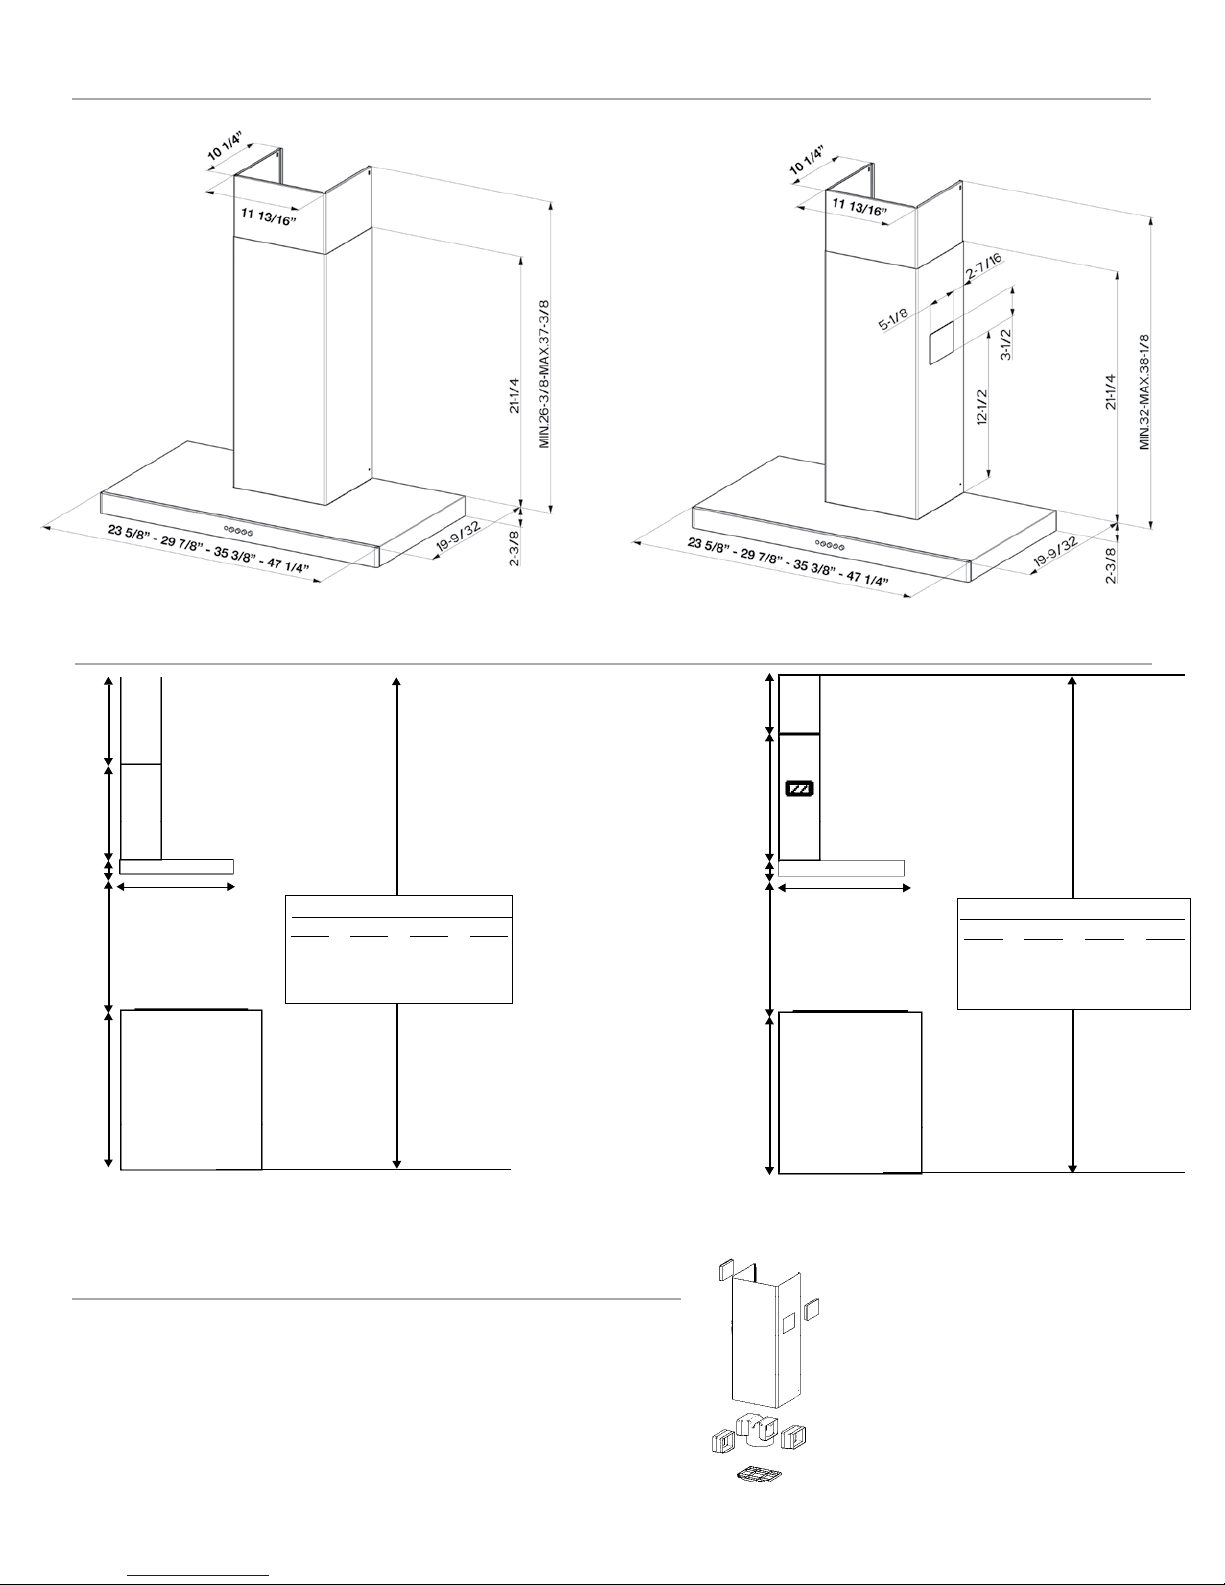
upper
chimney
cover
ductless
lower
chimney
cover
canopy
x = distance from hood to cooktop
(varies depending on installation)
min - 24”, suggested max - 30”
cabinet base
10" min
16
1/8”
max
21
1/4"
2
3/8"
36”
19
9/32"
x
also consult co oktop
manufacturer's recommendation
min & max ceiling height examples
x = 30"
min
8'
3 5/8"
max
8'
9 3/4"
x = 28"
min
8'
1 5/8"
max
8'
7 3/4"
x = 26"
min
7'
11 5/8"
max
8'
5 3/4"
x = 24"
min
7'
9 5/8"
max
8'
3 3/4"
Dimensional Diagrams
upper
chimney
cover
lower
chimney
cover
canopy
x = distance from hoo d to cooktop
(varies depending on install ation)
min - 24”, suggested max - 30”
cabinet base
5
1/8” min
16
1/8” max
21
1/4”
2 3/8"
36”
19 9/32"
x
also consult co oktop
manufacturer's recommendation
min & max ceiling height examples
x = 30"
min
7'
10 3/4"
max
8'
9 3/4"
x = 28"
min
7'
8 3/4"
max
8'
7 3/4"
x = 26"
min
7'
6 3/4"
max
8'
5 3/4"
x = 24"
min
7'
4 3/4"
max
8'
3 3/4"
DuctlessDucted
Pre-Planning Your Installation - Important: Consult the installation instructions before you begin installing this rangehood.
Ducted
For ducted installations, the
chimneys can be adjusted for
ceilings between 7’ 4 3/4” and
8’ 9 3/4” depending on the
distance between the bottom
of the hood and the cooktop
(distance x in Ducted
diagram).
For ductless installations, the
chimneys can be adjusted
for ceilings between 7’ 9
5/8” and 8’ 9 3/4” depending
on the distance between
the bottom of the hood and
the cooktop (distance x in
Ductless diagram).
For shorter ceilings, have
the chimney cover(s) cut at
a sheet metal shop. For
higher ceiling installations,
the High Ceiling Chimney
Kit includes a new 40” upper
chimney which would replace
the 16 1/8” upper chimney
that came with the hood.
Note: If 24” or 30” High Backsplash is being installed, the distance between the bottom of the hood and the cooktop (distance x in diagram) is equal
to the height of the Backsplash.
Pre-Planning Your Installation - Important: Consult the installation
instructions before you begin installing this rangehood.
Make your ductrun as straight and short as possible. The ductrun should not exceed
35 equivalent feet if ducted with the required minimum of 6” round duct. Count 45º
angles as 3 feet, 90º elbows as 5 feet, and 90º at elbows as 12 feet.
For best results, use no more than three 90° elbows. Make sure that there is a
minimum of 24” of straight duct between elbows if more than one is used. Do
not install two elbows together. If you must elbow right away, do it as far away
from the hood’s exhaust opening as possible.
Ductless Installations*
For installations where ductwork is impossible or highly impractical, a Ductless
Conversion Kit is available. A charcoal
lter, which attaches under the blower
assembly, absorbs smoke and odors. A
ductless diverter assembly directs the air
out to a lower chimney with vent grates cut
into the sides.
* it is highly recommended that
professional style cooking always be
vented to the outside.
WARNING! Product specications are subject to change without notication. Consult the installation instructions before you begin installing this rangehood.
Ductless
Rev. 07/11
 Loading...