

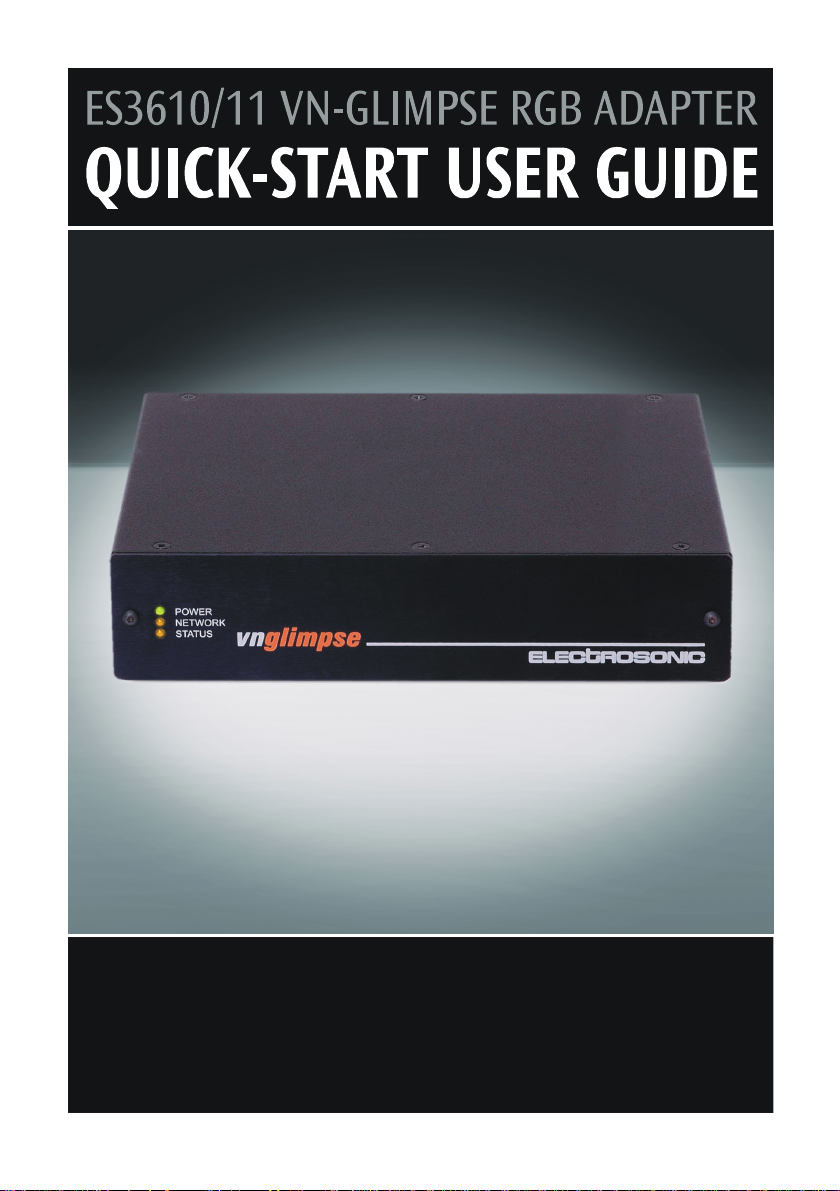
Page 1
Before You Do Anything Else...
Please take a couple of minutes to read this leaflet. It provides
essential information to help you to start using the VN-GLIMPSE
RGB ADAPTER as quickly as possible. If you need more details
please view the full User Guide included on the Software Disc.
Page 2
Checking the Contents of the Box
Before using or installing this unit check that the following items have been supplied:
• VN-GLIMPSE RGB ADAPTER
• 12V Power Supply Unit (PSU)
• Mains Power Cords (2 off)
3-pin plug version – for USA customers
unterminated version – for Europe and elsewhere (see Plug Wiring Details below)
• Mouse/Keyboard Cable (2 metre PS/2 to PS/2) (2 off)
• Digital Monitor Cable* (2 metre DVI-D to DVI-D)
• Analog Monitor Cable* (2 metre 15-pin HD-type to DVI-A)
• DVI-A to 15-pin HD-type Adapter
• Clip-on Ferrite* (for supplied Monitor cable – see Important Note below)
• Software Disc
If any items are missing or damaged please contact your supplier.
* IMPORTANT NOTE: Whether you are using the Digital or Analog Monitor Cable, it
must be fitted with the Clip-on Ferrite. Position the ferrite nearest to the end of the
cable that connects to the DVI- I IN connector on the VN-GLIMPSE RGB ADAPTER.
Refer to the connection diagrams on pages 4 & 5.
Plug Wiring Details
The wires of both mains power cords (supplied with each RGB ADAPTER) are colorcoded as shown in the table below; be sure to connect your plug in accordance with
the following guidelines:
Connect the wire colored... to the plug terminal identified with...
Brown ‘L’ or ‘Live’ or ‘Line’
Blue ‘N’ or ‘Neutral’
Green & Yellow ‘E ’ or ‘E’ or ‘Earth’ or ‘Ground’
WARNING — If you are unsure of the connections, or if
the markings in your plug do not match those given above,
CONSULT A QUALIFIED ELECTRICIAN.
NOTE: The PSU is double-insulated and does not require an earth/ground connection.
However, the earth cable of the mains lead must be connected in the plug.
(or colored red or brown)
(or colored blue or black)
(or colored green or green & yellow)
Page 2 I449GB issue 3
Page 3
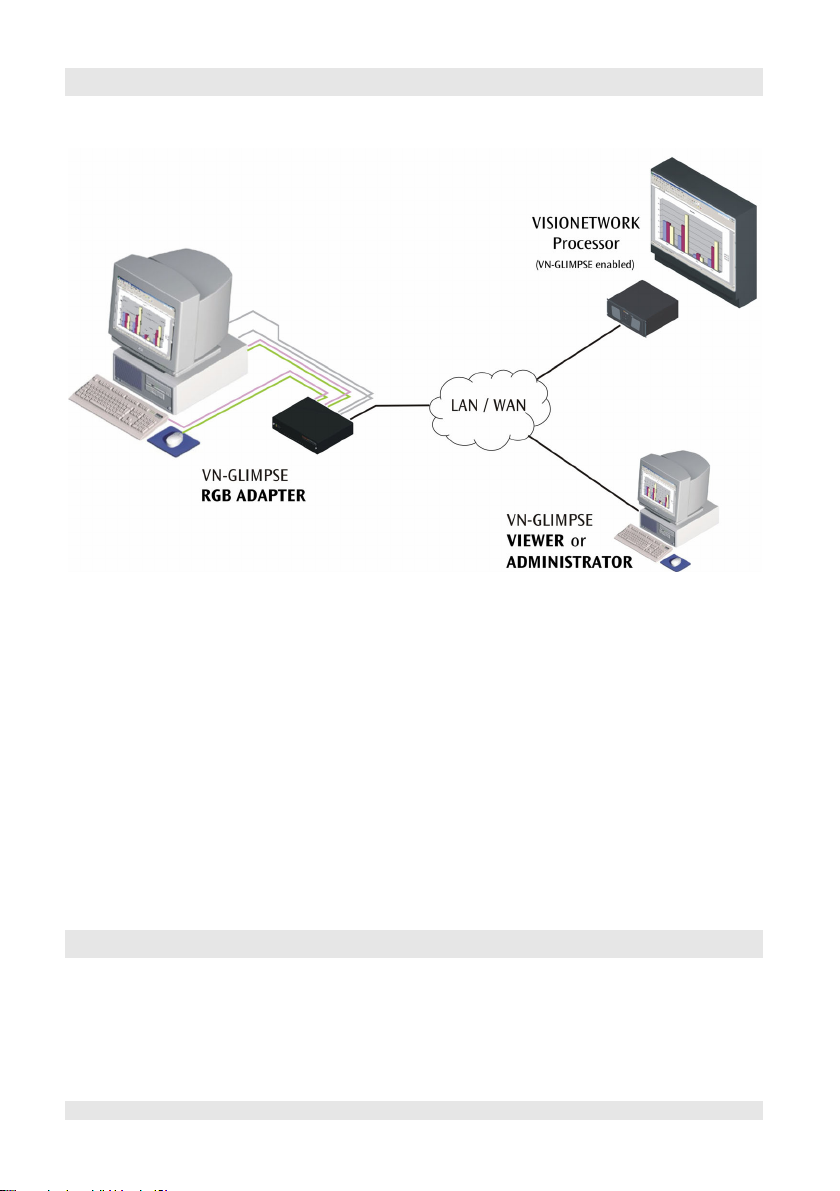
System Basics
The following diagram shows the basic system and interconnections for using
a VN-GLIMPSE RGB ADAPTER.
The VN-GLIMPSE RGB ADAPTER captures the source graphics and streams this
data onto a network. The resulting VN-GLIMPSE source can then be viewed using:
• a VN-GLIMPSE enabled VISIONETWORK Processor, or
• the VN-GLIMPSE VIEWER application, which can be installed
on any computer on the same network, or
• the VN-GLIMPSE ADMINISTRATOR application.
By default, the RGB ADAPTER streams the source data using TCP Unicast protocol.
This enables the source to be viewed by one client at a time and also allows the client
to have remote keyboard and mouse control of the source/host computer.
The RGB ADAPTER can also be configured to operate using UDP Multicast protocol.
This enables the source to be viewed simultaneously by multiple clients. However,
remote keyboard and mouse control is not possible in this mode.
Power-up Procedure
You must always ensure that the RGB ADAPTER is powered-up at the same time as
the source computer or slightly before.
Powering the RGB ADAPTER after the source computer may result in the source
computer not correctly detecting the mouse, keyboard and/or monitor.
I449GB issue 3 Page 3
Page 4

Connection Diagram (Digital Source)
Page 4 I449GB issue 3
Page 5

Connection Diagram (Analog Source)
I449GB issue 3 Page 5
Page 6

Installing the Software
The Software Disc contains the full User Guide (in Acrobat PDF) together with the
following software applications:
• VN-GLIMPSE Setup Utility
used to configure the ADAPTER network parameters. This utility can be installed
either on a separate computer/laptop or on the source computer.
• VN-GLIMPSE VIEWER
used to view a VN-GLIMPSE source (TCP Unicast only) on a remote computer. It
can view any VN-GLIMPSE sources on the same network, whether provided by
the RGB ADAPTER(s) or VN-GLIMPSE SERVER(s).
• VN-GLIMPSE ADMINISTRATOR
used to view all VN-GLIMPSE sources (both TCP Unicast and UDP Multicast) and
manage the configuration of RGB ADAPTERS and VN-GLIMPSE SERVERs on a
network.
A disc browser should run automatically when the Software Disc is inserted into a
CD-ROM drive. Simply follow the on-screen instructions to install the software
applications or view the User Guide.
HINT: If the browser does not start for any reason, start it manually by
running the setup.exe file located on the root of the disc.
Computer Specification
The following table gives the minimum and recommended computer specification for
installing and using the VN-GLIMPSE VIEWER and ADMINISTRATOR applications:
Operating System* Windows NT4 (SP6) Windows 2000, XP
Processor Any processor with MMX
Memory (RAM) 64MB 128MB
Hard Disk Free Space 1MB >1MB
Graphics 1024x768, 65K colors (16-bit) 1024x768, 16.7M colors (32-bit)
Network Card Ethernet 10BASE-T Ethernet 100BASE-T
* Direct X (v9 or above) is required. Direct X is included on the Software Disc or can be
downloaded from the Microsoft® web site.
Page 6 I449GB issue 3
Minimum Recommended
Pentium 3 or higher
instruction set
Page 7

Using the VN-GLIMPSE Setup Utility
Setting the IP Address
The IP Address of the VN-GLIMPSE RGB ADAPTER must be set within the range of
valid addresses for the network and must not be in use by another network device. It
also supports DHCP networks. Consult the network administrator for advice on which
address to use or if DHCP should be used.
The IP Address can only be changed using the VN-GLIMPSE Setup Utility provided on
the Software Disc. It is recommended that the computer running this utility is initially
connected directly to the ADAPTER using an Ethernet crossover patch cable. Once
the address is set, you can then safely connect the ADAPTER directly to the network.
HINT: To start using the RGB ADAPTER only the IP Address and Subnet Mask need
to be specified. Refer to the full User Guide for details on other network settings.
Understanding VN-GLIMPSE Performance
In an ideal VN-GLIMPSE system, the source seen at the viewing station should be
virtually indistinguishable from the original source. However, in extreme
circumstances, you may notice some reduction in refresh rate or increase in latency.
If you experience problems of this nature, please refer to the section entitled
‘Understanding VN-GLIMPSE Performance’ in the full User Guide.
I449GB issue 3 Page 7
Page 8

Using the VN-GLIMPSE VIEWER
Connecting and Disconnecting a Source
Viewing Options
The selected source will appear in the left-hand panel. By default this will be scaled to
fit the available viewing space. Click the Unity button to show the source at its native
resolution. Scroll bars will appear allowing you to select which part of the source frame
you want to view. Click Full Screen to maximize the display area.
Remote Keyboard/Mouse Control
With Mouse & Keyboard option enabled in the Tools Menu, click in the source
window to take control of the source computer – a red border will appear around the
source window while a control session is active.
Press Ctrl+F1 to end the control session (or wait for automatic timeout period).
Press Ctrl+F2 to access a menu of special key functions (e.g. the Windows key).
To change the default hot keys or timeout settings choose Mouse/Keyboard Options
from the Tools menu.
© 2006 ELECTROSONIC Ltd. www.electrosonic.com Part No. I449GB issue 3
Page 8 I449GB issue 3
 Loading...