

Page 1
User Guide
EXTRON CONTROL FOR
MICROSOFT TEAMS
TouchLink®
ROOMS
®
Application Software
68-3540-01 Rev. C
12 20
Page 2
Safety Instructions
Safety Instructions • English
WARNING: This symbol, , when used on the product, is intended to
alert the user of the presence of uninsulated dangerous voltage within
the product’s enclosure that may present a risk of electric shock.
ATTENTION: This symbol, , when used on the product, is intended
to alert the user of important operating and maintenance (servicing)
instructions in the literature provided with the equipment.
For information on safety guidelines, regulatory compliances, EMI/EMF
compatibility, accessibility, and related topics, see the Extron Safety and
Regulatory Compliance Guide, part number 68-290-01, on the Extron
website, www.extron.com.
Sicherheitsanweisungen • Deutsch
WARNUNG: Dieses Symbol auf dem Produkt soll den Benutzer
darauf aufmerksam machen, dass im Inneren des Gehäuses dieses
Produktes gefährliche Spannungen herrschen, die nicht isoliert sind und
die einen elektrischen Schlag verursachen können.
VORSICHT: Dieses Symbol auf dem Produkt soll dem Benutzer in
der im Lieferumfang enthaltenen Dokumentation besonders wichtige
Hinweise zur Bedienung und Wartung (Instandhaltung) geben.
Weitere Informationen über die Sicherheitsrichtlinien, Produkthandhabung,
EMI/EMF-Kompatibilität, Zugänglichkeit und verwandte Themen finden Sie in
den Extron-Richtlinien für Sicherheit und Handhabung (Artikelnummer
68-290-01) auf der Extron-Website, www.extron.com.
Instrucciones de seguridad • Español
Istruzioni di sicurezza • Italiano
AVVERTENZA: Il simbolo, , se usato sul prodotto, serve ad
avvertire l’utente della presenza di tensione non isolata pericolosa
all’interno del contenitore del prodotto che può costituire un rischio di
scosse elettriche.
ATTENTZIONE: Il simbolo, , se usato sul prodotto, serve ad avvertire
l’utente della presenza di importanti istruzioni di funzionamento e
manutenzione nella documentazione fornita con l’apparecchio.
Per informazioni su parametri di sicurezza, conformità alle normative,
compatibilità EMI/EMF, accessibilità e argomenti simili, fare riferimento
alla Guida alla conformità normativa e di sicurezza di Extron, cod. articolo
68-290-01, sul sito web di Extron, www.extron.com.
I
ADVERTENCIA: Este símbolo, , cuando se utiliza en el
producto, avisa al usuario de la presencia de voltaje peligroso sin aislar
dentro del producto, lo que puede representar un riesgo de descarga
eléctrica.
ATENCIÓN: Este símbolo, , cuando se utiliza en el producto,
avisa al usuario de la presencia de importantes instrucciones de uso y
mantenimiento recogidas en la documentación proporcionada con el
equipo.
Para obtener información sobre directrices de seguridad, cumplimiento
de normativas, compatibilidad electromagnética, accesibilidad y temas
relacionados, consulte la Guía de cumplimiento de normativas y seguridad
de Extron, referencia 68-290-01, en el sitio Web de Extron, www.extron.com.
Instructions de sécurité • Français
AVERTISSEMENT : Ce pictogramme, , lorsqu’il est utilisé sur le
produit, signale à l’utilisateur la présence à l’intérieur du boîtier du
produit d’une tension électrique dangereuse susceptible de provoquer
un choc électrique.
ATTENTION : Ce pictogramme, , lorsqu’il est utilisé sur le produit,
signale à l’utilisateur des instructions d’utilisation ou de maintenance
importantes qui se trouvent dans la documentation fournie avec le
matériel.
Pour en savoir plus sur les règles de sécurité, la conformité à la
réglementation, la compatibilité EMI/EMF, l’accessibilité, et autres sujets
connexes, lisez les informations de sécurité et de conformité Extron, réf.
68-290-01, sur le site Extron, www.extron.com.
Page 3
Copyright
© 2020 Extron. All rights reserved. www.extron.com
Trademarks
All trademarks mentioned in this guide are the properties of their respective owners.
The following registered trademarks (®), registered service marks (SM), and trademarks (TM) are the property of RGBSystems, Inc. or Extron
(see the current list of trademarks on the Terms of Use page at www.extron.com):
Registered Trademarks (
Extron, Cable Cubby, ControlScript, CrossPoint, DTP, eBUS, EDID Manager, EDID Minder, eLink, Flat Field, FlexOS, Glitch Free. Global
Configurator, GlobalScripter, GlobalViewer, Hideaway, HyperLane, IPIntercom, IPLink, KeyMinder, LinkLicense, LockIt, MediaLink,
MediaPort, NAV, NetPA, PlenumVault, PoleVault, PowerCage, PURE3, Quantum, ShareLink, Show Me, SoundField, SpeedMount,
SpeedSwitch, StudioStation, SystemINTEGRATOR, TeamWork, TouchLink, V-Lock, VideoLounge, VN-Matrix, VoiceLift, WallVault, WindoWall,
XPA, XTP, XTPSystems, and ZipClip
Registered Service Mark
(SM)
: S3 Service Support Solutions
Trademarks (™
AAP, AFL (Accu-RATEFrameLock), ADSP(Advanced Digital Sync Processing), Auto-Image, AVEdge, CableCover, CDRS(ClassD
Ripple Suppression), Codec Connect, DDSP(Digital Display Sync Processing), DMI (DynamicMotionInterpolation), DriverConfigurator,
DSPConfigurator, DSVP(Digital Sync Validation Processing), EQIP, Everlast, FastBite, Flex55, FOX, FOXBOX, IP Intercom HelpDesk,
MAAP, MicroDigital, Opti-Torque, PendantConnect, ProDSP, QS-FPC(QuickSwitch Front Panel Controller), RoomAgent, Scope-Trigger,
SIS, SimpleInstructionSet, Skew-Free, SpeedNav, Triple-Action Switching, True4K, True8K, Vector™ 4K, WebShare, XTRA, and ZipCaddy
®
)
)
Page 4
Conventions Used in this Guide
Notifications
The following notifications are used in this guide:
CAUTION: Risk of minor personal injury.
ATTENTION : Risque de blessuremineure.
ATTENTION:
• Risk of property damage.
• Risque de dommages matériels.
NOTE: A note draws attention to important information.
TIP: A tip provides a suggestion to make working with the application easier.
Software Commands
Commands are written in the fonts shown here:
^AR Merge Scene,,0p1 scene 1,1 ^B 51 ^W^C.0
[01] R 0004 00300 00400 00800 00600 [02] 35 [17] [03]
E X! *X1&* X2)* X2#* X2! CE}
NOTE: For commands and examples of computer or device responses used in this
guide, the character “0” is used for the number zero and “O” is the capital letter
“o.”
Computer responses and directory paths that do not have variables are written in the font
shown here:
Reply from 208.132.180.48: bytes=32 times=2ms TTL=32
C:\Program Files\Extron
Variables are written in slanted form as shown here:
ping xxx.xxx.xxx.xxx —t
SOH R Data STX Command ETB ETX
Selectable items, such as menu names, menu options, buttons, tabs, and field names are
written in the font shown here:
From the File menu, select New.
Click the OK button.
Specifications Availability
Product specifications are available on the Extron website, www.extron.com.
Extron Glossary of Terms
A glossary of terms is available at http://www.extron.com/technology/glossary.aspx.
ivExtron Control for Microsoft Teams Rooms • Introduction
Page 5

Contents
Introduction ................................................1
Overview ............................................................. 1
Requirements ...................................................... 1
Application Diagram ............................................ 2
Installing the Microsoft Teams Rooms Appli-
cation ......................................................... 3
GCP Configuration .............................................. 3
Special Notes .................................................. 4
Setting up the Microsoft Teams Rooms
Compute ............................................................. 5
Using Extron Control for Microsoft Teams
Rooms ........................................................ 6
Using Extron Control for Microsoft Teams
Rooms for the First Time ..................................... 6
Using Extron Control for Microsoft Teams
Rooms After the First Time ................................ 8
Out of Call ....................................................... 8
In Call .............................................................. 8
Reference Information ............................... 12
Troubleshooting User Interface, Admin
Account ............................................................. 12
Camera Controls, Admin Account ..................... 12
Setting a Preset with Extron Control for
Microsoft Teams Rooms Application .................. 13
Changing Friendly Name ................................... 13
Changing Controller Credentials ........................ 14
Deleting Controller Credentials and
Certificate ......................................................... 14
Communication Settings, Admin Account .......... 15
Uninstalling Extron Control for Microsoft
Teams Rooms ................................................... 16
Default vTLP Screens ..................................9
General Screen ................................................ 9
Camera Screen ............................................. 10
Display Screen ............................................... 10
Lighting Screen .............................................. 11
Shades Screen .............................................. 11
vExtron Control for Microsoft Teams Rooms • Introduction
Page 6

viExtron Control for Microsoft Teams Rooms • Introduction
Page 7

Introduction
This section provides an overview of the Extron Control for Microsoft Teams Rooms
application. Topics include:
• Overview
• Requirements
• Application Diagram
Overview
Extron Control for Microsoft Teams Rooms adds Extron AV control to the full range of
conferencing features provided by the Microsoft Teams Rooms application, which runs on a
variety of devices, including Logitech Tap, Logitech SmartDock, Lenovo Hub 500, and Poly
GC8, thus allowing a single device to deliver both collaboration and control solutions for any
presentation application.
The software can be deployed either through an MSI file via the Microsoft System Center
Configuration Manager (SCCM), or via Microsoft Intune. Both allow administrators to install
and manage the application remotely.
Once enabled and configured, the Extron Control for Microsoft Teams Rooms application
shows the Extron Control for Web HTML 5 virtual TouchLink® panel (vTLP) page, which can
be configured with Extron Global Configurator Plus and Professional (GCP) or programmed
with Global Scripter (GS). It allows various room functions, including shading, lighting, display,
and camera controls.
Requirements
The following are required to run the app:
• Either an All-in-One unit such as the Logitech Smartdock, Lenovo Hub 500, Logitech Tap,
Logitech SmartDock, Lenovo Hub 500, or Poly GC8 device with Microsoft Teams Rooms.
• Extron IPCP Pro control processor with User Interface Upgrade LinkLicense (see www.
extron.com for suitable models)
• Microsoft Teams Rooms GUI Designer system template file.
• Extron Control for Microsoft Teams Rooms MSI Installer.
• Extron Control for Microsoft Teams Rooms GCP Driver or GS Module.
• Extron software (see https://www.extron.com/download/software.aspx?material=2)
• GUI Designer version 1.11.0 or later
• Global Configurator Plus (GCP) version 3.5.1.x or later*
• or Global Scripter (GS) version 2.2.0.x or later
NOTES:
• Use GCP to configure functions associated with the template or GS to program
functions associated with the template.
• If required, the GUI Designer can be used to customize the GUI template.
Extron Control for Microsoft Teams Rooms • Introduction 1
Page 8
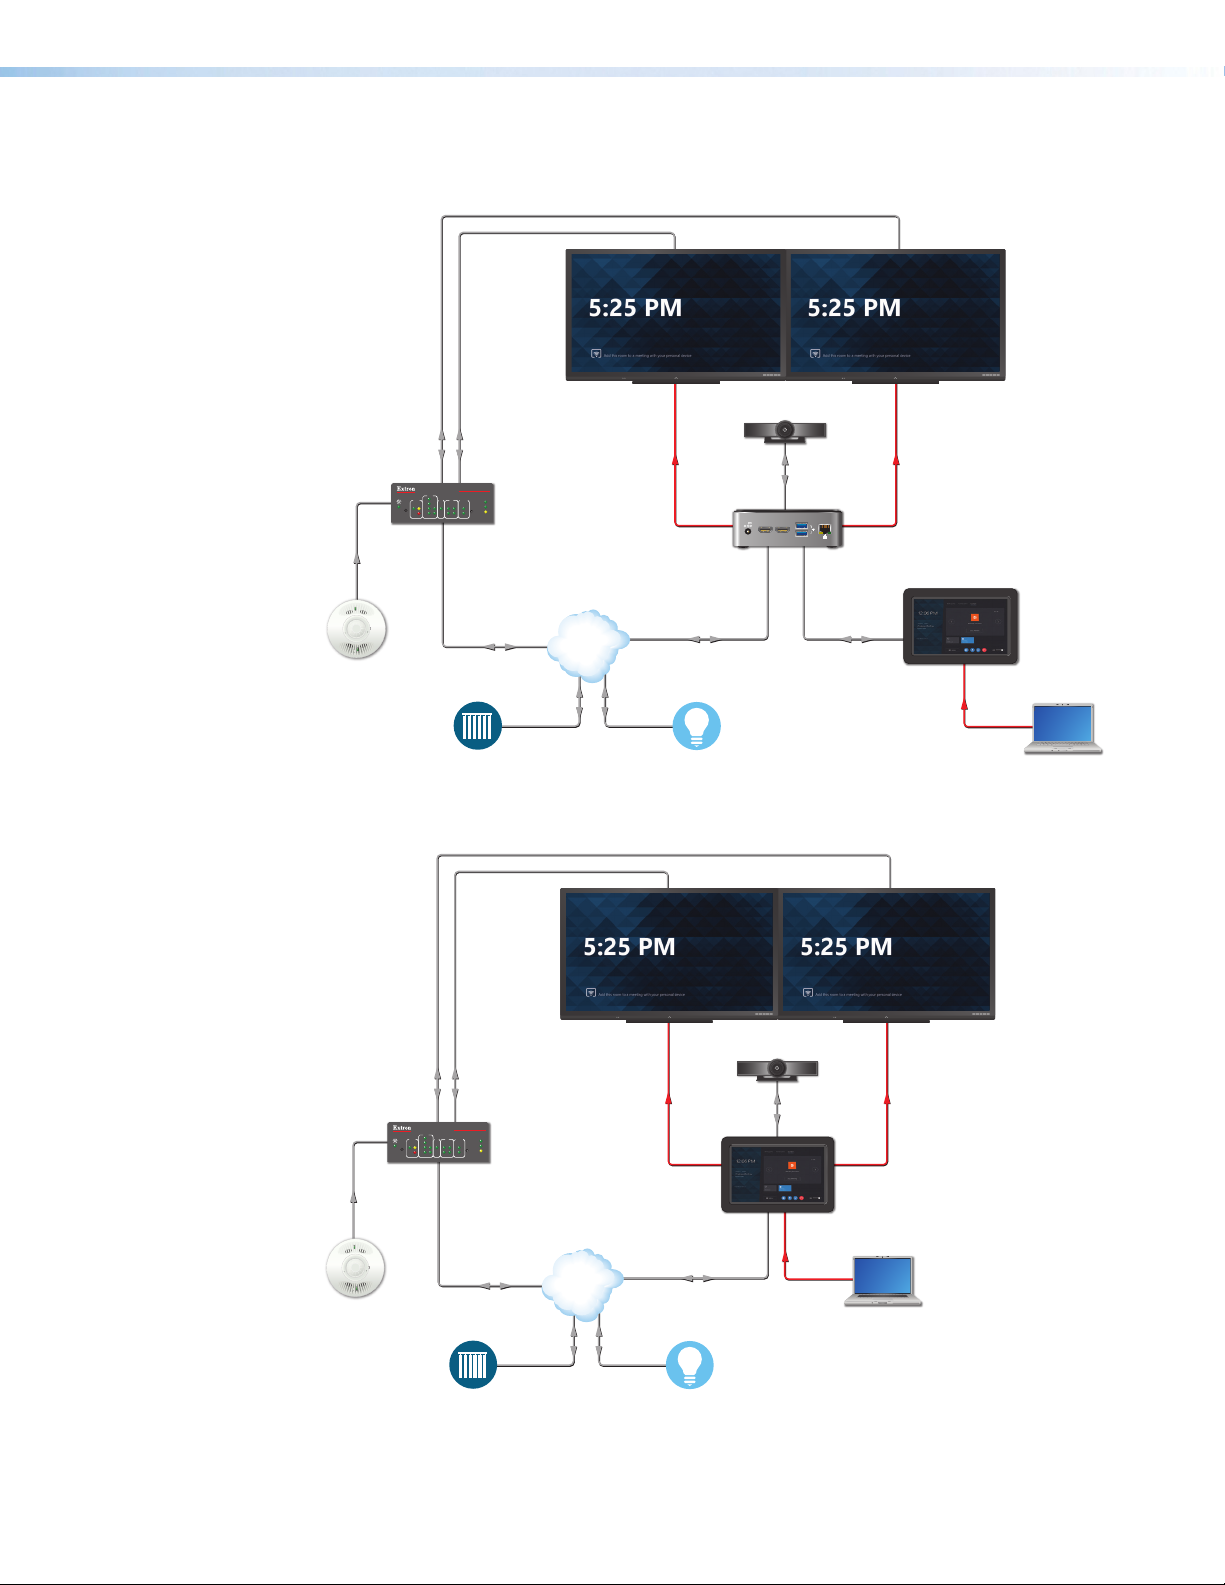
Application Diagram
LAN
1000
LINK
ACT
R
IR
IPCP PRO 250
eBUS
OVER
LIMIT
S
COM
I/O
1
2241321
RTS
CTS
Tx
Rx
RELAYS
IR/S
MODEL 80
FLAT PANEL
MODEL 80
FLAT PANEL
Laptop
Extron
IPCP Pro 250
IP Link Pro
Control Processor
RS-232RS-232
Ethernet
Ethernet Ethernet
Shade
Control
Ethernet USB
HDMI
HDMI HDMI
USB
Digital Input
Camera/Mic/Speaker
Room PC
Touch Screen
Device
Extron
OCS 100C
Occupancy
Sensor
Lighting
System
HDMI
DC IN
HDMI
SS
19V
-
+
LAN
1000
LINK
ACT
R
IR
IPCP PRO 250
eBUS
OVER
LIMIT
S
COM
I/O
1
2241321
RTS
CTS
Tx
Rx
RELAYS
IR/S
MODEL 80
FLAT PANEL
MODEL 80
FLAT PANEL
Extron
IPCP Pro 250
IP Link Pro
Control Processor
RS-232RS-232
Ethernet
Ethernet Ethernet
Shade
Control
Ethernet
HDMI
HDMI HDMI
USB
Digital Input
Camera/Mic/Speaker
Extron
OCS 100C
Occupancy
Sensor
Lighting
System
Laptop
Touch Screen
MTR PC and Touchscreen Display ((Logitech Tap, Poly GC8)
All-in-One MTR System (Logitech SmartDock, Lenovo Hub 500, Lenovo Hub Gen 2)
Figure 1. Extron Control for Microsoft Teams Rooms Application Diagram
Extron Control for Microsoft Teams Rooms • Introduction 2
Page 9

Installing the Microsoft Teams Rooms Application
This section provides the following topics, including:
• GCP Configuration
• Special Notes
• Setting up the Microsoft Teams Rooms Compute
GCP Configuration
1. Download the following from the Extron website:
The Extron Control for Microsoft Teams Rooms GCP driver
The Extron Control for Microsoft Teams Rooms GUI Designer template zip folder.
2. Make a note of the following:
Control processor user name and password for later use.
IP address and MAC address to locate device in GCP or Toolbelt.
3. Open a GCP project.
4. In the project add an Extron control processor and Extron Control for Web Panel (vTLP).
5. Import required Microsoft Teams Rooms GUI template, found in the downloaded zipped
folder.
6. Add the driver(s) or modules for other
devices that need to be controlled.
7. Add the driver downloaded in step 1
to the Ethernet ports on the control
processor (see figure 2, 1).
NOTE: The following steps show
configuration with GCP. For GS, see
the Global Scripter Help File.
22
a. Select the ethernet port with the
Extron Control for Microsoft Teams
Rooms driver (
b. Enter the IP address/hostname of the
Microsoft Teams Rooms compute
(
).
2
Extron Control for Microsoft Teams Rooms • Installing the MTR Application 3
1
).
1
1
Figure 2. Change the IP Address
Page 10

8. Build the GCP or GS file, and upload it to the controller.
11
Special Notes
The Extron Control for Microsoft Teams Rooms application by default creates a Back to
Rooms System (see figure 4, 1) button found on the Room Control page.
c. Click VTLP Name (see figure 3, 3) to select it.
d. Enter the name of the vTLP in the Set To text box (
NOTE: The name entered in the Set To text box (4) must match the name in black
text (5). In this case, the text is Logitech SmartDock.
5
5
Figure 3. Control Processor to MTR device communication
4
33
).
4
4
Figure 4. Room Control Page
To hide the Back to Rooms System button, please follow these steps:
1. In the GCP file, create a new monitor.
2. Place the Extron Control Show condition, from the driver into the Conditions space.
3. Place the Hide Return action from the driver into the Actions space.
4. Build the GCP file, and upload it to the controller.
To keep the default button, please follow these steps:
1. Open the system template file in Extron GUI Designer.
2. Remove the Back button from all pages.
3. Save and Build for import to GCP or GS.
Extron Control for Microsoft Teams Rooms • Installing the MTR Application 4
Page 11

Setting up the Microsoft Teams Rooms Compute
1. Set up a Microsoft Teams Rooms system before installing the Extron Control for
Microsoft Teams Rooms application.
2. Download and install the Extron Control for Microsoft Teams Rooms MSI Installer on a
supported Microsoft Teams Rooms device. The MSI file can be used directly via SCCM
command line, via a batch file, or PowerShell™ script.
Extron recommends that the software is installed via SCCM (see figure 5) as this allows
IT professionals to manage, deploy, and troubleshoot remotely.
Figure 5. Microsoft System Center Configuration Manager
3. Once the software is installed, reboot the Microsoft Teams Rooms device.
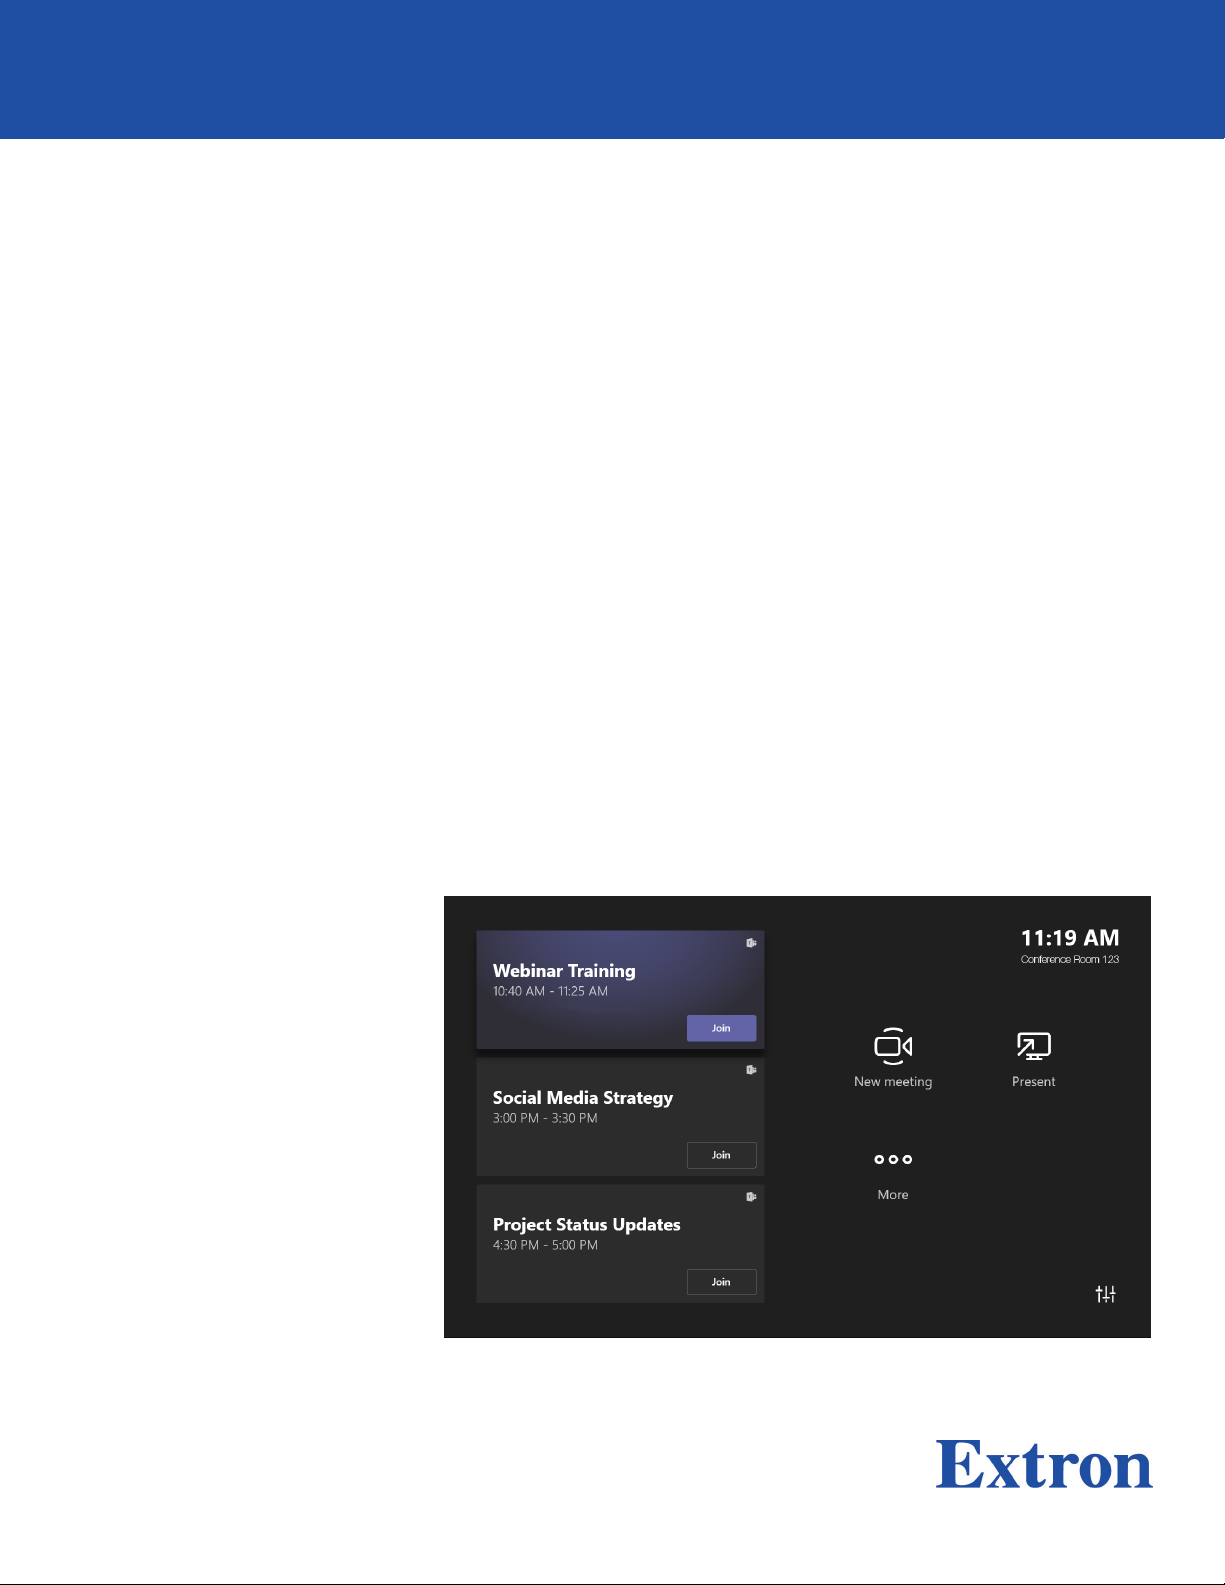
4. After rebooting, the home screen is visible (see figure 6). The Rooms Control option (1)
is available in the bottom right corner of the screen.
Figure 6. Microsoft Teams Rooms Viewer Home Screen with Control Icon
Extron Control for Microsoft Teams Rooms • Installing the MTR Application 5
Page 12

Installing Software via Microsoft Intune
1. Download the Extron Control for Microsoft Teams Rooms.MSI File.
2. Use Microsoft’s IntuneWinAppUtil.exe to package the .MSI file as an Intune Win32 app
for Windows 10 devices.
3. Import the Win32 app into Intune and deploy to eligible Microsoft Teams Rooms
devices.
Figure 7. Microsoft Intune Management Center
Extron Control for Microsoft Teams Rooms • Installing the MTR Application 6
Page 13

Using Extron Control for Microsoft Teams Rooms
This section details the steps for using Extron Control for Microsoft Teams Rooms:
• For the First Time
• After the First Time
Using Extron Control for Microsoft Teams Rooms for the First Time
When you use the program for the first time, you must configure it. This is a one-time setup.
1. Open the Extron Control for Microsoft Teams Rooms application by clicking the Room
Controls icon.
The Login screen opens:
Figure 8. Login Screen
2. Enter the username and password to access the Extron Control page. These are the
username and password for the IPCP Pro control processor. See the user guide for the
control processor for important information about passwords.
NOTE: Either the administrator or user account works, but Extron recommends
using the user account.
If the username and password are entered incorrectly, the login screen clears, and you
are required to re-enter the information.
Extron Control for Microsoft Teams Rooms • Using Extron Control for MTR 7
Page 14

3. Click Login.
Windows Defender Firewall may prompt user for permission:
Figure 9. Windows Defender Firewalls
NOTE: If upgrading from previous version of Extron Control for Microsoft Teams
Rooms software, Windows Defender may not prompt.
4. Allow both Private and Public network access.
The Security Certificate screen opens:
Figure 10. Security Certificate
5. Click either Accept Certificate or Reject Certificate.
Accept Certificate — User agrees to store the Extron self-signed certificate for this
user interface. The Microsoft Teams Rooms device will now display the vTLP screen.
Reject Certificate — User rejects the Extron self-signed certificate for this user
interface. The Microsoft Teams Rooms device will not display the vTLP screens and
the user is returned to the Login screen. To access the vTLP screens, the user must
install a certificate manually, using Windows Certificate Manager, and then restart
the device.
Extron Control for Microsoft Teams Rooms • Using Extron Control for MTR 8
Page 15

Using Extron Control for Microsoft Teams Rooms After the First Time
Out of Call
Figure 11. Out of Call
Click the Room Control icon, in the bottom-right corner (1). The General Screen opens.
In Call
22
Figure 12. In Call
Figure 12 shows the screen when Extron Control for Microsoft Teams Rooms is
configured to use Microsoft Teams. The screen looks different if you are using another
software program, such as Skype for Business.
The More icon “...” (2) provides access to Room Controls.
This and other options can now be found in the toolbar along t the bottom of the window.
NOTE: If you are currently making a call but the call has not yet been accepted, the
More icon is gray and inaccessible.
Extron Control for Microsoft Teams Rooms • Using Extron Control for MTR 9
Page 16

Default vTLP Screens
By default, the GUI Designer system templates provides five virtual TLP screens:
• General
• Camera Screen
• Display Screen
• Lighting Screen
• Shades Screen
Use the tabs on the left side of the screen to switch between the five. Use GUI Designer and
GCP or GS to customize the screens.
General Screen
To open the General Screen, click General from any of the other screens.
Figure 13. General Screen
This screen can be used to automatically set up the room based on meeting type.
Extron Control for Microsoft Teams Rooms • Default vTLP Screens 10
Page 17

Camera Screen
To open the Camera Screen, click Camera from any of the other screens.
Figure 14. Camera Screen
This screen shows camera presets and camera controls.
Display Screen
To open the Display screen, click Display from any of the other screens.
Figure 15. Display Screen
This screen shows switchable display input sources, for a dual display room.
Extron Control for Microsoft Teams Rooms • Default vTLP Screens 11
Page 18

Lighting Screen
To open the Lighting screen, click Lighting from any of the other screens.
Figure 16. Lighting Screen
This screen can be used to increase or decrease the brightness of the lights or to activate a
preset lighting configuration.
Shades Screen
To open the Shade screen, click Shade from any of the other screens.
Figure 17. Shades Screen
This screen can be used to adjust the room shades or to activate preset shade
configurations.
Extron Control for Microsoft Teams Rooms • Default vTLP Screens 12
Page 19

Reference Information
This section covers the following topics:
• Troubleshooting User Interface, Admin Account
• Camera Controls, Admin Account
• Setting a Preset with Extron Control for Microsoft Teams Rooms Application
• Changing Friendly Name
• Changing Controller Credentials
• Deleting Controller Credentials and Certificate
• Communication Settings, Admin Account
• Uninstalling Extron Control for Microsoft Teams Rooms
Troubleshooting User Interface, Admin Account
After the Extron Control for Microsoft Teams Rooms is download,
a shortcut will be created on the desktop (see figure 18, right). This
shortcut will launch the Extron Control for Microsoft Teams Rooms
application, which can be used as a troubleshooting user interface.
This user interface provides the following capabilities:
• USB Camera Control
• Credentials and Certificate Clearing
• Communication Settings
• Diagnostic Message Window and Data Logging
Figure 18. Desktop Shortcut
NOTE: When switching between Administrator and Skype accounts, please make
sure to close the Extron Control for Microsoft Teams Rooms application to prevent
two instances of the software being ran. This will cause the vTLP to remain in the
“Waiting for Connection...” state.
Extron Control for Microsoft Teams Rooms • Reference Information 13
Page 20

Camera Controls, Admin Account
1. Run the Extron Control for Microsoft Teams Rooms application found on the desktop.
The application will open the user interface, with the USB Camera Control tab selected.
Figure 19. USB Camera Control
2. Select a camera to be controlled by clicking on the Friendly Name.
3. Once the name is highlighted the Following Camera Controls can be used.
• Directional movements are up, down, left, and right
• Zoom allows for widen and narrow
• Presets, recalls presets that have been saved by the camera’s controller, cameras
software, or the Extron Control for Microsoft Teams Rooms application.
NOTE: A complete list of Certified cameras and their softwares can be found in
the Extron Control for Microsoft Teams Rooms release notes
Setting a Preset with Extron Control for Microsoft Teams Rooms Application
1. Use the directional buttons to move selected camera to desired position.
2. Click and hold Preset 1, 2, or 3 for five seconds to save that position.
NOTE: To see direction, zoom, preset recall, and preset set messages,
the Show Messages check box must be checked.
Figure 20. Camera Control Troubleshooting Messages
Extron Control for Microsoft Teams Rooms • Reference Information 14
Page 21

Changing Friendly Name
If there are multiples of the same cameras used within a room, the Friendly Name can be
changed to help reduce confusion.
1. Select a camera whose name needs to be changed.
2. Click the edit button.
3. A popup will appear with the following info:
Figure 21. Edit Camera Settings
4. The camera’s Friendly Name can be edited in the text box.
5. Once done, click OK to save changes.
The Friendly Name is now changed.
Changing Controller Credentials
If the control processor credentials have been changed, the Microsoft Teams Rooms system
requires a reboot. After the reboot, The Login screen opens (see figure 8 on page7)
and the new credentials must be entered.
Deleting Controller Credentials and Certificate
If it becomes necessary to delete the user name, password, and certificate data, it can be
done from the Admin account.
1. Log into the Admin account.
2. Launch the Extron Control for Microsoft Teams Rooms application.
3. Click on the System Settings tab to bring up the Credentials and Certificate section.
Figure 22. Credentials and Certificate
Extron Control for Microsoft Teams Rooms • Reference Information 15
Page 22

4. Checkmark the box to clear the Credentials and/or Certificate, and press OK.
NOTE: A Deletion confirmation can be seen in the Diagnostics message window by
enabling the Show Messages check box.
Figure 23. Credential and Certificate - Delete Conformation
To re-enter the information, log out of the Admin account and log into the Skype/Teams
account. Follow the instructions shown in Using Extron Control for Microsoft Teams
Rooms for the First Time on page 5.
Communication Settings, Admin Account
By default, Extron Control for Microsoft Teams Rooms listens for a Control Processor to
initiate communication, however this can be setup to accept communications from a single
IP address.
1. Login into the MTR devices Admin account
2. Run the Extron Control for Microsoft Teams Rooms application.
3. Go to the System Settings Tab:
Figure 24. Communication Settings
4. Click the box(s) in the Communication Settings to edit the grayed sections, when done
editing press OK
5. A prompt to restart the Extron Control for Microsoft Teams Rooms will appear:
Figure 25. Communication Settings Restart Prompt
Extron Control for Microsoft Teams Rooms • Reference Information 16
Page 23

NOTE: By default, the Extron Control for Mictrosoft Teams Rooms applications port
is 5000. This port should be changed if there is another program already using
that port. Please note, if the port is chanegd in the software, it will also need to be
changed in the Extron Control for Mictrosoft Teams Rooms driver located in the
GCP Script.
NOTE: A setting change conformation can be seen in the Diagnostics Message
window by enabling the Show Messages check box.
Figure 27. Communication Settings change conformation
Uninstalling Extron Control for Microsoft Teams Rooms
1. Log into the Admin account.
2. Open Add/Remove Programs.
3. Select Extron Control for Microsoft Teams Rooms
4. Click Uninstall.
Extron Control for Microsoft Teams Rooms • Reference Information 17
Page 24

Extron Warranty
Extron warrants this product against defects in materials and workmanship for a period of three years from the date
of purchase. In the event of malfunction during the warranty period attributable directly to faulty workmanship and/
or materials, Extron will, at its option, repair or replace said products or components, to whatever extent it shall
deem necessary to restore said product to proper operating condition, provided that it is returned within the warranty
period, with proof of purchase and description of malfunction to:
USA, Canada, South America,
and Central America:
Extron
1230 South Lewis Street
Anaheim, CA 92805
U.S.A.
Europe:
Extron Europe
Hanzeboulevard 10
3825 PH Amersfoort
The Netherlands
Africa:
Extron South Africa
South Tower
160 Jan Smuts Avenue
Rosebank 2196, South Africa
This Limited Warranty does not apply if the fault has been caused by misuse, improper handling care, electrical
or mechanical abuse, abnormal operating conditions, or if modifications were made to the product that were not
authorized by Extron.
NOTE: If a product is defective, please call Extron and ask for an Application Engineer to receive an RA (Return
Authorization) number. This will begin the repair process.
USA: 714.491.1500 or 800.633.9876 Asia: 65.6383.4400
Europe: 31.33.453.4040 or 800.3987.6673 Japan: 81.3.3511.7655
Africa: 27.11.447.6162 Middle East: 971.4.299.1800
Asia:
Extron Asia Pte Ltd
135 Joo Seng Road, #04-01
PM Industrial Bldg.
Singapore 368363
Singapore
China:
Extron China
686 Ronghua Road
Songjiang District
Shanghai 201611
China
Japan:
Extron, Japan
Kyodo Building, 16 Ichibancho
Chiyoda-ku, Tokyo 102-0082
Japan
Middle East:
Extron Middle East
Dubai Airport Free Zone
F13, PO Box 293666
United Arab Emirates, Dubai
Units must be returned insured, with shipping charges prepaid. If not insured, you assume the risk of loss or damage
during shipment. Returned units must include the serial number and a description of the problem, as well as the
name of the person to contact in case there are any questions.
Extron makes no further warranties either expressed or implied with respect to the product and its quality,
performance, merchantability, or fitness for any particular use. In no event will Extron Electronics be liable for direct,
indirect, or consequential damages resulting from any defect in this product even if Extron Electronics has been
advised of such damage.
Please note that laws vary from state to state and country to country, and that some provisions of this warranty may
not apply to you.
Worldwide Headquarters: Extron USA West, 1025 E. Ball Road, Anaheim, CA 92805, 800.633.9876
 Loading...