

Page 1
Quick Start Guide
Ultrasonic Thickness Gauges
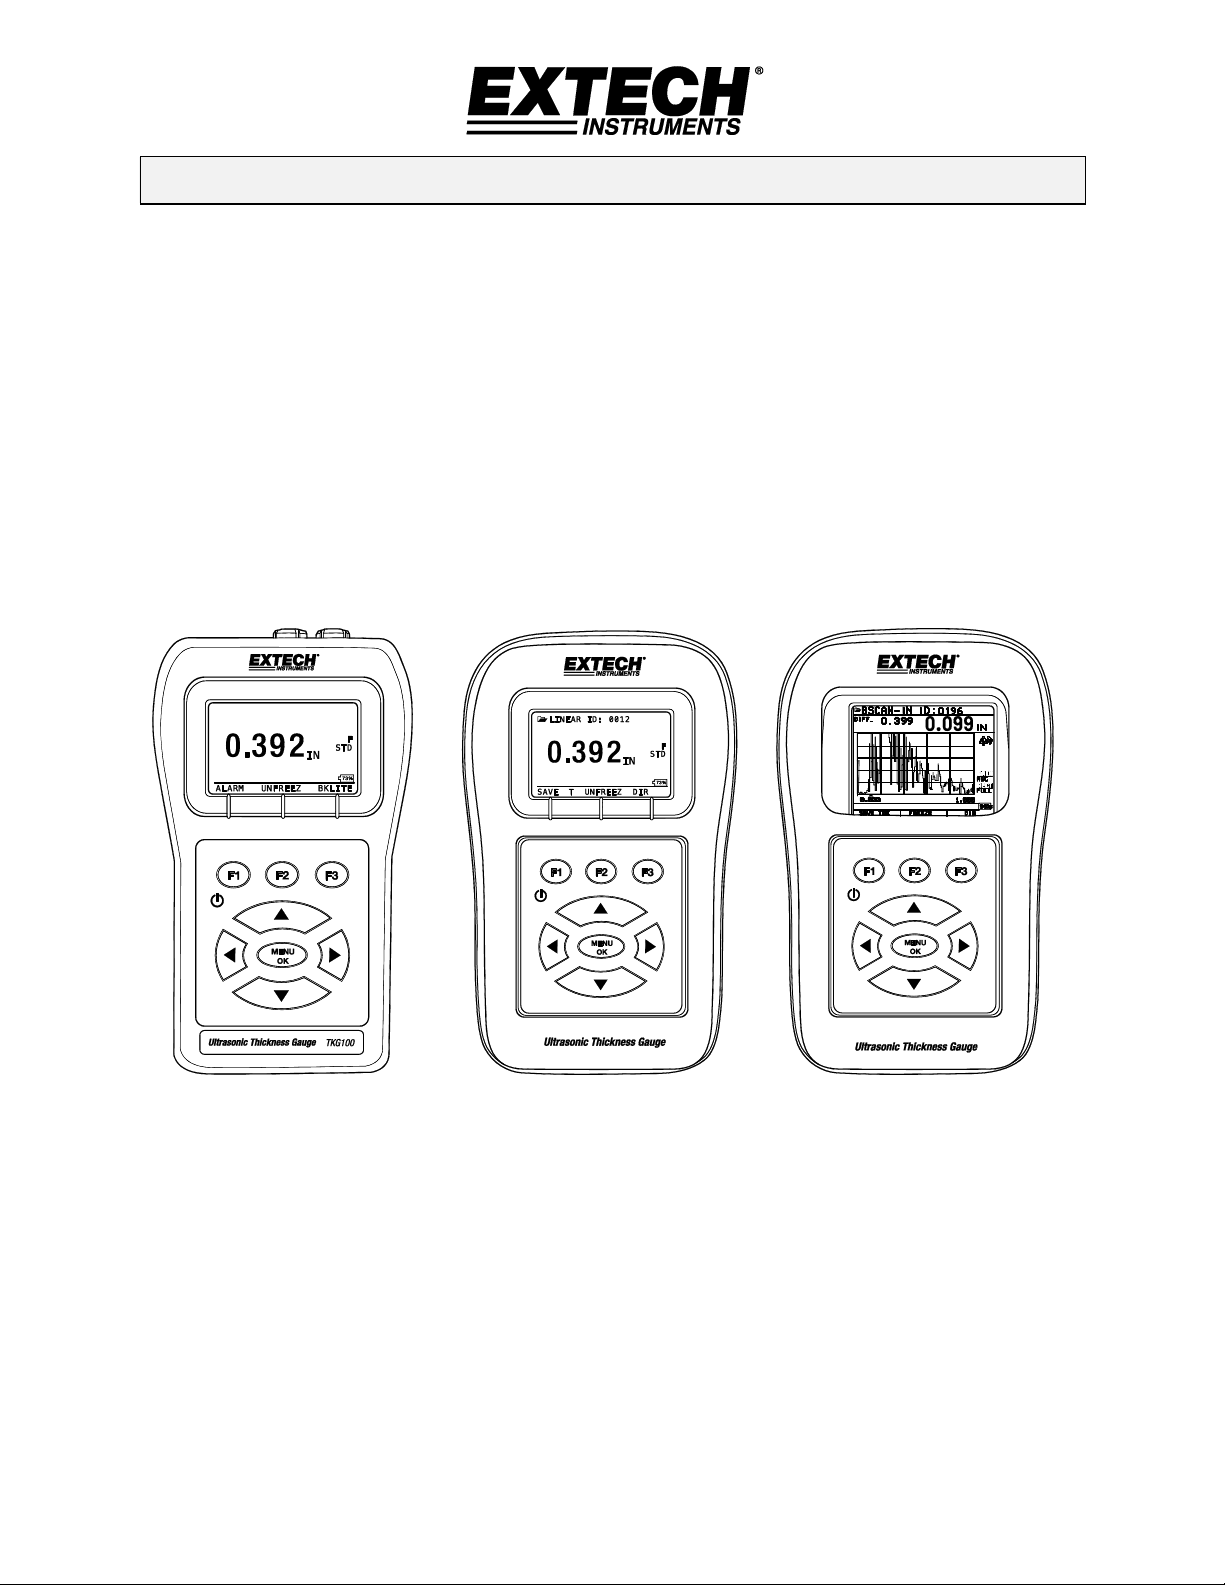
Models TKG100 TKG150 & TKG250
Page 2
Extech Instruments
TKG Series Quick Start Guide - EN v3.5 1/19
1. Installing Batteries
In order to install batteries, open the battery door at the bottom left of the unit. Slide in two ‘AA’
batteries with the positive terminal of both batteries facing towards the top of the unit. Close the
battery door tight enough so that the batteries make good contact with both battery terminals.
2. Powering ON/OFF
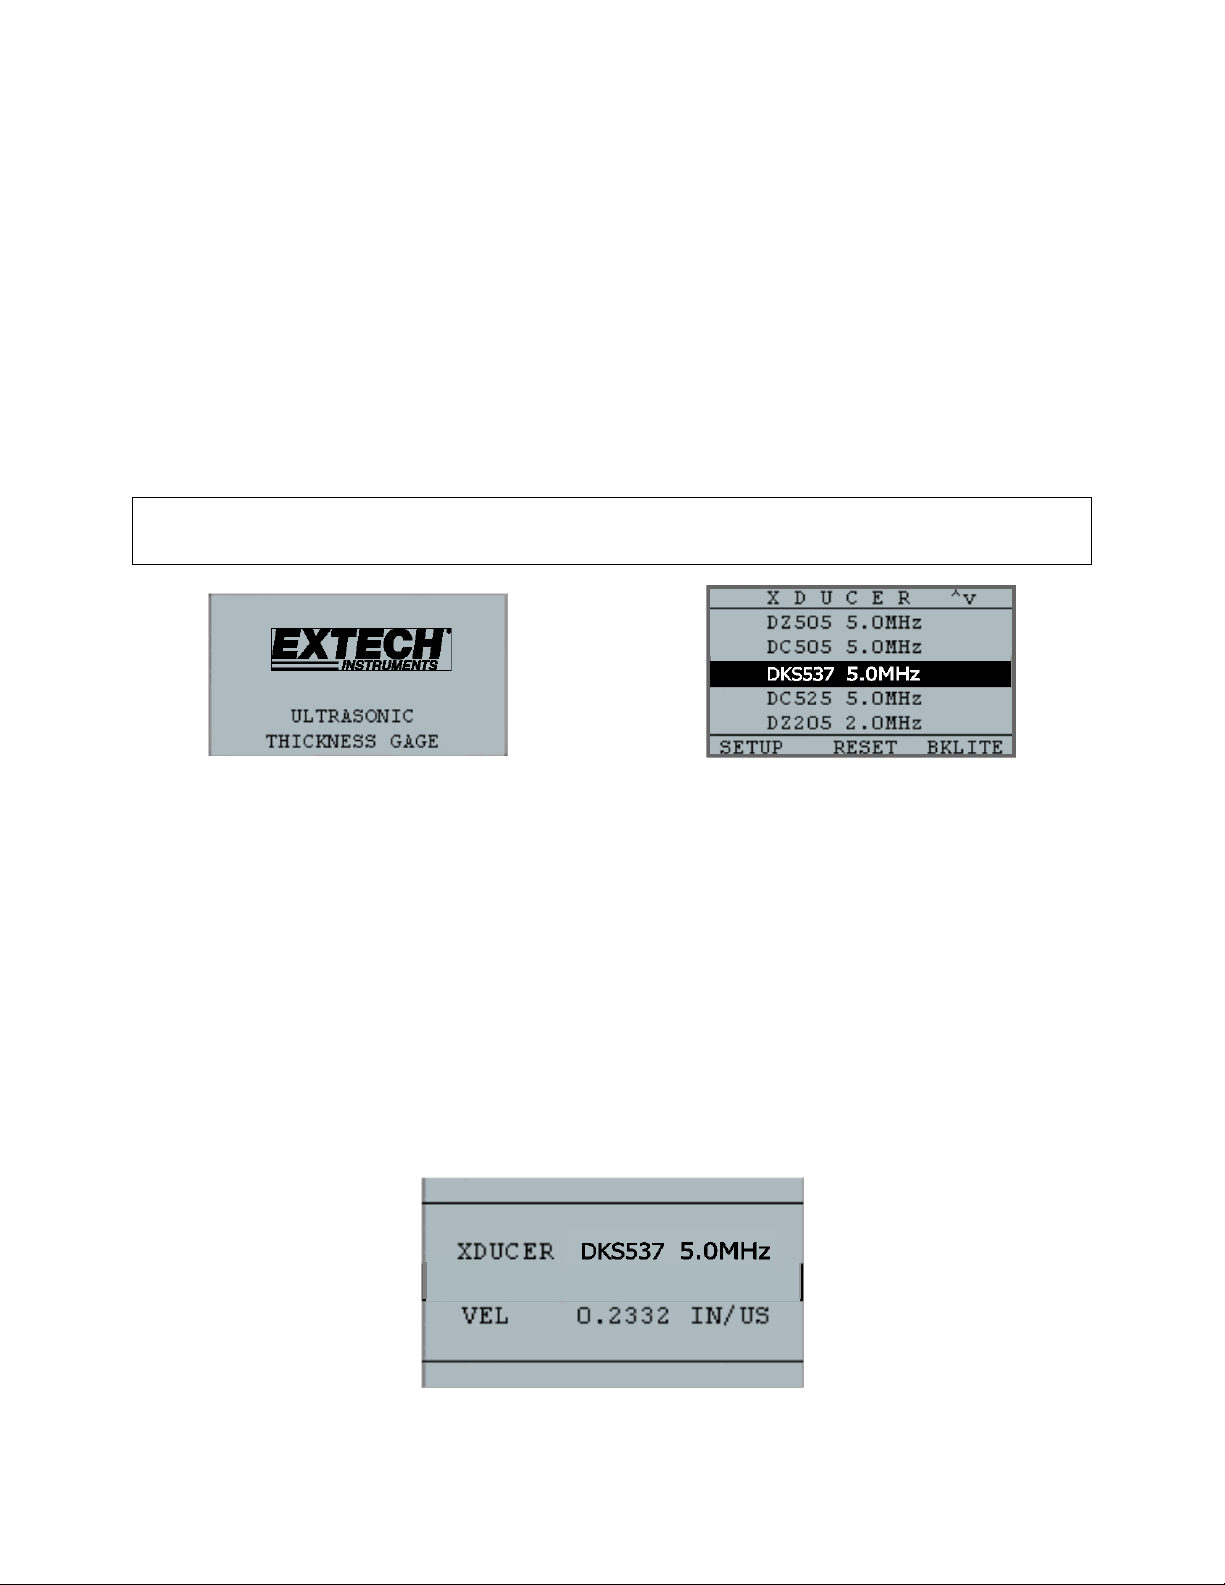
To power ON the unit, press and hold the F1 key for approximately three seconds. The LCD will display
the company information briefly and then it will move to the transducer selection screen. These two
screens are as shown below. To switch the unit OFF, press and hold the F1 key for approximately three
seconds. The LCD will briefly display the company information along with a ‘count down’ clock, after
which the instrument will switch OFF.
NOTE: If the Gauge is configured for right-hand operation, the F1 and F3 display prompts will be
reversed. To change from left-hand to right-hand operation, press Menu, Display, and User.
Company information screen Transducer Selection screen
3. Selecting the Transducer type and performing Auto Zero
A new transducer can be selected from the Transducer selection screen (the Transducer selection
appears after the device powers ON).
Note: it is very important that the transducer is not touching the test piece or has any fluid on the face
prior to selecting which probe is to be used.
While in the transducer selection screen, go to the transducer option that matches the part number on
the actual transducer by pressing the up or down arrow key. The unit will briefly display a ‘Wipe off
Couplant’ (fluid) instruction and will then perform an Auto Zero function. During Auto Zero, the unit will
display the text ‘Performing Auto Zero’.
Page 3

Extech Instruments
TKG Series Quick Start Guide - EN v3.5 1/19
4. Changing Units
To change units from IN (inches) to MM (millimeters) or sec (microseconds): At the first screen, before
the probe is selected, press F1 Menu, scroll to initial settings, press Menu/OK, scroll to units, press
Menu/OK, choose the desired unit, and then press Menu/OK and then F1 (Back).
5. Calibrating the Gauge
Calibrating is the process of adjusting the Gauge for a specific material and transducer before testing the
material to ensure that all measurements are accurate. Always perform a calibration before measuring
material to obtain standard accuracy. The following steps describe how to perform a Velocity and Zero
Calibration. A test step block of known thickness is required to perform an accurate calibration.
Velocity and Zero Calibration
Note: it is highly recommended that a test block with known thicknesses and multiple steps of the
same material with flat and parallel surfaces be used for calibration.
To calibrate both Zero and Velocity at the same time (strongly recommended) first go to the
Calibration mode by pressing menu, calibration, and OK. Messages will appear on the bottom of the
display prompting the user through the process “couple thin, press zero…” While measuring the
thinnest step, select Zero by pressing F2. After selecting Zero the transducer can be taken off of the
test block. If the displayed value is different than the known value of the step, adjust the value using
the up and down arrow keys and then press F1 (CAL). Then, while measuring the thickest step, select
‘VEl’ by pressing F3. After selecting ZERO the transducer can be taken off of the test block. If the
measured value is different than the known value of the step, adjust the measured value using the up
or down arrow key and then press OK. The unit will briefly display the acoustic sound velocity value
and then return to Measure mode. Note that the order of Zero and Velocity calibration could be
reversed as long as Zero is used on the thin section and Velocity on the thick section.
6. Taking Measurements
Once an Auto-zero is performed on the selected transducer, the unit automatically goes to the measure
mode. To take thickness readings, the user can simply apply the (fluid) couplant to the surface and put
the transducer on the test piece, applying some pressure, to measure thickness. Depending on the
parameter settings, the display may show other parameters. For more detailed information on Measure
mode, please refer to the User’s Manual.
7. Changing the Parameter settings
To change any parameter setting, press Menu/OK and then go to Measurement by pressing the up or
down arrow key and then Menu/OK. The Measurement screen lists the parameters in alphabetical order
such as alarm, diff, E to E, fast…these vary based on which Gauge is purchased. The procedure to change
any parameter is the same…scroll to the parameter, press Menu/OK, scroll to select, and then press
Menu/OK. Use the F1 key as the ‘back’ key to return to previous screens and main measurement modes.
Copyright © 2013-2019 FLIR Systems, Inc.
All rights reserved including the right of reproduction in whole or in part in any form
www.extech.com
 Loading...