

Page 1
User's Guide
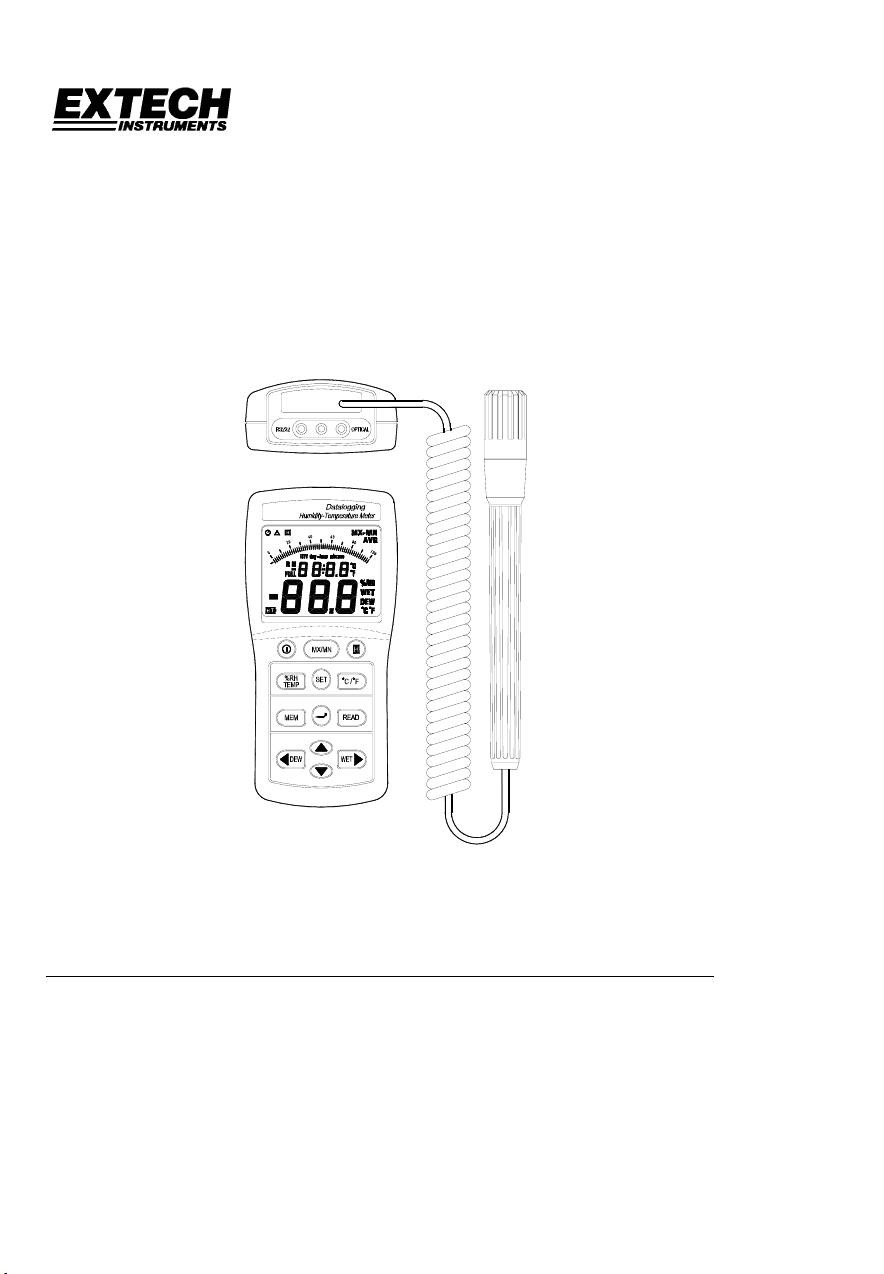
EasyView Digital Hygro-Thermometer Datalogger
Model EA25
Introduction
Congratulations on your purchase of the Extech EA25 EasyView Digital HygroThermometer Datalogger. This device measures and records Humidity, Temperature,
Dew Point, and Wet Bulb data in real-time. Careful use of this meter will provide years of
reliable service.
Page 2
Specifications
Function Range and Resolution Accuracy
Humidity 10.0 to 95.0% RH ±3% RH (at 25oC, 30 to 95% RH )
±5% RH (at 25
o
C, 10 to 30% RH )
Temperature* -4 to 140oF (-20 to 60oC) ±1.8oF (±1oC)
* Dew Point and Wet Bulb temperatures have the same range as shown above
Display Multifunction LCD with bargraph and status indicators
Sensor Type Humidity: capacitance sensor; Temperature: thermistor
Response Time Humidity: 45% to 95% < 1 min; 95% to 45% < 3 min.
Temperature: Approx. 2 seconds for a 10
o
C change
Reading Rate 2 readings per second
RS-232 PC Interface Optical connection with supplied interface cable. Software
compatible with Windows
TM
95/98, ME, 2000, and XP systems
Datalogger storage Stores 99 sets of data in manual mode (15,000 in auto mode)
Sampling Intervals 3 to 255 seconds (1 to 86,400 secs. using supplied software)
Operating Conditions 32 to 140
Storage Conditions 14 to 140
o
F (0 to 60oC); < 95% RH non-condensing
o
F (-10 to 60oC); <70% RH non-condensing
Power Supply 6 x 1.5V ‘AAA’ batteries
Auto power off After 30 minutes of inactivity
Battery Life Approx. 200 hours
Dimensions / Weight 5.9 x 2.8 x 1.4” (150 x 72 x 35mm); 8.3 oz. (235g)
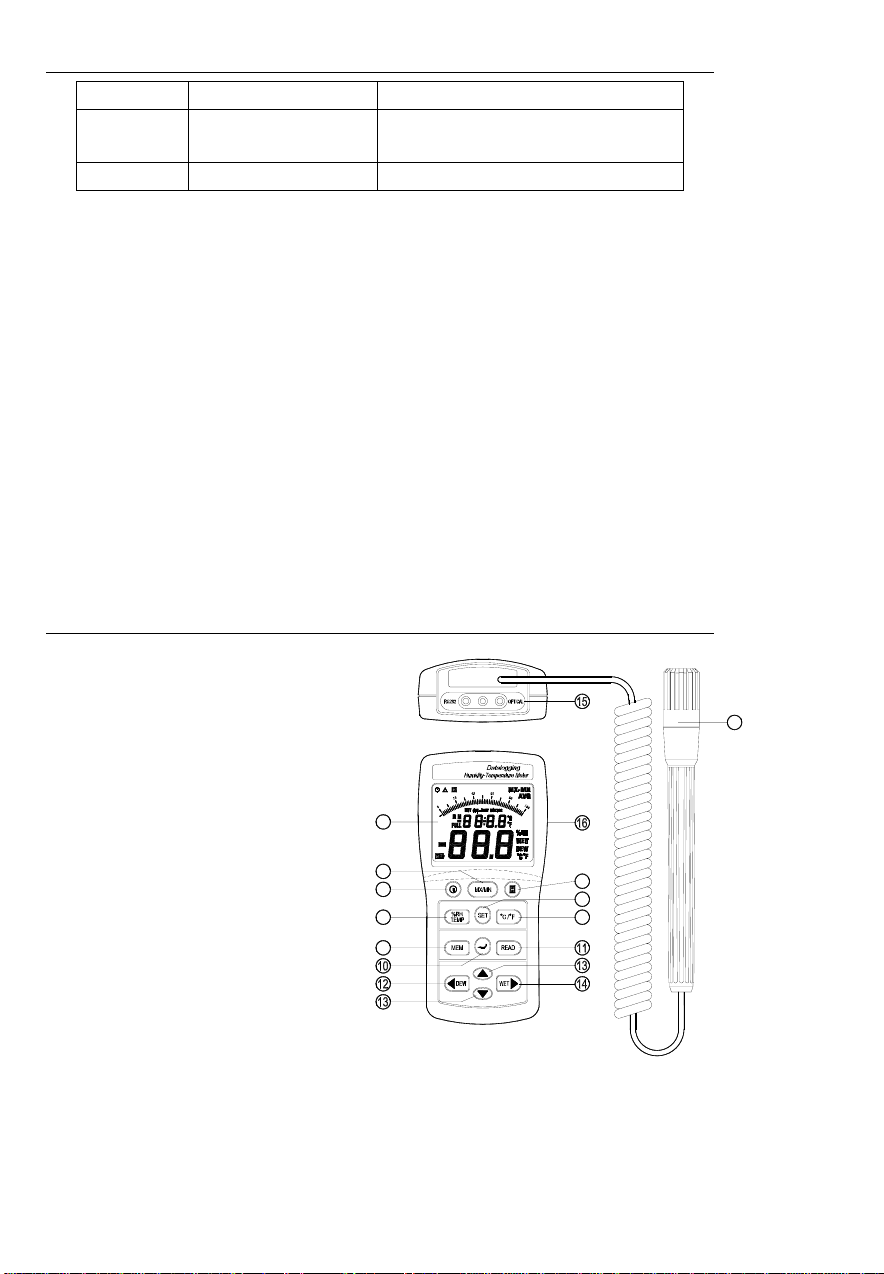
Meter Description
1. Humidity/Temperature Probe
2. Multifunction LCD with bargraph
and status indicators
3. Power ON/OFF button
4. MX/MN button
5. DATA HOLD button
6. Humidity / Temperature select
button
7. SET button
8. Units (C/F) select button
9. MEM (memory) button
10. ENTER button
11. READ button
12. DEW POINT temperature select
& left arrow button
13. UP/DOWN programming keys
14. WET BULB temperature select &
right arrow button
15. RS-232 optical jack
16. The battery compartment is
located on the rear of the instrument
2
4
3
6
9
5
7
8
1
EA25 V2.1 02/06 2
Page 3

Operation
Turn Power ON or OFF
1. Press the button to turn the meter on or off. The meter will perform a short self-test
when turned on.
2. The meter automatically turns off after 30 minutes of inactivity unless the MX/MN or
Datalogging modes are active.
Taking Measurements
1. Hold the probe in the air in the area to be tested. Do NOT immerse in liquid.
2. Allow adequate time for readings to stabilize.
3. Read the measurements on the LCD. The bargraph tracks the large digit display.
4. The %RH/TEMP button allows the user to choose whether the temperature or the
humidity is displayed on the large digit display.
Selecting temperature units of measure (C/F)
Press the
oC/o
F button momentarily to toggle the temperature units.
Maximum and Minimum recording (MX/MN)
NOTE: The Automatic Power OFF feature will be disabled while in the MX/MN mode.
The MX/MN mode allows the user to view only the highest and lowest readings while
taking measurements. (MX stands for maximum and MN for minimum).
1. Press the MX/MN button momentarily to start the elapsed timer and begin recording.
The display will now show only the highest reading (the MX icon will appear).
2. Press the MX/MN button again to view the lowest reading (MN will appear).
3. The SET button allows the user to view the elapsed time for a particular MX or MN
reading in Minutes:Seconds (59mins:59secs max) or Days:Hours (99days:24hours
max).
4. To check the highest and lowest Dew Point or Wet Bulb temperatures, use the DEW
and the WET buttons.
5. The following data displays are available in the MX/MN mode:
• Maximum and Minimum Humidity
• Maximum and Minimum Temperature
• Maximum and Minimum Dew Point temperature
with the associated Temperature
with the associated Humidity
with the associated Temperature or
Humidity
• Maximum and Minimum Wet Bulb temperature
with associated standard temperature
or humidity
6. To exit MX/MN mode, press and hold the MX/MN button (the MX/MN icons disappear).
Data Hold
Press the H button momentarily to freeze the displayed reading. The 'H' icon will appear on
the upper left-hand side of the display. Press the H button again to return to normal
operation (the 'H' hold icon will disappear).
DEW POINT and WET BULB Temperature Display
Dew Point and Wet Bulb temperatures are calculated by the meter based on
humidity/temperature measurements. To view the Dew Point or Wet Bulb temperatures,
press the DEW or WET button momentarily. The ‘DEW’ or ‘WET’ display icon will appear
on the right side of the LCD and the temperature will display on the bottom (larger) digits.
The upper (smaller) digits will display the regular temperature in
o
C or oF or the humidity in
RH% (use the %RH/TEMP button to toggle between the two).
EA25 V2.1 02/06 3
Page 4

Manual Datalogging
Clearing Previously Stored Data
1. Press the “
2. Press and hold the "MEM" button, then press the “
When the LCD indicates "CLr", the entire memory has been erased.
Manual Datalogging
1. Press the "MEM" button to store a reading manually. The LCD will display the "M" icon
and the address number. The total memory size for manual recording is 99 sets.
2. When the datalogger memory is full, the LCD will display "Full".
Recalling manually stored data
1. Press the "READ" button to view stored data. The LCD will show the "R" (recall) icon
and the current address number.
2. Use the " " or " " button to select another memory address to view.
3. Press the DEW or WET button to display the Dew Point or the Wet Bulb value.
4. Press " ↵ " (enter) to exit this mode.
” button to turn the meter off.
” button to turn the meter on.
Automatic Datalogging
NOTE: Before datalogging ensure that previous data has been downloaded otherwise it
will be lost. Up to 15,000 sets of data can be recorded in automatic datalogging mode.
The following settings must be configured before datalogging:
• Real-Time Clock: Set to the current time in hours, minutes, and seconds
• Start Time: Set the time that datalogging will automatically begin
• Stop Time: Set the time that datalogging will automatically stop
• Interval Time: Set the sampling rate (time between logged readings)
•
Real-Time Clock Setting
1. Press the
2. Press and hold the SET button until two beeps
sound (screen shown at right appears). Note
that if the "Ì" logging icon is already on the
LCD before pressing the SET button, the meter
is already datalogging and cannot be
programmed. To stop logging press " ↵ " (enter
button).
3. Press " " or " " to set the current hour.
4. Press "" to move to the two flashing digits representing minutes.
5. Press " " or " " to set the current minutes.
6. Press "" to move to the two flashing digits representing seconds.
7. Press " " or " " to set the current seconds.
8. Press " ↵ " (enter) to store the time and move to the next screen.
button to power the meter.
EA25 V2.1 02/06 4
Page 5

Datalogging Start-Time (St) Setting
1. The Datalogging start-time screen displays
"St1" and two flashing digits (for the hour).
2. Press " " or " " to set the hour of the day
that datalogging will begin.
3. Press "" to move to the two flashing digits
representing minutes.
4. Press " " or " " to set the desired minute
that datalogging will begin.
5. Press "" to move to the two flashing digits representing the seconds.
6. Press " " or " " to set the desired second that datalogging will begin.
7. Press " ↵ " (enter key) to store the datalogg ing star t-time and mo ve to t he next screen.
Datalogging Stop-Time (SP) Setting
1. The Datalogging stop-time setting screen shows
"SP1" and the two flashing numbers (for the hour).
2. Press " " or " " to set to the desired hour of
the day that datalogging will end.
3. Press "" to move to the two flashing digits
representing minutes.
4. Press " " or " " to set the desired minute that
datalogging will end.
5. Press "" to move to the two flashing digits representing seconds.
6. Press " " or " " to set the desired second that datalogging will end.
7. Press " ↵ " (enter key) to store the datalogging stop-time and move to the next screen.
Datalogging Sampling Interval Setting
1. "INTV" (interval) appears along with the current
interval selection (in seconds).
2. Use the " " or " " buttons to change the
number of seconds (3 to 255). For example, with
003 selected a reading will be automatically recorded every three seconds.
3. Press " ↵ " (enter key) to store the sampling interval rate and begin datalogging.
Datalogging Mode
1. In datalogging mode, the LCD will continue to display the "Ì" (logging icon). The LCD
will also flash the "M" icon each time a reading is logged.
2. Use the " " button to display the Start-Time and the " " button to display the StopTime.
3. Press "↵" (enter) to stop datalogging and exit the datalogging mode ("Ì" will
disappear).
Note: Readings automatically logged can only be viewed by downloading them to a PC.
EA25 V2.1 02/06 5
Page 6

Datalogging Software
The instructions on how to install the datalogging software are printed on the Software CD
label. The software operating manual can be found on the CD.
Note that the software is compatible with Windows
systems.
TM
95/98, 2000, ME, and XP operating
Maintenance
Cleaning and storage
1. The meter should be cleaned with a damp cloth and mild detergent when necessary.
Do not use solvents or abrasives.
2. Store the meter in an area with moderate temperature and humidity (refer to the
operating and storage range in the specifications chart earlier in this manual).
Battery Replacement
When the battery power falls low, the ‘BT’ symbol will appear on the LCD. Replace the six
1.5 ‘AAA’ batteries by removing the rear battery compartment screw and accessing the
battery compartment. Check that the polarity (orientation) is correct when placing the
batteries in the compartment. Ensure that the compartment cover is securely fastened
when finished.
Calibration and Repair Services
Extech offers complete repair and calibration services for all of the products we sell.
For periodic calibration, NIST certification or repair of this Extech product, call customer
service for details on services available. Extech recommends that calibration be performed
on an annual basis to ensure calibration integrity.
Warranty
EXTECH INSTRUMENTS CORPORATION warrants this instrument to be free of defects in parts and
workmanship for one year from date of shipment (a six month limited warranty applies on sensors and
cables). If it should become necessary to return the instrument for service during or beyond the warranty
period, contact the Customer Service Department at (781) 890-7440 ext. 210 for authorization or visit our
website at www.extech.com (click on ‘Contact Extech’ and go to ‘Service Department’ to request an RA
number). A Return Authorization (RA) number must be issued before any product is returned to Extech. The
sender is responsible for shipping charges, freight, insurance and proper packaging to prevent damage in
transit. This warranty does not apply to defects resulting from action of the user such as misuse, improper
wiring, operation outside of specification, improper maintenance or repair, or unauthorized modification.
Extech specifically disclaims any implied warranties or merchantability or fitness for a specific purpose and
will not be liable for any direct, indirect, incidental or consequential damages. Extech's total liability is limited
to repair or replacement of the product. The warranty set forth above is inclusive and no other warranty,
whether written or oral, is expressed or implied.
All rights reserved including the right of reproduction in whole or in part in any form.
Support Hotline (781) 890-7440
Tech support: Ext. 200; Email: support@extech.com
Repair/Returns: Ext. 210; Email: repair@extech.com;
Website: www.extech.com
Copyright © 2005 Extech Instruments Corporation.
EA25 V2.1 02/06 6
 Loading...