

Page 1
User's Guide
Phase Sequence and Motor Rotation
Tester
Model 480403
Page 2

Introduction
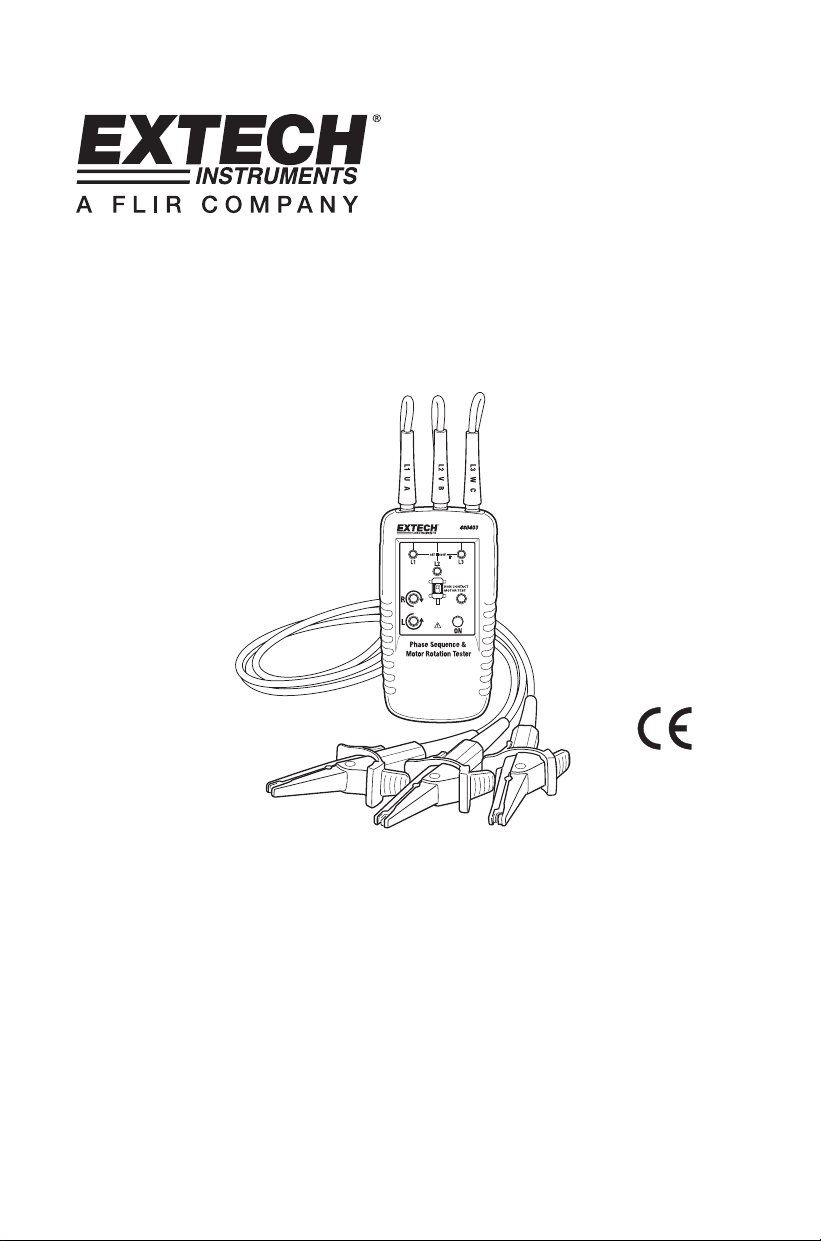
Congratulations on your purchase of the Extech Model 408403 Motor and Phase
Rotation Indicator. This handheld instrument detects the rotational field of three-phase
systems and determines motor-rotation direction. Color-coded test leads are provided for
connecting to the system or motor under test. This meter is shipped fully tested and
calibrated and, with proper use, will provide years of reliable service.
Safety
International Safety Symbols
!
Caution ! Refer to the explanation in this Manual
Caution ! Risk of electric shock
Earth (Ground)
Double Insulation or Reinforced insulation
AC, Alternating Current or Voltage
DC, Direct Current or Voltage
Safety Procedures
To avoid possible electric shock or fire, observe the following:
Read the following information carefully before using or servicing the instrument.
Adhere to local and national safety codes.
Individual protective equipment must be used to prevent shock and injury.
Use of instrument in a manner not specified by the manufacturer may impair safety
features/protection provided by the equipment.
Avoid working alone.
Inspect the test leads for damaged insulation or exposed metal. Check test lead
continuity. Damaged leads must be replaced. Do not use the meter if it appears
damaged.
Use care when working above 30V ac rms, 42V ac peak and 60V dc. Such
voltages pose a shock hazard.
When using the probes, keep fingers away from probe contacts. Keep fingers
behind the finger guards on the probes.
Measurements can be adversely affected by impedances of additional operating
circuits connected in parallel or by transient currents.
Verify operation prior to measuring hazardous voltages (voltages above 30V ac
rms, 42V ac peak and 60V dc).
Do not use the meter with any of the parts removed.
Do not use the meter near explosive gas, vapor, or dust.
Do not use the meter in a wet environment.
480403-EU-EN-V3.3-2/11 2
Page 3

Meter Description
1. L1 test Lead input to meter
2. L3 test lead input to meter
3. L2 test lead input to meter
4. L1 status LED
5. Orientation symbol for non-contact testing
6. L3 status LED
7. L2 status LED
8. Power ON status LED
9. ON button
10. Left/Right Clockwise/Counter-Clockwise status
LEDs
11. Test lead alligator clips
480403-EU-EN-V3.3-2/11 3
Page 4

Operation
Determine Phase Rotation Direction
1. Connect the supplied color-coded test leads to the meter’s test lead input jacks at the top
of the meter.
2. Connect the test probes to the three mains phases for the system under test.
3. Press the ON/OFF button to turn the meter on.
4. L1, L2, and L3 indicators will illuminate for each phase connected, respectively.
5. The clockwise and counter-clockwise arrows with the left/right ‘L’ or ‘R’ icons display the
phase rotation direction (phase sequence) of mains as connected.
6. To understand the status of a test, based on the condition of the meter’s front panel LEDs
, refer to the table printed on the meter:
Note: The rotational indicator LEDs illuminate even if one of the test probes is connected
to a neutral or ground conductor instead of one of the mains phases.
Check Motor Turn Direction (contact method)
1. Connect the supplied color-coded test leads to the meter’s test lead input jacks at the
top of the meter.
2. Connect the test (alligator) probes to the three motor connections (L1 to U, L2 to V,
and L3 to W).
3. Press the ON/OFF button. The green ON indicator shows that the instrument is ready
for testing.
4. Turn the motor shaft half of a revolution towards the right.
5. The clockwise and counter-clockwise arrows with the left/right ‘L’ or ‘R’ icons display
the orientation of the motor.
Check Motor Turn Direction (non-contact method)
1. Disconnect the test leads from the meter and from any other devices under test.
2. Hold the meter close (one inch or closer) to the
motor, parallel to the length of the motor shaft.
3. The bottom of the meter should face the drive shaft
and the back of the meter should be flush with the
motor (refer to diagram at right).
Note: There is an orientation symbol on the meter
to assist.
4. Press the ON/OFF button. The green ON indicator
shows that the instrument is ready for testing.
5. The orientation of the motor is represented by the
clockwise and counter-clockwise arrows with the left/right ‘L’ or ‘R’ icons display. Face
the rear of the motor (meter will appear upside down) when reading the status of the
display LEDs.
Note: The meter will not operate with motors controlled by frequency converters.
Magnetic Field Detection
1. Hold the meter in the area under test.
2. A magnetic field is present if either the clockwise or the counter-clockwise LED
illuminates.
480403-EU-EN-V3.3-2/11 4
Page 5

Battery replacement
The meter uses a 9V battery (supplied) as a power source. If the green LED does not light
when the ON/OFF button is pressed, replace the battery.
1. Place the meter on a clean, flat, non-abrasive surface.
2. Loosen the rear bottom Phillips head screw to access the battery compartment.
3. Lift the battery access door and replace the 9V battery observing polarity.
4. Place the battery carefully in the compartment without crimping the black and red
battery connecting wire.
5. Close the access door and secure the screw.
You, as the end user, are legally bound (Battery ordinance) to return all used
batteries and accumulators; disposal in the household garbage is prohibited!
You can hand over your used batteries / accumulators at collection points in your
community or wherever batteries / accumulators are sold!
Disposal: Follow the valid legal stipulations in respect of the disposal of the
device at the end of its lifecycle
Specifications
Environmental Specifications
Operating Temperature 0 to 40oC (32 to 104oF)
Operating Humidity 15 to 85% relative humidity
Operating altitude 2000m
Pollution Degree 2
Approvals DIN / VDE 0411
IEC 61010
DIN / VDE 0413-7
Mechanical Specifications
Dimensions (H x W x D): 130 x 69 x 32mm (5.1 x 2.7 x 1.3”)
Weight 130g (4.6 oz.)
Safety Specifications
Electrical Safety Approvals IEC 61010/EN61010,
IEC 61557-7/EN 61557-7
Maximum Operating Voltage (Ume) 600 V
Protection Levels CAT lll 600V
Electrical Specifications
Battery type 9V battery
Current Consumption 20mA max.
Battery life One (1) year minimum
Nominal Voltage 40 to 600 VAC
Frequency Range (fn) 2 to 400Hz
Nominal Test current (in per phase) < 3.5mA
Copyright © 2011 Extech Instruments Corporation (a FLIR company)
All rights reserved including the right of reproduction in whole or in part in any form.
480403-EU-EN-V3.3-2/11 5
 Loading...