

Page 1
User's Guide
Model 461920
Laser Photo Tachometer
Page 2
Introduction
Congratulations on your purchase of Extech's Mini Laser
Photo Tachometer, Model 461920. This Tachometer
provides non-contact RPM and Revolution count
measurements. The laser pointer beam provides accurate
long distance measurements for photo tachometer
measurements. This meter is shipped fully tested and
calibrated and, with proper use, will provide years of
reliable service.
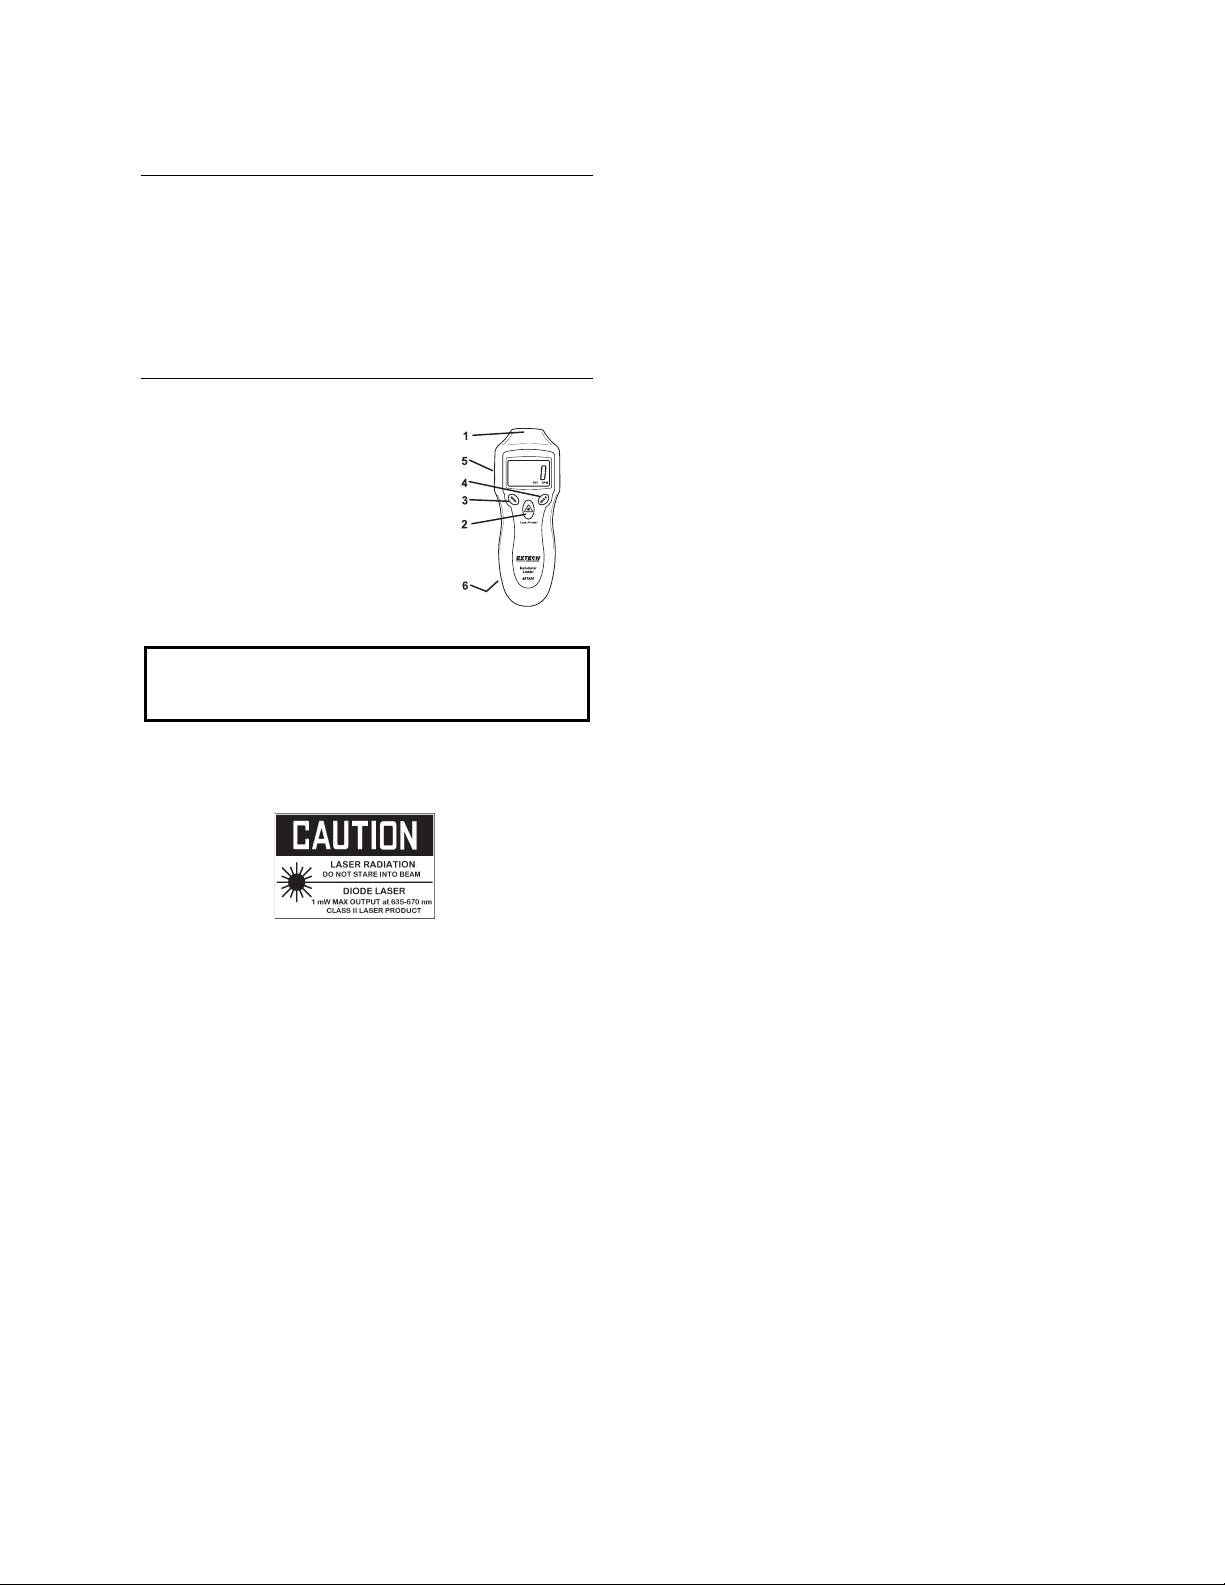
Meter Description
1. Photo Tachometer sensor and laser source
2. MEASURE button
3. MEMORY button
4. MODE button
5. AC Power Adaptor
6. Battery compartment (rear)
CAUTION: Rotating objects can be dangerous. Use extreme
care.
WARNING: Do not directly view or direct the laser pointer at
an eye. Low power visible lasers do not normally present a hazard,
but may present some potential for hazard if viewed directly for
extended periods of time.
Laser complies with:FDA 21 CFR 1040.10 and 1040.11, IEC 608251 (2001-2008) Edition 1.2
EN 60825-1:1994/A11:1996/A2:2001/A1:2002
2
461920-EU V2.1 8/09
Page 3

Meter Operation
1. Apply an appropriately (0.5”/12mm) sized square piece
of reflective tape to the surface of the object under test.
2. Point the meter toward the device under test at a
distance of 2" to 20" (50 to 500mm).
3. Press the Measure button (MEAS) and align the laser
light beam with the reflective tape.
( )
(
)
4. Verify that the (
when the reflective tape passes through the light beam.
5. To change units (RPM or REV), release the MEAS
button and press the MODE button.
6. When the Measure button is released the last reading
will remain in the display for 5 to 10 seconds before the
Auto Power Off feature turns the meter off.
7. With the meter OFF, press the MEM (memory) button to
recall the MAX, MIN and LAST rpm values or the last
count (REV) from the last measurement period.
Measurement Notes
1. Bright ambient light may interfere with the reflected light
beam. Shading the target area may be necessary in
some cases.
2. The non-reflective are must always be larger than the
reflective area.
3. If the shaft or rotating object is normally reflective, it
must be covered with black tape or paint before the
reflective tape is applied.
4. To improve repeatability of low rpm measurements,
apply additional squares of reflective tape. Divide the
reading shown on the display by the number of pieces of
reflective tape squares to calculate the actual rpm.
) Monitor Indicator appears on the LCD
3
461920-EU V2.1 8/09
Page 4

Specifications
Time base Quartz crystal
Display 5 digit LCD display
Laser light source Class 2 laser < 1mW power; Wavelength is
Detecting Distance 2 to 20" (50 to 500 mm)
Sampling Time 0.5sec (over 120 rpm)
Tachometer accuracy ± (0.05% + 1d)
Memory Last reading and MIN/MAX readings
Operating Conditions 32 °F to 122 °F (0 °C to 50 °C); RH 80% Max
Power Supply Internal 9V battery or external AC Adaptor (6
Power Consumption 45mA DC approx.
Weight 5.3oz. (151g)
Size 6.3x2.3x1.6" (160x58x39 mm)
Range Resolution
Photo
Tachometer
Counter 1 to 99,999 REV 1 count
630 to 670nm
to 9VDC)
2 to 99,999 rpm
0.1 rpm (<1000rpm)
1 rpm (>1000 rpm)
4
461920-EU V2.1 8/09
Page 5

Battery Replacement
The low battery indication appears as “ " on the display. To
replace the batteries, loosen the two Philips head screws securing the
rear battery cover and lift the cover off. Replace the 9V battery and
replace cover.
You, as the end user, are legally bound (Battery ordinance) to
return all used batteries and accumulators; disposal in the
household garbage is prohibited!
You can dispose of your used batteries / accumulators at collection points
in your community or wherever batteries / accumulators are sold!
Disposal: Follow the valid legal reulations with respect to the disposal of
the device at the end of its lifecycle
Copyright © 2007 Extech Instruments Corporation
All rights reserved including the right of reproduction in whole or in
part in any form.
5
461920-EU V2.1 8/09
 Loading...