

Page 1
ART.# PT-2225-2226-2227
Operating Instructions
Mode d’emploi
Gebrauchsanleitung
Manual de Instrucciones
Manuale d’istruzioni
Gebruiksaanwijzing
COMPACT TOP
Page 2
2
COMPACT FLUORESCENT TERRARIUM CANOPY
• Fits Exo Terra compact fluorescent or
incandescent light bulbs
(maximum 26 W bulb)
• Built-in reflector
• Sliding rim to mount accessories
• Easy to install
• On/Off Switch
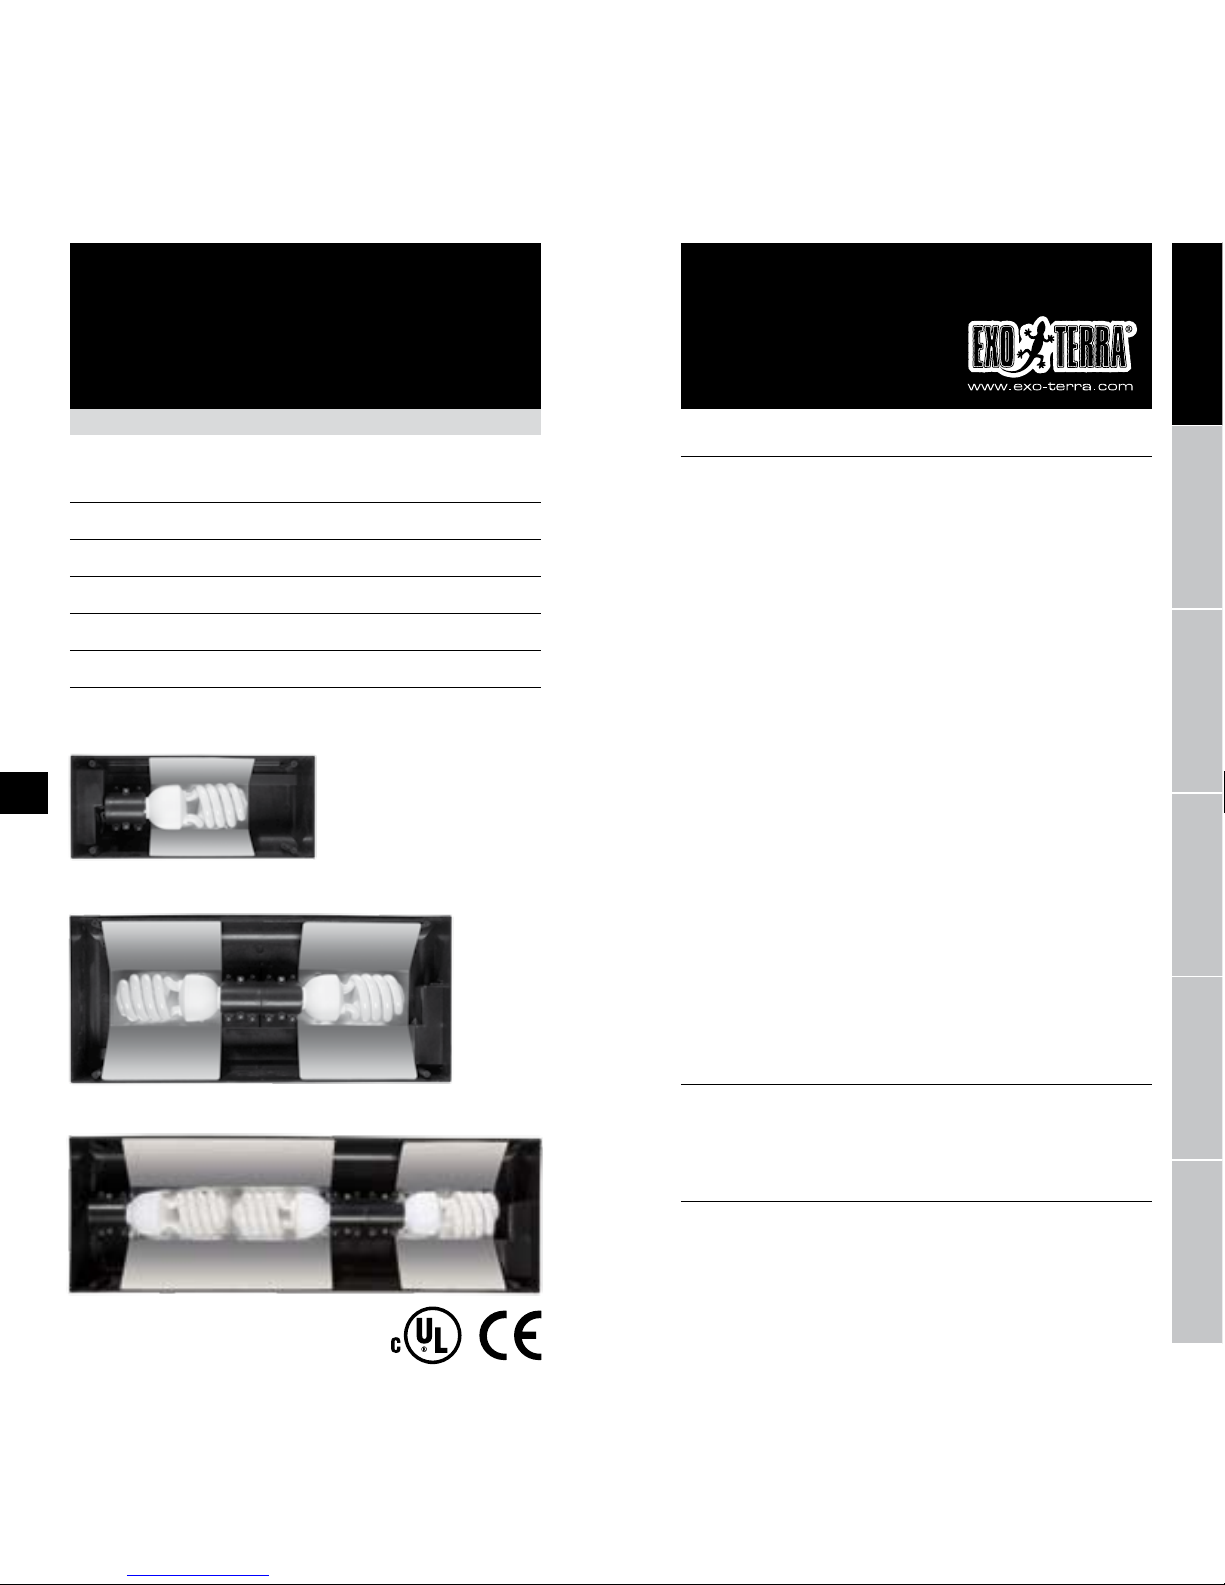
AVAILABLE IN 3 SIZES:
PT-2225 :
(30 cm x 9 cm x 15 cm; single light bulb fixture; max 26 W/ bulb)
PT-2226 :
(45 cm x 9 cm x 20 cm; two light bulb fixtures; max 26 W/ bulb)
PT-2227 :
(60 cm x 9 cm x 20 cm, three light bulb fixtures, max 26 W/ bulb)
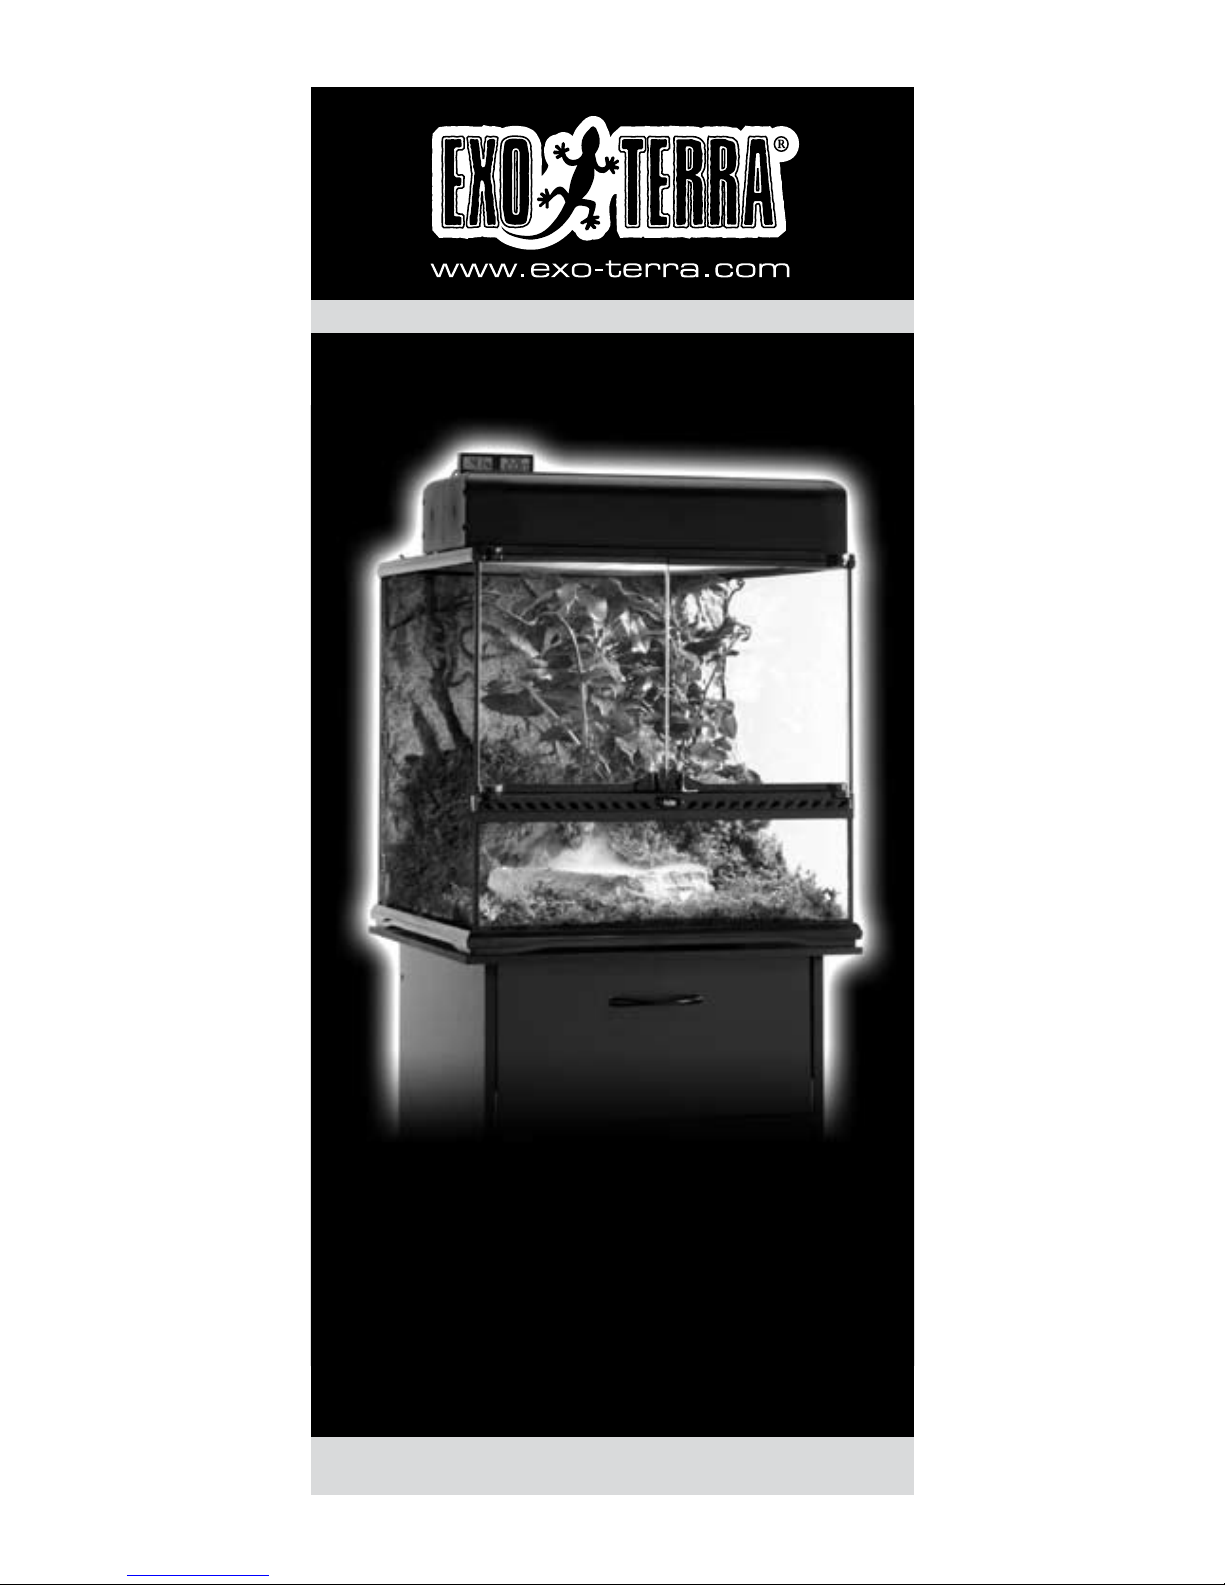
The Exo Terra Compact Top Canopy is a compact fluorescent
terrarium canopy designed for use with the Exo Terra Glass
Terrarium and the Exo Terra Screen Terrarium. This easy-to-install
canopy accommodates one, two, or three compact fluorescent or
incandescent light bulbs (PT-2225, PT-2226, PT-2227 respectively).
A special sliding rim allows optional accessories such as Exo Terra
Digital Thermometer, Hygrometer, Thermostat and Hygrostat to be
mounted on the canopy rim (optional accessories sold separately).
INSTRUCTIONS PERTAINING TO A RISK OF FIRE, ELECTRIC
SHOCK, OR INJURY TO PERSONS
IMPORTANT SAFETY
INSTRUCTIONS
WARNING: To guard against injury, basic safety precautions should
be observed when handling the Exo Terra® Compact Top Terrarium
Canopy, including the following.
1. READ AND FOLLOW ALL SAFETY INSTRUCTIONS
and all important notices on the appliance before using. Failure
to do so may result in damage to unit.
Compact Top
Operating
Instructions
ENGLISHFRANÇAISDEUTSCHESPAÑOLITALIANONEDERLANDS
INDEX
COMPACT TOP SMALL
ART.# PT-2225
ENGLISH 3
FRANÇAIS 8
DEUTSCH 13
ESPAÑOL 18
ITALIANO 23
NEDERLANDS 28
COMPACT TOP MEDIUM
ART.# PT-2226
COMPACT TOP LARGE
ART.# PT-2227
Page 3
4
2. THIS IS NOT AN AQUARIUM CANOPY. It should not be used on any
type of aquarium. Not For Damp Locations.
3. WARNING: This appliance is NOT water resistant and MUST be
protected from coming in contact with water. Do Not Submerse.
4. DANGER – To avoid possible electrical shock, special care should
be taken. For each of the following situations, do not attempt
repairs yourself; return the appliance to an authorized service
facility for service or discard the appliance.
A. If the appliance falls into water, DON’T reach for it! First
unplug it and then retrieve it. If the electrical components of the
appliance get wet, unplug the appliance immediately.
B. Carefully examine the appliance after installation. It should not
be plugged in if there is water on parts not intended to be wet.
C. Do not operate any appliance if it has a damaged electrical
cord or plug, or if it is malfunctioning or if it is dropped or
damaged in any manner. The power cord of this appliance
cannot be replaced: if the cord is damaged, the appliance should
be discarded. Never cut the cord.
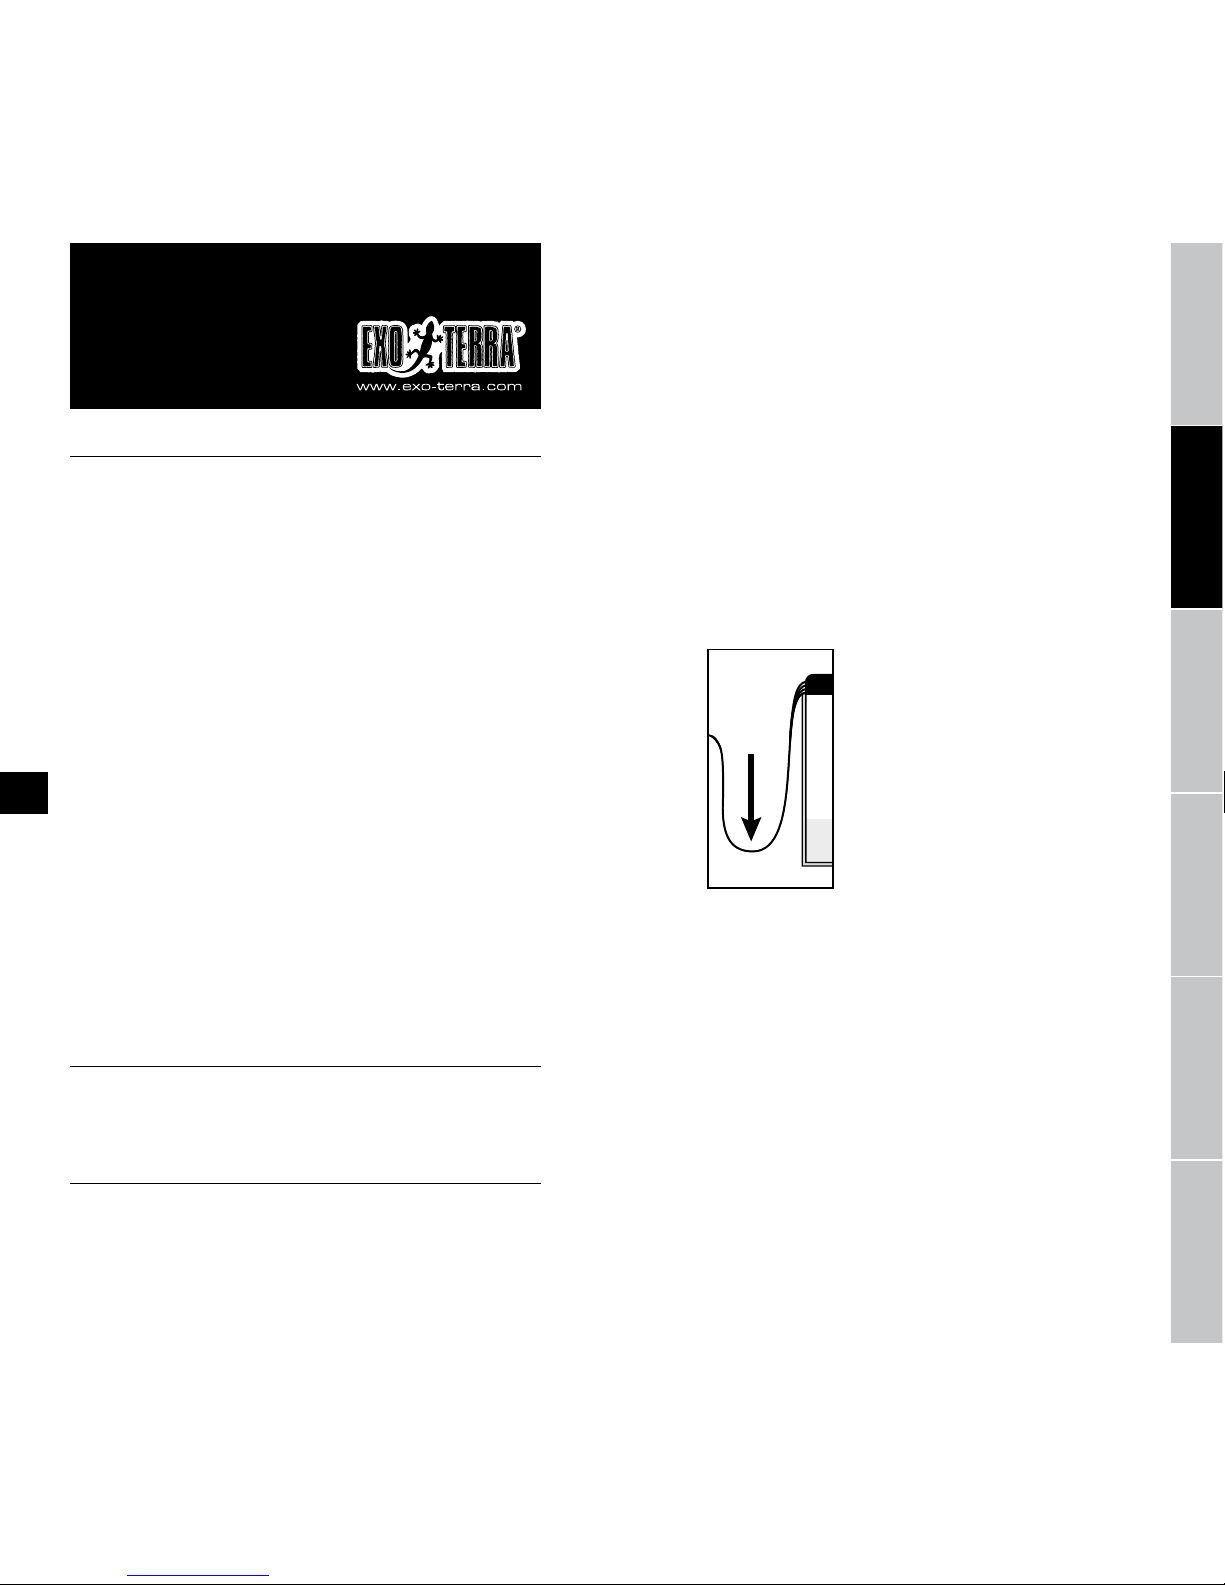
D. To avoid the possibility of the appliance plug or electrical
outlet getting wet, position the appliance to
one side of a wall mounted outlet to prevent
water from dripping onto the outlet or plug.
A “drip-loop” should be arranged. The
“drip-loop” is that part of the cord below
the level of the outlet, or the connector if
an extension cord is used, to prevent water
from traveling along the cord and coming in
contact with the outlet. If the plug or outlet
does get wet, DON’T unplug the electrical
cord. Disconnect the fuse or circuit breaker
that supplies power to the appliance, then
unplug and examine for presence of water
in the outlet.
5. To reduce the risk of injury, close supervision is necessary when
the appliance is used by or near children.
6. To avoid injury, do not contact hot surfaces..
7. Always unplug an appliance from an outlet when not in use,
before putting on or taking off parts, and before cleaning. Never
yank cord to pull plug from outlet. Grasp the plug and pull to
disconnect.
8. Do not use the appliance for other than intended use. The use
of attachments not recommended or sold by the appliance
manufacturer may cause an unsafe condition.
9. Do not install or store the appliance where it will be exposed to
weather or to temperatures below freezing.
10. Make sure the appliance is securely installed before operating
it. Do not place object(s) on top of the canopy, except optional
accessories in the special sliding rim designed for their
mounting. The safety of this appliance is granted only provided
that the bulb(s) and the canopy are properly installed.
11. If an extension cord is necessary, a cord with a proper rating
should be used. A cord rated for less amperes or watts than the
appliance rating may overheat. Care should be taken to arrange
the cord so that it will not be tripped over or pulled.
12. WARNING - For North American market only: This appliance has
a polarized plug (one blade is wider than the other). As a safety
feature, this plug will fit in a polarized outlet only one way. If
the plug does not fit fully in the outlet, reverse the plug. If it still
does not fit, contact a qualified electrician. Never use with an
extension cord unless plug can be fully inserted. Do not attempt
to defeat this safety feature.
SAVE THESE INSTRUCTIONS FOR FUTURE REFERENCE.
Only the faithful observation of these installation, electrical and
maintenance guidelines will ensure the safe and efficient use of
this appliance.
Installation Instructions:
RECOMMENDATION: Use only Exo Terra® compact fluorescent
or incandescent terrarium light bulbs as per the wattage rating
indicated on the electrical data label located on the canopy
(MAXIMUM 26W BULB).
•
This equipment is FOR INDOOR USE ONLY
• WARNING: Disconnect the plug of this canopy and all other
electrical equipment used for the terrarium before placing your
hands in the terrarium and/or performing any maintenance of
any kind.
• WARNING: Whenever installing, removing or changing compact
fluorescent or incandescent light bulbs or maintaining, installing
or removing the canopy or any other equipment, always ensure
that it is unplugged.
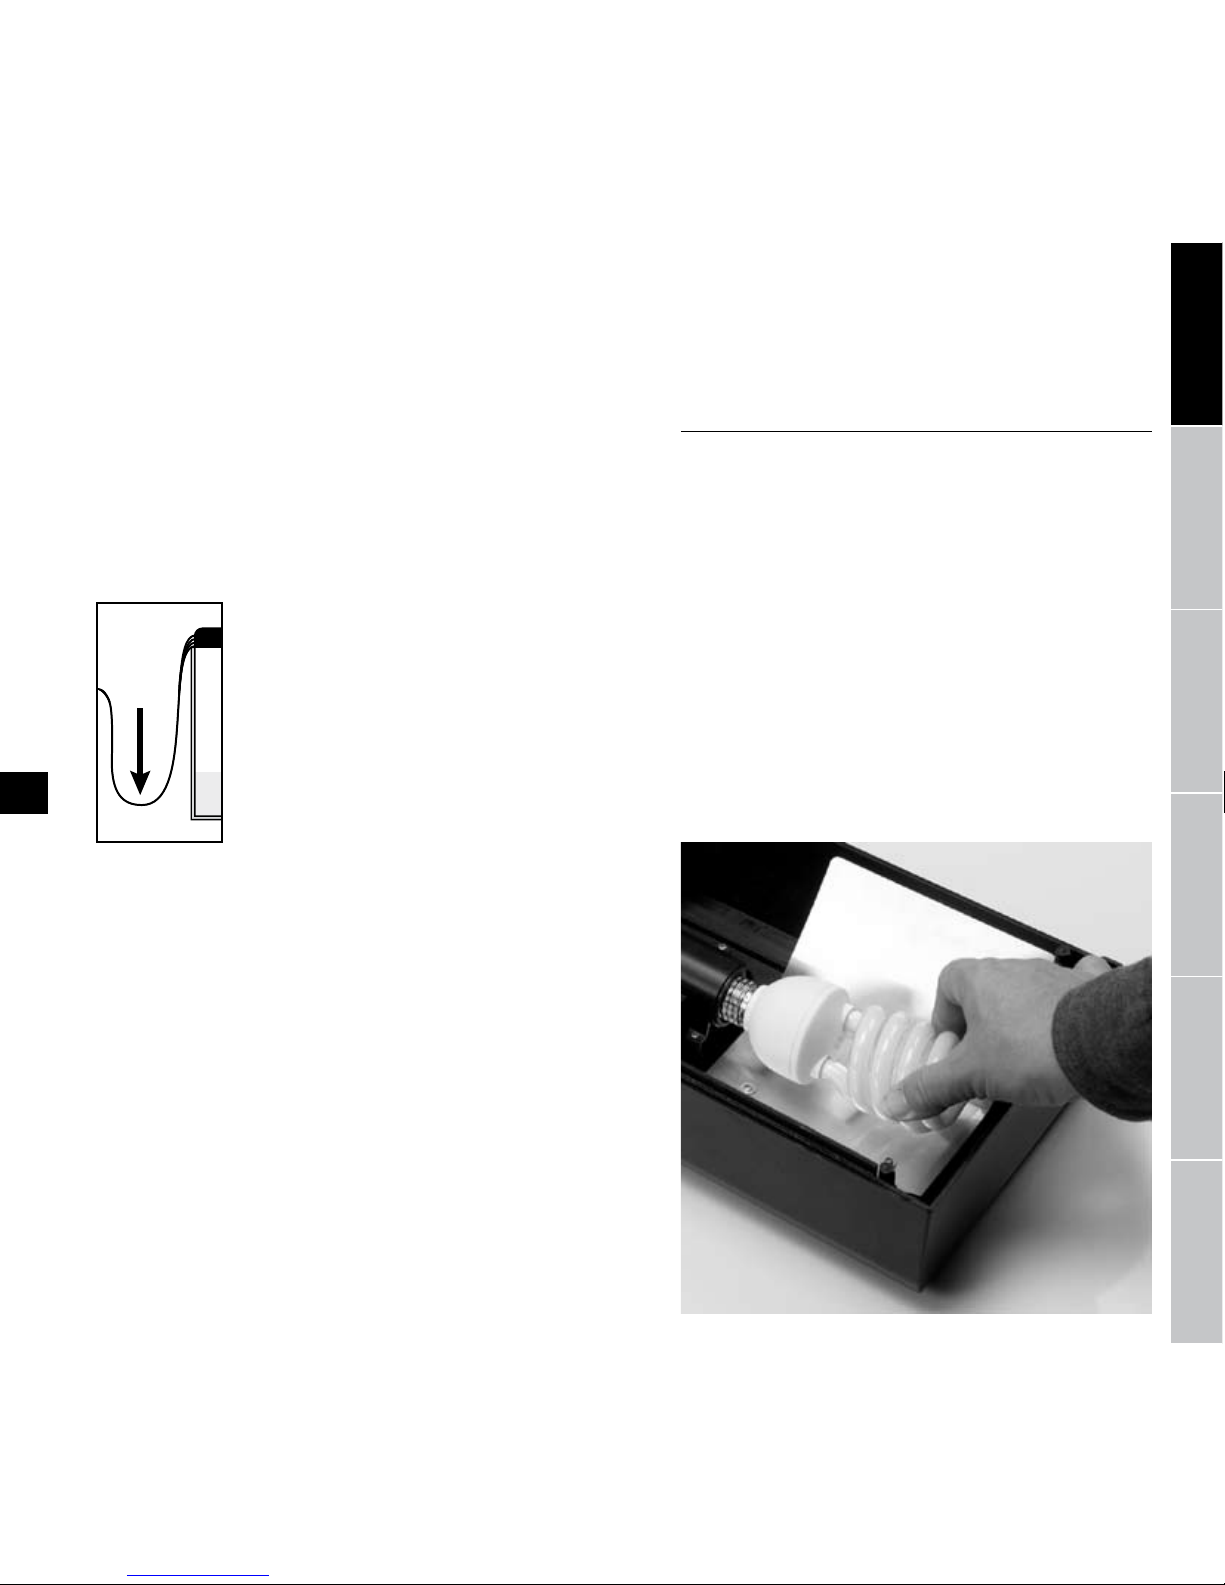
1. Screw Exo Terra® compact fluorescent or incandescent light
bulb(s) into the threaded fitting(s) on the underside of the canopy.
Follow maximum wattage guidelines. TIP: apply a thin layer of
petroleum jelly to the threads on the base of the light bulb before
screwing it in. This will make it easier to unscrew the bulb when
it is time to replace it.
ENGLISHFRANÇAISDEUTSCHESPAÑOLITALIANONEDERLANDS
Page 4
6
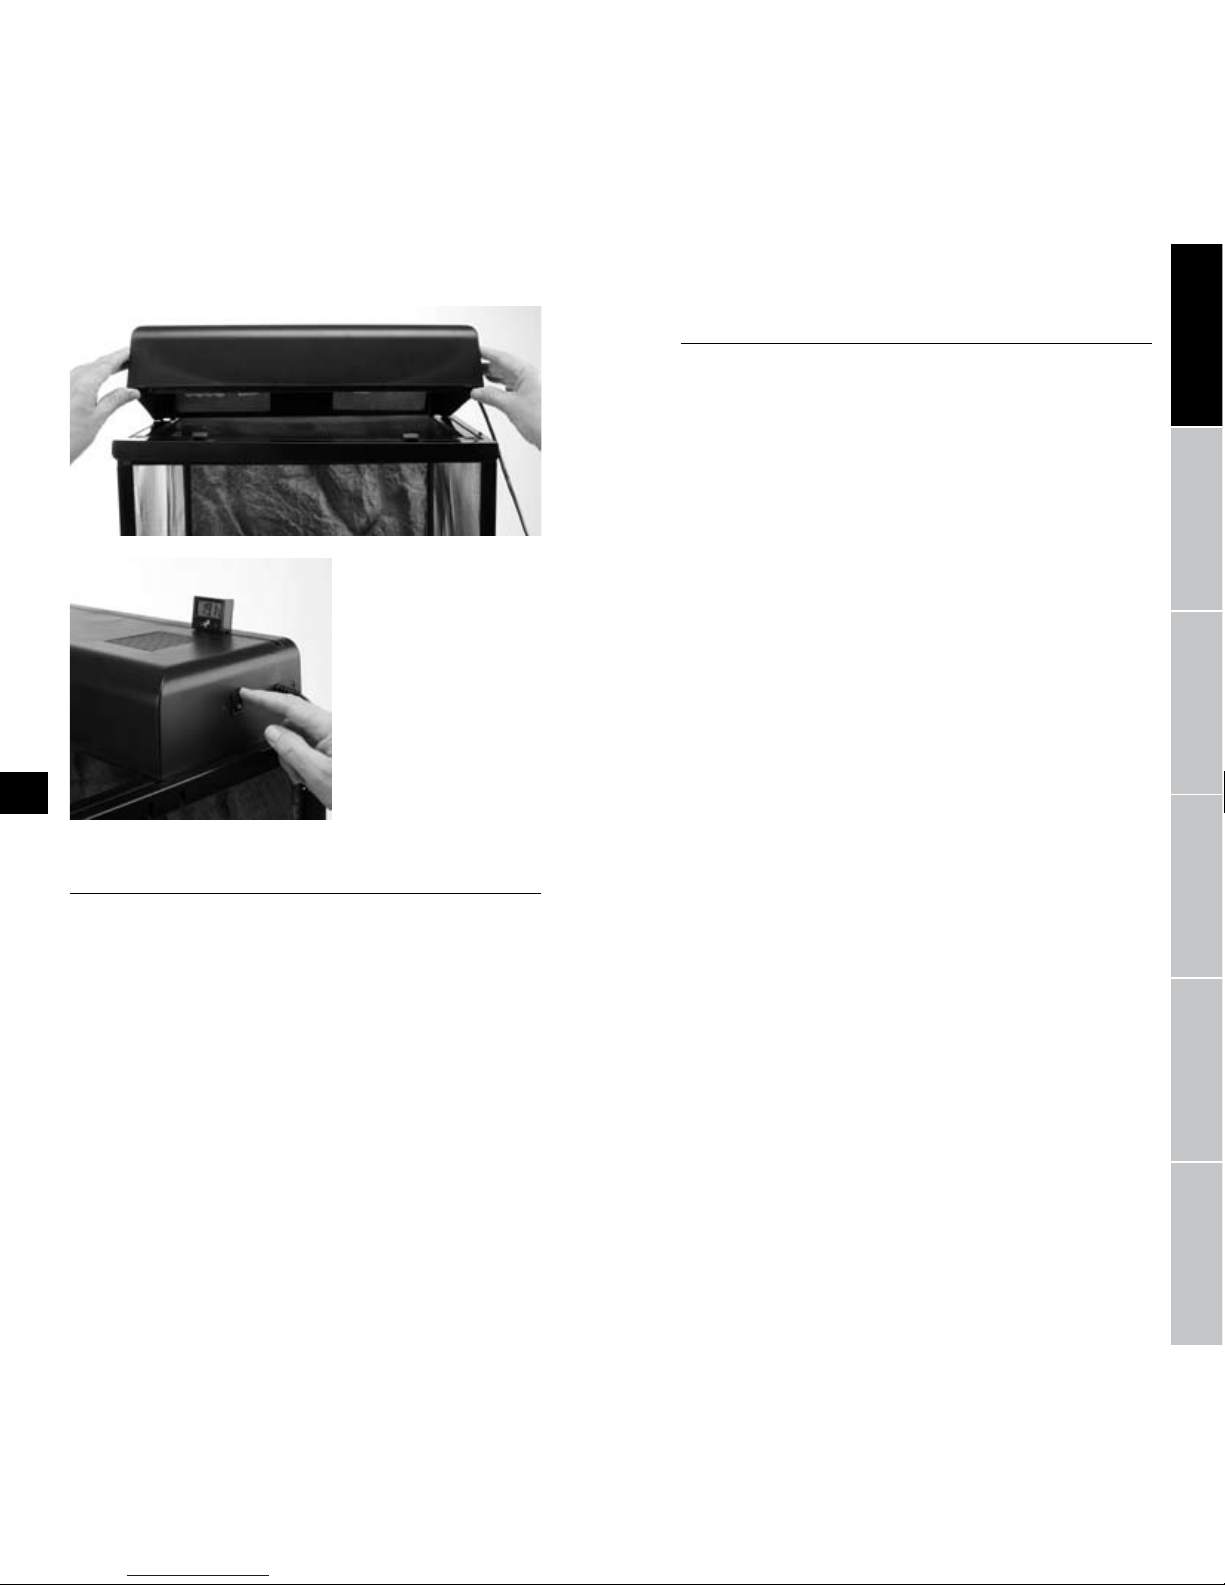
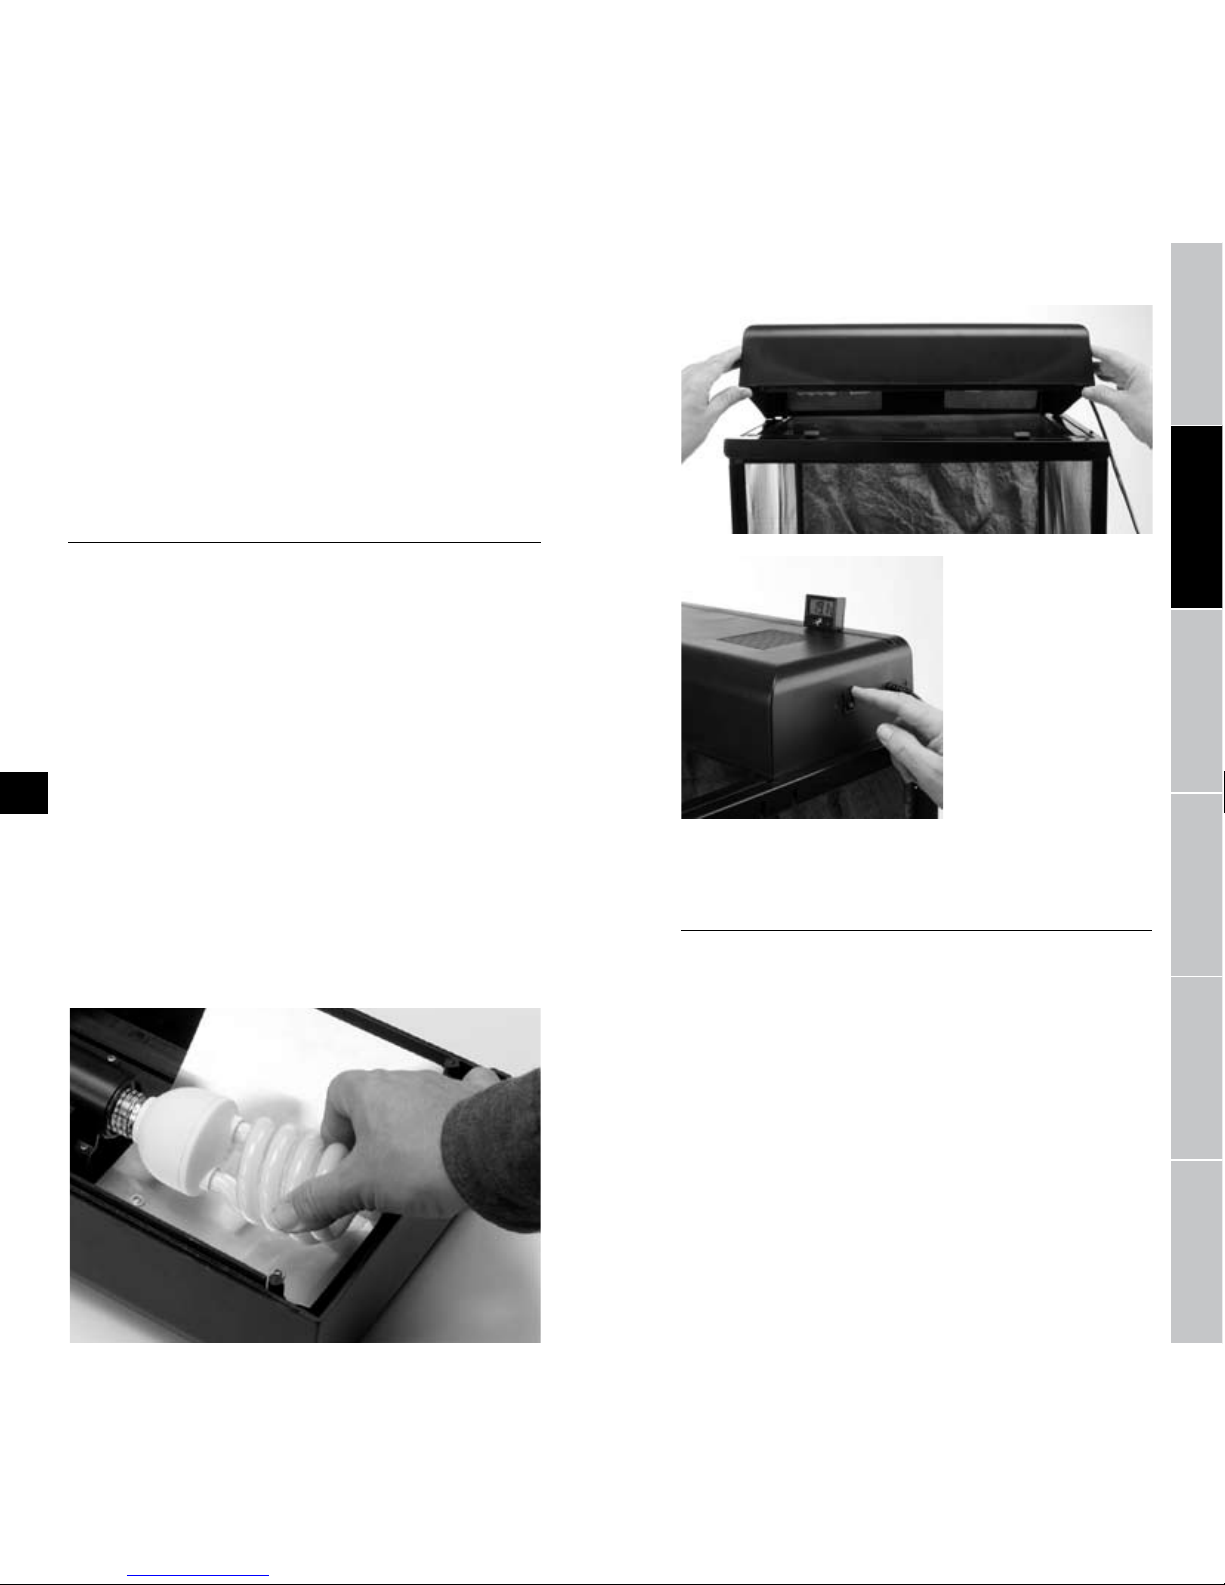
2. Verify that the light bulb(s) is correctly installed in the threaded
fitting(s). Carefully place the canopy on the terrarium rim with the
light bulb(s) facing downward.
3. Do not place object(s)
on the top of the canopy,
except in the special sliding
rim designed for this
purpose. The ventilation
slots on top of the canopy
allow heat to escape, do not
obstruct these vents in any
way and ensure that any
dust or debris is promptly
removed.
4. Plug in canopy. Use
canopy switch to turn
lighting on or off. WARNING:
DO NOT plug in the canopy
if there is water on parts not intended to be wet.
Maintenance:
Warning:
• Disconnect the plug of this canopy, and any other electrical
equipment, used for the terrarium or paludarium before placing
your hands in the enclosure; and/or performing any maintenance
of any kind.
• Whenever installing, removing or changing compact fluorescent
or incandescent light bulbs or maintaining, installing or removing
the canopy or any other equipment, always ensure that it is
unplugged.
• The electrical supply cord of this canopy cannot be replaced. If
the cord is damaged the entire unit should be discarded.
Cleaning the Unit:
1. This canopy is not water proof. Do not expose the canopy to
water spray or humidity. Do not submerge in water. DO NOT
SUBMERSE IN WATER OR ANY OTHER LIQUID.
2. Ensure that the heat vents on top of the canopy are kept free
and clear of any obstruction, dust and debris. Use a cloth to wipe
away any debris that may obstruct the heat vents.
3. No special maintenance is required for the Exo Terra® Compact
Top Terrarium Canopy, other than periodic cleaning with a cloth
(never use harsh chemical products or detergents). To remove
calcareous deposits (bulb sockets), it is recommended to use
a mild acid such as vinegar, followed by a thorough wipe down
with a damp cloth to remove any residues.
4. It is strongly recommended to always follow all the precautions
and procedures outlined in both the Important Safeguards and
Installation Instructions sections.
Guarantee
This product is guaranteed for defects in material or workmanship
for a period of 2 years from date of purchase. The guarantee is valid
with proof of purchase only. The guarantee is limited to repair or
replacement of the unit only and does not cover consequential loss
or damage of or to animate or inanimate objects. This guarantee
is valid only under normal operating conditions for which the unit
is intended. It excludes any damage caused by unreasonable use,
improper installation, negligence, tampering, or abuse of the unit.
For guarantee service or spare parts contact your local pet dealer or
write to the representative in your country. This guarantee does not
affect your statutory rights.
Service
If you have any problem or question about the operation of this
product, please let us try to help you before you return the product
to your dealer. Most problems can be handled promptly with a phone
call. When you call (e-mail or write), please have all relevant
information such as model number and/or part numbers available,
as well as the nature of the problem. Call our Customer Service
Department:
Canada Only: Toll Free Number 1-800-555HAGEN
(1-800-554-2436) Between 9:00 am and 4:30 pm (Eastern Time)
U.S.A. Only: Toll Free Number 1-800-724-2436
Between 9:00 am and 4:00 pm (Eastern Time)
U.K. Only: Helpline Number 01977 55662
Between 9:00 am and 5:00 pm
For Authorized Warranty Repair Service:
Return unit with dated receipt and reason for return to:
Canada: Hagen Industries, 3235 Guenette, Montreal, QC H4S 1N2
Rolf C. Hagen Inc., 8770-24th Street, Edmonton AB T6P 1X8
U.S.A.: Rolf C. Hagen (U.S.A.) Corp.
50 Hampden Road, Mansfield, MA. 02048-9107
U.K.: Rolf C. Hagen (UK) Ltd.
California Dr. Whitwood Industrial Estate
Castleford, West Yorkshire WF10 5QH
For general information on our whole product range,
explore our websites at: www.exo-terra.com or www.hagen.com.
Distributed by:
Canada: Rolf C. Hagen Inc., Montreal, QC H9X 0A2
U.S.A.: Rolf C. Hagen (U.S.A.) Corp., Mansfield MA. 02048
U.K.: Rolf C. Hagen (U.K.) Ltd. Castleford, W. Yorkshire WF10 5QH
ENGLISHFRANÇAISDEUTSCHESPAÑOLITALIANONEDERLANDS
Page 5
8
ENGLISHFRANÇAISDEUTSCHESPAÑOLITALIANONEDERLANDS
devrait être utilisée sur aucun type d’aquarium.
3. MISE EN GARDE : Cet appareil N’EST PAS résistant à l’eau et
DOIT être protégé du contact avec l’eau.
4. DANGER – Pour éviter tout risque d’électrocution, on doit porter
une attention spéciale à cet appareil. Dans chacune des situations
suivantes, ne pas essayer de réparer l’appareil soi-même; le
retourner plutôt à un service autorisé de réparations s’il est
encore sous garantie ou le jeter.
A. Si l’appareil tombe dans l’eau, NE PAS l’attraper. Il faut d’abord
le débrancher, et ensuite, le retirer. Si des pièces électriques de
l’appareil sont mouillées, on doit le débrancher immédiatement.
B. Examiner l’appareil avec soin après l’installation. Il ne devrait
pas être branché en présence d’eau sur des pièces ne devant
pas être mouillées.
C. Ne pas faire fonctionner un appareil dont la fiche ou le cordon
sont endommagés, qui ne fonctionne pas correctement ou qui
est tombé ou a été endommagé d’une quelconque manière. Le
cordon d’alimentation de cet appareil ne peut pas être remplacé;
si le cordon est endommagé, il faut jeter l’appareil. Ne jamais
couper le cordon.
D. Afin d’éviter que la fiche ou la prise de courant électriques
soient mouillées, installer l’appareil à
côté d’une prise de courant murale pour
empêcher l’eau de dégoutter sur la prise
ou la fiche. On devrait former une « boucle
d’égouttement ». Celle-ci est la partie du
cordon se trouvant sous la prise de courant
ou le raccord, si une rallonge est utilisée,
afin d’empêcher l’eau de glisser le long du
cordon et d’entrer en contact avec la prise
de courant. Si la fiche ou la prise de courant
sont mouillées, NE PAS débrancher l’appareil.
Mettre d’abord hors circuit le fusible ou le
disjoncteur qui fournit l’électricité à l’appareil
et le débrancher ensuite. Vérifier qu’il n’y a
pas d’eau dans la prise.
5. Pour réduire le risque de blessure, il est nécessaire de surveiller
étroitement les enfants qui utilisent cet appareil ou sont à
proximité.
6. Pour éviter toute blessure, ne toucher aucune pièce chaude.
7. Toujours débrancher un appareil d’une prise de courant quand il
n’est pas utilisé, avant d’insérer ou de retirer des pièces et avant
de le nettoyer. Ne jamais tirer sur le cordon d’alimentation pour
débrancher l’appareil mais plutôt prendre la fiche entre les doigts
et tirer.
8. Ne pas s’en servir pour un usage autre que celui prévu.
L’utilisation de fixations non recommandées ou vendues par le
fabricant de l’appareil peut être source de situations dangereuses.
9. Ne pas installer ou ranger l’appareil où il sera exposé aux
intempéries ou à des températures sous le point de congélation.
10. S’assurer que l’appareil est installé solidement avant de le faire
fonctionner. Ne pas placer d’objets sur le dessus de la rampe
d’éclairage sauf dans le cas du cadre spécial à coulisse conçu
à cette fin. La sécurité de cet appareil est assurée seulement à
condition que l’ampoule ou les ampoules et la rampe d’éclairage
soient correctement installées.
11. Si une rallonge électrique est nécessaire, vérifier qu’elle est d’un
calibre suffisant. Un cordon électrique de moins d’ampères ou de
watts que l’appareil peut surchauffer. Des précautions doivent être
prises afin d’éviter qu’on tire la rallonge ou qu’on trébuche dessus.
RAMPE COMPACTE D’ÉCLAIRAGE FLUORESCENT POUR TERRARIUM
• Convient à des ampoules fluorescentes
compactes ou incandescentes (jusqu’à 26 W)
• Réflecteur encastré
• Cadre à coulisse pour accessoires
• Facile à installer
• Interrupteur marche/arrêt
OFFERTE EN TROIS DIMENSIONS :
PT-2225 : (30 cm x 9 cm x 15 cm; dispositif d’éclairage à une
seule ampoule d’un maximum de 26 W)
PT-2226 : (45 cm x 9 cm x 20 cm; dispositif d’éclairage à deux
ampoules d’un maximum de 26 W)
PT-2227 : (60 cm x 9 cm x 20; dispositif d’éclairage à trois
ampoules d’un maximum de 26 W)
La rampe d’éclairage Compact Top Exo Terra est une rampe
compacte d’éclairage fluorescent pour terrarium conçue pour
utilisation avec le terrarium tout-verre Exo Terra et le terrarium
grillagé Exo Terra. Cette rampe d’éclairage facile à installer
contient une, deux ou trois ampoules fluorescentes compactes ou
incandescentes (PT-2225, PT-2226 et PT-2227 respectivement).
Un cadre spécial à coulisse permet d’installer des accessoires
facultatifs tels que les thermomètre, hygromètre, thermostat et
hygrostat numériques Exo Terra sur le cadre de la rampe d’éclairage
(les accessoires facultatifs sont vendus séparément).
INSTRUCTIONS SE RAPPORTANT À UN RISQUE D’INCENDIE, DE
CHOC ÉLECTRIQUE OU DE BLESSURES AUX PERSONNES
MESURES DE SÉCURITÉ
IMPORTANTES
MISE EN GARDE : Pour éviter toute blessure, il faudrait observer des
précautions élémentaires de sécurité, y compris les suivantes, en
manipulant la rampe d’éclairage Compact Top Exo Terra :
1.
LIRE ET RESPECTER TOUTES LES CONSIGNES DE SÉCURITÉ
et tous les avis importants apparaissant sur l’appareil avant de
l’utiliser. Tout manquement à ces précautions pourrait entraîner
des dommages à l’appareil.
2. Cette rampe d’éclairage ne convient pas à un aquarium. Elle ne
Compact Top
Mode d’emploi
Page 6
10
ENGLISHFRANÇAISDEUTSCHESPAÑOLITALIANONEDERLANDS
12. MISE EN GARDE - Pour le marché nord-américain seulement :
cet appareil a une fiche polarisée (une broche est plus large que
l’autre). Comme mesure de sécurité, cette fiche ne conviendra
dans une prise polarisée que d’un côté. Si la fiche n’entre pas
complètement dans la prise, on doit retourner la fiche. Si le
même problème se reproduit, on doit contacter un électricien
qualifié. Ne jamais utiliser avec une rallonge électrique à moins
que la fiche puisse être insérée complètement. Ne pas essayer
d’aller à l’encontre de cette mesure de sécurité.
CONSERVER CES INSTRUCTIONS POUR CONSULTATION FUTURE
Seule l’observation constante de ces directives d’installation,
d’électricité et d’entretien assurera l’emploi sûr et efficace de cet
appareil.
NOTICE D’INSTALLATION :
RECOMMENDATION : Employer seulement des ampoules
fluorescentes compactes ou des ampoules incandescentes Exo
Terra pour terrarium en observant la puissance nominale indiquée
sur l’étiquette de données électriques, apparaissant sur la rampe
d’éclairage (AMPOULE D’UN MAXIMUM DE 26 W).
•
Cet équipement est conçu POUR USAGE À L’INTÉRIEUR
SEULEMENT.
• MISE EN GARDE : Débrancher la fiche de cette rampe d’éclairage
et de tout autre équipement électrique employé pour le terrarium
avant de mettre les mains dans le terrarium ou d’effectuer
quelque entretien que ce soit.
• MISE EN GARDE : Chaque fois qu’on installe, enlève ou change
des ampoules fluorescentes compactes ou incandescentes, ou
qu’on entretient, installe ou retire la rampe d’éclairage ou tout
autre équipement, il faut toujours s’assurer que les appareils
sont débranchés.
1. Visser les ampoules fluorescentes compactes ou incandescentes
Exo Terra dans les raccords filetés sur la surface intérieure de la
rampe d’éclairage. Suivre les directives du wattage maximum.
CONSEIL : appliquer une mince couche de vaseline au filetage
sur la base de l’ampoule avant de la visser. Il sera facile de la
dévisser au moment de la remplacer.
2. Vérifier que les ampoules sont correctement installées dans les
raccords filetés. Déposer soigneusement la rampe d’éclairage
sur le cadre du terrarium en dirigeant les ampoules vers le bas.
3. Ne pas déposer d’objets
sur le dessus de la rampe
d’éclairage sauf dans le
cadre spécial à coulisse
conçu à cette fin. Les
orifices de ventilation sur
le dessus de la rampe
permettent à la chaleur de
s’échapper; on ne doit pas
obstruer ces bouches de
chaleur et il faut s’assurer
que la poussière et les
débris sont rapidement
retirés.
4. Brancher la rampe
d’éclairage. Utiliser son interrupteur pour mettre en marche
l’éclairage ou l’arrêter. Mise en garde : Ne pas brancher la rampe
si de l’eau se trouve sur des pièces ne devant pas être mouillées.
ENTRETIEN
Mise en garde :
•
Débrancher cette rampe et tout autre équipement électrique
utilisé pour le terrarium ou le paludarium avant de placer les
mains dans l’habitat des reptiles ou d’effectuer quelque entretien
que ce soit.
• Chaque fois qu’on installe, enlève ou change des ampoules
fluorescentes compactes ou incandescentes, ou qu’on entretient,
installe ou retire la rampe d’éclairage ou tout autre équipement,
il faut toujours s’assurer que les appareils sont débranchés.
• Le cordon d’alimentation de cette rampe d’éclairage ne peut
être remplacé. Si le cordon est endommagé, l’appareil complet
devrait être jeté.
Nettoyage de la rampe d’éclairage :
1. Cette rampe d’éclairage n’est pas imperméable. Ne pas l’exposer
à de l’eau pulvérisée ou à de l’humidité. Ne pas la submerger
dans l’eau.
2. S’assurer que les bouches de chaleur sur le dessus de la rampe
d’éclairage ne sont pas obstruées et sont exemptes de poussière
et de débris. Employer un linge pour essuyer tout débris qui
pourrait bloquer les bouches de chaleur.
Page 7

12
ENGLISHFRANÇAISDEUTSCHESPAÑOLITALIANONEDERLANDS
3. La rampe d’éclairage Compact Top Exo Terra ne nécessite pas
d’entretien spécial si ce n’est un nettoyage périodique avec un
linge (ne jamais utiliser de produits chimiques ni de détergents
corrosifs). Afin de retirer les dépôts calcaires (des douilles des
ampoules), il est recommandé de se servir d’abord d’un acide
doux comme du vinaigre et d’essuyer ensuite à fond avec un
linge humide pour enlever tout résidu.
4. Il est grandement conseillé de toujours suivre toutes les
précautions et les procédures décrites dans les Mesures de
sécurité importantes et dans la Notice d’installation.
GARANTIE
Cet appareil est garanti contre tout défaut de matériaux et de maind’œuvre pour une période de deux ans à partir de la date d’achat. La
garantie est valide uniquement avec une preuve d’achat. La garantie
ne couvre pas les dommages à des êtres animés ou inanimés ni
leur perte consécutive. Cette garantie est valide seulement dans des
conditions normales de fonctionnement pour lesquelles l’appareil a été
conçu. Un usage excessif, une mauvaise installation, de la négligence
ou la modification de l’appareil invalideront la garantie. Pour le service
de la garantie ou des pièces de rechange, vous adresser à votre
détaillant local de produits pour animaux de compagnie ou écrire au
représentant de votre pays. Cette garantie ne porte pas atteinte à vos
droits prévus par la loi.
Service
Si vous avez des problèmes ou des questions quant au
fonctionnement de cet appareil, veuillez nous permettre de vous aider
avant de le retourner chez votre détaillant. La plupart des problèmes
peuvent être réglés rapidement par un appel téléphonique. Lorsque
vous téléphonez (envoyez un courriel ou écrivez) ayez à portée de la
main tous les renseignements pertinents comme le numéro de modèle
ou le numéro des pièces en plus de pouvoir décrire la nature du
problème. Téléphonez à notre Service à la clientèle :
Canada seulement : Numéro sans frais à 1 800 55HAGEN (1 800
554-2436) Entre 9 h et 16 h 30 (HNE)
Pour le service autorisé de réparations par la garantie :
Retournez le filtre avec le reçu daté et la raison du retour à :
Canada: Industries Hagen, 3235, rue Guénette, Montréal QC H4S 1N2
Rolf C. Hagen Inc., 8770-24th Street, Edmonton AB T6P 1X8
É.-U. : Rolf C. Hagen (U.S.A.) Corp.
50 Hampden Road, Mansfield, MA. 02048-9107
G.-B. :
Rolf C. Hagen (UK) Ltd.
California Dr. Whitwood Industrial Estate
Castleford, West Yorkshire WF10 5QH
Pour des renseignements généraux sur notre gamme complète de
produits, explorez nos sites Web à : www.exo-terra.com ou
www.hagen.com.
Distribué par :
Canada : Rolf C. Hagen Inc., Montréal QC H9X 0A2
É.-U. : Rolf C. Hagen (U.S.A.) Corp., Mansfield MA. 02048
G.-B. : Rolf C. Hagen (U.K.) Ltd. Castleford, W. Yorkshire WF10 5QH
KOMPAKTE TERRARIENABDECKUNG FÜR TERRARIENLAMPEN
• Für Exo Terra Compact-Leuchtstoffröhren
oder Glühlampen bis zu 26 W geeignet
• Mit eingebautem Reflektor
• Aussparung zur Installation von Zubehör
• Einfach zu installieren
• An/Ausschalter
IN 3 GRÖSSEN ERHÄLTLICH:
PT-2225 : (30 cm x 9 cm x 15 cm, Fassung für eine Lampe bis
zu max. 26 W)
PT-2226 : (45 cm x 9 cm x 20 cm, Fassung für zwei Lampen bis
zu max. 26 W)
PT-2227 : (60 cm x 9 cm x 20 cm, Fassung für drei Lampen bis
zu 26 W)
Die Exo Terra Compact Top ist eine kompakte TerrarienlampenAbdeckung, die für das Exo Terra Glasterrarium und das Exo Terra
Netzterrarium konstruiert wurde. Diese einfach zu installierende
Abdeckung nimmt ein, zwei oder drei Compact-Leuchtstoffröhren
(PT-2188-2191) oder Glühlampen (PT-2225, PT-2226 bzw. PT-2227)
auf. Eine spezielle Aussparung am Rand der Abdeckung ermöglicht
den Anbau von weiterem optionalem Zubehör, wie z.B. das digitale
Exo Terra Thermometer, Hygrometer, Thermostat oder Hygrostat
(dieses Zubehör ist separat erhältlich).
ANLEITUNGEN ZUM SCHUTZ VOR FEUER, ELEKTRISCHEN SCHLÄGEN ODER VERLETZUNGEN AN PERSONEN
WICHTIGE
SICHERHEITSHINWEISE
WARNUNG: Zum Schutz vor Verletzungen sind grundlegende
Sicherheitsvorkehrungen zu beachten, einschließlich der folgenden
Hinweise:
1.
LESEN UND BEFOLGEN SIE ALLE SICHERHEITSHINWEISE
und alle wichtigen Hinweise auf dem Gerät vor der Inbetriebnahme des Gerätes. Bei Nichtbeachtung kann dies zu Schäden
an diesem Gerät führen.
Compact Top
Gebrauchsanleitung
Page 8

14
vorgesehenen speziellen Aussparung angebracht werden. Die
Sicherheit des Gerätes ist nur gewährleistet, wenn die Lampen
und die Abdeckung korrekt installiert sind.
11. Wenn ein Verlängerungskabel benötigt wird, muss ein Kabel
geeigneter Leistung benutzt werden. Ein Verlängerungskabel mit
einer kleineren Ampere- oder Wattzahl als das Gerät kann sich
überhitzen. Achten Sie darauf, das Verlängerungskabel so zu
verlegen, dass man nicht darüber stolpert oder es herauszieht.
BEWAHREN SIE DIESE ANLEITUNG AUF.
Nur die genaue Beachtung dieser Hinweise zu Installation,
elektrischen Daten und Wartung gewährleistet den sicheren und
effizienten Betrieb dieses Gerätes.
MONTAGEANLEITUNGEN
EMPFEHLUNG: Benutzen Sie ausschließlich Exo Terra® Compact-
Leuchtstoffröhren oder Glühlampen gemäß der auf dem Etikett mit
den elektrischen Daten auf der Abdeckung angegebenen Wattstärke
(maximal 26 W).
•
Dieses Gerät ist ausschließlich für den Gebrauch IN
GESCHLOSSENEN RÄUMEN GEEIGNET.
• WARNUNG: Trennen Sie immer dieses Gerät und alle anderen,
die im Terrarium in Gebrauch sind, vom Stromnetz, bevor Sie die
Hände in das Terrarium halten und/oder bevor Sie eine Wartung
durchführen.
• WARNUNG: Achten Sie darauf, dass die Abdeckung vom
Stromnetz getrennt ist, wenn Sie eine Terrarienlampe oder
Glühlampe montieren, entfernen oder auswechseln oder wenn
Sie die Abdeckung oder andere Geräte warten, montieren oder
entfernen.
1. Drehen Sie eine Exo Terra® Compact-Leuchtstoffröhre oder
Glühlampe in die Fassung auf der Unterseite der Abdeckung.
Befolgen Sie dabei die Richtlinien für die maximale Wattstärke.
TIPP: Geben Sie eine dünne Schicht Vaseline auf das Gewinde
der Lampe, bevor Sie sie eindrehen. So wird es einfacher, die
Lampe wieder herauszudrehen, wenn Sie sie erneuern müssen.
ENGLISHFRANÇAISDEUTSCHESPAÑOLITALIANONEDERLANDS
2. Dies ist keine Abdeckung für Aquarien und darf daher nicht auf
Aquarien verwendet werden.
3. WARNUNG: Diese Abdeckung ist NICHT wasserdicht und darf
daher NICHT in Kontakt mit Wasser kommen.
4. GEFAHR – Um einen möglichen elektrischen Schlag zu
vermeiden, sollten Sie besonders vorsichtig sein. Wenn eine der
nachfolgenden Situationen eintritt, sollten Sie nicht versuchen,
das Gerät selber zu reparieren, sondern dieses an eine
autorisierte Kundendienststelle zur Reparatur geben oder das
Gerät entsorgen.
A. Wenn das Gerät ins Wasser fällt, NICHT danach greifen!
Erst die Netzsteckverbindung lösen und dann das Gerät
herausnehmen. Wenn die elektrischen Teile des Gerätes nass
werden, sofort die Netzsteckverbindung lösen.
B. Gerät nach dem Einbau sorgfältig überprüfen. Es darf nicht
an das Stromnetz angeschlossen werden, wenn sich Wasser auf
Teilen befindet, die nicht nass werden dürfen.
C. Kein Gerät mit beschädigtem Netzkabel oder beschädigtem
Stecker benutzen oder wenn dieses nicht richtig funktioniert
oder heruntergefallen oder anderweitig beschädigt wurde. Die
Netzschnur dieses Gerätes kann nicht ausgewechselt werden;
wenn die Schnur beschädigt ist, sollte das Gerät weggeworfen
werden. Niemals die Schnur abschneiden.
D. Um die Möglichkeit auszuschließen, dass der Gerätestecker
oder die Steckdose nass werden, soll
das Gerät neben einer Wandsteckdose so
angeordnet werden, dass kein Wasser auf
Steckdose oder Stecker tröpfeln kann. Eine
„Tropfschleife“ sollte zur Steckdose hin
gebildet werden. Die „Tropfschleife“ ist der
Teil des Netzkabels, der unter dem Niveau
der Steckdose oder der Anschlussdose bei
Verwendung einer Verlängerungsschnur
liegt. Damit wird verhindert, dass Wasser
die Schnur entlang wandert und mit der
Steckdose in Berührung kommt. Wenn
der Stecker oder Steckdose nass werden,
Netzkabel NICHT aus der Steckdose ziehen.
Sicherung oder Sicherungsschalter des Stromkreises für das
Gerät ausschalten. Erst danach das Netzkabel herausziehen und
die Steckdose auf Vorhandensein von Wasser überprüfen.
5. Sorgfältige Aufsicht ist notwendig, wenn das Gerät von Kindern
oder in der Nähe von Kindern benutzt wird.
6. Zur Vermeidung von Verletzungen keine heißen Teile berühren.
7. Trennen Sie immer alle Geräte vom Stromnetz, wenn sie nicht in
Gebrauch sind, bevor Teile angebracht oder entfernt werden und
vor der Reinigung. Nicht am Netzkabel ziehen, um den Stecker
aus der Steckdose zu lösen. Immer am Stecker anfassen und
herausziehen.
8. Benutzen Sie das Gerät nur für den vorgesehenen
Verwendungszweck. Die Verwendung von Anbauteilen, die nicht
vom Gerätehersteller empfohlen oder verkauft werden, kann zu
einem unsicheren Betriebszustand führen.
9. Installieren oder lagern Sie das Gerät nicht an Stellen, an denen
es der Witterung oder Temperaturen unter dem Gefrierpunkt
ausgesetzt ist.
10. Achten Sie darauf, dass das Gerät sicher installiert ist, bevor
es in Betrieb genommen wird. Stellen Sie keine Objekte auf
die Abdeckung. Zubehör kann ausschließlich in der hierfür
Page 9

16
Reinigung der Einheit:
1. Diese Abdeckung ist nicht wasserdicht. Die Einheit darf weder
Wasserspritzern noch Feuchtigkeit ausgesetzt werden. Außerdem
darf sie nicht in Wasser eingetaucht werden.
2. Achten Sie darauf, dass die Entlüftungsschlitze oben auf der
Abdeckung frei von Blockagen, Schmutz oder Staub sind.
Wischen Sie jeglichen Schmutz, der die Entlüftungsschlitze
verstopfen könnte, mit einem Lappen ab.
3. Für das Exo Terra® Compact Top ist keine besondere Wartung
notwendig. Es muss nur regelmäßig mit einem Lappen
abgewischt werden (benutzen Sie niemals aggressive chemische
Produkte oder Reinigungsmittel). Um kalkhaltige Ablagerungen
zu entfernen (Lampenanschlüsse), ist es empfehlenswert,
eine milde Säure, z.B. Essig, zu benutzen und diese dann
gründlich mit einem feuchten Lappen abzuwischen, damit keine
Rückstände zurückbleiben.
4. Es wird dringend empfohlen, immer alle Vorsichtsmaßnahmen
und –vorgehensweisen zu befolgen, die sowohl in den
WICHTIGEN SICHERHEITSHINWEISEN als auch in den
MONTAGEANLEITUNGEN hervorgehoben werden.
GARANTIE
Dieses Produkt hat eine uneingeschränkte Garantie auf Mängel
in Material und Verarbeitung für die Dauer von zwei Jahren ab
Kaufdatum. Diese Garantie ist begrenzt auf Reparatur oder Ersatz
und schließt Schäden an Personen oder Gegenständen, die durch
Berührung mit der Abdeckung entstehen, aus. Ausgeschlossen sind
außerdem alle Schäden, die durch unsachgemäße Verwendung oder
Missbrauch der Abdeckung verursacht werden. Für Garantieleistung
oder Ersatzteile wenden Sie sich bitte an Ihren örtlichen Zoofachhändler oder schreiben Sie an den Vertreter in Ihrem Land.
Kundendienst
Falls dieses Produkt fehlerhaft sein sollte, geben Sie es zusammen
mit dem Kaufnachweis entweder an Ihren örtlichen Zoofachhändler
oder senden Sie es mit im Voraus bezahlten Versandkosten an:
HAGEN Deutschland GmbH & Co. KG
Lehmweg 99-105, 25488 Holm
Weitere Informationen über unser gesamtes Produktsortiment
erhalten Sie auf: www.exo-terra.com oder www.hagen.com.
Vertrieb durch:
HAGEN Deutschland GmbH & Co. KG, 25488 Holm
ENGLISHFRANÇAISDEUTSCHESPAÑOLITALIANONEDERLANDS
2. Achten Sie darauf, dass die Terrarienlampen ordentlich in der
Fassung sitzen. Platzieren Sie die Abdeckung vorsichtig auf dem
Rand des Terrariums. Die Lampen weisen dabei nach unten.
3. Stellen Sie keine
Objekte auf die
Abdeckung. Zubehör kann
ausschließlich in der hierfür
vorgesehenen speziellen
Aussparung angebracht
werden. Hitze kann durch
die Entlüftungsschlitze
oben auf der Abdeckung
entweichen. Blockieren Sie
diese Entlüftungsschlitze
nicht und achten Sie darauf,
dass Staub oder Schmutz
immer sofort entfernt
werden.
4. Verbinden Sie die Abdeckung mit dem Stromnetz. Mit dem
Schalter können Sie das Licht an der Abdeckung an- oder
ausstellen. Warnung: Die Abdeckung darf nicht an das
Stromnetz angeschlossen werden, wenn sich Wasser auf Teilen
befindet, die nicht nass werden dürfen.
WARTUNG:
Warnung:
• Trennen Sie immer dieses Gerät und alle anderen, die im
Terrarium oder Paludarium in Gebrauch sind, vom Stromnetz,
bevor Sie die Hände in das Terrarium halten und/oder bevor Sie
eine Wartung durchführen.
• Achten Sie darauf, dass die Abdeckung vom Stromnetz
getrennt ist, wenn Sie eine Compact-Leuchtstoffröhre oder
Glühlampe montieren, entfernen oder auswechseln oder wenn
Sie die Abdeckung oder andere Geräte warten, montieren oder
entfernen.
• Die Netzschnur dieses Gerätes kann nicht ausgewechselt
werden; wenn die Schnur beschädigt ist, sollte das Gerät
weggeworfen werden.
Page 10

18
ENGLISHFRANÇAISDEUTSCHESPAÑOLITALIANONEDERLANDS
2. Esta no es una tapa de acuario. No debe ser usada en ningún
tipo de acuario.
3. ADVERTENCIA: este equipo NO es resistente al agua y DEBE ser
protegido de la entrada en contacto con el agua.
4. PELIGRO – Para evitar descaga electrica, especial cuidado
deben ser tomados. Para cada una de la siguientes situaciones,
no intente repararlo usted mismo; devuelva el equipo a la
facilidades del servicio autorizado o deseche el equipo.
A. Si el equipo cae dentro de agua, NO intente alcanzarlo!
Primero desenchufelo y luego recuperelo. Si los componentes
eléctricos se mojaron, desenchufe el equipo inmediatamente.
B. Examine cuidadosamente el equipo después de instalarlo.
Este no debe estar enchufado si hay agua en partes que no
deberían húmedas.
C. No opere ningún equipo si este tiene el cable o el enchufe
dañado, o si funciona mal o si se cayó o es dañado de
alguna manera. El cable electrico de este equipo no puede
ser reemplazado: si el cable esta dañado, el equipo debe ser
desechado. Nunca corte el cable.
D. Para evitar la posibilidad que el enchufe del equipo o tomas
electricas entren en contacto con el agua, colocar el equipo a
un lado del toma corriente para prevenir
agua por goteo entre en enchufes o toma
corrientes. Un “bucle de goteo” (drip loop)
deberá emplearse. Un “bucle de goteo” es
la parte del cable que está entre el aparato
y la toma de corriente, o del conector si
se emplea una extensión; esto para evitar
que el agua que se mueve a través del
cable entre en contacto con la toma de
corriente o con el equipo. Si el enchufe
llegase a mojarse, NO desconecte el cable.
Desconecte el fusible o el breaker que
suministra energía eléctrica al aparato,
luego desconéctelo y revíselo para
confirmar la presencia de agua en la toma de corriente.
5. Para reducir el riesgo de lesiones, una supervisión estrecha es
necesaria cuando el equipo es usado por niños o cerca de ellos.
6. Para evitar lesiones, no toque las partes calientes.
7. Siempre desconecte el aparato cuando no esté en uso, antes de
colocar o quitar alguno de sus componentes y antes de limpiarlo.
Nunca tire del cable para desconectarlo de la toma de corriente.
Agarre el cable y hale para desconectarlo.
8. No use este equipo para otra finalidad distinta a lo que está
destinado. El uso de accesorios no recomendados o no vendidos
por el fabricante del aparato podría causar una condición
insegura.
9. No instale o coloque el equipo donde pueda quedar expuesto al
clima o a temperaturas bajo cero.
10. Asegúrese que el equipo está instalado de manera segura antes
de operarlo. No coloque objeto(s) encima de la tapa, excepto en
la ranura especial diseñada para este fin. La seguridad de este
equipo se da solo siempre que la(s) bombilla(s) y la tapa están
apropiadamente instaladas.
11. Si se requiere de un cable de extensión, deberá emplearse uno
del tipo adecuado. Una extensión con menor amperaje o vataje
que el del equipo, éste podría recalentarse. Deberá tenerse
cuidado al acomodar el cable de forma tal que no pueda ser
tropezado o halado accidentalmente.
12. PRECAUCION: Sólo para el mercado Norteamericano: Este
TAPA PARA TERRARIO DE FLUORESCENTES COMPACTOS
• Encaja bombillas fluorescentes compactas
o incandecentes hasta 26W
• Reflector incluido
• Ranura corrediza para montaje de
accesorios.
• Fácil de instalar
• Interruptor encendido/apagado.
DISPONIBLE EN 3 TAMAÑOS:
PT-2225 : (30 cm x 9 cm x 15 cm; Fijación de una bombilla
de luz; bombilla 26 W max)
PT-2226 : (45 cm x 9 cm x 20 cm; Fijación de dos bombillas
de luz; bombilla 26 W max)
PT-2227 : (60 cm x 9 cm x 20 cm, Fijación de tres bombillas
de luz; bombilla 26 W max)
El Compact Top Exo Terra es una tapa para fluorescentes compactos
de terrarios diseñada para los terrarios de vidrio y de rejilla Exo
Terra. Esta tapa fácil de instalar alberga uno, dos o tres bombillas
fluorescentes compactas o incandescentes (PT-2225, PT-2226,
PT-2227 respectivamente). Una ranura especial corrediza permite
accesorios opcionales tales como Termométro - Hidrómetro Digital
Exo Terra y el Termómetro – Higrómetro Exo Terra que pueden ser
pueden ser montados en el riel de la tapa (accesorios opcionales
vendidos por separado).
INSTRUCCIONES REFERENTES A RIESGO DE FUEGO, DESCARGA
ELECTRICA O LESIONES A PERSONAS
IMPORTANTES INSTRUCCIONES
DE SEGURIDAD
ADVERTENCIA: Para proteger contra lesiones, precauciones básicas
de seguridad deben ser cumplidas cuando se manipula la Tapa
para Terrario de Fluorescentes Compactos Exo Terra, incluyendo las
siguientes.
1.
LEA Y SIGA TODAS LAS INTRUCCIONES DE SEGURIDAD
y todos los importantes avisos en el equipo antes de usar. El no
hacerlo puede resultar en daño del equipo.
Compact Top
Manuale
d’istruzioni
Page 11

20
ENGLISHFRANÇAISDEUTSCHESPAÑOLITALIANONEDERLANDS
2. Verifique que la(s) bombilla(s) de luz es correctamente instalada
en el(los) socate(s) con rosca. Coloque cuidadosamente la tapa
en el borde del terrario con la(s) bombilla(s) orientados hacia
abajo.
3. No coloque objetos
encima de la tapa, excepto
en la ranura especial
diseñada para este fin. Las
rejillas de ventilación en
el tope de la tapa permite
que el calor se disipe, no
las obstruyas de ninguna
manera y asegurese que
cualquier sucio o detrito
sea removido en seguida.
4. Enchufe la tapa. Use el
interruptor de la tapa para
encender o apagar la luz.
Precaución: No enchufe la tapa si hay agua en partes que no
deberían estar mojadas.
MANTENIMIENTO
Precaución:
• Desconecte el cable de la tapa, y cualquier otro equipo usado
para terrarios, paludarios antes de introducir sus manos en el
recinto; y/o llevar a cabo algún tipo de mantenimiento.
• Siempre que instale, retire o cambie bombilla de luz
fluorescentes compacta o incandescentes o mantenga, instale o
retire la tapa o cualquier otro equipo, siempre asegurar que este
desenchufado.
• El cable de alimentación eléctrico de esta tapa no puede ser
reemplazado. Si el cable es dañado, la unidad completa debe ser
desechada.
Limpieza de la unidad:
1. Esta tapa no es resistente al agua. No exponga la tapa a rocio
con agua o humedad. No lo sumerja en agua.
2. Asegurese que la rejilla de ventilación para el calor encima de
la tapa se mantenga libre de cualquier obstrucción, suci o y
detritos. Use una toalla para limpiar cualquier detrito que pueda
obstruir la rejilla de ventilación para el calor.
3. No se requiere de un mantenimiento especial para el Compact
Top Exo Terra; solo una limpieza periódica con un toalla (nunca
use productos químicos fuertes o detergentes) Para eliminar los
depósitos calcáreos, se recomienda usar un ácido suave, como
equipo tiene un cable polarizado (el enchufe tiene una hoja más
ancha que la otra). Como medida de seguridad, este enchufe
podrá sólo entrar en una toma de corriente polarizada. Si el
enchufe no encaja en la toma de corriente, conéctelo a la
inversa. Si aún persiste el problema, contacte a un electricista
calificado. Nunca lo use como un cable de extensión a menos
que el enchufe puede insertarse completamente. No pase por
alto esta medida de seguridad.
GUARDE ESTAS NORMAS DE SEGURIDAD PARA FUTURAS REFERENCIAS
Solo siguiendo al pie de la letra los pasos de instalación, las pautas
de mantenimiento y electricidad asegurarán el seguro y eficiente
uso de este equipo.
INSTRUCCIONES DE INSTALACIÓN
RECOMENDACIÓN: Use solo bombillas de luz compacta
fluorescentes o incandescente para terrario con el nivel de vataje
indicado en la etiqueta de datos eléctricos localizada en la tapa
(BOMBILLAS 26 W MAXIMO).
• Este equipo es para usar UNICAMENTE DENTRO DE LA CASA.
• PRECAUCIÓN: Desconecte el cable de la unidad de iluminación y
cualquier otro equipo usado en el terrario antes de introducir las
manos en el y/o llevar a cabo algún tipo de mantenimiento.
• PRECAUCIÓN: Siempre que instale, quite o cambie las bombillas
de luces compactas fluorescentes o incandescentes o realice
mantenimiento, instale o quite la tapa de cualquier otro equipo,
siempre asegúrese de que esté desconectado.
1. Enrosque la(s) bombilla(s) de luces compactas o incandescentes
en el(los) casquillo(s) con rosca ubicado(s) debajo de la tapa.
Siga los lineamientos de vataje máximo. CONSEJO: aplique una
capa delgada de baselina de petróleo en la rosca base de la
bómbilla de luz antes de enroscarla en ella. Esto hará más fácil
desenroscar la bombilla cuando sea tiempo de reemplazarla.
Page 12

22
ENGLISHFRANÇAISDEUTSCHESPAÑOLITALIANONEDERLANDS
el vinagre, y posteriormente limpiar profundamente con un paño
húmedo para eliminar cualquier residuo.
4. Se recomienda encarecidamente seguir siempre todas las
precauciones y procedimientos esbozados en las secciones de
Seguridad e Instrucciones de Instalación.
GARANTIA:
Este producto está garantizado por defectos del material o mano
de obra por un período de 2 años a partir de la fecha de compra.
La garantía es válida sólo con la prueba de la compra. La garantía
está limitada a reparar o reemplazar la unidad únicamente y no
cubre pérdida o daño consecuente de o por objetos animados o
inanimados. Esta garantía es válida sólo bajo condiciones normales
de operabilidad para lo cual está destinado el equipo. Ésta excluye
cualquier daño causado por uso irracional, instalación inapropiada,
negligencia, forzamiento o abuso de la unidad. Para servicio de
garantía o repuestos, contacte a su comerciante preferido o escriba
al representante en su país. Esta garantía no afecta sus derechos
legales.
SERVICIO:
Si tiene algún problema o duda respecto a la operación de este
producto, por favor, permítanos ayudarle antes que devuelva el
producto a su proveedor. La mayoría de los problemas pueden
manejarse prontamente mediante una llamada telefónica. Cuando
usted llame (envíe un e-mail o nos escriba), por favor, tenga a
mano toda la información relevante, como el número del modelo y/o
número de los componentes, así como también la naturaleza del
problema. Llame a nuestro Departamento de Atención al Cliente:
En Canadá: Número de Teléfono Gratuito 1-800-555HAGEN
(1-800-554-2436) Entre 9:00 am y 4:00 pm (Hora del Este)
En Estados Unidos: Número de Teléfono Gratuito 1-800-724-2436
Entre 9:00 am y 4:00 pm (Hora del Este)
En Reino Unido: Ayuda Telefónica 01977 55662
Entre 9:00 am y 5:00 pm
Para Servicio de Reparación Autorizado:
Devuelva la unidad con el recibo y el motivo de devolución a:
Canadá: Hagen Industries, 3235 Guenette, Montreal, QC H4S 1N2
Rolf C. Hagen Inc., 8770-24th Street, Edmonton AB T6P 1X8
Estados Unidos:
Rolf C. Hagen (U.S.A.) Corp.
50 Hampden Road, Mansfield, MA. 02048-9107
Reino Unido:
Rolf C. Hagen (UK) Ltd.
California Dr. Whitwood Industrial Estate
Castleford, West Yorkshire WF10 5QH
Para información general sobre todos nuestros productos, visite
nuestro sitio Web: www.exo-terra.com o www.hagen.com.
Distribuido por:
Canada: Rolf C. Hagen Inc., Montreal, QC H9X 0A2
Estados Unidos: Rolf C. Hagen (U.S.A.) Corp., Mansfield MA. 02048
Reino Unido:
Rolf C. Hagen (Reino Unido) Ltd. Castleford,
W. Yorkshire WF10 5QH
España :
Rolf C. Hagen ( España) Avda. de Beniparrel, 11 y 13 – Silla Valencia
COMPACT FLUORESCENT TERRARIUM CANOPY
• Compatibile con lampadine Exo Terra
fluorescenti o incandescenti (max 26 W)
• Riflettore interno
• Bordo scorrevole per montare gli accessori
• Facile da installare
• Interruttore On/Off
DISPONIBILE IN 3 DIMENSIONI:
PT-2225 : (30 cm x 9 cm x 15 cm; impianto a lampadina
singola; max 26 W)
PT-2226 : (45 cm x 9 cm x 20 cm; impianto da due lampadine;
max 26 W bulb)
PT-2227 : (60 cm x 9 cm x 20 cm, impianto da tre lampadine;
max 26 W bulb)
L’ Exo Terra Compact Top Canopy è un tettuccio fluorescente
concepito per essere utilizzato con l’Exo Terra Glass Terrarium e
l’Exo Terra Screen Terrarium. Il tettuccio è facile da installare e può
contenere uno, due, o tre lampadine fluorescenti o incandescenti
(rispettivamente PT-2225, PT-2226, PT-2227). Uno speciale bordo
scorrevole permette di montare accessori quali il Termometro
digitale Exo Terra, l’Igrometro, il Termostato e l’Igrostato sul bordo
del tettuccio (accessori venduti separatamente).
STRUZIONI RELATIVE A RISCHIO DI INCENDIO, SCOSSE ELETTRICHE, O DANNI ALLE PERSONE
IMPORTANTI ISTRUZIONI
DI SICUREZZA
ATTENZIONE: Per un corretto utilizzo dell’Exo Terra® Compact
Top Terrarium Canopy , è necessario osservare delle precauzioni di
sicurezza basilari, incluse le seguenti.
1.
LEGGERE E SEGUIRE TUTTE LE ISTRUZIONI DI SICUREZZA
e tutte le avvertenze relative all’unità prima del suo utilizzo.
La non osservanza di tali istruzioni potrebbe provocare danni
all’unità
2. Questo non è un tettuccio da acquario. Non può essere usato in
alcun tipo di acquario.
Compact Top
Instrucciones
de Operación
Page 13

24
ENGLISHFRANÇAISDEUTSCHESPAÑOLITALIANONEDERLANDS
3. ATTENZIONE: Quest’apparecchio NON è impermeabile e DEVE
essere protetto dal contatto con l’acqua.
4. PERICOLO – Per evitare possibili scosse elettriche, bisogna
osservare delle precauzioni particolari. Per ognuna delle
situazioni seguenti, non tentare di riparare l’unità da soli:
rivolgersi ad un servizio d’assistenza convenzionato oppure
gettarla via
A. Se l’unità cade nell’acqua, NON tentare di raccoglierla senza
prima aver tolto la presa! Se i componenti elettrici si bagnano,
togliere la presa immediatamente.
B. Esaminare attentamente l’unità dopo l’installazione. Essa non
deve essere collegata se i suoi componenti elettrici sono bagnati.
C. Non utilizzare l’unità con un cavo o una spina danneggiati,
se presenta anomalie di funzionamento o se è stata bagnata o
danneggiata. Il cavo di alimentazione di quest’unità non può
essere sostituito; se il cavo è danneggiato, non è più possibile
utilizzare l’unità. Non tagliare mai il cavo.
D. Per evitare il rischio che la spina o
l’attacco si bagnino, si consiglia di utilizzare
un “drip loop”. Un “drip-loop” è la parte
del cavo sotto il livello dell’unità e della
spina, o del connettore se si utilizza una
prolunga, che evita che l’acqua entri nel
cavo e venga in contatto con l’attacco o la
lampada. Se la spina o l’attacco si bagnano,
NON scollegare la prolunga. Disconnettere
il fusibile o l’interruttore che alimentano
l’unità, poi scollegare e controllare la
presenza di acqua nell’attacco.
5. Per ridurre il rischio di incidenti, è
necessaria la massima supervisione quando
l’unità viene utilizzata da o in presenza di un bambino.
6. Per evitare incidenti, non toccare le parti calde.
7. Togliere sempre la presa dalla corrente dopo aver utilizzato la
lampada, prima dell’inserimento o della sostituzione di eventuali
componenti, e prima della pulizia. Non tirare mai il cavo per
togliere la spina dalla corrente. Afferrare la spina e tirare.
8. Non utilizzare l’unità per un uso diverso da quello per cui è stata
concepita. L’utilizzo di parti non consigliate o non vendute dal
fabbricante dell’unità potrebbe causare situazioni a rischio.
9. Non installare o conservare l’unità in luoghi esposti alle
intemperie o a temperature troppo basse.
10. Assicurarsi che il dispositivo sia installato in modo corretto
prima di metterlo in funzione. Non posizionare oggetti sulla parte
superiore del tettuccio, se non sullo speciale bordo concepito
a tale scopo. La sicurezza di quest’unità è garantita solo se le
lampade, gli adattatori e l’unità sono stati installati in modo
corretto.
11. Nel caso fosse necessaria una prolunga, essa deve avere
un amperaggio appropriato, poiché una prolunga con meno
amperes o watts provocherebbe il surriscaldamento della
lampada. Riavvolgere i cavi in modo da non accavallarli o tirarli.
12. ATTENZIONE - Solo per mercato Nord Americano: L’unità è
dotata di una spina polarizzata (uno spinotto è più grande
dell’altro). Per sicurezza, questa spina può essere inserita solo
in una presa polarizzata e quindi solo in un verso. Se non si
riesce ad inserire la spina perfettamente nella presa, provare ad
inserirla nell’altro verso. Se il problema persiste, contattare un
elettricista qualificato. Non utilizzare mai una prolunga finché
la spina non è correttamente inserita nella presa. Non tentare di
disabilitare questo dispositivo di sicurezza.
CONSERVARE QUESTE ISTRUZIONI PER EVENTUALI CONSULTAZIONI FUTURE.
Solo l’attenta osservazione di queste istruzioni elettriche, di
installazione e manutenzione assicurano la sicurezza e l’efficienza
di quest’unità.
ISTRUZIONI DI INSTALLAZIONE
ATTENZIONE: Utilizzare solo lampadine fluorescenti o incandescenti
Exo Terra® rispettando il wattaggio indicato sull’etichetta del
tettuccio (MAX LAMPADINE DA 26W).
• SOLO PER USO INTERNO.
• ATTENZIONE: Scollegare la spina dell’unità di luce, o qualsiasi
altro dispositivo elettrico utilizzato per terrario, prima di
immergere le mani in acqua e/o iniziare una manutenzione di
qualsiasi tipo.
• ATTENZIONE: Quando si installano, rimuovono o sostituiscono
i lampadine fluorescenti o incandescenti , o si installano,
rimuovono o sostituiscono il tettuccio o qualsiasi altro
accessorio, assicurarsi sempre che il dispositivo sia scollegato.
1. Avvitare le lampadine fluorescenti o incandescenti Exo Terra®
sul tettuccio. Rispettare le indicazioni di wattaggio. N.B. applicare
un sottile strato di gel al petrolio sulle scanalature alla base
della lampadina prima di avvitarla. Ciò faciliterà lo svitarsi della
lampadina quando sarà il momento di sostituirla.
Page 14

26
2. Verificare che la lampadina sia avvitata correttamente.
Posizionare il tettuccio nel ternario con le lampadine rivolte verso
il basso
3. Non posizionare
oggetti sulla parte
superiore del tettuccio, se
non sui bordi scorrevoli
concepiti appositamente
a tale scopo. Le fessure
di ventilazione nella parte
superiore del tettuccio
permettono al calore di
fuoriuscire; non ostruire
tali orifizi ed assicurarsi di
rimuovere regolarmente
ogni polvere o detrito.
4. Collegare la spina del
tettuccio. Utilizzare l’interruttore per spegnere o accendere le
luci. Attenzione: Non collegare il tettuccio se alcuni dei suoi
componenti elettrici sono bagnati.
MANUTENZIONE:
Attenzione:
• Togliere la presa di questo tettuccio o di altri dispositivi elettrici
utilizzati nel terrario o paludario prima di immergere le mani
nell’acqua e/o iniziare una manutenzione di qualsiasi tipo.
• Prima di installare, rimuovere o sostituire le lampadine
fluorescenti o incandescenti, o prima di manutenere, installare o
rimuovere il tettuccio o qualsiasi altro dispositivo, assicurarsi che
le spina sia scollegata.
• I cavi elettrici di questo tettuccio non possono essere sostituiti.
Se sono danneggiati, l’intera unità deve essere gettata.
Pulizia dell’Unità:
1. Il tettuccio non è impermeabile. Non esporlo a getti d’acqua o
umidità. Non immergerlo in acqua.
2. Assicurarsi che le ventole posizionate nella parte superiore del
tettuccio siano libere da qualsiasi ostruzione, polvere o detrito.
Utilizzare un panno per asportare i detriti che potrebbero ostruire
le ventole.
3. L’Exo Terra® Compact Top Terrarium Canopy non necessita
ENGLISHFRANÇAISDEUTSCHESPAÑOLITALIANONEDERLANDS
manutenzioni particolari, all’infuori di tale pulizia periodica
con un panno (non utilizzare mai prodotti chimici o detergenti
abrasivi). Per rimuovere i depositi di calcare, si raccomanda di
utilizzare un acido dolce come l’aceto e un panno morbido.
4. Si consiglia vivamente di osservare tutte le precauzioni e
le procedure descritte nelle sezioni Istruzioni di Sicurezza e
Istruzioni di Installazione.
GARANZIA
Questo prodotto è garantito per i difetti di materiale o fabbricazione
per un periodo di 2 anni dalla data di acquisto. La garanzia è valida
solo dietro presentazione di una prova d’acquisto. La garanzia è
limitata alla riparazione o sostituzione dell’unità e non copre danni a
persone, animali o oggetti. La garanzia è valida solo se l’unità è stata
utilizzata in modo appropriato. Essa esclude ogni danno causato da
un uso irragionevole, da un’installazione impropria, da negligenza,
o abuso dell’unità. Per servizi di garanzia o assistenza tecnica,
contattare il proprio rivenditore di animali domestici o scrivere al
rappresentante della propria città.
Per ottenere delle informazioni generali sull’intera gamma di
prodotti, consultare i nostri siti a: www.exo-terra.com o www.
hagen.com.
Distribuito da:
Canada: Rolf C. Hagen Inc., Montreal, QC H9X 0A2
U.S.A.: Rolf C. Hagen (U.S.A.) Corp., Mansfield MA. 02048
U.K.: Rolf C. Hagen (U.K.) Ltd. Castleford, W. Yorkshire WF10 5QH
Page 15

28
ENGLISHFRANÇAISDEUTSCHESPAÑOLITALIANONEDERLANDS
A. Valt het toestel in het water, grijp er NIET naar! Trek eerst de
stekker uit en neem het dan uit het water. Zijn er elektrische
onderdelen nat geworden, trek onmiddellijk de stekker uit.
B. Onderzoek het toestel na installatie. Het mag niet aangesloten
zijn als er onderdelen, hiervoor niet bestemd, nat geworden zijn.
C. Sluit geen toestel aan waarvan de elektrische bedrading of
stekker beschadigd is of wanneer het toestel gevallen is. De
elektrische bedrading kan niet vervangen worden. Knip deze
bedrading nooit door.
D. Om te vermijden dat de stekker van het toestel of het
elektrische stopcontact nat wordt, plaats de eenheid aan één
kant van een aan de muur bevestigd stopcontact, zodat er
geen water druppelt op de contactdoos of
de stekker. Een “druiplus” moet worden
voorzien. De “druiplus” is dat gedeelte
van het snoer onder het niveau van de
contactdoos, of het verbindingsstuk als
een verlengingssnoer wordt gebruikt,
zodat geen water langs het snoer loopt en
in contact komt met de contactdoos. Als
de stekker of de contactdoos nat worden,
TREK het snoer dan NIET UIT. Schakel de
ontsteker of de stroomonderbreker uit die
stroom levert aan uw toestel. Trek dan
de stekker uit en kijk na of er water in de
contactdoos zit.
5. Strikt toezicht is noodzakelijk bij elk toestel dat door of in de
nabijheid van kinderen wordt gebruikt.
6. Om ongevallen te vermijden, geen hete delen aanraken.
7. Trek de stekker uit als het toestel niet in werking is of als je
onderdelen wil vervangen of reinigen. Trek nooit aan de kabel
maar altijd aan de stekker om het toestel los te koppelen.
8. Gebruik het toestel alleen waarvoor het is voorzien.
9. Installeer of bewaar het toestel niet bij vriestemperaturen.
10. Wees er zeker van dat het toestel veilig is geïnstalleerd voor
ingebruikstelling. Plaats geen voorwerpen op de lichtkap,
behalve accessoires in de daarvoor bestemde schuifrail. De
veiligheid is alleen gegarandeerd als het toestel correct gebruikt
en geïnstalleerd wordt.
11. Als een verlengingssnoer noodzakelijk is, moet een snoer met
een aangepast toelaatbaar vermogen worden gebruikt. Een
snoer dat een vermogen toelaat voor minder ampère of wattage
dan het vermogen van het toestel kan oververhitten. Let erop
dat het snoer zo bevestigd wordt, dat er niet kan worden over
gestruikeld of aan getrokken.
BEWAAR DEZE INSTRUCTIES VOOR LATER ALS REFERENTIE.
Alleen het zorgvuldig opvolgen van deze installatie, elektrische en
onderhoudsrichtlijnen garanderen de veilige en efficiënte werking
van het toestel.
Installatie instructies:
AANBEVELING: Gebruik alleen de Exo Terra® spaarlampen of
gloeilampen (T-10) geschikt voor terrariumgebruik volgens de
wattage aangegeven op het label van de lichtkap. (MAXIMUM
26W BULB).
• Het toestel is ALLEEN GESCHIKT VOOR BINNENSHUIS
• WAARSCHUWING: Trek de stekker uit het stopcontact en van
alle andere elektrische apparaten van het terrarium alvorens
TERRARIUM LICHTKAP VOOR SPAARLAMPEN
• Voor spaarlampen of gloeilampen tot 26 W
• Met ingebouwde reflector
• Schuifrail om accessoires in te schuiven
• Gemakkelijk te installeren
• Aan/uit schakelaar
VERKRIJGBAAR IN 3 MATEN:
PT-2225 : 30 cm x 9 cm x 15 cm, één fitting, max. 26 W lamp
PT-2226 : 45 cm x 9 cm x 20 cm, twee fittingen, max. 26 W lamp
PT-2227 : 60 cm x 9 cm x 20 cm, drie fittingen, max. 26 W lamp
De Exo Terra Compact Top is een terrarium lichtkap voor
spaarlampen ontworpen voor de Exo Terra Glazen Terrariums en
de Exo Terra Screen Terrariums. Deze gemakkelijk te installeren
lichtkap heeft één, twee tot drie fittingen voor spaarlampen of
gloeilampen (respectievelijk PT-2225, PT-2226, PT-2227). Optionele
accessoires zoals de Exo Terra digitale thermometer en hygrometer
en de Exo Terra thermostaat en Hygrostaat kunnen in de schuifrail
aan de bovenzijde van de lichtkap worden aangebracht. (optionele
accessoires worden apart verkocht).
Lees voor de installatie en de inbedrijfstelling aandachtig de
instructies.
BELANGRIJKE
VEILIGHEIDSVOORSCHRIFTEN
WAARSCHUWING: Om u te beschermen tegen verwondingen,
moeten minimale voorzorgsmaatregelen in acht worden genomen,
met inbegrip van het volgende.
1. LEES EN VOLG ALLE VEILIGHEIDSVOORSCHRIFTEN
en alle belangrijke aantekeningen op het toestel voor gebruik. Als
u nalaat dit te doen, kan dit resulteren in schade aan het toestel.
2. Dit is geen aquarium lichtkap en mag in geen enkel type van
aquarium gebruikt worden.
3. WAARSCHUWING: Deze lichtkap is niet waterbestendig en mag
dus NIET in contact komen met water.
4. GEVAAR – Om een mogelijke elektrische shock te vermijden,
wees voorzichtig. In elk van de volgende situaties, probeer nooit
zelf reparaties te verrichten; zet het toestel uit en stuur het terug
naar een gemachtigd servicecentrum.
COMPACT TOP
Gebruiksaanwijzing
Page 16

30
ENGLISHFRANÇAISDEUTSCHESPAÑOLITALIANONEDERLANDS
onderhoud of andere taken aan het terrarium uit te voeren.
• WAARSCHUWING: Bij installatie, verwijderen of vervangen
van lampen of bij onderhoud, installatie of verwijderen van de
lichtkap, steeds de stekker uit het stopcontact verwijderen.
1. Draai de Exo Terra® spaar- of gloeilampen in de fittings aan de
onderzijde van het. Let op het maximum wattage. TIP: breng een
filterdun laagje vaseline aan op de schroefdraad van de lamp
alvorens de lamp in te draaien. Dit zal het vergemakkelijken om
de lamp er later weer uit te draaien.
2. Kijk na of de lampen correct zijn ingeschroefd in de daarvoor
voorzien fittings. Plaats de lichtkap voorzichtig op het terrarium
met de lampen naar onder gericht.
3. Plaats geen voorwerpen
op de lichtkap wanneer
in gebruik, behalve in de
daarvoor voorzien rail
aan de bovenkant. De
ventilatiesleuven zorgen
ervoor dat hete lucht kan
ontsnappen, deze mogen
in geen geval worden
afgedicht. Verwijder vuil
of stof onmiddellijk uit de
sleuven.
4. Steek de stekker van de
lichtkap in het stopcontact.
Gebruik de schakelaars om
de lichtkap aan of uit te zetten. Waarschuwing: De stekker niet in
het stopcontact steken indien de lichtkap nat is.
Onderhoud:
Waarschuwing:
•
Trek de stekker uit het stopcontact en van alle andere elektrische
apparaten van het terrarium alvorens onderhoud of andere taken
aan het terrarium uit te voeren.
• Bij installatie, verwijderen of vervangen van lampen of bij
onderhoud, installatie of verwijderen van de lichtkap, steeds de
stekker uit het stopcontact verwijderen.
• De draad en het stopcontact van deze lichtkap kunnen niet
worden vervangen, het apparaat moet dan volgens de richtlijnen
van het land waar u zich bevindt, worden gedeponeerd op een
daartoe bestemde plaats.
Het reinigen van het apparaat:
1. Deze lichtkap is NIET waterbestendig, niet blootstellen aan
sproeiwater of hoge vochtigheid. Niet onderdompelen.
2. De ventilatiesleuven zorgen ervoor dat hete lucht kan
ontsnappen, deze mogen in geen geval worden afgedicht.
Verwijder vuil of stof onmiddellijk uit de sleuven, gebruik een
doek om dit te verwijderen.
3. Geen speciaal onderhoud is noodzakelijk voor de Exo Terra®
lichtkap dan regelmatig schoonmaken door middel van een doek.
(Gebruik nooit chemicaliën of detergenten). Om kalkaanslag te
verwijderen gebruikt men best een zurige oplossing zoals azijn.
Daarna met een doek schoonvegen.
4. Het is sterk aan te bevelen om steeds de richtlijnen en
waarschuwingen te volgen in deze instructies.
Garantie
Dit product is gegarandeerd voor een periode van twee jaar op
materialen en werkuren na de dag van aankoop. De garantie is
alleen geldig op vertoon van het gedateerde aankoopbewijs. De
garantie is beperkt tot het herstellen of vervangen van het toestel
en dekt niet de eventuele schade aan verwante objecten. Deze
garantie is alleen geldig bij normaal gebruik van het toestel waarvoor
het is bestemd. De garantie vervalt bij onredelijk gebruik, slechte
installatie, verwaarlozing, modificatie of misbruik. Voor garantie of
wisselstukken, contacteer uw locale Exo Terra dealer of schrijf de
invoerder of verdeler aan van het land waar u zich bevindt.
Service
Indien je een probleem hebt of een vraag over de werking van dit
product, laat ons dan proberen het op te lossen alvorens het product
terug naar de dealer te brengen. De meeste problemen kunnen
worden opgelost met een telefoontje. Indien je ons mailt of schrijft,
gelieve dan alle nuttige gegevens te voorzien zoals modelnummer of
onderdeelnummer, alsook de aard van het probleem.
Voor algemene informatie over onze gehele reeks producten, verken
onze websites op: www.exo-terra.com of www.hagen.com
Distributed by:
Canada: Rolf C. Hagen Inc., Montreal, QC H9X 0A2
U.S.A.: Rolf C. Hagen (U.S.A.) Corp., Mansfield MA. 02048
U.K.: Rolf C. Hagen (U.K.) Ltd. Castleford, W. Yorkshire WF10 5QH
Page 17

32
 Loading...