

Page 1

Original Instructions
EN
FR
IT
NL
Date Published: 01/03/2016Written in UK English
Page 2

ENGLISH
Original Instructions
EN
FR
NL
IT
Page 3
www.evolutionpowertools.com www.evolutionpowertools.com
TABLE OF CONTENTS
English Page 2
Français Page 22
Italiano Pagina 42
Nederlands Pagina 62
INTRODUCTION
Guarantee Page 5
Machine Specification Page 6
Vibration Page 7
Labels and Symbols Page 7
Intended use of this Power Tool Page 8
Prohibited use of this Power Tool Page 8
SAFETY PRECAUTIONS
Electrical Safety Page 9
Outdoor Use Page 9
General Power Tool Safety Instructions Page 9
Additional Safety Instructions Page 11
GETTING STARTED
Unpacking Page 13
Machine Overview Page 14
Assembly and Preparation Page 15
Operating Instructions Page 17
MAINTENANCE
Environmental Protection Page 19
DECLARATION OF CONFORMITY Page 20
THIS INSTRUCTION MANUAL
WAS ORIGINALLY WRITTEN IN ENGLISH
IMPORTANT
Please read these operating and safety
instructions carefully and completely.
For your own safety, if you are uncertain
about any aspect of using this equipment
please access the relevant Technical Helpline,
the number of which can be found on the
Evolution Power Tools website. We operate
several Helplines throughout our worldwide
organization, but Technical help is also
available from your supplier.
WEB
www.evolutionpowertools.com/register
Congratulations on your purchase of an
Evolution Power Tools Machine. Please
complete your product registration ‘online’
as explained in the A4 online guarantee
registration leaflet included with this machine.
You can also scan the QR code found on the
A4 leaflet with a Smart Phone. This will enable
you to validate your machine’s guarantee
period via Evolutions website by entering your
details and thus ensure prompt service if ever
needed. We sincerely thank you for selecting
a product from Evolution Power Tools.
EVOLUTION LIMITED GUARANTEE
Evolution Power Tools reserves the right
to make improvements and modifications
to the product design without prior notice.
Please refer to the guarantee registration
leaflet and/or the packaging for details of
the terms and conditions of the guarantee.
Evolution Power Tools will, within
the guarantee period, and from the original
date of purchase, repair or replace any
goods found to be defective in materials or
workmanship. This guarantee is void if the
tool being returned has been used beyond the
recommendations in the Instruction Manual or
if the machine has been damaged by accident,
neglect, or improper service.
This guarantee does not apply to machines
and / or components which have been altered,
changed, or modified in any way, or subjected
to use beyond recommended capacities
and specifications. Electrical components
are subject to respective manufacturers’
warranties. All goods returned defective shall
be returned prepaid freight to Evolution Power
Tools. Evolution Power Tools reserves the right
to optionally repair or replace it with the same
or equivalent item.
There is no warranty – written or verbal –
for consumable accessories such as (following
list not exhaustive) blades, cutters, drills,
chisels or paddles etc. In no event shall
Evolution Power Tools be liable for loss or
damage resulting directly or indirectly from
the use of our merchandise or from any other
cause. Evolution Power Tools is not liable
for any costs incurred on such goods
or consequential damages.
No officer, employee or agent of Evolution
Power Tools is authorized to make oral
representations of fitness or to waive any
of the foregoing terms of sale and none
shall be binding on Evolution Power Tools.
Questions relating to this limited
guarantee should be directed to the
company’s head office, or call the
appropriate Helpline number.
EN
FR
IT
4 5
NL
Page 4
www.evolutionpowertools.com www.evolutionpowertools.com
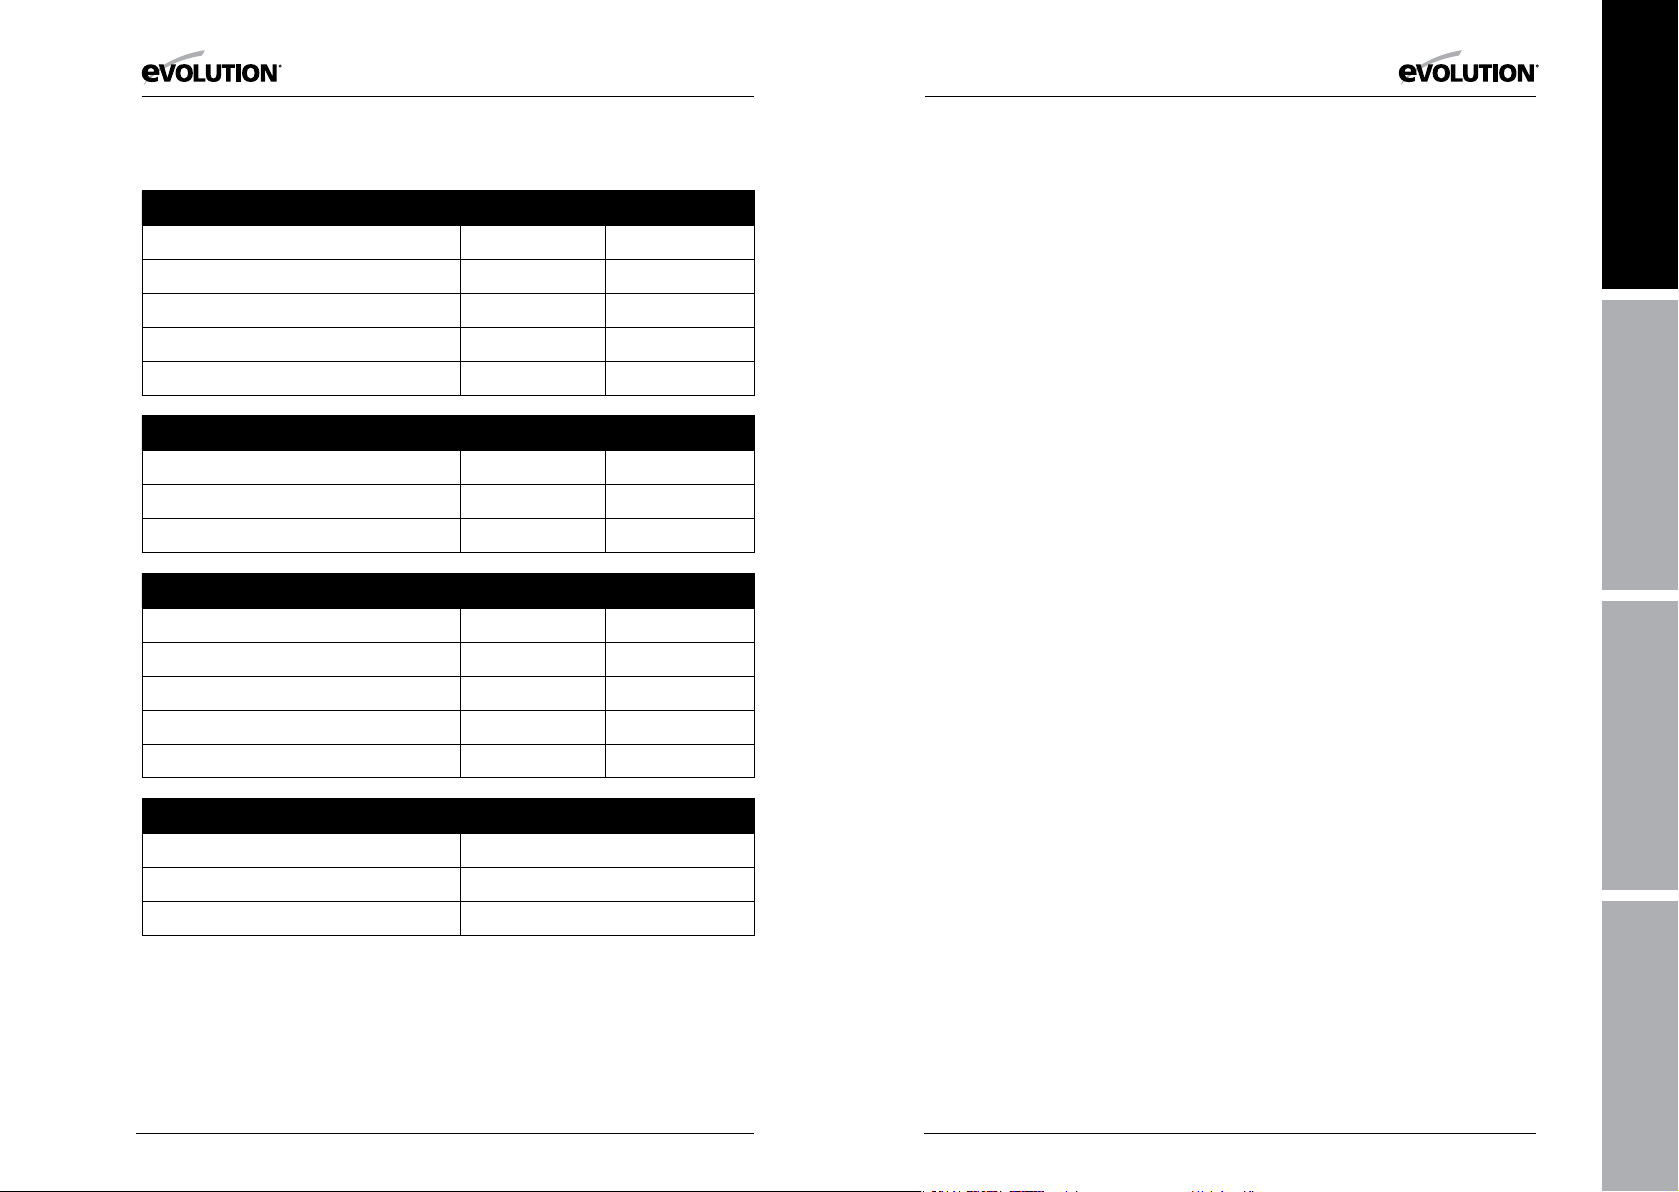
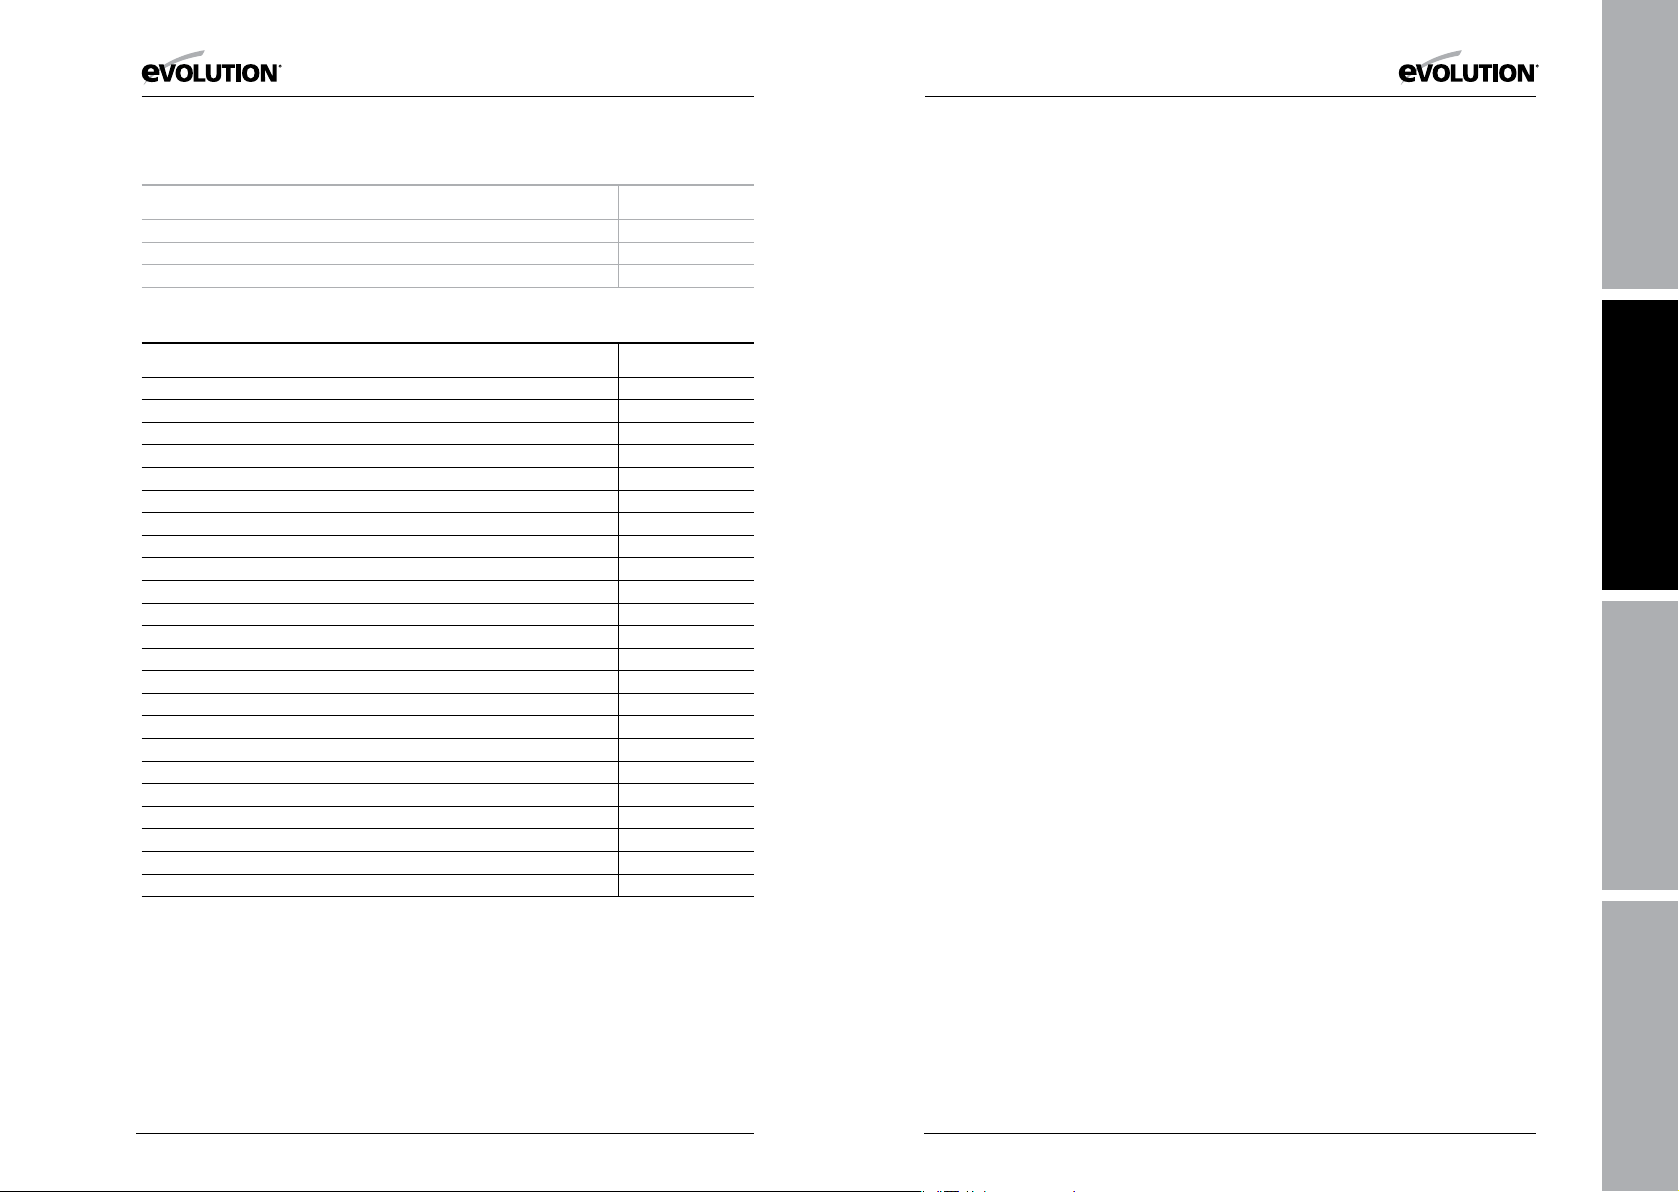
SPECIFICATIONS
MACHINE METRIC IMPERIAL
Motor (USA) 120v ~ 60Hz 1050W 9A
Motor (UK/EU) 230/240v ~ 50Hz 1050W 5A
Motor (UK) 110v ~ 50Hz 1050W 10A
Speed No Load 3500min
-1
Weight 6.5kg 14lbs
CUTTING CAPACITY METRIC IMPERIAL
Mild Steel Plate (Maximum Thickness) 6mm 1/4”
Maximum Cutting at 90
Maximum Cutting at 45
0
0
55mm 2-1/8”
35mm 1-3/8”
BLADE METRIC IMPERIAL
Diameter 185mm 7-1/4”
Bore 20mm 3/4”
Number of Teeth 20 20
Kerf 1.7mm .067”
Speed 3900min
-1
NOISE & VIBRATION DATA
Sound Pressure L
Sound Power Level L
(Under Load) 93 dB(A) K= 3 dB(A)
PA
(Under Load) 104 dB(A) K= 3 dB(A)
WA
Vibration Level (Under Load) 4.99m/s
3500rpm
3900rpm
2
K= 1.5m/s2
Note: The vibration measurement was made
under standard conditions in accordance with:
BS EN 61029-1:2009.
The declared vibration total value has been
measured in accordance with a standard test
method and may be used for comparing one
tool with another.
The declared vibration total value may also be
used in a preliminary assessment of exposure.
VIBRATION
WARNING: When using this machine the
operator can be exposed to high levels of
vibration transmitted to the hand and arm.
It is possible that the operator could develop
“Vibration white finger disease” (Raynaud
syndrome). This condition can reduce the
sensitivity of the hand to temperature as
well as producing general numbness.
Prolonged or regular users of this machine
should monitor the condition of their hands
and fingers closely. If any of the symptoms
become evident, seek immediate
medical advice.
• The measurement and assessment of
human exposure to hand-transmitted
vibration in the workplace is given in:
BS EN ISO 5349-1:2001 and
BS EN ISO 5349-2:2002.
• Many factors can influence the actual
vibration level during operation e.g. the
work surfaces condition and orientation
and the type and condition of the machine
being used. Before each use, such factors
should be assessed, and where possible
appropriate working practices adopted.
Managing these factors can help reduce
the effects of vibration:
Handling
• Handle the machine with care, allowing
the machine to do the work.
• Avoid using excessive physical effort on
any of the machines controls.
• Consider your security and stability,
and the orientation of the machine
during use.
Work Surface
• Consider the work surface material;
its condition, density, strength,
rigidity and orientation.
WARNING: The vibration emission during
actual use of the power tool can differ from
the declared total value depending on the
ways in which the tool is used.
The need to identify safety measures
and to protect the operator are based on
an estimation of exposure in the actual
conditions of use (taking account of all parts
of the operating cycle, such as the times the
tool is switched off, when it is running idle,
in addition to trigger time).
LABELS & SYMBOLS
WARNING: Do not operate this machine
if warning and/or instruction labels are
missing or damaged. Contact Evolution
Power Tools for replacement labels.
Note: All or some of the following symbols
may appear in the manual or on the product.
EN
FR
IT
NL
6 7
Page 5
www.evolutionpowertools.com www.evolutionpowertools.com
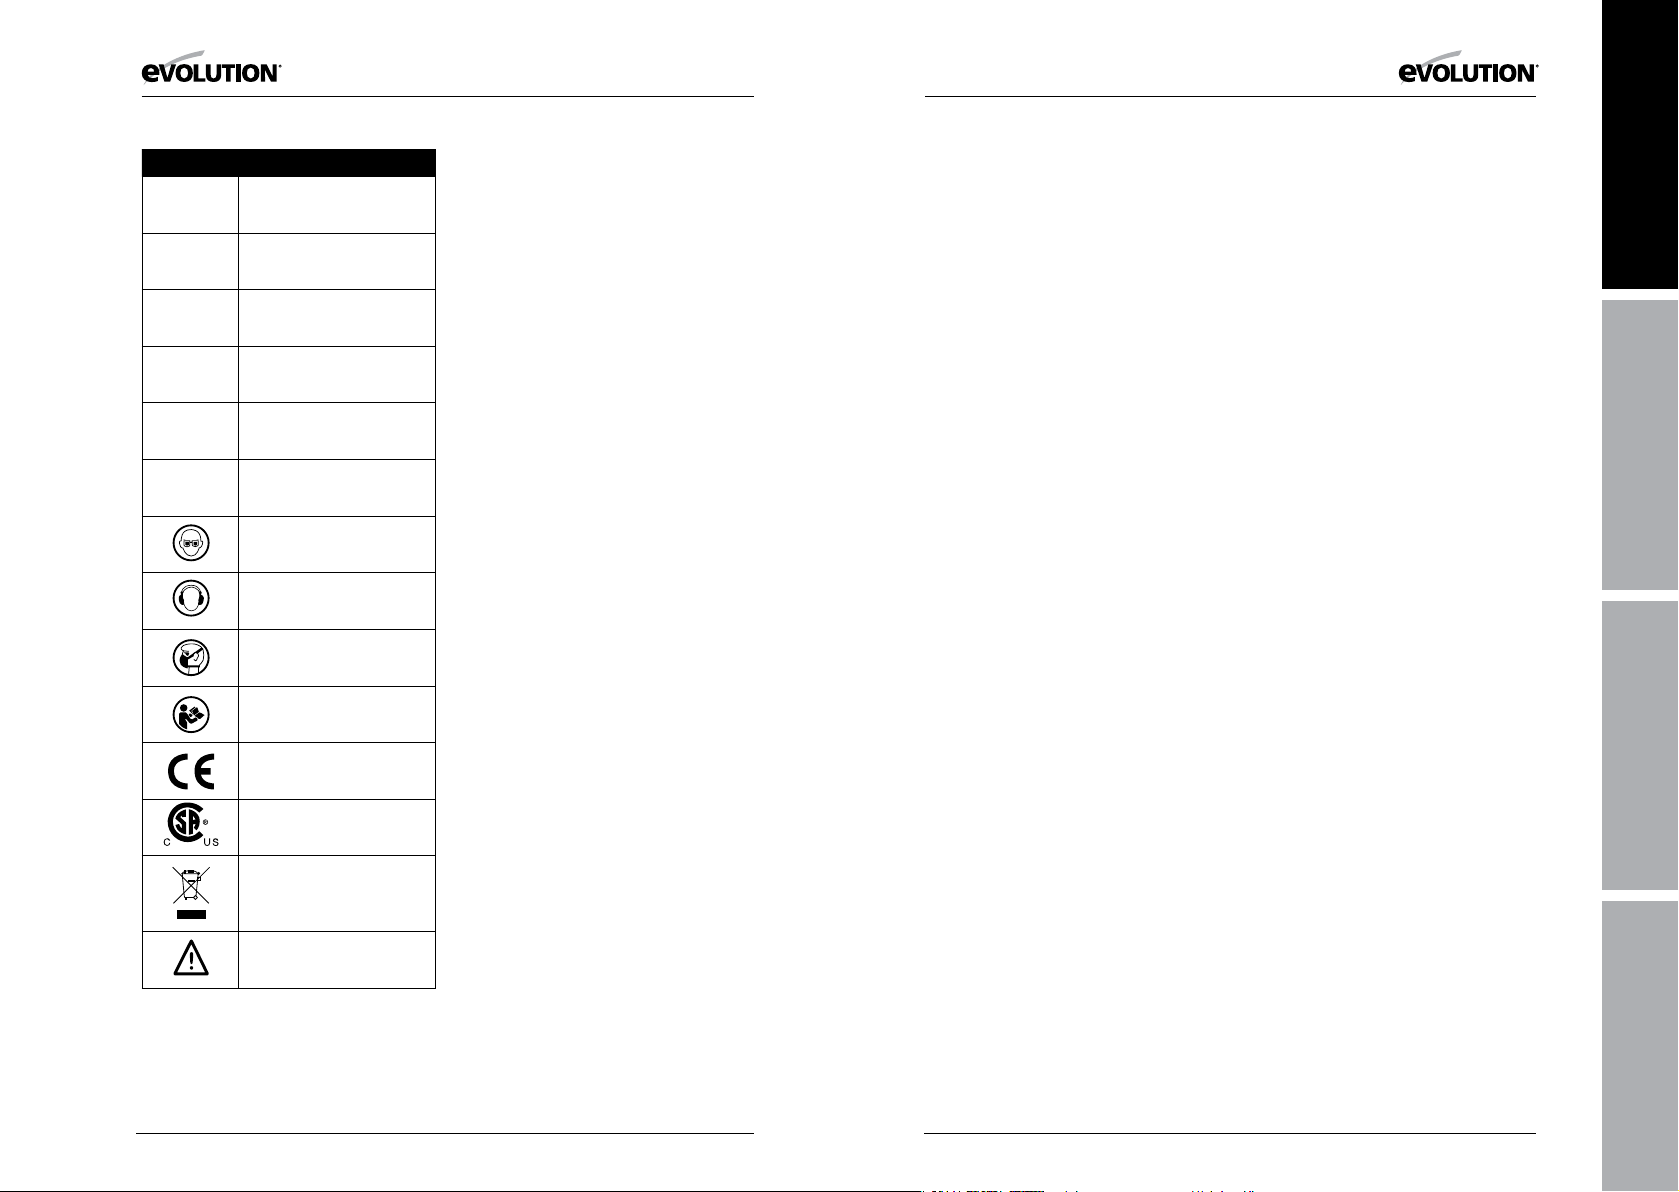
Symbol Description
Volts
Amperes
Hertz
Speed
Alternating Current
No Load Speed
Wear Safety Goggles
Wear Ear Protection
Wear Dust Protection
Read Instructions
CE Certification
CSA Certification
Waste Electrical &
Electronic Equipment
Warning
Hz
Min
n
V
A
-1
~
o
INTENDED USE OF THIS POWER TOOL
WARNING: This product is a Hand Operated
Circular Saw and has been designed to be
used with special Evolution blades. Only use
accessories designed for use in this machine
and/or those recommended specifically
by Evolution Power Tools Ltd.
When fitted with an appropriate blade
this machine can be used to cut:
Mild Steel
Aluminium
Wood
PROHIBITED USE OF THIS POWER TOOL
WARNING: This product is a Hand Operated
Circular Saw and must only be used as such.
It must not be modified in any way, or used to
power any other equipment or drive any other
accessories other than those mentioned in this
Instruction Manual.
WARNING: This machine is not intended
for use by persons (including children) with
reduced physical, sensory
or mental capabilities, or lack of experience
and knowledge, unless they have been given
supervision or instruction concerning the safe
use of the machine by a person responsible
for their safety and who is competent
in its safe use.
Children should be supervised to ensure
that they do not have access to, and are
not allowed to play with, this machine.
ELECTRICAL SAFETY
This machine is fitted with the correct
moulded plug and mains lead for the
designated market. If the supply cord is
damaged, it must be replaced by a special
cord or assembly available from the
manufacturers or its service agent.
OUTDOOR USE
WARNING: For your protection if this tool is to
be used outdoors it should not be exposed to
rain, or used in damp locations. Do not place
the tool on damp surfaces. Use a clean, dry
workbench if available. For added protection
use a residual current device (R.C.D.) that will
interrupt the supply if the leakage current to
earth exceeds 30mA for 30ms. Always check
the operation of the residual current device
(R.C.D.) before using the machine.
If an extension cable is required it must be a
suitable type for use outdoors and so labelled.
The manufacturers instructions should be
followed when using an extension cable.
POWER TOOL GENERAL
SAFETY INSTRUCTIONS
(These General Power Tool Safety Instructions
are as specified in BS EN 60745-1:2009
& EN 61029-1:2009).
WARNING: Read all safety warnings and
instructions. Failure to follow the warnings
and instructions may result in electric shock,
fire and/ or serious injury.
Save all warnings and instructions for
future reference. The term “power tool” in
the warnings refers to your mains-operated
(corded) power tool or battery-operated
(cordless) power tool.
1) General Power Tool
Safety Warnings [Work area safety]
a) Keep work area clean and well lit.
Cluttered or dark areas invite accidents.
b) Do not operate power tools in explosive
atmospheres, such as in the presence of
flammable liquids, gasses or dust. Power
tools create sparks which may ignite the
dust or fumes.
c) Keep children and bystanders away while
operating power tool. Distractions can cause
you to lose control.
2) General Power Tool Safety Warnings
[Electrical Safety]
a) Power tool plugs must match the outlet.
Never modify the plug in any way. Do not use
any adapter plugs with earthed (grounded)
power tools. Unmodified plugs and matching
outlets will reduce the risk of electric shock.
b) Avoid body contact with earthed or
grounded surfaces, such as pipes, radiators,
ranges and refrigerators. There is an
increased risk of electric shock if your body
is earthed or grounded.
c) Do not expose power tools to rain or wet
conditions. Water entering a power tool will
increase the risk of electric shock.
d) Do not abuse the cord. Never use the cord
for carrying, pulling orunplugging the power
tool. Keep cord away from heat, oil, sharp edges
or moving parts. Damaged or entangled cords
increase the risk of electric shock.
e) When operating a power tool outdoors,
use an extension cord suitable for outdoor
use. Use of a cord suitable for outdoor use
reduces the risk of electric shock.
f) If operating a power tool in a damp
location is unavoidable, use a residual
current device (RCD) protected supply.
Use of an RCD reduces the risk of
electric shock.
EN
FR
IT
NL
8 9
Page 6
www.evolutionpowertools.com www.evolutionpowertools.com
3) General Power Tool Safety Warnings
[Personal Safety].
a) Stay alert, watch what you are doing and
use common sense when operating a power
tool. Do not use a power tool while you are
tired or under the influence of drugs, alcohol
or medication. A moment of inattention while
operating power tools may result in serious
personal injury.
b) Use personal protective equipment.
Always wear eye protection. Protective
equipment such as dust masks, non-skid safety
shoes, hard hat or hearing protection used
for appropriate conditions will reduce
personal injuries.
c) Prevent unintentional starting. Ensure the
switch is in the off-position before connecting
to power source and or battery pack, picking
up or carrying the tool. Carrying power tools
with your finger on the switch or energising
the power tools that have the switch on
invites accidents.
d) Remove any adjusting key or wrench
before turning the power tool on. A wrench
or key left attached to a rotating part of
a power tool may result in personal injury.
e) Do not overreach. Keep proper footing
and balance at all times. This enables better
control of the power tool in unexpected
situations.
f) Dress properly. Do not wear loose clothing
or jewellery. Keep your hair, clothing and
gloves away from moving parts. Loose clothes,
jewellery or long hair can be caught in
moving parts.
g) If devices are provided for the connection
of dust extraction and collection facilities,
ensure that these are connected and
properly used. Use of dust collection
can reduce dust-related hazards.
4) General Power Tool Safety Warnings
[Power tool use and care].
a) Do not force the power tool. Use the
correct power tool for your application. The
correct power tool will do the job better and
safer at a rate for which it was designed.
b) Do not use the power tool if the switch
does not turn it on or off. Any power tool
that cannot be controlled with the switch
is dangerous and must be repaired.
c) Disconnect the power tool from the
power source and/or battery pack from the
power tool before making any adjustments,
changing accessories, or storing power
tools. Such preventative safety measures
reduce the risk of starting the power
tool accidentally.
d) Store idle power tools out of the reach
of children and do not allow persons
unfamiliar with the power tool or these
Instructions to operate the power tool.
Power tools are dangerous in the hands of
untrained users.
e) Maintain power tools. Check for
misalignment or binding of moving parts,
breakage of moving parts and any other
condition that may affect the power tools
operation. If damaged, have the power tool
repaired before use. Many accidents are
caused by poorly maintained power tools.
f) Keep cutting tools sharp and clean.
Properly maintained cutting tools with
sharp cutting edges are less likely to bind
and are easier to control.
g) Use the power tool, accessories and
tool bits etc. in accordance with these
instructions, taking into account the
working conditions and the work to
be performed. Use of the power tool for
operations different fromthose intended
could result in a hazardous situation.
5) General Power Tool
Safety Warnings [Service]
a) Have your power tool serviced by a
qualified repair person using only identical
replacement parts. This will ensure that the
safety of the power tool is maintained.
HEALTH ADVICE
WARNING: When using this machine,
dust particles may be produced. In some
instances, depending on the materials you
are working with, this dust can be particularly
harmful. If you suspect that paint on the
surface of material you wish to cut contains
lead, seek professional advice. Lead based
paints should only be removed by
a professional and you should not
attempt to remove it yourself.
Once the dust has been deposited on
surfaces, hand to mouth contact can result
in the ingestion of lead. Exposure to even
low levels of lead can cause irreversible brain
and nervous system damage. The young and
unborn children are particularly vulnerable.
You are advised to consider the risks
associated with the materials you are working
with and to reduce the risk of exposure.
As some materials can produce dust that may
be hazardous to your health, we recommend
the use of an approved face mask with
replaceable filters when using this machine.
You should always:
• Work in a well-ventilated area.
• Work with approved safety equipment, such
as dust masks that are specially designed to
filter microscopic particles.
WARNING: the operation of any power tool
can result in foreign objects being thrown
towards your eyes, which could result in
severe eye damage. Before beginning power
tool operation, always wear safety goggles
or safety glasses with side shield or a full face
shield where necessary.
ADDITIONAL SAFETY INSTRUCTIONS
a) DANGER: Keep hands away from cutting
area and the blade. Keep your second hand
on auxiliary handle, or motor housing. If both
hands are holding the saw, they cannot be cut
by the blade.
b) Do not reach underneath the workpiece.
The guard cannot protect you from the blade
below the workpiece.
c) Adjust the cutting depth to the thickness
of the workpiece. Less than a full tooth of
the blade teeth should be visible below the
workpiece.
d) Never hold piece being cut in your hands
or across your leg. Secure the workpiece to
a stable platform. It is important to support
the work properly to minimize body exposure,
blade binding, or loss of control.
e) Hold power tool by insulated gripping
surfaces when performing an operation
where the cutting tool may contact hidden
wiring or its own cord. Contact with a “live”
wire will also make exposed metal parts of the
power tool “live” and shock the operator.
f) When ripping always use a rip fence
or straight edge guide. This improves the
accuracy of cut and reduces the chance
of blade binding.
g) Always use blades with correct size and
shape (diamond versus round) of arbor
holes. Blades that do not match the mounting
hardware of the saw will run eccentrically,
causing loss of control.
h) Never use damaged or incorrect blade
washers or bolt. The blade washers and
bolt were specially designed for your saw,
for optimum performance and safety
of operation.
EN
FR
IT
NL
10 11
Page 7
www.evolutionpowertools.com www.evolutionpowertools.com
i) Do not use High Speed Steel (HSS)
saw blades.
j) Inspect the machine and the blade
before each use. Do not use deformed,
cracked, worn or otherwise damaged blades.
k) Never use the saw without the original
guard protection system. Do not lock
the moving guard in the open position.
Ensure that the guard operates freely
without jamming.
l) Only use blades that comply with the
characteristics specified in this manual.
Before using accessories, always compare
the maximum allowed RPM of the
accessory with the RPM of the machine.
Causes and operator
prevention of kickback:
Kickback is a sudden reaction to a pinched,
bound or misaligned saw blade, causing an
uncontrolled saw to lift up and out of the
workpiece toward the operator:
1. When the blade is pinched or bound
tightly by the kerf closing down, the blade
stalls and the motor reaction drives the
unit rapidly back toward the operator;
2. If the blade becomes twisted or
misaligned in the cut, the teeth at the
back edge of the blade can dig into the top
surface of the workpiece causing the blade
to climb out of the kerf and jump back
towards the operator.
Kickback is the result of saw misuse and/
or incorrect operating procedures or
conditions and can be avoided by taking
proper precautions as given below.
a) Maintain a firm grip with both hands
on the saw and position your arms to
resist kickback forces. Position your body
to either side of the blade, but not in line
with the blade. Kickback could cause the
saw to jump backwards, but kickback forces
can be controlled by the operator, if proper
precautions are taken.
b) If the blades are binding, or when
interrupting a cut for any reason, release
the trigger and hold the saw motionless
in the material until the blades come to a
complete stop. Never attempt to remove the
saw from the work or pull the saw backward
while the blades are in motion or kickback may
occur. Investigate and take corrective actions
to eliminate the cause of blade binding.
c) When restarting a saw in the workpiece,
centre the saw blade in the kerf and check
that saw teeth are not engaged into the
material. If saw blade is binding, it may walk
up or kickback from the workpiece as the saw
is restarted.
d) Support large panels to minimise
the risk of blade pinching and kickback.
Large panels tend to sag under their own
weight. Supports must be placed under
the panel on both sides, near the line
of cut and near the edge of the panel.
e) Blade depth and bevel adjusting locking
levers must be tight and secure before
making a cut. If the blade adjustment
shifts while cutting it may cause binding
and kickback.
f) Do not use dull or damaged blades.
Unsharpened or improperly set blades
produce a narrow kerf causing excessive
friction, blade binding and kickback.
g) Use extra caution when making a “plunge
cut” into existing walls or other blind areas.
The protruding blade may cut objects that
can cause kickback.
h) Check lower guard for proper closing
before each use. Do not operate the saw if
lower guard does not move freely and close
instantly. Never clamp or tie the lower guard
into the open position. If saw is accidentally
dropped, lower guard may be bent. Raise the
lower guard with the retracting handle and
make sure it moves freely and does not touch
the blade or any other part, in all angles and
depths of cut.
i) Check the operation of the lower guard
spring. If the guard and the spring are not
operating properly, they must be serviced
before use. Lower guard may operate
sluggishly due to damaged parts, gummy
deposits, or a build-up of debris.
j) Lower guard may be retracted manually
only for special cuts such as “plunge cuts”
and “compound cuts.” Raise lower guard
by retracting handle and as soon as blade
enters the material, the lower guard must be
released. For all other sawing, the lower guard
should operate automatically.
k) Always observe that the lower
guard is covering the blade before
placing saw down on a bench or the floor.
An unprotected, coasting blade will cause the
saw to walk backwards, cutting whatever is in
its path. Be aware of the time it takes for the
blade to stop after switch is released.
WARNING: If any parts are missing, do not
operate your machine until the missing parts
are replaced. Failure to follow this rule could
result in serious personal injury.
GETTING STARTED - UNPACKING
Caution: This packaging contains sharp
objects. Take care when unpacking. Remove
the machine, together with the accessories
supplied from the packaging. Check carefully
to ensure that the machine is in good
condition and account for all the accessories
listed in this manual. Also make sure that all
the accessories are complete.
If any parts are found to be missing,
the machine and its accessories should
be returned together in their original
packaging to the retailer.
Do not throw the packaging away;
keep it safe throughout the guarantee
period. Dispose of the packaging in an
environmentally responsible manner.
Recycle if possible.
Do not let children play with empty plastic
bags due to the risk of suffocation.
ITEMS SUPPLIED
Description Quantity
Instruction Manual 1
Multipurpose Blade (Fitted) 1
Hex Key (Blade Change) 1
Discharge Port Exhaust 1
Parallel Edge Guide 1
Carry Case 1
ADDITIONAL ACCESSORIES
In addition to the standard items supplied
with this machine the following accessories
are also available from the Evolution online
shop at www.evolutionpowertools.com
or from your local retailer.
Description Part No
Multipurpose Blade RAGE
185
Diamond Blade DIAMOND
185
EN
FR
IT
NL
12 13
Page 8
www.evolutionpowertools.com www.evolutionpowertools.com
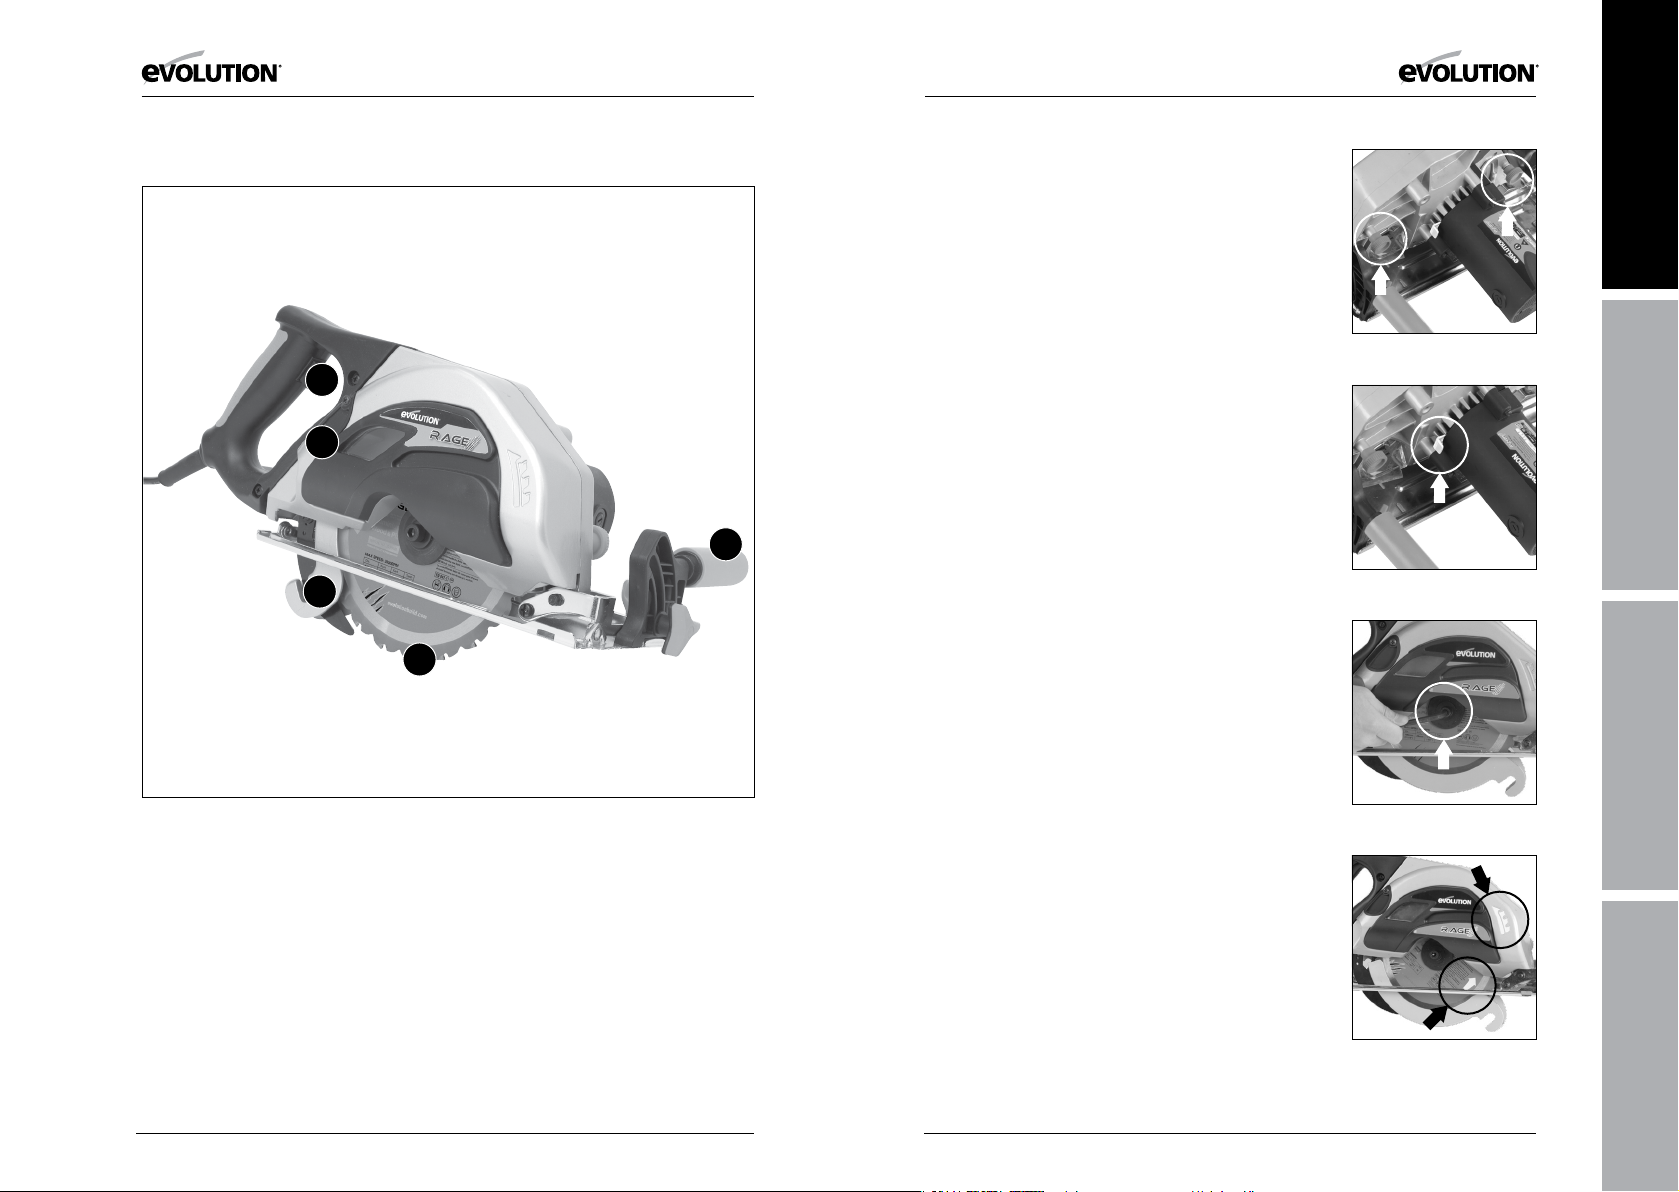
MACHINE OVERVIEW
GETTING STARTED - PREPARATION
WARNING: Always disconnect the saw from the power source
before making adjustments.
WARNING: Never start the saw with the cutting edge of the
saw blade in contact with the workpiece surface. Do not retract
blade guard manually. Guard retracts automatically.
This saw is equipped with an approved cord and plug for its
intended Country of use. Do not alter or modify the power cord.
1
3
2
4
5
Installing or Removing a Blade
WARNING: Only use genuine Evolution blades which are designed
for this machine. Ensure that the maximum speed of the blade is
compatible with the machine. Only perform this operation with
the machine disconnected from the power supply.
Note: It is recommended that the operator considers wearing
protective gloves when handling the blade during installation
or when changing the machines blade.
1. Place saw on a level, secure surface.
2. Remove the chip collector from the machine by undoing the
(2) large thumb screws. (Fig. 1)
Note: The chip collector thumb screws are ‘captive’ and cannot
be removed from the machine.
Fig. 1
Fig. 2
EN
FR
1. ON/OFF TRIGGER SWITCH
2. AUXILLARY FRONT HANDLE
3. DISCHARGE PORT
4. LOWER BLADE GUARD
5. FITTED BLADE IN SITU
3. Lock the machine arbor by engaging the arbor lock. (Fig. 2)
4. Using the supplied Allen Key loosen and remove the arbor
socket headed screw and outer blade drive flange. (Fig. 3)
5. Remove the saw blade.
6. Thoroughly clean inner and outer blade drive flanges and
blade mounting surface before installing a new blade.
7. Ensure that the direction of rotation arrows printed on the
blade, match the direction of rotation arrow found on the chip
collection cover. (Fig. 4)
8. Reinstall the outer drive flange and the arbor socket headed
screw.
9. Engage the arbor lock and tighten the arbor socket headed
screw securely using the Allen key.
Note : The socket headed arbor screw has a RH thread.
14 15
Fig. 3
Fig. 4
IT
NL
Page 9
www.evolutionpowertools.com www.evolutionpowertools.com
Fig. 5
Fig. 6
Fig. 7
10. Replace the chip collector and securely tighten the two
thumb screws.
11. Check that the arbor lock is fully released by manually
rotating the blade.
12. Check the operation of the safety guard.
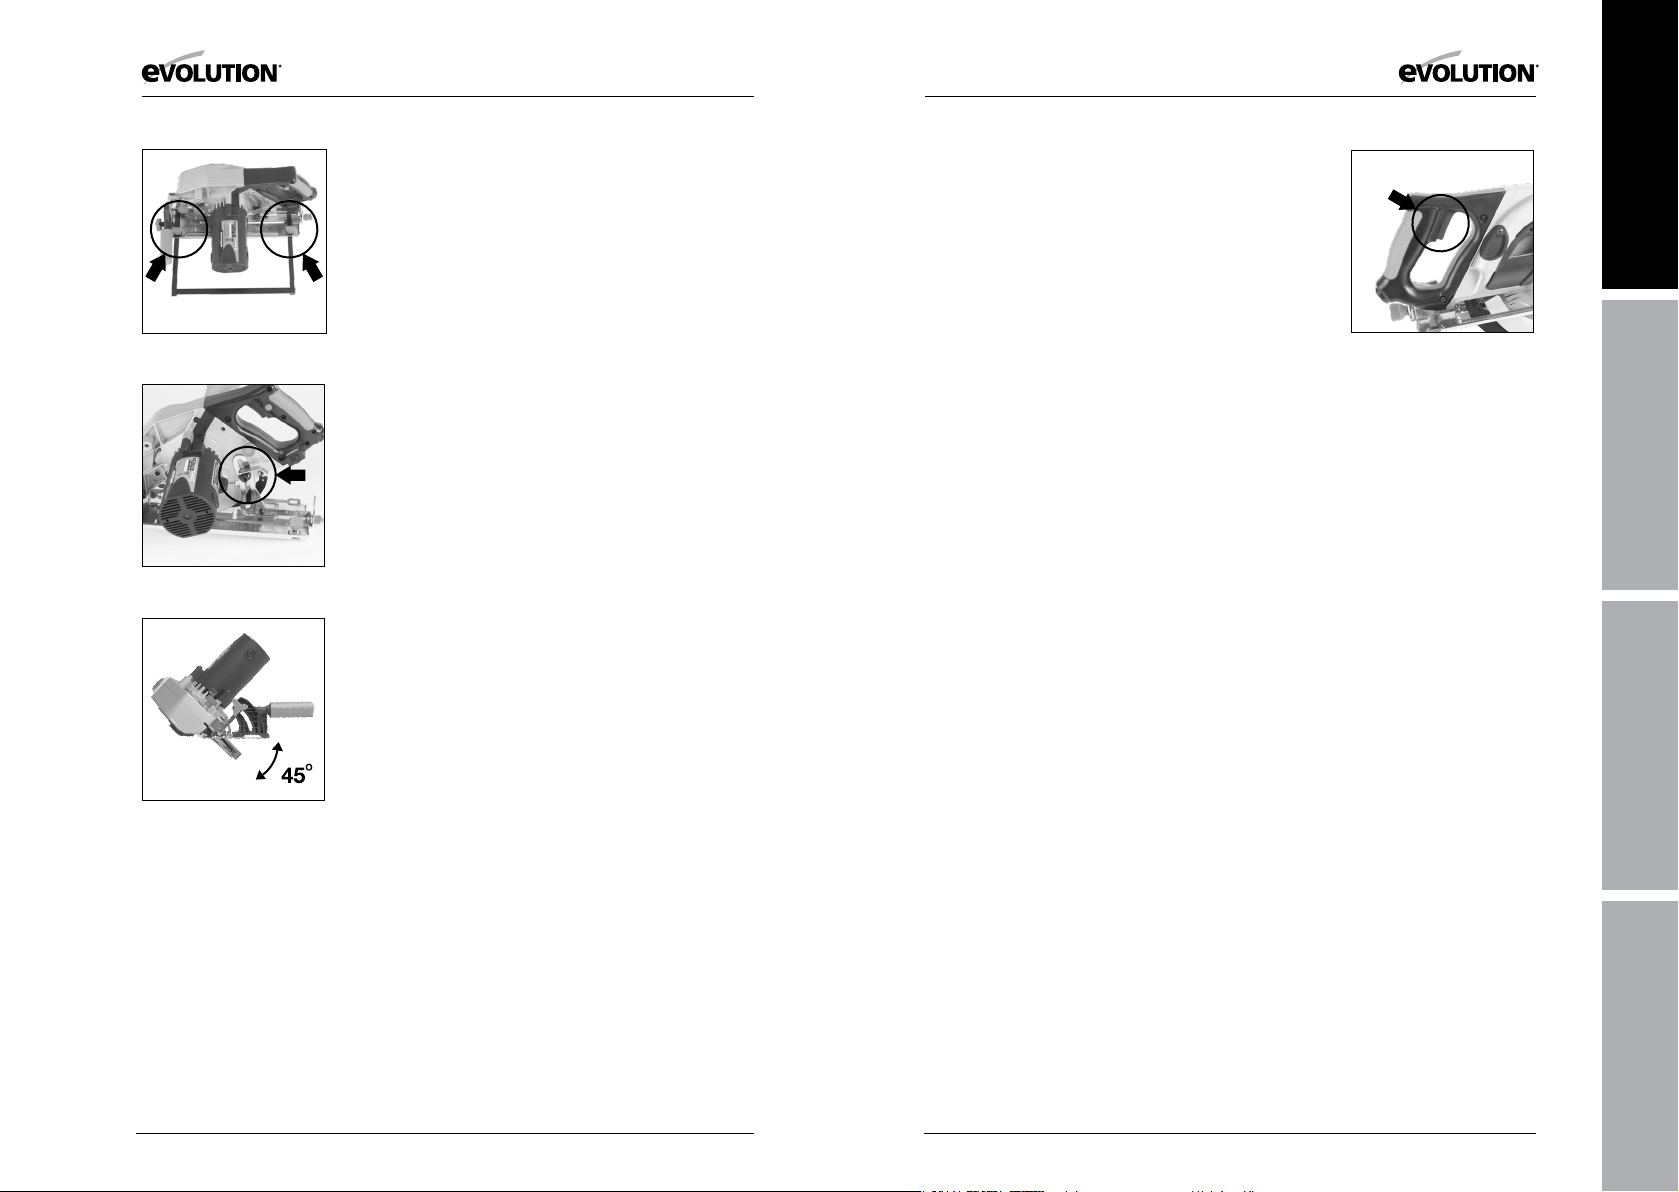
Parallel Edge Guide
A parallel guide (for help when rip cutting) can be fitted to the
sole plate of the machine The guides arms should be inserted
into the rectangular slots in the turned up edges of the sole
plate, and slid under the locking thumb screws. (Fig. 5)
Note: The edge guide can be fitted to either side of the sole
plate and should only be fitted and adjusted with the machine
disconnected from the power supply.
Adjust the edge guide so that it is at the required distance from
the blade and tighten the two thumb screws. Check that the
edge guide is parallel to the saw blade.
Adjustment of the Cutting Depth
Release the Lever Lock to adjust to the required cutting depth.
Adjust the cutting depth to the thickness of the workpiece.
Less than a full tooth of the blade teeth should be visible below
the workpiece. Tighten the Lever Lock securely to lock in the
required position. (Fig.6)
Adjustment of the Cutting Angle
1. Loosen the Bevel Locking Screw found at the front of the saw.
2. Loosen the Rear Bevel Locking Screw found at the rear of the
machines sole plate.
3. Tilt the blade to the required angle. (Fig. 7)
4. Tighten both Bevel Locking Screws securely
Operating Advice
Carry out routine safety checks each time you use the machine.
Check that all safety guards are operating correctly, and that all
adjustment handles/screws are tightened securely.
Check that the blade is secure and installed correctly. Also check
that it is the correct blade for the material being cut.
Check the integrity of the power cord.
Always clamp the workpiece to a rigid support such as a bench
or saw horse whenever possible.
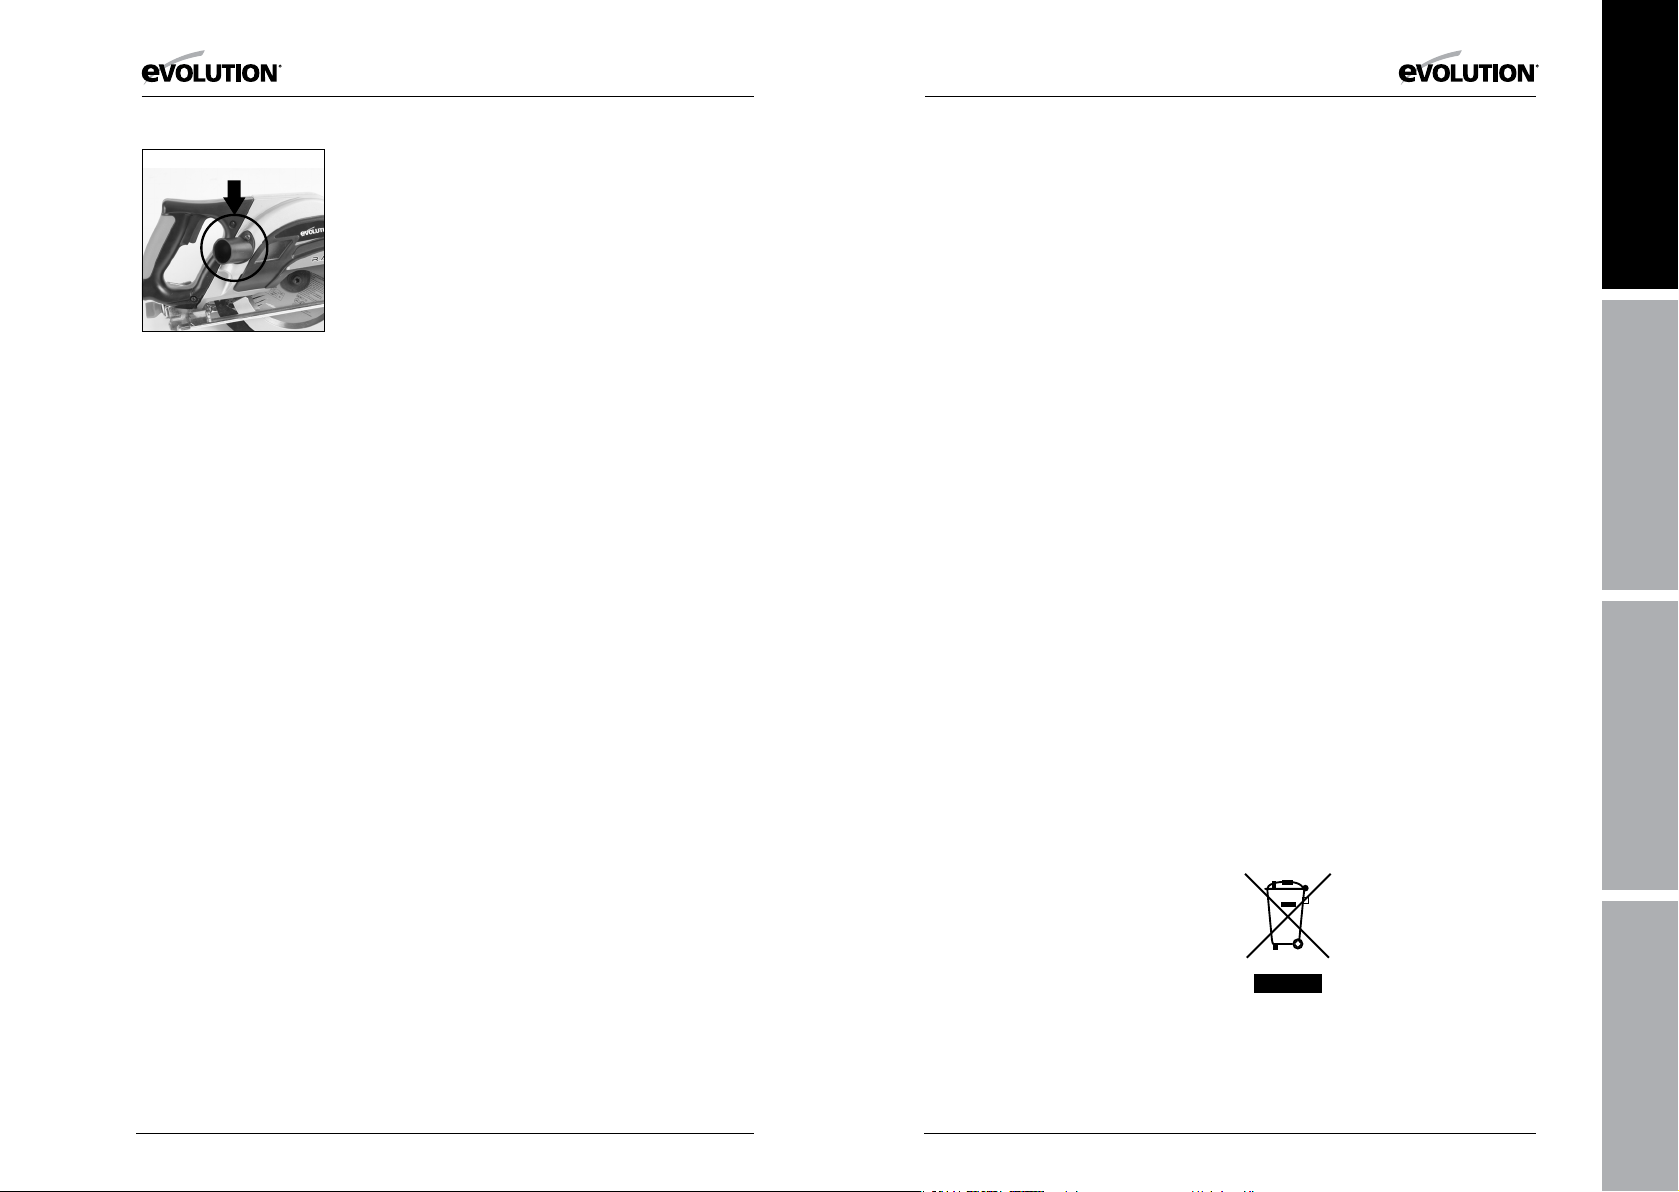
ON/OFF Trigger Switch
This machine is equipped with a safety start trigger switch.
To start the machine:
• Push in the safety lock button on the side of the
handle with your thumb.
• Depress the main trigger switch to start the motor. (Fig. 8)
Chip Collector
This machine is fitted with a chip collector to capture metal
chips. The chip collector cover plate is provided with a
transparent ‘window’ so that the operator can see the contents
and empty when necessary.
To remove and empty the chip collector:
• Loosen the two chip collector thumb screws.
• Ease the chip collector from the machine.
• Empty the contents of the chip collector by tipping the
collector upside down over a suitable waste container,
allowing the contents to fall out.
EN
Fig. 8
FR
IT
Note: An angle scale (0
O
-45O) is incorporated into the Bevel
Locking quadrant to aid setting.
16 17
Note: To maintain operational efficiency we recommend that
the collector is emptied when approximately 60% full. Dispose
of the contents of the chip collector in an environmentally
responsible manner.
• Replace the chip collector and securely tighten
the (2) thumb screws.
NL
Page 10
www.evolutionpowertools.com www.evolutionpowertools.com
Fig. 9
Discharge Port
When cutting wood the Discharge Port Exhaust should be fitted
to the chip collector cover Discharge Port.
To fit the Discharge Port Exhaust
• Remove the Discharge Port blanking cover by unscrewing
the cross headed screw.
• Pull the blanking cover from the Discharge Port and safely
store for future use.
• Fit the Discharge Port Exhaust in place of the blanking cover.
(Fig. 9) Wood chips will be ejected from the Discharge Port
Exhaust during cutting operations.
When cutting has been completed, remove the Exhaust Port
and replace the blanking cover and tighten the fixing screw
securely.
Cutting Advice
The operator should wear all relevant PPE (Personal Protection
Equipment) necessary for the job at hand. This could include
safety glasses, dust masks, safety shoes etc.
The operator should always be aware of the position and
routing of the power cable.
• Do not force the machine.
• Allow the speed of the saw blade do the work. Cutting
performance will not be improved by applying excessive
pressure to the machine, and blade life will be reduced.
• When using the parallel edge guide, ensure that it is parallel
with the blade. The blade and/or motor could become
damaged if the machine is used with an incorrectly adjusted
parallel edge guide.
• To set the guide, loosen the two retaining screws, and adjust
the guide to the required position. Tighten the locking screws.
• Place front edge of sole plate squarely on the workpiece
before starting the motor.
• When starting a cut, sight the cutting line with the line of
cut guide, taking care to introduce the blade to the material
slowly, so as not to damage its teeth.
• Use both hands to move the saw forwards the work piece.
• Apply smooth, constant pressure to move the saw forwards
through the workpiece.
When a cut has been completed release the
ON/OFF trigger switch and allow the blade to
come to a complete halt. Do not apply lateral
pressure to the blade disc in an attempt to
slow it down more quickly.
WARNING: If the motor should stop or stall
whilst a cut is being attempted release the
trigger switch immediately and disconnect
the machine from the power supply. Remove
the machine from the workpiece before
investigating the cause and attempting to
restart the motor.
Note: This saw is fitted with an overload
protection device. This is designed to prevent
overloading and consequent damage to the
motor. If this feature ‘trips’, the motor stops
and will not operate.
Allow the machine to cool down and then press
the ‘reset switch’ at the base of the main handle.
MAINTENANCE
Note: Any maintenance must be carried
out with the machine switched off and
disconnected from the power supply.
Check that all safety features and guards are
operating correctly on a regular basis. Only use
this machine if all guards/safety features are
fully operational.
All motor bearings in this machine are
lubricated for life. No further lubrication
is required.
Use a clean, slightly damp cloth to clean
the plastic parts of the machine. Do not use
solvents or similar products which could
damage the plastic parts.
WARNING: Do not attempt to clean by
inserting pointed objects through openings
in the machines casings etc. The machines air
vents should be cleaned using compressed
dry air.
Excessive sparking may indicate the presence of
dirt in the motor or worn out carbon brushes.
Brush Checking and Replacement
To replace the motor brushes:
• Disconnect the machine from the
power supply.
• Place the machine on a level, secure surface.
• Remove the (2) motor brush retainer
cap screws.
• Withdraw the brushes.
Note: If the Carbon rod is less than 6mm long
or if there are signs of burning or damage,
replace the brushes.
• Fit the new brushes.
• Refit the motor brush retainer caps.
• Run the saw without load for several
minutes after brush replacement to aid the
‘bedding in’ process.
ENVIRONMENTAL PROTECTION
Waste electrical products should not be
disposed of with household waste. Please
recycle where facilities exist. Check with your
Local Authority or retailer for recycling advice
EN
FR
IT
NL
18 19
Page 11
www.evolutionpowertools.com www.evolutionpowertools.com
EC DECLARATION OF CONFORMITY
In accordance with EN ISO 17050-1:2004
The manufacturer of the product covered by this Declaration is:
Evolution Power Tools, Venture One, Longacre Close, Holbrook Industrial Estate, Sheffield, S20 3FR.
The manufacturer hereby declares that the machine as detailed in this declaration fulfils all the
relevant provisions of the Machinery Directive and other appropriate directives as detailed below.
The manufacture further declares that the machine as detailed in this declaration, where
applicable, fulfils the relevant provisions of the Essential Health and Safety requirements.
The Directives covered by this Declaration are as detailed below:
2006/42/EC. Machinery Directive.
2004/108/EC. (until Apr 19th 2016) Electromagnetic Compatibility Directive.
2014/30/EU. (starting from Apr 20th 2016) Electromagnetic Compatibility Directive.
93/68/EC. The CE Marking Directive.
2011/65/EU. The Restriction of the Use of certain Hazardous
Substances in Electrical Equipment (RoHS) Directive.
2002/96/EC as The Waste Electrical and Electronic Equipment (WEEE) Directive.
amended by
2003/108/EC .
And is in conformity with the applicable requirements of the following documents:
EN55014-1 : 2006 • EN55014-2 : 1997+A1 • EN61000-3-2 : 2006 • EN61000-3-3 : 1995+A1+A2
EN60745-1 : 2003+A1 • EN60745-2-5 : 2003 • EN60825-1 : 1994+A1+A2
Product Details
Description: RAGE 185mm (7-1/4”) MULTIPURPOSE CIRCULAR SAW
Evolution Model No: RAGE1851 / RAGE1852 / RAGE1852EU
Brand Name: EVOLUTION
Voltage: 110V / 230V ~ 50Hz
Input: 1050W
NOTES
EN
FR
IT
The technical documentation required to demonstrate that the product meets the requirements
of directive has been compiled and is available for inspection by the relevant enforcement
authorities, and verifies that our technical file contains the documents listed above
and that they are the correct standards for the product as detailed above.
Name and address of technical documentation holder.
Signed: Print: Matthew Gavins - Group Chief Executive
Date: 01/03/2016
20 21
NL
Page 12

EN
FRANçAIS
Traduction D’original
FR
IT
NL
Page 13
www.evolutionpowertools.com www.evolutionpowertools.com
TABLE DES MATIERES
English Page 2
Français Page 22
Italiano Pagina 42
Nederlands Pagina 62
INTRODUCTION
Garantie Page 25
Spécifications de l’outil Page 26
Vibrations Page 27
Etiquettes et symboles Page 27
Utilisation prévue pour cet outil électrique Page 28
Utilisation prohibée pour cet outil électrique Page 28
PRECAUTIONS DE SECURITE
Sécurité électrique Page 29
Utilisation extérieure Page 29
Instructions générales concernant les outils électriques Page 29
Instructions de sécurité supplémentaires Page 31
COMMENCER AVEC L’OUTIL
Déballage Page 33
Présentation de l’outil Page 34
Assemblage et préparation Page 35
Instructions d’utilisation Page 37
ENTRETIEN
Protection de l’environnement Page 39
DECLARATION DE CONFORMITE Page 40
LA LANGUE D’ORIGINE DE CE MANUEL
EST L’ANGLAIS
IMPORTANT
Merci de lires ces instructions d’utilisation et
de sécurité avec attention et en totalité. Pour
votre sécurité personnelle et si vous n’êtes
pas sûr de connaître l’un des aspects de cet
outil, contactez le ser vice technique dont le
numéro se trouve sur le site web de Evolution
Power Tools. Nous disposons de plusieurs
services techniques à travers le monde, mais
une assistance technique est également
disponible auprès de votre distributeur.
ADRESSE WEB
www.evolutionpowertools.com/register
Félicitations pour votre achat d’un outil
Evolution Power Tools. Merci de remplir le
formulaire de garantie en ligne décrit dans le
dépliant A5 livré avec cet outil. Vous pouvez
également scanner le code QR qui se trouve
sur le dépliant A4 avec votre smartphone.
Ceci vous permettra de valider votre garantie
sur le site Evolution Power Tools et vous
assurera un service rapide en cas de besoin.
Nous vous remercions sincèrement d’avoir
choisi un outil Evolution Power Tools.
GARANTIE LIMITEE EVOLUTION
Evolution Power Tools se réserve le droit
d’apporter des améliorations ou des
modications dans la conception du produit
sans notication préalable.
Merci de vous référer au prospectus
d’enregistrement de garantie et/ou à
l’emballage pour plus d’informations sur les
conditions de garantie.
Pendant la période de garantie et à compter
de la date d’achat, Evolution Power Tools
réparera ou remplacera les outils défectueux,
pièces et main d’œuvre comprises. Cette
garantie ne s’applique pas si l’outil qui nous est
renvoyé a été utilisé dans un cadre qui dépasse
les recommandations du manuel d’utilisation
ou si l’outil a été endommagé par accident,
négligence ou utilisation inappropriée.
Cette garantie ne s’applique pas aux outils et/ou
aux éléments de l’outil qui ont été modiés ou
utilisés hors des capacités et des spécications
prescrites. Les éléments électriques sont soumis
aux garanties de leurs fabricants. Les outils qui
nous sont retournés le seront port payé et à
l’attention d’Evolution Power Tools.
Il n’existe aucune garantie, écrite ou verbale,
sur les consommables tels que (sans que
cette liste soit exhaustive) : les lames, les
cutters, les mèches, les burins, etc. En aucune
circonstance Evolution Power Tools ne
pourra être tenu pour responsable des pertes
ou dommages résultant directement ou
indirectement de l’utilisation de nos produits
ou de toute autre cause.
Aucun employé o u agent d’Evolution Power
Tools n’est autorisé à établir de décla ration
de convenance ora le ou à renoncer l’une des
conditions de vente et de tels en gagements ne
pourront être opposé s à Evaluation Power Tools.
Les questions relatives à la présente
limitation de garantie seront directement
adressées au siège de l’entreprise ou par
appel téléphonique au numéro du service
technique approprié.
EN
FR
IT
24 25
NL
Page 14

www.evolutionpowertools.com www.evolutionpowertools.com
SPECIFICATIONS
MACHINE METRIQUE IMPERIAL
Moteur (USA) 120v ~ 60Hz 1050W 9A
Moteur (UK/EU) 230/240v ~ 50Hz 1050W 5A
Moteur (UK) 110v ~ 50Hz 1050W 10A
Vitesse hors charge 3500min
-1
Poids 6.5kg 14lbs
CAPACITE DE COUPE METRIQUE IMPERIAL
Plaque d’acier doux (Epaisseur maximum) 6mm 1/4”
Coupe maximum à 90
Coupe maximum à 45
0
0
55mm 2-1/8”
35mm 1-3/8”
LAME METRIQUE IMPERIAL
Diamètre 185mm 7-1/4”
Alésage 20mm 3/4”
Nombre de dents 20 20
Saignée 1.7mm .067”
Vitesse 3900min
-1
BRUIT ET VIBRATIONS
Pression acoustique L
Niveau sonore L
(en charge) 93 dB(A) K= 3 dB(A)
PA
(en charge) 104 dB(A) K= 3 dB(A)
WA
Niveau de vibrations (en charge) 4.99m/s
3500rpm
3900rpm
2
K= 1.5m/s2
Note: Les mesures de vibrations ont été
eectuées en conditions normales selon la
norme BS EN 61029-1:2009.
La valeur totale de vibrations déclarée a
été mesurée selon des méthodes de test
standards et peuvent être utilisées pour
comparer les outils entre eux.
La valeur totale de vibrations déclarée peut
également être utilisée dans le cadre d’une
évaluation préliminaire d’exposition.
VIBRATIONS
ATTENTION : Lors de l’utilisation de cet
outil, l’utilisateur peut être soumis à de forts
niveaux de vibrations transmises par les
mains et par les bras.
Il est possib le que l’utilisateur développe un
syndrom e de blanchiment des doigts suite aux
vibrations, ou syndrome de Raynaud. Cet état est
susceptible de réduire la sensibilité des mains à la
température et de créer des engourdissements.
Les utilisateurs réguliers et sur de longues
périodes de cet outil doivent contrôler l’état de
leurs mains et de leurs doigts régulièrement.
En cas d’apparition de tels symptômes,
consultez immédiatement un médecin.
• La mesure et l’évaluation de l’exposition
humaine aux vibrations transmises par les
mains est donnée par les documents de
référence suivants : BS EN ISO 5349-1:2001
et BS EN ISO 5349-2:2002
• De nombreux facteurs peuvent inuencer
le niveau réel de vibrations pendant
l’utilisation tel que l’état des surfaces
usinés, l’orientation et le type ou l’état
de l’outil utilisé. Ces facteurs doivent être
évalués avant utilisation et de bonnes
pratiques de travail doivent être adoptées
à chaque fois que possible. Une bonne
gestion des facteurs suivants peut aider à
réduire les eets des vibrations.
Manutention
• Utilisez l’outil avec précaution en le
laissant eectuer le travail.
• Evitez d’utiliser trop de force sur l’un
quelconque des contrôles de l’outil.
• Pensez à votre sécurité et à votre
stabilité, ainsi qu’à l’orientation de la
machine lors de son utilisation.
Surface usinée
• Prenez en considération la surface du
matériau : son état, sa densité, sa force
et sa rigidité et son orientation.
ATTENTION : Les émissions de vibrations lors
de l’utilisation de la machine peuvent varier
de la valeur totale déclarée selon l’utilisation
qui est faite de l’outil.
Le besoin d’identier les mesures de sécurité
et de protéger l’opérateur se basent sur
une estimation de l’exposition dans des
conditions d’utilisation réelles (prenant en
considération tous les éléments du cycle
d’utilisation, tels que les moments pendant
lesquels l’outil est éteint, les moments
pendant lesquels il est inutilisé, et les
moments pendant lesquels on allume l’outil).
ETIQUETTES ET SYMBOLES
ATTENTION : N’utilisez pas cet outil si les
étiquettes de signalisation et/ou d’instructions
manquent ou sont endommagées. Contactez
Evolution Power Tools pour recevoir des
étiquettes de remplacement.
Note: Tous ou certains des symboles suivants
sont susceptibles d’apparaître dans le manuel
ou sur le produit.
EN
FR
IT
NL
26 27
Page 15

www.evolutionpowertools.com www.evolutionpowertools.com
Symbole Description
Volts
Ampères
Hertz
Vitesse
Courant alternatif
Vitesse hors charge
Portez des protections
anti poussières
Lire les instructions
Certification CE
Certification CSA
Déchet électrique et
Hz
Min
n
V
A
-1
~
o
Portez des lunettes de protection
Portez une protection des oreilles
d’équipement électronique
Triman - Collecte des déchets
& Recyclage
Attention
UTILISATION PREVUE DE CET OUTIL
ELECTRIQUE
ATTENTION : Cet outil est une scie circulaire
à main, conçue pour une utilisation avec des
lames Evolution multi usages. N’utilisez que
des lames conçues pour cet outil et/ou des
accessoires recommandés spéciquement
par Evolution Power Tools Ltd.
Equipé d’une lame appropriée, cet outil peut
être utilisé pour couper :
Acier doux,
aluminium,
bois
UTILISATION PROHIBEE DE CET OUTIL
ELECTRIQUE
ATTENTION : Cet outil est une scie circulaire
à main qui ne doit être utilisée qu’à cet eet. Il
ne doit être modié en aucune façon ni utilisé
pour entrainer un autre outil ou un accessoire
autre que ceux mentionnés dans le présent
manuel d’instruction.
ATTENTION : Cette machine n’est pas conçue
pour une utilisation par des personnes
aux capacités physiques, sensorielles ou
intellectuelles réduites, y compris les enfants,
ni par des personnes manquant d’expérience
ou de connaissance de l’outil, à moins qu’ils
n’aient été formés et qu’ils soient supervisés
quant à l’utilisation sécurisée de l’outil par
une personne responsable de leur sécurité et
compétente en la matière.
Les enfants doivent être surveillés pour
s’assurer qu’ils n’ont pas accès à et ne sont pas
autorisés à jouer avec cet outil.
SECURITE ELECTRIQUE
Cet outil est équipé d’une prise moulé
et d’un câble d’alimentation adaptés au
marché désigné. Si le câble d’alimentation
est endommagé, il doit être remplacé par un
câble et un assemblage spécial disponible
auprès du fabricant ou de son distributeur.
UTILISATION EXTERIEURE
ATTENTION : Dans le cas où cet outil serait
utilisé en ex térieur et pour votre protection, il
ne doit pas être exposé à la pluie ni utilisé dans
un environnement humide. Ne placez pas l’outil
sur une surf ace humide. Utilisez si possible
un établi propre et sec. Pour une protection
supplémentaire, utilisez un disjonc teur
diérentiel qui coupera l’alimentation si la fuite
vers la terre dépasse 30mA p our 30ms. Vériez
toujours le bon fonctionnement du disjoncteur
diérentiel avant d’utiliser cet outil.
Si une rallonge est nécessaire, elle doit être
d’un modèle adapté pour une utilisation
extérieure et marquée comme telle. Les
instructions des fabricants doivent être
respectées lors de l’utilisation d’une rallonge.
INSTRUCTIONS GENERALES DE SECURITE
POUR LES OUTILS ELECTRIQUES
(Ces instructions générales de sécurité pour
outils électriques sont celles décrites dans les
documents BSEN60745-1:2009 &
EN 61029 -1:20 09)
ATTENTION : Lisez tous les aver tissements
et toutes les instructions de sécurité. Le
fait de ne pas suivre les avertissements et
les instructions de sécurité peut avoir pour
conséquence une décharge électrique, un
incendie et/ou des blessures graves.
Gardez tous les avertissements et toutes les
instructions de sécurité pour pouvoir vous y
reporter.
Le terme «Outil électrique» mentionné
dans les avertissements concerne vos outils
branchés sur secteur (câblés) ou fonctionnant
sur piles (non câblés).
1) Avertissements de sécurité générale
[Sécurité de la zone de travail]
a) Travaillez dans un espace de travail
propre et bien éclairé. Les zones de travail
encombrées ou sombres attirent les accidents.
b) N’utilisez pas d’outil électrique
dans un environnement explosif tel
qu’en présence de liquides, de gaz ou
de poussières inammables. Les outils
électriques sont susceptibles de créer
des étincelles qui peuvent enammer la
poussières ou les fumées.
c) Eloignez les enfants et les spectateurs
lors de l’utilisation d’un outil électrique.
Une distraction peut vous faire perdre le
contrôle de l’outil.
2) Avertissements de sécurité générale
[Sécurité électrique]
a) Les ches élec triques doivent
correspondre aux prises murales. Ne
modiez jamais la che en aucune façon.
N’utilisez pas d’adaptateur de prise avec des
outils mis à la terre. Des ches non modiées
sur des prises correspondantes minimisent les
risques de décharge électrique.
b) Evitez de toucher les su rfaces mises à la
terre, telles que les tuyaux, les radiateurs,
les cuisinières et les réfrigérateurs. Le
risque de décharge électrique augmente si
votre corps est relié à la terre.
c) N’exposez pas les outils élect riques à
la pluie ou à l’humidité. L’eau qui pénètre
dans un outil électrique augmente le risque
de décharge électrique.
d) Ne maltraitez pas le câble électrique.
N’utilisez jamais le câble électrique pour
transporter, tirer ou débrancher l’outil.
Eloignez le câble des sources de chaleur, des
graisses, des bords tranchants et des parties
mobiles. Un câble endommagé ou emmêlé
augmente le risque de décharge électrique.
e) Lors de l’utilisation d’un outil électrique
en extérieur, utilisez une rallonge adaptée
à une utilisation extérieure. L’utilisation
d’un câble adapté à une utilisation extérieure
diminue le risque de décharge électrique.
f) Lors de l’utilisation d’un outil
électrique dans un environnement
humide, si cela est inévitable, utilisez un
disjoncteur diérentiel. L’utilisation d’un
disjoncteur diérentiel réduit le risque de
décharge électrique.
EN
FR
IT
NL
28 29
Page 16

www.evolutionpowertools.com www.evolutionpowertools.com
3) Avertissements de sécurité générale
[Sécurité personnelle].
a) Restez éveillé, regardez ce que vous
faites et utilisez votre bon sens lors de
l’utilisation d’un outil électrique. N’utilisez
pas d’outil électrique lorsque vous êtes fatigué
ou sous l’inuence de drogues, d’alcool ou de
médicaments. Un moment d’inattention lors
de l’utilisation d’un outil électrique peut être la
cause de blessures graves.
b) Utilisez des équipements de
protection individuelle. Portez toujours
des lunettes de protection. Un équipement
de protection personnelle tel qu’un masque
anti poussières, des chaussures de sécurité
antidérapantes, un casque ou une protection
auditive utilisé dans les bonnes conditions
réduit les risques de blessures.
c) Evitez les démarrages intempestifs.
Assurez-vous que l’interrupteur est bien sur
la position arrêt avant de brancher l’outil
au secteur et/ou à une batterie, et avant de
soulever ou de transporter l’outil. Le fait de
porter l’outil avec un doigt sur l’interrupteur
ou de brancher un outil électrique dont
l’interrupteur est sur la position marche est
susceptible de provoquer des accidents.
d) Retirez toutes les clés et clés de
réglage avant d’allumer l’outil électrique.
Une clé ou une clé de réglage xée à une
partie mobile d’un outil électrique peut être
la cause de blessures.
e) Ne vous penchez pas trop. G ardez
une bonne position des pieds et un bon
équilibre à tout moment. Ceci permet un
meilleur contrôle de l’outil électrique en cas
de situation inattendue.
f) Portez des vêtements adaptés. Ne
portez pas de vêtements lâches ni de bijoux.
Eloignez vos cheveux, vos vêtements et vos
gants des par ties mobiles. Les vêtements
lâches, les bijoux et les cheveux longs
peuvent être pris dans les parties mobiles.
g)Si des équ ipements so nt fournis pour
le branchement de systèmes d›extraction
et de ramassage des poussières, faites
en sorte qu›ils soient branchés et utilisés
correctement. L’utilisation de collec teurs de
poussières réduit les risques liés aux poussières.
4) Avertissements de sécurité générale
[Utilisation et soin de l’outil électrique].
a) Ne forcez pas l’outil électrique. Utilisez
l’outil électrique adapté à votre utilisation.
L’outil électrique adapté fera un meilleur travail
dans de meilleures conditions de sécurité à la
puissance pour laquelle il a été conçu.
b) N’utilisez pas l’outil électrique si
l’interrupteur ne l’allume ou ne l’éteint
pas. Tout outil électrique qui ne peut être
contrôlé au niveau de l’interrupteur est
dangereux et doit être réparé.
c) Débranchez l’outil électrique
du secteur ou de la batte rie avant
d’effectuer un réglage, de changer un
accessoire ou de ranger l’outil. De telles
mesures de sécurité préventives réduisent le
risque d›un démarrage intempestif de l›outil.
d) Rangez les outils électriques que vous
n’utilisez pas hors de portée des enfants
et ne permettez pas aux personnes qui
ne sont pas familiarisées avec ces outils
de les utiliser. Les outils électriques sont des
outils dangereux entre les mains d’utilisateurs
non avertis.
e) Prenez s oin de vos outils é lectrique s.
Vériez les alignements des parties mobiles, le
fait qu’elles ne soient pas cassées et toute autre
situation qui p ourrait en altérer l’utilisation. En
cas de dégâts, faites réparer l’outil électrique
avant de l’utiliser. De nombreux accidents sont
causés par de s outils électriques mal entretenus.
f) Maintenez les outils de coupe propres
et bien aiguisés. Des outils de coupe bien
entretenus et bien aiguisés sont moins
susceptibles de se tordre et sont plus
faciles à contrôler.
g) Utilisez l’outil électrique, les accessoires
et les él éments de l’outi l en respect ant ces
instructions d’utilisation et en prenant
en considération les conditions de travail
ainsi que le travail à eectuer. Le fait
d’utiliser un outil électrique dans un cadre pour
lequel il n’a pas été conçu pourrait avoir pour
conséquence une situation dangereuse.
5) Avertissements de sécurité générale
[Entretien]
a) Faites entretenir votre outil électrique
par un réparateur qualié et n’utilisez que
des pièces identiques aux pièces d’origine.
Ceci garantira que l’outil électrique est
correctement entretenu.
CONSEILS CONCERNANT LA SANTE
ATTENTION : Lorsque vous utilisez cet
outil, des particules de poussières peuvent
être éjectées. Dans certains cas et selon les
matériaux que vous utilisez, cette poussière
peut être particulièrement dangereuse. Si
vous suspectez que la peinture présente sur
les surfaces des murs de votre maison contient
du plomb, demandez l’avis d’un professionnel.
Les peintures à base de plomb ne doivent être
retirées que par un professionnel et vous ne
devez pas essayer de les retirer vous-mêmes.
Une fois la poussière déposée sur les surfaces,
un contact entre les mains et la bouche peut
résulter en une ingestion de plomb. Une
exposition au plomb, même à faible taux,
peut être la cause de dommages irréversibles
au cerveau et au système nerveux. Les
enfants en bas âge et les enfants à naître y
sont particulièrement sensibles.
ATTENTION : L’utilisation d’un outil électrique
quel qu’il soit peut provoquer la projection
de corps étrangers vers vos yeux. Avant de
commencer à utiliser un outil électrique,
assurez-vous que vous por tez bien des lunettes
de protection équipées de protections latérales
ou un casque intégral si nécessaire.
CONSEI LS SUPPLEMEN TAIRES D E SÉCURITE
Etant donné que certains matériaux p euvent
produire des poussières dangereuses pour
votre santé, nous vous recommandons d’utiliser
un masque facial agréé équipé de ltres
remplaçables lorsque vous utilisez cet outil.
Vous devez toujours:
• Travailler dans un endroit bien aéré.
• Travailler avec un équipement de sécurité
agréé tel qu’un masque anti poussières
conçu spécialement pour ltrer les
particules microscopiques.
a) DANGER: El oignez vos mai ns de la zone
de coup e et de la lame. Gardez votre deuxième
main sur la poig née auxiliaire ou sur le carter du
moteur. Si les deux mains tiennent la scie, elles n e
peuvent pas ê tre coupées par la lame.
b) Ne vous pen chez pas sous l a pièce à
usiner. La protection ne p eut pas vous protéger
de la lame en dessous de la piè ce à usiner.
c) Ajustez la profondeur de coupe à
l’épaisseur de la pièce à usiner. Moins
d’une dent entière de la lame doit apparaître
sous la pièce à usiner.
d) Ne tene z jamais la piè ce que vous êtes en
tarin de c ouper avec vos main s ou entre vos
jambes. Sécurisez la pièce sur une plateforme
stable. Il est impor tant de bien soutenir la pièce
pour minimiser les risques corporels, de blocage
de la lame ou de perte de contrôle.
e) Tenez l’outil électrique par ses surfaces
de prise isolées lorsque vous réalisez
une opération pendant laquelle l’outil
de coupe peut entrer en contact avec un
câble électrique caché ou avec son propre
câble. Un contact avec un câble alimenté
alimentera également les parties métalliques
exposées de l’outil électrique et peut
provoquer une décharge pour l’utilisateur.
f) Lors du déplacement de l’outil, utilisez
toujours un guide à refendre ou une
règle. Ceci améliore la précision de la coupe
et limite les risques de blocage de la lame.
g) Utilisez toujours des lames de la
bonne dimension et de la bonne forme
d’alésage (diamant ou rond). Les lames
qui ne correspondent pas à l’équipement sur
lequel elles sont montées tourneront de façon
excentrée, conduisant à une perte de contrôle.
h) N’utilisez jamais de joints ou de boulons
endommagés ou inadaptés. Les joints et les
boulons de la lame ont été spécialement conçus
pour votre scie, an d’assurer des p erformances
et une sécurité optimales.
EN
FR
IT
NL
30 31
Page 17

www.evolutionpowertools.com www.evolutionpowertools.com
i) N’utilisez pas de lame pour acier rapide.
j) Inspectez la machine et la lame avant
chaque utilisation. N’utilisez pas de lames
déformées, fêlées, usées ou endommagées
d’une façon quelconque.
k) N’utilisez jamais la scie sans son
système de protection d’origine. Ne
bloquez pas la protection mobile en position
ouverte. Assurez-vous que la protection
fonctionne librement sans se bloquer.
l) N’utilisez que des lames dont les
spécications correspondent à celles
indiquées dans ce manuel. Avant d’utiliser
des accessoires, comparez toujours le nombre
de tours minute maximum autorisé pour
l’accessoire et pour l’outil.
Causes et prévention des retours de lame
par l’utilisateur :
Un retour de lame est une réaction soudaine
au pincement, au blocage ou au mauvais
alignement de la lame, provoquant un bond
non contrôlé de la scie hors de la pièce à
usiner et en direction de l’utilisateur.
1. Lorsque la lame est pincée ou bloquée par
la fermeture de la saignée, la lame cale et la
réaction du moteur renvoie rapidement l’outil
en direction de l’utilisateur;
2. Si la lame se tord ou perd son alignement
avec la saignée, les dents qui se situent au
dos de la lame peuvent creuser la partie
supérieure de la pièce à usiner et provoquer
le saut de la lame hors de la saignée en
direction de l’utilisateur.
Le retour de lame est la conséquence d’une
mauvaise utilisation de la scie et/ou d’une
mauvaise procédure d’utilisation et/ou
de mauvaises conditions d’utilisation et
peut être évité en prenant les précautions
nécessaires décrites ci-dessous:
a) Maintenez une bonne prise des deux
mains sur la scie et positionnez vos bras
pour pouvoir résister à la force d ’un
retour de lame. Positionnez votre corps des
deux côtés de la lame et non en alignement
avec la lame. Un retour de lame peut
provoquer un saut de la lame vers l’arrière,
mais les forces en présence dans un retour de
lame peuvent être maitrisées par l’utilisateur
si les bonnes précautions sont prises.
b) En cas de bl ocage de la lame, ou lors
de l’arrêt d’une coupe pour une raison
quelconque, relâchez la gâchette et ne
bougez pas la lame dans le m atériau avant
que la lame ne soit complètement arrêtée.
Ne tentez jamais de retirer la lame de la pièce à
usiner ou de tirez la lame vers l’arrière lorsque
la lame est en mouvement ou qu’elle n’est pas
engagée dans le matériau, un retour de lame
pourrait intervenir. Recherchez et éliminez la
cause du blocage de la lame.
c) Lors du redémarrage de la scie dans
la pièc e à usiner, centre z la lame dans la
saign ée et vériez que l es dents de la sc ie
ne sont pa s engagées dan s le matériau. Si la
lame de la scie se bloque, elle peut ressortir de
la pièce à usiner lors du redémarrage de la scie.
d) Soutenez les grands panneaux pour
limiter le risque de pincement de la lame
et de retour de lame. Les grands panneaux
ont tendance à plier sous leur propre poids.
Un support doit être placé des deux côtés
sous le panneau, près de la ligne de coupe, et
proche du bord du panneau.
e) Les leviers de réglage de profondeur
de lame et de biseau doivent être serrés
et bloqués avant de réaliser une coupe. Si
les réglages de la lame changent pendant une
coupe, la lame peut se bloquer et un retour
de lame peut se produire.
f) N’utilisez pas de lames émoussées ou
endommagées. Les lames mal aiguisées
ou en mauvais état produisent une saignée
étroite résultant en une friction excessive, en
un blocage de la lame et en un retour de lame.
g) Faites particulièrement attention
lorsque vous réalisez une saignée dans un
mur ou dan s un endroit aveug le. La partie
de la lame qui dépasse peut couper des objets
qui peuvent causer des retours de lame.
h) Vériez que la protection inférieure
est bien fermée avant chaque utilisation.
N’utilisez pas la scie si la prote ction inférieure
ne fonctionne pas lib rement et ne se ferme
pas instant anément. Ne bloque z ou n’attac hez
jamais le protection inférieure en position
ouverte. Si la scie tombe accidentellement,
la protection inférieure peut être tordue.
Soulevez la protection inférieure avec la poignée
rétract able et assurez-vous qu’elle b ouge
librement et ne touche pas la lame ou une
autre par tie de l’outil, quels que soit l ’angle u la
profondeur de coupe.
l) Vériez le fonctionnement du
ressort de la protection inférieure. Si la
protection et le ressort ne fonctionnent pas
correctement, ils doivent être révisées avant
utilisation. La protection inférieure peut être
molle en raison d’éléments endommagés, de
dépôts collants ou d’un bourrage de débris.
k) La protection inférieure ne peut être
rétractée manuellement que dans le cas
de coupes spéciales telles que les coupes
«en plongée» ou les coupes «combinées».
Soulevez la protection inférieure en rétractant
la poignée et, dès que la scie pénètre dans le
matériau, relâchez la protection. Pour toutes
les autres coupes, la protection inférieure doit
fonctionner automatiquement.
l) Vériez toujours que la protection
inférieure recouvre bien la lame avant de
placer la scie sur l’établi ou sur le sol. Une
lame non protégée et en roue libre déplacera
la scie vers l’arrière, coupant tout sur son
passage. Prenez conscience du temps d’arrêt
complet de la lame après que le bouton de
marche ait été relâché.
ATTENTION : Si un élément est manquant
, n’utilisez pas l’outil avant que les éléments
manquants aient été remplacés. Ne pas
suivre cette instruction pourrait résulter en
blessures graves.
DEMARRAGE – DEBALLAGE
Attention: Ce colis contient des objets
coupants. Faites attention lors du déballage.
Retirez l’outil et les accessoires fournis dans
le colis. Vériez soigneusement que l’outil
est en bon état et vériez l’état de tous les
accessoires listés dans ce manuel. Vériez
également qu’ils sont tous bien présents.
Si un ou plusieurs éléments sont manquants,
l’outil est ses accessoires doivent être renvoyés
au fournisseur dans leur carton d’origine.
Ne jetez pas le carton, gardez le à l’abri
pendant toute la période de garantie. Jetez le
carton en respectant l’environnement.
Recyclez si possible.
Ne laissez pas les enfants jouer avec les sacs
en plastique vides pour éviter les risques
d’asphyxie.
ELEMENTS FOURNIS
Description Quantité
Manuel d’utilisation 1
Lame multi-usages
(Montée)
Clé anglaise
(changement de lame)
Echappement de l’orifice
d’évacuation
Guide de bord parallèle 1
Valise transport 1
ACCESSOIRES SUPPLÉMENTAIRES
En plus des éléments standards fournis
avec cet outil, les accessoires suivants sont
disponibles auprès de la boutique en ligne
d’Evolution à l’adresse suivante:
www.evolutionpowertools.com ou auprès de
votre distributeur.
Description Pièce No
Lame multi-usages RAGE
Lame diamant DIAMOND
1
1
1
185
185
EN
FR
IT
NL
32 33
Page 18

www.evolutionpowertools.com www.evolutionpowertools.com
DESCRIPTION DE L’APPAREIL
1
3
4
DEMARRAGE - PRE PARATION
ATTENTION : Débranchez toujours l’outil du secteur avant
d’eectuer un réglage.
ATTENTION : Ne démarrez jamais la scie avec le bord de
coupe de la scie en contact direct avec la surface de la pièce
à usiner. Ne rentrez pas la protection de lame à la main.
La protection se rétracte automatiquement. Cette scie est
équipée d’un câble d’alimentation et d’une prise homologués
dans le pays d’utilisation. Ne changez pas ou ne modiez pas
le câble d’alimentation.
INSTALLATION ou R ETRAIT D’UNE LAME.
ATTENTION : N’utilisez que des lames Evolution d’origine
ou des lames approuvées par Evolution et conçues pour
cet outil. Assurez-vous que la vitesse maximum de la lame
est compatible avec celle de l’outil. Ne réalisez cette opération
2
5
qu’une fois l’outil débranché du secteur.
Note: Le port de gants protecteurs est recommandé lors
de la manutention de la lame et pendant l’installation ou le
changement de lame.
1) Placez la scie sur une surface plate et stable.
2) Retirez de l’outil le collecteur de poussières en desserrant les
(2) deux gros écrous moletés. (Fig. 1).
Fig. 1
Fig. 2
EN
FR
1. INTERRUPTEUR MARCHE/ARRÊT
2. POIGNÉE AVANT AUXILIAIRE
3. ORIFICE D’EVACUATION
4. PROTECTION INFERIEURE DE LAME
5. LAME EN PLACE
Note: Les écrous moletés sont captifs et ne peuvent être
retirés de l’outil.
3) Bloquez le mandrin en embrayant le verrou de mandrin.
(Fig. 2)
4) Avec la clé hexagonale fournie, desserrez et retirez la vis à
tête creuse du mandrin et l’embase extérieure de l’arbre de la
lame. (Fig. 3)
5) Retirez la lame de la scie.
6) Nettoyez soigneusement les embases intérieures et
extérieures de lame ainsi que les surfaces de montage de la
lame avant d’installer une nouvelle lame.
7) Assurez-vous que la direction des èches de rotation
imprimées sur la lame correspond au sens de rotation des èches
qui se trouvent sur le collec teur de poussières. (Fig. 4)
8) Réinstallez l’embase extérieure et la vis de mandrin.
9) Embrayez le verrou de mandrin et resserrez la vis à tête
creuse avec la clé hexagonale.
34 35
Fig. 3
Fig. 4
IT
NL
Page 19

www.evolutionpowertools.com www.evolutionpowertools.com
Fig. 5
Fig. 6
Fig. 7
Note : La vis à tête creuse du mandrin est letée à droite.
10) Replacez le collecteur de poussières et resserrez
fermement les deux écrous moletés.
11) Vériez que le verrou du mandrin est bien libéré en faisant
tourner la lame à la main.
12) Vériez le bon fonctionnement de la protection.
Guide de bordure parallèle
Un guide parallèle (pour les coupes en long) peut être xé sur
le sabot de l’outil. Les bras du guide doivent être insérés dans
les fentes rectangulaires qui se trouvent sous le sabot et glissés
sous les vis de xation. (Fig. 5)
Note: Le guide parallèle peut être xé des deux côtés du
sabot et ne doivent être xés et réglés que lorsque l’outil est
débranché du secteur.
Ajustez le guide parallèle à la bonne distance de la lame et
resserrez les deux écrous moletés. Vériez que le guide est
parallèle à la lame de la scie.
Réglage de la profondeur de coupe.
Relâchez le verrou de levier pour ajuster la lame à la
profondeur de coupe désirée. Ajuster la profondeur de coupe à
l’épaisseur de la pièce à usiner. Moins d’une pleine dent des dents
de la lame soit visible sous la pièce. Resserrez le verrou de levier
fermement pour le bloquer dans la position requise. (Fig. 6)
Réglage de l’angle de coupe
• Desserrez la vis de blocage du biseau située à l’avant de
l’outil.
• Desserrez la vis de blocage arrière du biseau située à
l’arrière du sabot.
• Basculez la lame à l’angle désiré (Fig. 7).
• Resserrez les deux vis de blocage fermement.
Note: Un rapporteur (0° à 45°) est incorporé au quadrant de
blocage du biseau pour permettre un bon réglage.
CONSEILS D’UTILISATION
Faites des vérications de routine de sécurité à chaque fois
que vous utilisez l’outil. Vériez que toutes les protections
fonctionnent correctement et que toutes les poignées de
réglage ainsi que toutes les vis sont serrées correctement.
Vériez que la lame est bien xée et installée correctement.
Vériez également que vous utilisez une lame adaptée au
matériau que vous coupez.
Vériez l’état du cordon d’alimentation.
Fixez toujours la pièce à usiner sur un support rigide tel qu’un
établi ou un tréteau.
Interrupteur Marche/Arrêt (Fig. 10)
Cet outil est équipé d’un interrupteur de sécurité.
Pour démarrer l’outil:
• Poussez l’interrupteur de sécurité situé sur le côté de l’outil
avec votre pouce.
• Appuyez sur l’interrupteur principal pour lancer le moteur.
(Fig. 8)
Collecteur de poussière
Cet outil est équipé d’un collecteur de poussière qui récupère
les copeaux de métal. La plaque supérieure du collecteur est
équipée d’une fenêtre transparente qui permet à l’utilisateur
d’en vérier le remplissage et de le vider lorsque nécessaire.
Pour retirer et vider le collecteur:
• Desserrez les deux écrous moletés du collecteur.
• Séparez le collecteur de l’outil.
• Videz le collecteur en le retournant au- dessus d’un conteneur
à déchets approprié pour faire tomber les copeaux.
Note: Pour lui garder toute son ecacité, nous recommandons
de vider le collecteur lorsqu’il est plein à environ 60%. Jetez les
déchets du collecteur de façon responsable.
• Replacez le collecteur et resserrez fermement les deux (2)
écrous moletés.
Orice d’évacuation
Lors de la coupe de bois, l’échappement de l’orice d’évacuation
doit être monté sur l’échappement du collecteur de copeaux.
EN
Fig. 8
FR
IT
NL
36 37
Page 20

www.evolutionpowertools.com www.evolutionpowertools.com
Fig. 9
Pour monter l’échappement de l’orice d’évacuation:
• Retirez le couvercle de l’orice d’évacuation en dévissant la
vis cruciforme.
• Tirez le couvercle de l’orice d’évacuation et rangez-le
soigneusement pour une future utilisation.
• Montez l’échappement de l’orice d’évacuation à la place du
couvercle (Fig. 9). Les copeaux de bois seront é jectés à travers
l’échappeme nt de l’orice d’évacuation lors de la coupe.
Lorsque la coupe est terminée, retirez l’échappement et
remettez en place le couvercle en le serrant bien.
CONSEILS DE COUPE
L’utilisateur doit toujours porter des équipements de
protection individuelle (EPI) adaptés au travail en cours. Ceci
inclut des lunettes de protection, des masques anti poussières,
des chaussures de sécurité, etc.
L’utilisateur doit toujours être conscient de la position et du
parcours du câble d’alimentation.
• Ne forcez pas l’outil.
• Laissez faire le travail par la vitesse de la lame. Les performances
de coupe ne seront pas meill eures grâce à une pression
excessive sur l’outil et la durée de vie de la lame en serait rédui te.
• Lorsque vous utilisez le guide parallèle, assurez-vous qu’il est
bien parallèle à la lame. La lame et/ou l’outil pourraient être
endommagés par l’utilisation d’un guide parallèle mal ajusté.
• Pour régler le guide, desserrez les deux vis de maintien et ajustez
le guide à la position désirée. Resserrez alors les vis de maintien.
• Positionnez le bord avant du sabot à angle droit de la pièce
à usiner avant de commencer le travail.
• Lorsque vous commencez à couper, alignez la ligne de coupe
avec la mire du guide, puis introduisez doucement la lame
dans le matériau pour ne pas abîmer les dents de la lame.
• Utilisez les deux mains pour faire avancer la scie dans la
pièce à usiner.
• Appliquez une pression légère et régulière pour déplacer la
scie à travers la pièce à usiner.
Lorsqu’une coupe est terminée, relâchez l’interrupteur
Marche/Arrêt et laissez la lame s’arrêter complètement.
N’appliquez pas une pression latérale sur le disque de la lame
pour la ralentir plus rapidement.
ATTENTION : N’essayez pas de nettoyer l’outil en y insérant des
objets pointus à travers les fentes du boîtier. Les prises d’air de
l’outil doivent être nettoyées avec du gaz sec sous pression.
ATTENTION: En cas d’arrêt ou de calage
du moteur lors d’une coupe, relâchez
l’interrupteur gâchette immédiatement et
déconnec tez l’outil du secteur. Retirez l’outil de
la pièce à usiner avant de rechercher la cause
ou de tenter de redémarrer le moteur de l’outil.
Note: Cette scie est équipée d’un système de
protection contre les surcharges. Ceci permet
d’éviter les surcharges et les dommages au
moteur qui pourraient en résulter. Si cette
fonction se met en marche, le moteur s’arrête
et ne peut être utilisé.
Laissez l’outil refroidir puis appuyez sur le
bouton de redémarrage situé à la base de
la poignée principale. Des étincelles trop
nombreuses peuvent être une indication de
la présence de saletés dans le moteur ou de
l’usure des balais carbone.
VERIFICATION ET REMPLACEMENT DES
BALAIS CARBONE
Pour remplacer les balais carbone:
• Débranchez l›outil du secteur
• Placez l’outil sur une surface plate et stable.
• Dévissez et retirez les deux (2) vis de
retenue des capuchons de balais du boitier
du moteur.
• Retirez les balais.
Note: Si l’épaisseur du balai carbone est
inférieure à 6mm (¼”), ou s’il existe
des signes de brulure ou de dégâts,
remplacez les balais.
• Placez les nouveaux balais
• Replacez les vis des capuchons de retenue
des balais
• Faites fonctionner l’outil hors charge
pendant quelques minutes après le
remplacement des balais. Ceci facilitera le
processus d’ajustement.
ENTRETIEN
ATTENTION : Tout entretien doit être réalisé
machine éteinte et débranchée du secteur ou
de la batterie.
Vériez régulièrement que tous les
équipements de sécurité et toutes les
protections fonctionnent correctement.
N’utilisez cet outil que si les protections et
les équipements de sécurité fonctionnent
correctement.
Tous les roulements du moteur de cet outil
sont lubriés à vie. Aucune lubrication
supplémentaire n’est nécessaire.
Utilisez un chion propre et légèrement
humide pour nettoyer les éléments en
plastique de l’outil. N’utilisez pas de solvants
ou de produits similaires, qui pourraient
endommager les parties en plastique.
PROTECTION DE L’ENVIRONNEMENT
Les déchets de produits électriques ne
doivent pas être jetés avec les déchets
ménagers. Merci de recycler lorsqu’un centre
de recyclage existe. Vériez les possibilités
de recyclage locales auprès de vos autorités
locales ou votre distributeur.
EN
FR
IT
NL
38 39
Page 21

www.evolutionpowertools.com www.evolutionpowertools.com
DÉCLARATION DE CONFORMITÉ CE
En accord avec EN ISO 17050-1:2004
Le fabricant du produit décrit dans la présente Déclaration est
Evolution Power Tools Ltd. Venture 0ne, Longacre Close, Holbrook Industrial Estate, Sheffield S20 3FR,
Le fabricant déclare par les présentes que l’outil décrit dans la présente déclaration répond aux
dispositions de la Directive relative au machines et autres directives appropriées, telles que décrites
ci-dessous. Le fabricant déclare également que l’outil décrit dans la présente déclaration répond,
lorsque nécessaire, aux dispositions pertinentes des Exigences essentielles de santé et de sécurité.
Les directives couvertes par la présente déclaration sont les suivantes
2006/42/EC. Directive sur les machines.
2004/108/EC. (until Apr 19th 2016) Directive sur la compatibilité électromagnétique.
2014/30/EU. (starting from Apr 20th 2016) Directive sur la compatibilité
électromagnétique.
93/68/EC. Directive sur le marquage CE.
2011/65/EU. Directive relative à la limitation de certaines substances dangereuses dans les
équipements électriques et électroniques.
2002/96/EC Directive relative aux déchets d’équipements électriques et électroniques (DEEE).
modifiée
2003/108/EC .
Et qu’il est en accord avec les exigences nécessaires des documents suivants:
EN55014-1 : 2006 • EN55014-2 : 1997+A1 • EN61000-3-2 : 2006 • EN61000-3-3 : 1995+A1+A2
EN60745-1 : 2003+A1 • EN60745-2-5 : 2003 • EN60825-1 : 1994+A1+A2
Détails du produit
Description: RAGE 185mm (7-1/4») SCIE CIRCULAIRE MULTI-USAGES
N° du modèle Evolution: RAGE1851 / RAGE1852 / RAGE1852EU
Marque: EVOLUTION
Tension: 110V / 230V ~ 50Hz
Alimentation: 1050W
NOTES
EN
FR
IT
La documentation technique nécessaire pour démontrer que le produit répond aux directives a
été rassemblée et reste disponible pour inspection par les autorités concernées. Elle confirme que
notre dossier technique contient l’ensemble des documents listés ci-dessus.
Nom et adresse du détenteur de l’information technique.
Signé : Nom imprimé : Matthew Gavins: Directeur Général du Groupe.
Date: 01/03/2016
40 41
NL
Page 22

EN
FR
ITALIANO
Traduzione di manuali di istruzioni originali
IT
NL
Page 23

www.evolutionpowertools.com www.evolutionpowertools.com
INDICE
English Page 2
Français Page 22
Italiano Pagina 42
Nederlands Pagina 62
INTRODUZIONE Pagina 45
Garanzia Pagina 45
Specifiche Macchina Pagina 46
Vibrazioni Pagina 47
Etichette E Simboli Pagina 47
Destinazione D'uso Di Questo Strumento Di Potere Pagina 48
Uso Vietato Di Questo Strumento Di Potere Pagina 48
MISURE DI SICUREZZA Pagina 49
Sicurezza Elettrica Pagina 49
Uso Esterno Pagina 49
Generali Power Tool Istruzioni Di Sicurezza Pagina 49
Ulteriori Istruzioni Di Sicurezza Pagina 53
PER INIZIARE Pagina 54
Apertura della confezione Pagina 54
Panoramica della macchina Pagina 55
Montaggio e preparazione Pagina 57
Istruzioni per l'uso Pagina 58
MANUTENZIONE Pagina 60
Protezione Ambientale Pagina 60
DICHIARAZIONE DI CONFORMITA Pagina 61
IL PRESENTE MANUALE DI
ISTRUZIONIÈ STATO SCRITTO IN INGLESE
IMPORTANTE
Si prega di leggere attentamente le tesi
di istruzioni di sicurezza e di funzionamento.
Per la vostra sicurezza , se non siete sicuri
su qualsiasi aspetto di utilizzare questa
attrezzatura vi preghiamo di consultare la
relativa Helpline tecnico , il cui numero può
essere trovato sul sito Elettroutensili Evolution.
Operiamo Diversi Helplines Durante tutta
la nostra organizzazione a livello mondiale ,
ma un aiuto tecnico è utile disponibile
presso il fornitore .
WEB
www.evolutionpowertools.com/register
Complimenti per l’acquisto
o un Evolution Power Tools Machine.
Si prega di completare la registrazione
del prodotto ‘online’ , come spiegato nella
linea garanzia registrazione A4 opuscolo
fornito con la macchina. È utile possibile
eseguire la scansione del codice a barre si
trova sul volantino A4 con una Smart Phone
. Ciò consentirà di convalidare periodo di
garanzia della macchina attraverso il sito web
Evoluzioni inserendo i tuoi dati e osmanto
Garantire un servizio tempestivo , se mai
necessario. Ringraziamo di cuore
per aver scelto un prodotto da
Evolution Power Tools .
EVOLUZIONE DI GARANZIA LIMITATA
Evolution Power Tools si riserva il diritto
di apportare miglioramenti e modifiche
per la progettazione del prodotto
senza alcun preavviso .
Si prega di fare riferimento alla registrazione
del foglietto di garanzia e / o la confezione per
i dettagli o i termini e le condizioni
della garanzia.
Evolution Power Tools sarà, entro
il periodo di garanzia , e dalla data di
acquisto , riparerà o sostituirà qualsiasi
merci riconosciute come difetti di materiale
o di lavorazione . Questa garanzia è nulla
se lo strumento è tornato gamba utilizzata
al di là delle raccomandazioni del manuale
di istruzioni , o se la macchina ha gamba
danneggiato accidentalmente, per
negligenza o manutenzione non corretta.
Questa garanzia non si applica alle macchine
e / o componenti che siano stati alterati ,
modificati , o modificati in qualsiasi modo,
o sottoposti a uso oltre le capacità e le
specifiche consigliate. I componenti elettrici
sono soggetti a garanzia dei rispettivi
produttori . Tutti i beni restituiti difettoso
deve essere restituito in porto franco
al Evolution Power Tools.
Evolution Power Tools si riserva il diritto di
riparare o sostituire con lo stesso o equivalente
elemento opzionale . Non vi è alcuna garanzia
- scritta o verbale - per accessori di consumo
( zoals seguente elenco non esaustivo )
lame, frese , trapani , scalpelli o piastre ecc
In nessun caso la Evolution Power Tools è
responsabile della perdita o danno risultati
ting direttamente o indirettamente dal utilizzo
della nostra merce o da qualsiasi altra causa.
Evolution Power Tools non è responsabile
di eventuali spese sostenute per tali beni
o danni conseguenti . Nessun funzionario,
dipendente o agente di Evolution Power Tools
è autorizzato a rilasciare dichiarazioni orali
o di idoneità o di rinunciare a nessuna delle
precedenti condizioni di vendita e nessuno
è vincolante per Evolution Power Tools.
Domande relative a questa garanzia
limitata assumersi essere indirizzate
alla società, sedes, oppure chiamare
il numero appropriatezza Helpline.
EN
FR
IT
NL
44 45
Page 24

www.evolutionpowertools.com www.evolutionpowertools.com
SPECIFICHE
MACCHINA METRIC IMPERIAL
Motore (USA) 120v ~ 60Hz 1050W 9A
Motore (UK/EU) 230/240v ~ 50Hz 1050W 5A
Motore (UK) 110v ~ 50Hz 1050W 10A
Nessun Velocità Del Carico 3500min
-1
Carico 6.5kg 14lbs
CUTTING CAPACITIES METRIC IMPERIAL
Mild Steel Plate - Spessore Max 6mm 1/4”
Massima di taglio a 90
Massima di taglio a 45
0
0
55mm 2-1/8”
35mm 1-3/8”
DIMENSIONI LAMA METRIC IMPERIAL
Diametro 185mm 7-1/4”
Bore 20mm 3/4”
Numero Di Denti 20 20
Massima Velocità Di 1.7mm .067”
Spessore 3900min
-1
3500rpm
3900rpm
VIBRAZIONI
AVVERTENZA: Durante l’utilizzo della presente
macchina l’utente può essere esposto a un livello
elevato di vibrazioni che vengono trasmesse alle
mani e alle braccia dell’utente stesso. Sussiste la
possibilità che l’utente sviluppi la “sindrome delle
dita bianche”, causata dalle vibrazioni (sindrome
di Raynaud). Questa condizione può causare una
ridotta sensibilità termica della mano e la perdita
di sensibilità generale. Gli utenti che utilizzano gli
utensili elettrici in modo regolare o continuativo
devono tenere costantemente sotto controllo
lo stato delle proprie mani e dita. In presenza di
uno dei suddetti sintomi è necessario consultare
immediatamente un medico.
• La misurazione e la valutazione degli effetti
delle oscillazioni sul sistema delle mani/
braccia dell’uomo sono previste dalle
seguenti norme: EN ISO 5349-1:2001 e
EN ISO 5349-2:2002
• Molti fattori possono influenzare il
livello attuale di vibrazioni durante il
funzionamento, ad esempio lo stato delle
superfici di lavoro e la rispettiva ubicazione,
nonché la tipologia e lo stato della lama
di taglio utilizzata. Prima di ogni utilizzo è
necessario valutare tali fattori e, laddove
possibile, adottare procedure di lavoro
idonee. La gestione di tali fattori contribuisce
alla riduzione degli effetti delle vibrazioni:
Utilizzo:
• Maneggiare la macchina con cautela e
lasciare che esegua il proprio lavoro.
• Evitare di esercitare eccessiva forza sugli
elementi di comando della macchina.
• Prestare attenzione alla sicurezza e alla
stabilità, nonché all’orientamento della
macchina durante l’uso.
Superficie di lavoro
• Tenere conto del materiale della superficie
di lavoro, nonché dello stato, dello
spessore, della robustezza, della durezza e
dell’orientamento della medesima.
ETICHETTE DI SICUREZZA E SIMBOLI
AVVERTENZA: Non mettere in funzione
l’apparecchio se le etichette di avvertimento
e/o pericolo non sono presenti o sono
danneggiate. Rivolgersi a Evolution Power
Tools per ricevere etichette sostitutive.
Nota: tutti o alcuni dei seguenti simboli
possono essere riportati nelle istruzioni d’uso
o sul prodotto.
EN
FR
IT
NOISE & VIBRATION DATI
Pressione sonora L
PA
Livello di potenza sonora L
WA
93 dB(A) K= 3 dB(A)
104 dB(A) K= 3 dB(A)
Livello di vibrazione 4.99m/s
46 47
2
K= 1.5m/s2
NL
Page 25

www.evolutionpowertools.com www.evolutionpowertools.com
ETICHETTE E SIMBOLI
Simbolo Descrizione
V
Ampere
Hertz
Velocità
Corrente Alternata
Nessun Velocità Del Carico
Indossare Una
Protezione Acustica
Non Toccare
Indossare Protezione
Antipolvere
Leggere Le Istruzioni
Certificazione CE
Certificazione CSA
Attenzione
Rifiuti Elettrici Ed
Doppio Isolamento
Hz
Min
N
A
-1
~
o
Indossare Occhiali Di Sicurezza
Apparecchiature Elettroniche
Volt
DESTINAZIONE D’USO DEL PRESENTE
UTENSILE ELETTRICO
AVVERTENZA: Il presente prodotto è una
sega multiuso per troncature e tagli obliqui,
appositamente studiata per l’utilizzo con lame
di taglio multiuso Evolution.
Utilizzare esclusivamente lame di taglio
appositamente progettate per la presente
macchina e/o espressamente raccomandate
da Evolution Power Tools Ltd.
Se la sega è attrezzata con la corretta lama
di taglio, è idonea al taglio dei seguenti
materiali: Prodotti a base di legno (MDF,
legno compensato, legno lamellare, pannelli
truciolari, pannelli di fibre compresse ecc.)
NOTA: È possibile anche tagliare in modo sicuro
legno contenente chiodi o viti non zincati, a
condizione che si proceda con la massima cautela.
UTILIZZO VIETATO DEL PRESENTE
UTENSILE ELETTRICO
AVVERTENZA: Il presente prodotto è una
sega multiuso per troncature e tagli obliqui e
può essere utilizzata solo ed esclusivamente
come tale. Il prodotto non può essere
modificato in alcun modo né può essere
utilizzato per la propulsione di apparecchi
o componenti diversi da quelli citati nelle
presenti istruzioni d’uso.
AVVERTENZA: Il presente apparecchio
non deve essere utilizzato da bambini né
da persone con facoltà psichiche, fisiche,
sensoriali e mentali limitate o non in possesso
di idonee conoscenze, salvo nel caso in cui
la loro incolumità e l’utilizzo sicuro della
macchina siano tutelati da una persona
competente o abbiano ricevuto corrette
istruzioni sull’utilizzo dell’apparecchio.
DATI ELETTRICI PER I PAESI UE
IMPORTANTE
Il presente prodotto è dotato di un cavo e una
spina approvati per il paese di destinazione e
corrisponde agli standard/requisiti internazionali.
Collegare questa sega a una tensione di rete
conforme ai dati riportati sulla targhetta
identificativa. I cavi o le spine danneggiati devono
essere sostituiti con componenti completi e
identici all’originale LasciateVi consigliare da un
elettricista qualora aveste die dubbi.
All’interno del prodotto non sono presenti
componenti sostituibili da parte dell’utente,
fatta eccezione per quelli indicati nelle presenti
istruzioni d’uso. Far sempre eseguire gli interventi
di manutenzione da personale manutentore
qualificato. Non smontare mai nessun
componente del corpo esterno dell’apparecchio
se non si è qualificati a tal fine; la presente
macchina contiene tensioni pericolose.
UTILIZZO ALL’APERTO
AVVERTENZA: Per proteggersi da pericoli
qualora sia necessario utilizzare il presente
utensile elettrico all’aperto, non esporlo alla
pioggia né utilizzarlo in ambienti umidi. Non
posizionare l’apparecchio su una base umida.
Utilizzare un banco di lavoro pulito e asciutto,
se disponibile.
Come ulteriore misura di protezione, utilizzare
un dispositivo di sicurezza per correnti di guasto
(salvavita) che interrompa l’alimentazione di
corrente non appena la corrente di guasto verso
terra superi i 30 mA per 30 ms. Verificare sempre il
funzionamento del salvavita prima di mettere in
funzione la macchina.
Se è necessario utilizzare un cavo di prolunga,
tale cavo deve essere idoneo per l’utilizzo
all’aperto e opportunamente contrassegnato.
In caso di utilizzo di un cavo di prolunga, è
necessario seguire le istruzioni del produttore.
AVVERTENZE GENERALI DI SICUREZZA
PER UTENSILI ELETTRICI
Le presenti avvertenze di sicurezza per utensili
elettrici sono eseguite in conformità alle
norme EN60745-1:2009 e EN 61029-1:2009.
AVVERTENZA: Leggere tutte le avvertenze
e le istruzioni di sicurezza. In caso di mancato
rispetto delle avvertenze e delle istruzioni
sussiste il pericolo di scosse elettriche,
incendio e/o lesioni gravi.
Conservare tutte le avvertenze e le istruzioni di
sicurezza per la futura consultazione.
Il concetto di “utensile elettrico” utilizzato nelle
presenti avvertenze si riferisce all’apparecchio
elettrico alimentato dalla rete (con cavo) o da
batteria (senza cavo).
1) Avvertenze generali di sicurezza
[sicurezza sul lavoro] per utensili elettrici
• Mantenere il luogo di lavoro pulito e
perfettamente illuminato. Gli ambienti
disordinati e bui favoriscono gli incidenti.
• Non utilizzare utensili elettrici in
ambienti a rischio di esplosione,
in cui siano presenti, ad esempio,
liquidi infiammabili, gas o polveri. Gli
apparecchi elettrici producono scintille che
possono causare l’ignizione di polveri o gas.
• Mantenere bambini e astanti a debita
distanza durante l’esecuzione di lavori
con l’utensile elettrico. La distrazione può
causare la perdita di controllo dell’utensile.
2) Avvertenze generali di sicurezza
[sicurezza elettrica] per utensili elettrici
• La spina di collegamento degli utensili
elettrici deve essere idonea alla presa
elettrica. Non apportare modifiche alla
spina elettrica. Non utilizzare adattatori per
spina in caso di utensili elettrici dotati di
contatto di sicurezza (messa a terra). Le spine
elettriche non modificate e le prese idonee
riducono il rischio di scosse elettriche.
EN
FR
IT
NL
48 49
Page 26

www.evolutionpowertools.com www.evolutionpowertools.com
• Evitare il contatto del corpo con le
superfici collegate a massa, ad esempio
tubi, termosifoni, fornelli e frigoriferi.
Sussiste un elevato rischio di scosse elettriche
qualora il corpo sia collegato a terra.
• Non esporre gli utensili elettrici alla
pioggia né utilizzarli in ambienti umidi. La
penetrazione d’acqua in un utensile elettrico
aumenta il rischio di scosse elettriche.
• Maneggiare con cautela il cavo di
alimentazione. Non utilizzare mai il cavo di
alimentazione per trasportare o appendere
l’utensile e non estrarre mai la spina dalla
presa elettrica tirando il cavo di alimentazione.
Mantenere il cavo lontano da fonti di
calore, oli, spigoli taglienti o componenti
di apparecchi in movimento. Eventuali cavi
elettrici danneggiati o intrecciati aumentano il
rischio di folgorazione.
• Eseguire lavori all’aperto con l’utensile
elettrico solo utilizzando un cavo di
prolunga idoneo all’uso in esterni.
L’utilizzo di un cavo di prolunga adatto all’uso
in esterni riduce il rischio di scosse elettriche.
• Utilizzare un dispositivo di sicurezza per
correnti di guasto in caso qualora non sia
possibile evitare di eseguire interventi
con l’utensile elettrico in ambienti umidi.
L’utilizzo di un interruttore differenziale di
sicurezza riduce il rischio di scosse elettriche.
3) Avvertenze generali di sicurezza
[sicurezza personale] per utensili elettrici
• Mantenere sempre la massima
concentrazione sul lavoro che si sta
eseguendo e utilizzare l’utensile
elettrico in modo ragionevole. Non
utilizzare l’utensile elettrico in condizioni
di stanchezza o sotto l’effetto di droghe,
farmaci o alcolici. Anche un solo attimo di
disattenzione durante gli interventi con gli
utensili elettrici può causare gravi lesioni.
• Utilizzare dispositivi di protezione
individuale. Indossare sempre occhiali
protettivi. I dispositivi di protezione
individuale, ad esempio una maschera
antipolvere, calzature antinfortunistiche
antiscivolo, caschetto o protezioni
auricolari, conformi alle condizioni di lavoro,
riducono il rischio di lesioni.
• Evitare l’accensione accidentale
dell’utensile. Prima di collegare l’utensile
alla fonte di alimentazione e/o alla batteria
e durante il sollevamento o il trasporto
dell’utensile, accertarsi che l’interruttore
si trovi in posizione Off. Se durante il
trasporto dell’utensile viene premuto
involontariamente l’interruttore di
accensione o se l’utensile viene collegato
all’alimentazione di rete allo stato acceso,
possono verificarsi gravi infortuni.
• Prima dell’accensione dell’utensile
elettrico rimuovere tutti gli attrezzi o le
chiavi di regolazione. Una chiave inglese
o una chiave per mandrino di trapano, se
ancora posizionata su un componente
dell’utensile elettrico in movimento, può
causare gravi lesioni.
• Non sporgersi eccessivamente.
Mantenersi sempre in una posizione stabile
e costantemente in equilibrio. Ciò aiuta
a mantenere il controllo dell’utensile in
situazioni impreviste.
• Indossare abbigliamento idoneo. Non
indossare indumenti ampi né gioielli. Tenere
i capelli, gli indumenti e i guanti lontano dai
componenti in rotazione. Gli indumenti ampi,
i gioielli o i capelli lunghi potrebbero rimanere
impigliati in componenti in movimento.
Se sono presenti dispositivi collegabili
per l’aspirazione e la raccolta di polvere, è
necessario collegare anche tali dispositivi e
utilizzarli correttamente. L’utilizzo di dispositivi
di raccolta della polvere può evitare pericoli
connessi alla polvere.
4) Avvertenze generali di sicurezza
[utilizzo e cura degli utensili elettrici]
• Non esercitare una forza eccessiva
sull’utensile. Utilizzare l’utensile elettrico
adatto all’impiego previsto. Con il corretto
utensile elettrico è possibile svolgere il
lavoro previsto in modo più rapido e sicuro.
• Non utilizzare l’utensile elettrico se
l’interruttore di accensione/spegnimento
non funziona correttamente. Un
utensile elettrico che non è più attivabile/
disattivabile correttamente è pericoloso e
deve essere riparato.
• Estrarre la spina di rete e/o rimuovere
la batteria dall’utensile elettrico prima
di eseguire regolazioni dell’utensile,
sostituire accessori o riporre l’utensile.
Tali misure precauzionali evitano il rischio di
accensione accidentale dell’utensile elettrico.
• Collocare gli utensili elettrici spenti
fuori dalla portata dei bambini e non
consentire l’utilizzo dell’utensile elettrico
da parte di persone che non siano a
conoscenza dell’utensile o delle relative
istruzioni d’uso. Gli utensili elettrici sono
pericolosi se maneggiati da utenti inesperti.
• Gli utensili elettrici devono sempre
essere sottoposti a manutenzione.
Verificare che il funzionamento dei
componenti in movimento sia corretto,
che non siano presenti componenti
danneggiati o che non sussistano condizioni
particolari che possano compromettere il
corretto azionamento dell’utensile. In caso
di danneggiamento, l’utensile elettrico
deve essere riparato prima dell’uso. Gli
utensili elettrici non sottoposti a corretta
manutenzione sono causa di molti incidenti.
• Mantenere affilati e puliti gli utensili
da taglio. Gli utensili da taglio sottoposti
ad accurata manutenzione e con lame
affilate si inceppano raramente e sono
più maneggevoli.
• Utilizzare l’utensile elettrico, gli
accessori, le punte dell’utensile ecc.
esclusivamente in conformità alle presenti
istruzioni d’uso e nel rispetto delle condizioni
di lavoro e della tipologia di intervento da
eseguire. L’utilizzo dell’utensile elettrico per
destinazioni d’uso diverse da quelle previste
può causare situazioni di pericolo.
5) Avvertenze generali di sicurezza
[manutenzione] per utensili elettrici.
• Far eseguire gli interventi di
manutenzione dell’utensile elettrico
esclusivamente da personale qualificato
e utilizzando ricambi originali. In tal
modo viene garantita la sicurezza a lungo
termine dell’utensile elettrico.
CONSIGLI SULLA TUTELA DELLA SALUTE
AVVERTENZA: Consultare un professionista se
si teme che la pittura applicata alle superfici della
propria abitazione contenga piombo. Le pitture
contenenti piombo devono essere rimosse
solo da specialisti. Non tentare di rimuoverle
personalmente. Se la polvere si è depositata
su una superficie, il contatto mano-bocca può
portare all’assunzione di piombo. L’esposizione
anche a minime quantità di piombo può causare
danni irreversibili al cervello e al sistema nervoso.
I neonati e i feti sono particolarmente a rischio.
AVVERTENZA: Alcuni tipi di legno e materiali
simili al legno, in particolare MDF (pannelli
di fibra a media densità), possono generare
polveri dannose per la salute. Durante l’uso della
presente sega si raccomanda di utilizzare, oltre al
dispositivo di raccolta della polvere, una maschera
respiratoria omologata, dotata di filtri sostituibili.
Avvertenze di sicurezza specifiche per
l’utilizzo della sega per tagli obliqui
Le seguenti avvertenze di sicurezza specifiche
per seghe per tagli obliqui si basano sui
requisiti della norma EN 61029-2-9:2009.
EN
FR
IT
NL
50 51
Page 27

www.evolutionpowertools.com www.evolutionpowertools.com
SICUREZZA DELLA LAMA DI TAGLIO
AVVERTENZA: Le lame di taglio in rotazione
sono estremamente pericolose e possono
causare gravi lesioni o mutilazioni. Mantenere
sempre le dita e le mani a una distanza di
almeno 150 mm dalla lama di taglio.
Non tentare mai di rimuovere il materiale
segato quando la testina di taglio non si trovi
già in posizione sollevata, la paralama non sia
completamente chiusa e la lama di taglio non
si sia arrestata completamente.
Utilizzare esclusivamente lame di taglio
raccomandate dal produttore e indicate nelle
presenti istruzioni d’uso. Tali lame devono inoltre
essere conformi ai requisiti della norma EN 847-1.
Non utilizzare lame di taglio danneggiate
o deformate. Potrebbero rompersi e causare
gravi lesioni all’utente o agli astanti.
Non utilizzare lame di taglio in acciaio
superrapido (HSS).
Se l’inserto del tavolo è danneggiato o usurato,
deve essere sostituito da un inserto identico,
reperibile presso il produttore in base ai dati
riportati nelle istruzioni d’uso.
DISPOSITIVI DI PROTEZIONE INDIVIDUALE
(DPI)
È obbligatorio indossare protezioni auricolari
per evitare il rischio di deficit uditivi causati
dal rumore. È obbligatorio indossare occhiali
protettivi per evitare la possibilità di perdita
della vista a causa dell’espulsione di trucioli.
È inoltre consigliabile indossare dispositivi
di protezione per le vie respiratorie poiché
alcuni tipi di legno e materiali simili al legno,
ad esempio MDF (pannelli di fibra a media
densità), possono generare polveri tossiche.
Durante l’uso della presente macchina si
raccomanda di utilizzare, oltre al dispositivo di
raccolta della polvere, una maschera respiratoria
omologata, dotata di filtri sostituibili. Durante
la movimentazione delle lame di taglio o di
materiale grezzo è necessario indossare guanti.
Si raccomanda di trasportare le lame di taglio
in un supporto, laddove possibile. Durante la
movimentazione della sega per tagli obliqui non
è consigliato indossare guanti.
FUNZIONAMENTO SICURO
Accertarsi sempre di aver selezionato la lama
di taglio corretta per il materiale da tagliare.
Non utilizzare la presente sega per tagli obliqui
per sezionare materiali diversi da quelli indicati
nelle presenti istruzioni d’uso.
Durante il trasporto di una sega per tagli obliqui
accertarsi che la lama di taglio sia fissata in
posizione inferiore di 90° (in caso di sega per tagli
obliqui con funzione di trazione è necessario
assicurarsi che le rotaie di scorrimento siano
saldamente fissate). Sollevare la macchina
afferrando i bordi esterni della piastra di base con
entrambe le mani (in caso di sega per tagli obliqui
con funzione di trazione il trasporto va eseguito
mediante le maniglie in dotazione). La macchina
non deve mai essere sollevata o trasportata
mediante il paralama inseribile o tramite altri
elementi di tale meccanismo di azionamento.
Prima di ogni utilizzo è necessario controllare che
il paralama inseribile e il relativo meccanismo
non presentino danni e verificare il movimento
corretto e ottimale di tutti i componenti mobili.
Mantenere il banco di lavoro e l’area del
pavimento privi di tracce di sporco, ivi inclusi
segatura, trucioli e sfridi.
Controllare e assicurarsi sempre che il numero
di giri indicato sulla lama di taglio corrisponda
almeno al regime minimo indicato sulla sega per
tagli obliqui. Non deve mai essere utilizzata una
lama di taglio contrassegnata da un numero di giri
inferiore al regime minimo indicato sulla sega.
Qualora sia necessario utilizzare distanziatori o
anelli riduttori, questi devono essere
idonei allo scopo previsto e conformi alle
raccomandazioni del produttore.
Se la sega per tagli obliqui è dotata di laser,
questo non deve essere sostituito con un
laser di altro tipo. Se il laser è guasto, deve
essere riparato dal produttore o da un suo
rappresentante autorizzato.
La lama di taglio può essere sostituita solo in
conformità alla descrizione riportata nelle
presenti istruzioni d’uso.
Non tentare mai di rimuovere pezzi di sfrido altre
parti del pezzo in lavorare quando la testina di
taglio non si trovi già in posizione sollevata, la
paralama non sia completamente chiusa e la lama
di taglio non si sia arrestata completamente.
ESEGUIRE I TAGLI A REGOLA D’ARTE E IN
MODO SICURO
A seconda della possibilità, fissare sempre il
pezzo da lavorare mediante la morsa bloccapezzo sul banco sega, se in dotazione.
Prima di ogni taglio assicurarsi sempre che la
sega per tagli obliqui sia stata montata in una
posizione stabile.
Se necessario, la sega per tagli obliqui, in
conformità ai dati riportati nelle presenti
istruzioni d’uso, può essere montata su un
pannello di legno o su un banco di lavoro o
fissata a un supporto per sega per tagli obliqui.
I pezzi da lavorare lunghi devono essere
supportati mediante i supporti in dotazione o su
un idoneo cavalletto di lavoro supplementare.
AVVERTENZA: Durante il funzionamento di ogni
sega per tagli obliqui è possibile che corpi estranei
vengano proiettati contro il viso dell’operatore,
causando gravi lesioni oculari. Se necessario,
prima di iniziare il lavoro con l’utensile elettrico
indossare sempre occhiali protettivi o schermi
protettivi di vetro dotati di protezione laterale o
una maschera copri-viso completa.
AVVERTENZA: Non mettere in funzione la
sega per tagli obliqui qualora manchi anche
uno solo dei suoi componenti, ma solo una
volta installati tutti i componenti mancanti.
L’inosservanza della presente istruzione
potrebbe causare gravi lesion fisiche.
ULTERIORE AVVERTENZA DI SICUREZZA
TRASPORTO DELLA SEGA PER TAGLI OBLIQUI
Avvertenze di sicurezza
• La presente sega per tagli obliqui,
nonostante la sua forma compatta, è
molto pesante. Richiedere pertanto aiuto
a persone competenti in caso di necessità
di sollevare la sega per evitare di procurarsi
lesioni alla schiena.
• Durante il sollevamento mantenere
l’utensile vicino al corpo per evitare il
pericolo di lesioni alla schiena. Durante il
sollevamento piegare le ginocchia e non la
schiena. Sollevare l’utensile utilizzando le
apposite maniglie presenti su entrambi i lati
della piastra di base della macchina.
• Non trasportare mai la sega afferrandola
dal cavo di alimentazione. Se la sega
viene trasportata afferrandola dal cavo,
possono verificarsi danni all’isolamento o
ai conduttori con conseguente pericolo di
scosse elettriche o incendi.
• Prima di movimentare la sega è necessario
serrare le viti di arresto dell’angolo obliquo e
di inclinazione e la vite di arresto della slitta
per proteggersi da movimenti improvvisi.
• Fissare la testina taglio nella posizione più
bassa. Assicurarsi che il perno di arresto
della testina di taglio sia completamente
scattato in posizione.
AVVERTENZA: Non utilizzare il paralama
come “impugnatura di sollevamento”. Prima del
trasporto della macchina è necessario estrarre il
cavo di alimentazione dalla presa di corrente.
• Bloccare la lama di taglio nella posizione più
bassa mediante il perno di arresto.
• Allentare la vite di arresto dell’angolo di
taglio obliquo. Ruotare il tavolo in una delle
posizioni di finecorsa.
EN
FR
IT
NL
52 53
Page 28

www.evolutionpowertools.com www.evolutionpowertools.com
• Fissare il tavolo in questa posizione
mediante la vite di arresto.
• Utilizzare le due impugnature di trasporto
a incavo, presenti su entrambi i lati della
piastra di base della macchina, per il
trasporto della macchina.
Posizionare la sega su un piano di lavoro
sicuro e stabile ed eseguire un controllo
accurato della sega.
Controllare in particolare il funzionamento di
tutti i dispositivi di sicurezza prima di mettere
in funzione la macchina.
MESSA IN FUNZIONE – ESTRAZIONE DELLA
MACCHINA DALL’IMBALLO
AVVERTENZA: Il presente imballaggio
contiene oggetti taglienti. Prestare la massima
attenzione durante la rimozione dall’imballo. Per
il sollevamento, il montaggio e il trasporto della
presente macchina possono essere necessarie
due persone. Montare la macchina mediante gli
accessori in dotazione, presenti nell’imballaggio.
Controllare attentamente che la macchina si trovi
in condizioni ottimali e verificare il contenuto in
base all’elenco dei componenti riportato nelle
istruzioni d’uso. Assicurarsi anche che tutti i
componenti siano presenti in modo completo.
COMPONENTI IN DOTAZIONE
Descrizione Codice
Manuale di istruzioni 1
Lama multiuso 185 mm
(installata)
Chiave a brugola 1
Scarico Porta di scarico 1
Guida parallela 1
Valigetta 1
ULTERIORI ACCESSORI
Oltre agli articoli standard eccesso di offerta
con questa macchina i seguenti accessori
Evolution alsoavailable dal negozio online
www.evolutionpowertools.com
o dal vostro rivenditore locale.
Descrizione Codice
RAGE Lama RAGE
Diamond Lama DIAMOND
1
185
185
DESCRIZIONE DELLA MACCHINA
1
3
4
EN
FR
2
5
IT
Qualora dovessero mancare componenti, la
macchina deve essere restituita al rivenditore,
insieme agli accessori, nell’imballaggio originale.
Non gettare l’imballaggio ma conservarlo in un
luogo sicuro per l’intera durata della garanzia.
Smaltire quindi l’imballaggio in modo
compatibile con l’ambiente. Se possibile,
provvedere al suo riciclaggio. Non lasciare che
i bambini giochino con sacchetti di plastica
vuoti. Sussiste il pericolo di soffocamento.
1. ON / OFF TRIGGER INTERRUTTORE
2. IMPUGNATURA SUPPLEMENTARE FRONT
3. SCARICO PORT
4. LOWER BLADE GUARD
5. EQUIPAGGIAMENTO LAMA IN SITU
NL
54 55
Page 29

www.evolutionpowertools.com www.evolutionpowertools.com
Fig. 1
Fig. 2
Fig. 3
Fig. 4
GUIDA INTRODUTTIVA
Installazione o rimozione di una lama
ATTENZIONE: Utilizzare soltanto lame originali Evolution
progettate per questa macchina. Assicurarsi che la velocità
massima della lama sia compatibile con la macchina. Eseguire
questa operazione soltanto quando la macchina è
scollegata dalla rete elettrica.
Nota: Si raccomanda all’operatore di utilizzare occhiali di
protezione quando maneggia la lama durante l’installazione e
la sostituzione.
1. Collocare la sega su una superficie piana e sicura.
2. Rimuovere il raccoglitore di trucioli dalla macchina svitando
le (2) grandi viti ad alette. (Fig. 1)
Nota: Le viti ad alette del raccoglitore di trucioli sono “vincolate”
e non possono essere rimosse dalla macchina.
3. Bloccare l’albero della macchina utilizzando il blocco
dell’albero. (Fig. 2)
4. Utilizzando la chiave a brugola in dotazione allentare e
rimuovere la vite a testa incassata dell’albero e la flangia di
guida esterna della lama. (Fig. 3)
5. Rimuovere la lama della sega.
6. Pulire con attenzione le flange interne ed esterne di guida
della lama prima di installare una nuova lama.
7. Assicurarsi che la direzione delle frecce di rotazione stampate
sulla lama corrisponda alla direzione della freccia di rotazione
che si trova sul coperchio del raccoglitore di trucioli. (Fig. 4)
8. Installare di nuovo la flangia di guida esterna e la vite a testa
incassata.
9. Attivare il blocco dell’albero e stringere la vite a testa
incassata utilizzando la chiave a brugola.
Nota: La vite a testa incassata ha la filettatura verso destra.
10. Ricollocare il raccoglitore di trucioli e stringere
adeguatamente le due viti ad alette.
11. Controllare che il blocco dell’albero sia completamente
rilasciato ruotando manualmente la lama.
12. Controllare il funzionamento del coprilama di protezione.
Guida parallela
Una guida parallela (per aiutare durante il taglio trasversale)
può essere installata sulla piastra di base della macchina. I
bracci della guida devono essere inseriti negli slot rettangolari
nei bordi rialzati della piastra di base e scivolare sotto le viti di
bloccaggio ad alette. (Fig. 5)
Nota: La guida laterale può essere installata su entrambi i lati
della piastra di base e deve essere montata e regolata soltanto
con la macchina scollegata dalla rete elettrica.
Regolare la guida laterale in modo che sia alla distanza richiesta
dalla lama e serrare le due viti ad alette. Controllare che la guida
laterale sia parallela alla lama.
Regolazione della profondità di taglio
Rilasciare la leva di bloccaggio per regolare la profondità di
taglio richiesta. Regolare la profondità di taglio allo spessore
del pezzo. Meno di un dente completo dei denti lama deve
sporgere sotto al pezzo. Stringere la leva di bloccaggio
adeguatamente per bloccare nella posizione richiesta. (Fig. 6)
Regolazione dell’angolo di taglio
1. Allentare la vite di bloccaggio angolare che si trova nella
parte anteriore della sega.
2. Allentare la vite di bloccaggio angolare che si trova sulla parte
posteriore della piastra di base dellla macchina.
3. Inclinare la lama fino all’angolazione richiesta. (Fig. 7)
4. Stringere adeguatamenteentrambe le viti di bloccaggio angolare
Nota: Una scala graduata degli angoli (0
0
-450) è incorporata nel
quadrante “bloccaggio angolare” per aiutare l’impostazione.
CONSIGLI OPERATIVI
Effettuare i controlli di sicurezza di routine ogni volta che la
macchina è utilizzata. Controllare che tutte le protezioni di
sicurezza funzionino correttamente e che tutte le viti/manopole
di regolazione siano strette saldamente.
Controllare che la lama sia fissata e installata correttamente.
Controllare anche che si tratti della lama corretta per il materiale
da tagliare.
EN
Fig. 5
FR
Fig. 6
IT
Fig. 7
NL
56 57
Page 30

www.evolutionpowertools.com www.evolutionpowertools.com
Fig. 8
Controllare l’integrità del cavo di alimentazione.
Fissare sempre l’oggetto di lavoro su un supporto rigido come
un banco o un cavalletto per sega quando possibile.
Interruttore ON/OFF
Questa macchina è dotata di interruttore di avvio sicuro.
Per avviare l’utensile:
• Premere il pulsante del bloccaggio di sicurezza sul manico
con il pollice.
• Premere l’interruttore principale per avviare il motore. (Fig. 8)
Raccoglitore di trucioli
Questa macchina è dotata di un raccoglitore di trucioli per
raccogliere i trucioli di metallo. La piastra di copertura del
raccoglitore di trucioli è fornita di una “finestra” trasparente
in modo che l’operatore possa vederne il contenuto e, se
necessario, svuotarlo.
Per rimuovere e svuotare il raccoglitore di trucioli:
• Allentare le due viti ad alette del raccoglitore di trucioli.
• Estrarre il raccoglitore di trucioli dalla macchina.
• Svuotare il contenuto del raccoglitore di trucioli riversando
il raccoglitore in un contenitore per i rifiuti adatto,
permettendo al contenuto di fuoriuscire.
Nota: Per mantenere l’efficienza operativa si consiglia di
svuotare il raccoglitore quando è pieno per circa il 60%.
Smaltire il contenuto del raccoglitore dei trucioli in modo
ecologicamente responsabile.
• Ricollocare il raccoglitore di trucioli e stringere saldamente le
(2) viti ad alette.
Bocchetta di scarico
Durante il taglio del legno la presa della bocchetta di scarico
deve essere collegata al coperchio della bocchetta di scarico del
raccoglitore trucioli.
Collegare la presa della bocchetta di scarico
• Rimuovere il coperchio di chiusura della bocchetta di scarico
svitando la vite a testa incrociata.
• Rimuovere il coperchio di chiusura dalla bocchetta di scarico
e riporlo adeguatamente per utilizzo futuro.
• Installare la presa della bocchetta di scarico al posto del
coperchio di chiusura. (Fig. 9) I trucioli saranno espulsi dalla
presa della bocchetta di scarico durante le operazioni di taglio.
Quando è stato completato il taglio del legno, rimuovere la
bocchetta di scarico, riposizionare il coperchio di chiusura e
serrare la vite di fissaggio adeguatamente.
CONSIGLI PER IL TAGLIO
L’operatore deve indossare tutti i previsti PPE (Attrezzature
per la Protezione Personale) necessari per i lavori manuali. Ciò
include occhiali di sicurezza, maschere antipolvere, scarpe
antinfortunistiche ecc.
L’operatore deve sempre prestare attenzione alla posizione e al
percorso del cavo elettrico.
• Non forzare la macchina.
• Consentire alla velocità della lama della sega di effettuare il
proprio lavoro. Il rendimento del taglio non migliorerà se è
applicata una pressione eccessiva alla macchina e la vita della
lama si ridurrà.
• Durante l’utilizzo della guida parallela, assicurarsi che essa
sia effettivamente parallela alla lama. La lama e/o il motore
potrebbero danneggiarsi se la macchina è utilizzata con una
guida parallela regolata in modo non corretto.
• Per impostare la guida allentare le due viti di fissaggio e regolare
la guida nella posizione desiderata. Stringere le viti di fissaggio.
• Collocare il bordo frontale della piastra di appoggio
esattamente sull’oggetto di lavoro prima di accendere il motore.
• Quando si avvia un taglio, puntare la linea di taglio sulla linea
di taglio della guida, avendo cura di introdurre lentamente la
lama nel materiale per non danneggiarne i denti.
• Utilizzare entrambe le mani per spostare la sega attraverso
l’oggetto di lavoro.
• Applicare una pressione costante e graduale per muovere la
sega in avanti attraverso l’oggetto di lavoro.
Quando è stato completato un taglio rilasciare l’interruttore
ON/OFF e consentire alla lama di fermarsi completamente.
Non applicare una pressione laterale sul disco della lama nel
tentativo di rallentarlo più rapidamente.
ATTENZIONE: Se il motore dovesse arrestarsi o entrare in
fase di stallo mentre si sta effettuando un taglio, rilasciare
immediatamente l’interruttore e scollegare la macchina dalla rete
EN
Fig. 9
FR
IT
NL
58 59
Page 31

www.evolutionpowertools.com www.evolutionpowertools.com
elettrica. Rimuovere la macchina dall’oggetto di
lavoro prima di cercare la causa e di tentare di
avviare di nuovo il motore.
Nota: Questa sega è dotata di un dispositivo
di protezione contro il sovraccarico elettrico.
Esso è stato progettato per prevenire
sovraccarichi e conseguenti danni al motore.
Se questa caratteristica “si aziona”, il motore si
arresta e non funzionerà.
Consentire alla macchina di raffreddarsi e poi
premere l’“interruttore reset” alla base del
manico principale.
MANUTENZIONE
Nota: Qualsiasi manutenzione deve essere
effettuata a macchina spenta e scollegata dalla
rete elettrica.
Controllare regolarmente che tutte le
caratteristiche di sicurezza e le protezioni
funzionino correttamente. Utilizzare la
macchina soltanto se tutte le protezioni/
caratteristiche di sicurezza sono
completamente operative.
Tutti i cuscinetti del motore presenti in questa
macchina sono stati lubrificati per la sua
durata prevista di vita. Non è richiesta
ulteriore lubrificazione.
Utilizzare un panno pulito e leggermente umido
per pulire le parti in plastica della macchina.
Non utilizzare solventi o prodotti simili che
potrebbero danneggiare le parti in plastica.
ATTENZIONE: Non cercare di pulire inserendo
oggetti appuntiti attraverso le aperture degli
alloggiamenti delle macchine ecc. Le bocchette
di ventilazione delle macchine devono essere
pulite utilizzando aria compressa secca.
Un’eccessiva formazione di scintille può
indicare la presenza di sporcizia nel motore o
l’usura delle spazzole al carbonio.
CONTROLLO O SOSTITUZIONE DELLE
SPAZZOLE AL CARBONIO
Sostituire entrambe le spazzole al carbonio
anche se una sola delle due presenta una
lunghezza di carbonio residuo inferiore ai 6mm
o se la molla o il filo sono danneggiati o bruciati.
Per rimuovere le spazzole:
• Svitare i tappi di plastica che si trovano sul
retro del motore.
• Fare attenzione poiché i tappi sono a molla.
• Rimuovere le spazzole con le loro molle.
• Se è necessaria la sostituzione, cambiare le
spazzole e reinserire i tappi.
NOTA: Le spazzole usurate ma ancora
utilizzabili possono essere riutilizzate, ma
soltanto se sono inserite nella stessa posizione
e nello stesso modo in cui sono state rimosse
dalla macchina.
• Avviare le nuove spazzole senza carico per
circa 5 minuti. Ciò aiuterà il processo di
assestamento.
TUTELA DELL’AMBIENTE
Lo smaltimento dei prodotti elettrici non
deve essere effettuato con i rifiuti domestici.
Si prega di riciclare nelle strutture preposte.
Consultare la propria autorità locale o il
rivenditore per consigli sul riciclaggio.
EC DECLARATION OF CONFORMITY
In accordance with EN ISO 17050-1:2004
The manufacturer of the product covered by this Declaration is:
Evolution Power Tools, Venture One, Longacre Close, Holbrook Industrial Estate, Sheffield, S20 3FR.
The manufacturer hereby declares that the machine as detailed in this declaration fulfils all the
relevant provisions of the Machinery Directive and other appropriate directives as detailed below.
The manufacture further declares that the machine as detailed in this declaration, where
applicable, fulfils the relevant provisions of the Essential Health and Safety requirements.
The Directives covered by this Declaration are as detailed below:
2006/42/EC. Machinery Directive.
2004/108/EC. (until Apr 19th 2016) Electromagnetic Compatibility Directive.
2014/30/EU. (starting from Apr 20th 2016) Electromagnetic Compatibility Directive.
93/68/EC. The CE Marking Directive.
2011/65/EU. The Restriction of the Use of certain Hazardous
Substances in Electrical Equipment (RoHS) Directive.
2002/96/EC as The Waste Electrical and Electronic Equipment (WEEE) Directive.
amended by
2003/108/EC .
And is in conformity with the applicable requirements of the following documents:
EN55014-1 : 2006 • EN55014-2 : 1997+A1 • EN61000-3-2 : 2006 • EN61000-3-3 : 1995+A1+A2
EN60745-1 : 2003+A1 • EN60745-2-5 : 2003 • EN60825-1 : 1994+A1+A2
Product Details
Description: RAGE 185mm (7-1/4”) MULTIPURPOSE CIRCULAR SAW
Evolution Model No: RAGE1851 / RAGE1852 / RAGE1852EU
Brand Name: EVOLUTION
Voltage: 110V / 230V ~ 50Hz
Input: 1050W
The technical documentation required to demonstrate that the product meets the requirements
of directive has been compiled and is available for inspection by the relevant enforcement
authorities, and verifies that our technical file contains the documents listed above
and that they are the correct standards for the product as detailed above.
Name and address of technical documentation holder.
Signed: Print: Matthew Gavins: Group Chief Executive
Date: 01/03/2016
EN
FR
IT
NL
60 61
Page 32

EN
FR
NEDERLANDS
Vertaling van de originele handleiding
IT
NL
Page 33

www.evolutionpowertools.com www.evolutionpowertools.com
INHOUDSOPGAVE
English Page 2
Français Page 22
Italiano Pagina 42
Nederlands Pagina 62
INLEIDING Pagina 65
Garantie Pagina 65
Machinespecificatie Pagina 66
Vibratie Pagina 67
Labels en symbolen Pagina 67
Beoogd gebruik van dit elektrisch gereedschap Pagina 68
Verboden gebruik van dit elektrisch gereedschap Pagina 68
VEILIGHEIDSVOORZORGEN Pagina 69
Elektrische veiligheid Pagina 69
Gebruik buitenshuis Pagina 69
Algemene veiligheidsinstructies voor elektrisch gereedschap Pagina 69
Aanvullende veiligheidsinstructies Pagina 73
OPSTARTEN Pagina 74
Uitpakken Pagina 74
Machine-overzicht Pagina 75
Montage en voorbereiding Pagina 77
Instructies voor de bediening Pagina 78
ONDERHOUD Pagina 80
Milieubescherming Pagina 80
CONFORMITEITSVERKLARING Pagina 81
DEZE INSTRUCTIEHANDLEIDING
WERD OORSPRONKELIJK IN HET
ENGELS GESCHREVEN
BELANGRIJK
Lees deze instructies voor de bediening
en veiligheid zorgvuldig en volledig. Voor
uw eigen veiligheid, als u twijfelt over enig
aspect met betrekking tot het gebruik van
deze apparatuur, ga dan naar de Technische
Hulplijn, het nummer is te vinden op de
website van Evolution Power Tools. In onze
wereldwijde organisatie hebben wij diverse
Hulplijnen, maar technische hulp is ook
verkrijgbaar bij uw leverancier.
WEB
www.evolutionpowertools.com/register
Gefeliciteerd met uw aankoop van een
machine van Evolution Power Tools. Vul uw
productregistratie ‘online’ in zoals beschreven
in de A4 online garantieregistratiefolder bij
deze machine. U kunt ook de QR-code in de
A4-folder met een Smart Phone scannen.
Hierdoor kunt u de garantieperiode van
uw machine valideren via de website van
Evolution door uw gegevens in te voeren en
op deze manier prompte service garanderen
wanneer dat ooit nodig zal zijn. Wij danken
u van harte voor het selecteren van een
product van Evolution Power Tools.
GARANTIE VAN EVOLUTION LIMITED
Evolution Power Tools behoudt zich het recht
voor om zonder bericht vooraf verbeteringen
en aanpassingen aan het productontwerp
aan te brengen.
Raadpleeg de garantieregistratiefolder en/of
de verpakking voor bijzonderheden over de
voorwaarden van de garantie.
Evolution Power Tools zal, binnen de
garantieperiode en vanaf de oorspronkelijke
datum van aankoop, alle goederen
die defect blijken te zijn in materiaal
of afwerking, repareren of vervangen.
Deze garantie is ongeldig wanneer het
teruggestuurde gereedschap anders is
gebruikt dan volgens de aanbevelingen
in de instructiehandleiding of wanneer de
machine per ongeluk, door verwaarlozing
of verkeerde service is beschadigd.
Deze garantie is niet van toepassing op
machines en / of componenten die op enige
wijze zijn gewijzigd, veranderd of aangepast
of zijn onderworpen aan gebruik buiten de
aanbevolen capaciteiten en specicaties.
Elektrische componenten vallen onder
respectievelijke garanties van fabrikanten.
Alle geretourneerde defecte goederen
moeten via vooruitbetaalde vracht worden
teruggestuurd naar Evolution Power Tools.
Evolution Power Tools behoudt zich het recht
voor het optioneel te repareren of vervangen
door hetzelfde of een soortgelijk artikel.
Er is geen garantie - schriftelijk of mondeling
- voor verbruikstoebehoren zoals (de
volgende lijst is niet volledig) bladen, cutters,
boren, beitels of peddels enz. Evolution
Power Tools zal in geen geval aansprakelijk
zijn voor verlies of schade als direct of indirect
gevolg van het gebruik van onze goederen of
van enige andere oorzaak. Evolution Power
Tools is niet aansprakelijk voor mogelijke
kosten die zijn ontstaan over dergelijke
goederen of gevolgschade.
Geen functionaris, werknemer of agent
van Evolution Power Tools is geautoriseerd
voor het geven van mondelinge
geschiktheidsverklaringen of om af te
zien van een van de eerder genoemde
verkoopvoorwaarden en geen ervan zal
bindend zijn voor Evolution Power Tools.
Vragen met betre kking tot deze beperkte
garantie dienen te worden gericht aan
het hoofdkantoor van de onderneming,
of u kunt het van toepassing zijnde
Hulplijn-nummer bellen.
EN
FR
IT
NL
64 65
Page 34

www.evolutionpowertools.com www.evolutionpowertools.com
SPECIFICATIES
MACCHINA METRIC IMPERIAL
Motor (VS) 120 v ~ 60 Hz 1050W 9A
Motor (VK/EU) 230/240 v ~ 50 Hz 1050W 5A
Motor (VK) 110 v ~ 50 Hz 1050W 10A
Onbelast toerental 3500min
-1
Gewicht 6.5kg 14lbs
SNIJCAPACITEIT METRIC IMPERIAL
Zacht plaatstaal (Maximale dikte) 6mm 1/4”
Snijden bij maximaal 90
Snijden bij maximaal 45
0
0
55mm 2-1/8”
35mm 1-3/8”
MES METRIC IMPERIAL
Diameter 185mm 7-1/4”
Boring 20mm 3/4”
Aantal tanden 20 20
Zaagsnede 1.7mm .067”
Toerental 3900min
-1
GEGEVENS MET BETREKKING TOT GELUID & VIBRATIE
Geluidsdruk L
Geluidsvermogensniveau L
(Belast) 93 dB(A) K= 3 dB(A)
PA
(Belast) 104 dB(A) K= 3 dB(A)
WA
Vibratieniveau (Belast) 4.99m/s
3500omw/min
3900 omw/min
2
K= 1.5m/s2
Opmerking: De vibratiemeting is onder
standaard omstandigheden uitgevoerd
conform: BS EN 61029-1:2009.
De aangegeven totale vibratiewaarde is
gemeten conform een standaard testmethode
en kan worden gebruikt om het ene
gereedschap te vergelijken met een ander.
De aangegeven totale vibratiewaarde
kan ook worden gebruik t in een
voorlopige blootstellingsbepaling.
VI BRAT IE
WAARSCHUWING: Bij gebruik van
deze machine kan de operator worden
blootgesteld aan hoge vibratieniveaus
overgebracht op hand en arm.
Het is mogelijk dat de operator “witte
vibratievingerziekte” (syndroom van Raynaud)
zou kunnen ontwikkelen. Deze aandoening
kan de gevoeligheid voor temperatuur van
de hand verminderen evenals een algemene
gevoelloosheid produceren.
Langdurige of regelmatige gebruikers van deze
machine dienen de conditie van hun handen
nauwlettend te controleren. Wanneer een
van de symptomen merk baar wordt dient u
onmiddellijk de hulp van een arts in te roepen.
• De meting en beoordeling van
blootstelling van mensen aan via de hand
doorgegeven vibratie in de werkplaats
wordt gegeven in: BS EN ISO 5349-1:2001
en BS EN ISO 5349-2:2002.
• Veel factoren kunnen het actuele
vibratieniveau tijdens bediening
beïnvloeden bijv. de conditie en oriëntatie
van werkoppervlakken en het type en de
conditie van de gebruikte machine. Vóór
elk gebruik dienen dergelijke factoren
te worden beoordeeld en waar mogelijk
dienen passende werkpraktijken te worden
toegepast. Het onder controle houden van
deze factoren kan helpen de eecten van
vibratie te verminderen:
Hantering
• Hanteer de machine voorzichtig,
laat de machine het werk doen.
• Vermijd het gebruik van excessieve
lichamelijke inspanning op ongeacht
welk van de machinebesturingen.
• Denk aan uw veiligheid en stabiliteit en de
oriëntatie van de machine tijdens gebruik.
Werkoppervlak
• Denk aan het materiaal van het
werkopper vlak; de conditie, dichtheid,
sterkte, starheid en oriëntatie ervan.
WAARSCHUWING: De vibratie-emissie
tijdens werkelijk gebruik van het elektrische
gereedschap kan verschillen met de vermelde
totaalwaarde, afhankelijk van de manieren
waarop het gereedschap wordt gebruikt.
De noodzaak veiligheidsmaatregelen
te identiceren en de operator te
beschermen is gebaseerd op een schatting
van blootstelling onder de werkelijke
gebruiksomstandigheden (waarbij rekening
wordt gehouden met alle onderdelen van
de bedrijfscyclus, zoals de tijden waarin het
gereedschap is uitgeschakeld, wanneer het
stationair draait, naast de activeringstijd).
LABELS & SYMBOLEN
WAARSCHUWING: Deze machine niet
bedienen wanneer waarschuwings- en / of
instructielabels ontbreken of beschadigd zijn.
Neem contact op met Evolution Power Tools
voor vervangende labels.
N.B.: Alle of sommige van de volgende
symbolen kunnen in de handleiding of op
het product verschijnen.
EN
FR
IT
NL
66 67
Page 35

www.evolutionpowertools.com www.evolutionpowertools.com
Symbool Beschrijving
Volt
Ampère
Hertz
Toerental
Wisselstroom
Onbelast toerental
Draag stofbescherming
Lees de instructies
Leggere Le Istruzioni
CEcertificering
CSAcertificering
Waarschuwing
Afval elektrische &
Dubbel Geïsoleerd
Hz
Min
N
V
A
-1
~
o
Draag een veiligheidsbril
Draag gehoorbescherming
elektronische apparatuur
BEOOGD GEBRUIK VAN DIT ELEKTRISCH
GEREEDSCHAP
WAARSCHUWING: Dit product is een
handbediende cirkelzaag en is ontworpen
voor gebruik met speciale Evolution bladen.
Gebruik alleen accessoires die zijn ontworpen
voor gebruik in deze machine en/of die die
speciek worden aanbevolen door
Evolution Power Tools Ltd.
Indien voorzien van een geschikt blad kan
deze machine worden gebruikt voor het
zagen van:
Zachtstaal
Aluminium
Hout
VERBODEN GEBRUIK
VAN DIT ELEK TRISCH
GEREEDSCHAP
WAARSCHUWING: Dit product is een
handbediende cirkelzaag en mag alleen als
zodanig worden gebruikt. Het mag op geen
enkele wijze worden aangepast of worden
gebruikt voor het bekrachtigen van andere
apparatuur of andere accessoires aandrijven
dan de in deze instructiehandleiding
vermelde.
WAARSCHUWING: Deze machine is niet
bedoeld voor gebruik door personen
(met inbegrip van kinderen) met beperkte
lichamelijke of verstandelijke vermogens of
een gebrek aan ervaring en kennis, tenzij zij
toezicht of instructies met betrekking tot het
veilige gebruik van de machine krijgen door
een voor hun veiligheid verantwoordelijke
persoon en die competent is in het veilige
gebruik ervan.
Kinderen dienen onder toezicht te blijven om
zeker te stellen dat zij geen toegang krijgen
tot en niet met deze machine mogen spelen.
ELEKTRISCHE VEILIGHEID
Deze machine is voorzien van de correct
gevormde stekker en netstroomkabel voor de
specieke markt. Wanneer de voedingskabel
is beschadigd, moet hij worden vervangen
door een speciale kabel die verkrijgbaar is bij
de fabrikant of zijn service-agent.
GEBRUIK BUITENSHUIS
WAARSCHUWING: Wanneer dit gereedschap
buitenshuis wordt gebruikt dient het voor
uw veiligheid niet te worden blootgesteld
aan regen of op vochtige plekken te worden
gebruikt. Plaats het gereedschap niet
op vochtige oppervlakken. Gebruik een
schone, droge werkbank. Gebruik voor ex tra
bescherming een reststroomapparaat (R.C.D.)
dat de voeding zal onderbreken wanneer de
lekstroom naar aarde de 30 mA gedurende 30
ms overschrijdt. Controleer altijd de werking
van het reststroomapparaat (R.C.D.) voordat u
de machine gebruikt.
Wanneer een verlengsnoer nodig is, moet het
geschikt zijn voor gebruik buitenshuis en moet
dit met een label worden aangegeven. Bij
gebruik van een verlengsnoer dient men zich
te houden aan de instructies van de fabrikant.
ALGEMENE VEILIGHEIDSINSTRUCTIES
VOOR ELEKTRISCH GEREEDSCHAP
(Deze algemene veiligheidsinstructies
voor elektrisch gereedschap worden
gespeciceerd in BS EN 60745-1:2009 & EN
61029 -1:20 09).
WAARSCHUWING: Lees alle
veiligheidswaarschuwingen en instructies.
Wanneer u zich niet aan alle hieronder
vermelde waarschuwingen en instructies
houdt, kan dit resulteren in elektrische schok,
brand en / of ernstig letsel.
Bewaar alle waarschuwingen en instructies
voor toekomstig gebruik. De term Elektrisch
gereedschap” in de waarschuwingen heeft
betrekking op uw op stroom werkende
(met snoer) elektrische gereedschap of op
accu werkende (zonder snoer) elektrische
gereedschap.
1) Algemene veiligheidswaarschuwingen
voor elektrisch gereedschap [Veiligheid
op de werkplek]
a) Zorg dat de werkplek schoon en goed
verlicht is. Rommelige of donkere plekken
vragen om ongelukken.
b) Gebruik geen elektrisch gereedschap
in een explosieve omgeving, zoals
in aanwezigheid van brandbare
vloeistoen, gassen of stof. Elektrisch
gereedschap vormt vonken die het stof of de
dampen kunnen doen ontbranden.
c) Houd kinderen en omstanders uit de
buurt tijdens het bedienen van elektrisch
gereedschap. Door aeiding kunt u de
controle verliezen.
2) Algemene veiligheidswaarschuwingen
voor elektrisch gereedschap
[Elektrische veiligheid]
a) Stekkers voor elektrisch gereedschap
moeten overeenkomen met de
contactdoos. Pas de stekker op geen enkele
manier aan. Gebruik geen adapterstekkers
met geaard elektrisch gereedschap. Niet
aangepaste stekkers en overeenkomende
contactdozen zullen het risico van elektrische
schok verminderen.
b) Vermijd contact van het lic haam met
geaarde oppervlakken zoals leidingen,
radiatoren, fornuizen en koelkasten. Er
bestaat een verhoogd risico van elektrische
schok wanneer uw lichaam geaard wordt.
c) Elektrisch gereedschap niet
blootstellen aan regen of natte
omstandigheden. Water dat in elektrisch
gereedschap komt zal het risico van
elektrische schok vergroten.
EN
FR
IT
NL
68 69
Page 36

www.evolutionpowertools.com www.evolutionpowertools.com
d) Gebruik het snoer niet verkeerd.
Gebruik het snoer nooit voor het
dragen, trekken of om de stekker van
het elektrische gereedschap uit de
contactdoos te trekken. Houd het snoer
uit de buurt van hitte, olie, scherpe randen
of bewegende onderdelen. Beschadigde of
verstrikte snoeren verhogen het risico van
elektrische schok.
e) Gebruik tijdens het buitenshuis
bedienen van elektrisch gereedschap een
verlengsnoer dat geschikt is voor gebruik
buitenshuis. Het gebruik van een snoer
dat geschikt is voor gebruik in de open lucht
vermindert het risico van elektrische schok.
f) Wanneer het bedienen van elektrisch
gereedschap in een vochtige omgeving
noodzakelijk is, gebruik dan een
hulpmiddel dat wordt beschermd door
een reststroomapparaat (RCD). Het
gebruik van een RCD vermindert het risico
van elektrische schok.
3) Algemene veiligheidswaarschuwingen
voor elektrisch gereedschap
[Persoonlijke veiligheid].
a) Blijf alert, let op wat u doet en gebruik
gezond verstand bij het bedienen van
elektrisch gereedschap. Gebruik geen
elektrisch gereedschap wanneer u moe
of onder invloed van drugs, alcohol of
geneesmiddelen bent. Een moment van
onoplettendheid tijdens het bedienen van
elektrisch gereedschap kan resulteren in
ernstig lichamelijk letsel.
b) Gebruik persoonlijke beschermende
uitrusting. Draag altijd oogbescherming.
Beschermende uitrusting zoals stofmaskers,
slipvaste veiligheidsschoenen, helm of
gehoorbescherming die wordt gebruikt
onder toepasselijke omstandigheden zal
lichamelijk letsel verminderen.
c) Vermijd onbedoeld starten. Controleer
of de schakelaar in de uit-stand staat alvorens
aan te sluiten op stroomvoor ziening en/of
accupakket, het gereedschap op te pakken of te
dragen. Het dragen van elektrisch gereedschap
met uw vinger op de schakelaar of het activeren
van het elektrische gereedschap met de
schakelaar aan vraagt om ongelukken.
d) Verwijder elke stelspie of sleutel alvorens
het elektrische gereedschap in te schakelen.
Een sleutel of spie die wordt achtergelaten i n een
draaiend deel van elektrisch gereedschap kan
resulteren in lichamelijk letsel.
e) Niet overreiken. Houd te allen tijde
een goede steun en een goed evenwicht.
Hierdoor kunt u het elektrische gereedschap
in onverwachte situaties beter onder
controle houden.
f) Draag de juiste kle ding. Draag geen
loszittende kleding of sieraden. Houd uw
haar, kleding en handschoenen uit de buurt
van bewegende onderdelen. Loszittende
kleding, sieraden of lang haar kan tussen
bewegende onderdelen terechtkomen.
g) Wanneer hulpmiddelen worden
geleverd voor het aansluiten van
stofafzuigings- en opvangfaciliteiten,
controleer dan of deze zijn aangesloten
en correct worden gebruikt . Het gebruik
van stofopvang kan gevaren die verband
houden met stof verminderen.
4) Algemene veiligheidswaarschuwingen
voor elektrisch gereedschap [Gebruik
en verzorging van het elektrische
gereedschap].
a) Het elektrische gereedschap niet
forceren. Gebruik het correcte elektrische
gereedschap voor uw toepassing. Het
correcte elektrische gereedschap zal zijn
werk beter en veiliger doen in het toerental
waarvoor het werd ontworpen.
b) Gebruik het elektrische gereedschap
niet wanneer het niet wordt in- of
uitgeschakeld door de schakelaar. Elk
elektrisch gereedschap dat niet met de
schakelaar kan worden geregeld is gevaarlijk
en moet worden gerepareerd.
c) Neem de stekker van het elekt rische
gereedschap uit de contactdoos en/
of het accupakket van het elektrische
gereedschap alvorens aanpassingen
aan te bre ngen, accessoires te
vervangen of elektrisch gereedschap
op te bergen. Dergelijke preventieve
veiligheidsmaatregelen verminderen het
risico op het per ongeluk starten van het
elektrische gereedschap.
d) Bewaar niet gebruikt elektrisch
gereedschap buiten het bereik van
kinderen en laat het elektrische
gereedschap niet bedienen door personen
die niet bekend z ijn met het elektrische
gereedschap of deze instructies. Elektrisch
gereedschap is gevaarlijk in de handen van
niet-getrainde gebruikers.
e) Onderhoud van elektrisch
gereedschap. Controleer op verkeerde
uitlijning of vastlopen van bewegende
onderdelen, breuk van bewegende
onderdelen en elke andere conditie die
van invloed kan zijn op de werking van
het elektrische gereedschap. Wanneer het
elektrische gereedschap beschadigd is, laat
het dan repareren alvorens het te gebruiken.
Veel ongelukken worden veroorzaakt door
slecht onderhouden elektrisch gereedschap.
f) Houd snijwerktuigen scherp en
schoon. Goed onderhouden snijwerktuigen
met scherpe snijranden zullen niet zo snel
vastlopen en zijn gemakkelijker te bedienen.
g) Gebruik het elektrische gereedschap,
de accessoires en hulpstukken enz.
conform deze instructies, waarbij
rekening dient te worden gehouden met
de werkomstandigheden en het uit te
voeren werk. Gebruik van het elektrische
gereedschap voor andere werkzaamheden
dan de bedoelde zou kunnen resulteren in
een gevaarlijke situatie.
5) Algemene veiligheidswaarschuwingen
voor elektrisch gereedschap [Service]
a) Laat uw elektrische gereedschap
een ser vicebeurt geven door een
gekwaliceerde monteur die alleen
identieke vervangende onderdelen
gebruikt. Dit zal ervoor zorgen dat de
veiligheid van het elektrische gereedschap
wordt gehandhaafd.
GEZONDHEIDSADVIES
WAARSCHUWING: Bij gebruik van deze
machine kunnen stofdeeltjes worden
geproduceerd. In sommige gevallen kan dit
stof, afhankelijk van de materialen waarmee u
werkt, bijzonder gevaarlijk zijn. Als u vermoedt
dat verf op het opper vlak van materiaal dat u
wilt zagen lood bevat, vraag dan professioneel
advies. Verf op loodbasis dient alleen door een
professional te worden verwijderd en u dient
niet te proberen het zelf te verwijderen.
Zodra het stof op oppervlakken is afgezet kan
contact van hand naar mond resulteren in het
opnemen van lood. Blootstelling aan zelfs
kleine hoeveelheden lood kan onomkeerbare
schade aan de hersenen en het zenuwstelsel
veroorzaken. Met name de jonge en
ongeboren kinderen zijn kwetsbaar. U wordt
geadviseerd de risico’s in verband met de
materialen waarmee u werkt te overwegen en
de blootstellingsrisico’s te verminderen.
WAARSCHUWING: Door het gebruik van
elektrisch gereedschap kunnen vreemde
voorwerpen in de richting van uw ogen
worden gegooid, wat zou kunnen resulteren
in ernstig oogletsel. Draag, alvorens te
beginnen met werkzaamheden met het
elektrische gereedschap, altijd een schutbril,
veiligheidsbril met zijbescherming of waar
nodig een volledig gezichtsschild.
AANVULLENDE
VEILIGHEIDSINSTRUCTIES
a) GEVAAR: Houd handen uit de buurt
van het snijvlak e n het blad. Houd uw
andere hand op het tweede handvat of de
motorbehuizing. Wanneer beide handen
de zaag vasthouden, kan er niet in worden
gesneden door het blad.
b) Reik niet onder het werkstuk. De
bescherming kan u niet beschermen tegen
het blad onder het werkstuk.
EN
FR
IT
NL
70 71
Page 37

www.evolutionpowertools.com www.evolutionpowertools.com
c) Pas de zaagdiepte aan aan de dikte
van het werkstuk. Onder het werkstuk
dient minder dan een volle tand van de
tanden van het blad te zien te zijn. Houd het
te zagen stuk nooit in uw handen of over uw
been. Zet het werkstuk vast op een stabiel
platform. Het is belangrijk het werk goed
te ondersteunen om blootstelling van het
lichaam, vastlopen van het blad of verlies van
controle tot een minimum te beperken.
d) Houd het elektrische gereedschap
vast via geïsoleerde grepen tijdens de
uitvoering van een operatie waarbij het
zaaggereedschap in contact kan komen
met verborgen bedrading of zijn eigen
snoer. Door contact met een “onder stroom
staande” draad zullen ook de blootliggende
metalen delen van het elektrische
gereedschap “onder stroom staan” en kan de
gebruiker een schok krijgen.
e) Gebruik tijdens het sc hulpen altijd een
schulpgeleider of geleider met rechte
rand. Hierdoor wordt de snijnauwkeurigheid
verbeterd en de kans op vastlopen van het
blad verminderd.
f) Gebruik alt ijd bladen in de juiste
grootte en vorm (diamant versus rond)
van doornopeningen. Bladen die niet
overeenkomen met de montagehardware
van de zaag zullen excentrisch draaien en
verlies van controle veroorzaken.
g) Gebruik nooit beschadigde of
incorrecte bladvulplaatjes of bout. De
bladvulplaatjes en bout werden speciaal
ontworpen voor uw zaag, voor een optimale
prestatie en veilige operatie.
h) Gebruik geen hoge snelheid stalen
(HSS) zaagbladen.
i) Inspecteer de machine en het blad voor
elk gebruik. Gebruik geen misvormde,
gebarsten, versleten of anderszins
beschadigde bladen.
j) Gebruik de zaag nooit zonder het
oorspronkelijke beschermkapsysteem.
Vergrendel de bewegende beschermkap
niet in de open stand. Controleer of de
beschermkap vrij, zonder blokkering, beweegt.
k) Gebruik alleen bladen die voldoen aan
de in deze handleiding gespeciceerde
kenmerken. Alvorens accessoires te
gebruiken dient u altijd de maximaal
toelaatbare omw/min van de accessoire te
vergelijken met de omw/min van de machine.
Daar sommige materialen stof kunnen
produceren dat gevaarlijk kan zijn voor uw
gezondheid, adviseren wij het gebruik van een
goedgekeurd gezichtsmasker met vervangbare
lters bij gebruik van deze machine.
U dient altijd:
• in een goedgeventileerde ruimte te werken.
• met goedgekeurde veiligheidsapparatuur
te werken, zoals stofmaskers die speciaal
zijn ontworpen om microscopische
deeltjes te lteren.
Oorzaken en voorkomen van terugslag
door de operator:
Terugslag is een plotselinge reactie op
een bekneld, vastgelopen of verkeerd
uitgelijnd zaagblad, met als resultaat dat een
ongecontroleerde zaag omhoog en uit het
werkstuk komt in de richting van de operator:
1. Wanneer het blad strak bek neld of
vastgelopen is doordat de zaagsnede
sluit, loopt het blad vast en drijft de
motorreactie de eenheid snel terug in de
richting van de operator;
2. Wanneer het blad gedraaid of verkeerd
uitgelijnd wordt in de zaagsnede,
kunnen de tanden op de achterrand van
het blad in het bovenste oppervlak van
het werk stuk graven waardoor het blad
uit de inkeping kan klimmen en terug
kan springen naar de operator.
Terugslag i s het resulta at van verkeerd
gebru ik van de zaag en/of ve rkeerde
werkprocedures of omstandigheden en
zijn te vermijden door de juiste hieronder
vermelde voorzorgsmaatregelen te nemen.
a) Houd de zaag stevig met beide handen
op de zaa g vast en plaats uw a rmen
zodanig dat zij terugslagkrachten
kunnen opvangen. Plaats uw lichaam aan
weerskanten van het blad, maar niet in lijn
met het blad. Terugslag zou er voor kunnen
zorgen dat de zaag achteruitspringt, maar
terugslagkrachten kunnen onder controle
worden gehouden door de operator, indien de
juiste voorzorgsmaatregelen worden genomen.
b) Wanneer de bladen vastlopen, of
wanneer een insnijding om ongeacht
welke reden wordt onderbroken, laat
de trek ker dan los en houd de zaag
bewegingloos in het materiaal tot het
blad volledig tot stilstand komt. Probeer
nooit een zaag uit het werk te verwijderen
of de zaag naar achteren te trekken terwijl
de bladen in beweging zijn, anders kan een
terugslag optreden. Onderzoek en neem
stappen ter correctie om de oorzaak van het
vastlopen van het blad op te heen.
c) Bij het herstar ten van een zaag in het
werkstuk, het zaagblad ce ntreren in de
inkeping en controleer of de zaagtanden
niet vastzitten in het materiaal. Wanneer
het zaagblad vastloopt, kan het bij het starten
omhooglopen of terugslaan uit het werkstuk.
d) Ondersteun grote panelen om het
risico van bekneld rake n van het blad en
terugslag tot een minimum te beperken.
Grote panelen hebben de neiging door te
zakken onder hun eigen gewicht. Steunen
moeten aan weerskanten onder het paneel
worden geplaatst, in de buurt van de snijlijn
en bij de rand van het paneel.
e) De stelborghendels voor de bladdiepte
en schuine rand moeten s tevig vastzit ten
alvorens een insnijding te maken. Wanneer
de bladinstelling verschuift tijdens het snijden,
kan het vastlopen en terugslag veroorzaken.
f) Gebruik geen botte of gebroken
bladen. Niet-geslepen of verkeerd ingestelde
bladen produceren een smalle inkeping
waardoor excessieve wrijving, vastlopen van
het blad en terugslag wordt veroorzaakt.
g) Wees extra voorzichtig bij het maken
van een “diepte-insnijding” in bestaande
wanden of andere blinde gebieden.
Het uitstekende blad kan voorwerpen snijden
die terugslag kunnen veroorzaken.
h) Controleer de onderste beschermkap
voorafgaand aan elk gebruik op correcte
sluiting. Gebruik de zaag niet wanneer de
onderste beschermkap niet onbelemmerd
beweegt en onmiddellijk sluit. Klem of bind
de onderste beschermkap nooit vast in de
open positie. Wanneer u de zaag per ongeluk
laat vallen, kan de onderste beschermkap
worden verbogen. Breng de onderste
beschermkap omhoog met het intrekhandvat
en let op dat hij onbelemmerd werkt en het
blad of enig ander onderdeel in geen van de
snijhoeken en -diepten raakt.
i) Controleer de werking van de
veer van de onderste beschermkap.
Wanneer de beschermkap en de veer
niet goe d werken, moeten zij gebruik
een servicebeurt hebben. De onderste
beschermkap kan wat traag zijn als gevolg
van beschadigde onderdelen, gomachtige
afzettingen of een ophoping van afval.
j) De onderste beschermkap kan alleen
handmatig worden ingetrokken voor
speciale snijvormen zoals “diepteinsnijdingen” en “verbindingsinsnijding.”
Breng de onderste beschermkap omhoog
met behulp van het intrekbare handvat en
zodra het blad in het materiaal komt moet de
onderste beschermkap worden vrijgezet. Voor
alle andere zaagwerkzaamheden dient de
onderste beschermkap automatisch te werken.
k) Let er altijd op dat de onderste
beschermkap het blad bedekt alvorens
de zaag op een bank of op de vloer te
plaatsen.Een onbeschermd vrijlopend blad
zal ervoor zorgen dat het blad achteruit loopt
en alles op zijn weg snijdt. Let op hoelang
het duurt voordat het blad stopt nadat de
schakelaar wordt losgelaten.
EN
FR
IT
NL
72 73
Page 38

www.evolutionpowertools.com www.evolutionpowertools.com
WAARSCHUWING: Wanneer er onderdelen
ontbreken, uw machine pas gebruiken nadat
de ontbrekende onderdelen zijn teruggezet.
Wanneer u zich niet aan deze regel houdt, kan
dit resulteren in ernstig lichamelijk letsel.
OPSTARTEN - UITPAKKEN
Let op: Deze verpakking bevat scherpe
voorwerpen. Wees voorzichtig bij het
uitpakken. Neem de machine, samen met de
meegeleverde accessoires uit de verpakking.
Controleer zorgvuldig om zeker te stellen dat
het apparaat in goede conditie verkeert en
alle in deze handleiding vermelde accessoires
aanwezig zijn. Controleer ook of alle
accessoires volledig zijn.
Wanneer er onderdelen blijken te ontbreken,
dienen de machine en de accessoires samen
in de originele verpakking teruggestuurd te
worden naar de verkoper.
Gooi de verpakking niet weg; berg het
gedurende de gehele garantieperiode
veilig op. Ruim de verpakking op een
milieuvriendelijke wijze op.
Laat kinderen niet spelen met lege plastic
zakken in verband met het risico op
verstikking.
GELEVERDE ARTIKELEN
Beschrijving Aantal
Instructiehandleiding 1
Multifunctioneel blad
(gemonteerd)
Zeskantsleutel
(bladvervanging)
Afvoeropeningsuitlaat 1
Parallelle randgeleider 1
Draagkoffer 1
AANVULLENDE ACCESSOIRES
Behalve de met deze machine meegeleverde
standaardartikelen zijn ook de volgende artikelen
uit de Evolutio n onlineshop verkrijgbaar via
www.evolutionpowertools.com of bij uw
lokale verkoper.
Beschrijving Onderdeelnr
Multipurpose blad RAGE
Diamond blad DIAMOND
1
1
185
185
BESCHRIJVING VAN DE MACHINE
1
3
4
EN
FR
2
5
IT
1. AAN/UIT-TRIGGERSCHAKELAAR
2. HULPHANDVAT AAN DE VOORK ANT
3. AFVOEROPENING
4. ONDERSTE BLADBESCHERMKAP
5. OP DE PLA ATS GEMONTEERD BLAD
74 75
NL
Page 39

www.evolutionpowertools.com www.evolutionpowertools.com
Fig. 1
Fig. 2
Fig. 3
Fig. 4
OPSTARTEN - VOORBEREIDEN
WAARSCHUWING: De zaag altijd loskoppelen van de
stroomvoorziening alvorens aanpassingen uit te voeren.
WAARSCHUWING: De zaag nooit starten terwijl de snijrand van
het zaagblad in contac t is met het oppervlak van het werkstuk .
De bladbescherming niet handmatig intrekken. De beschermkap
trekt automatisch terug. Deze zaag is uitgerust met een
goedgekeurde kabel en stekker voor het land waarin hij gebruikt
zal worden. De stroomkabel niet veranderen of aanpassen.
Installeren of verwijderen van een blad
WAARSCHUWING: Gebruik alleen originele voor deze
machine ontworpen bladen van Evolution. Controleer of
het maximale toerental van het blad compatibel is met de
machine. Voer deze operatie alleen uit terwijl de machine
is losgekoppeld van de stroomvoorziening.
N.B.: De operator dient te overwegen of het raadzaam is bij het
hanteren van het blad tijdens installatie of het ver vangen van het
blad van de machine beschermende handschoenen te dragen.
1. Plaats de zaag op een horizontaal, stevig oppervlak.
2. Verwijder de spaanopvang van de machine door de (2)
grote duimschroeven los te maken. (Fi g. 1)
N.B.: De duimschroeven van de spaanopvang ‘zitten vast’
en kunnen niet van de machine worden verwijderd.
3. Zet de hoofdas van de machine vast door de
hoofdasvergrendeling in te schakelen. (Fig. 2)
4. Draai met behulp van de meegeleverde inbussleutel los en
verwijder de inbuskopschroef van de hoofdas en de buitenste
bladaandrijens. (Fig . 3)
5. Verwijder het zaagblad.
6. Reinig de binnen- en buitenbladaandrijenzen en het
bladmontage-oppervlak grondig alvorens een nieuw blad
te installeren.
7. Zorg ervoor dat de op het blad aangegeven pijlen voor de
draairichting overeenkomen met de richtingpijl die te vinden
is op de kap van de spaanopvangbak. (Fig. 4)
8. Zet de buitenste aandrijens en de
hoofdasinbuskopschroef terug.
9. Schakel de hoofdasvergrendeling in en draai de
hoofdasinbuskopschroef stevig vast met behulp van
de inbussleutel.
N.B.: De inbuskophoofdasschroef heeft een schroefdraad
naar rechts.
10. Zet de spaanopvang terug en draai de twee
duimschroeven stevig vast.
11. Controleer of de hoofdasvergrendeling volledig is vrijgezet
door het blad handmatig te draaien.
12. Controleer de werking van de beschermkap.
Parallelle randgeleider
Een parallelle geleider (als hulpmiddel bij schulpzagen) kan
aan de grondplaat van de machine worden gemonteerd. De
armen van de geleiders dienen in de rechthoekige sleuven te
worden gestoken in de opstaande randen van de grondplaat
en onder de borgduimschroeven worden geschoven. (Fig. 5)
N.B.: De randgeleider kan aan beide zijden van de grondplaat
worden gemonteerd en dient alleen gemonteerd en
aangepast te worden terwijl de machine is losgekoppeld
van de stroomvoorziening.
Pas de randge leider zodanig aan dat hij zich op de vereis te afstand
van het blad b evindt en draai de twe e duimschroeven vast.
Controleer of de randgeleider parallel loopt aan het zaagblad.
Instellen van de snijdiepte
Zet de hendelvergrendeling vrij om in te stellen tot de
gewenste snijdiepte. Pas de snijdiepte aan de dikte van
het werkstuk. Minder dan een volledige tand van het mes
tanden moeten zichtbaar onder het werkstuk zijn. Draai de
hendelvergrendeling goed vast om in de gewenste positie te
vergrendelen. (Fig. 6)
Instellen van de snijhoek
1.Draai de afschuinborgschroef aan de voorkant van de zaag los.
2. Draai de afschuinborgschroef aan de achterkant van de
grondplaat van de machine los.
3. Kantel het blad in de gewenste hoek. (Fig. 7)
4. Draai beide afschuinborgschroeven stevig vast
N.B.: Een hoekschaal (0
O
-45O) is opgenomen in het
afschuinborgkwadrant als hulpmiddel bij instelling.
EN
Fig. 5
FR
Fig. 6
IT
Fig. 7
NL
76 77
Page 40

www.evolutionpowertools.com www.evolutionpowertools.com
Fig. 8
Advies voor de bediening
Voer elke keer dat u de machine gebruikt
routineveiligheidscontroles uit. Controleer of alle
veiligheidsbeschermingen correct werken en of alle
stelhendels/schroeven stevig zijn vastgedraaid.
Controleer of het blad stevig en corre ct is geïnstalleer d. Controleer
of het het correcte bla d is voor het te snijden materiaal.
Controleer de integriteit van de stroomkabel.
Klem het werkstuk waar mogelijk altijd aan een starre steun
zoals een bank of zaagblokken.
AAN/UIT-triggerschakelaar
Deze mac hine is uitgerust met een
veiligheidsstartschakelaar. Starten van de machine:
• Duw met uw duim op de veiligheidsvergrendelingsknop
aan de zijkant van de hendel.
• Druk op de hoofdtriggerschakelaar om de motor te starten.
(Fig. 8)
Spaanopvang
Deze machine is uitgerust met een spaanopvang voor het
opvangen van metaalspanen. De dekplaat van de spaanopvang
is voorzien van een transparant ‘venster’ zodat de operator de
inhoud kan zien en kan ledigen wanneer dat nodig is.
Het verwijderen en ledigen van de spaanopvang:
• Draai de twee spaanopvangduimschroeven los.
• Maak de spaanopvang los van de machine.
• Ledig de inhoud van de spaanopvang door de opvangbak
om te keren boven een geschikte afvalcontainer, zodat de
inhoud eruit kan vallen.
N.B.: Voor het handhaven van de operationele eciënte
adviseren wij dat de opvang wordt geledigd wanneer hij
ongeveer 60 % vol is. Ruim de inhoud van de spaanopvang
op een voor het milieu verantwoorde manier op.
• Zet de spaanopvang terug en draai de (2) duimschroeven
stevig vast.
Afvoeropening
Bij het snijden van hout dient de afvoeropeninguitlaat aan
de spaanopvangkapafvoeropening te worden gemonteerd.
De afvoeropeninguitlaat monteren
• Verwijder de afdekking van de afvoeropening door de
kruiskopschroef los te schroeven.
• Trek de afdekking van de afvoeropening en bewaar hem
veilig voor toekomstig gebruik.
• Monteer de afvoeropeningsuitlaat op de plaats van de
afdekking. (Fig. 9) Houtspanen zullen tijdens zaagoperaties
uit de afvoeropeningsuitlaat worden gestoten.
Na voltooiing van het zagen de uitlaatopening
verwijderen en de afdekking terugzetten en de
bevestigingsschroef stevig vastdraaien.
Zaagadvies
De operator dient alle relevante PPE (Persoonlijke
beschermingsvoorzieningen) te dragen die nodig zijn voor de
uit te voeren taak. Dit zouden veiligheidsbrillen, stofmaskers,
veiligheidsschoenen enz. kunnen omvatten.
De operator dient altijd op de hoogte te zijn van de positie en
loop van de stroomkabel.
• De machine niet forceren.
• Laat het werk doen door de snelheid van het zaagblad. De
snijprestatie zal niet verbeteren door excessieve druk op de
machine toe te passen en de levensduur van het blad zal
worden verminderd.
• Zorg er bij gebruik van een parallelle randgeleider voor dat hij
parallel loopt aan het blad. Het blad en/of de motor zouden
beschadigd kunnen worden wanneer de machine wordt
gebruikt met een verkeerd ingestelde parallelle randgeleider.
• Voor het instellen van de geleider de twee
bevestigingsschroeven losdraaien en de geleider bijstelling
in de gewenste positie. Draai de borgschroeven vast.
• Plaats de voorrand van de grondplaat een op het werkstuk
alvorens de motor te starten.
• Bekijk bij het starten van een snede de snijlijn met de lijn
van de snijgeleider, waarbij ervoor gezorgd moet worden
dat het blad langzaam op het materiaal wordt gezet, zodat
de tanden niet worden beschadigd.
• Gebruik beide handen om de zaag naar het werkstuk te
bewegen.
• Pas soepele, constante druk toe om de zaag vooruit door het
werkstuk te bewegen.
EN
Fig. 9
FR
IT
NL
78 79
Page 41

www.evolutionpowertools.com www.evolutionpowertools.com
Triggerschakelaar loslaten en het blad
volledig tot stilstand laten komen. Pas geen
zijdelingse druk toe op de bladschijf in een
poging hem sneller te laten vertragen.
WAARSCHUWING: Probeer niet schoon
te maken door puntige voorwerpen
in te brengen door openingen in de
machinebehuizingen enz. De luchtopeningen
van de machines dienen te worden gereinigd
met behulp van droge perslucht.
WAARSCHUWING: Wanneer de motor
stopt of afslaat terwijl wordt geprobeerd te
zagen, de triggerschakelaar onmiddellijk
loslaten en de machine loskoppelen van de
stroomvoorziening. Verwijder de machine
van het werkstuk alvorens de oorzaak te
onderzoeken en te proberen de motor
opnieuw te starten.
N.B.: Deze zaag is uitgerust met een
overbelastingsbeschermingshulpmiddel. Deze
is ontworpen om overbelasting en schade aan
de motor als gevolg daarvan te voorkomen.
Wanneer deze functie ‘inschakelt ’, stopt de
motor en zal hij niet werken.
Laat de machine afkoelen en druk vervolgens
op de ‘reset-schakelaar’ aan de basis van de
hoofdhendel.
Excessieve vonkenvorming kan wijzen op
de aanwezigheid van vuil in de motor of
versleten koolborstels.
Borstelinspectie en -vervanging
De motorborstels vervangen:
• Trek de stekker van de machine uit het
stopcontact.
• Plaats de machine op een horizontale,
stevige ondergrond.
• Verwijder de (2)
motorborstelbevestigingsdopschroeven.
• Verwijder de borstels.
N.B.: Wanneer de koolstofstang minder dan 6
mm (¼”) lang is, of bij tekenen van verbranding
of beschadiging, de borstels vervangen.
ONDERHOUD
N.B.: Al het onderhoud moet worden
uitgevoerd terwijl de machine uitgeschakeld
en losgekoppeld is van de stroomvoorziening.
Controleer regelmatig of alle
veiligheidsvoorzieningen en
beschermkappen correct werken.
Gebruik de machine alleen wanneer alle
beschermkappen/veiligheidsvoorzieningen
volledig operationeel zijn.
Alle motorlagers in deze machine zijn voor
de gehele levensduur gesmeerd. Verdere
smering is niet nodig.
Gebruik een schone, iets vochtige doek voor
het reinigen van de kunststofonderdelen
van de machine. Gebruik geen
oplosmiddelen of soortgelijke producten
die de kunststofonderdelen zouden kunnen
beschadigen.
MILIEUBESCHERMING
Elektrische afvalproducten dienen niet
te worden weggegooid met het huisvuil.
Recycle waar voorzieningen aanwezig zijn.
Vraag uw gemeentelijke instantie of verkoper
om advies met betrekking tot recycling
Monteer de nieuwe borstels. Zet de
motorborstelbevestigingsdoppen terug. Laat
de zaag na het vervangen van de borstels een
aantal minuten zonder belasting werken als
hulpmiddel bij het ‘inbeddings’ proces.
EG-CONFORMITEITSVERKLARING
In overeenstemming met EN ISO 17050-1:2004
De fabrikant van het product dat wordt gedekt door deze verklaring is:
Evolution Power Tools, Venture 0ne, Longacre Close, Holbrook Industrial Estate, Sheffield S20 3FR.
De fabrikant verklaart hierbij dat de machine zoals beschreven in deze verklaring voldoet aan
alle relevante voorwaarden van de Richtlijn voor Machines en andere passende richtlijnen zoals
hieronder beschreven. De fabrikant verklaart bovendien dat de machine zoals in deze verklaring
beschreven, waar van toepassing, voldoet aan de relevante voorwaarden van de essentiële
vereisten voor gezondheid en veiligheid.
De richtlijnen die worden gedekt door deze verklaring zoals hieronder uiteengezet:
2006/42/EC. Machinerichtlijn.
2004/108/EC. (until Apr 19th 2016) Elektromagnetische compatibiliteitsrichtlijn.
2014/30/EU. (starting from Apr 20th 2016) Elektromagnetische compatibiliteitsrichtlijn.
93/68/EC. De CE-Markeringsrichtlijn.
2011/65/EU. Richtlijn voor de beperking van gebruik van bepaalde gevaarlijke
stoen bij elektrische apparatuur (RoHS).
2002/96/EC als de richtlijn voor Waste Electrical and Electronic Equipment (WEEE) (afval
aangepast door van elektrische en elektronische uitrusting).
2003/108/EC .
En is conform de van toepassing zijnde vereisten van de volgende documenten:
EN55014-1 : 2006 • EN55014-2 : 1997+A1 • EN61000-3-2 : 2006 • EN61000-3-3 : 1995+A1+A2
EN60745-1 : 2003+A1 • EN60745-2-5 : 2003 • EN60825-1 : 1994+A1+A2
Productinformatie
Beschrijving: RAGE 185 mm (7-1/4”) MULTIPURPOSE CIRKELZAAG
Evolution Model Nr: RAGE1851 / RAGE1852 / RAGE1852EU
Merknaam: EVOLUTION
Spanning: 110 V/230 V ~ 50Hz
Invoer: 1050W
De technische documentatie die nodig is om aan te tonen dat het product voldoet aan de
vereisten van de richtlijn is samengesteld en is beschikbaar voor inspectie door de relevante
handhavingsautoriteiten en verifieert dat ons technische dossier de bovenvermelde documenten
bevat en dat zij de correcte normen zijn voor het product zoals hierboven vermeld.
Naam en adres van de houder van de technische documentatie.
Signed: Print: Matthew Gavins: Group Chief Executive
Datum: 01/03/2016
EN
FR
IT
NL
80 81
Page 42

www.evolutionpowertools.com www.evolutionpowertools.com
NOTESNOTES
EN
FR
82 83
IT
NL
Page 43

UK
Evolution Power Tools Ltd
Venture One
Longacre Close
Holbrook Industrial Estate
Sheffield
S20 3FR
US
Evolution Power Tools LLC
8363 Research Drive
Davenport
Iowa
52806
EU
Evolution Power Tools SAS
61 Avenue Lafontaine
33560
Carbon-Blanc
Bordeaux
+44 (0)114 251 1022
+1 866-EVO-TOOL
Discover Evolution Power Tools
Visit: www.evolutionpowertools.com or download
the QR Reader App on your smart phone and scan
the QR code (Right).
V1.2
+ 33 (0)5 57 30 61 89
 Loading...