

Page 1

USER GUIDE
Evolis © 2015 All rights reserved. November 2015.
Ref. KU-BDG2-044-ENG-B1
Page 2

COPYRIGHT INFORMATION
Evolis © November 2015. All rights reserved.
Users must observe the copyright regulations applicable in their country. This manual must not be photocopied, translated, reproduced, or transmitted, in whole or in part,
for any reason and by any electronic or mechanical means whatsoever without the express written consent of Evolis Card Printer.
All the information contained in this document is subject to change without prior notice.
Evolis Card Printer cannot be held liable for any errors that may be found in this manual, or for any loss or damage arising accidentally or as a result of dissemination or
use of this manual.
TRADEMARKS
Badgy and Badgy Premium Suite® are trademarks of Evolis Card Printer. All other trademarks belong to their respective holders.
WARRANTY
Refer to the warranty notice supplied in digital format with your printer for warranty terms and conditions and limitations.
ENVIRONMENTAL INFORMATION
Evolis is committed to helping the environment by reducing the energy consumption of its products.
RECYCLING END-OF-LIFE PRODUCTS
The manufacture of the equipment that you have purchased required the extraction and use of natural resources. This equipment may contain materials that are hazardous
to health and the environment.
To prevent the dispersal of such materials into our environment and reduce pressure on our natural resources, we recommend that you use existing collection systems.
These systems will re-use or recycle most of the materials in your end-of-life equipment in an appropriate way.
The crossed-out dustbin symbol on your device is a reminder to use these systems.
If you need further information on collection, re-use or recycling systems, contact your local or regional waste management body.
Do not hesitate to contact us for more information by visiting our website www.badgy.com
2
Page 3

ABOUT YOUR NEW PRINTER
Using your new Badgy printer, you will be able to create a wide variety of high-quality cards and personalized badges which can be printed in various thicknesses, colors
and styles. This printer uses consumables and accessories that are available from your Badgy reseller. For further details, visit our website
This user guide has been developed for the Badgy100 and Badgy200 machines.
www.badgy.com.
WARRANTY REGISTRATION
Please register online at www.badgy.com to receive driver updates, special offers, and to download new badge templates.
Once on the website, click on My account then Sign up and fi ll in all the fi elds, giving the printer model and serial number in particular, which you will fi nd on the sticker
underneath the machine.
GETTING STARTED
The purpose of this user guide is to support you, step by step, in discovering your printer and how it works. Take some time to read it in order to better understand your
printer and its features, and to save time during installation and use.
CONTENTS
The bookmarks found in the left-hand menu of your screen can be used to navigate between the various sections in this user guide.
ICONS
The following icons are used in this manual to highlight important information:
Information providing further details or depth about certain points in the main text.
Indicates that failing to take the recommended action is liable to damage your printer.
This symbol indicates that a video showing the procedure is available on the website www.badgy.com.
Clicking on this takes you straight to the online Help.
This symbol links to the Badgy Print Center, accessible from your computer, which you can use to administer and manage your printer and
change its settings.
3
Page 4

Getting Started
1-1 UNPACKING
Your printer is supplied with several accessories that we ask you to look at closely.
This list may vary depending on your location.
The printer is shipped in special packaging designed to prevent any damage in transit. If you notice any visible damage, do not hesitate to contact the carrier and immediately
inform your Badgy reseller, who will tell you the procedure to follow.
We have paid particular attention to the quality of the packaging for Badgy printers.
We ask that you keep this packaging somewhere clean and dry.
You will be asked for the full original packaging (outer box, chocks, and protective bags) in the event that the printer is returned. If the
printer is returned without its original packaging and components are damaged in transit, these components will no longer be covered by
the warranty. You will be charged for new packaging for shipping the printer back to you.
Accessories supplied with your printer:
O
Power supply unit – SWITCHBOX type F10723-A or CWT type KPL-065M.
O
Mains power cable.
O
USB cable.
O
Installation CD-ROM including:
- Card and badge design software
- The driver for Macs
- Badgy Premium Suite for WindowsTM and the driver for Windows
- The warranty notice
- The declaration of conformity
O
A consumables kit made up of a color ribbon and PVC cards
TM
1
If any of these components is missing, please contact your Badgy reseller. Only use the power supply unit provided with your Badgy printer
(SWITCHBOX type F10723-A or CWT type KPL-065M). Only use the USB cable supplied with your Badgy printer.
4
Page 5

1-2 DESCRIPTION OF THE PRINTER AND ITS FUNCTIONS
Warning lights
Cards and ribbon
Printer
Control button
A - Card feeder
B - Output hopper
C - Control panel
D - USB port
E - Power cable socket
F - Kensington lock
5
Page 6

G - Thermal print head H - Serial number label
The machine should always be disconnected from the power supply (unplugged) before any work is carried out on it.
6
Page 7

1-3 INSTALLATION
Watch the getting started video for the machine described in this section, also available at www.badgy.com
The Badgy printer must be placed in a dry location, protected from dust and drafts but well-ventilated. Take care to keep your printer on a
at, sturdy surface able to bear its weight.
1-3a Connecting the Printer
Connection to the power supply
The printer must be connected to a properly protected and earthed electrical installation.
FI: Laite on liitettävä suojamaadoitus koskettimilla varustettuun pistorasiaan.
NO: Apparatet må tilkoples jordet stikkontakt.
SE: Apparaten skall anslutas till jordat uttag.
Connect the power cable to the power supply unit, then plug the power cable connector into the printer.
Next, plug the end of the power cable into an earthed power socket.
The printer is powered on: the control panel lights up showing the printer is working properly. If the
control panel does not light up, then either the installation has not been carried out correctly or the
printer is not working properly. Check the installation.
7
Page 8

Before attempting any maintenance, always ensure that the power cable is unplugged. For your personal safety, ensure that the cable and power
supply unit remain easy to access, especially in the event of an emergency.
To save energy, the printer will automatically switch itself to standby mode after 10 minutes of inactivity.
The standby times can be con gured in the Badgy Print Center. In standby mode, sending a print request restarts the printer.
Hibernation mode can also be con gured; brie y pressing the control button (for 1 second) takes the printer out of this mode.
Connecting the USB cable
Under no circumstances should you connect the USB data cable before the installation of the driver is complete.
Refer to the section on driver installation for further details, and follow the instructions carefully.
8
Page 9

1-3b Ribbons
Evolis original ribbons optimize your printer’s operation and avoid causing damage to it. Ribbons from other suppliers are not compatible with your printer. Their use
is liable to damage your printer and voids the manufacturer’s warranty for the printer.
For optimum print quality, it is recommended that you fully clean the Badgy printer once a year, or after a period of inactivity. See the Servicing and Maintenance section of this
manual.
Fitting the ribbon
Open the cover.
Insert the ribbon as shown.
Close the cover and press until a click is heard.
heard.
The printer automatically recognizes the ribbon inserted.
9
Page 10

1-3c Cards
For optimum quality, the cards used must be ISO 7810 certi ed.
Only use the card types recommended for Badgy.
Avoid touching the printable surface of the cards in order to preserve print quality.
Do not use cards that have been damaged, folded, embossed or dropped on the oor.
Keep your cards protected from dust.
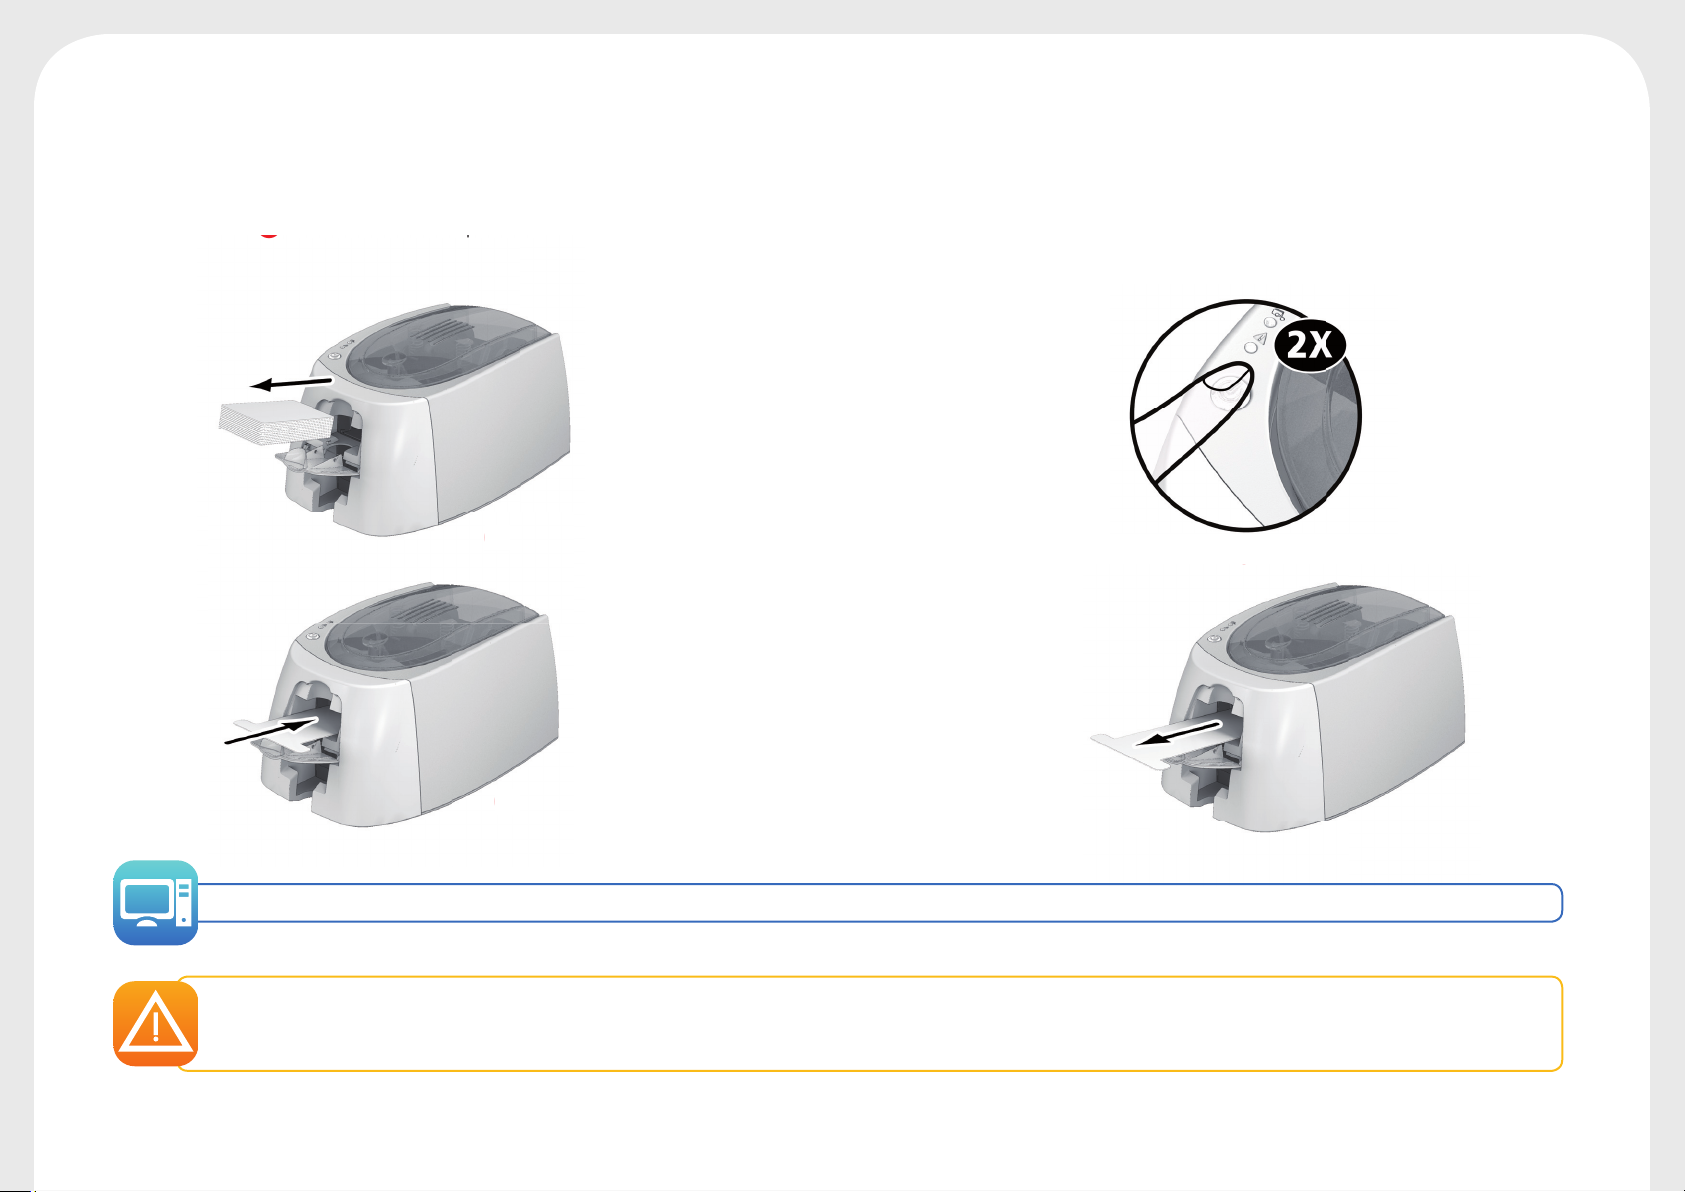
Loading the cards
Open the card feeder.
Insert the cards, 25 cards maximum (0.76 mm thick) or 40 cards maximum (0.5 mm thick).
Hold and insert the cards as illustrated in the diagram.
Close the feeder.
25x
10
Page 11

Removing printed cards
Once the print cycle is complete, the cards are issued into the output hopper below the card feeder. This output hopper is designed to collect the printed cards. The printer is
equipped with an output hopper with a maximum capacity of 25 cards that are 0.76 mm thick and 40 cards that are 0.50 mm thick.
Using cards that are 0.76 mm thick after extended use of cards that are 0.50 mm thick may require the rollers to be cleaned. See section 3-1a
Cleaning the Printer.
11
Page 12
Printing
2-1 INSTALLING THE DRIVER
New advanced functions automate printer confi guration after the driver has been installed.
Your printer is delivered with a CD containing the drivers for Windows and Macintosh platforms.
To install a driver, insert the CD into your computer and select the driver menu. A program will guide you through the entire installation process.
Do not connect your USB cable to your computer until prompted to do so by the installation program.
For more information on the connection procedure, see the section on Connecting the Printer.
Follow the installation procedure scrupulously. All versions of Windows require the user to have administrator rights to install the driver.
Installing the driver requires the installation of the Badgy Print Center by default.
This will help you to con gure your machine.
2
12
Page 13

2-2 MANAGING THE PRINT SETTINGS IN WINDOWS
Once the ribbon is installed, your Badgy printer will confi gure itself automatically.
A graphic application called Badgy Print Center is available to help you change certain predefi ned settings, if needed.
To access this application:
O
From the Start button on the bottom left of your screen in the Windows task bar, select All programs, Evolis Card Printer, Badgy Premium Suite, Badgy Print Center.
13
Page 14

O
Select the desired printer.
O
Right-click on the printer name, then select Properties to access the confi guration space, or double-click on the printer name.
Pay attention to the settings de ned under the driver Properties settings and do not hesitate to contact your Badgy reseller for any advice and
assistance required before making any changes.
14
Page 15

2-3 NOTIFICATION OF MESSAGES AND WARNINGS
Through visual notifi cations on the computer, the Badgy Printer Manager provides information about the printer, and alerts you when your attention is required.
There are several types of message:
O
Messages and alerts associated with the ribbons, their compatibility with your printer, and the nature of your print requests.
O
Alerts about problems which have stopped the printer.
When the Badgy Printer Manager is active, a small icon is displayed in the bar on the bottom right of your screen:
The color of the icon varies according to the status of the printer:
O
Green: Printer ready
O
Orange: Information message issued – printing stopped
O
Red: Warning message issued – printing stopped
O
Grey: Printer in hibernation mode, disconnected, or communication interrupted.
When a notifi cation is issued, it is displayed in a window of the following type (see below):
Depending on the type of message, you can either:
Get additional help from the Badgy support site (requires an
Internet connection).
Interrupt the print task.
Restart the task.
The Badgy Printer Manager can be disabled by right-clicking on the icon in the status bar.
Interrupting the Badgy Printer Manager service is only recommended if there is a con ict with other applications installed on your computer. The
Badgy Printer Manager is the best way of monitoring your printer effectively from your workstation.
15
Page 16

2-4 PRINTING CARDS WITH BADGE STUDIO
Your printer is delivered with software for creating badges and cards.
The Evolis Badge Studio allows you to easily personalize your badges and cards.
You can add various items:
O
Logos and illustrations
O
Identifi cation photos
O
Text
O
Barcodes, QR codes etc.
O
Geometric shapes
O
Connection to an Excel database (Badge studio +)
O
Taking photos directly (Badge studio +)
To use Badge Studio the following con guration is required:
MAC:
O
Mac OS X 10.6 or above
O
Intel Processor only
O
512 MB of RAM
O
A screen with a resolution of 1024 x 768 pixels
O
1 USB port
PC:
O
Windows® XP SP3, Vista®, 7 and 8 (32 & 64 bits)
O
512 MB of RAM
O
A screen with a resolution of 1024 x 768 pixels
O
1 USB port
More information on how the software works can be found in the Badge Studio user manual.
You can also design and print cards using other applications (Microsoft Word, PowerPoint, etc.).
16
Page 17

Servicing
In order to get the most from your printer, cleaning is recommended. We recommend regular cleaning of the different printer parts: rollers and
print head.
The "T" cards and Evolis cleaning pens are available at your Badgy reseller.
Do not hesitate to clean the printer in the event of any printing problems.
After a long period of inactivity, dust can get into the rollers and the print head. We therefore advise cleaning before re-use.
If you intend not to use your printer for an extended period, we advise you to acquire a protective cover, to avoid your printer getting clogged up
with dust.
Contact your reseller to purchase one.
3
17
Page 18

3-1 Cleaning the Printer
Recommended cleaning cycle: Once a year.
However, we do recommend more regular cleaning if your printer is located in a dusty place or if you use it intensively.
Servicing accessory: impregnated "T" shaped card.
Follow the procedure below to proceed with cleaning:
Open the printer cover.
Remove the ribbon as shown in the diagram.
Close the cover and press until a click is heard.
18
Page 19
Remove any cards present in the feeder.
p
Double-click the control button before inserting the "T" shaped cleaning card.
Take the "T" shaped cleaning card and insert it in the feeder as shown. Cleaning starts.
Remove the "T" shaped card
Printer cleaning may also be carried out from the Badgy Print Center by clicking on "Start cleaning."
Warning, the "T" shaped card must be used immediately after the bag is opened. A dry "T" card would not be operational, and may damage
your printer.
The "T" card is single use. Please use a new card each time you clean.
19
Page 20

3-2 Cleaning the Print Head
Recommended cleaning cycle: If you notice poor-quality printing or after a period of inactivity.
®
Servicing accessory: cleaning pen from the Evolis High Trust
brand.
Unplug the printer from its power supply before cleaning the print head.
Follow the cleaning cycles scrupulously.
Avoid any contact between the print head and any metal or sharp objects.
Avoid touching the print head directly with your ngers, as this could affect print quality or permanently damage the print head.
You must also protect the print head and its components from any discharge of static electricity.
20
Page 21

The cleaning pen can be used up to 8 times for cleaning the print head.
Warning! Like the "T" cards, the cleaning pen should not be allowed to dry out or it will no longer work.
Follow the procedure below:
Remove the cover from the cleaning pen.
Unplug the power supply, open the cover, and fi nd the print head.
Gently rub the pen from left to right along the print head as indicated for a few seconds.
Close the cover. Reconnect the printer.
After cleaning, please wait 2 minutes before using your printer again.
21
Page 22
Help
h
h
eThe
This section provides a number of suggestions for identifying problems that may arise when using your printer. If you do not manage to solve
your problem, this section also explains how to contact Badgy technical support.
4
4-1 WARNINGS AND DIAGNOSIS
Although the Badgy printer was designed to work independently, keeping user involvement to a minimum, it may nonetheless prove useful to gain some familiarity with
the main warnings.
Cf. section 1 – Description of the Printer and its Functions for further details about the control panel.
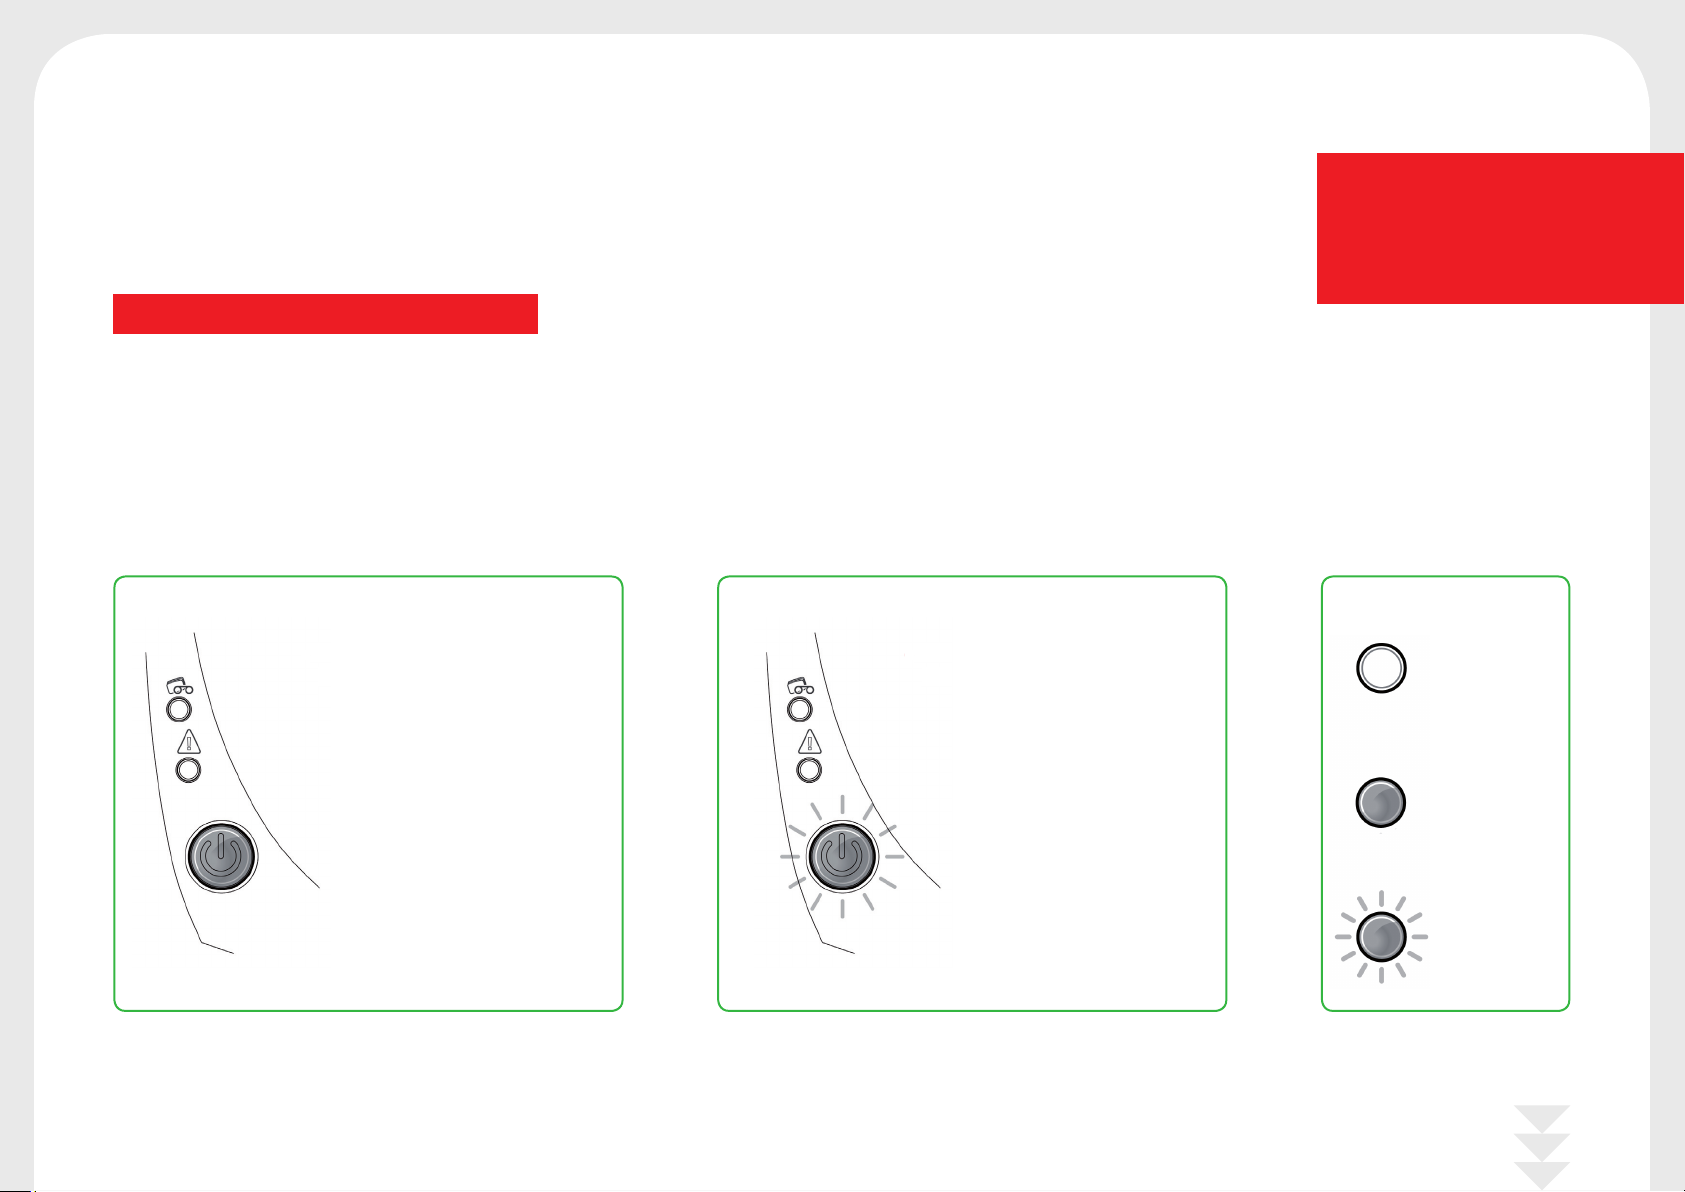
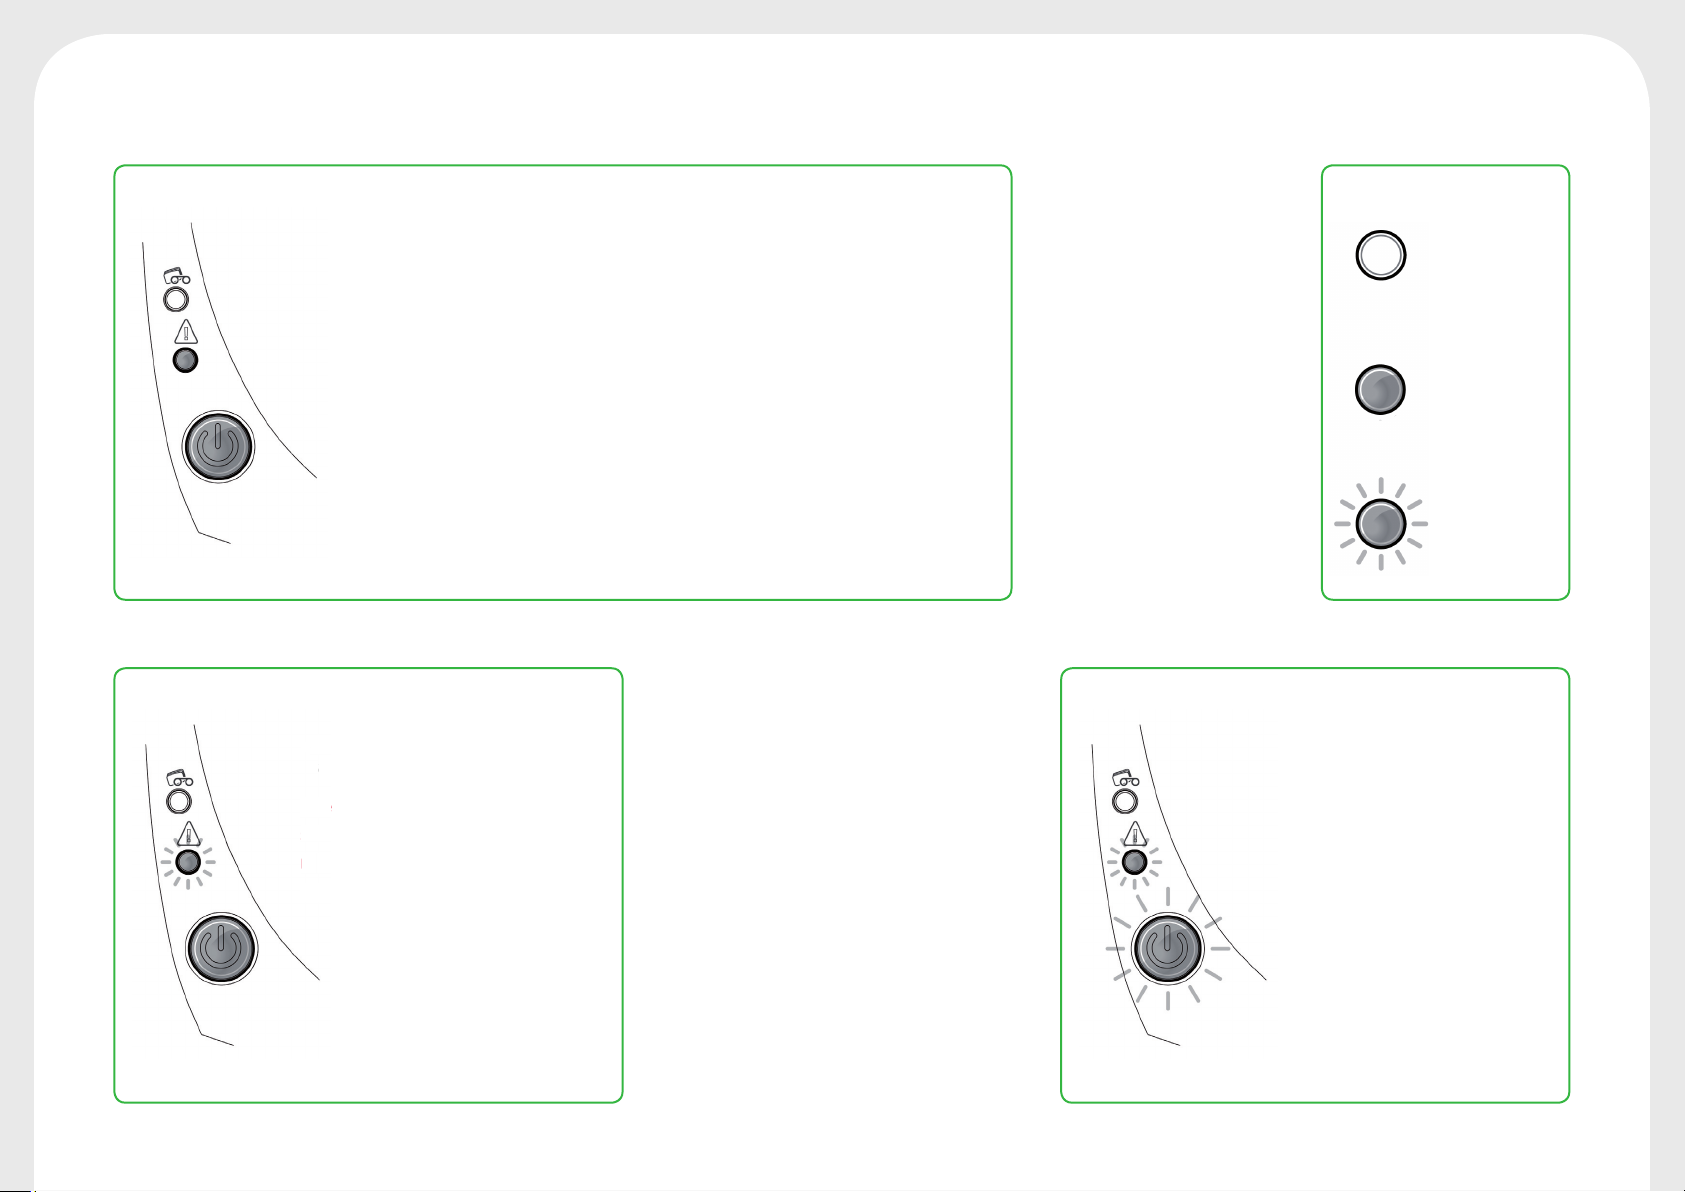
PRINTER READY
O The control button lights up.
T
The printer is ready to receive
T
data.
22
PROCESSING LEGEND
O The printer is receiving data.
Th
The control button is fl ashing.
OFF
STEADY LIGHT
FLASHING
Page 23
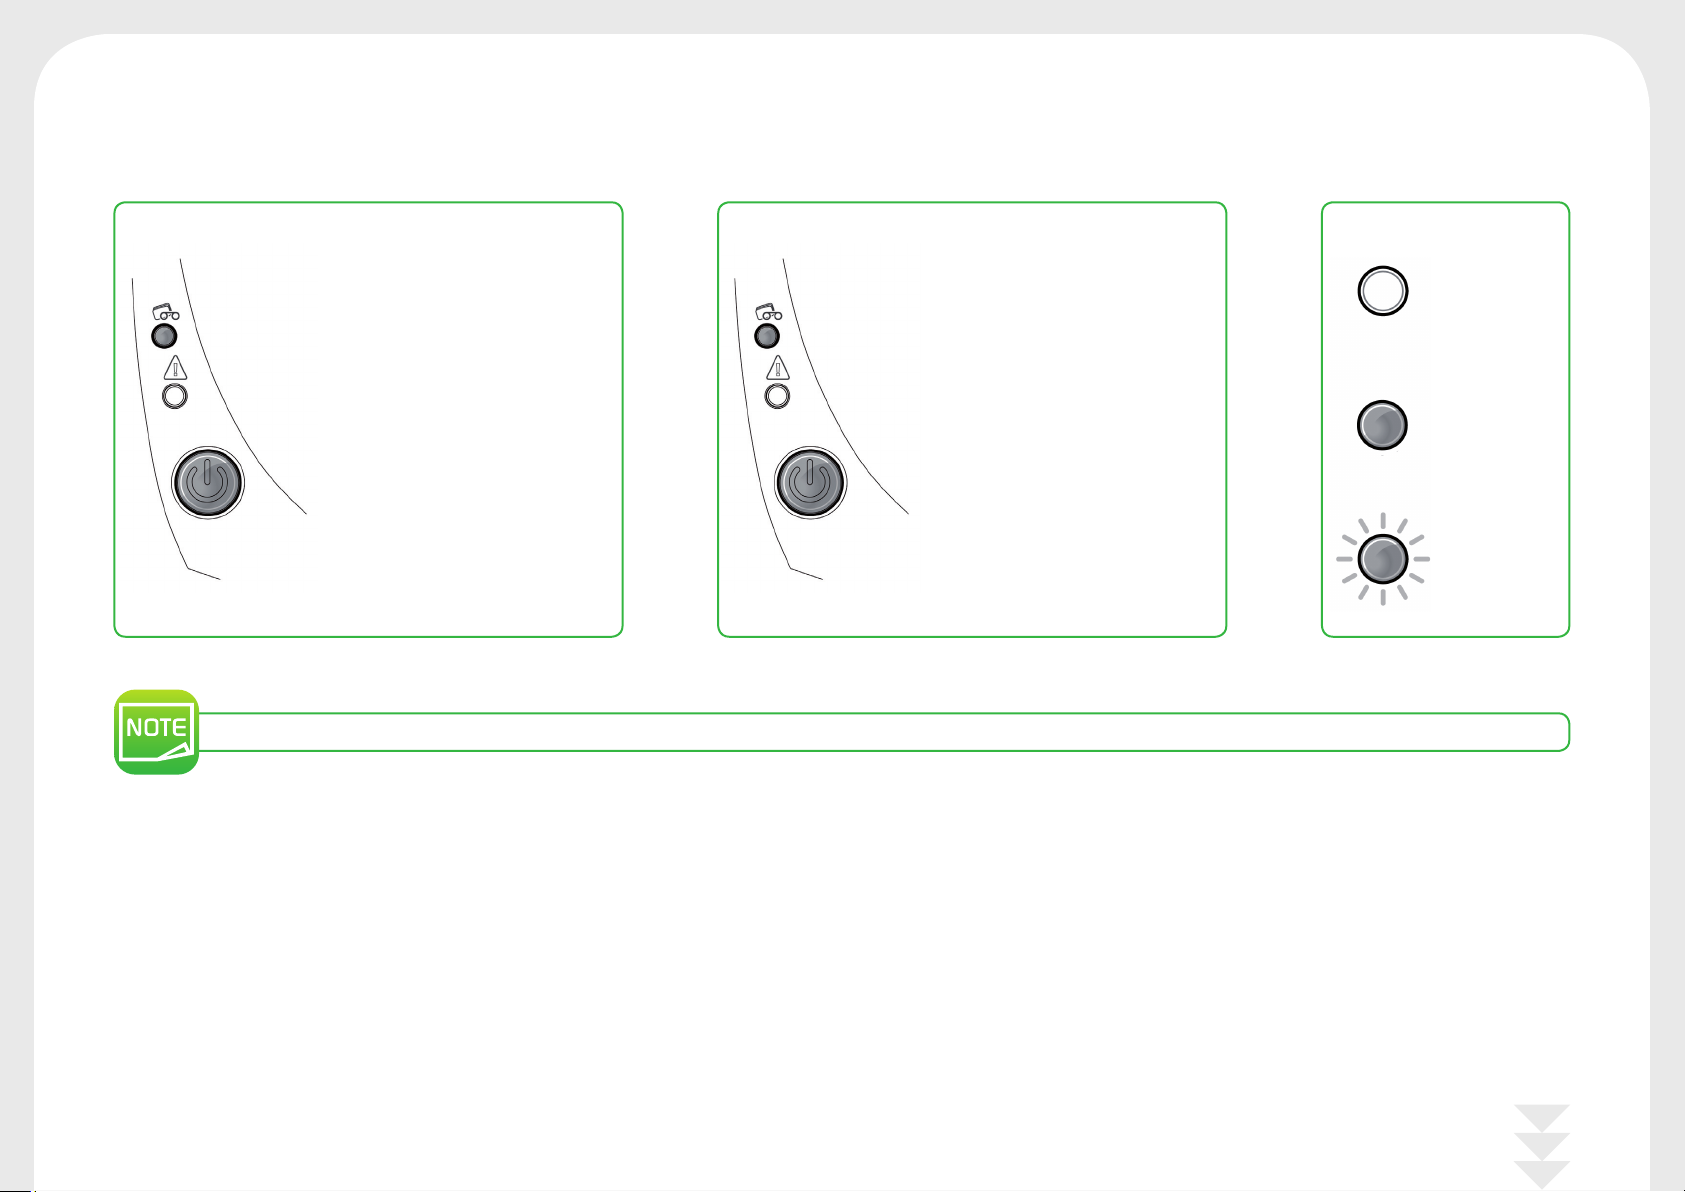
The control button and the card/ribbon warning lights are lit
CARDS RIBBON LEGEND
O
No cards in the card feeder.
Load cards into the feeder – the
process starts again.
O
Error loading cards.
Check the cards are loaded. For
any other problems, contact your
Badgy reseller.
O
No ribbon in the printer.
O
End of ribbon.
O
The ribbon is not correctly fi tted.
O
The ribbon is torn.
O
The ribbon is not recognized.
Check the condition of the ribbon
in the printer. If you have a print
job in progress, this restarts with
a new card.
OFF
STEADY LIGHT
FLASHING
For optimum use of your printer, we advise you to use the recommended ribbons and cards.
23
Page 24
The control button and the printer warning lights are lit
h
c
e
o
utem
PRINTER COVER OPEN
O
The printer cover is open.
Close the cover again. The printer
starts up.
MECHANICAL ERROR
O
Card jammed in the printer.
O
Mechanical component fault.
Open the cover and hold down
LEGEND
the pushbutton in order to eject
the jammed card. For more
details, refer to section 4-3b. If
the problem persists, contact
technical support at
www.badgy.com
COOLING MODE FIRMWARE UPDATE
O The cooling system has been
T
activated.
a
O The printer is updating its
Firmware.
OFF
STEADY LIGHT
FLASHING
The printer pauses for a few
Th
seconds and restarts once it has
sec
returned to its normal operating
et
The printer is operational again
following the update.
temperature.
24
Page 25

4-2 DIAGNOSIS HELP
In this section, you will fi nd all the information you need to carry out a few simple checks that you may be asked to run when you contact technical support.
4-2a Printing a Technical Test Card
We recommend that you print a technical test card to ensure that your printer is working properly. This card shows various technical information concerning the machine
(serial number, fi rmware, print head, etc.).
Printing a technical test card
Wait for any current print jobs to fi nish.
Check that there is a ribbon and card in the printer.
Press the control button for four seconds. All the warning lights go out.
Press and hold down the control button again.
The control button light comes on.
Release the control button once the light fl ashes.
The technical test card is printed.
The printed card is ejected into the output hopper.
Printing the technical test card can also be launched from the Badgy Print Center. To do this, open the Badgy Print Center, double-click on your
printer or right-click on "Properties" and go to "System details" then "Testing cards."
25
Page 26

4-2b Printing a Graphic Test Card
The graphic test card is used to check the print quality in color or monochrome, the absence of any offsets, and whether the ribbon is synchronized correctly.
To print the graphic test card, check fi rst of all that a ribbon and card are present in the printer.
Go to the Badgy Print Center, select System details, and click on the Testing cards tab. Then click on the Graphical test card button. The card is printed and the printed card is
ejected into the output hopper.
Printing the graphic test card can only be launched from the Badgy Print Center. To do this, open the Badgy Print Center, double-click on your
printer or right-click on "Properties" and go to "System details" then "Testing cards."
4-2c Identifying Installed Software Versions
You can directly identify the system versions installed (driver, setup, etc.):
From the Badgy Print Center, double-click on the printer name to access its Properties.
Click on System details , then System details.
26
Page 27

4-3 TROUBLESHOOTING
Do not attempt to use tools or other items to repair your printer in the event of problems. You risk causing irreparable damage.
4-3a Printing Problems
Printing won't launch
Check the driver
Check that there is a driver for your printer in the system parameters.
Check that the printer is selected as the default printer.
Check the printer's power supply
Check that the power cable is correctly connected to the printer and to a working electrical socket.
Check that the printer is on and that the control button is lit.
Make sure you are using the power supply unit supplied with the printer.
Check the USB cable
Check that the printer is connected to your computer via the USB cable.
Check the ribbon
Check that the ribbon is fi tted correctly and that the cover is closed.
Check the cards
Check that there are cards in the card feeder.
Check that no cards are jammed in the printer.
Print a test card
See elsewhere in this section for the procedure to be followed.
Nothing is printed on the card
Check the ribbon
Check that the ribbon is not fi nished or damaged. Replace it or re-install it if necessary.
The print head may be damaged
Print a test card.
If the test card does not print, contact Badgy technical support or visit the website
www.badgy.com.
27
Page 28

Poor print quality
Small blemishes on the card
Horizontal white lines
O
The card surface may be dirty.
Check that your cards are perfectly clean.
Use new cards.
O
Cleaning roller or print head dirty.
Launch a cleaning cycle.
O
The ribbon is not correctly tted.
Check that there are no wrinkles on the ribbon surface.
O
Print head dirty or damaged.
Clean or replace the print head.
Blurred image
We recommend that you obtain your cards from a Badgy reseller.
Use of cards from a different brand is liable to adversely affect print quality and/or damage the print head.
O
The ribbon is not correctly tted.
Check that the ribbon is correctly positioned in the printer.
O
Poor ribbon synchronization.
Open and close the printer cover to synchronize the ribbon.
O
Dirty printer or cleaning rollers.
Clean the printer
O
Use of incompatible cards.
Check that the cards used match the specifi cations.
28
Page 29

Partial or incorrect printing
Check the print settings
Check that no area of the card design to be printed is outside the print margins.
Check the document orientation (portrait or landscape) in the Badgy Print Center confi guration.
Check the interface cable
If irregular characters are printed, check that you are using the USB cable supplied with your printer.
Check the connection between the computer and the printer.
Try using another cable of the same type.
Check that the printer is clean
Clean the printer, especially the cleaning roller.
Refer to section 3-1 on servicing.
Check that the cards are clean
Keep your cards protected from dust.
Check the ribbon
Check that the ribbon is fi tted correctly.
Check that the ribbon spools freely.
Check the print head
Should horizontal straight lines appear on printed cards, it is likely that the print head is dirty or damaged.
Refer to the sections on printer servicing.
If the problem persists, contact a Badgy reseller or visit the website
29
www.badgy.com.
Page 30

4-3b Freeing Jammed Cards
CH
Control panel displays:
MECHANICAL ERROR
E
O
Card jammed in the printer. Print jobs are interrupted.
a
The printer warning light and control button light up.
Th
Do not turn your printer off, as this cancels pending print jobs in the printer’s memory.
Remove the card as follows:
Open the printer cover and remove the ribbon.
Press the control button to turn the card transport rollers. If the card is still stuck inside the printer, slide it manually towards the printer output.
If there is more than one card, always push the top one fi rst.
Replace the ribbon, then close the printer cover.
To prevent card jams:
Check that the thickness of the cards used matches the specifi cations set out in Appendix A "Technical Specifi cations" in this manual.
Check that the cards are fl at. Keep them in a horizontal position.
Check that the cards are not stuck together. Shuffl e the cards before loading them.
30
Page 31

4-3c Updating the Firmware
In Windows
Updating the fi rmware is a simple operation but one which, if not properly completed, can result in your printer breaking down.
Before any update, please contact your Badgy reseller who will be able to guide you on whether it is advisable to carry out this operation.
In general, such updates are only required in the event of a problem or malfunction that has been clearly identi ed by your Badgy reseller.
The printer’s rmware update is made via the Badgy Print Center. The update can be performed automatically or manually.
We recommend using the Update Veri cation wizard. This wizard will fi rst search for available updates for the software suite. Once the software suite is up to date,
please run this wizard again to check for printer fi rmware updates.
To launch this wizard, go to the Print Center > Tools > Update verifi cation wizard. An internet connection is required to run the wizard.
If you want to update your rmware manually, you can run the Firmware Update wizard.
Before starting, you must download the rmware update le from www.badgy.com:
Go to Drivers & Support, then select your printer model.
Go to Drivers & Firmware, then click on the fi le for the corresponding fi rmware.
Accept the download then save the fi le in a directory on your hard drive.
Now, open the Badgy Print Center and double-click on the name of your printer: the Properties window will open.
Go to ‘Maintenance > Firmware update’ and click on ‘Launch the update wizard’. This wizard will guide you through the printer fi rmware update
process.
When prompted by the program, follow the instructions and select the “.fi rm” fi le you downloaded previously on your computer.
The operation might last up to 1 minute. When the fi rmware has transferred to the printer, the printer restarts. The update is completed and your
equipment is ready to use.
Never interrupt the transfer between computer and printer during the download phase (powering off the printer or computer, unplugging a cable).
This would result in a complete inability to restart the printer. Should such an incident occur, please contact your Badgy reseller, who will have to
replace your printer’s processor board.
If the printer is not showing a «READY» status, this means that the update has not been carried out correctly or, possibly, that the printer is not working
properly. Check the connection cables and run a new update
However, if you experience problems while updating the fi rmware with the Badgy Print Center, please contact your Badgy reseller who can provide a new fi le to install
the fi rmware.
31
Page 32

For Mac:
Updating the fi rmware is a simple operation but one which, if not properly completed, can result in your printer breaking down.
Before any update, please contact the Badgy team, we will be able to guide you on whether it is advisable to carry out this operation. In
general, such updates are only required in the event of a problem or malfunction that has been clearly identi ed by your Badgy reseller.
Updates can be downloaded from the website www.badgy.com:
Go to Drivers & Support, then select your printer model.
Go to Drivers & Firmware, then click on the fi le for the corresponding fi rmware.
Accept the download then save the fi le in a directory on your hard drive.
Then go to System Preferences, Print & Scan, Badgy, Options & Supplies, Utility, and click on Open
Printer Utility. The Badgy Card Printer window will open. All you need to do is click on Upgrade.
Select the folder where you extracted the downloaded fi le and open the fi rmware fi le (.fi rm).
When prompted by the program, follow the instructions in order to select the printer and
start the operation. The fi rmware transfer is in progress.
After about thirty seconds, the fi rmware has transferred to the printer and the operation is complete.
Never interrupt the transfer between computer and printer during the download phase (powering off the printer or computer, unplugging
a cable). This would result in a complete inability to restart the printer. Should such an incident occur, please contact your Badgy reseller,
who will have to replace your printer’s processor board.
You can check the Firmware version by clicking on Identify.
If the printer is not showing a "READY" status, this means that the update has not been carried out correctly or, possibly, that the printer is not working
properly. Check the connection cables and run a new update.
However, if you experience problems while updating the fi rmware with the Badgy Print Center, please contact your Badgy reseller who can provide a new fi le to install
the fi rmware.
Once the update is complete, your equipment is ready for use.
32
Page 33

4-3d Updating the Driver
Updating the driver is a task that is required in order to fi x malfunctions or gain the benefi t of new options.
Before any update, please contact your Badgy reseller who will be able to guide you on whether it is advisable to carry out this operation.
Updates can be downloaded from the website www.badgy.com:
Go to Drivers & Support, then select your printer model, and click on the Drivers & Firmware link.
Then click on the fi le for the driver corresponding to your operating system.
Accept the download then save the fi le in a directory on your hard drive. If the fi le stored is compressed in zip format, then it will have to be extracted.
Windows users should double-click on the Setup_Badgy_Premium_Suite.exe fi le that you have just downloaded in order to run the installation
program. Mac users should double-click on the fi le BadgyCardPrinter.pkg
For more details about the procedure, please see the Installing the Driver section.
33
Page 34

4-4 TECHNICAL SUPPORT
If you are having diffi culties confi guring and using your printer, read this manual carefully.
For any unresolved technical problems and to help you with daily tasks, we provide a dedicated website:
www.badgy.com
Connect to this site and click on Support for technical support and troubleshooting. You may need to provide the following information:
Your printer model and serial number
The confi guration and operating system that you are using
A description of the incident that occurred
A description of the steps that you took to resolve the problem.
The Badgy website also provides driver updates, FAQs*, educational videos, our special offers, and general information.
*
FAQs: Frequently Asked Questions
34
Page 35

Appendix
SPECIFICATIONS
This section presents your printer’s specifi cations.
A
Print area
Print speed
O
YMCKO color
O
Monochrome (K) 16 s per card (180 cards an hour) 11 s per card (240 cards an hour)
Printing close to the edge with a margin of 1.35 mm Edge-to-edge printing
45 s per card (80 cards an hour) 38 s per card (95 cards an hour)
Badge customization software
O
You can pay to upgrade from Badge Studio to Badge Studio+
Printing mode
O
Color sublimation and monochrome thermal transfer
O Printing resolution : 260 x 300 dpi
O
16 million colors
O
16 MB RAM
Card management and specifi cations
O
Feeder capacity: 25 cards (0.76 mm – 30 mil)/40 cards (0.5 mm – 20 mil)
O
Output hopper capacity: 25 cards (0.76 mm – 30 mil)/40 cards (0.5 mm – 20 mil)
O
Card thickness: 0.5 to 0.76 mm (20 to 30 mil), no adjustment gauge
O
Card type: PVC and composite PVC cards, PET
O
Card format: ISO CR80 – ISO 7810 (53.98 mm x 85.60 mm)
Badge Studio Badge Studio + (including database management)
35
Page 36

Ribbons
To maximize the quality and lifetime of the printed cards, the service life of your print head and the overall reliability of your printer, use the recommended ribbons.
O
Recognition and automatic confi guration
O
Ribbon inserted in a cassette to make handling easier
O
Graphic notifi cation of the ribbon level
O
Ribbon:
• YMCKO: 100 prints/roll
• Monochrome ribbons: 500 prints/roll
Ports/connectivity
O
USB 2.0 (1.1 and 3.0 compatible)
Display
O
LEDs
O
Graphic printer notifi cations1:
• Feeder empty
• Ribbon nearly fi nished/fi nished warning
• Etc.
1
Depends on your operating system, not available for Mac.
Software
O
Supplied with Badgy Premium Suite® for Windows:
• Driver
• Badgy Print Center for administering, managing, and confi guring the printer
• Badgy Printer Manager for two-way graphic notifi cation
• Compatible with Windows: XP SP3, Vista, 7 & 8 (32 & 64 bits)
2
Requires .net 4.0 client profi le version
3
For the oldest versions of Windows, by request only.
2
3
Warranty conditions
O
1 year of warranty4 (printer and print head)
O
Warranty extensions available at www.badgy.com
4
Warranty valid as long as the recommended ribbons are used.
36
Page 37

Dimensions and weight
O
Dimensions (H x W x L): 147 x 200 x 276 mm
O
Weight: 1.7 kg
Acoustics (tested in accordance with ISO standard 7779)
Acoustic pressure on supporting workstations L
O
While in operation: below 60 dB (A)
O
In standby mode: Background noise level
(YMCKO color mode)
pAm
Security
O
Space for Kensington® security lock
Eco-design and certifi cation
O
Standby mode and reduced power consumption
Certifi cation and declaration of conformity
O
CE, FCC, IEC, VCCI, CCC, KC*
O
ROHS
*
Available in September 2014
Power supply
O
Power supply unit: 100-240 volts AC, 50-60 Hz, 1.7 A
O
Printer: 24 volts DC, 2.7 A
Environment
O
Min./max. operating temperature: 15°/30° C (59°/86° F)
O
Humidity: 20% to 65% non-condensing
O
Min./max. storage temperature: –5°/+70° C (23°/158° F)
O
Storage humidity: 20% to 70% non-condensing
O
Ventilation while in operation: free air circulation
37
Page 38
Appendix
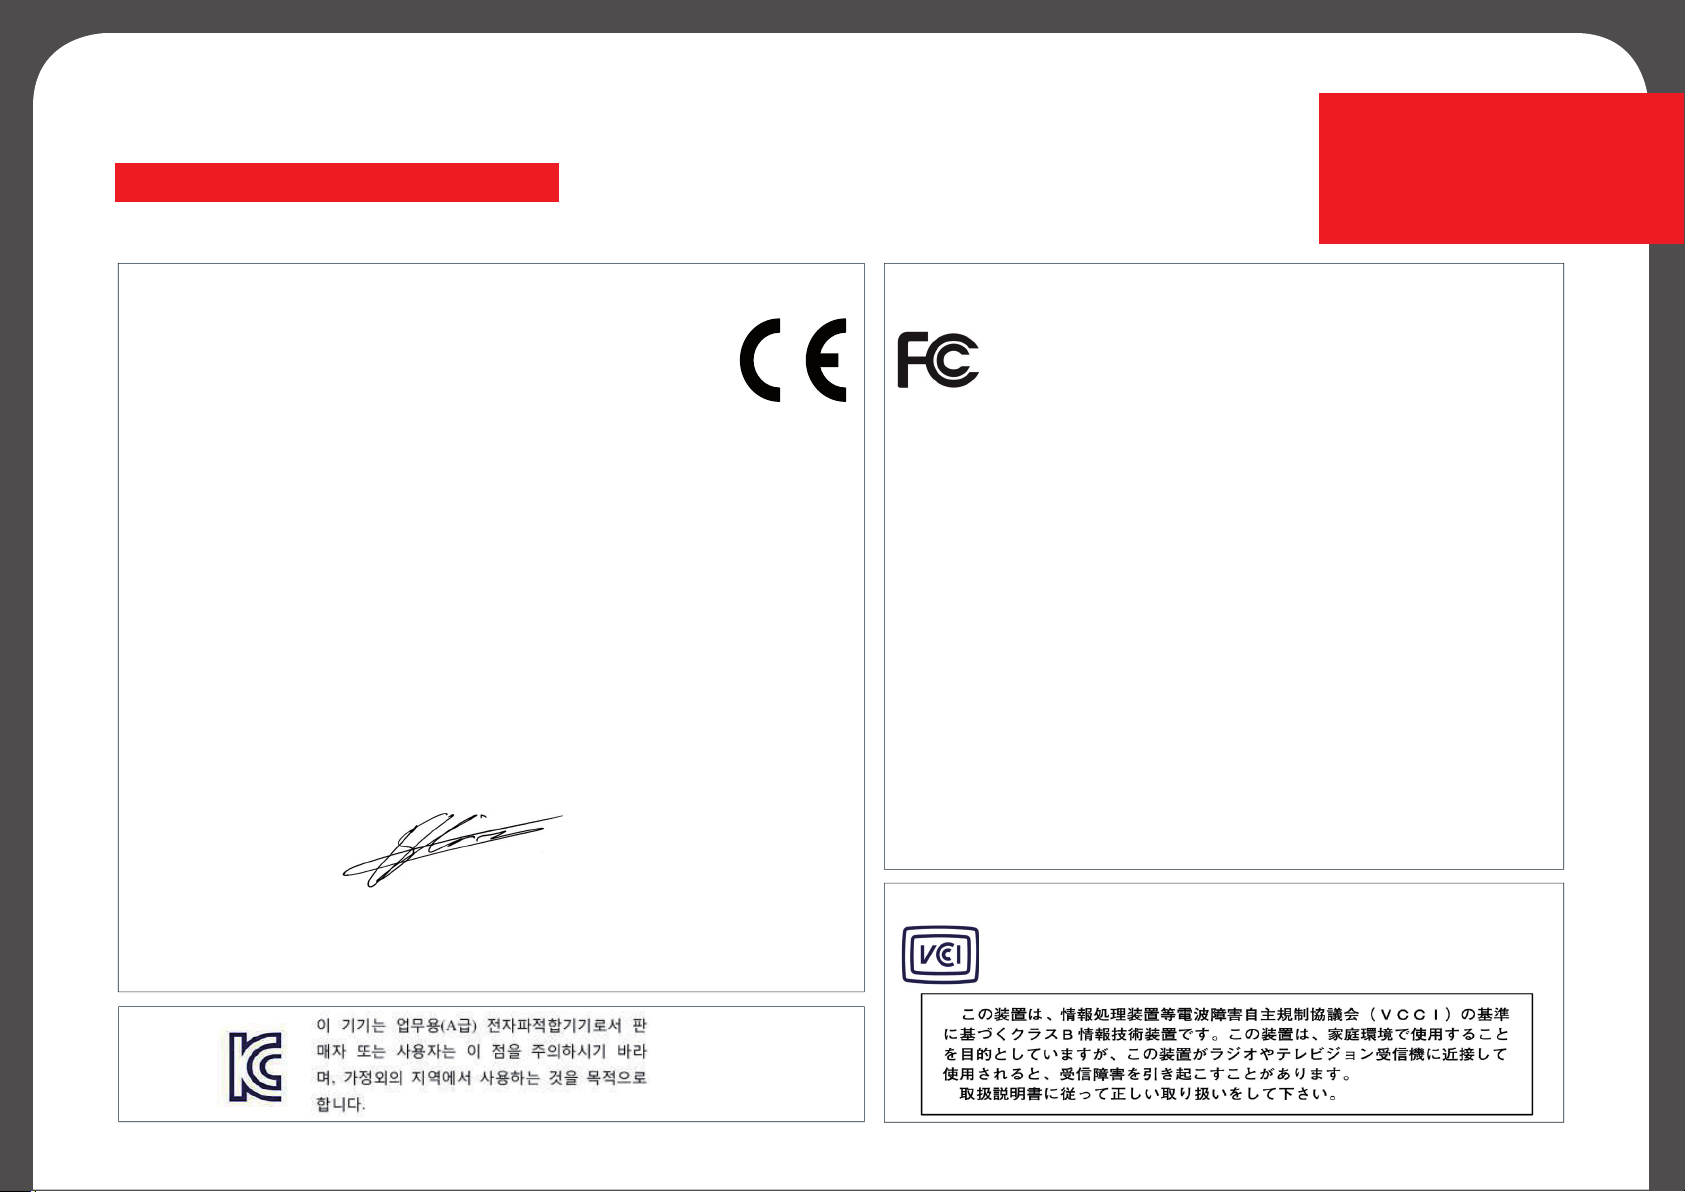
DECLARATION OF CONFORMITY
This section will provide certifi cations of your Evolis printer.
B
Concerning Safety and Electromagnetic Compatibility of Radio Equipment (R&TTE 1999/5/EC, 2006/95/EC
& 2004/108/EC Directives and (RoHS2) 2011/65/EU)
Manufacturer’s name: Evolis Card Printer
Manufacturer’s address: 14, avenue de la Fontaine
Z.I. Angers Beaucouzé
49070 Beaucouzé, France
Material Designation: Badgy100 / Badgy200
Year of manufacture: 2014
I, the undersigned, Serge Olivier,
Declare under his own responsibility that the product here above described complies with the essential
applicable requirements, (particularly with those of the 1999/5/EC, 2006/95/EC & 2004/108/EC directives
and (RoHS2) 2011/65/EU) as follows:
Article 3.1 b: (Electromagnetic compatibility protection requirements)
Safety standard applied EN60950-1:2006 + A11: 2009 + A1: 2010 + A12: 2011
EN50364:2001
EN62311:2008
Article 3.1 b: (Electromagnetic compatibility protection requirements)
EMC standard applied EN55022:2010
EN55024:2010
EN61000-3-2:2006
EN61000-3-3:2008
EN301489-3:V1.4.1
Article 3.2: (Good use of the radio frequency spectrum to avoid undesirable interferences)
EMC standard applied EN300330-2 V1.5.1
RoHS standard applied EN50581:2012
And declare that all test sequences regarding radio testing were conducted.
Full name: Serge Olivier
Title: R&D Director
Date: 2014
Signature:
EUROPE - Norway Only: This product is designed for IT power system with phase-to-phase voltage 230V.
Earth grounding is via the polarized, 3-wire power cord.
FI: “Laite on liitettävä suojamaadoitus koskettimilla varustettuun pistorasiaan”
SE: “Apparaten skall anslutas till jordat uttag”
NO: “Apparatet må tilkoples jordet stikkontakt”
FCC Statement (For U.S.A.)
Federal Communications Commission Radio Frequency Interferences Statement
Badgy100 / Badgy200 model conforms to the following specifi cations: FCC Part
15, Subpart A, Section 15.107(a) and Section 15.109(a) Class B digital device.
Supplemental information:
This equipment has been tested and fi nds to comply with the limits for a Class B digital device,
pursuant to part 15 of the FCC Rules. These limits are designed to provide reasonable protection
against harmful interference in a residential installation. This equipment generates uses and can
radiate radio frequency energy and, if not installed and used in accordance with the instructions,
may cause harmful interference to radio communications. However, there is no guarantee that
interference will not occur in a particular installation. If this requirement does cause harmful
interference to radio or television reception, which can be determine by turning the equipment off
and on, the user is encouraged to try to correct the interference’s by one or more of the following
measures:
- Reorient or relocate the receiving antenna.
- Increase the separation between the equipment and the receiver.
- Connect the equipment into an outlet on a circuit different from that to which the receiver is connected.
- Consult the dealer or an experienced radio/TV technician for help.
Use of a shielded cable is required to comply within Class B limits of Part 15 of FCC Rules.
Pursuant to Part 15.21 of the FCC Rules, any changes or modifi cations to this equipment not
expressly approved by Evolis Card Printer may cause, harmful interference and void the FCC
authorization to operate this equipment.
This equipment complies with FCC’s radiation exposure limits set forth for an uncontrolled
environment under the following conditions: (1) This equipment should be installed and operated
such that a minimum separation distance of 20cm is maintained between the radiator (antenna)
and user’s/nearby person’s body at all times. (2) This transmitter must not be co-located or
operating in conjunction with any other antenna or transmitter.
This device complies with Industry Canada licence-exempt RSS standard(s). Operation is
the following two conditions: (1) this device may not cause interference, and (2) this device must
accept any interference, including interference that may cause undesired operation of the device.
VCCI (For Japan)
This is a Class B product based on the standard of the Voluntary Control Council for
Interference from Information Technology Equipment (VCCI). If this is used near a radio or
television receiver in a domestic environment, it may cause radio interference. Install and
use the equipment according to the instruction manual.
subject to
38
 Loading...