


HSC04-0 U-Net Gateway
User Manual
1. Introduction
The HSC04 Gateway is a member of the U-Net series and is fully compatible
with any U-Net enabled devices. It can remotely control and monitor your
U-Net enabled devices. Whether onsite or logged in through the internet, you
will always have access to control and monitor your control system. With this
system you can achieve a better control of your home security to make your
life safer and easier than ever.
2. Appearance
Figure 1 HSC04 Appearance
2.1 Sockets
DC Jack: DC power voltage
9V, current 2A.
RJ-45 socket: HSC04 has
an Ethernet hub function
and is equipped with two
linked RJ-45 sockets.
2.2 Buttons
HSC04 has two buttons:
One reset button and a
connection button (next to
the RJ-45 socket).
■ Reset Button:
This button will reboot the system. The user can press this button when the
system is halting.
Note: HSC04 is equipped with internal battery power, which will be
automatically switched to when DC power is cut off. The device will still
be halting.
■ Connection Button:
‧
Manually enable the bind function:
Press the connection button once after the system is powered on.
‧
Manually cancel the bind function:
Press the connection button once when the system is in bind mode.
2.3. LED
LED1 LED2 LED3 LED4
Figure 2 HSC04Front View
- 1 -
Definition of LED:
LED1 Power LED2 Connection
LED3 Network 1
LED
LED4 Network 2
LED
2.3.1 Power LED
Green light: The power is on.
Red light: The Flash is writing data.
Red light flashes every 5 seconds: The system time is not synchronized
after boot up.
2.3.2. Connection LED
Green light: OpenVPN has successfully connected to the server.
Red light: The DHCP function is enabled but could not obtain IP
information.
Red and green light flashes: The firmware upgrade function is enabled in
bootloader time.
Green light flashes with an interval of 0.5 seconds: The system is in
binding mode.
Green light flashes with an interval of 2 seconds: The system has
successfully added other U-Net devices.
Green light flashes with an interval of 0.1 seconds: If code learning has
timed out it will continue to flash for 4 seconds.
If code learning is aborted it will continue to flash for 1 second.
Green and red light flash 3 times: The system has successfully booted.
2.3.3 Network 1 LED
Green light: The RJ-45 socket near the connection button is connecting.
2.3.4 Network 2 LED
Green light: The RJ-45 socket near the DC power jack is connecting.
2.4 USB
There are three USB sockets in the box, which can plug to the 3G dongle.
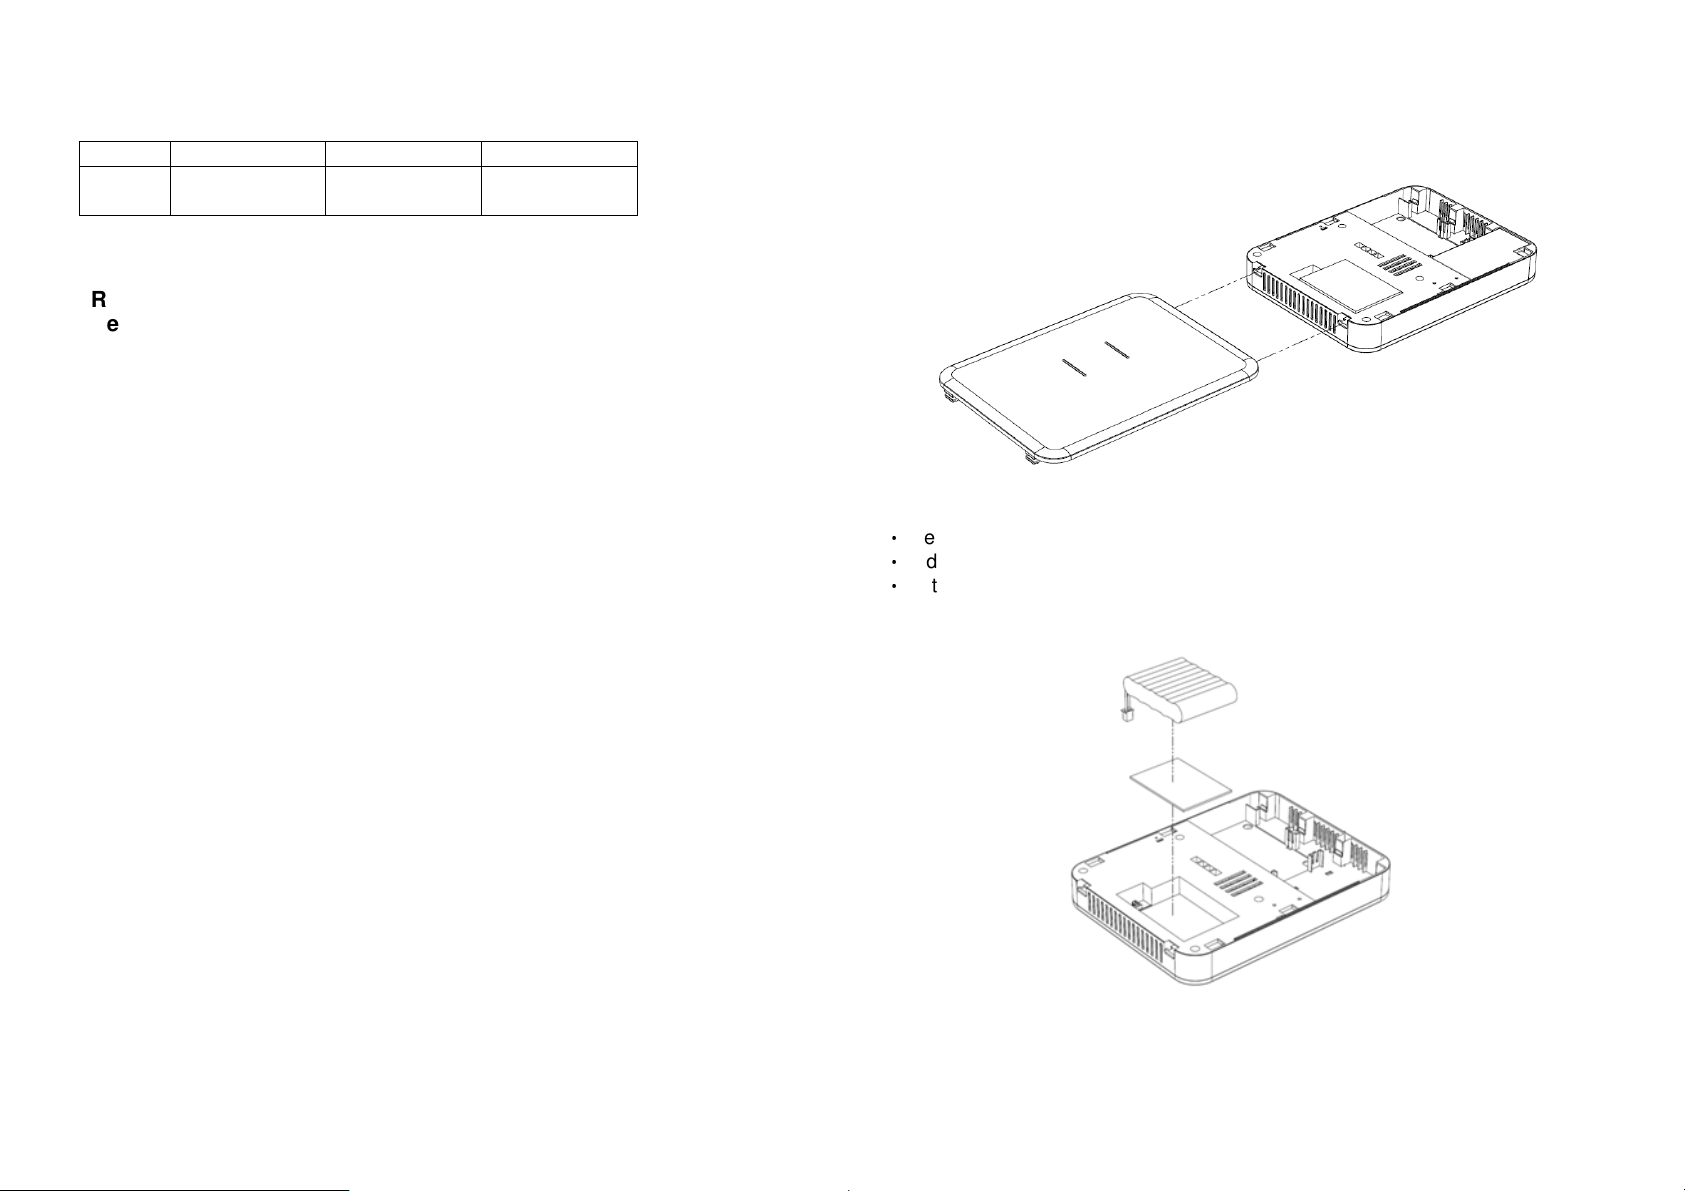
3. Installation
Figure 3 Upper cover installation
‧
Press and hold the latch.
‧
Slide to release the upper cover.
‧
Fit the latch to replace the upper cover.
Figure 4 Battery installation
- 2 -

‧
Stick the double-sided tape to where you wish to place the batteries.
‧
Attach batteries and insert power cables to complete installation.
4. U-Net Binding
U-Net binding is an operation of the HSC04 used to include other U-NET
devices.
We will describe how to use the connection button to operate the binding
function below:
Start binding:
Press the connection button once and the connection LED will flash green.
Device binding:
Specifications
Operating temperature range
Operating humidity 5 - 85% RH
Adapter I/P: 100-240Vac 50/60Hz 0.5A
Battery type AA batteries x5
Transmission range Indoors 30m; Outdoors >150m (Open space)
Frequency range 923 MHz
** Specifications are subject to change without notice
WARNING:
Do not dispose of electrical appliances as unsorted municipal waste, use separate collection facilities instead. Please contact your local government for information regarding the
collection systems available.
If electrical appliances are disposed of in landfills or dumps, hazardous substances can leak into the groundwater and get into the food chain, damaging your health and well-being.
When replacing old appliances with new once, the retailer is legally obligated to take back your old appliance for disposal at least for free of charge.
-10°C to +40°C
O/P: DC9V 2000mA
Federal Communication Commission Interference Statement
This equipment has been tested and found to comply with the limits for a Class B digital device,
pursuant to Part 15 of the FCC Rules. These limits are designed to provide reasonable protection
against harmful interference in a residential installation. This equipment generates, uses and can
The connection LED on the HSC04 will stop flashing and turn on and off with
an interval of 2 seconds if binding was successful.
Cancel binding:
Press the connection button when the connection LED is blinking in binding
mode and the connection LED will flash rapidly and stop binding.
Binding timeout:
Timeout will happen when binding mode has been idle for 30 seconds. The
connection LED will rapidly flash 4 seconds when this happens.
radiate radio frequency energy and, if not installed and used in accordance with the instructions,
may cause harmful interference to radio communications. However, there is no guarantee that
interference will not occur in a particular installation. If this equipment does cause harmful
- 3 -

interference to radio or television reception, which can be determined by turning the equipment
off and on, the user is encouraged to try to correct the interference by one of the following
measures:
- Reorient or relocate the receiving antenna.
- Increase the separation between the equipment and receiver.
- Connect the equipment into an outlet on a circuit different from that to which the receiver is
connected.
- Consult the dealer or an experienced radio/TV technician for help.
This device complies with Part 15 of the FCC Rules. Operation is subject to the following two
conditions: (1) This device may not cause harmful interference, and (2) this device must accept
any interference received, including interference that may cause undesired operation.
FCC Caution: Any changes or modifications not expressly approved by the party responsible for
compliance could void the user's authority to operate this equipment.
This transmitter must not be co-located or operating in conjunction with any other antenna or
transmitter.
Warning:
This device complies with Part 15 of the FCC Rules. Operation is subject to the
following two conditions: (1) this device may not cause harmful interference, and (2)
this device must accept any interference received, including interference that may
cause undesired operation.
Do not dispose of electrical appliances as unsorted municipal waste, use separate
collection facilities.
Contact your local government for information regarding the collection systems
available.
If electrical appliances are disposed of in landfills or dumps, hazardous substances
can leak into the groundwater and get into the food chain, damaging your health and
well-being.
When replacing old appliances with new ones, the retailer is legally obligated to take
back your old appliance for disposal at least for free of charge.
- 2 -
 Loading...