

Everspring Industry Co EU605 User Manual
FCC ID: FU5EU605
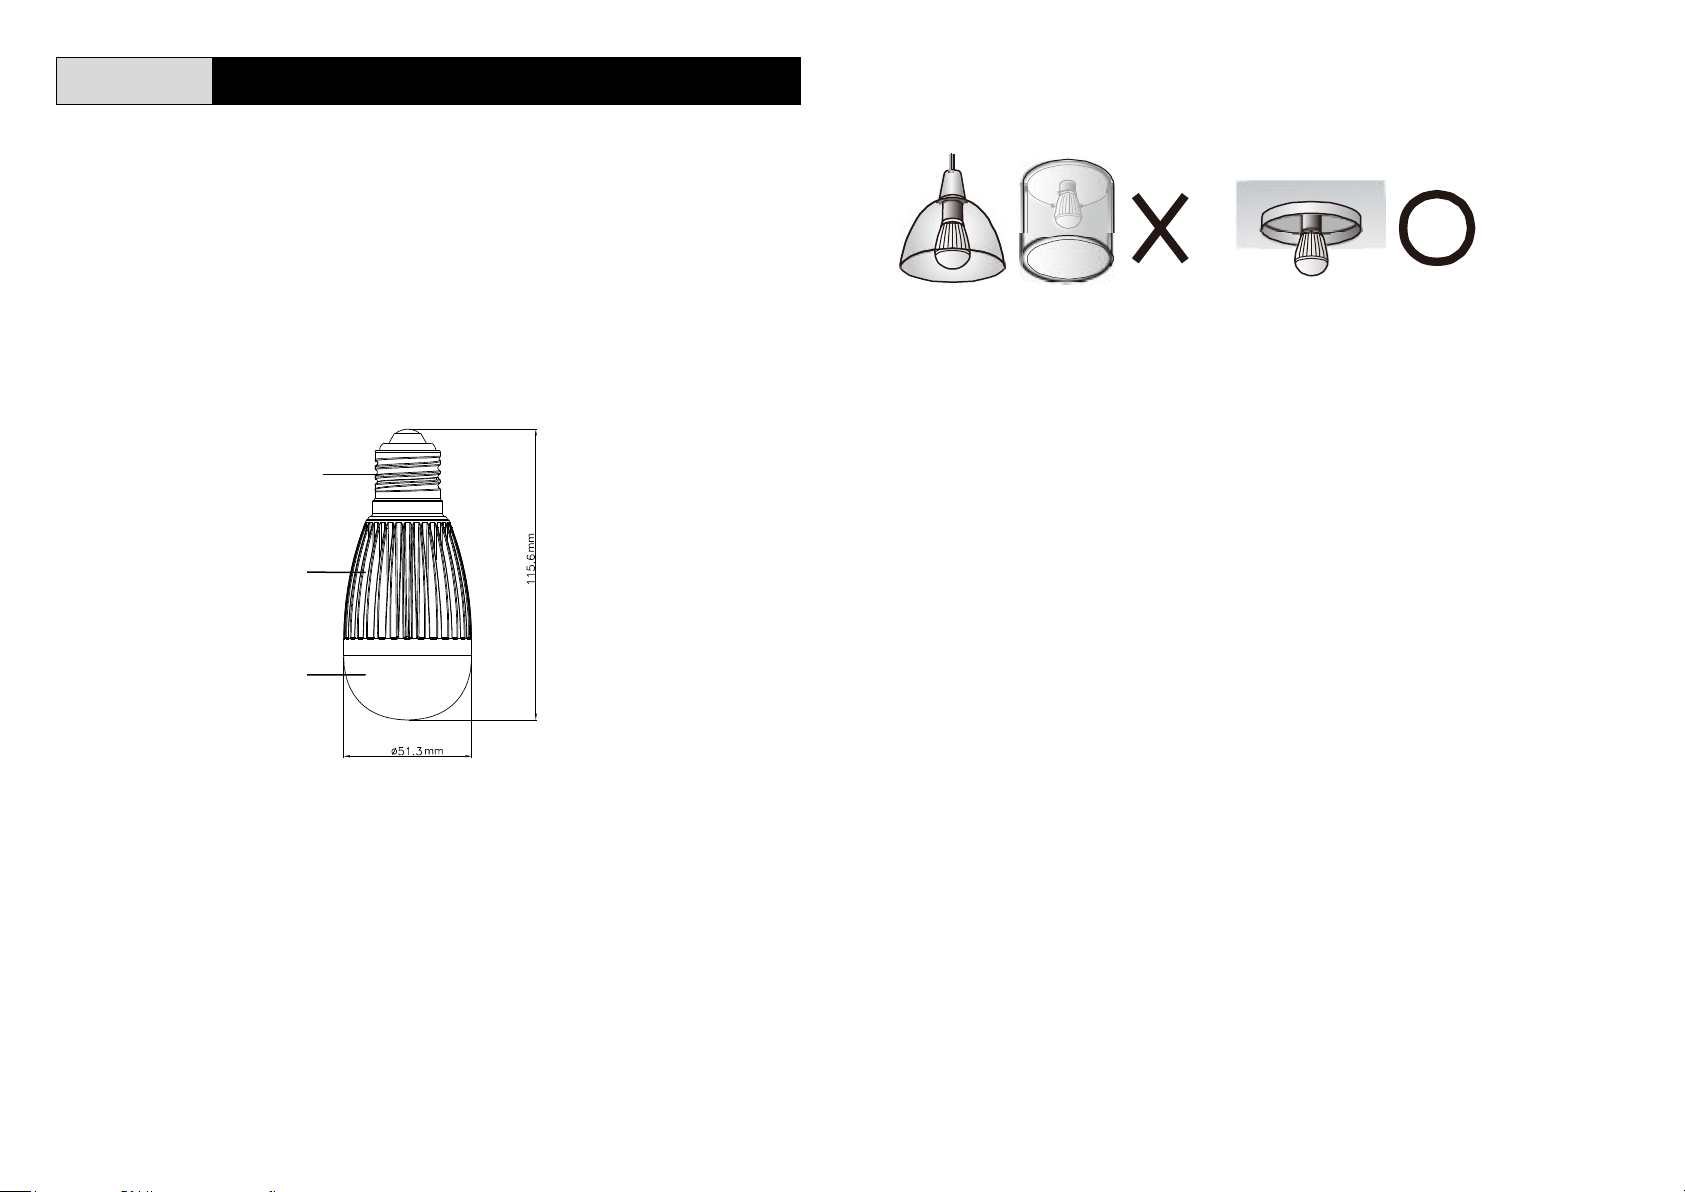
EU605 WIRELESS LED BULB
These instructions should be read in conjunction with your System
Installation and Operating Manual and be retained for future reference.
This Wireless LED Bulb is designed to work with a Master device (e.g. U-Net Gateway
or Control Panel) or with other associated devices (up to 11 devices). The bulb can
be powered on or off wirelessly by a Gateway or associated devices. It can be used
to control the on/off status of other associated devices as well. The unit is a
transceiver which belongs to the member of U-Net series and is compatible with other
U-Net enabled systems. The LED Bulb can connect with U-Net wall switches, U-Net
on/off plugs, or other EU605 LED Bulbs.
Product Overview
Cap
Heat Sink
LED Light
Safety Precautions
1. Do not put the unit in humid or dusty places or facing direct sunlight.
2. The suitable ambient temperature for the unit is 0°C - +40°C (indoor).
3. Do not place the unit near combustible substances or any source of heat, e.g. fires,
radiators, boilers etc.
4. Avoid installing this product in storming or raining weather.
5. Turn off or isolate the power supply during installation or maintenance.
6. Consult with a professional electrician about proper installation methods if you are
not familiar with the techniques.
7. This product is not designed for use with dimmable lighting fixtures.
8. The alloy case and glass can become very hot while in use or after use. Allow the
bulb to cool down a while after switching off.
9. This bulb should be installed in a well-ventilated lighting fixture:
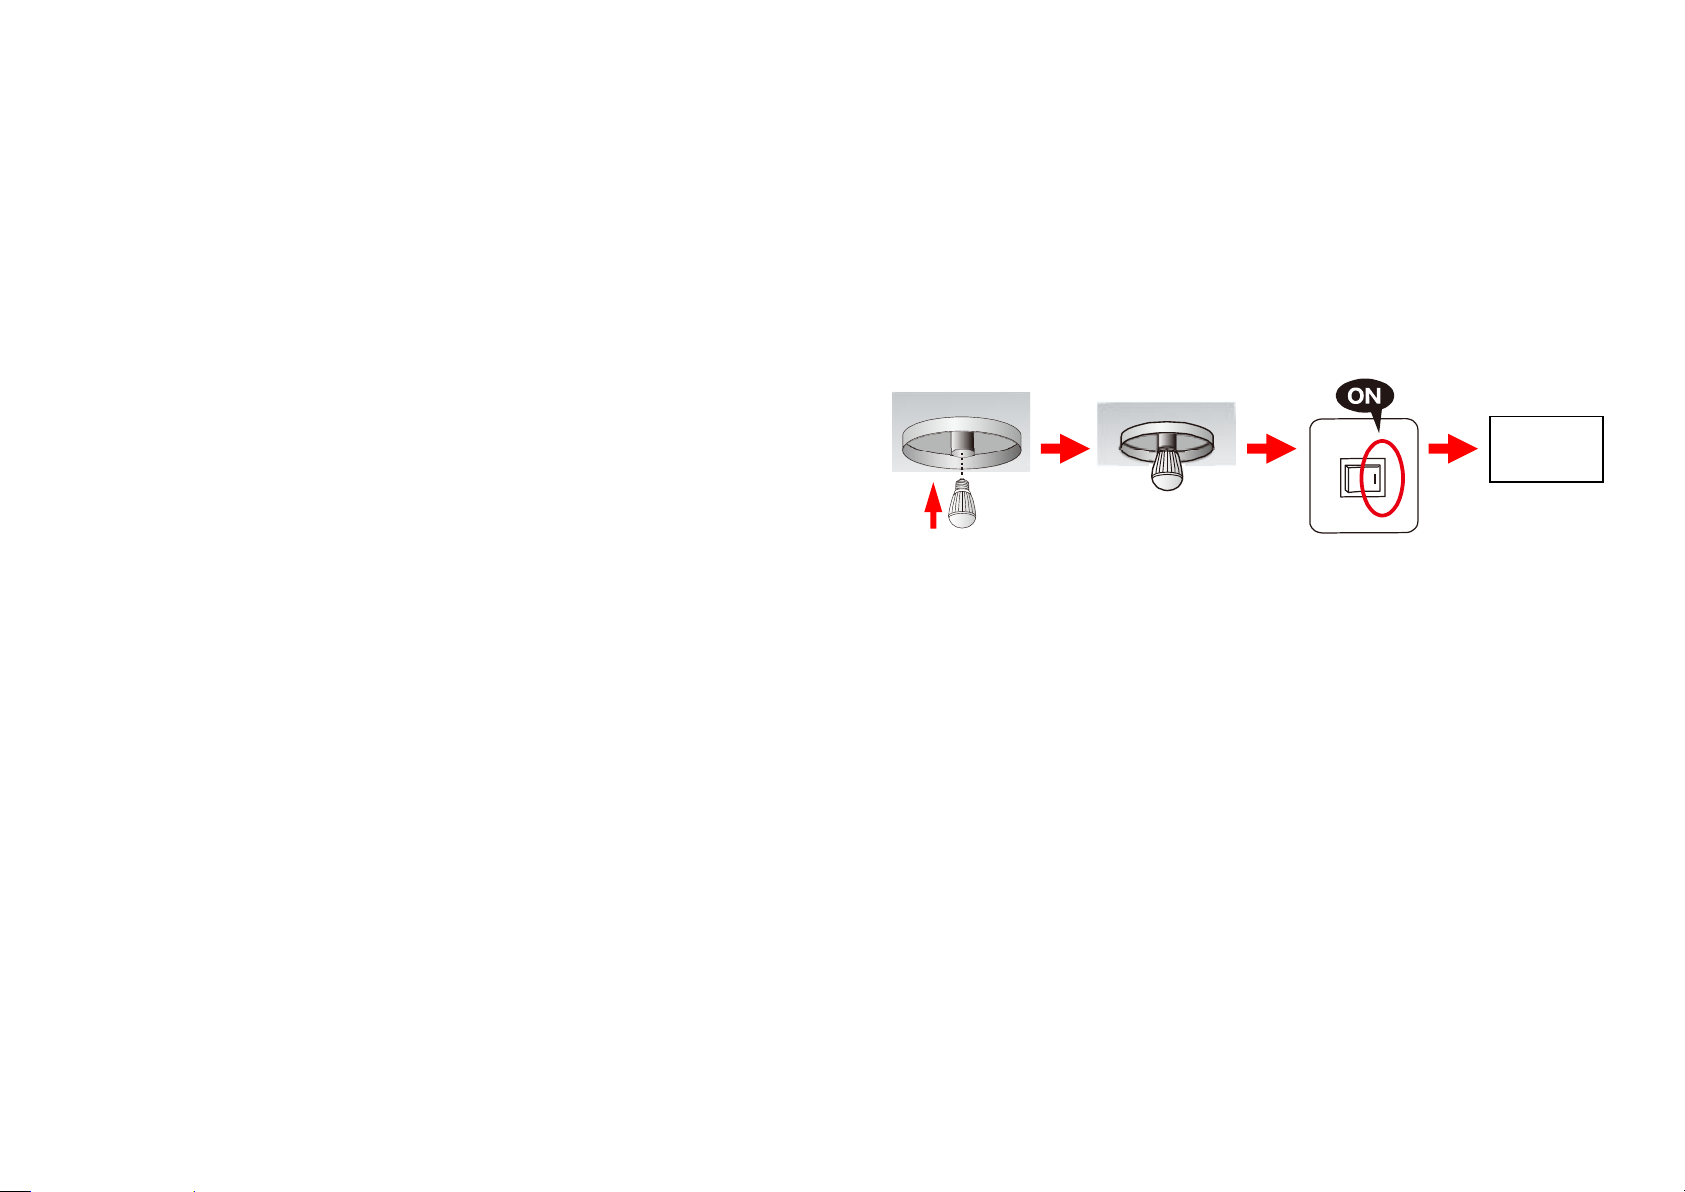
Initial Power Up / Auto-binding with Master Device
The LED Bulb must complete the ID learning process before it can function normally in
the system. When the unit is powered on and no ID code is stored in the memory, it
will enter auto-binding status and can “auto-bind” with a Master device (e.g. U-Net
Gateway or Control Panel) provided the device is present. The status will last for 30
seconds and the light will flash (on for 0.5 second; off for 0.5 second). If the
auto-binding is successful, the unit’s ID code will be learned and recognized by the
Master device automatically (and the unit will remember the device’s ID as well).
If a Master device is not present and the auto-binding period expires, you will need to
power off and then power on again for the LED Bulb to re-enter the auto-binding mode.
Note: If no ID code is stored in the unit and you want to do code learning with a
compatible U-Net device of your choice (including non-Master devices), you can force
the unit to do so:
1) First ensure the LED Bulb is powered on (in auto-binding mode).
2) Power off and on the LED Bulb twice (off-on; off-on) within 2.5 seconds. The light
will flash quickly for 3 times, indicating the LED Bulb has exited auto-binding mode.
Then the light will flash moderately (on for 0.5 second; off for 0.5 second) for 30
seconds and the unit is ready to learn a Master or Slave device ID. If the unit
learned a non-Master device in this way, you can later do the code learning with a
Master device manually.
Learning ID Code Manually
After the unit already learned one ID code (whether it is a Master device ID or not), you
can do ID code learning with other device by following the steps below:
1. First ensure the LED Bulb is turned on.
1
2. Power off and on the LED Bulb twice (off-on; off-on) within 2.5 seconds. The light
Code
Learning
will begin to flash moderately (on for 0.5 second; off for 0.5 second) for 30 seconds
and the unit is ready to learn a device ID.
3. Operate the to-be-connected device to emit its ID code to the LED Bulb to
complete code learning.
4. If the LED flashes rapidly (on for 0.1 second; off for 0.1 second) for 3 times, it can
be ascribed to one of the following conditions:
a. The LED Bulb failed to learn ID code after it enters the 30-second code
learning countdown.
b. The LED Bulb enters auto-binding mode and then the user operates the unit to
learn a device manually.
c. The LED Bulb has already learned 11 non-Master ID codes.
Note:
1) To fully control the unit, the auto-binding and/or ID code learning process must be
completed.
2) When doing manual code learning, two (or more) LED Bulbs cannot be installed in
the same lighting fixture.
3) The ID code setting is stored in non-volatile memory and is not lost during
power-off period.
4) Up to 11 ID codes and 1 Master Device ID can be learned. Only the last learned
Master Device ID code will be stored.
Clearing ID Code
1. First ensure the LED Bulb is on; then power off and on the LED Bulb twice (off-on;
off-on) within 2.5 seconds. The unit enters code learning mode and a 30-second
countdown starts.
2. After 4 seconds into the 30-second countdown, power off and on the LED Bulb
twice within 2.5 seconds again. All the stored ID codes will be cleared. The light
will flash (on for 1 second; off for 1 second) for 5 seconds. Then the LED Bulb will
enter code learning mode automatically and can learn either a Master or Slave
device.
Installation
Note:
1) Ensure the unit is installed within transmission range of all devices that it would
need to communicate with.
2) Turn off or isolate the power supply during installation or maintenance.
3) If multiple LED Bulbs are installed, ensure the distance between any two bulbs is
at least 20cm or more.
4) For LED Bulb status report, do not connect more than 5 LED Bulbs to one power
source/switch.
5) If using a ladder is needed, ensure that the ladder is solid and placed on a flat and
stable surface.
Screw the bulb into the standard Edison base as indicated and turn on the power to
start code learning. The bulb should be installed indoor and should be kept from high
temperature and heavy humidity.
Operation
Note: The Bulb can work in one of two modes: either with a gateway (gateway mode)
or with associated devices (standalone mode). The two modes should not be mixed
and used at the same time. If you want to change the operation mode (ex. switching
from working with a gateway to associated devices), you should clear the ID code(s) of
the bulb first and then learn the ID code(s) of the device(s) that the bulb will work with.
Gateway Mode:
When the LED Bulb is powered on, it will start sending the data of its operation
status to the Master device after about 2 minutes. Afterwards the LED Bulb will
report its status to the Master device once every 60 minutes.
The Gateway can emit a “Device Status” enquiry command to the unit. The LED
Bulb will report to the Gateway of its on/off condition and communication status.
The LED Bulb will send a signal to the Gateway when it is powered on/off. Refer
to the table below for signal types:
2
 Loading...