

EverFocus EHD935 Series Quick Installation Manual
EHD935 eZ.HD Series
720p Analog High Definition True Day/Night
Outdoor IR Dome Vandal Camera
Quick Installation Guide
Copyright © EverFocus Electronics Corp,
Release Date: Nov., 2014
1
Model
Image Sensor and Lens
Resolution
IR LEDs
Day / Night
EHD935
1/2.8" SONY 1.37M pixels CMOS
2.8-12mm DC Iris
720p
Yes (28 LEDs)
True Day/Night
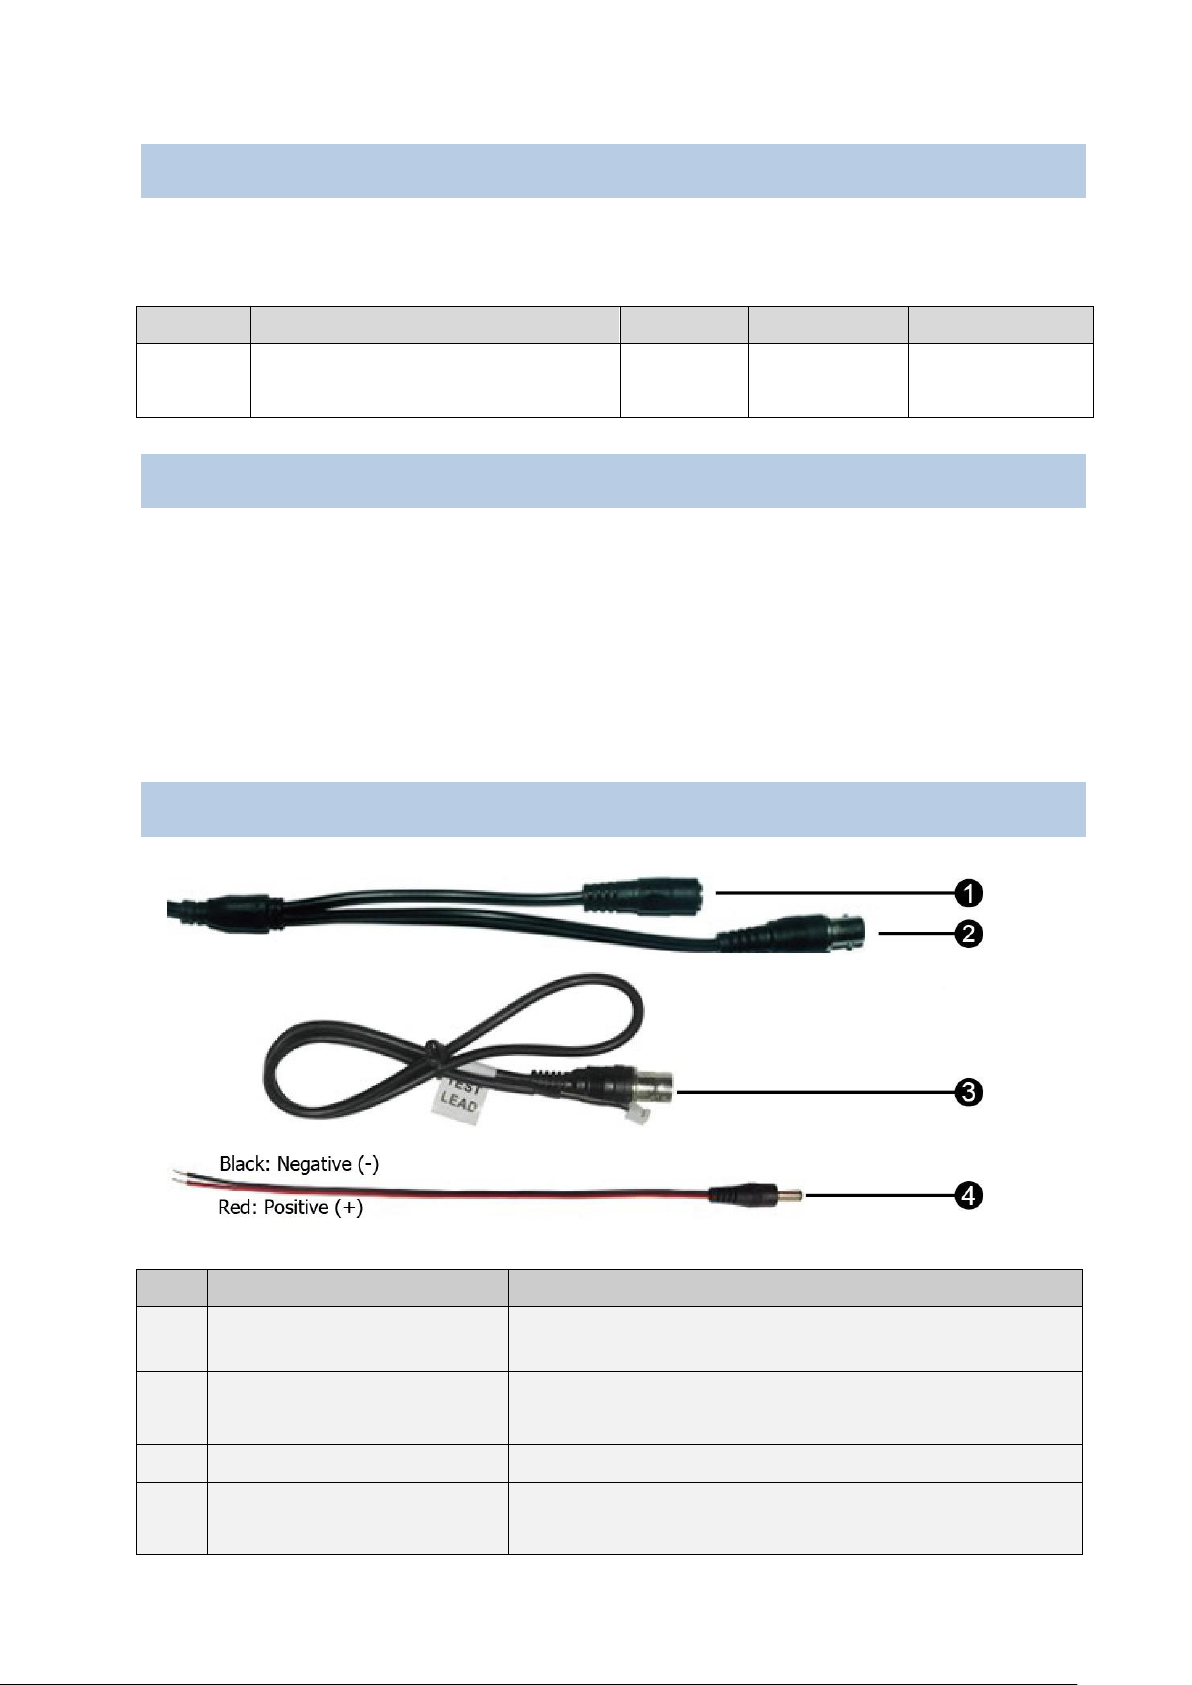
No.
Name
Descriptions
1
Power Cable
Connect to a 12VDC or 24VAC power source.
2
Dual Video Output
720p and 960H output, using a 75 Ohm BNC-type
coaxial cable.
3
Test Lead
Connect to a monitor for setting image aim and focus.
4
DC Power Pigtail Cable
Optional power pigtail cable. The red wire is positive (+);
while the black wire is negative (-).
Camera Body x 1
Screw x 4
User Manual x 1
Screwdriver x 1
Test Lead x 1
Plastic Anchor x 4
Template Plate x 1
DC Power Pigtail Cable x 1
Adapter Plate x 1
Desiccant Bag x 1
Rubber Plate x 1
Hexagon Wrench x 1
Quick Installation Guide x 1
Introduction
This Quick Installation Guide will instruct you the installation steps of the EHD935 cameras.
Packing List
Cable Descriptions
2
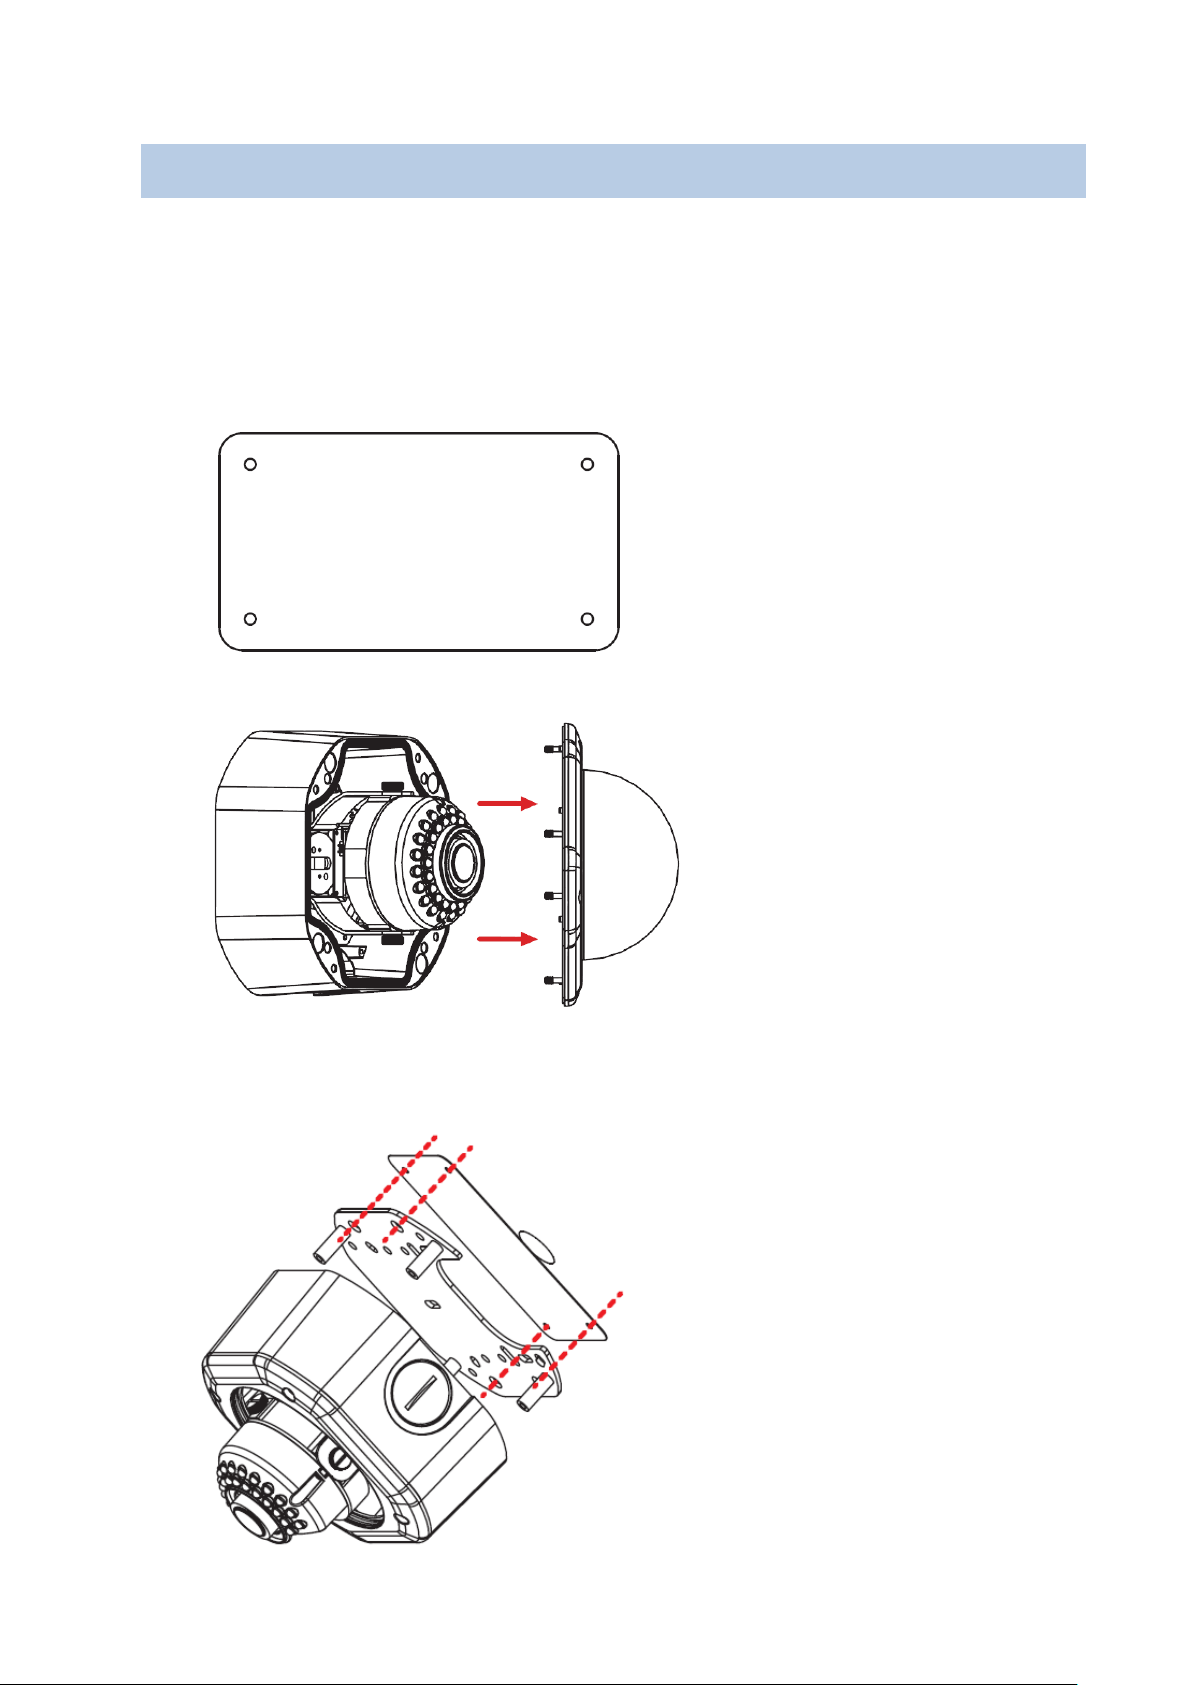
Installation and Adjustment
1. For Ceiling Mount / Wall Mount users: Stick the Template Plate on the position where
you want to attach the camera, drill the four holes on the Template Plate for screwing the
Adapter Plate with the supplied Screws and Anchors.
Drill the hole in the centre of the template plate only if you want to wire the cables
through the wall / ceiling. Insert the supplied four Anchors into the holes.
2. Remove the Cover Cap, unscrew the four screws using the supplied Hexagon Wrench.
3. Remove the Adapter Plate from the camera and screw to the wall/ceiling with supplied
Screws, then fasten the camera to the Adapter Plate.
3
 Loading...