


EWF172
Washer Owner ’s Manual
MODELS EWF150 AND EWF172
ENGLISHFRANÇAISESPAÑOL
IMPORTANT!
To get the best performance from
your washer, read all operating
instructions before using it for the
first time.
SAVE THESE INSTRUCTIONS FOR FUTURE REFERENCE
Version 2

CONTENTS
IMPORTANT SAFETY INSTRUCTIONS..................................................... 3
DESCRIPTION OF THE MACHINE ............................................................ 4
INSTALLATION INSTRUCTIONS ............................................................... 5
INSTRUCTIONS FOR USING THE WASHER ............................................ 7
CARE LABEL INSTRUCTIONS .................................................................. 8
CONTROL PANEL ...................................................................................... 9
WASHER PROGRAMS............................................................................. 10
CARE AND MAINTENANCE......................................................................1 1
COMMON LAUNDRY PROBLEMS........................................................... 12
TROUBLESHOOTING .............................................................................. 14
WARRANTY.............................................................................................. 15
QUICK START REFERENCE ................................................................... 16
2

IMPORTANT SAFETY INSTRUCTIONS
To reduce the risk of fire, electric shock, or injury to
persons when using your appliance, follow basic
precautions, including the following:
♦ Read all instructions before using the appliance.
♦ Do not run appliance while you are out of the
home.
♦ Do not allow children to play on or in the appliance.
Children should be closely supervised when near
the appliance.
♦ Before the appliance is removed from service or
discarded, remove the door to the washing
compartment.
♦ Do not reach into the appliance if the drum is
moving.
♦ Do not install or store this appliance where it will
be exposed to the weather.
♦ Do not tamper with controls.
♦ Do not repair or replace any part of the appliance
or attempt any servicing unless specifically
recommended in the user-repair instructions or
in published user-repair instructions that you
understand and have the skills to carry out.
♦ Do not add gasoline, dry-cleaning solvents, or
other flammable or explosive substances to the
wash water. These substances give off vapors
that could ignite or explode.
♦ Under certain conditions, hydrogen gas may be
produced in a hot water system that has not been
used for 2 weeks or more. HYDROGEN GAS IS
EXPLOSIVE. If the hot water system has not been
used for such a period, before using a washing
machine or combination washer-dryer, turn on all
water faucets and let the water flow from each
for several minutes. This will release any
accumulated hydrogen gas. As the gas is
flammable, do not smoke or use an open flame
during this time.
WARNING!
Do not wash or dry articles that have been
previously cleaned in, washed in, soaked in,
or spotted with gasoline, dry-cleaning
solvents, cooking oils, or other flammable
or explosive substances because they give
off vapors that could ignite or explode.
WARNING!
This appliance must be properly grounded.
Improper connection of the equipment
grounding conductor can result in a risk of
electric shock. Check with a qualified
electrician or serviceman if you are in doubt
as to whether the appliance is properly
grounded.
The plug must be plugged into an appliance
outlet that is properly installed and grounded
in accordance with all local codes and
ordinances.
NOTE: This manual does not cover every possible
condition and situation that may occur. Use
common sense and caution when installing,
operating, and maintaining any appliance.
ENGLISH
3
DESCRIPTION OF THE MACHINE
The washing machine is a domestic appliance capable of washing any type of fabric.
♦ The machine is constructed in sheet steel panels with a treated and painted finish that ensures its
aesthetic quality remains unaltered over time.
♦ The motor and all moving parts have been designed and produced in a manner that guarantees minimum
noise levels.
♦ The stainless steel drum is large and well mounted to ensure a better quality wash and a longer life of
clothing.
♦ The control panel lets you use all the wash and dry programs with ease.
♦ The access door has a wide opening to facilitate easy loading and unloading of the washing.
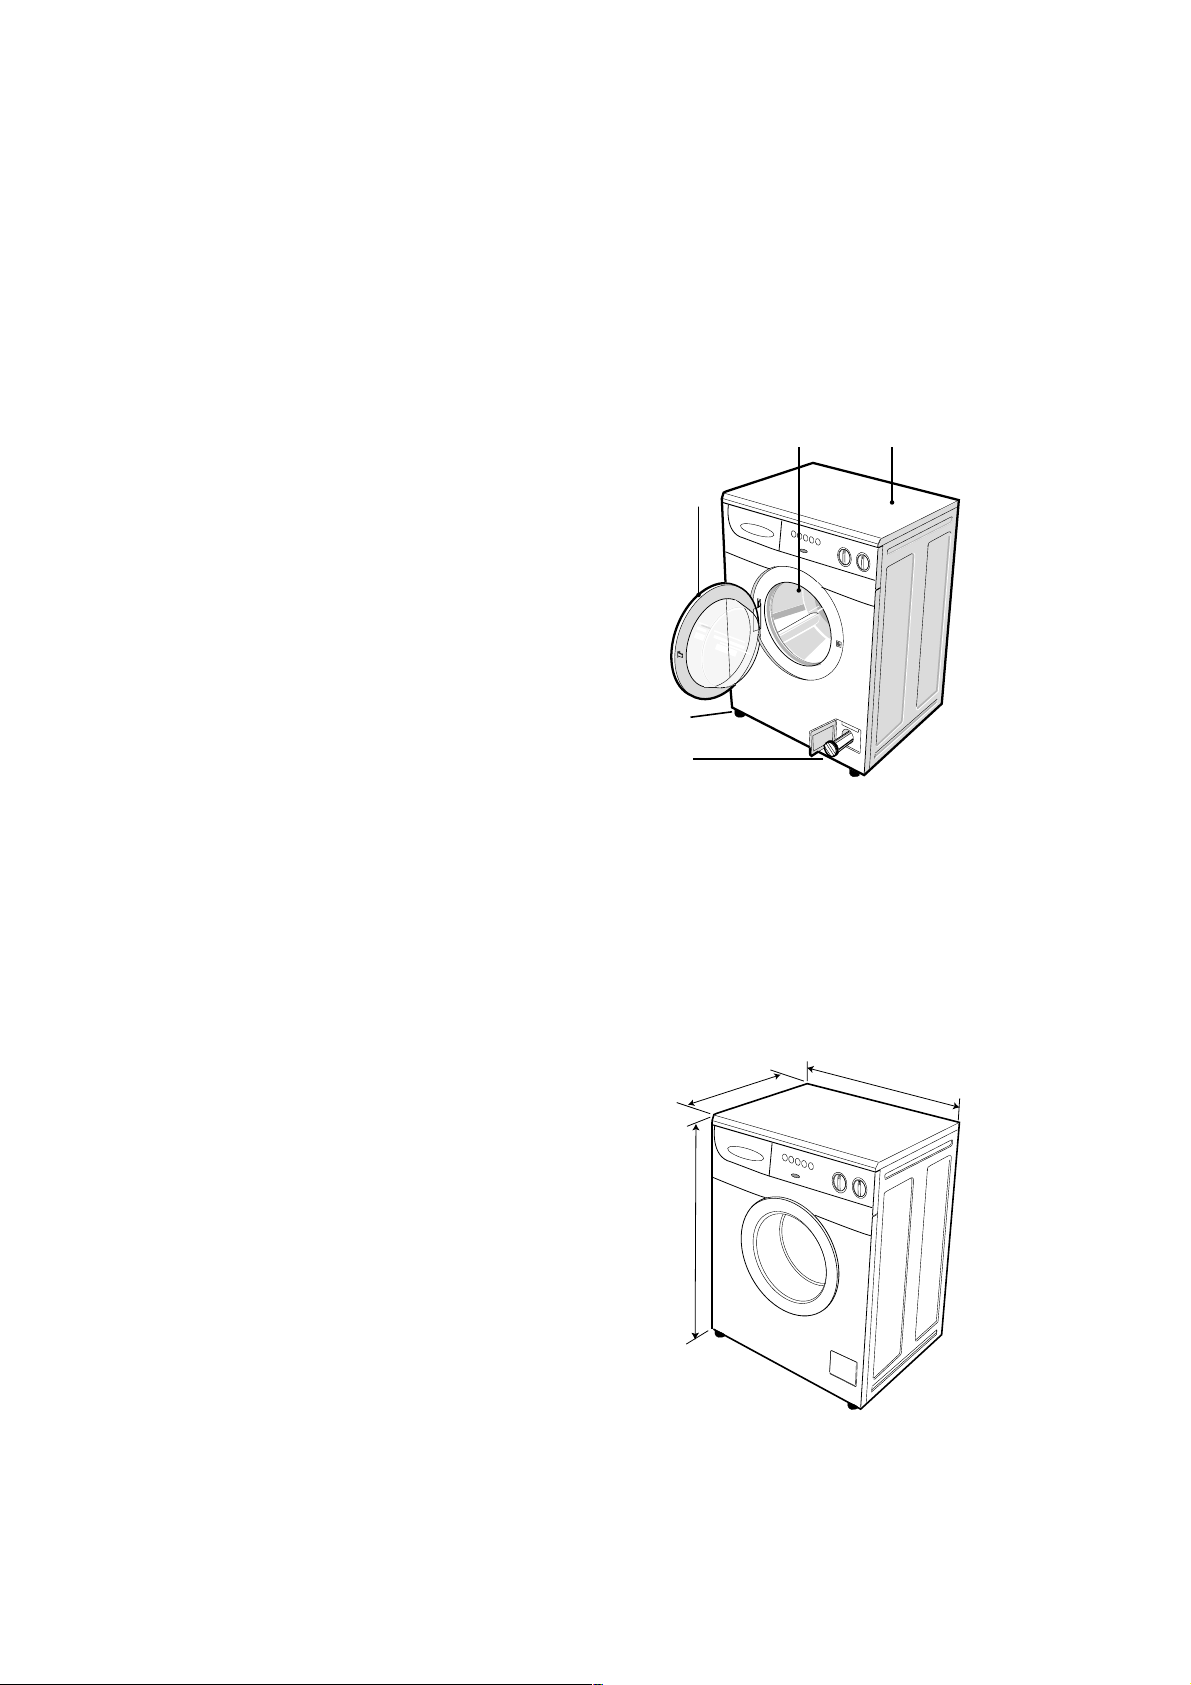
1. Door
2. Stainless steel drum and barrell
3. Stove-enamelled power-coat paint
4. Four adjustable rubber-covered feet
5. Emergency drain and lint filter
SPECIFICATIONS:
Supply voltage: Single-phase 115 V, 60 Hz
Fuse: 15 Amp
Inlet supply hose: Two 5-ft (1.5 m) fill hoses (hot and cold)
Supply pressure: 15-142 PSI
Outlet hose: 5.5 ft (1.7 m) polypropylene hose, 3/4” ID
2
1
4
5
3
CAPACITY:
Model EWF150 Large – 5 kilos (weight of clothes)
Model EWF172 Extra Large –7 kilos (weight of clothes)
DIMENSIONS:
MODEL EWF150
A. Width 23-3/8” 59.37 cm
B. Depth* 21-3/8” 54.29 cm
C. Height 33-1/4” 84.45 cm
C
* Depth w/door open: 36-7/8” (93.66 cm)
MODEL EWF172
A. Width 23-3/8” 59.37 cm
B. Depth* 23-1/8” 58.74 cm
C. Height 33-1/4” 84.45 cm
* Depth w/door open: 38-3/4” (98.43 cm)
For additional information, see the type plate on the inner door facing.
B
A
4
INST ALLATION INSTRUCTIONS
Read these instructions carefully and completely before you install the machine. The installation should be
carried out by a qualified person who is familiar with all local codes and ordinances for electrical and
plumbing connections. Incorrect installation may cause damage and/or injury . If the integrity of the machine
is in doubt, do not use it. Call your dealer for qualified assistance.
The washer can be installed anywhere provided that the temperature is not less than 38° F (3° C) and the
electrical cords and hoses behind the machine are not cramped.
To install the washing machine, follow the steps below:
1. Move the machine to its installation position and remove the outer
wrapping and the polystyrene base.
2. Model EWF150 has a plastic strip taped to the bottom of the machine
to secure two cones that prevent the tub from moving during
shipment. This plastic strip and the cones must be removed. To do
this, simply peel away the tape on the bottom sides of the unit that
hold the plastic strip and cones in place.
NOTE: Failure to remove these cones will likely cause the unit to
vibrate excessively during the spin cycles.
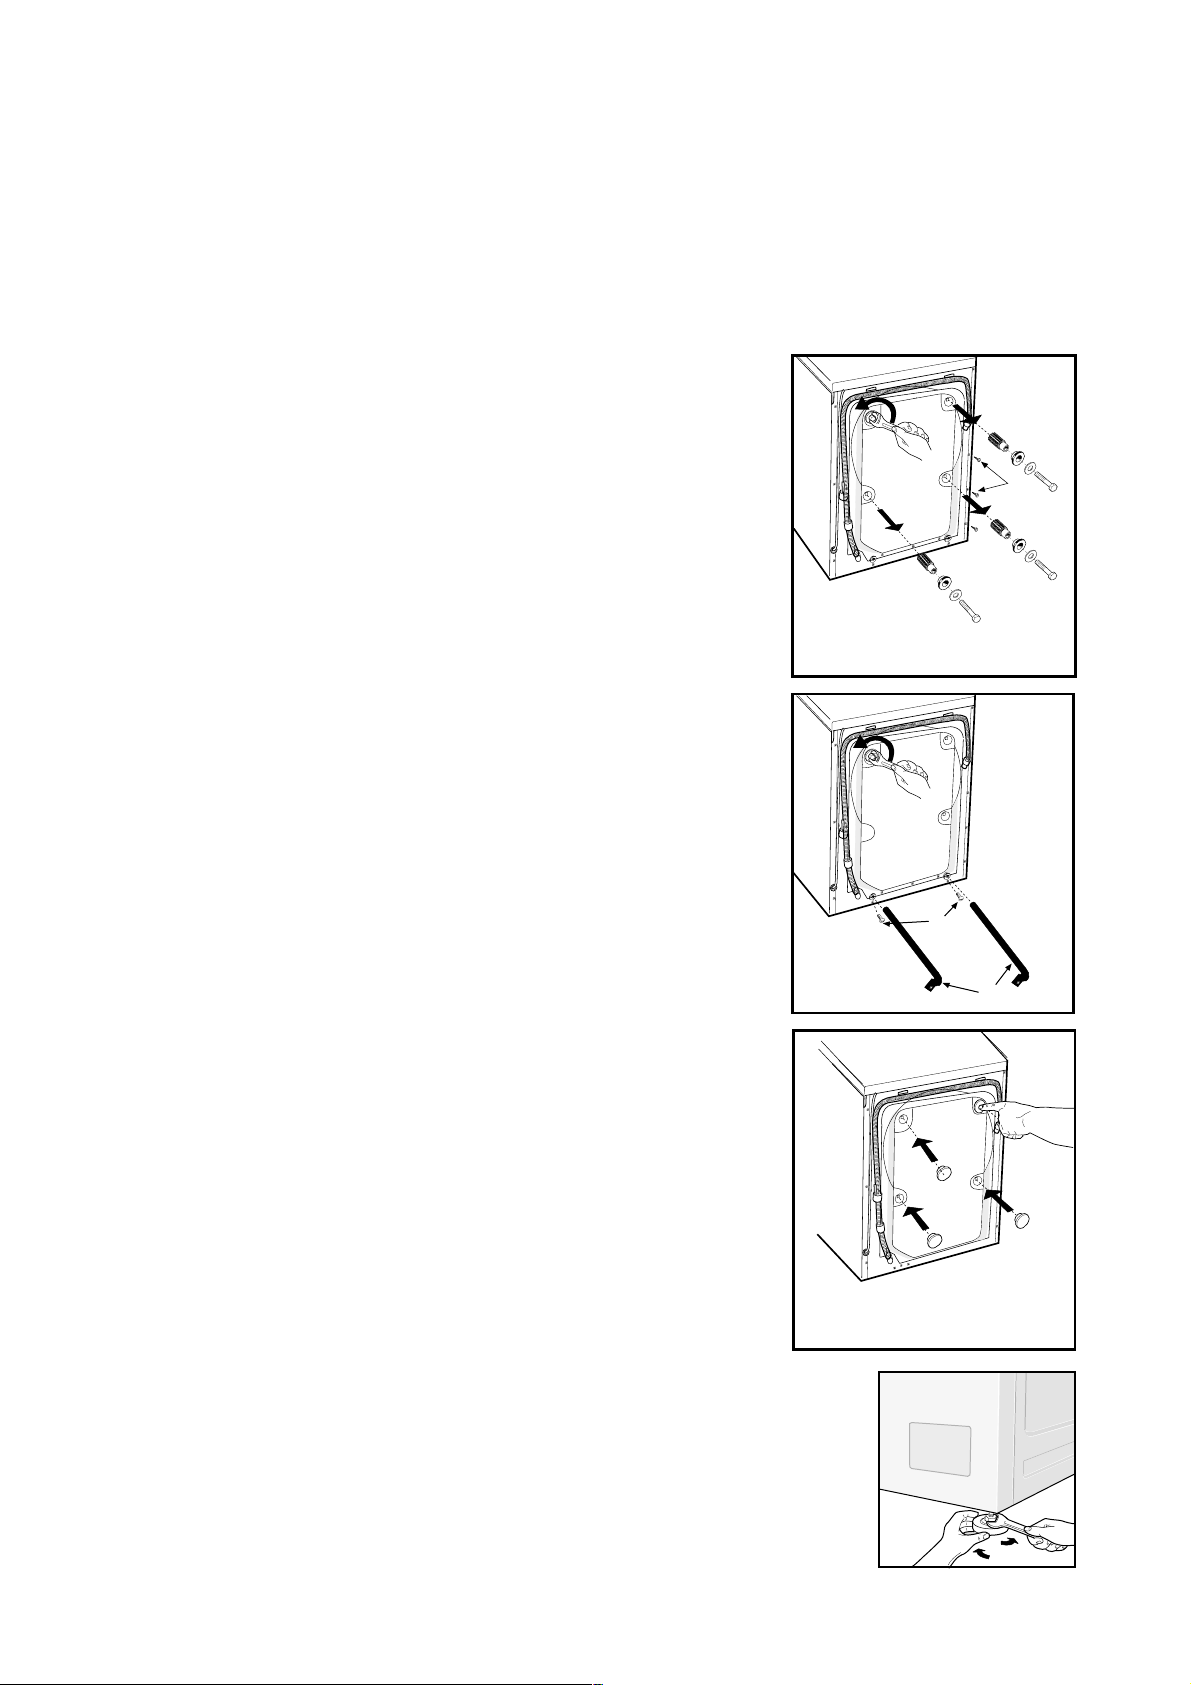
3. The drum on both models is locked in position. Loosen the four
locking bolts and remove them along with the plastic spacers
(Fig. 1).
NOTE: If the plastic spacers cannot be removed, open the side
panel by loosening the screws indicated as “V” in
Fig. 1. Remove the spacers and replace the panel.
4. Next, loosen the two locking screws (Z) and remove the two pins
(U), as illustrated in Fig. 2. Keep the bolts, screws and pins for
future use.
5. Plug the holes with the plastic plugs provided with the unit (packed
inside the drum with the documentation) (Fig. 3).
6. To level the machine, adjust the feet by screwing or unscrewing as
needed. Once the machine is level, tighten the locknuts (Fig. 4).
FIG. 1
Z
V
ENGLISH
FIG. 2
FIG. 3
U
FIG. 4
5
 Loading...