

Page 1
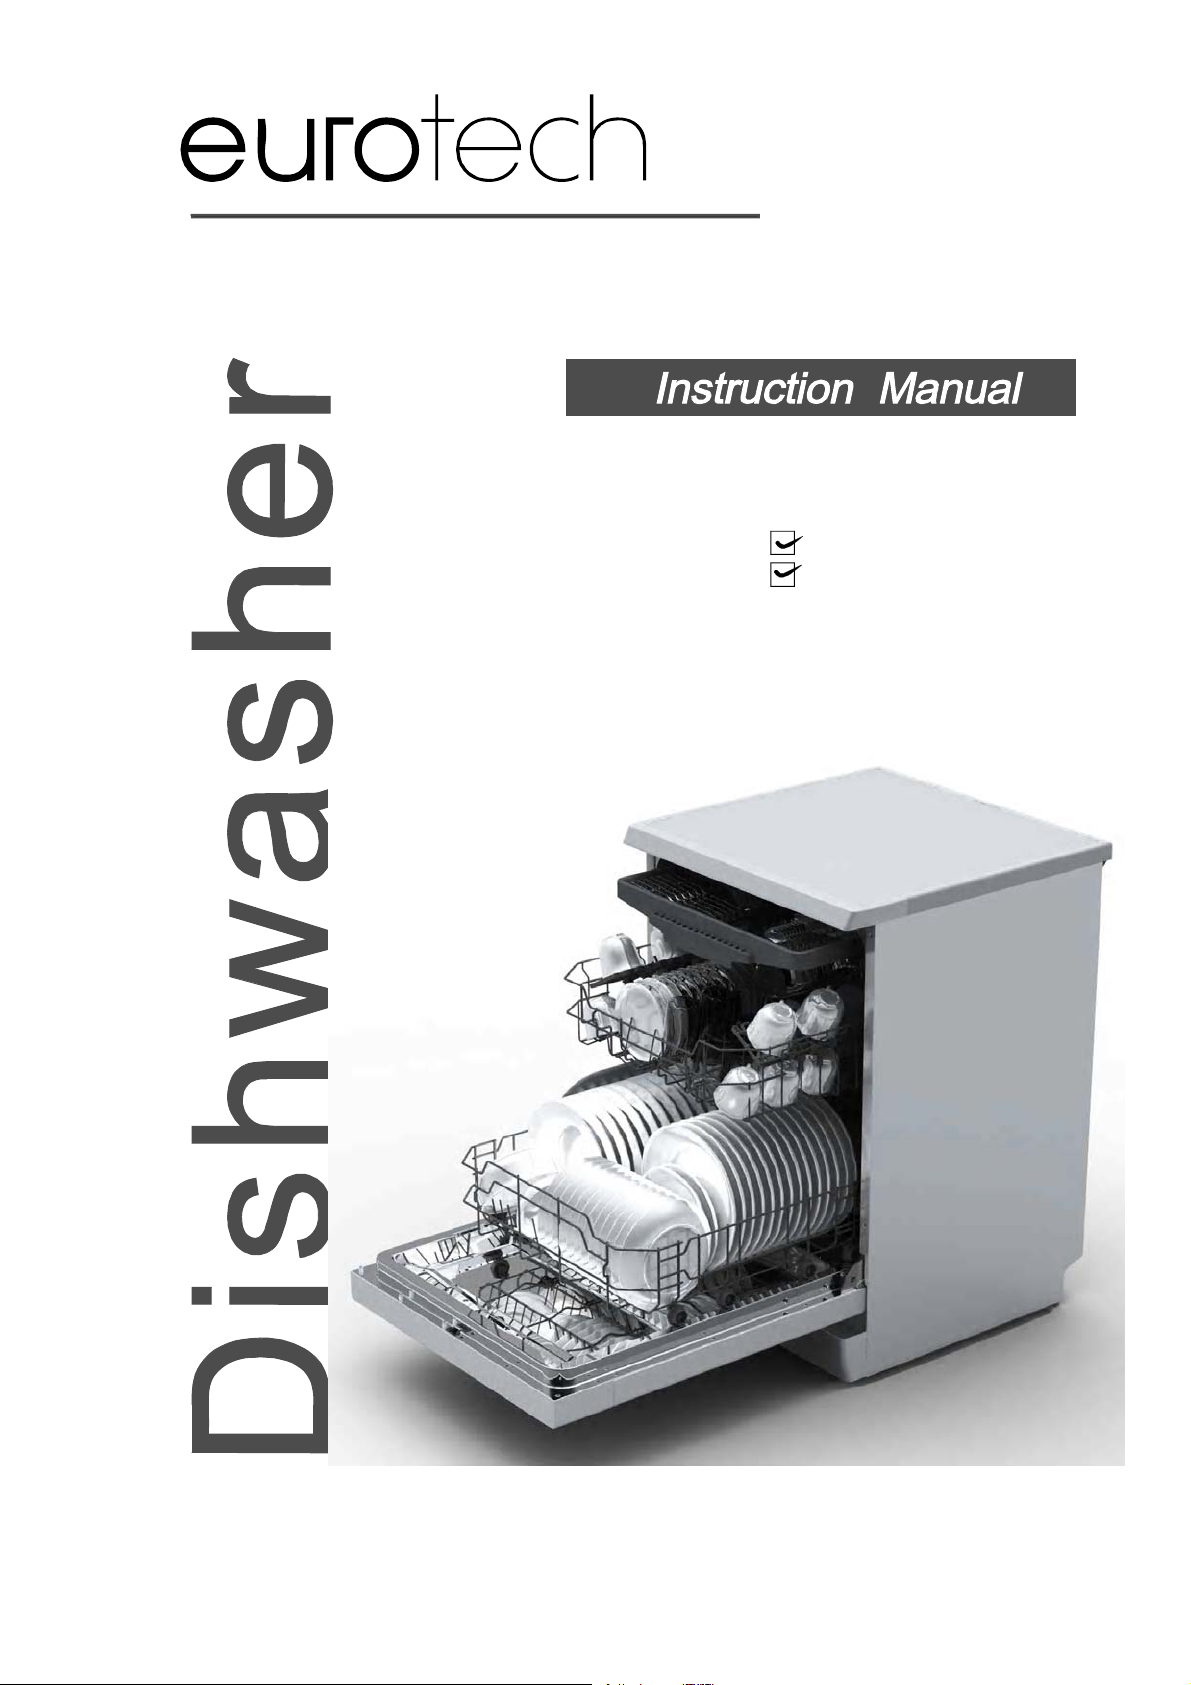
ED-D60CM14P
14 place settings
Alt function
Page 2
For det ail ed o pe ra ti ng me tho d read the cor re spo n di ng co nte n t on th e inst r uction man ua l .
Switch on the appliance Press the ON/OFF button to switch on the appliance, Open the door.
With each wash cycle.
Fillthedetergent dispenser
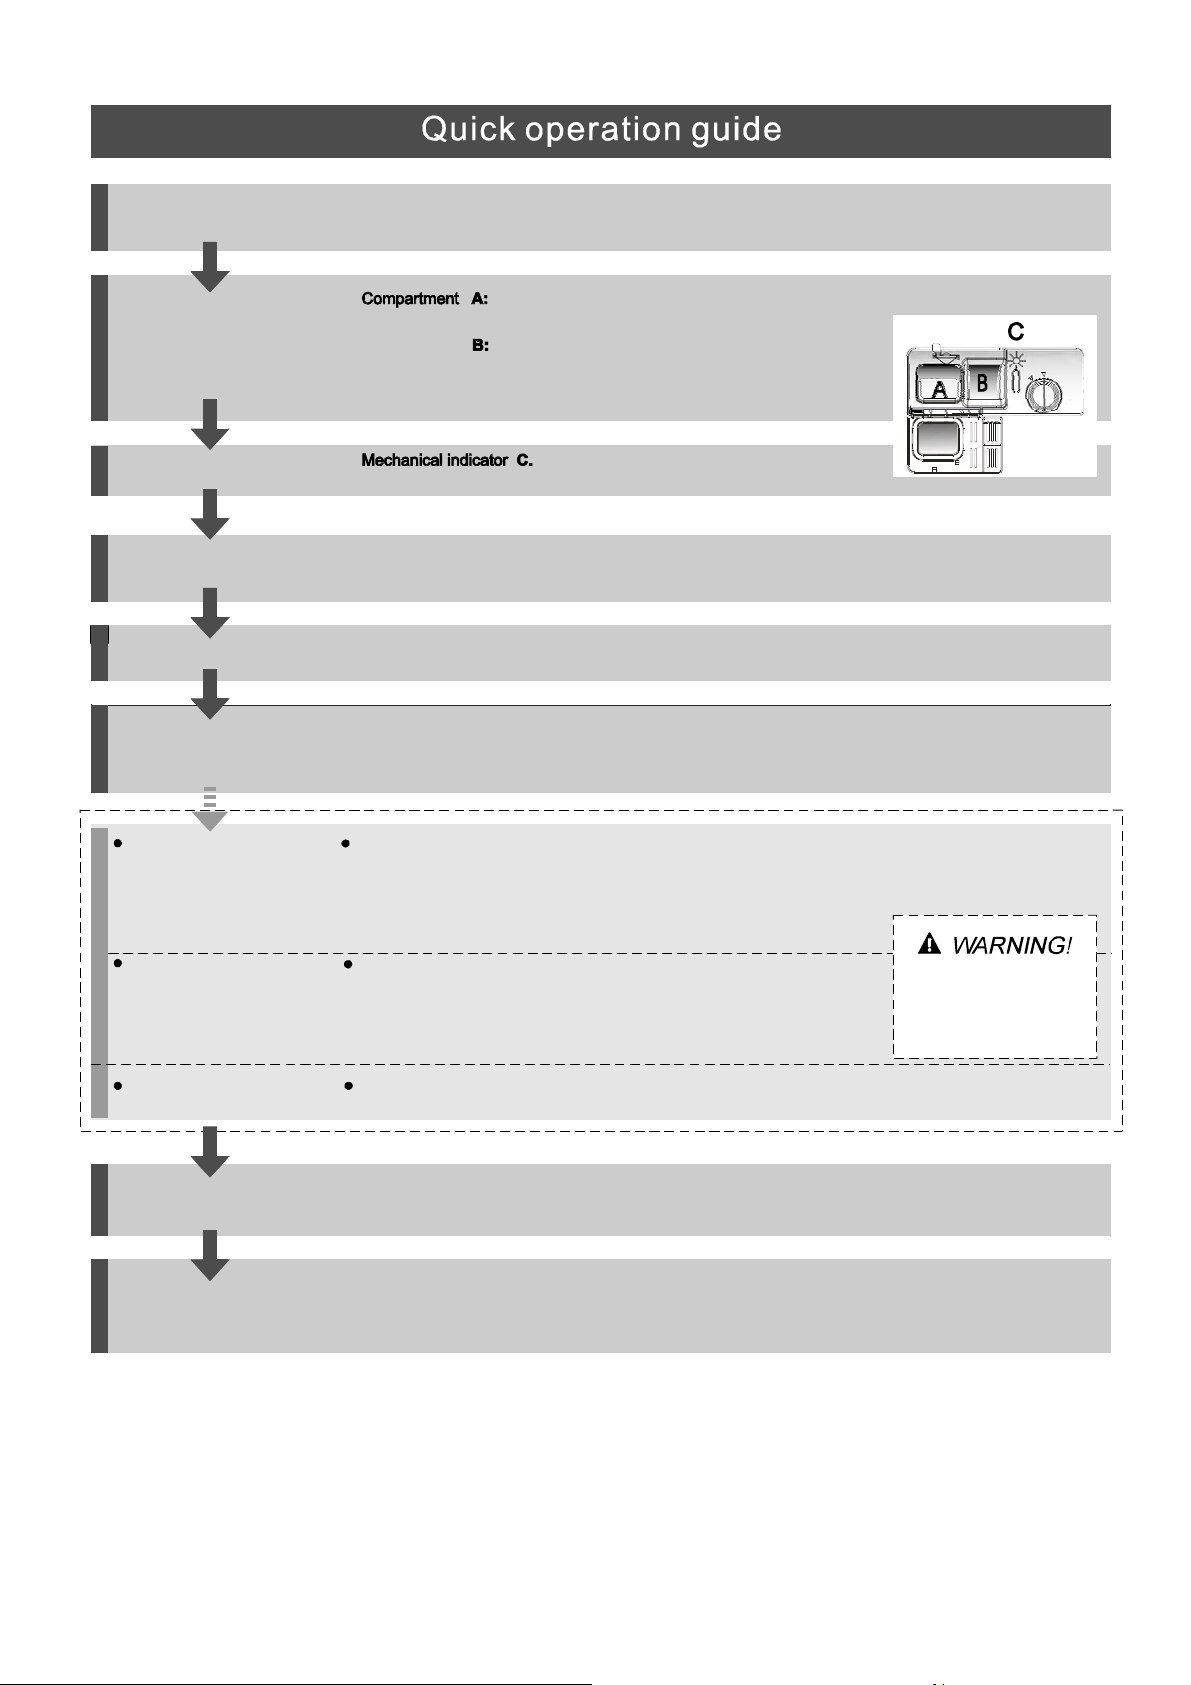
Compartment
For programmes with pre-wash only.
(Follow the user instructions!)
Check the rinse aid level
Load the baskets
Select a programme
Running the dishwasher
Changing the programme
Add forgottendishes in the
dishwasher.
If the appliance is switched
off during a wash cycle.
Electric indicatoroncontrolpanel (if provided).
Scrape off any large amount of leftover food. Soften remnants of burnt food in pans,
then load the baskets. Refer to the dishwasher loading instructions.
Close the door, Press the Programme button to select a desired programme.
( See the section entitled Operating instruction )“”
Turn on the water tap and press the Start/Pause button. The machine will start working
after about 10 seconds.
1.Arunning cycle canonly be modified if it has been running for a short time. Otherwisethedetergent
may have already been released and the water already drained. If this is the case, the detergent
dispenser must be refilled.
2. Press the Start/Pause button then press the program button for more than 3 seconds to cancel the
running programme.
3. Select a new programme.
4. Restart thedishwasher.
1.Press the Start/Pause Button to stop the washing.
2.Open the door a little .
3.After the spray arms stop working, you can open the door completely.
4.Add forgotten dishes.
5.Close the door
6.Press the Start/Pause Button, the dishwasher will run after 10 seconds.
If the appliance is switched off during a wash cycle, when switched
onagain,pleasere-selectthewashingcycleandoperatethedishwasher
accordingtotheoriginalPower-onstate).
Open the door carefull y.
Hotste ammayescape
whenthe dooris opened!
Switch off the appliance
Turn off the water tap,
unload the baskets
When the working cycle hasfinished, the buzzerof the
dishwasher will sound 8 times, then stop.
Turn off the appliance using the ON/OFF button.
Warning: wait a few minutes (about 15 minutes) before unloading the dishwasher to avoid handling
the dishes and utensils while they are still hot and more susceptible to break.
They willalsodry better.Unloadtheappliance, starting from the lowerbasket.
Page 3
Dear Custom er ,
This appli ance is intended t o be use d in h ousehold
andsimilarapplications suchas:
-staff kitch en ar eas in s hops, off ices and other
workin g en viro nme nts;
-farm houses;
-by cli ents inhotels, mot els and other residen tial
ty pe e nviro nments ;
-bed andbreakfast typeenvironments.
Pleasecarefully r eadthismanual bef oreusing the
dishwasher, it willhelpy outouseand maintain the
dishwasherproperly.
Keep it as a ref er in t he late r days .
Passit ontoanysubsequentowneroftheappliance.
Thismanualcontains sectionsonsafety Instructions,
Operating Instructions, InstallationInstructionsand
Trouble sho o tin g Tip s, etc.
Contr ol Pane l.... ... . ... ....... . ... . ... ....... . ... . ... ....... . ..2
Dishwasher Features.......................................2
A Fillthe Rinse Aid Dispenser............. .. ..3、 ..... ...
B Function o f Detergent .........................4、 ........
AttentionbeforeorafterloadingtheDishwasher
Baskets..........................................................6
The Met hod Load ing Normal D ishware
............ ..7
WashCycleTable...........................................8
Turning on th e Appl ian ce. ... ..... . ... ..... . .. ... .... .. ..8
ChangetheP rogramme.............. ................9....
At theEnd of the Wash Cycle...........................9
FilteringSystem.............................................10
CaringfortheDishwasher..................... .........11.
To review the section on t roublesho oting Tips
willhelpyoutosolvesomecommonproblems
byyourself .
Ifyou can not solve the problems by yo urself ,
please ask fo r the help of profe ssional technician s.
The manufactu rer,following a p olicy of c onst ant
development a nd updati ng of the product, may
make modificatio ns witho ut givi ng prior notice.
Positioningthe Appliance................... ..........12..
AboutPower Connection........................ .......12.
Water Co nne ct i on...... . .... ... .. . ..... ... . ..... ... ...... .13.
Startof dishwasher................................ ......14..
Befo re call ing for servic e.. ... .. ... .. .. .. ........ . .. ... . .1 5.
Errorcodes.................................... . .............16.
Technical information.............................. .....17..
Page 4
When using your dishwasher, follow the precaut i ons lis t ed below:
This appliance must be grounded. In the event of a
malfunction or breakdown, grounding will reduce
the risk of anelectric shock by providing a path of
least resistance of electric current. This appliance
is equipped with a cord having an equipmentgrounding conductor and a grounding plug.
The plug must be plugged into an appropriate outlet
that is installed and grounded in accordance with
all local codes and ordinances.
Donotabuse,siton,orstandonthedoorordish
rack of the dishwasher.
Do not touch the heating element during or
immediately after use.
(This instruction is only applicable to machines
with a visual heating element.)
Do not operate your dishwasher unless all
enclosure panels are properly in place. Open
the door very carefully if the dishwasher is
operating, there is a risk of water squirting out.
Do not place any heavy objects the
door when it is open. The appliance could tip
forward.
When loadin g items to be washed :
1) Locate sharp items so t hat theyare not li kely
to damage the door seal;
2 Warni ng: Knives and other utensils with
)
sharp points must be l oaded in t he bask et
with their points down orplaced in a
horizontalposition.
When using y our dishwasher, you should
pr ev en t plastic items fr o m c oming int o co nta c t
with the h eating e lement.( This instruction is only
applicable to machines with a vi sual he ating
element. )
Check that th e deterge nt comparm ent is e mpty
after completio n of the wash cycle.
Do not wash plastic items unless they are marked
dishwasher safe or the equivalent. For plastic items
n
ot so marked, check the manufacturer's
recommendations.
Use only det ergent and rinse additives
design ed for an a ut omati c dishwas her.
Never use so ap, laun dry dete rgent, or h and
washing dete rgent in your dis hwasher. Keep
these produ cts out of the re ach of chi ld r en.
on or stand on
Improper connection of the equipment-grounding
conductor can result in the risk of an electric shock.
Check with a qualified electrician or service
representative if you are in doubt whether the
appliance is properly grounded. Do not modify the
plug provided with the appliance; If it does not fit
the outlet. Have a proper outlet installed by a
qualified electrician.
Keep children away from detergent and rinse aid, keep
child away from the open door of the dishwasher,
ren
there could still be some detergent left inside.
This appliance is not intended for use by persons
(including children with reduced physical, sensory or
mental capabilities, or lack of experience and
knowledge ,unless they have been given supervision
or instruction concerning use of the appliance by a
person responsible for their safety.
Children should be supervised to ensure that they do
not play with the appliance.
Dishwasher de tergents are strongly alk aline, th ey
can be extr emely dangerou s if swallowed.Avoid
contact with ski n and e yes and keep children away
from t he dishwasher when the door is open.
The door sh ould n ot be left open,
since this could increase t he ris k of tripping.
Ifthe supply cordisdamaged,itmustbe replaced
bythemanufactureroritsserviceagentora
similar ly q uali fied person in or der to av oid a
hazar d .
Remove the door to the washing compartment when
removing an old dishwasher from service or discarding it.
Pleasedispose ofpacking mater ials properly.
Use the dishwasher only for its intended function.
During installat ion, the power supply must not
be exces sively or d angerously bent or f lattened.
Do not tamper with controls.
The applianc e is to be connec ted to t he water
mains us ing new hose sets and that old ho se-sets
should not be reused.
The maximum number of place set tings t o be
washed is 14 .
The maximum permissible i nlet water pressure is
1Mpa.
The minimum permissible i nlet wat er press ure is
0.04Mpa.
)
Page 5
To get the bestperformance from your di shwasher,read all operatinginstructions
beforeusing itfor the firsttime.
33
1. On/ Off Button: t o s wi tch On/Off t he a ppli anc e.
2.Displayscreen: toshowthe reminding time
and the state (running s tate, del ay time et c )
3.A lt B utton(lower s p rayarm) : p re s s t he b utton
to select l ower basket loaded, and the lo wer
sprayarm indicator in s creen w ill light on.
Th e n pr ess the bu tt o n se con d t i m e,the dual zone
was function,the lower sprayarm andtheupper
sprayarm indicators in screen will light on.
4.Alt Button (upper sprayarm): pr ess the button
to select upper basket loaded, a nd the up per
spr a yarm indica tor in sc r e e n w i l l li g ht o n .
Then press t he butt on seco nd time,the dual zone
was function,th e lower sprayarm an d the upper
sprayarm indicators in screen wi ll light on.
Front view
1
2
3
5.Start /P ause but ton: To start the selected
washi ng p rogr am or pause the washing p ro gram
when the machine is w orki ng.
6.D e l ay Bu t to n : P ress the button to add the delay tim e.
7.D e l ay Bu t to n : P ress the button to decrea se th e
del ay time.
8.P rog r a m Button : To Pres s th e butt on to select
appropriateProgram.
Attention:
Childlockfunction:press theuppersprayarmbutton
and the lowers pray arm button s imult aneously to lock
the progra m.
Back View
7
4
5
8
9
6
Top spray arm
1
Cutleryrack
2
Upperbasket
3
Inner pip e
4
Lower basket
5
Dispenser
6
10
Cupshelf
7
Spra y arm s
8
Fil ter as sem bly
9
10
Inletpipe connector
11
Drainpipe
11
Page 6

Before usi ng you r dishwas her fo r the first time:
A. Fill therinse aiddispenser
B. F i ll in deterg e nt
Rin seAi d D ispe ns er
The r inseaid isreleasedduringthefinalrinsetopreventwaterfromformingdroplets on your dishes, which c an
leave spotsand streaks. It alsoimproves dryingbyallowing watertoroll off thedishes.Your dishwasheris
designedtouse liquidrinseaids. The rinseaid dispenser is locatedinsidethedoornextto thedetergentdispenser.
Tofill the dispenser,open the c ap and pour the rinse aid into the di spenser until the levelindicator t urns completely
black.The v olume oftherinseaidcontainer is about110ml.
Functi on of RinseAid
Rinse aid is automatical ly a dde d dur ing the last rinse, e nsuri ng th oro ugh r insi ng, an d s pot and strea k fre e drying.
Attenti on!
Only use branded rinse aidfor dishwasher. Neverfilltherinse a iddispenser withany othersubstances
(e.g. Dis hwasher clean ing a gent , liqu id detergen t). This would d amage the ap plia nce.
When to Re fill the Rinse Ai d D isp enser
If there is no ri nse-aid warning l ight in the c ontrol p anel, you can judge the amount o f rinse- aid by the color of the
opticallevel
indicator "C" located next to t he ca p. Whe n the r inse- aid cont ainer is full, the whole indicator will be dark .As the
rinse-aid
diminishes, the s ize of the dark dot decre ases. Youshould neve r l et th e rinse aid get below 1 / 4 ful l.
As the rinse aid diminishes, the size of the bl ack dot
on the rinse aid level indica tor changes, as illust rated be low.
Full
3/4full
1/2full
1/4full-Shouldrefilltoeliminatespotting
Empty
RINSEAID DISPENSER
To open the dispenser,turn the cap to th e "open" (left ) arrow a nd lif t it out.
1
Pour th e r inse aid into t he dispen ser, bei ng careful not to o verf ill.
2
Replacethecap by insertingit alignedwith "open"arrowandturningit to the closed(right)arrow.
3
Be careful not to over fill the dispenser, because this could cause over sudsing. Wi pe away any spill s
withadampcloth.Don't forgettoreplacethe c ap beforeyouclose dishwasherdoor.
Attention!
Clean up any rinse ai d spl it during filling w ith an absorbent clo th to av oid e xcess fo aming
during the nextwash.
Page 7
Clean up an y rinse aid spilled w hile during filling w ith an absorbent cl oth to avoid excessive foaming
duringthe nextwash.
Don't for get to replacethe cap before you c lose dis hwasher door.
Adjust ing Rins eAid Dis penser
The rin se aid di spen ser has s ix or four set tings. Always start withthe dispens er
set on "4 ". If spots and poor dryi ng ar e a proble m,increase t he am ount of rinse
aid dispensedbyremovingthe dispenser lid androtatingthe dialto"5".Ifthe
dishes still are not drying p roperly or are show spots, adjust the di al to th e next
higher le ver until your d ishes are sp ot- free. The r ecommend ed setting is "4".
(Factoryvalueis"4".)
Increase th e dose if there are drops of water o r li me spot s on t he di shes af ter wa shing.
Reduce it i f the re are sticky whit ish stai ns on your dish es or abluish f ilm on g lassw are or
knifeblades.
Detergents w ith its c hemi cal i ngredients a re ne cessary t o remove dirt, c rush d irt an d transpo rt it ou t of the dishw asher.
Most of th e co mmercial quality de tergents a re sui table fo r t his p urpose.
Detergen ts
There are 3 sorts of d etergents
1.Withphosphate and withchlorine
2.Withphosphate and witho ut c hlorine
3.Withoutphosphate and without chl orine
Normally new pulveris eddeter gent is wi thout p hosphate. Th us the w ater sof tener function of
phosphate is not given . In this case we r ecommend t ofill sa lt in t he salt c ontainer evenwhen
the har dness o f water is only 6 dH. If d eterg ents withou t phosph ate are used in t he case ofhard w ater
often white spots appe ar on di shes and glasses. In this case please add m ore det ergent to reach
better resu lts. Det ergents without chlori ne do o nly bleac h a lit tle. Strong and coloured spots w ill not
beremoved completely.Inthiscase please choose aprogram withahighertemperature.
°
ConcentratedDetergent
Based ontheir chemical composition,detergentscanbesplitintwobasic types:
conventi onal, alkaline d etergent s with caustic compon ents
low alkal ine conc entrated det ergents with natural enzymes
The us eof normal washing p rograms in combination with concent rated de tergents
reduces pollutionandis good foryour dishes; thesewashprograms arespecifically matched
to the dirt-dissolving pr operties of the enzymes of the co ncentrated d etergent . For th is rea son
normal was hprograms i n which concentrated de tergents are used can ac hieve the same
“”
results that can oth erwise o nly be achiev ed usin g intensive programs.
“”
“”
Detergent Tabl ets
Detergent t ablets o f different brand s dissolve at different speeds. For thi s reason some
detergent t ablets ca nnot dis solve an d develop their full cleaning power during sho rt
programs. Ther efore please use lon g progra ms when using d etergent tabl ets, to
ensurethe complete removal of detergent residuals.
DetergentDispenser
Thedispenser must be refilledbeforethe startof eachwashcyclefollowingtheinstructions
provided in the wash c ycle t able . Yourdishwasher uses l ess deterge nt an d rinse a id than
Conventional dishwasher. Generally,only one ta blespoon of detergent is needed f or
a normal w ashload. Moreheavily soileditems need more detergent. Always addthe
detergent j ust b efore st arting t he dis hwasher, otherw ise it could get damp and will not
dissolve pr operly.
Page 8

Amountof DetergenttoUse
If t he l i d i s closed: p r es s releas e bu tt on . T he l i d will sprin g op en.
Always add the detergent jus t be fore star ting eac h wash c ycle.
Only use brande d deterg ent aid f or d ishwasher.
Deter gen t powd er
Detergent tablet
Dishwasherdetergentiscorrosive!Takecare tokeepitout of reach ofchildren.
Proper Use ofDetergent
Use only det ergent spe cifically made for t he us e in d ishwashers. Keep your d etergent fr esh and dry.
Don't put pow dered d etergent into the di spenser u ntil you'r e ready to wash dishes.
Fill in Deter gent
Fill the deterge nt di spenser with detergent.
Themarkingindicatesthedosinglevels , as
illustrated o nthe right:
The place o f main wa sh cycle de tergent pl aced.
A
The place o f pre-wa sh cycle det ergent placed.
B
Please observe the manufacture rs dosing an d storag e
Rec omme ndations as s tated on the dete r gent pack ag in g .
Close t helid andpressuntilit locksinplace.
Ifthedishesare heavilysoiled, place an additional
detergent dose in the pre-wa sh dete rgent c h amber.This detergent wi ll tak e effect duri ng the p re-wash phase.
You find information abou t the a mount o f deter gent for the sing le programm e on the las t page.
Pleaseaware, th at accor ding tothe level soi ling an d th e specif ic hardness of w ater differen ces are possible.
Pleaseobserve t he manu facturer's re commen dations onthe detergent packaging.
Page 9

Considerbuying utensilswhichare identified as dishwasher-proof.
Use a mild detergent thatis describedas'kindto dishes'.If necessary,seekfurther
informationfromthe detergentmanufacturers.
Forparticular items,selectaprogram withaslowatemperature as possible.
To prev ent damage, do no t t ake glass a nd c utl ery out of the di shw ashe r i mmed iatel y
after t he p rog ram me h as e nde d.
Are n ot su itable
Cutlerywithwooden,hornchina or
mother-of-pearl handles
Plastic ite ms that are not h eat resis tant
Older cutl ery with glued parts t hat a re not
temperatureresistant
Bonded cutl ery item s or dishes
Pewter or cooper items
Crystal glass
Steel items subject to rusting
Wooden platters
Items made fromsyntheticfibres
(For best perf ormance of the di shwasher,follow the se loading guidelines.
Features and ap peara nce of baske ts and cut ler y baskets may vary fr om your mod el.)
Scrape off any large amount s o f leftover food. Soften r emnants of burnt f ood in pa ns.
It is not necessary torinse t he dishes u nder running water.
Place objects in the dishwasher in following way:
1.Itemssuch as cups, g lasses, pots/pans, etc. a re faced downwards.
2.Curveditems, or ones with recess es, should b e loade d aslant so that wate r can run off.
3.Allutensils are st acked secu rely and can not ti p ov er.
4.Allutensils are pl aced in the way t hat the spray arms can rotate fr eely during washin g.
Very sm all items s hould not be washed i n the dishwasher as they could eas ily fall out of the basket.
Are of limitedsuitability
Some types ofglasses c an become
dull after a large number of washes
Silver an d a lumi num parts have a
tendency to discolour duringwashing
Glazedpatternsmay fadeifmachine
washed frequent ly
Load hollow ite ms suc h as cup s, glasses, pans etc. With the opening facing downwards so t hat
wat e r cannot co lle c t in the c ont a ine r or a deep base .
Dishesanditems of cutlery must not lieins ide one another, orcovereach other.
To avoid da mage to glasses, th ey mus t not touch.
Load large items w hich are most difficult to clean into th e l ower bask et.
The upper basket is de signed to hold more d elicate and lighter d ishware such as glasses , coffee
andtea cups
Long blad ed kni ves sto red in a n upr ight po sition are a potenti al hazard !
Long and/ or s harp item s of cutlery such as carving knives must bepositione d
horizon tally in the upper b asket .
Please do not ove rload yo ur di shwasher. This is importan t for g ood r esults a nd fo r
reasonab le consu mption of energy.
To prevent water drippi ng fr om the uppe r basket into the lower basket, we rec ommend tha t you
empty the lower basket first and the n the upper bask et.
Page 10

The u pper basket is designed t o ho ld more delicate
and lighter di shware such as glasses, coffee and
teacups and saucers,as wellas plates, smallbowls
andshallow pans(as longas theyare not too dirty).
Positionthedishes andcookwaresothatt hey will
notget movedby the sprayofwater.
Please be remin ded that :
Pots,servingbowls,etc,mustalwaysbeplacedtopdown.
D eep pots shou ld be slanted to allow wate r to f low o ut.
The B otto m B ask et fe atur es folding spikes so tha t l arge r or more po t s an d p ans can be l o aded.
We sugges t tha t you pl ace large items and t he m ost
difficult to clean items are to beplaced into the lower
basket: su ch a s pots, p ans, lids , serving dishes and
bowls, as s h own in the f igu r e be low. It is prefer ab l e t o
pla ce s erv ing dishe s an d li ds o n t he s i de of the ra cks
in order to avoid blocking t he ro tation of the top spray
arm.
Adju sting the Upper B asket
The heigh t of the upper ba sket can be adjusted inorder to
create mo re space fo r larg e utensil s both for the upper
/lower basket. The height of the upper basket can b e
adjusted byplacing thewheels on differentheight of the
rails. Long items, serving cutlery,salad servers and knives
shouldbeplaced onthe shelfso thatthey donot obstruct
therotationofthesprayarms..
Foldin g b ack th e c up shelives
For better st acking ofpots and pans ,
the spik es can be f ol de d dow n as
show in th e pict ure ri ght .
Foldin g Spi kes of Lower Bask et
For better stacking ofpots and pa ns,
the spi kes can be f olded do wn a s
show in the p ictur e right.
Cutleryshould be placed inthe cutlery rack separately
from each ot her in th e appropr iate pos itions, and d o
make sure theutensils d o not nest together, this ma y
cause badperformance.
Page 11

()
Means:needtofill rinse into the Rinse-AidDispenser.
Intensive
Heavy
Normal
(*AS/NZS2007.1)
Glass
1Hour
Rapid
Soak
Forheaviest soiledcrockery,
and normallysoiled pots
pans dishesetcwith dried
、
、
onsoiling.
For heavil y soile d loa d s ,
such as pots, plates,glasses
and lightly soiled pans .
Standard daily cycle for
normallysoiledloads,such
aspots plates glasses.、、
For lightl y soi led croc ker y
and glass
For li ghtl y so ile d loa ds that
do not n eed excellent drying
efficiency.
A shorter washfor lightly
soiled lo adsandquickwash.
Torinsedishes that you plan
towash later that day.
Pre-wash(50 )
Wash(65 )
℃
℃
Rinse
Rinse
Rinse(55 )
℃
Drying
Pre-wash(45 )
Wash(55 )
℃
℃
Rinse
Rinse (60 )
℃
Drying
Pre-wash
Wash(45 )
℃
Rinse
Rinse(50 )
℃
Drying
Pre-wash
wash(4 0 )
℃
Rinse
Rinse(60 )
℃
Drying
Pre-w ash (5 0 )
Wa sh(60 )
Rinse ( 50 )
℃
℃
℃
Drying
Wash (40 )
℃
Rinse
Rinse (45 )
℃
Pre-wash
5/27.5g
(Or A ll )in1
5
/27.5g
(OrAll )
in1
5/27.5g
(OrAll )in1
5/27.5g
5/27.5g
20g
150
180
165
120
60
40
80.01
1.3
1.15
0.74
0.85
0.8
0.5
16.5
13.0
12.6
13.0
9
10
3.5
* : This progr am is the test cy cle. The information fo r com parability test
AS/NZS 2007.1
inaccordance wit h , as follo ws:
AS/NZS 2007.1
Capacity:14setting
Position Upper basket: upper w heels on rails
Rinse aid setting:6
Open the door slightly 50mm t o assi st in drying of the di shes after every wash
Starting a cycl e wash
1 Draw out the lower and up per basket , l oad the dish es and push the m back.
It is co mmended t o load t he lower basket first, then the upper one (see the section entitl ed
Loading the Di shwashe r ).
“”
2 Pour in th e detergent (see the section ent itled Det ergent and RinseAid ).
“”
3 Insert the pl ug int o the socket. The power s upply i s 220- 240 VAC/50 HZ, the specificatio n
of the so cket is10A 250VAC. Make sur e that the water supply is turned on to full pressur e.
4 Close the do or,press the On/Off button to switch on the machine.
5 Press the pro gram bu tton ,the wash pr ogram w ill be ch anged as foll ows dire ction:
Intensiv e->Heavy->N ormal->G lass ->Rapid ;->1 Hour ->Soak
If aprogram is se lected, t he response light will l ight. Th en press the Start/Pause button, the
dishwasher b egins to start.
Page 12

Whe n you pr ess th e St ar t/Paus e butt on to pau s e duri n g was hi ng, t he run ni ng in d icat o r will
stopblinkingandthedishwasherwillmooingeveryminuteunless youpressthe
button to start.Start/Pause
Premise:
1 A cycle th at is underway ca n on ly be m odified if it has on ly been running for a short time. O therw ise, the
detergent m ay hav e alr eady be en relea sed, a nd the appliance m ay have alrea dy dr ained the wash water.
If t his is the case, the detergent d ispenser must be refilled (see the section ent itled " Loading the
Detergent " ).
2 Press the Start/Pau se but ton , the mach ine will be in stand by s tate, press the program b utton mo re than
3s then you can cha nge t he pro gram to the desired c ycle setting (see the section entitled " St arting a wash
cycle. . ." ).
Ifyou open the door ,the machinewillpause. The programlightwill
duringawashcycle
stopblinkingandthe buzzerwill mooing every minuteunless you close the door.After
you c lose the door ,the mac hine will keep on worki ng after 10 second s.
Aforgottendish can be added any time before the detergent cup opens.
Open the door a little to stop the washing.
1
After the spray arms stop working,you can open the door
2
completely.
Add forgotten dishes.
3
When the working cy cle h as fini s hed, t he b u z zer of th e di s hwa she r wi l l so u nd fo r 8 sec o n d s , th en stop. Turn o ff
the a pp li a n c e us ing th e P ow er s wi tc h button , shut off th e water su p p ly and o pe n t h e door of the d ishw a sh er.
Wait for a few minutes bef ore unlo ading th e dishwa sher to a void ha ndling th e dishes and utensils w hi le they
are still hot and m ore suscept ible tobreakage. The y will als o dry be tter.
Close the door
4
the dishwasher will run after 10 seconds.
5
SwitchOff the Dishwasher
The program light is on but is not blinking, onl y in this case the programme h as ended .
1.Switchoffthe dishwa sher by pressing the On/Off button.
2.Turnoff the watertap!
Openthe door carefully.
Hot dishes ar e sensit ive to kn ocks. The di shes shou ld theref ore be a llowed t o cool d own arou nd 15 minutes
beforeremovingfrom the appliance.
Open the d ishwasher's door,leave it ajar and wai t a few minutes before removing the dishes. In this way they
will be cool er and t he dryi ng will b e impr oved.
Unloadingthe dishwasher
Itis normal that the di shwasher is wet insid e.
Empty the l ower basket first and then the up per one. T his wil l avoid water dripp ing from the upper Bas ket on to
the dishes in the lower one.
Washthearms in soapy and w arm w ater a nd u se a sof t brush to
cleanthe jets.Replacethem afterrinsing them thoroughly.
When following this procedure from step1 to step 3, the filter system will be removed;
when following it from Step 3 to Step 1, the f ilter system will be installed.
It is dan gero u s t o ope n th e do or w hen w ashing, beca us e the hot wat e r may scald y ou .
Page 13

The filter prevents lar ger remnants of food or ot her obj ects from getting insi de the pu m.
Theresiduesmayblockthefilter, inthiscasethey mustbe removed.
The filter system c onsists of a coarse fi lter,aflat (M ain filter)
An d a mic rofilter( F i ne fi lte r ) .
1
2
3
2
1
3
Main filter
Foodand soilparticlestrapped inthisfilterare pulverizedby a
special jet on the l ower spr ay arm an d washe d down todrain.
Coarse filter
Larger items, s uc h as p i e c es o f bo ne s or glas s, t ha t cou l d bl o ck
thedrainaretrapped in thecoarsefilter.To remove the items
caught by the fil ter,gently squeeze the tap on th e top of this
filterand liftout.
Fine filter
This filterholdssoiland foodresiduesinthe sump areaand
prevents i tfrombeingredepositonthe dishes duringwashcycle.
Filterassembly
Thefilterefficiently
For best performance and results, the filte r must be cleaned re gularly. this reaso n, it is a goo d idea t o
remove th e larger food par ticles tr apped in the filter after each wash cycle b y rin sing t he sem icircular filter and
cup unde r runnin g water. Toremove th e filter d evice, p ull the c up ha ndle in t he upwa rd direct ion.
removes food particles fro m the wa sh wate r,allowing it t o be rec ycled du ring the cycle.
For
Th e d is h washer m ust never b e us ed w i tho ut the f ilters.
Improper replacement of the filter may reduce the performanc e level o f the appliance
anddamagedishes and utensils.
2
1
Step 1 Turn t he filter i n ant i-clockwise d irection,:
Step 2 lift the filter assy up:
When following this procedure from step1 to step 2, the filter system will be removed;
when following it from Step 2 to Step 1, the f ilter system will be installed.
Page 14

Remarks:
- Inspect t he filter s for blo cking a fter ever y time th e dis hwasher ha s been u sed.
- By unscrew ing the c oarse fi lter, you can remove the filter syst em. Re move any foo d remna nts and
cleanthe filters under running water.
Theentire filterassemblyshouldbe cleanedoncea week.
Cleaning the Filter
To cle an the coa rse filt er and the f i ne f i lter , use a clean i n g brush. Re as se mbl e the fil t er part s as shown i n t h e figu res
on the la st page a nd r eins ert the e ntire assem bly in the dis hwasher, po s itio ning i t in its s eat and pressing downwa rds .
Whencleaningthefilters, don'tknockonthem.Otherwise,thefilterscouldbe
contortedandthe performanceof thedishwashercould bedecreased.
The control p anel can be cleaned by using a l ightly dampened cloth .
After cleaning, m ake sureto dry it thoroughly.
For the e xteri or, use a go od appl ia nc e po li s h w ax .
Neveruse sharp objects, sco uring pads o r har sh clean ers on a ny part o f the di shwasher.
CleaningThe Door
To clean the e dge ar ound the d oor,you should u se o nly a so ft warm, damp cloth.
To avoid penetrat ion of water into t he door l ock and electrical com ponents, d o not
usea spray cleaner of any kind.
Never use a spr ay c leaner t o clean t he door panel as it may dam age the door lock
and electrical components.
Abrasive agents or some paper towels shou ld not be u sed b ecause of therisk of
scra tching or leavin g sp ot s on the st ai n les s st ee l s ur fa ce.
Protec tAga inst Freezi ng
please t ake frost protection meas ures o nthe di shwasher in winter.Every fter washing c ycles,
please op erate as follows
1.Cutofftheelectrical power tothedishwasher.
2.Turnoffthe water su pply and d isconnec t the w ater i nlet pipe from the w ater val ve.
3.Drain the water from the inlet pipe an d water valve. (Use a pan to gat her the water)
4.Reconnect the wate r inlet pipe to t he wate r valve.
5.Remove the filte r at the bottom of the tub and use a spong e to soak up wate r in t he sump.
:
If your dishwasher cannot work because of t he ice,
please con tact prof essiona l service persons.
timea
Cleani ng the SprayArms
It is ne ce ss ar y to c lean t h e sp ray arms re g ula r l y for har d
water chemicals willclog the spray armjets and bearings.
Toremov e the upper spr a y a rm , hol d the nu t, rot ate th e arm
clockwiseto remove i t.
Toremove thelowersprayarm,pull out the sprayarm upward.
Washthe arms in soapy and war m water and use a soft brush t o
clean the jets . Replac e them after rinsing t hem th oroughly.
Page 15

AfterEvery Wash
After ever y wash, turn off the w ater supply to th e
appliance and leave th e doo r slightly op en sothat
moisture a nd odour s ar e not tra pped in side.
Removethe Plug
Before cleani ng or p erformi ng mainten ance, always
remove the plug from the socket.
No Sol vent s or Abras ive Cleani ng
Toclean the exterior and rubber partsof the dishwasher,
donotusesolventsorabrasive cleaningproducts.
Only use a clo th with warm so apy water.
Tor em ove s pots or stains from the sur f ace ofthe
interi or, use a cloth dampe ned with wa ter an a little
vinegar,or a c leaning pro duct mad especifical ly for
dishwashers.
Position the appliance i n t he desired location. The back should rest again st the w all b ehind i t, and the sides,
along the adjacent ca binets or walls. The d ishwasher is equippe d with water supply a nd drain hoses th at can
be positio ned eith er to the right or the left s ides to facilitate p roper i nstallati on.
Whennotin Use for aLongTime
It isrecommend thatyou runa wash cyclewith the
dishwasher empt yand the n remove th e plu g from the
socket, turn o ffthe wa ter supp ly and l eave the door of
the app li a n c e sl ig ht ly open. This wil l h elp the d oo r
sealsto l ast longerandprevent odoursfromforming
withinth e appliance.
Moving theA ppli ance
If the app liance m ust be mo ved, tr y to keep it in t he
verticalposition. If absolutely necessary,it can be
positioned on its back.
Seals
Oneofthefactorsthatcauseodourstoforminthe
dishwasher is foo d th at remain strapped in the seals .
Periodic cleaning with a damp sponge will prev ent t his
fro m occurri ng.
Once the appliance is positioned for levelling, the height of the dishwashe r
may be altered vi a adjust ment of the screwing leve l of the feet. In any case,
the applia nce should not b e inclin ed more than 2 .
For personal safety:
DO NOT USE AN EXTENSION CORD OR AN ADAPTER PLUG WITH THIS APPLIANCE.
DONOT, UNDERANYCIRCUMSTANCES, CUT OR REMOVETHEEARTHING
CONNECTION FROM THE POWER CORD.
Please look at th e ra ting label to know the rat ing v oltage a nd conn ect the d ishwasher to the appropriate powersupply.
Use the r equired fuse 10 amp , tim e delay f use orcircuit bre aker rec ommended and provide separate circ uit servi ng
only this appliance.
Ensure the v oltage a nd frequenc y of thepower being correspond s to
those on the rating plate . Only insert the p lug into an electrical so cket whichis earthed
properly.Ifthe el ectrical sock et to whi ch the a pplianc e must b e connecte d is not
appropriate for theplug,replace the socket,rather thanusing a adaptors or t helike as
theycould causeoverheatingand burns.
This appliance must be earthed. In the event of a malfunction or breakdown, earthing will reduce the risk of
electric shock by providing a path of least resistance for the electric current. This appliance is equipped with a
cord havingan equipment-earthing conductor and an earthing plug. The plug mustbe plugged into an
appropriate outlet that is installed and earthed in accordance with all local standards and requirements.
Page 16

Improper connection of the equipment earthing conductor can result in the risk of an
electric shock.
Check with a qualified electrician or service representative if you are in doubt whether the
appliance is properly earthed.
Do not modify the plug provided with the appliance. If the plug does not fit properly to the
outlet, please have a qualified electrician to install a proper outlet.
for personal safety:
DO NOT USE AN EXTENSION CORD OR AN ADAPTER PLUG WITH THIS APPLIANCE.
DO NOT, UNDER ANY CIRCUMSTANCES, CUT OR REMOVE THE
CONNECTION
Connect the cold water s upply hoseto a th readed 3 /4(inch) connector an d make s ure
thatitisfastened tightlyin place.
Ifthe wat er pipe s are new or have not been usedfor anextended per iod of time, let the
waterrun to makesurethatthe waterisclear. Thisprecaution is needed toavoidthe
risk of the w ater in let to b e blocked and damage the appliance.
Please closethe hydrant afterusing.
FROM THE POWER CORD.
EARTHING
Insert t he drain hose into a d rain pi pe wi th a minimum diamet er of 40mm, or let it run into th e si nk, making s ure t o
avoid bend ing or cr imping it . The top of the hose must be less than 1000m m.
Front
Counter
NOTE
The top of the hose
must be less than
A
1000mm.
Drain pipe
B
φ 40mm
Page 17

How to Drain ExcessWater FromHoses
If the sink is 100 0 hi gh er f rom the floo r, th e ex c ess wate r in hoses c a nno t be drai ne d directl y
into thesink.It will be necessaryto drainexcess waterfromhosesintoabowlorsuitable
container that is held out side and lower than t he sink.
Wat er O u t l et
Connect the water dr ain h ose. The dr ain hose must be cor rectly fit ted to avoid water leaks.
Ensure that the water drain hose is not kinked or sq uashed.
ExtensionHose
Ifyou needadrain hose extension,make suretouse a similardrain hose.
It must be no longer th an 4 met res; otherw ise t he cleani ng effect of the dishw asher coul d be reduced.
Syphon Conn ection
Insert the drainhose into a drain pipe with a minimum diam eter of 4 0mm, or let it run into the sink, making sure to
avoid bending or crimping it. T he top of the hose must be less t han 100 0mm.
Thefollowingthings shouldbe checkedbefore startingthe dishwasher.
1
Thedishwasheris leveland fixed properly
2
The i nle t va lv e is open
3
Thereis a leakageat the connections ofthe conducts
4
Thewires aretightly connected
5
The poweris switched on
6
The i nlet and drain hoses a re k nott ed
7
Allpacking materials andprintingsshouldbe takenout fromthe dishwasher
After installation, please make sure to keep this manual.
The conten t of this manual is very he lpfulto the users.
Page 18

Fuse blown, or the
circuit breaker acted
Replace fuse or reset circuit breaker. Remove any other
appliance s sharing the same circuit with the dishwasher
Power supplyis not
turned on
Error code:E1;
Water pressure is low
Door of dishwasher
not properly closed.
Kink in drain hose
Filter clogged
Kitchen sink clogged
Improper detergent
Spilled rinse-aid
Make sure the dishwasher is turned on and the door is
closed securely.
Make sure the power cord is properly plugged into the
wall socket.
Check that the water supply is connected properly and
the water is turned on.
Make sure to close the door properly and latch it.
Check drain hose.
Check coarse the filter
(see section titled )" Cleaning The Filter "
Check the kitchen sink to make sure it is draining well.
If the problem is the kitchen sink not draining ,you may
need a plumber rather than a serviceman for dishwashers.
Use only the special dishwasherdetergent to avoid suds.
If this occurs, open the dishwasher and let suds evapora te.
Add 1 gallon of cold water to the tub. Close and latch the
dishwasher, thenselect any cycle. Dishwasher will drain
outthewateratthe firststep.Openthe doorafter draining
is stop and check if the suds is disappeared.
Repeat if necessary.
Always wipe up rinse-aid spills immediately.
Detergent with
colourant was used
Hard water minerals
The affected items are
notcorrosionresistant.
A programme was not
run after dishwasher
salt was added.
Traces of salt have
gotten into the wash cycle.
The lid of the softer
is loose
r
Aspayarmis
knocking against
an itemina basket
Items of crockery
are loose in the
wash cabinet
This may be caused
by on-site installation
or the cross- section of
the piping.
Make sure that the detergent is the one without
colourant.
To clean the interior, use a damp sponge with
dishwasher detergent and wear rubber gloves.
Never use any other cleaner than dishwasher
detergent for the risk of foaming or suds.
Always run the quick wash programme .
without any crockery in the dishwasher and
without selecting the Turbo function (if present),
after adding dishwasher salt.
Check the lip .Ensure the fix is fine.
Interrupt the programme, and rearrange the items
which are obstructing the sp ay arm.r
Interrupt the programme,
and rearrange the items of crockery.
This has no influence on the dishwasher function.
if in doubt, contact a suitably qualified plumber.
Page 19

The dishes were not
loaded correctly.
See notes in " Loading the Dishwasher Baskets ".
Theprogramme was
notpowerfulenough.
Not enough detergent
wasdispensed.
Items are blocking
the path of sp ay arms.r
The filter combination
inthebaseofwash
cabinet is not clean or
is not correctly fitted.
This may cause
the sp ay arm jets
r
to get blocke d.
Combination of soft
water and too much
detergent.
Aluminum utensils
have rubbed against
dishes.
Dishes block
detergent cups.
Improper loading
Too little rinse-aid
Select a more intensive programme.
See" Wash Cycle Table ."
Use more detergent, or change your detergent.
Rearrange the items so that the sp ay can rotate freely.r
Clean and/or fit the filter combination correctly.
Clean the sp ay arm jets. See "Cleaning the Spray
Arms".
Use less detergent if you have soft water and select
a shortest cycle to wash the glassware and to get
them clean.
Use a mild abrasive cleaner to eliminate those marks.
Re-loadin g the dishes properly.
Load the dishwasher as suggested in the directions.
Increase the amount of rinse-aid/refill the rinse-aid
dispenser.
r
Dishes are removed
too soon
Wrong program
has been selected
Use of cutlery with
a low-quality coating
Do not empty your dishwasher immediately after
washing. Open the door slightly so that the steam can
escape. Begin unloadingthe dishwasher only once t
he dishes are barely warm to the touch. Empty the low
basket first. This prevents water form dropping off
dishes in the upper basket.
In short program the washing temperature is lower.
This also lowers cleaning performance. Choose
a program with a long washing time.
Water drainage is more difficult with these items.
Cutlery or dishes of this type are not suitable for
washing in the dishwasher.
When some malfunctions come on, the appliance will display error codes to warn you:
E1
E4
E8
Longer inlet time.
Overflow.
Failure of diverter valve.
Faucets is not opened, or water intake is
restricted,or water pressure is too low.
Some element of dishwasher leaks .
Open circuit or break of diverter valve.
Page 20

If overflow occurs, turn off the main water supply before calling a service.
If there is water in the base pan because of an overfill or small leak,
the water should be removed before restarting the dishwasher.
Height: 845mm
Width : 598mm
Depth : 600mm
(with the door closed)
Waterpressure: 0.04-1.0MPa
Power supp ly: see rating label
Capacity: 14place settings
Page 21

 Loading...