

Page 1
MONSTER
SUPERCLEAN FLOOR STEAMER (EZ2)
INSTRUCTION MANUAL
S
t
e
a
m
B
o
o
s
t
e
r
Model #: EZ2 AUS, NZ
Page 2

SAVE THESE INSTRUCTIONS
When using an electrical appliance, basic safety precautions
should always be observed, including the following:
Read all instructions before using this appliance.
WARNING:
To reduce the risk of re, electrical shock, or injury:
1. This appliance is authorized for household/residential use only.
2. Do not charge or use outdoors or on wet surfaces. Do not immerse the oor
steamer in water or other liquids.
3. Do not allow to be used as a toy. Close attention is necessary when used by or
near children. Do not leave Steamer unattended. Always unplug unit when not
in use.
4. Use only as described and for the uses described in this manual. Use only
manufacturer’s approved and supplied parts and accessories. Use of other
accessories is not recommended and will void the warranty.
5. Always make sure the Handle Assembly is in the upright “off” position before
plugging in or unplugging. Keep cord away from heated surfaces (e.g.,
cooking surfaces), and sharp edges and corners.
6. Do not use if power cord or plug has been damaged, or if any part of
appliance has been dropped, damaged, left outdoors, or dropped in
water. Do not attempt to disassemble or repair appliance. Return it to the
manufacturer or an authorized service center for examination or repair.
7. Do not wrap cord too tightly around appliance. Never carry by the cord or
yank to disconnect from an outlet. To unplug, always grasp plug to remove
from outlet – do not pull on cord.
8. Do not handle cord or appliance with wet hands or without shoes on.
9. Look closely at Steamer and follow all labels and marking instructions.
10. Do not put any objects into openings. Do not use with any opening blocked.
11. Before lling with water or emptying, always place Handle Assembly in upright
“off” position, unplug Steamer and allow it to cool completely.
12. Turn the Boiler Cap slowly to open the boiler – this will allow any remaining
steam to escape gradually.
13. Use caution while emptying the appliance. Contact with hot water or steam
may cause burns.
14. Be sure Boiler Cap is (and remains) closed during use.
15. The Antibak Tank Cover should never be opened during use except to rell
while Steamer is stationary.
16. Never use cleaning solutions, perfumes, oils, Antibak or substances other than
tap or distilled/demineralized water in the Boiler. Use of any chemicals in Boiler
may damage Steamer and will automatically void the warranty.
17. Antibak should ONLY be used in the Antibak Tank (as detailed on pages 9 and 10).
18. When in use, never turn the appliance on its side. Do not direct steam at
people, animals, plants or electrical equipment (i.e, inside an oven).
19. Do not operate around ammable or combustible liquids such as gasoline, or in
areas where fumes may be present.
20. To reduce the likelihood of circuit overload, do not operate another high
wattage appliance on the same circuit. Plug in to a standard (220-240V,
50/600Hz) electrical outlet.
ATTENTION: This appliance is equipped with a 3-prong grounded power
cord. Insert only into a 3-prong grounded electrical outlet. Do not try to
remove the contacts of the grounded connection.
IMPORTANT SAFE TY INSTRUCTIONS
2
Safety Instructions
Page 3
SAVE THESE INSTRUCTIONS
21. Do not use extension cords or outlets with inadequate voltage.
22. Store appliance indoors in a cool, dry place.
23. If appliance is damaged, it must be repaired by the manufacturer or an
authorized service agent to avoid safety issues or risk of danger to the operator.
24. This appliance is not intended for use by persons (including children) with
reduced physical, sensor y or mental capabilities, or lack of experience and
knowledge, unless they have been given super vision or instruction concerning
use of appliance by a person responsible for their safety.
25. Do not use Antibak sanitiser on carpets or rugs (or any other soft furnishings
such as mattresses or lounge). When using the Carpet Glide on carpets or rugs,
do not pull the trigger on the Handle to dispense Antibak. The steam coming
from the bottom of the Steamer is sufcient to refresh carpet or rugs.
26. Read and follow all important notices in this guide.
Euroex relieves itself of any liability for damages that shall be the
result of improper use of the appliance, not in conformity with what’s
written in this instruction manual.
3
Safety Instructions
*IMPORTANT*
Please read all of the
instructions for use and
Important Safety
Instructions carefully.
Remove and discard all
packaging materials
and keep them out
of the reach of children.
WARNING
THIS FLOOR STEAMER WAS DESIGNED TO USE
ANTIBAK
CLEANING
SOLUTION
ONLY! DO NOT USE
ANY OTHER SOLUTION OR CLEANING
AGENT OR YOU WILL HARM THE STEAMER AND VOID THE WARRANTY.
CAUTIONS
• Do not use your Floor Steamer without a Hard Surface Pad or Carpet Glide &
Pad attached to the system.
• Never leave your Floor Steamer in one spot on any surface for any period
of time. Always place on the Parking Pad and make sure the Floor Steamer
Handle Assembly is in the fully upright position when not in use - this turns the
Steamer Off.
• DO NOT disassemble Floor Steamer after assembly. This will cause damage.
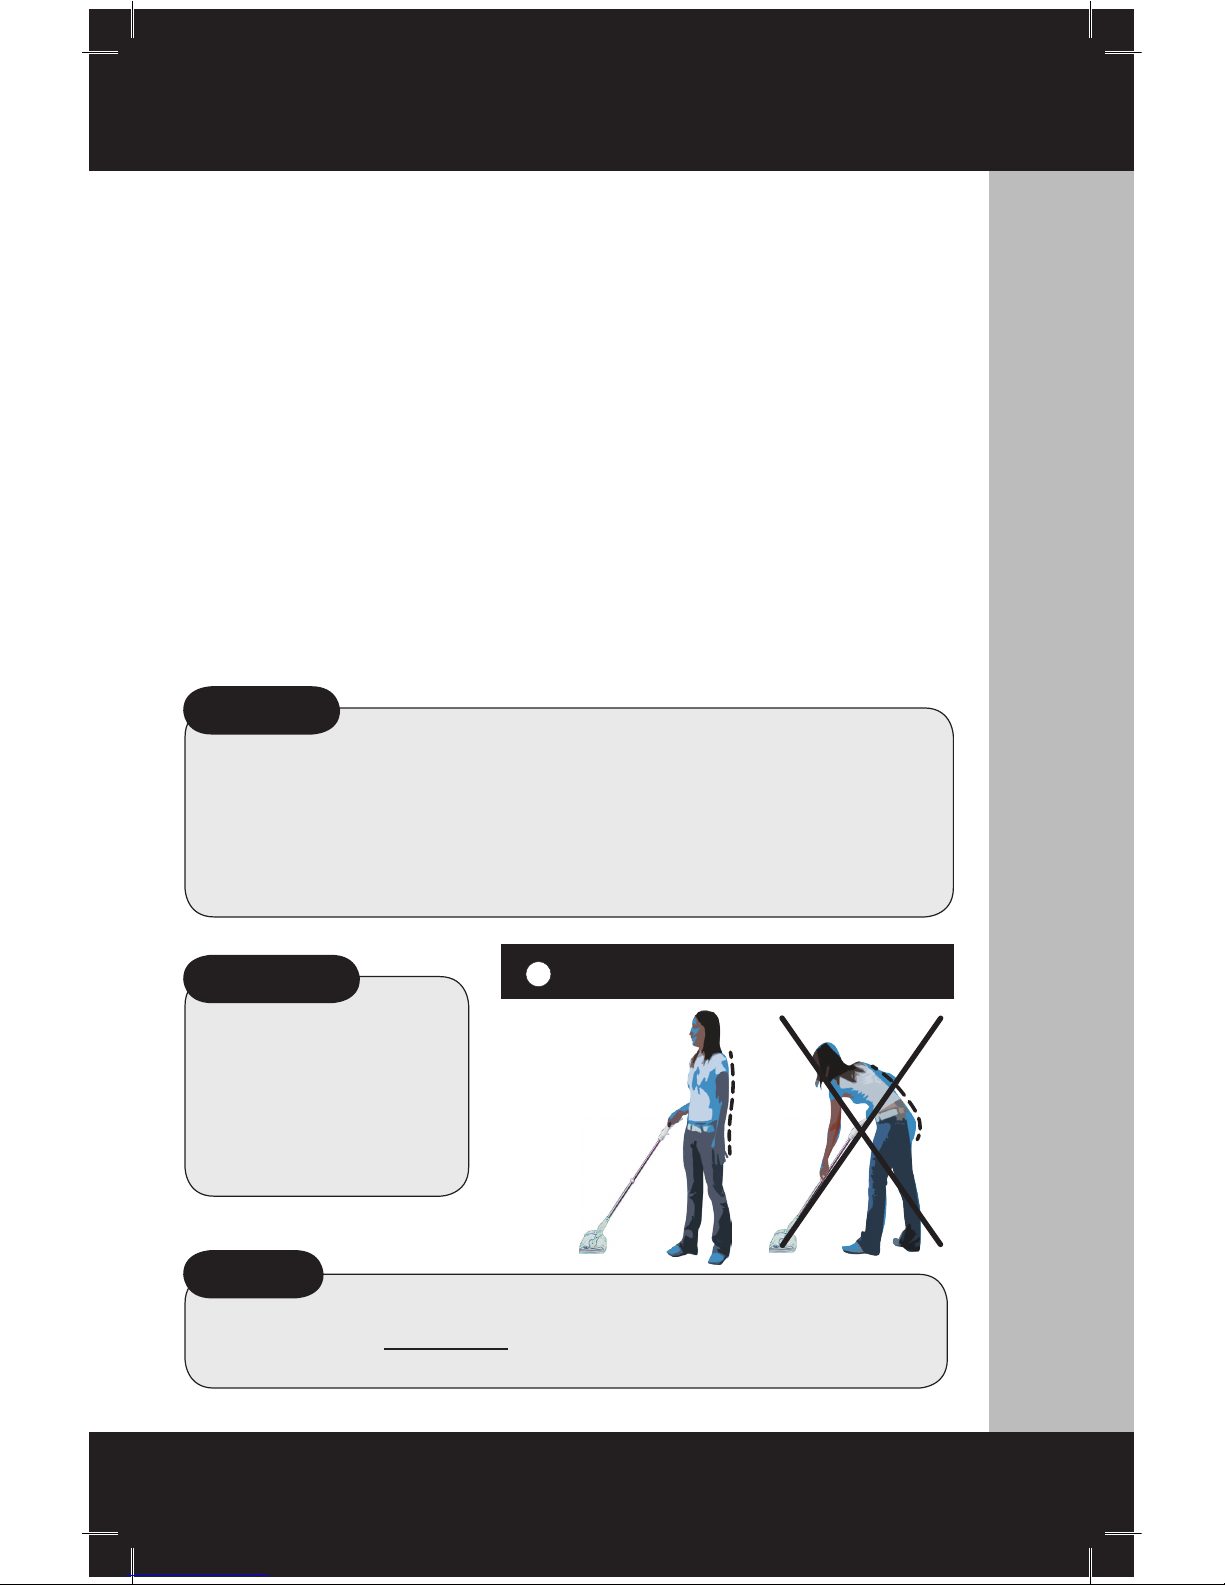
Save your back
No need to
press hard
The steamer
does the
work for you
Page 4

One (1) Floor Steamer
1
11
6
3
7
10
2
1 - Cord Winder
2 - Handle
3 - Metal Extension Tube
4 - Measuring Cup
(pre-marked)
5 - Filler Funnel
6 - Boiler Cap
7 - Steam Ready Indicator Light
(green)
8 - Power Indicator Light
(orange)
9 - Power Cord
10 - Front Steam Jets
11 - Antibak Tank Cover
12 - Hard Surface Floor Pad
13 - Carpet Floor Pad
14 - Parking Pad
15 - Carpet Glide
16 - Bottle of Antibak
17 - Antibak Tank Funnel
Product Feautres
4
Product Features
9
8
Technical Data
Adapter Input: 220 -240V~, 50/60Hz
Cord Length: 7 m
Power: 1200 watts
Boiler: Stainless Steel
Boiler Capacity: 0.6 lt
Pressure: 3.5 bars
4
1/2 Cup
1 Cup
F
I
L
L
U
N
I
T
W
I
T
H
2
C
U
P
S
W
A
T
E
R
M
A
X
C
L
E
A
N
B
L
A
S
T
(
M
a
x
)
PARKING PAD
14
15
13
12
16
5
17
Page 5
Before Use
5
Before Use
Assembly of Parts & Preparation of Steamer
Make sure all parts are in the box (see pg 4).
IMPORTANT: FOLLOW THESE INSTRUCTIONS CAREFULLY!
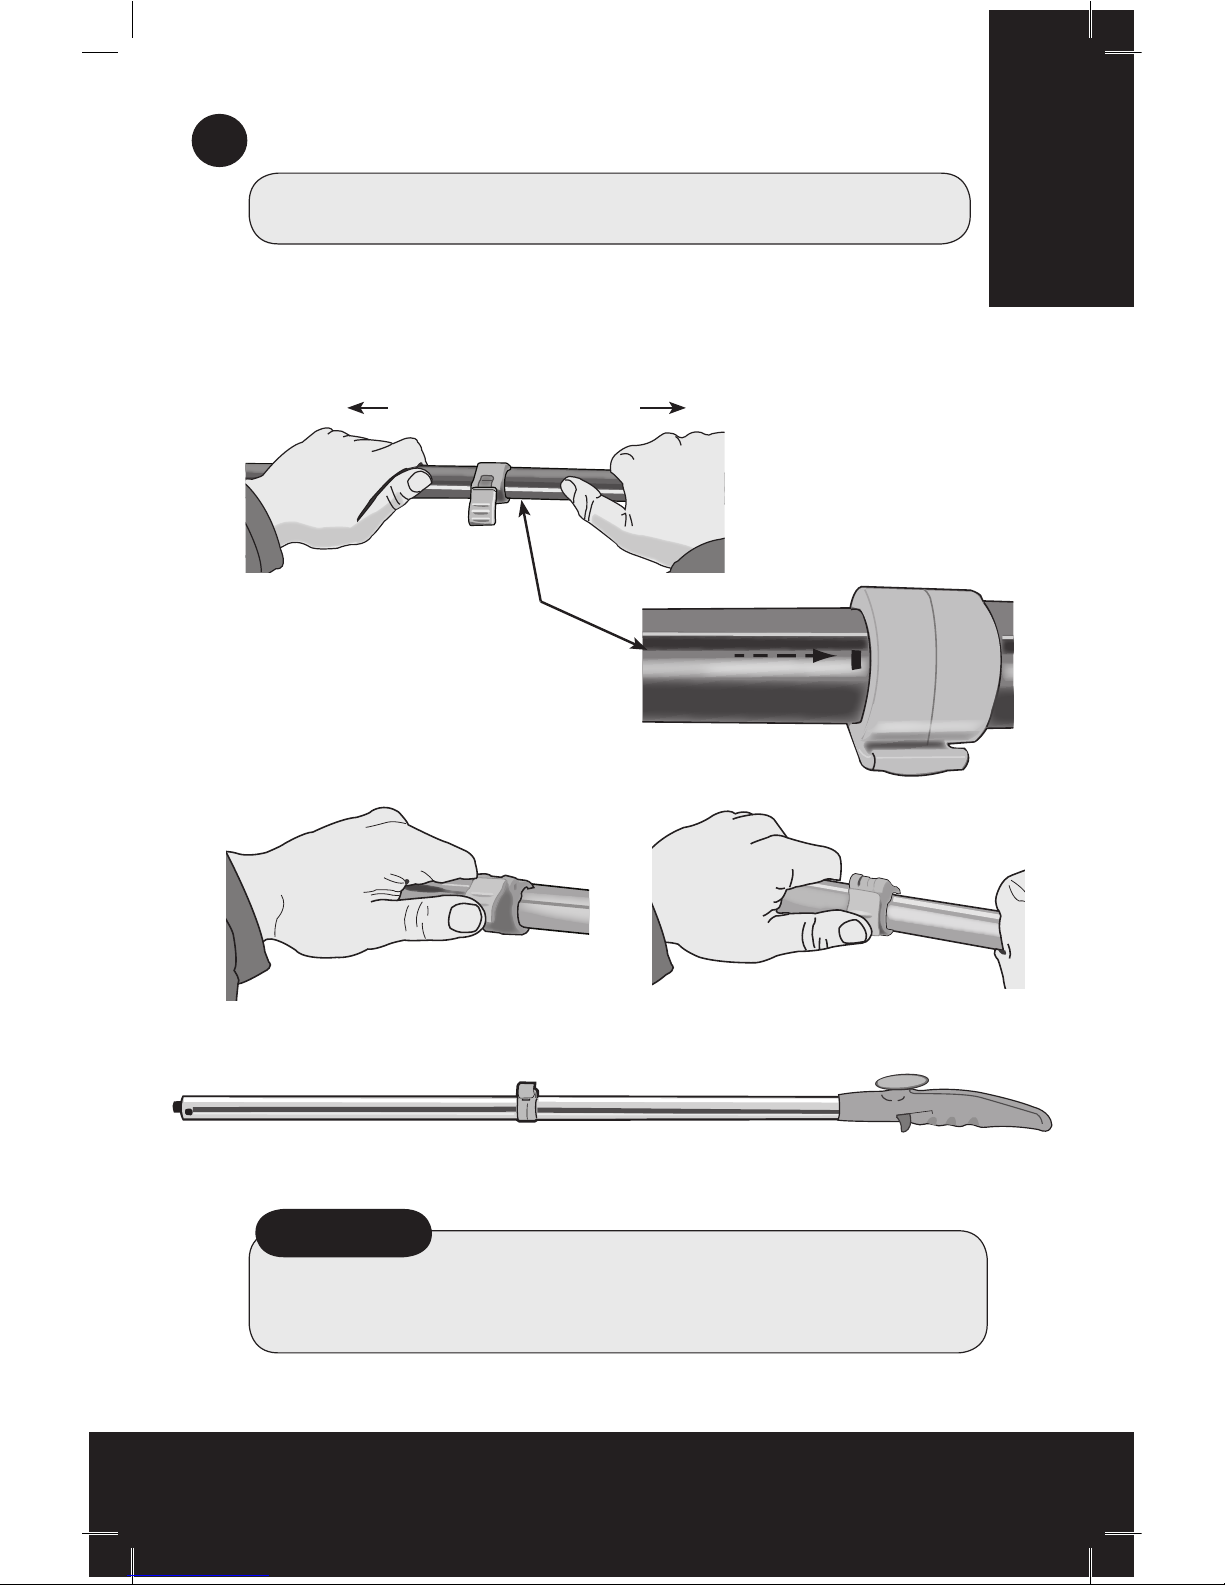
1
*IMPORTANT*
Frontal steam can only be generated when Extension Tube is in the
“Maximum Extension” position.
BE SURE EXTENSION TUBE IS FULLY
EXTENDED AND LOCKED IN PLACE FOR OPTIMAL STEAM OPERATION.
“Maximum Extension” Position
• Snap connector down. When a “click” is heard, the Tube is locked in position.
• Extend Tube to the
“Lock - I” position.
LOCK
CLICK!
Pull apart Extension Tube
A. Assemble Handle
After removing Handle Assembly from carton:
• Pull Extension Tube apart (shown below).
Page 6

6
Before Use
Before Use
B. Attach Handle to Steamer
• Before starting, remove the self-tapping screw from the bottom
of Extension Tube.
• Insert the Handle Assembly into the Floor Steamer Base. Align
Arrow on Handle with Arrow on Base (as shown in Fig. A).
• Once inserted, twist Handle Assembly 90° clockwise (as shown
in Fig. B). Be sure Arrow on the Handle is aligned with Line/Lock
Icon on Base.
• Align the Handle Assembly
screw hole with the opening
in the steamer housing.
Secure the Handle assembly
with self-tapping screw
which was removed from
bottom of Extension Tube
(as shown in Fig. C).
Fig. A
Fig. B
Fig. C
Front View Side View
90°
Page 7

7
Before Use
C. Attach Hard Surface Floor or Carpet Pad to Steamer
Afx either the Hard Surface Floor Pad or Carpet Glide with
Carpet Pad to your Floor Steamer.
WARNING:
To prevent oor damage, ALWAYS attach either the
HARD SURFACE FLOOR PAD or the CARPET GLIDE ACCESSORY
with CARPET PAD when using your Floor Steamer. NEVER use
without either of these attachments afxed to the machine.
ATTACHING HARD SURFACE FLOOR PAD
Place Floor Pad face down on the oor, with
white hook and loop strips facing up. Hold
Floor Steamer about 2” above Pad and
gently place Floor Steamer onto the Pad.
Firmly press down to assure Pad is securely
adhered to the Floor Steamer.
ATTACHING CARPET GLIDE WITH CARPET PAD
Place Carpet Glide face up on oor. Center
and place Carpet Pad on top of Carpet
Glide. Hold Floor Steamer over the Carpet
Glide and gently lower the Steamer on to
the Glide. Make sure the 4 clips on Glide are
around the outside of the Steamer Base, and
then, using hands, attach 4 clips from the
Carpet Glide to the Steamer Base.
USE ON HARDWOOD FLOORS
For hardwood oors, use only on “sealed”
hardwood surfaces. Move Steamer forward
and backward while cleaning. Carefully
control the amount of steam used, as too
much water could cause damage.
Before Use
IMPORTANT NOTE ABOUT LINOLEUM FLOORING
Steam can cause wax to be stripped from some varieties of linoleum
ooring causing damage. ALWAYS test a small, inconspicuous portion of
the oor BEFORE using steam to ensure that your linoleum oor does not
have this issue.
NOTE: See “Maintenance & Cleaning” for care and cleaning instructions for
Microber Pads.
Page 8

Before Use
8
Before Use
D. Filling Boiler with Water
WARNINGS:
•
Carefully read all instructions before removing Boiler Cap.
•
Always unplug appliance before lling the Boiler.
Follow these instructions to avoid overlling
the Boiler.
• Be sure appliance is unplugged from the
electrical power outlet, and has
cooled for
at least 5 minutes before lling with water.
• Make sure Handle Assembly is in the
upright “off” position.
Remove Boiler Cap
by turning it counterclockwise.
• Pour in 600 mls of water using
the Measuring Cup and Filler
Funnel provided – ll cup to the
“200 ml” marking three times.
Be careful not to overll the
Boiler.
Please note that excess
water will be ushed out during
use if the Boiler is overlled,
resulting in wet oors.
• Replace Boiler Cap by turning it clockwise.
Do not tighten Boiler Cap too much – nger
tightening is sufcient to lock the steam in the Boiler.
If using cold water, heating time is about 3-5 minutes. If using warm
water, heating time is reduced.
*IMPORTANT*
Use ordinary tap water. Distilled or demineralized water is
recommended if tap water is too hard.
DO NOT add detergents,
perfumes, oils, Antibak or other chemical substances to the Boiler.
The product warranty will be null and void if anything other than
water is added to the Boiler.
100 ml
200 ml
A
N
T
(
M
a
x
*IMPORTANT*
Do not overll the Boiler as excess water will be ushed out of the Boiler
before dry steam will emit. If re-lling the Boiler while Steamer has
been in use, be sure to allow Steamer to cool for at least 5 minutes and
loosen Boiler Cap slowly to allow any excess steam to escape before
completely removing Cap. (See step 2D, “Relling Boiler During Use” for
detailed instructions.)
100 ml
200 ml
A
N
T
I
B
A
K
(
M
a
x
)
Page 9

9
Before Use
Before Use
Continued on next page
WARNING:
Do not put Antibak sanitiser in the
Boiler. This will damage the Steamer and it will
void the warranty.
E. The Antibak Sanitizing System
This Monster Superclean Floor Steamer (EZ2) is equipped with a unique
on-demand option designed to sanitize your non-porous hard oor
surfaces (sealed wood, tile, marble, granite, linoleoum, etc.).
Included in this package is a 200 ml bottle of “Antibak”, a special
sanitizing agent that will quickly kill up to 99.9% of germs and bacteria –
including Norovirus, MRSA, E-coli, Staph, Salmonella and black mold.
The Antibak continues to work after it’s used, by killing bacterial and
fungal spores for up to 7 days following use. Be sure to use as directed.
C
A
Adding Antibak Sanitiser
• Push Antibak Tank Cover in the upward
direction (as shown in “A”) to reveal opening.
• Insert the small Antibak Tank Funnel in the
Antibak Tank.
• Use provided Measuring Cup to ll the Antibak
Tank (Figs. “B” and “C”). Pour Antibak into
Measuring Cup up to the “Antibak (Max)”
marking. We recommend tilting the Steamer
back when lling the Antibak Tank. Be careful
not to overll.
REMEMBER: YOU CAN FILL THE ANTIBAK TANK WHEN
THE STEAMER IS ON AND HOT. BUT NEVER FILL THE
BOILER TANK WHILE THE STEAMER IS HOT!
• Remove the small Antibak Tank Funnel from the
Antibak Tank.
D
Trigger
E
100 ml
200 ml
A
N
T
I
B
A
K
(
M
a
x
)
B
• Close the Antibak Tank Cover “D”.
• You can now sanitize on
demand by pulling back the
Trigger on the Handle “E”.
Page 10

10
Before UseUsing Your Floor Steamer
Before Use & Using Your Floor Steamer
Using Your Floor Steamer
2
A. Using the Parking Pad
PARKING PAD
*IMPORTANT*
The Parking Pad is provided to prevent oor
damage that can result from leaving a hot
steamer resting on the same spot for too
long. ALWAYS place Floor Steamer on the
Parking Pad when not in use, or while it is
cooling before storage.
You can use the Parking Pad if the Steamer
is warm or hot.
C. Using Floor Steamer
• To start cleaning using the
bottom steam ports, simply pull
the Handle downward.
use a Microbre Pad.
You will nd that your Floor
Steamer can easily clean most
hard oors using the underside
steam alone.
B. Starting the Appliance
• Be sure Boiler is lled with water, Boiler Cap is securely in place and
Antibak (if using) has been added to Antibak Tank.
• Insert the plug into a-3 prong grounded
electrical outlet (orange Power Indicator Light
will illuminate).
• Keep the Handle in the upright “off”
position. Wait until the (green) Steam Ready
Indicator Light illuminates.
• Once Boiler is lled and the green Steam Ready
Indicator Light illuminates, the Floor Steamer is
ready to clean.
PLEASE NOTE: The green Steam Ready Indicator
Light may turn on and off during
use. This is normal and not a fault.
F
The EZ2 Steamer was designed to be used with
Antibak only. Any other cleaning solution used
may harm your Steamer and will void the warranty.
HINT: A little Antibak goes a long way – no need to soak your oor.
E. The Sanitizing System (continued)
• The sanitiser is delivered to the surface only
through the front ports of the EZ2 Steamer “F”.
WARNING:
Only use Antibak sanitiser in the
Antibak Tank located on the front of Steamer.
*IMPORTANT*
Do not use Antibak sanitiser on carpets or rugs (or any other soft furnishings
such as mattresses or lounge). When using the Carpet Glide on carpets or rugs,
do not pull the trigger on the Handle to dispense Antibak. The steam coming
from the bottom of the Steamer is sufcient to refresh carpet or rugs.
Page 11

11
Using Your Floor Steamer
Using Your Floor Steamer
To Use the Sanitizing System
The Monster Superclean Steamer will
sanitize non-porous hard oor
surfaces by using a sanitizing agent
called Antibak. The Antibak will
also keep oors sanitized by stopping
the growth of bacterial and fungal
spores for 7 days after use.
To sanitise your oors using Antibak,
follow the lling instructions on page
9 of this manual.
To release the Antibak onto the oor,
pull the trigger on the Handle. The
Antibak will mix into the steam as it exits from the 4 front steam jets. Run the
steamer up and down on the oor to spread the Antibak.
A small amount of Antibak goes a long way. One pull of the trigger will release
enough Antibak to cover an area of 1 meter by 1 meter. The Antibak sanitiser
that is mixed with the steam coming from the front jets will get under furniture
and cabinets and disinfect to a distance of 30 cm.
Rell the Antibak Tank as needed. Once the Antibak runs out, replacement
bottles can be purchased from the appliance retailer who sold you the Monster
Superclean Floor Steamer.
To stop steam, simply return Handle to the upright position.
The Floor Steamer will stop producing steam when the
Boiler is empty. When this happens, rell with water
according to the instructions (see step 2D, “Relling Boiler
During Use”).
C. Using Floor Steamer
• To start cleaning using the
bottom steam ports, simply pull
the Handle downward. Always
use a Microbre Pad.
You will nd that your Floor
Steamer can easily clean most
hard oors using the underside
steam alone.
NOTE: Some water may be emitted when the Handle is rst pulled down
after lling or when trigger on the Handle is pulled. This is normal.
REMINDER:
If Floor or Carpet Pad become too wet or too
dirty, replace with a clean, dry Pad and continue cleaning.
*IMPORTANT*
Do not use Antibak sanitiser on carpets or rugs (or any other soft furnishings
such as mattresses or lounge). When using the Carpet Glide on carpets or rugs,
do not pull the trigger on the Handle to dispense Antibak. The steam coming
from the bottom of the Steamer is sufcient to refresh carpet or rugs.
Page 12

12
Using Your Floor Steamer
Using Your Floor Steamer
WARNING: Let Steamer cool 5 minutes before opening Boiler Cap.
Use care when opening Boiler Cap as it may still be hot and steam
may escape, causing burns. If Boiler is still hot, water may spurt out
during relling which can also cause burns.
•
Unplug the appliance from the electrical power outlet. This will stop
the Steamer from continuing to heat up.
• Once unplugged from the power outlet, place Handle in the “On”
position to release any residual steam and pressure from the Boiler.
• After all steam and pressure has been expressed from the Steamer,
return the Handle to the upright “Off” position.
• Slowly turn Boiler Cap counterclockwise. This will allow remaining
steam to escape.
•
Be sure Steamer has cooled 5 minutes before relling with water.
The product warranty will be null and void if
anything other than water is added to the Boiler.
• Pour in 600 mls of water using the Measuring Cup
and Filler Funnel provided – ll the Measuring
Cup to the 200 ml marking 3 times. Be careful
not to overll the Boiler.
• Replace Boiler Cap by turning it clockwise.
Do not tighten Boiler Cap too much – nger
tightening is sufcient to lock the steam in
the Boiler.
• Insert plug into 3-prong electrical outlet. Wait for
green Steam Ready Indicator Light to turn on. Steamer is ready to use
once again.
D. Relling Boiler During Use
When the Floor Steamer has run out of water, there will be no more
steam coming out of the unit. At this stage it is time to rell the Boiler.
Follow the relling instructions below.
100 ml
200 ml
A
N
T
(
M
a
x
*IMPORTANT*
The Floor Steamer has a Boiler that should not be overlled. To avoid the
potential for overlling, only rell the Boiler when it is completely run out of
water and only add 600ml. Always follow the practice of using the Floor Steamer
until it has run out of water and then rell 600ml only.
If oor cleaning is completed and water remains in the Boiler, the Floor Steamer
can be stored with the remaining water in the Boiler, there will be no harm done
to the unit. At the next cleaning session simply heat up the unit and use the
water already in the Boiler, then rell when empty.
Or alternatively at the next cleaning session, open the Boiler Cap when the unit
is still cold and pour out the water and then rell (if this alternative method is
used, it is recommended that only 500ml of water is added, because the unit
will not completely drain when the water is poured out from the Boiler).
Page 13

13
Using Your Floor Steamer Maintenance & Cleaning
*IMPORTANT*
Do not overll the Boiler as excess water will be ushed out of the
Boiler before dry steam will emit.
If distilled or demineralized water is regularly used in the Steamer,
cleaning of the Boiler can be done less frequently. In some areas tap
water is very hard, it is recommended that the Boiler is cleaned more
frequently if hard water is used.
The cleaning of the Boiler and Steamer is the sole responsibility of the
appliance owner. Calcium, mineral deposits and other sediment left
to build up in the Floor Steamer causing the Steamer to fail and/or the
steam pathways in the Steamer to block, is not covered by the product
warranty. Users must follow the cleaning instructions above.
If the Steamer and Boiler are not cleaned according to the instructions above and the product fails and/or the steam pathways are
blocked, the appliance owner should send the product for servicing
by contacting the Customer Support Line.
The Monster Superclean Floor Steamer is intended for domestic
household use only. It is not intended for commercial use. Any use other
than for domestic household purposes will void the product warranty.
Cleaning the Floor Steamer
We recommend you periodically clean the Floor Steamer to prevent
the accumulation of calcium, mineral deposits and other sediment
caused by the use of tap water. After every 10-15 rells, ll the Boiler
three-quarters full of hot tap water, shake several times and empty
out the water into sink. Repeat several times to ensure that the Boiler
is ushed of any calcium or mineral deposits. Wipe the Steamer
base with a damp cloth and dry.
NEVER HOLD THE STEAMER UNDER THE TAP TO FILL. Use the Measuring
Cup and Funnel provided to ll the Boiler.
3
REMINDERS
• Always use ordinary tap water.
• If tap water is too hard, use distilled or demineralized water to
avoid the risk of mineral deposits and sediment from forming.
• Do not add detergents, perfumes, oils or other chemical
substances to the Boiler or Antibak Tank. This will damage the
Steamer and void the warranty.
• The green Steam Ready Indicator Light may turn on and off during
use. This is normal and not a fault.
• Only use Antibak sanitizer in the front Antibak Tank.
Page 14

14
Maintenance & Cleaning
Maintenance & Cleaning
Microber Pad Care & Cleaning
Your Microber Pads are designed for hundreds of uses. Clean Pads
regularly, either by hand (using mild soap and warm water) or in your
clothes washer on a delicate cycle, cool water. Never use fabric
softener or bleach. We recommend letting Pads air dry to maintain
maximum long term effectiveness.
Replacement pads are available at most retail outlets.
Microber washing instructions – ULTRA MICROFIBRE
HARD SURFACE FLOOR PAD
75% Polyester / 25% Polyamide
Hand wash only
Tumble dry low or air dry
No bleach / No fabric softener
CARPET PAD
80% Polyester / 20% Polyamide
Hand wash only
Tumble dry low or air dry
No bleach / No fabric softener
*IMPORTANT*
Do not add detergents, perfumes, oils, or other chemicals to the Boiler.
The product warranty will be null and void if anything other than water is
added to the Boiler.
Page 15

15
Troubleshooting
IMPORTANT QUESTION:
Q: Do I always need to use a Microber Pad when cleaning with my
Steamer?
A. YES!
It is critically important to ALWAYS use your Microber Pads. The
Floor Steamer should NEVER be used without either a Hard Surface
Floor Pad or Carpet Glide with Carpet Pad.
Issues Possible Causes Solutions
Steam is not coming out of the Improper Handle assembly. Call Customer Service to receive instructions
Steam Nozzles. to correct the problem.
The Hard Surface Floor Pad Not enough pressure was Position Steamer about 2” above Pad and
is not adhering to Steamer. applied when attaching Pad. FIRMLY press it down onto the Pad.
Floor Pad requires replacing Replacement Floor Pads can be purchased at
due to age of the Floor Pad. most electrical appliance reatail outlets.
The Cleaning Pads are getting Boiler is overfilled. Let Steamer run until excess water ceases.
soaked (too wet). Why? -OR- Remove some water from Boiler once
the Boiler has cooled down completely.
Green “Steam Ready Indicator Wait for green “Steam Ready Indicator Light”
Light” is not illuminated. to illuminate.
The steam seems to be Front Steam Jets are being Only use Front Steam Jets in shor t bursts for
making my floor too wet. used too frequently. cleaning tougher stains or to clean hard to
reach areas.
Antibak Sanitizer Trigger is Pull the Trigger less frequently, use more
being used too often. sparingly.
The Cleaning Pad is too wet Replace the wet Pad with a dry, clean Pad
(saturated with moisture) and continue cleaning.
The Antibak is running out Trigger is being used too Pull Trigger less frequently and use Antibak
quickly. frequently. more sparingly.
Page 16

EZ2 (Australia/NZ) 8/12/13
EFLX-058 AA
Patent Pending
Customer Support
Customers needing assistance with their Monster Superclean Floor Steamer can call
the Customer Support Line on the phone numbers listed below. Customers should
also call the Customer Support Line if they require product warranty repair or postwarranty product servicing. Our friendly Customer Service Team can assist you to
get the best cleaning results from your Floor Steamer, they are full of helpful steam
cleaning tips, too.
Monster Customer Support Line
AUSTRALIA 1800 663 866
NEW ZEALAND 0800 666 783
EUROFLEX Australia Pty Ltd
8 Success Way
WANGARA WA 6065
AUSTRALIA
TEL: 08 9302 2526
Email: admin@euroex.com.au
Website: www.euroex.com.au
EUROFLEX New Zealand Ltd
PO BOX 305 650
Triton Plaza
North Shore 0757
NEW ZEALAND
TEL: 0800 666 783
Email: admin@euroex.com.au
Website: www.euroex.com.au
EUROFLEX SRL
Via dei Colli, 153
31058 Susegana (TV)
ITALY
Tel: +39 0438 661711
Email: euroex@euroex.tv
Website: www.euroex.tv
 Loading...