

Eton FR800 User Manual
WEATHER TRACKERFR800
Safety Preparedness Radio with NOAA Weather Alert
and S.A.M.E. Technology
EN Users Manual
FR Manuel de L'utilisateur
ES Manual de Usuariso
DE Benutzerhandbuch
IT Manuale D'uso
EN English
FR Français
ES Espanõl
DE Deutsch
IT Italiano

2
WEATHER TRACKERFR800
Thank you for purchasing the WEATHERTRACKER FR800. We want you
to thoroughly enjoy the use of this product. To take advantage of its
many excellent and unique features, we urge you to carefully read the
user’s manual.
WEATHERTRACKER FR800 OPERATION
EN English
1
Turn POWER off
ALERT
SIREN
SINGLE
COUNTY
6
Press MENU twice to
exit and save the setting
2
Press MENU
3
Press and
choose COUNTY
4
ALERT
SIREN
SINGLE
COUNTY
Press and the
display will flash
ALERT
SIREN
SINGLE
COUNTY
5
Press until
COUNTY - ALL
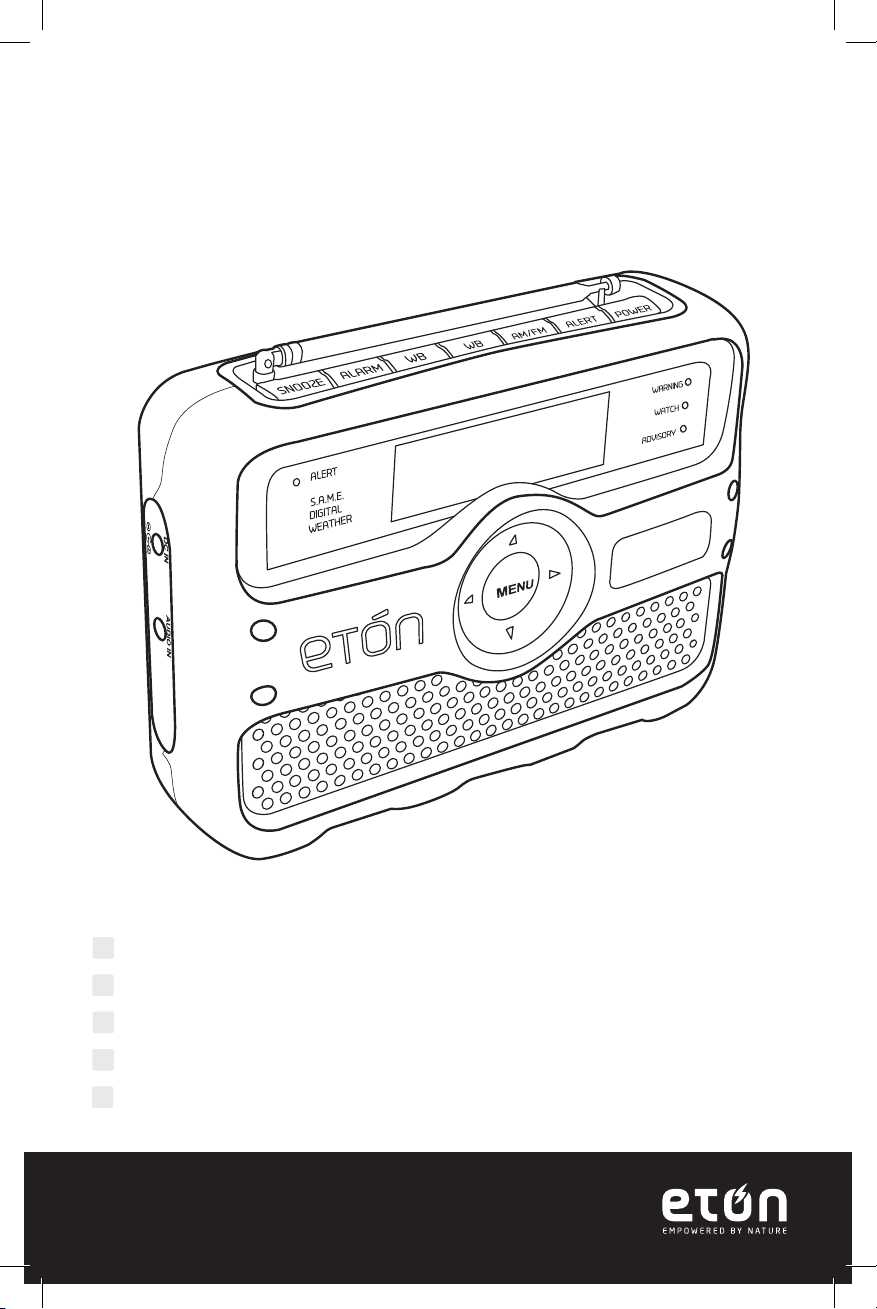
Alert / WB ( Weather alert button)
Alarm ON / OFF
Snooze
WB (Weather Band)
AM / FM Tuner Band
Alert ON / OFF
Power ON / OFF
Antenna
Alert Indicator
DC in
Audio in
Warning Indicator
Watch Indicator
Advisory Indicator
Menu
SIREN
SINGLE
COUNTY
1
ALERT
Turn POWER off
ALERT
SIREN
SINGLE
COUNTY
6
Press MENU twice to
exit and save the setting
ALERT
SIREN
SINGLE
COUNTY
2
Press MENU
3
ALERT
SIREN
SINGLE
COUNTY
Press and
choose COUNTY
4
ALERT
SIREN
SINGLE
COUNTY
Press and the
display will flash
ALERT
SIREN
SINGLE
COUNTY
5
Press until
COUNTY - ALL
Alert / WB ( Weather alert button)
Alarm ON / OFF
Snooze
WB (Weather Band)
AM / FM Tuner Band
Alert ON / OFF
Power ON / OFF

3
USER MANUAL WEATHERTRACKERFR800
POWERING THE FR800
The FR800 can be powered by 3 D cell batteries or with an AC adapter
(included). Install the 3 D cell batteries into the battery compartment on
the back of the radio, matching them to the polarity diagram. Plug the
AC adapter into the upper socket on the left side of the radio. Battery
condition is shown on the right side of the display with a battery symbol
that’s fi lled with black hatch marks. When the AC adapter is plugged in a
power cord appears next to the battery symbol, which only has two hatch
marks in it.
LIGHTING THE DISPLAY
To light the display for about 8 seconds, press the SNOOZE button at the
top of the display.
TURNING ON THE FR800
Turn the FR800 on and off with the POWER button, on the top right
of the radio.
OR
4
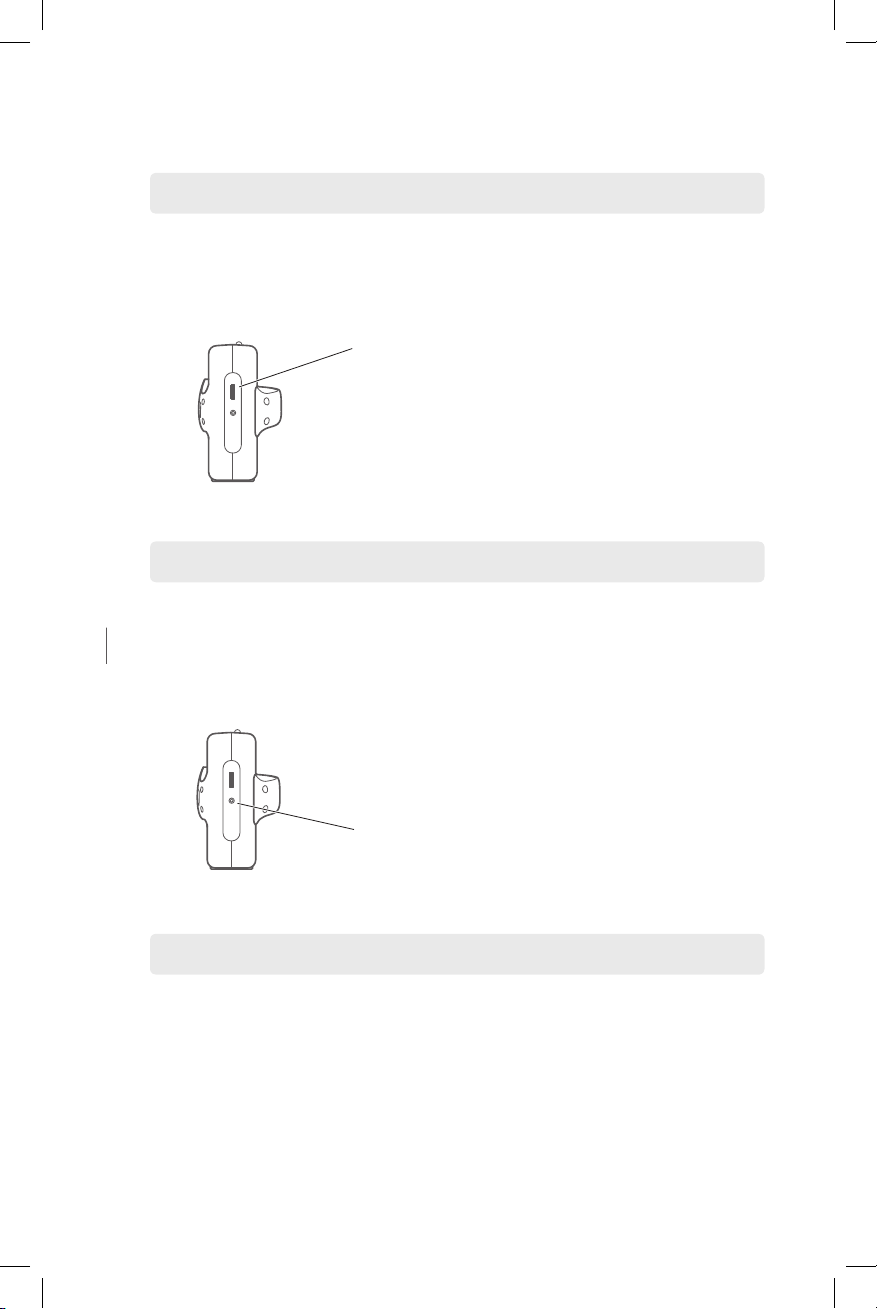
VOLUME CONTROL
Turn the VOLUME knob (located on the upper right side of the radio) up to
increase the volume, down to decrease the volume. Always turn down the
volume before using earphones.
USING HEADPHONES
Plug headphones into the socket labeled HEADPHONE on the right side of
the radio. Use headphones with a 3.5mm stereo plug (1/8 inch). Always
decrease the volume before using headphones.
USING THE AUDIO IN SOCKET
Using a 3.5mm (1/8 inch) stereo plug, plug the audio source into the
AUDIO IN socket (left side of radio) with the radio turned on and set to
AM or FM. Audio from any standard audio source can be used, including
an MP3 player.
Volume control
Headphone input
VOLUMEEAR
VOLUMEEAR
VOLUMEEAR

5
USER MANUAL WEATHERTRACKERFR800
SETTING THE TIME
Turn off the radio and press the MENU button. SETUP TIME appears in
the display. Press the button and the hour fl ashes. Press the
buttons to adjust the hour. Once the hour is adjusted press the
button and the minutes fl ash. Press the buttons to adjust the minutes.
Press MENU twice to exit and to save the setting.
SETTING THE ALARM
Turn off the radio and press the MENU button. SETUP TIME appears in
the display. Press the button. SETUP ALARM appears in the display.
Press the button and the alarm hour fl ashes. Press the
buttons to adjust the hour. Once the hour is adjusted press the
button and the minutes fl ash. Press the buttons to adjust the minutes.
Press MENU twice to exit and to save the setting.
ACTIVATING AND DEACTIVATING THE ALARM
To activate or deactivate the alarm press the ALARM ON/OFF button
at the top of the radio. When activated a small bell appears in
the display to the right of the ALERT indication. When deactivated,
the bell disappears.
ALERT
ALERT
ALERT
SIREN
MULTIPLE
COUNTY
ALERT
SIREN
MULTIPLE
COUNTY
ALERT
SIREN
SINGLE
COUNTY
ALERT
ALERT
SIREN
ALERT
SIREN
MULTIPLE
COUNTY
6
SNOOZE SETTING
Once the alarm activates, press the SNOOZE button to temporarily
deactivate it and sleep a little longer. It will reactivate automatically after
5 minutes. This can be repeated up to 5 times. When SNOOZE is on,
a box with SNZ appears next to the bell in the display.
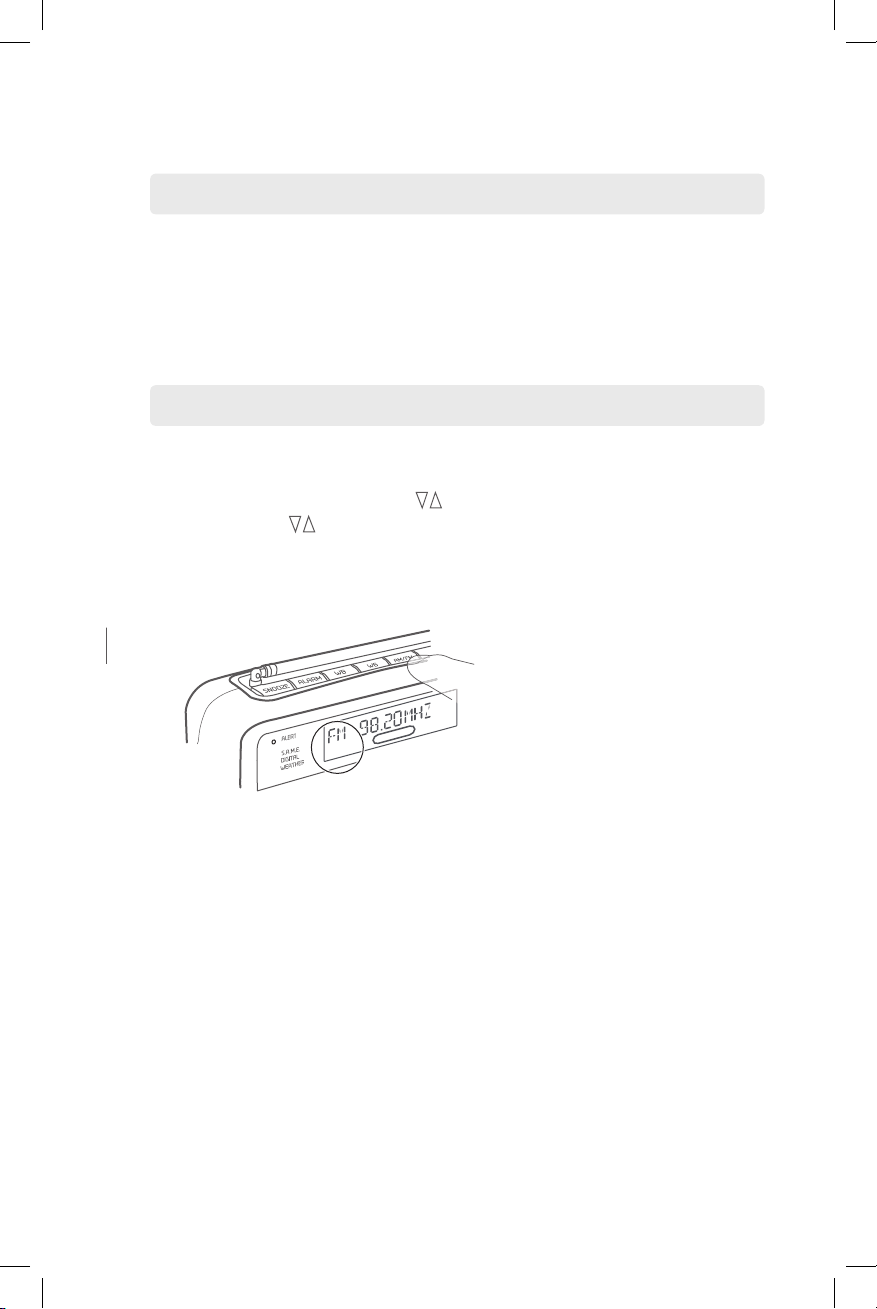
AM/FM BROADCAST RECEPTION
Turn on the radio. Press the AM/FM button, AM or FM will appear on
the top left of the display with the frequency to the right of it, in KHz for
AM and in MHz for FM. Press the buttons quickly to tune individual
frequencies, hold to tune automatically to the next frequency. Pull up
the telescopic antenna to hear FM frequencies.
The AM ferrite bar antenna is built-in to the radio, so no telescopic
antenna is needed for AM reception.
• FM tuning range: 87.5 to 108 MHz.
• AM tuning range: 520 to 1710 KHz.
ALERT
VOLUM EEAR
7
USER MANUAL WEATHERTRACKERFR800
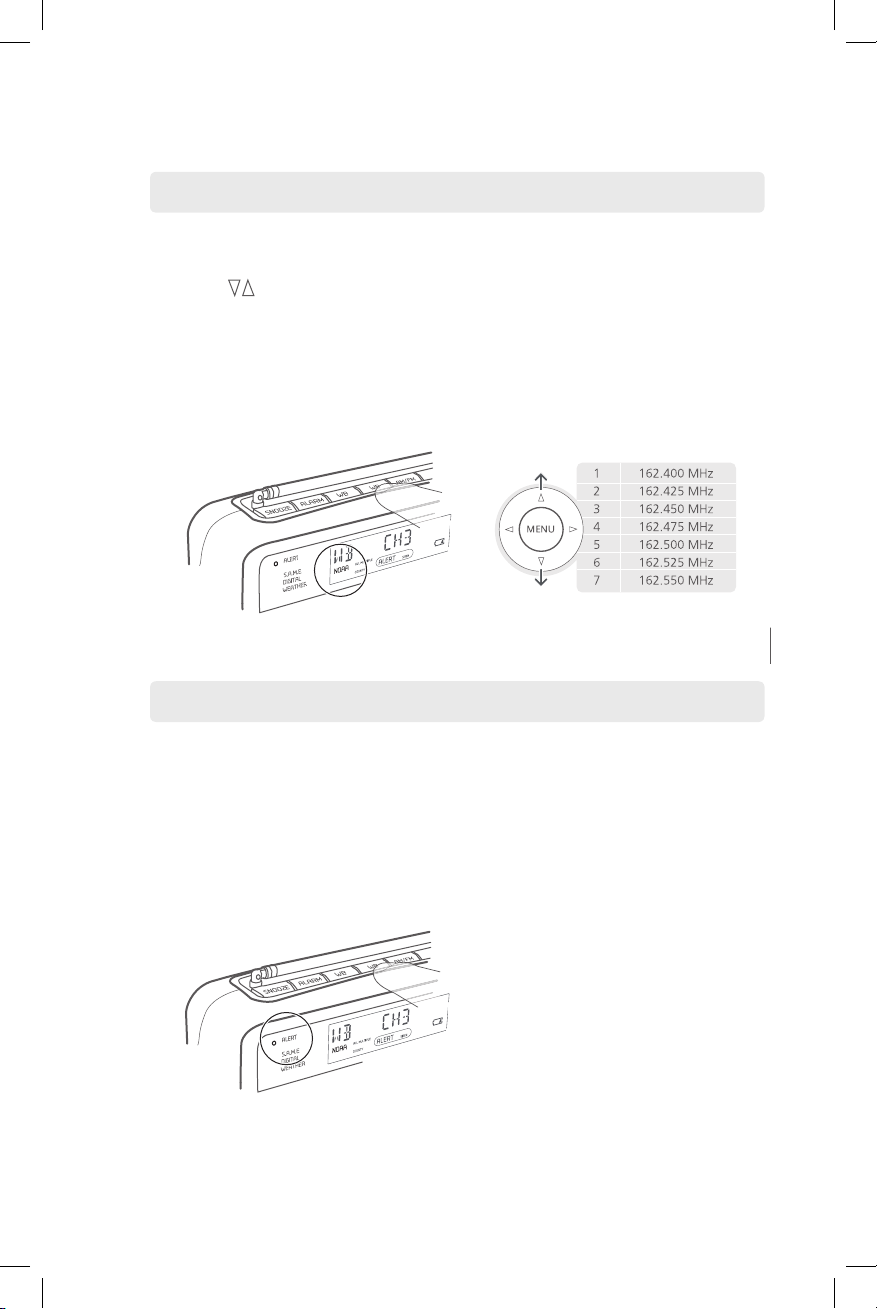
RECEPTION OF NOAA WEATHER FREQUENCIES
To hear your local weather station, pull up the antenna, turn on the radio
and press the WB button at the top of the radio. Turn up the volume and
press the buttons to go through all 7 weather channels. WB and CH
appear at the top of the display, with 1-7 next to CH. You’ll probably only
hear one channel, but if you hear a weather broadcast on more than one,
select the strongest. The strongest one will usually be your local weather
station. Below are the frequencies that correspond to the radio’s channels:
RECEIVING WEATHER ALERTS
Tune to your local NOAA Weather frequency at a volume you wish to
hear. Press the ALERT/WB button at the top of the radio. The ALERT light
shines in the upper left corner of the radio. The audio will disappear,
but the radio is still on, monitoring the NOAA Weather station until an
alert appears. When it appears, you are alerted by a SIREN or a VOICE.
Immediately press the WB button to hear the alert.
VOLUM EEAR
ALERT

8
SETTING ALERT MODE (SIREN or VOICE)
Turn off the radio and press the MENU button. SETUP TIME appears in the
display. Press the button twice. ALERT appears in the upper part of the
display, with SIREN or VOICE to its right. Press the button and SIREN
or VOICE flashes. Press the buttons to select the one that you wish
to hear when an ALERT is activated. Press MENU twice to exit and save
the setting.
While the alert SIREN is activated, you can press the ON/OFF ALERT
button at the top of the radio to turn it on or off.
SETTING S.A.M.E.
Codes in the US, CLC Codes in Canada
• S.A.M.E. = Specic Area Message Encoding
• CLC = Canadian Location Codes
A six-digit code instructs the radio only to receive an ALERT when the
code is programmed in. There are far too many S.A.M.E and CLC codes
to include them all in this manual. We therefore provide the following
to assist you in looking up the code for your area.
Look up a United States county code at the following web site:
http://www.nws.noaa.gov/nwr/indexnw.htm#sametable
Look up a Canadian CLC code at:
http://www.msc-smc.ec.gc.ca/msb/weatheradio/transmitter/index_e.cfm
Your radio can be set for one (SINGL) to 23 (MULTI) codes, or can be set
to receive ALL coded information sent from any transmitter, if you’re
within range. When you set codes, it will only pick up alerts when you’re
in that county or within reception distance of the signal. ALL, MULTI
or SINGLE COUNTY will appear in the lower left side of the display,
depending on how you have set it.
9
USER MANUAL WEATHERTRACKERFR800
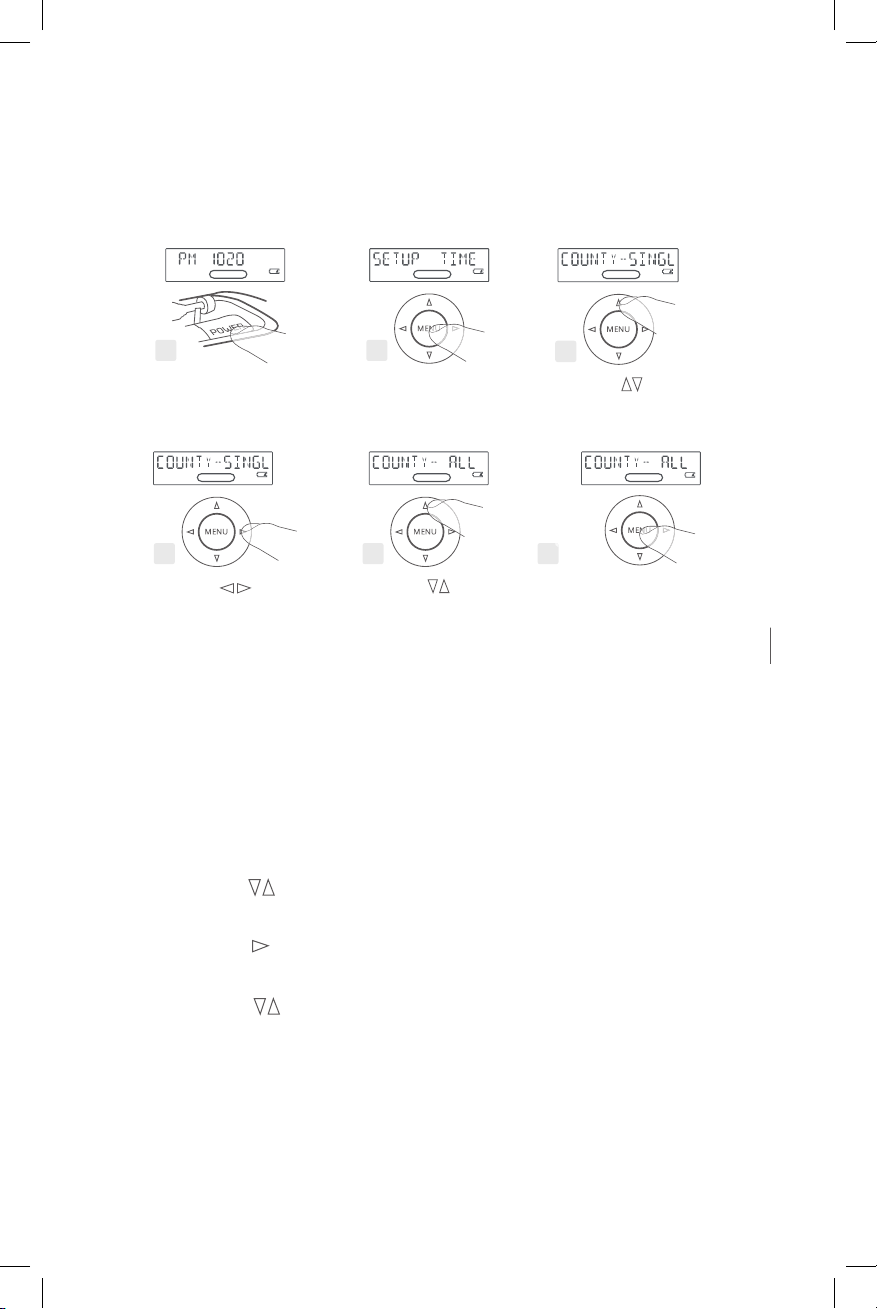
If you want to receive all alerts:
To set single or multiple codes:
Select SINGLE below if you only want to enter a code for a single area.
Enter MULTI if you wish to enter multiple codes for different areas.
Remember, you must be in that area to receive the ALERT for the area.
1. Turn the radio off.
2. Press the MENU button to enter the setting menu.
3. Press the buttons to select COUNTY at the top of the display
with SINGLE, MULTI or ALL to the right of it.
4. Press the button to make the wording to the right
of COUNTY ash.
5. Press the buttons to select SINGLE or MULTI.
Continues on next page...
SIREN
SINGLE
COUNTY
1
ALERT
Turn POWER off
ALERT
SIREN
SINGLE
COUNTY
6
Press MENU twice to
exit and save the setting
ALERT
SIREN
SINGLE
COUNTY
2
Press MENU
3
ALERT
SIREN
SINGLE
COUNTY
Press and
choose COUNTY
4
ALERT
SIREN
SINGLE
COUNTY
Press and the
display will flash
ALERT
SIREN
SINGLE
COUNTY
5
Press until
COUNTY - ALL

10
6.
Press the to select
01 CODE-- -- -- -- -- -- .
7. Press the button to start inputting 6 digit county code.
8. Press the buttons to set the fi rst code digit.
9. Repeat steps 7 and 8 until all six code digits are set.
10. When fi nished press MENU three times to exit and save.
RECEPTION OF EVENT CODES
Your radio can receive ‘event code’ information during weather alerts.
These codes are identi ed at: http://www.nws.noaa.gov/os/eas_codes.
shtml.
Canadian Weather Alerts are addressed at: http://www.msc-smc.ec.gc.ca/
cd/brochures/warning_e.cfm#top.
When receiving event codes the WARNING, WATCH or ADVISORY
light may shine in the upper right corner of the radio.
ENABLING/DISABLING ALERT MODES
Certain Alert modes can be disabled or enabled by selecting DISABLE or
ENABLE in the following procedure.
1. Turn the radio off.
2. Press MENU, then press the button.
3. DEFEAT – SIREN appears in the display.
4. Press the button to make the alert modes scroll in the display.
5. Press the buttons to go from one alert mode to another, carefully
reading each one.
For MULTI options press
then to enter local codes
in presets 1 through 23
ALERT
SIREN
MULTIPLE
COUNTY
ALERT
SIREN
MULTIPLE
COUNTY
ALERT
SIREN
SINGLE
COUNTY
ALERT
SIREN
MULTIPLE
COUNTY
ALERT
SIREN
MULTIPLE
COUNTY

ALERT
VOLUM EEAR
VOLUM EEAR
11
USER MANUAL WEATHERTRACKERFR800
6. Press the buttons to select ENABLE or DISABLE,
as viewed in the lower right corner of the display.
7. Press MENU twice when nished.
WARRANTY REGISTRATION
To ensure full warranty coverage or product updates, registration of
your product should be completed as soon as possible after purchase or
received. You may use one of the following options to register
your product:
1. By visiting our website at http://www.etoncorp.com.
2. Mail in enclosed warranty card.
3. Mail your registration card or information to following address. Include
your name, full mailing address, phone number, email address, model
purchased, date purchased, retail vendor name:
Etón Corporation
1015 Corporation Way
Palo Alto, CA 94303 USA
LIMITED WARRANTY
Retain the warranty information from your warranty card with your proof
of purchase. The Limited Warranty information can also be viewed at
www.etoncorp.com.

12
SERVICE FOR YOUR PRODUCT
To obtain service for your product, we recommend first contacting an Etón
service representative at 1-800-872-2228 US, 1-800-637-1648 Canada,
(650) 903-3866 US, customersvc@etoncorp.com or your respective country
distributor in Europe (see enclosed list) for problem determination and
trouble-shooting. If further service is required,
the technical staff will instruct how to proceed based on whether the radio
is still under warranty or needs non-warranty service.
WARRANTY – If your product is still in warranty and the Etón service
representative determines warranty service is needed, a return
authorization will be issued and instructions will be given. DO NOT ship
your radio back without obtaining the return authorization.
NON-WARRANTY – If your product is no longer under warranty and
requires service, the Etón service representative will refer you to the nearest
repair facility that will best handle the repair.
For service outside North America, please refer to the distributor
information included at time of purchase/received.
WARNING
• Do not submerge or expose for extended period to water.
• Protect from high humidity and rain.
• Only operate within specied temperature range (0 °C to 40 °C).
• Unplug immediately if liquid has been spilled or object has
fallen into the apparatus.
• Clean only with a dry cloth. Do not use detergents or chemical solvents
as this might damage the finish.
• Do not remove cover [or back].
• Refer servicing to qualied service personnel.
 Loading...